
58PFL5666 - Television PHILIPS - Free user manual and instructions
Find the device manual for free 58PFL5666 PHILIPS in PDF.


| Product Type | Smart Television |
| Brand | Philips |
| Model | 58PFL5666/F8 |
| Display Technology | LED-backlit LCD |
| Screen Resolution | 3840 x 2160 pixels (UHD 4K) |
| Screen Size (Diagonal) | 58 inches (147.32 cm) |
| Aspect Ratio | 16:9 |
| Viewing Angle | 178° horizontal / 178° vertical |
| Audio Output Power | 10 W x 2 (RMS) |
| Digital Tuner | ATSC / NTSC / Free-QAM |
| Smart TV Platform | Roku TV (version 9.4) |
| HDMI Inputs | 4 (one with ARC/eARC) |
| USB Ports | 1 (for media playback and Live TV Pause) |
| Ethernet Port | 1 (RJ-45, 10/100 Base-T) |
| Digital Audio Output | 1 (TOSLINK optical) |
| Headphone Output | 1 (3.5 mm) |
| Composite AV Input | 1 (mini jack, breakout cable included) |
| Wireless Connectivity | Wi-Fi 802.11 a/b/g/n/ac (2.4 GHz and 5.7 GHz) |
| Power Supply | 120 V ~ 50/60 Hz |
| Power Consumption (Typical) | 155 W |
| Standby Power Consumption | < 0.5 W (estimated) |
| VESA Wall Mount Compatible | Yes (screw size M6 x 12 mm) |
| Cleaning Instructions | Clean only with a dry cloth |
| Safety | Do not open; no user-serviceable parts; refer servicing to qualified personnel |
Frequently Asked Questions - 58PFL5666 PHILIPS
User questions about 58PFL5666 PHILIPS
0 question about this device. Answer the ones you know or ask your own.
Ask a new question about this device
Download the instructions for your Television in PDF format for free! Find your manual 58PFL5666 - PHILIPS and take your electronic device back in hand. On this page are published all the documents necessary for the use of your device. 58PFL5666 by PHILIPS.
USER MANUAL 58PFL5666 PHILIPS
5600/5700/4700 series
70PFL5666/F8 58PFL5666/F8 55PFL5766/F8 50PFL5766/F8 40PFL4766/F8 32PFL4766/F8
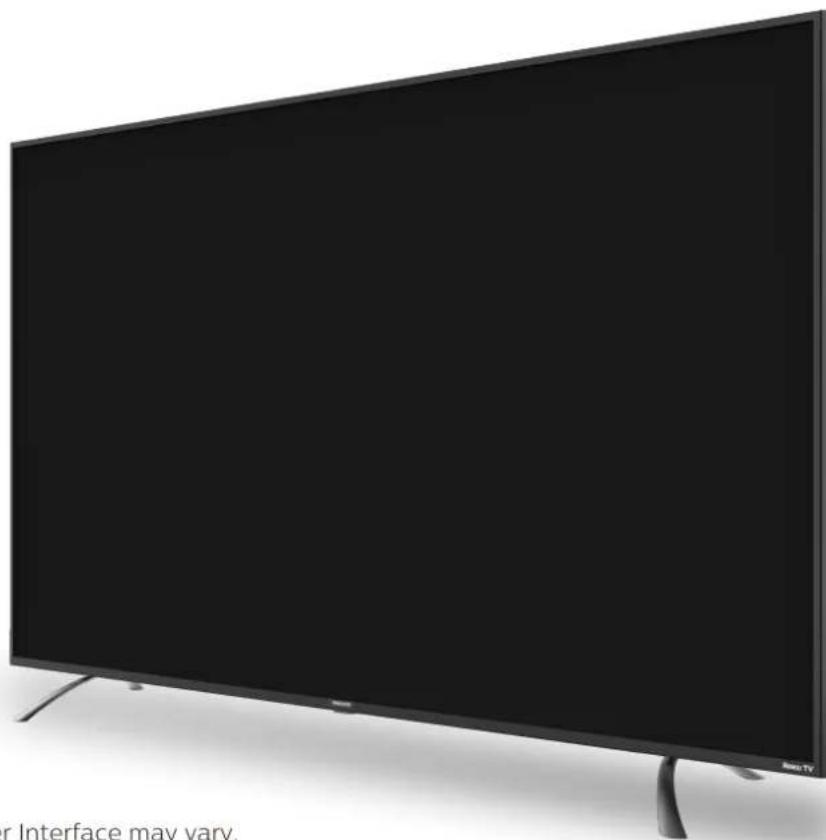
natural_image
Modern black TV with a flat screen and stand, no visible text or symbols on the device itself.Register your product and get support at
www.philips.com/welcome
EN User manual
EN For further assistance, call the customer support service in your country.
• To obtain assistance, contact Philips customer care center; Mexico city and metropolitan area; (55)5887 9736 Interior de la republica; (800) 8391 989
Register online at www.philips.com/welcome today to get the most benefits from your purchase.
Registering your model with Philips makes you eligible for all of the valuable benefits listed below, so don't miss out.
Register online at www.philips.com/welcome to ensure:
\*Product safety notification
By registering your product, you'll receive notification - directly from the manufacturer - in the rare case of a product recall or safety defect.
\*Additional benefits
Registering your product guarantees that you'll receive all of the privileges to which you're entitled, including special money-saving offers.
Know these safety symbols

CAUTION
RISK OF ELECTRIC SHOCK DO NOT OPEN

CAUTION: TO REDUCE THE RISK OF ELECTRIC SHOCK, DO NOT REMOVE COVER (OR BACK). NO USER-SERVICEABLE PARTS ARE INSIDE. REFER SERVICING TO QUALIFIED SERVICE PERSONNEL.
The caution marking is located on the rear or bottom of the cabinet.

The lightning flash with arrowhead symbol, within an equilateral triangle, is intended to alert the user to the presence of uninsulated "dangerous voltage" within the apparatus's enclosure that may be of sufficient magnitude to constitute a risk of electric shock to persons.

The exclamation point within an equilateral triangle is intended to alert the user to the presence of important operating and maintenance (servicing) instructions in the literature accompanying the apparatus.
WARNING:
To reduce the risk of fire or electric shock, do not expose this apparatus to rain or moisture. Apparatus shall not be exposed to dripping or splashing and no objects filled with liquids, such as vases, shall be placed on the apparatus.
CAUTION:
To prevent electric shock, match wide blade of plug to wide slot, fully insert.
PHILIPS
For fastest support visit us online for chat and self service solutions at www.philips.com/support
CHILD SAFETY:
PROPER TELEVISION PLACEMENT MATTERS
THE CONSUMER ELECTRONICS INDUSTRY CARES
• Manufacturers, retailers and the rest of the consumer electronics industry are committed to making home entertainment safe and enjoyable.
- As you enjoy your television, please note that all televisions – new and old- must be supported on proper stands or installed according to the manufacturer's recommendations. Televisions that are inappropriately situated on dressers, bookcases, shelves, desks, speakers, chests, carts, etc., may fall over, resulting in injury.
TUNE IN TO SAFETY
- ALWAYS follow the manufacturer's recommendations for the safe installation of your television.
• ALWAYS read and follow all instructions for proper use of your television - NEVER allow children to climb on or play on the television or the furniture on which the television is placed.
- NEVER place the television on furniture that can easily be used as steps, such as a chest of drawers.
• ALWAYS install the television where it cannot be pushed, pulled over or knocked down - ALWAYS route cords and cables connected to the television so that they cannot be tripped over, pulled or grabbed.
WALL OR CEILING MOUNT YOUR TELEVISION
- ALWAYS contact your retailer about professional installation if you have any doubts about your ability to safely mount your television.
- ALWAYS use a mount that has been recommended by the television manufacturer and has a safety certification by an independent laboratory (such as UL, CSA, ETL).
• ALWAYS follow all instructions supplied by the television and mount manufacturers. - ALWAYS make sure that the wall or ceiling where you are mounting the television is appropriate. Some mounts are not designed to be mounted to walls and ceilings with steel studs or cinder block construction. If you are unsure, contact a professional installer.
- Televisions can be heavy. A minimum of two people is required for a wall or ceiling mount installation.
MOVING AN OLDER TELEVISION TO A NEW PLACE IN YOUR HOME
- Many new television buyers move their older CRT televisions into a secondary room after the purchase of a flat-panel television. Special care should be made in the placement of older CRT televisions.
- ALWAYS place your older CRT television on furniture that is sturdy and appropriate for its size and weight.
- NEVER place your older CRT television on a dresser where children may be tempted to use the drawers to climb.
• ALWAYS make sure your older CRT television does not hang over the edge of your furniture
Important safety instructions
-
Read these instructions.
-
Keep these instructions.
-
Heed all warnings.
-
Follow all instructions.
-
Do not use this apparatus near water.
-
Clean only with dry cloth.
-
Do not block any ventilation openings. Install in accordance with the manufacturer's instructions.
-
Do not install near any heat sources such as radiators, heat registers, stoves, or other apparatus (including amplifiers) that produce heat.
-
Do not defeat the safety purpose of the polarized or grounding-type plug. A polarized plug has two blades with one wider than the other. A grounding type plug has two blades and a third grounding prong. The wide blade or the third prong are provided for your safety. If the provided plug does not fit into your outlet, consult an electrician for replacement of the obsolete outlet.
-
Protect the power cord from being walked on or pinched particularly at plugs, convenience receptacles, and the point where they exit from the apparatus.
-
Only use attachments / accessories specified by the manufacturer.
-
Use only with the cart, stand, tripod, bracket, or table specified by the manufacturer, or sold with the apparatus. When a cart is used, use caution when moving the cart / apparatus combination to avoid injury from tip-over.
-
Unplug this apparatus during lightning storms or when unused for long periods of time.
-
Refer all servicing to qualified service personnel.

natural_image
Silhouette of a person pushing a ladder inside a circular frame (no text or symbols)Servicing is required when the apparatus has been damaged in any way, such as power-supply cord or plug is damaged, liquid has been spilled or objects have fallen into the apparatus, the apparatus has been exposed to rain or moisture, does not operate normally, or has been dropped.
Note to the CATV system installer:
This reminder is provided to call the CATV system installer's attention to Article 820-40 of the NEC that provides guidelines for proper grounding and, in particular, specifies that the cable ground shall be connected to the grounding system of the building, as close to the point of cable entry as practical.
Example of antenna grounding as per NEC - National Electric Code

Wall mount bracket kit
| Model | Screw dimension |
| 70PFL5666/F8 | M6 x12mm |
| 58PFL5666/F8 | M6 x12mm |
| 55PFL5766/F8 | M6 x12mm |
| Model | Screw dimension |
| 50PFL5766/F8 | M6 x12mm |
| 40PFL4766/F8 | M6 x12mm |
| 32PFL4766/F8 | M4 x 8mm |
- Your TV meets the VESA standard for wall mounting. Consult with your local dealer for a wall mount bracket which is compatible with your TV model.
- The recommended wall mount bracket kit (sold separately) allows the mounting of the TV on the wall.
- For detailed information on installing the wall mount, refer to the wall mount instruction book.
- P&F Mexicana S.A.de C.V. is not responsible for any damage to the product or injury to yourself or others if you elect to install the TV wall mount bracket or mount the TV onto the bracket on your own.
• The wall mount bracket must be installed by experts.
P&F Mexicana S.A. de C.V. is not liable for any accidents or injuries incurred while installing this product, including but not limited to those noted below:
• Install the wall mount bracket on a sturdy vertical wall.
- If installed onto a ceiling or slanted wall, the TV and wall mount bracket may fall which could result in a severe injury.
- Do not use screws that are longer or shorter than their specified length. If screws too long are used this may cause mechanical or electrical damage inside the TV set. If screws too short are used this may cause the TV set to fall.
- Do not fasten the screws by excessive force. This may damage the product or cause the product to fall, leading to an injury.
- For safety reasons use 2 people to mount the TV onto a wall mounting bracket.
- Do not mount the TV onto the wall mounting bracket while your TV is plugged in or turned on. It may result in an electrical shock injury.
When installing the unit on the wall, allow this much space.
| Top | : 11.8 inches (30cm) |
| Left and right side | : 5.9 inches (15cm) |
| Bottom | : 3.9 inches (10cm) |
Only for Mexico:
For use in Mexico, the operation of this unit is subject to the following two conditions:
- This unit or device may not cause harmful interference.
- This unit or device must accept any interference, including interference that may cause undesired operation.
Notice
Trademarks are the property of Koninklijke Philips N.V. or their respective owners.
P&F Mexicana S.A. de C.V. reserves the right to change products at any time without being obliged to adjust earlier supplies accordingly.
The material in document is believed adequate for the intended use of the system. If the product or its individual modules or procedures are used for purposes other than those specified herein, confirmation of their validity and suitability must be obtained.
P&F Mexicana S.A. de C.V. warrants that the material itself does not infringe any United States patents No further warranty is expressed or implied.
P&F Mexicana S.A. de C.V. cannot be held responsible neither for any errors in the content of document nor for any problems as a result of the content in document. Errors reported to P&F Mexicana S.A. de C.V. Corporation will be adapted and published on the Funai Corporation support website as soon as possible.
Pixel characteristics
This LCD product has a high number of color pixels. Although it has effective pixels of 99.999% or more, black dots or bright points of light (red, green or blue) may appear constantly on the screen. This is a structural property of the display (within common industry standards) and is not a malfunction.
Warranty
No components are user serviceable. Do not open or remove covers to the inside of the product. Repairs may only be done by service centers and official repair shops. Failure to do so shall void any warranty, stated or implied.
Any operation expressly prohibited in document, any adjustments or assembly procedures not recommended or authorized in document shall void the warranty.
Positioning the TV
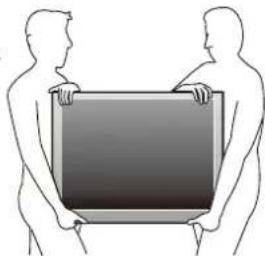
• Large screen TVs are heavy. 2 people are required to carry and handle a large screen TV.
• Make sure to hold the upper and bottom frames of the unit firmly as illustrated.
• Install the unit in a horizontal and stable position.
- Do not install the unit in direct sunlight or in a place subject to dust or strong vibration.
- Depending on the environment, the temperature of this unit may increase slightly. This is not a malfunction.
- When installing this unit in a temperate environment, avoid a place with rapid temperature changes.
- This unit should not be used in a tropical environment as it has not been evaluated under such conditions.
- No objects should be placed directly on or under this unit, especially lighted candles or other flaming objects.
- Depending on your external devices, noise or disturbance of the picture and / or sound may be generated if the unit is placed too close to them. In this case, please ensure enough space between the external devices and the unit.
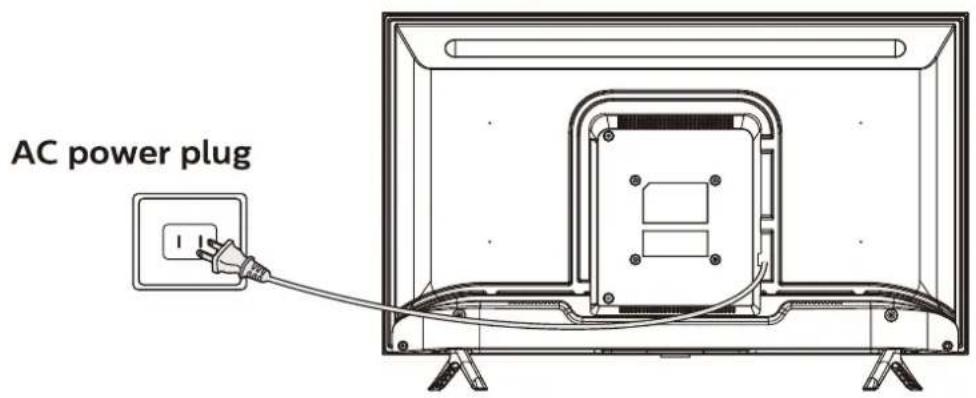
- Do not insert the AC power cord into the power socket outlet before all the connections are made.
- Ensure that you always have easy access to the AC power cord and outlet to disconnect the TV from the AC outlet.
- Before you move the TV, disconnect attached cables to prevent damage to connectors, especially the TV tuner.
- Be sure to unplug the AC power plug from the AC outlet before moving or carrying the unit.
natural_image
Two silhouettes of two people holding a large rectangular object (no text or symbols visible)- When moving the TV and then setting it down, please be careful not to pinch the AC power cord under the unit.
Regulatory notices
WARNING: To prevent injury, this apparatus must be securely attached to the furniture / wall in accordance with the instructions.
Tipping, shaking or rocking the unit may cause injury / death.
WARNING: Never place a TV in an unstable location. A TV may fall, causing serious personal injury or death. Many injuries, particularly to children, can be avoided by taking simple precautions such as:
- Using cabinets or stands recommended by the manufacturer of the TV.
- Only using furniture that can safely support the TV.
- Ensuring the TV is not overhanging the edge of the supporting furniture.
- Not placing the TV on tall furniture (for example, cupboards or bookcases) without anchoring both the furniture and the TV to a suitable support.
- Not placing the TV on cloth or other materials that may be located between the TV and supporting furniture.
- Educating the children about the dangers of climbing on furniture to reach the TV or its controls.
If your existing TV is being retained and relocated, the same considerations as above should be applied.
Do not place the unit on the furniture that is capable of being tilted by a child and an adult leaning, pulling, standing or climbing on it. A falling unit can cause serious injury or even death. In order to avoid interruption of ventilation, this unit should not be placed in built-in equipment such as a book cabinet, rack, etc., and the vents of this unit should not be covered with anything such as a tablecloth, curtain, newspaper, etc. Make sure that there is enough ventilation space (4 inches / 10 cm or more) around this unit.
Press ⏻ to turn the unit on and go into standby mode. To completely turn off the unit, you must unplug the AC power plug from the AC power outlet.
Disconnect the AC power plug to shut the unit off when trouble is found or not in use. The AC plug shall remain readily available.
Never use a gas duster on this TV.
The gas trapped inside of this unit may cause ignition and explosion.
Environmental care

The packaging of this product is intended to be recycled.
Contact your local authorities for information about how to recycle the packaging.
End of life directives
Philips pays a lot of attention to produce environmental-friendly products in green focal areas. Your new TV contains materials which can be recycled and reused. At the end of its life, specialized companies can dismantle the discarded TV to concentrate the reusable materials and to minimize the amount of materials to be disposed of. Please ensure you dispose of your old TV according to local regulations.
▲Batteries usage
CAUTION: Danger of explosion if battery is incorrectly replaced. Replace only with the same or equivalent type.
WARNING: Batteries (battery pack or battery installed) should not be exposed to excessive heat such as sunshine, fire or the like.
• Do not mix old and new batteries.
- Do not mix alkaline, standard (carbon-zinc) or rechargeable (ni-cad, ni-mh, Li-ion, etc.) batteries.
Disposal of used batteries
The batteries supplied do not contain the heavy metals mercury and cadmium, however in certain localities, disposing batteries with household waste is not permitted. Please ensure you dispose of batteries according to local regulations.
Downloading an electronic copy
To obtain a more detailed electronic copy of document
- Point your browser to : www.philips.com/support
- Choose your country of location with language.
- Enter the product name or number in the search field. Alternatively, you can browse the catalog.
- Click the description or model.
- Under product support, click "User manual".
Preparing to move / ship the unit
Please pack the unit properly by following the diagram on the carton (as noted below).
• To avoid damage to the screen, do not pack the stand on the same side as the TV screen, refer to the illustration.

natural_image
Diagram of a device with rotating wheels and a screen, showing airflow or vibration (no text or symbols)Copyright
All other registered and unregistered trademarks are the property of their respective owners.

HIGH-DEFINITION MULTIMEDIA INTERFACE
The terms HDMI and HDMI High-Definition Multimedia Interface, and the HDMI Logo are trademarks or registered trademarks of HDMI Licensing Administrator, Inc. in the United States and other countries.

Manufactured under license from Dolby Laboratories. Dolby, Dolby Audio and the double-D symbol are trademarks of Dolby Laboratories Licensing Corporation.
Portions of this software are copyright © The FreeType Project (www.freetype.org)
The American Academy of Pediatrics discourages television viewing for children younger than two years of age.
Some features may require an always-on broadband internet connection, firmware update and / or a minimum bandwidth. Internet services vary by location.
P&F MEXICANA, S.A. de C.V. does not warrant access to the portal or to any of the services, content, software and advertising. P&F MEXICANA, S.A. de C.V. or third party content / service providers may, in its sole discretion, add or remove access to any specific services, content, software and advertising at any time. Although P&F MEXICANA, S.A. de C.V. will strive to provide a good selection of services, content or software, P&F MEXICANA, S.A. de C.V. does not warrant continued access to any specific services, and content or software. P&F MEXICANA S.A. de C.V. does not warrant screen mirroring compatibility with all source devices such as smartphones, tablets, laptops, etc. due to large variability in, hardwarefirmware, drivers, software and implementation of wireless casting applications on these source devices. Although P&F MEXICANA S.A. de C.V. will strive to enhance compatibility and performance across a range of source devices, P&F MEXICANA S.A. de C.V. does not warrant compatibility with specific source devices.
Copyright
© 2020 Roku, Inc. All rights reserved. Roku, the Roku Logo, and "NOW THIS IS TV" are trademarks and/or registered trademarks of Roku, Inc. Material in this User Manual is the property of Roku, Inc., and is protected under US and International copyright and/or other intellectual property laws. Reproduction or transmission of the materials, in whole or in part, in any manner, electronic, print, or otherwise, without the prior written consent of Roku, Inc., is a violation of Roku, Inc.'s, rights under the aforementioned laws.
No part of this publication may be stored, reproduced, transmitted or distributed, in whole or in part, in any manner, electronic or otherwise, whether or not for a charge or other or no consideration, without the prior written permission of Roku, Inc.
Requests for permission to store, reproduce, transmit or distribute materials shall be made to both of the following address:
Roku, Inc.
1155 Coleman Avenue
San Jose, CA 95110
Product name: Roku TV™
Document name: Roku TV™ User Guide
Document revision: 9.4 - Mexico, English
Publication date: 31 October 2020
Contents
Welcome....1
The new standard in Smart TVs....1
Get the most out of your new TV....1
Connections and setup....6
Connecting an antenna, cable, or satellite box....6
Connecting external equipment with a composite AV video cable....7
Connecting external equipment with an HDMI® cable 7
Connecting headphones or analog soundbar 8
Connecting an AV receiver or digital soundbar 8
Preparing for Internet connectivity 9
AC power 10
Roku remote batteries....10
Roku TV remote....10
Panel buttons....14
Single button....14
Three buttons....15
Game-pad style joystick....15
Four buttons....15
Five buttons (with mute)....16
Five buttons (without mute)....16
Seven buttons....17
Guided Setup....18
Starting Guided Setup....18
Completing Guided Setup....19
Network connection 21
Activation 25
Connect your devices 27
The Home screen 30
Personalize your Home screen....31
Benefits of connecting....33
Connecting brings out your TV's full potential! 33
Take advantage of awesome features....33
What is streaming? 34
What if I didn't connect my TV? 35
Setting up live TV 37
How do I set up the TV tuner? 38
Using your TV 43
Status indicator 43
Standby mode energy savings....44
Watching live TV channels....44
Changing channels....44
Favorite Channels 45
Viewing program information....47
Adjusting settings while watching a program....48
Pausing live TV 48
Requirements 48
Enabling Live TV Pause 49
Using Live TV Pause 49
Notes about Live TV Pause....51
Switching TV inputs....51
Auto-detecting devices....51
Adjusting audio/video settings....51
Using Roku Voice commands....52
Using Roku Voice remotes (select models only)....52
Playing content from USB storage devices....53
Auto player launch....53
Playing content from local network media servers....54
Setting up a payment method ....55
Using your TV in a hotel or dorm room....55
About using your TV on a restricted public network....55
Getting your Roku TV on line on a restricted public network....56
Using Apple AirPlay and the Apple Home app 59
Apple AirPlay....59
Other AirPlay things to try 59
Apple Home app 60
Some Apple Home things to try....60
Adjusting TV settings....61
Settings menu....61
Options menu....62
Options menu settings 63
Picture settings....65
Picture settings menu options 65
Auto Low Latency Mode (ALLM): 68
Variable refresh rate (VRR)....68
Sound settings....68
Volume mode (select models only)....69
Sound settings - Dolby ^® Audio Processing (select models only)....70
Sound settings - DTS ^ TruSurround / DTS ^ Studio Sound (select models only)....71
Sound settings - Sonic Emotion Premium (select models only) 72
Sonic Emotion settings....73
Expert Picture Settings (4K models only)....74
Changing privacy settings....74
Advertising....74
Microphone....75
Searching for something to watch....77
How do I search? 77
Keyboard search using the remote....78
Voice Search from a Roku Voice remote....78
Searching from the Roku mobile app....79
Searching with Google Assistant 79
Searching with Amazon Alexa 79
Searching for free content 80
I found a program. Now what? 80
Recent Searches....81
Using the Roku Channel Store 82
Automatic Account Link 83
Customizing your TV 84
Add TV inputs....84
Add streaming channels....84
Rename inputs....85
Remove unwanted tiles....86
Rearrange tiles....87
Change the look and feel with themes 88
Edit live TV channel lineup....88
Change menu volume....89
Configure power settings....90
Power on settings 90
Auto power savings 90
Standby LED On/Off 91
Fast TV start 91
Changing caption settings....92
Customize the Home screen 94
Parental controls 95
Creating a parental control PIN....95
Blocking Broadcast TV programs 95
Enabling parental control of TV programs 96
Blocking based on US movie ratings 97
Blocking based on Other ratings....98
Blocking based on Canadian French ratings....99
Blocking unrated programs....100
What happens when a TV program is blocked?....101
Changing the parental control PIN 102
Resetting parental controls....103
More settings....104
Guest Mode 104
Network settings....105
Postal code....106
Time settings....107
Scan again for live TV channels....108
HDMI® mode (4K models only)....109
Control by mobile apps....109
Home theater configuration....110
Turning off the TV speakers for home theater use....110
Setting up a digital audio connection....111
Choosing an audio format....112
Turning off the TV screen while listening to music 113
Controlling other devices through CEC....113
Restart the TV....115
Reset the TV 115
Reset audio/video settings 115
Factory reset everything....115
What if I can't access the Factory Reset option? 116
Network connection reset 117
Roku account PIN 117
Update the TV 118
Checking for updates on a connected TV....118
Getting updates on a non-connected TV 119
Other devices....121
Mirror your phone or tablet 121
Roku mobile app....122
Private Listening on the Roku mobile app 122
Universal remotes 123
FAQ 124
Welcome
Congratulations on the purchase of your new Roku TV! Discover the joy of endless entertainment. After it's set up, you'll be able to access a world of streaming content channels that may include paid subscription channels and thousands of free channels.
Important: Your TV receives automatic updates from time to time, enabling new content and features. This edition of the User Guide describes Roku TV version 9.4. To determine the current version of your Roku TV, go to Settings > System > About after you complete Guided Setup.
The new standard in Smart TVs
Welcome to TV like you've most likely never seen before—a home screen that you can personalize with your favorite devices and streaming channels. Choose from hundreds of thousands of streaming movies and TV episodes, plus music, sports, kids, family, international and much more. You should never run out of things to watch.
Note: A paid subscription or other payments may be required for some channel content. Channel availability is subject to change and varies by country.
Get the most out of your new TV
Follow these steps to get the most out of your new TV.
- Connect to the Internet
- It's easy, and it will unlock a world of entertainment. All you need is a network connection. There are hundreds of free streaming channels, paid subscription services, and convenient ways to rent or buy a favorite movie or program.
- Pick your favorite streaming channels
- Find the entertainment you love. From the latest blockbuster movies to your favorite TV programs, with tons of live sports, a broad selection of music streaming channels, popular programming in a dozen international languages, 24x7 live news and so much more, your new Roku TV has your sweet spot. A paid subscription or other payments may be required for some channels.
• Personalize your Home screen
- Put your favorite streaming channels and TV inputs front-and-center on the Home screen. No more flipping through inputs or wading through complicated menus. You can even customize the names of each input and move tiles around so your most-often used devices and streaming channels are only a click away.
• Search for your favorite movie, TV program, actor, or director
- Once you're connected to the Internet, you can easily search across top streaming channels. Search by movie or TV program title, actor or director—all from one place. Search by typing words or phrases using the on-screen keyboard or on your mobile device, or speak words or phrases in a conversational tone using Voice Search. Some channels and content require payment.
- Pause live TV
- Pause, resume, fast forward, and rewind TV programs by connecting your own USB drive to the TV and pause live TV for up to 90 minutes.
Note: Live TV Pause is available on digital TV programs received on the ANT input, and only when the TV is linked to a valid Roku account.
• Control your TV with voice commands
- Use your Roku Voice Remote (select models) or the free Roku mobile app to control your Roku TV. Use conversational voice commands to search for programs by title, actor, director, or genre. Also, use voice commands to launch streaming channels, switch inputs, or change live TV channels. ^1
While you're at it, explore these additional voice features:
- Set sleep timers. For example, say “Turn the TV off in 30 minutes”, or “Go to sleep at 11 p.m.”
- Search for movies based on popular quotes in English. For example, say "What movie is this from - 'Here's looking at you, kid'."
- Only on 4K TVs, say "Show me 4K movies" to see a list of 4K movies available across participating streaming channels.
- Control the Roku Media Player to play your personal music and show movies and photos. Say commands like, "Play classic rock on Roku Media Player," "Skip ahead 20 seconds," or "Play the next song."
- Ask Siri on your Apple device to control your 4K Roku TV with just your voice. Say things like “Hey Siri, play jazz on the living room TV” to play music from your iPhone, iPad, Apple Watch, HomePod, or Mac on your Roku TV. 4K Roku TVs also support Apple HomeKit, providing an easy way to control HomeKit-enabled accessories using the Apple Home app and Siri. After installing your 4K Roku TV, set it up with just a few simple steps within the Apple Home app. You can even create your own custom automations and scenes that include HomeKit-enabled accessories such as your 4K Roku TV, to control your home setting.
- Use Google Home, Google Pixel phone, or the Google Home mobile app to control your Roku TV. You can search for movies and TV programs, launch most channels, control playback, adjust the volume, switch inputs, turn the TV on and off, and more. Control multiple Roku devices by including the location of the device in your commands. For example, say “Hey Google, turn off Roku in the bedroom.”
- Use Amazon Echo Dot, Echo Plus, Echo Show, or the Amazon Alexa mobile app to control your Roku TV. You can search for movies and TV programs, launch most channels, control playback, adjust the volume, switch inputs, turn the TV on and off, and more. Control multiple Roku devices by including the location of the device in your commands. For example, say "Hey Alexa, pause Roku in the living room."
• Use Apple AirPlay 2 with your iOS and MacOS devices
- Effortlessly share videos, photos, music, and more from Apple devices on 4K Roku TVs. Control AirPlay sessions with pause, rewind, and more using your iPhone, iPad, or Mac. Play music from your Apple devices on Roku TVs and other AirPlay 2 enabled speakers in your home at the same time in perfect sync. Plus, mirror the screen from your iPhone, iPad, or Mac to the big screen.
- Send your personal media to the big screen
- Send personal photos, videos, and music from your compatible smartphone or tablet to the TV screen in just a few taps. Plus, with certain channels, you can send movies, programs, sport highlights, and more directly to your TV.
• Take charge with a smartphone or tablet
- Control your TV with the included remote or from your compatible smartphone or tablet with the free mobile app for iOS ^ and Android ^TM mobile devices ^1 . Browse channels and listen to audio from Antenna TV and streaming channels.
- Mirror your compatible smartphone or tablet on your TV. Share videos, photos, web pages, and more from compatible devices.
- Connect your Roku TV to networks found in hotels and college dorms
- Temporarily link your smartphone or tablet to your TV to agree to any terms, enter codes, or provide required information before you can get Internet access in locations that require these additional steps (also known as restricted public networks.
Note: Using your Roku TV on a restricted public network requires wireless availability and use of your network-connected smartphone, tablet, or computer to authenticate access to your account. You must use your Roku TV remote, and not the Roku mobile app, to initiate the connection process. Streaming content might be limited due to your geographic location or due of restrictions imposed by the network host.
Go to support.roku.com for device compatibility information.
Let's get started.
Connections and setup
Refer to your TV's Quick Start Guide or other provided documentation to for model-specific information about attaching the base or a wall mount and making connections to AC power and to your other audio/video devices. The following information applies to all Roku TV models.
Connecting an antenna, cable, or satellite box
If you are using an antenna, CATV cable without a set-top box, or a cable or satellite box that has only an antenna output, connect a 75-ohm coaxial cable (not provided) from the device to the ANT/CABLE input on the TV.
Tip: If you are using an antenna with a 300 ohm twin-lead cable, you need to use a 300-to-75 ohm adapter (not provided) to adapt the twin-lead cable to a connection that is compatible with the TV's antenna input.
Tip: If you receive your TV stations through a set top box from a cable or satellite TV provider, connect it to the TV using the best connection method available. From most to least desirable:
- HDMI ^ input - Digital HD and SD video
• AV input - analog SD video - Antenna input - analog SD video using NTSC
Connecting external equipment with a composite AV video cable
If the best connection available on your device is AV or composite video output, connect it to the TV using a composite AV cable (not provided). Composite AV cables typically have three RCA-type plugs on each end, color coded as follows:
- Yellow - Video
• Red - Audio, right channel
• White or black - Audio, left channel
Connect each plug to the corresponding connector on the device and on the TV.
Note: Select models have an AV Input that looks like a headphone jack. Use the breakout cable (included) to adapt this input to the three RCA-type plugs on your composite cable.
Connecting external equipment with an HDMI ^® cable
If possible, connect your devices using HDMI ^® cables (not provided). They help to provide the best video quality and also carry audio signals, so that only one cable is needed. For better picture quality, we recommend that you use cables designated as High Speed HDMI ^® Cables.
Tip: You might need to configure the device to send its signal through its HDMI ^® connector.
The connector labeled HDMI (ARC) has the additional ability to use the audio return channel to send digital audio to a receiver or soundbar, as explained in Connecting an AV receiver or digital soundbar.
Only on select models: The connector labeled HDMI (eARC) provides the same functionality as the HDMI ARC connector, plus the ability to pass through full-resolution sound formats such as Dolby Atmos and DTS:X from and to devices that support these formats, without additional processing by the TV. Additional details are provided in Choosing an audio format.
Connecting headphones or analog soundbar
You can connect headphones or an analog soundbar (not provided) to the TV's headphone jack.
Tip: Inserting a plug in the headphone jack disables the sound from the TV's built-in speakers.
Warning: Loud noise can damage your hearing. When using headphones, use the lowest volume setting on your headphones that still lets you hear the sound.
Select models also have an audio line out connection that is not affected by TV volume or mute settings and does not disable the TV speakers. Use this connection when you want to use your amplifier or soundbar to control the TV volume. To turn off the TV's built-in speakers, from the Home screen menu, navigate to Settings >
Audio > TV speakers and change the setting.
Connecting an AV receiver or digital soundbar
You can enjoy Dolby Audio™ multichannel sound from your TV if you connect a digital amplifier or soundbar (not provided) in either of two ways:
- Digital optical audio out (S/PDIF) - Connect a TOSLINK optical cable (not provided) from the TV to the Optical input on your receiver or soundbar.
- HDMI ^® ARC – Connect an HDMI ^® cable (not provided) from the HDMI (ARC) connector to the HDMI ^® input on your receiver or soundbar. This connection uses the Audio Return Channel (ARC) feature of HDMI ^® to output sound from the TV to a compatible device. To use this feature, you must configure the TV to enable HDMI ^® ARC, as explained in Enable HDMI ^® ARC.
- HDMI® eARC - Select models only: Connect an HDMI® cable (not provided) from the HDMI (eARC) connector to the HDMI (ARC) or HDMI (eARC) input on your receiver or soundbar. If your receiver or soundbar supports HDMI enhanced ARC (eARC), the TV can pass through full-resolution sound from programs containing enhanced audio. If your receiver or soundbar does not support eARC, use the TV's eARC port to make the connection. The eARC port is backward compatible with the ARC standard.
Preparing for Internet connectivity
If you want to watch streaming content and take advantage of most of the cool features of your Roku TV, connect it to the Internet through a wireless modem/router or a wireless access point (not provided). The TV has a built-in wireless LAN adapter.
Note: The TV supports only its internal wireless network adapter—it does not support the use of a USB network adapter.
Select models also have wired and wireless network connectivity. To use the wired network connection, connect an RJ-45 Ethernet cable (not provided) from the jack on the back of your TV to your network router or switch. The wired connection automatically supports both 10 Base-T and 100 Base-T Ethernet.
AC power
Plug your TV into a power outlet. You can tell that the TV has power because the status indicator lights up when the TV is off.
The topic Status indicator explains how the status indicator shows what is happening with the TV.
Roku remote batteries
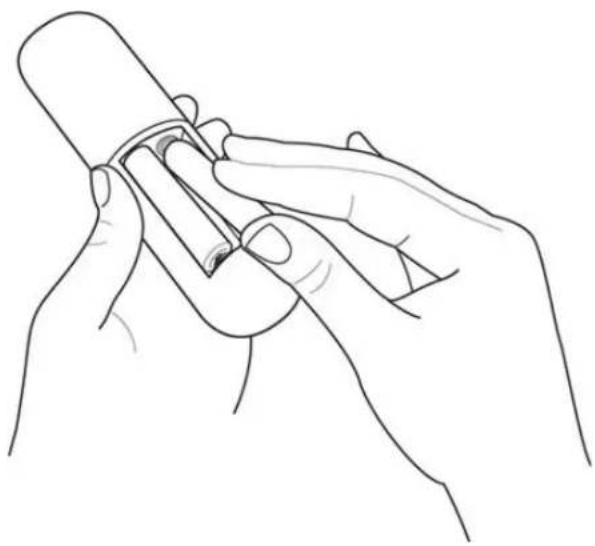
Open the back of your Roku remote and insert the included batteries, observing the proper orientation as indicated in the battery compartment. Reattach the back cover.
natural_image
Line drawing of two hands holding a cylindrical object, no text or symbols presentRoku TV remote
Use the following information to identify the buttons on your Roku remote.
Note: Certain remote buttons and features vary by model. Your remote might not have all buttons or features listed.
If your remote has a VOICE button just below the purple pad, then you have a Roku Voice Remote.
| BUTTON | FUNCTION | DESCRIPTION |
 | POWER | Turns TV on and off. |
 | BACK | Menu: Goes back to previous menu/screen.Home screen tile: Moves highlight back to the Home screen option.Watching live TV or a TV input: Returns to Home screen.Playing streaming content: Stops playing stream and returns to the previous menu or screen.Browsing streaming content: Goes to the previous level in the content tree. |
 | HOME | Immediately returns to the Home screen. |
 | DIRECTIONAL PAD | Moves the highlight in the corresponding direction.OK chooses the highlighted option.While watching TV:UP/DOWN changes channel.LEFT displays the channel list.LEFT/RIGHT while displaying the channel list, switches between ALL CHANNELS and FAVORITE CHANNELS.OK while in the channel list, selects the highlighted channel. While watching live TV: displays the program information banner. |
  | VOICE SEARCH and VOICE COMMANDSGAME MODE | Only on select models with Roku voice remotes hold and sayThe name of a movie, TV program, actor, director, or game name.Search for special genres “free” and “4K”.Use your voice to start streaming, change a channel, and more.For more information, go to:go.roku.com/voicesearchOnly on HDMI and AV inputs on select models. Displays a banner showing whether Game mode is on or off, or “Not available at this time.” Subsequent presses toggle Game mode. When On, the TV performs less image processing and has less input lag, producing a better experience with action games.Select models. Auto Low Latency Mode (ALLM) detects certain game consoles connected to an HDMI input and automatically switches to the best settings for action games. When ALLM is active, the manual Game mode setting is unavailable.Select models. Variable refresh rate (VRR) allows a compatible game console or computer to control the refresh rate of the TV. The result is smoother image animation with a lower instance of stutter or tearing. |
 | REPLAY | Select models. Streaming programs that support this feature and live TV channels: if Live TV Pause is enabled, jumps back a few seconds with each press and resumes playing.Live TV: If Live TV Pause is disabled, jumps to previous channel.When using an on-screen keyboard: Backspaces in the text you are entering. |
 | SLEEP | Select models. Displays a banner showing the remaining sleep time, if any, or Sleep timer is off. Subsequent presses cycle among the preset sleep time intervals. Once set, the sleep timer remains in effect unless you cancel it. |
| BUTTON | FUNCTION | DESCRIPTION | ||
 |  |  | ◀ REWIND▶|| PLAY/PAUSE▶ FAST FWD | Rewind, pause, play, and fast forward streaming content and live TV channels (if Live TV Pause is enabled).Press REWIND ◀ or FAST FORWARD ▶ one, two, or three times to control the speed of the operation.REWIND ◀ and FAST FORWARD ▶ also jump backward and forward one screen at a time when viewing long lists, such as when you are browsing live TV programs in the channel list. |
 | STAR | Displays additional options when available. On-screen hints let you know when this button is active. | ||
 |  | FACTORYASSIGNEDCHANNELSHORTCUT | Dedicated buttons show the logo of a preset streaming content provider. Dedicated content providers vary by model and region. Pressing a button:• Displays the streaming channel's main page if you have already added the channel to your Home screen.• Displays the streaming channel's sign-up page if you have not already added the channel. | |
 |  | |||
| or | ||||
 | ||||
 | ||||
 | ||||
 | ||||
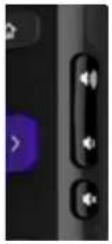 | VOLUME/MUTE | Located on the right edge of the remote.Increases/decreases volume and mutes the TV sound.Note: If the TV is muted, pressing VOLUME UP unmutes.Pressing VOLUME DOWN does not unmute the sound. | ||
Panel buttons
Your TV has a set of panel buttons that perform simple control functions. The TV panel buttons are not a substitute for the remote, as they do not give you access to all TV functions.
Depending on model, your TV model has one of several different panel button designs. Choose the one that applies to your TV from the following list:
- Single button
- Three buttons
• Game-pad style joystick - Four buttons
- Five buttons (with mute)
• Five buttons (without mute) - Seven buttons
Single button
If your TV has this style of panel button, you can perform the following functions:
• Turn TV on: short press.
• Display the Input List: short press when TV is on.
- Select the next input in the Input List: short press while the TV is showing the Input List.
- Dismiss the Input List without changing inputs: no press.
• Turn TV off: long press.
Short press = less than two seconds
Long press = more than two seconds
No press: = no press within two seconds
Three buttons
If your TV has this style of panel buttons, you can perform the following functions:
- Turn TV on: middle button, short or long press.
• Volume up: right button when Input List is not active.
• Volume down: left button when Input List is not active. - Display Input List: middle button, short press when TV is on.
- Highlight next input in the Input List: right button when Input List is active.
- Highlight previous input in the Input List: left button when Input List is active.
- Select highlighted item in the Input List: middle button, short press, or no press.
- Turn TV off: middle button, long press.
Short press = less than two seconds
Long press = more than two seconds
No press: = no press within four seconds
Game-pad style joystick
If your TV has this style of panel button, you can perform the following functions:

- Press in: Toggle between power ON and Standby.
- Press up or down: Increase/decrease the volume.
- Press left or right: Switch inputs. Each press moves the highlight up or down one item. Pausing for a few moments selects the highlighted item.
Four buttons
If your TV has this style of panel buttons, you can perform the following functions:
• Power: Turns the power on and off.
- Input: Selects among TV inputs. Each press moves down one item. Pausing for a few moments selects the highlighted item.
• Volume +: Increases the volume.
• Volume -: Decreases the volume.
Five buttons (with mute)
If your TV has this style of panel buttons, you can perform the following functions. Note that the order of the buttons might vary from model to model. Examine the panel button labels to determine your TV model's layout.
• Power: Turns the power on and off.
- Input: Selects among TV inputs. Each press moves down one item. Pausing for a few moments selects the highlighted item.
• Volume +: Increases the volume.
• Volume -: Decreases the volume.
- Mute: Mutes and unmutes the sound.
Five buttons (without mute)
If your TV has this style of panel buttons, you can perform the following functions. Note that the order of the buttons might vary from model to model. Examine the panel button labels to determine your TV model's layout.
• Power: Turns the power on and off.
- Input +: Selects the next TV input. Each press moves down one item. Pausing for a few moments selects the highlighted item.
- Input -: Selects the previous TV input. Each press moves up one item. Pausing for a few moments selects the highlighted item.
• Volume +: Increases the volume.
• Volume -: Decreases the volume.
Seven buttons
If your TV has this style of panel buttons, you can perform the following functions. Note that the order of the buttons might vary from model to model. Examine the panel button labels to determine your TV model's layout.
- Input: Selects among TV inputs. Each press moves down one item. Pressing Channel + or Channel - moves the highlight up or down. Pausing for a few moments selects the highlighted item.
- Channel +: Moves the highlighted item up in the current menu.
- Channel -: Moves the highlighted item down in the current menu.
• Volume +: Increases the volume.
• Volume -: Decreases the volume.
- Mute: Mutes and unmutes the sound.
• Power: Turns the power on and off.

natural_image
Pure electrical circuit lines without any symbolsGuided Setup
With the preliminaries out of the way, it's time to turn on your TV. As the TV starts for the first time, it leads you through Guided Setup, which configures the TV before you start to use it.
During Guided Setup, you'll:
• Answer a few questions
- Provide network connection information
• Get a software update
- Link your TV to your Roku account.
- Connect devices such as a DVD player, game console, or cable box.
Starting Guided Setup
To start Guided Setup, press POWER ⏻ on the remote to turn on your TV.
Note: Guided Setup normally runs only once, the first time you turn on your TV. If you need to run Guided Setup again, you must perform a factory reset, as explained in Factory reset everything.
When you first turn on your TV, it will take a few seconds to get itself ready. You'll notice the following things happening:
- The status indicator blinks every time the TV is busy doing something; in this case it's powering up and getting ready for you.
- The power-on screen appears and the status indicator blinks slowly for a few more seconds. The power-on screen shows a brand logo while the TV starts up.
Roku TV
- After a few seconds, Guided Setup starts.
Completing Guided Setup
Follow these steps to complete Guided Setup. At this point, you should be seeing the Language screen.
Roku TV | Language
Let's get started >
Español
Deutsch
Français
Português
English
- Only on models that have a Roku Voice remote: A few moments after the Let's get started screen appears, Guided Setup starts the pairing process for the Roku Voice remote. (You'll know if you have this type of remote because it has a VOICE or SEARCH button just below the purple directional pad.) If the
Roku Voice remote does not pair automatically, follow the instructions on the screen to complete the pairing process.
- Press DOWN on the purple directional pad to highlight your preferred language, and then press OK.
- Some models have a country selection screen. If you don't see this screen, skip ahead to the next step.

If you see this screen, select your country and then press OK.
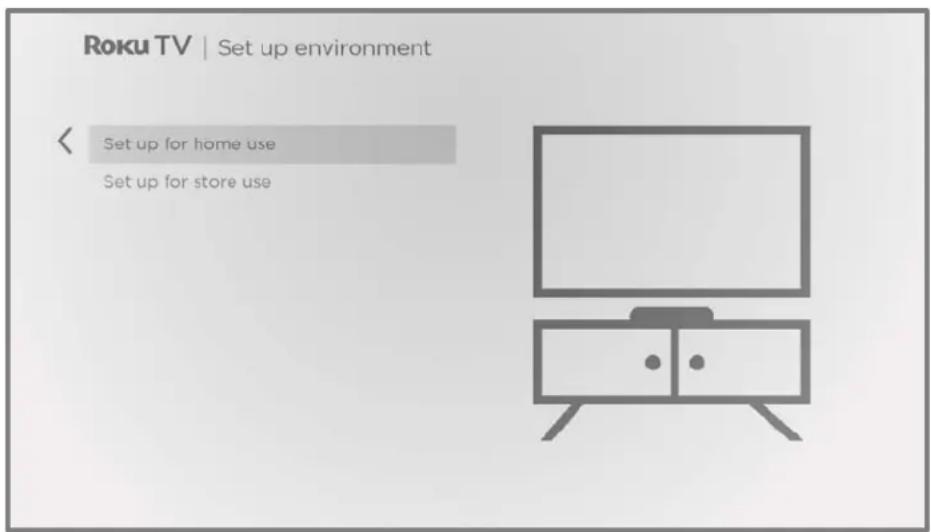
- Press OK to select Set up for home use. This is the right choice for enjoying your TV at home. It provides energy saving options as well as access to all features of the TV.
Note: Set up for store use configures the TV for retail display and is not recommended for any other use. In store mode, some features of the TV are missing or limited. To switch from one mode to the other, you have to perform a factory reset as explained in Factory reset everything, and then repeat Guided Setup.
Network connection
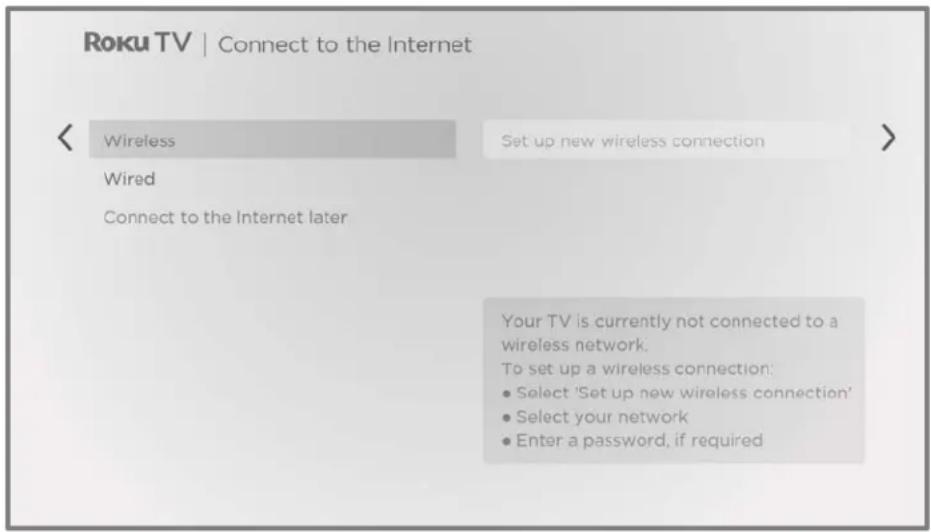
After you select Set up for home use, the TV prompts you to make a network connection. If your TV has both wired and wireless connections, you'll see the following screen. If your TV has only wireless connectivity, skip the following step.
-
Only on models that display the Connect to the Internet screen: Make a selection:
-
Wireless connection - Highlight Set up new wireless connection and press OK. The TV prompts you through wireless setup. Skip ahead to the next step for help with the process.
- Wired connection - Highlight Connect to wired network and press OK. The TV immediately attempts to connect to your wired network, your local network, and then the Internet. Go to Step 9 to continue with Guided Setup.
- Connect to the Internet later – If you don't want to connect to the Internet right now, you can select this option, and then press OK. You can then use the TV to watch live TV channels, and connect your devices to play games, watch DVDs, or watch channels from a cable box or another streaming device. When you're ready to connect, it's easy. We'll show you how in Benefits of connecting.
Note: If you decide not to connect, Guided Setup skips ahead to setting up the devices that you've connected to your TV. Jump ahead to Connect your devices to complete Guided Setup.
- On models that have wireless only, and models with both wired and wireless when you've selected Wireless: The TV scans for the wireless networks within range and displays them in order, with the strongest signals first. In addition to your own wireless signal, the TV might pick up signals from your neighbors.

Press UP or DOWN to highlight the name of your wireless network, and then press OK to select it.
Note: Some networks, such as those often found in dorm rooms, hotels, and other public places, require you to read and agree to terms, enter a code, or provide identifying information before letting you connect to the Internet. If your Roku TV detects that you are connecting to such a network, it prompts you through the connection process using your compatible smartphone or tablet to provide the needed information. For more information, see Using your TV in a hotel or dorm room.
Other options
- Scan again / Scan again to see all networks – The name of this option depends on the number of wireless networks within range.
- Scan again appears if the list already shows all available wireless networks within range. If you don't see your wireless network name in the list, you might need to adjust the location of your wireless router or the TV, turn on your router, or make other changes. When everything is ready, select Scan again to see if your network name now appears in the list. - Scan again to see all networks appears if there are more wireless networks than the strongest ones it initially listed. If you don't see your wireless network name in the list, this option displays the complete list. I you still don't see your network name, you might have your router configured to provide wireless service as a “private network.”
Note: Highlighting either of these options displays an informational panel with the unique media access control (MAC) address of your Roku TV. You will need the MAC address if your wireless router is configured to use MAC address filtering.
- Private network – If your wireless network name is hidden, it won't appear in the list. Select Private network and then press OK to display an on-screen keyboard. Use the keyboard to enter your network name. Unless you changed the factory-set network name, you can find the name (also called SSID) on a label on the router.
Tip: Wireless networks that are password-protected display a "padlock" icon adjacent to the name. This icon enables you to know that you are going to be prompted to enter a password after you select that network.

- Only if you select a password protected wireless network: An on-screen keyboard appears. Use the purple direcital pad to enter the network password.

After you select Connect, the TV displays progress messages as it connects to your wireless network, your local network, and the Internet.
- Only if your TV cannot get the correct time zone and current time from your network service provider. The Choose your time zone screen appears. Press UP or DOWN to highlight your time zone, and then press OK.
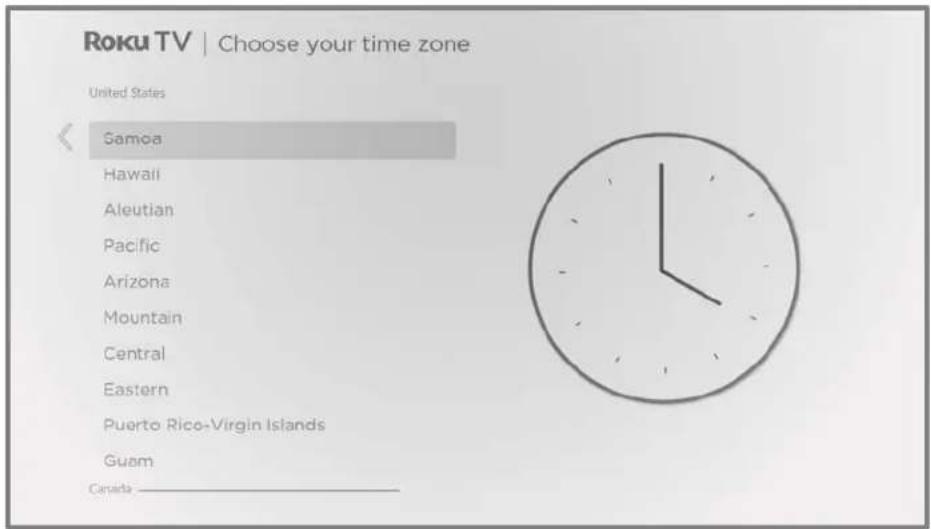
Tip: Your TV needs to know the local time zone so that it can correctly display information about the program you are currently watching.
As soon as the TV is able to connect to the Internet, it downloads and installs its first software update, and then restarts.
Tip: Your TV automatically checks for updates periodically. These updates provide new features and improve your overall experience with the TV. After an update, you might notice that some Options have moved, and that there are new options or features. This User Guide describes version 9.4. To determine your current Roku TV software version, go to Settings > System > About after you complete Guided Setup. You can download an updated User Guide that matches your Roku TV software version from the Roku TV web site.
Activation
After the TV restarts, it prompts you through activation.
- Use a computer, tablet, or smartphone with an Internet connection to link to a new or existing Roku account.
Note: Roku does not charge for activation support – beware of scams.
Why do I need a Roku account?
You need a Roku account for several reasons:
- It links you, your Roku TV, and your other Roku streaming devices to the Roku Channel Store and billing service.
- Streaming content providers know that it's OK to send content you request to your Roku TV.
- Roku can automatically send updates to your device.
You need a Roku account to activate your device and access entertainment across thousands of streaming channels. Linking to a Roku account also activates several advanced features on your TV, such as Guest Mode, the Roku mobile app, and Live TV Pause, to name just a few. Roku accounts are free, and while a valid credit card number is not required to create your account, providing your credit card information makes renting, purchasing, and subscribing to entertainment from the Roku Channel Store fast and convenient.
After you activate your TV, it gets an acknowledgement, and then adds your newly-selected and pre-existing streaming channels to your Roku TV. This process is automatic and takes a few moments—a little longer if you have added a lot of streaming channels.
Tip: Streaming channels from all of the Roku streaming devices associated with your account are synchronized periodically. All of your Roku streaming devices therefore display the same set of channels (subject to compatibility with the device).
Connect your devices
Next, Guided Setup helps you set up the external devices that you want to use with it, such as a cable box, Blu-ray™ player, or game console.
Roku TV
Let's connect your devices >
- Press OK to proceed.
Connect devices
-
Connect your devices to this TV (cable box, game console, etc.)
-
Turn them all on
Everything is plugged in and turned on
Do this later
- Connect all the devices you plan to use with your TV, turn them all on, and then select Everything is plugged in and turned on. The TV now takes you step by step through each of its inputs and asks what kind of device you have
connected. For each input that has a connected and active device, you can see its picture and hear its sound.

- Press UP or DOWN to highlight the label you want to associate with the input, and then press OK. If you are not using the input, select Nothing, and the input won't appear on the Home screen.
- While setting up your devices, rather than using the predefined names and icons, you can set a custom name and icon. To do so, scroll up or down to highlight Set custom name & icon, and then press OK. Follow the instructions on the screen to enter a name and select an icon for the input. See Rename inputs for more information.
Note: If you specify a custom name for an input, voice commands will not reliably switch to that input. Voice commands typically can only switch among inputs that use built-in names, such as "AV," and "Cable Box," and "DVR."
- Repeat the previous step for each input.
You're done with Guided Setup.

Note: Some Roku TVs, depending on where you live and other factors, show you an introductory video filled with some great hints and tips. If you're not interested in viewing this video, press HOME on the remote to go to the Roku TV Home screen.
Whenever you press HOME 🔒, the Home screen greets you.
From here, you can explore everything your TV has to offer. Use the purple directional pad to move around, and then press OK to select a highlighted item. We've designed the TV to encourage you to explore, and you can probably figure out most of the capabilities and settings on your own. If you have any questions or difficulties, you can find answers and solutions in this guide.
The Home screen
The following illustrations show typical Home screens, which vary depending on location, connected mode, selected theme, number of TV inputs enabled, and streaming channels and apps added.
Note: A paid subscription or other payments may be required for some channel content. Channel availability is subject to change and varies by country. Not all content is available in countries or regions where Roku ^® products are sold.

Typical connected Home screen, Mexico
- Home screen menu—shows options available to you when you are on the Home screen.
- Highlighted option—press OK to select.
- TV input tiles—select an input to watch the connected device.
- Streaming channel and app tiles—select a tile to go to the indicated streaming channel or application. You can add any number of channels from the Roku Channel Store.
- Direct access tiles - shortcuts to often used features.
- Options hint—press STAR * to see options when this symbol is present.
- Next screen hint—press RIGHT to see the next screen.

Typical non-connected Home screen
- Home screen menu—shows options available to you when you are on the Home screen.
- Highlighted option—press OK to select.
- TV input tiles—select an input to watch the connected device.
- Direct access tiles - shortcuts to often used features.
- Options hint—press STAR * for options when this symbol is present.
- Next screen hint—press RIGHT to see the next screen.
Personalize your Home screen
There are many things you can do to personalize your Home screen and make it just right for you and your family:
- Only in connected mode: Add streaming channels by using the Streaming Channels menu option or the Add Channels shortcut to browse the Roku Channel Store.
- Only in connected mode: Change the screen theme by going to Settings > Themes to find and pick one to suit your mood.
- Customize the Home screen. Hide or show the shortcut tiles that appear at the bottom of your Home screen grid.
- Remove a tile by highlighting it and pressing STAR *. Then highlight Remove input or Remove channel and press OK.
- Move a tile by highlighting it and pressing STAR *. Then highlight Move input or Move channel and press OK. Use the purple directional pad to move the tile, and then press OK to lock it in its new location. Move the shortcut tiles within the shortcut area only. Shortcuts are designed to always appear at the very bottom of the grid, so you can access them quickly by pressing UP once when you're at the top of the grid.
- Rename a TV input tile by highlighting it and pressing STAR *. Then highlight Rename input and press OK. Highlight a new name in the list, and then press OK to assign that name to the tile.
Rather than using the predefined names and icons, you can set a custom name and icon. To do so, scroll up or down to highlight Set custom name & icon, and then press OK. Follow the instructions on the screen to enter a name and select an icon for the input.
Note: If you specify a custom name for an input, voice commands will not reliably switch to that input. Voice commands typically can only switch among inputs that use built-in names, such as "AV," and "Cable Box," and "DVR."
Benefits of connecting
Connecting brings out your TV's full potential!
Make any night a movie night
Thousands of movies to choose from, across all major streaming movie channels ^1 . You'll never run out of something new to watch.
Get in the groove
Stream endless hours of music from free and subscription-based channels. With almost instant access to thousands of music artists, your favorite beats are just as close as your remote.
Explore your passions
In addition to the most popular streaming channels, your Roku TV also offers hundreds of other streaming channels to fuel your passions—including fitness, cooking, religion, outdoors. International programming and much more.
Enjoy FREE trials of popular channels
Your Roku TV comes loaded with special offers, including free trials (if eligible) from popular streaming channels. REMEMBER THAT YOU MUST CANCEL BEFORE THE FREE TRIAL ENDS TO AVOID SUBSCRIPTION FEES.
Take advantage of awesome features
Powerful, voice-enabled search lets you use voice commands to find movies and TV programs by title, actor, director, or genre across multiple streaming channels ^2 .
Additionally, your search commands can include popular movie quotes, and words like "free" and "4K."
Voice commands with multiple device support let you use the Apple Siri ^1 , Google Assistant, or Amazon Alexa to change stations, TV inputs, launch streaming channels, and more. Include a location in your command such as “in the bedroom” to specify which Roku device you want to control.
Automatic account linking keeps track of supported streaming subscriptions on other Roku devices, so that you won't have to re-enter your user name and password when adding the same channel on your newly-activated Roku TV. ^2
Live TV Pause lets you connect a USB drive (not provided) and pause live TV for up to 90 minutes. After pausing, you can play, fast-forward, rewind, and pause again to any point within the rolling 90-minute window.
Mobile Private Listening on the Roku mobile app lets you listen to streaming programs and “over-the-air” TV programs from the Live TV input on headphones (not provided) plugged into your IOS® or Android™ mobile device.
What is streaming?
Streaming is viewing or listening to video or audio content that is sent over the Internet, or located on a network-connected media server or on a USB device plugged into the TV's USB port.
With streaming, you can buy or rent most programs on demand, when it's convenient for you, and you can also watch live streaming channels and events. Also, you can play, pause, rewind, and fast forward most on-demand streaming programs.
Tip: Some content cannot be paused or skipped. For example, if you are viewing live programming or a program that is supported by ads, you might not be allowed to skip the ads.
Your Roku TV lets you choose from thousands of streaming channels that offer a huge selection of entertainment:
• Thousands of movies and TV episodes
• Unlimited music, live and on-demand
• Tons of live and on-demand sports
• Programming for kids and family
• International programming in 22 languages
• 24x7 news and in-depth news commentary
Many streaming channels are free. Some streaming channels let you purchase or rent the latest movie releases or popular TV series. Some channels charge a monthly subscription fee and others are available at no additional cost if you subscribe to a companion service through your cable or satellite provider.
If you have an existing subscription to a streaming provider, you can just sign in with your existing user name and password.
To play streaming content, add one or more streaming channels to your Home screen. Use the Streaming Channels option on the Home screen menu to go to the Channel Store, and then select the streaming channel you want to add. The channel remains on your Home screen unless you remove it, and you can watch it at any time.
For more information on using the Roku Channel Store feature, see Using the Roku Channel Store.
Note: A paid subscription or other payments may be required for some channels. Channel availability is subject to change and varies by country. Not all content is available in countries or regions where Roku® products are sold.
What if I didn't connect my TV?
What if you went through Guided Setup and chose Connect to the Internet later? No worries. Your Roku TV makes it easy to connect whenever you want. As you move around the Home screen, you'll see several places where you can start the connection process. For example:
- Now and then you'll see a message appear on the panel to the right of the Home screen offering a Connect Now Conéctese ahora] option. Simply highlight and select the Connect Now option to get started.
- Use the Connect and activate now option in the Settings menu. From the Home screen menu, select Settings, then Network, and then Connect and activate now.
- If you want to start over from the beginning, use the Settings menu to do a Factory reset, and then go through Guided Setup again. This time, select your home network when prompted.
Setting up live TV
In addition to the other entertainment possibilities of your Roku TV, you might want to watch broadcast channels from an antenna or cable TV service connected to the ANT input. On your Roku TV, you can watch broadcast TV in much the same way you watch other entertainment choices. You select a tile—in this case, the Live TV tile—from the Home screen.
The first time you select the Live TV tile, you have to set up the TV tuner. Setting up the TV tuner scans for active channels and adds them to your Live TV channel list.
Why do I have to set up the TV tuner?
Not everyone needs to use the TV tuner. For example, you might have a set top box provided by a cable or satellite company that receives all of your channels. Most of these set top boxes use an HDMI ^® connection.
More and more people are watching only streaming TV and do not have a TV antenna or cable/satellite service. If you don't need the TV tuner, you can bypass setting it up and instead remove it from the Home screen as explained in Remove unwanted tiles.
When you set up Live TV, the TV scans the signals on its antenna input for channels with a good signal, and adds those to the channel list, skipping dead channels and channels with a very weak signal.
The TV lets you add two analog channels, even if they have no signal, for the purpose of using an older set top box, VCR, or game console that can only output a signal on analog channel 3 or 4. Typically, you'll only need one of these channels, but both are provided to make setup simpler. You can hide the one you don't want as explained in Edit Live TV channel lineup.
How do I set up the TV tuner?
- Make sure your antenna (not provided) or TV cable is connected to the TV's ANT/CABLE input.
- On the Home screen, select the Live TV tile.
- Read the simple on-screen instructions, and then select Start finding channels.

- If prompted, select your time zone. You'll only need to do this if the TV can't figure out your time zone from your Internet connection.

Why does the TV need my time zone?
The TV needs to know your time zone so that it can correctly display time information about the program you are currently watching. In most cases, it can get the time zone automatically and skips this step.
- When prompted, select whether to add analog channels 3 and 4. These channels enable you to connect older set top boxes, VCRs, or game consoles.

- Wait while your TV scans for live TV stations...

... and then cable TV channels.

bar
Step 3 of 4: Finding Channels | Category | Value (%) | |---|---| | Scanning cableTV... | 34 | | Skip this step | Cancel |Scanning for channels can take several minutes.
Tip: If you use a set-top box to receive cable TV channels (and don't have your cable connected directly to the TV's ANT input), you can save time by skipping the cable TV portion of the channel scan.
- When the channel scans finish, the TV programs the number of channels it added.
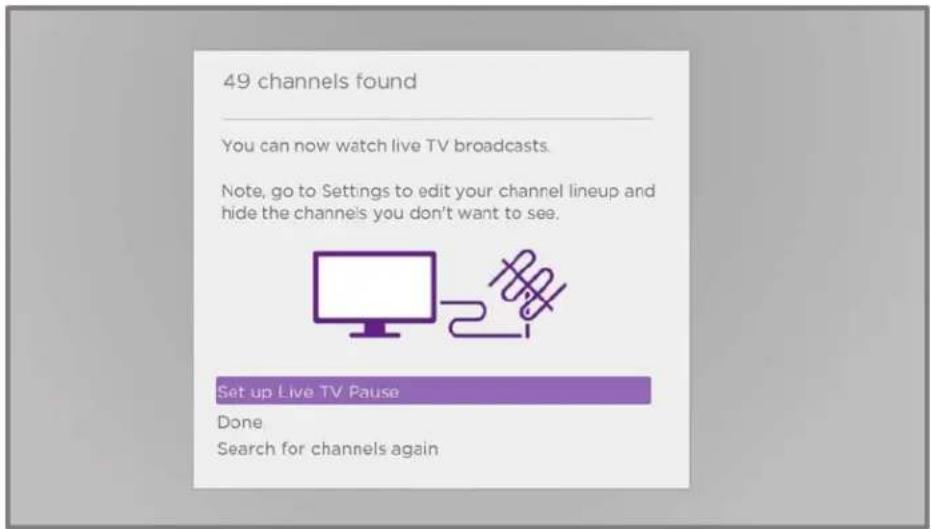
- Only in connected mode, you have the option of setting up Live TV Pause. The topic Pausing Live TV explains how to set up and use this feature. If you don't want to set up Live TV Pause, or if this option is not available to you, select Done to start watching Live TV.
Tip: Repeat the channel scan from time to time to make sure you are receiving all of the latest channels. Broadcasters add and remove channels, move channels to different parts of the spectrum, and change the power levels of their channels periodically. Your antenna reception and picture quality depend on the position of your antenna and on your location relative to the antennas of broadcasters in your area. To repeat the channel scan, use the purple directional pad to highlight the Live TV tile, press STAR *, select Scan for channels, and then press OK.
You'll also have to repeat the channel scan if you remove and re-add the Live TV tile from the Home screen or perform a factory reset.
Now, you're ready to watch live TV! While you're watching, try the following tips:
- Press UP or DOWN to change channels.
-
Press LEFT to display the channel list, and then press UP or DOWN to select a channel to watch. Or press REWIND ◀ or FAST FWD ▶ to jump through the channel list a page at a time.
-
Press OK to display information about the current program.
- Press STAR * to see options for picture and sound settings.
- Only on models that have a Roku Voice remote, hold down VOICE 📁 or SEARCH 🔒, and then say the name of a movie, TV program, or actor, director, or the genre you want to find. The TV displays the result and the streaming channels that offer the requested content.
Note: If you do not have a Roku Voice remote, you can use the Roku mobile app to search. For more information, see Roku mobile app.
Using your TV
This section provides information on using the day-to-day features of your TV.
Status indicator
Your TV has a single status indicator. It goes on and off and blinks in different ways depending on the status of the TV, as shown in the following table:
| TV CONDITION | STATUS INDICATOR | MEANING |
| On (screen is active) | Off | Screen is communicating that TV is on. |
| Screensaver (screen is active) | Off | Screen is communicating that TV is on. |
| Off (no power) | Off | TV is not connected to power. |
| Off (standby) | On | TV is connected to power and is ready to use. |
| Starting up from off state Slow | pulsing blink until startup completes | TV is doing something. |
| On (receiving update from USB) | Slow pulsing blink until update completes | TV is doing something. |
| Remote command received | Dims on/off once | TV has received your command. |
| Network connection lost Two short blinks, pause, repeat | TV was connected and paired with a Roku account and now has no network connection. | |
| Powering down to standby mode | Slow pulsing blink until the TV reaches standby. | TV is doing something. |
Standby mode energy savings
When you turn off your TV, it remains in a higher power mode for a few minutes, after which it goes into a very low power standby mode. If you turn on the TV again before it has entered the very low power mode, it turns on immediately. After the TV goes into the lower power standby mode, it takes a few seconds longer to start up.
Only in connected mode, you can optionally enable Fast TV start. When this option is enabled, your TV starts up almost immediately regardless of how long it has been turned off, but uses somewhat more power in standby mode. For more information, see Fast TV start.
Watching live TV channels
Select the Live TV tile in the Home screen. Your TV remembers the last channel you watched and starts with that channel playing.
Changing channels
To change channels, you can do any of the following:
- Press UP to change to the next higher channel.
- Press DOWN to change to the next lower channel.
- Press LEFT to display the channel list, and then press the arrow keys to select the channel or program you want to watch. Press REWIND ◀ and FAST FWD ▶ to move through the list one page at a time. When you've highlighted the channel or program you want to watch, press OK. (If you decide you don't want to change channels, press BACK ←.)
- Only if Live TV Pause is not enabled press REPLAY 🔔 to jump to the previous channel. Press again to return to the channel you were watching before you pressed REPLAY 🔔
- Note: If REPLAY is not available on your remote, you can use this feature in the Roku mobile app. For more information, see Roku mobile app.
Favorite Channels
You can quickly change from surfing among all channels or only your favorite channels. First, you have to mark one or more channels as your favorites.
Mark your favorite channels
You can make any channel a favorite whenever you're watching live TV channels.
- Press LEFT to display the channel list. Notice that the words All channels appear at the top of the channel list.
- Scroll up or down to highlight a channel that you want to make a favorite.
- Press STAR *. At this point, you'll see two options:
- Add to favorites
- Back
- With Add to favorites highlighted, press OK. A FAVORITE symbol ♥ appears adjacent to the channel to indicate that it is now a favorite.
- Repeat these steps to add more favorite channels.
Surf only your favorite channels
After you've marked one or more channels as favorites, you can switch to your favorite channels whenever you're watching live TV channels.
- Press LEFT to display the channel list.
- Press LEFT or RIGHT once to switch to Favorites. Notice that the word Favorites appears at the top of the channel list.
- Highlight a channel and press OK to select one of the channels in the Favorites channel list, or wait a few moments until the channel list disappears.
- Press UP or DOWN to change to the previous or next favorite channel. Each channel you select in this way is a favorite channel. Your channel surfing is limited to favorite channels only.
Your favorite channel list remains in effect even if you turn off or unplug your TV, until you switch back to all channels.
Note that when you press OK to view the program information banner while watching a program, a FAVORITE ♥ symbol appears below the channel number.
Surf all channels again
You can switch back to all channels whenever you're watching live TV channels.
- Press LEFT to display the channel list.
- Press LEFT or RIGHT once to switch to All channels. Notice that the words All channels appear at the top of the channel list.
- Highlight a channel and press OK to select one of the channels in the All channels list, or wait a few moments until the channel list disappears.
- Press UP or DOWN to change to the previous or next channel among all your available channels. You can surf among all channels in your channel list.
Remove a channel from your favorites
You can remove a channel from your favorites whenever you're watching the Live TV input.
- Press LEFT to display either channel list—All channels or Favorites.
- Scroll up or down to highlight a favorite channel that you want to remove from your favorites.
- Press STAR * on your remote. At this point, you'll see two options:
- Remove from favorites
- Back
- With Remove from favorites highlighted, press OK. The FAVORITE ♥ symbol adjacent to the channel disappears.
- Repeat these steps to remove other channels from Favorites.
Viewing program information
To view information about the current program, press OK. The TV displays a banner at the bottom of the screen with as much information as is available in the program data stream. The following illustration shows the information that is available:

Program information banner
Program information might include any or all of the following, depending on availability within the broadcast information:
- Channel number
- Channel call sign
- Favorite channel icon
- Signal strength
• Program title and episode name/number - Start time, end time, and graph of program length showing current position
- Content rating
• Video resolution (480i, 480p, 720p, 1080i, 1080p, 4K) - Frame rate (24Hz, 30Hz, 60Hz for television sources, 60Hz, 70Hz, 72Hz, 75Hz for computer sources)
• Audio format (Mono, Stereo, Dolby Audio™ logo)
• Audio features (SAP/MTS) - Only on select 4K models: HDR or Dolby Vision™ logo (HDMI® and streaming sources)
• Closed captioning (CC) - Current time
- Program description. If the entire description does not fit, press OK to expand the size of the banner and see the entire description.
Tip: If you've set up Live TV Pause and you're watching Live TV, you'll also see a progress bar showing the current playback position within the rolling 90-minute pause time. For more information, see Pausing Live TV.
Adjusting settings while watching a program
Press STAR * to display the Options menu. Press UP or DOWN to highlight an option, and then press LEFT or RIGHT to change the setting. The topic Adjusting TV settings explains each of the settings in detail.
Pausing live TV
Live TV Pause gives your Roku TV the ability to pause, play, fast forward, and rewind digital live TV. You can pause live TV for up to 90 minutes.
Requirements
To use this feature, you need to:
- Connect your TV to the Internet. If you didn't connect during Guided Setup, see What if I didn't connect my TV?
- Provide your own dedicated USB flash drive (thumb drive) with the following minimum specifications.
• 16 GB
• 15 Mbps read/write speed
- USB 2.0 compliant
A USB flash drive (thumb drive) meeting the minimum requirements is highly recommended over an externally-powered hard disk drive. Note that you can use any larger size drive—there is no limit to the maximum size—but using a larger drive does not extend the 90 minute pause time.
Important: After warning you and giving you a chance to cancel Live TV Pause setup, all existing content on your USB drive is erased when you enable this feature.
- Connect your USB drive to the TV's USB port.
Important: Some TV models have more than one USB port. You can connect your Live TV Pause USB drive to any port, but make sure that nothing is connected to other USB ports while enabling Live TV Pause. Reconnect other USB devices after you have finished enabling Live TV Pause.
- Enable Live TV Pause, as explained in the following topic.
Enabling Live TV Pause
- After completing a channel scan, select Set up Live TV Pause from the available options.
- Press PLAY/PAUSE ▶II on the Roku remote while watching a live TV channel.
- Highlight the Live TV tile on the Home screen, press STAR * on the remote, and then select Enable Live TV Pause.
After starting setup of Live TV Pause in any of these ways, the TV prompts you through the steps needed to enable this feature. Setup takes only a few moments.
Note: Use of a USB hub is not supported.
Using Live TV Pause
If you have used the Roku remote to watch streaming channels, using Live TV Pause should be very familiar to you.
- While watching a digital live TV channel, press PLAY/PAUSE ▶II to pause or play the content. After the TV program has been paused for 90 minutes, the TV resumes playing.
- After watching a channel for a while, press REWIND ◀ to jump back up to the point where you first started watching the channel, up to 90 minutes.
- After pausing or rewinding, press FAST FWD ▶ to jump ahead up to the point where you are once again watching the live TV program.
- Press FAST FWD ▶ or REWIND ◀ repeatedly to cycle through 1x, 2x, and 3x skip speeds. Press REPLAY 🔔 to play back the last several seconds of the program.
- When the program is paused, press LEFT or RIGHT to move backward or forward through the program approximately 10 seconds per press. Small frames appear across the screen to identify your location in the program.
Note: If REPLAY is not available on your remote, you can use the Roku mobile app. For more information, see Roku mobile app.
Whenever you use any of the Live TV Pause features, the TV momentarily displays a progress bar:

- Time at current playback position.
- Current playback position
- Extent of pause time, representing the amount of time this channel has been buffered, up to 90 minutes.
- 90 minute mark, representing the maximum extent of pause time.
- Current time.
The progress bar also shows tick marks at each half hour point, to help you locate the boundaries where one program ends and a new one begins.
Notes about Live TV Pause
- You can use Live TV Pause only with digital broadcast and cable channels received through the TV's ANT input (ATSC and Clear QAM channels).
- Changing channels erases and restarts the Live TV Pause buffer.
- Returning to the Home screen, selecting another input, or turning off the TV erases and resets the Live TV Pause buffer.
- Disconnecting the USB drive erases the Live TV Pause buffer.
Switching TV inputs
Switch TV inputs to access the device connected to that input, for example, a Blu-ray™ player. Switching inputs is as easy as highlighting the input's tile in the Home screen, and pressing OK. The video signal on the input, if any, plays on the screen.
Tip: To learn how to add, remove, rename, and rearrange the tiles on your Home screen, see Customizing your TV.
Auto-detecting devices
Your TV automatically detects when you connect a new device to an HDMI ^ input and turn on its power. The input is automatically added to the Home screen if it isn't already present.
Adjusting audio/video settings
While watching video content on any input, press STAR * to display the Options menu. Press UP or DOWN to highlight an option, and then press LEFT or RIGHT to change the setting. To learn about each of the audio and video settings, see Adjusting TV settings.
Using Roku Voice commands
Roku Voice commands make it fast and easy to control your TV and find entertainment with simple voice commands like “show me comedies.” Control your TV with commands like “switch to game console,” or “watch channel 7.1.” Use your Roku Voice remote, the Roku mobile app, or a compatible smart speaker to speak commands. When using a smart speaker, add “on my Roku” or, for example, “on my bedroom Roku” to the end of the command.
By using the Roku Voice command, you can use the command at any time, without a need to call up the menu.
Using Roku Voice remotes (select models only)
Only on TVs with the Roku Voice remotes: The following topics explain how to get the most out of your TV when it includes a Roku Voice remote or Roku Enhanced Voice remote.
Re-pairing your Roku Voice remote
The Roku Voice remotes operate with wireless radio-frequency signals and must be paired with your TV. You initially paired the remote when you set up your TV during Guided Setup. But if your remote loses its pairing with the TV for some reason, you can easily re-pair it using either of the following methods:
- Remove the battery cover from the back of the remote.
- Press and hold down the pairing button for 3 seconds or longer, until the adjacent LED lights up.
-
Do one of the following:
-
Turn on the TV using the power button on the TV side or back panel. Pairing occurs as the TV starts up.
- Use the Roku mobile app or a different remote to navigate to Settings > Remotes & devices > Pair new device > Remote.
Tip: If the remote fails to pair with the TV, try installing new batteries. Also, it's helpful to hold the remote within two to three feet of the TV to ensure successful pairing.
Checking the Roku Voice remote battery level
You can check the condition of the batteries in your Roku Voice remote at any time by navigating to Settings > Remotes & devices, and then pressing OK to select your remote below My paired devices. With your remote selected, navigate right to
About > Remote to view its Battery level. The resulting screen displays not only the battery level, but also other information that can be useful when you need technical support with your remote.
Tip: When you first turn on the TV, a battery level indicator appears in the upper right corner of the screen for a few seconds.
Playing content from USB storage devices
Only in connected mode, your Home screen has the Roku Media Player tile.
Otherwise, the Home screen has the USB Media Player tile. You can play personal music, video, and photo files from a personal USB flash drive or hard disk connected to the TV's USB port.
To use this feature, make sure your media files are compatible with the Roku/USB Media Player. To see the latest list of supported formats, view Help in the Media Player ^1 . The Roku/USB Media Player displays supported file types only, and hides file types it knows it cannot play.
For more information about playing back your personal videos, music, and photos, go to the following link on the Roku web site:
go.roku.com/rokumediaplayer
Auto player launch
Only in connected mode, you can set your TV to automatically open the Roku Media Player when you connect a USB drive with a recognizable file system (such as FAT16/32, NTFS, HFS+ or EXT2/3). To configure this setting, from the Home screen, navigate to Settings > System > USB media. At this point, the following options are available:
- Auto-launch - Select Prompt, On, or Off, as desired.
o Prompt - (default) Display a prompt each time a recognized USB drive is connected. The prompt provides options to launch the Roku Media Player as well as to change future auto-play behavior.
On - Always launch the Roku Media Player whenever you connect a recognized USB drive.
- Off - Never launch the Roku Media Player automatically.
- Launch channel - Select the app you want to use to play back media files.
Playing content from local network media servers
Only in connected mode, your TV can play personal video, music, and photo files from a media server on your local network. Media servers include personal computers running media server software such as Plex or Windows Media Player, network file storage systems that have built-in media server software, and other devices that implement the specifications of the Digital Living Network Alliance. Some servers do not fully implement the DLNA specification but are UPNP (Universal Plug and Play) compatible. The Roku Media Player can connect to them as well.
Some media servers can convert files into Roku compatible formats. DRM-protected content is not supported.
Setting up a payment method
For Movie Store, TV Store, and other channels that allow you to pay through your linked Roku account, you can enter a payment method directly on your TV. Entering a payment method on your TV means that you don't need to go to a computer or mobile device to set up a payment method.
To add a payment method:
- From the Home screen menu, navigate to Settings > Payment method > Add payment method.
- Use the on-screen number pad to enter your credit/debit card number, expiration date, CVV number, and postal code.
- Select Save Card, and then press OK.
To manage your saved payment method and to see other payment methods, log into your account at go.roku.com/pay.
Using your TV in a hotel or dorm room
Hotels, school dorms, conference facilities, and similar locations with public wireless Internet access often require you to interact with a web page to authenticate your access. These types or networks are called restricted public networks. When you select a network of this type, the TV automatically detects that additional information is needed and prompts you through using another wireless device to supply the requested information.
About using your TV on a restricted public network
Here are some points to keep in mind when using your TV on a restricted public network:
- Using your Roku TV on a hotel or dorm room network requires wireless availability and a network-connected smartphone, tablet, or computer to authenticate access to your wireless access point.
• You will need your Roku TV remote.
- Some content might be limited or unavailable if you try to connect outside your home country due to geo-filtering.
Getting your Roku TV on line on a restricted public network
- Either during Guided Setup or after using the Settings > Network menu to set up a new connection, the TV automatically detects that you are connecting to a restricted network and displays the following prompt:

Tip: Your TV can connect to a restricted network only if Enable 'Device connect' is selected in Settings > System > Advanced system settings. (Device connect is enabled by default, but if you have disabled it, the TV cannot complete the connection.)
Note: Device connect is not present if the TV is in non-connected mode.
- After selecting the correct network, highlight I am at a hotel or college dorm, and then press OK. The TV prompts you to use your smartphone, tablet, or laptop to complete the connection.

- Use a phone, tablet, or wireless-enabled computer to detect wireless networks. In most cases, you can simply open the device's Wi-Fi Settings or Network Settings screen to start scanning.
Note: The phone, tablet, or computer must be on the same wireless network to which you are connecting the TV.
- Connect to the network named on your TV screen. The actual network name varies.
Note: The previous step connects your smartphone, tablet, or computer directly to the TV. No connection charges apply and the connection does not impact your device's data plan.
-
The wireless connection process prompts you for a password. Enter the password as shown on the TV screen. The actual password varies.
-
Start the web browser on your smartphone, tablet, or computer. When you attempt to open any web page, the restricted connection will prompt you for whatever information it needs. In most cases, you must agree to terms and conditions, provide identifying information, or enter a password, PIN, or room number to proceed. The information requested depends on the organization that controls the wireless connection.
- After you enter the requested information, the TV automatically proceeds to complete its connection and resumes normal operation.
- If the TV prompts you to link to your Roku account, use your smartphone, tablet, or computer to complete the pairing operation and activate your Roku TV.
Using Apple AirPlay and the Apple Home app
Only on supported 4K Roku TV models.
Apple AirPlay
AirPlay lets you share videos, photos, music, and more from your iPhone, iPad, or Mac. To use AirPlay, your 4K Roku TV must be on the same wireless network as your Apple device ^1 . To configure your preferred AirPlay security settings, navigate to Settings >
Apple AirPlay and HomeKit from your Roku TV home screen. Depending on the AirPlay settings you select, you may be required to enter a password on your Apple device to initiate an AirPlay session on your Roku TV.
Other AirPlay things to try
• Screen mirroring from an iOS device.
- Screen mirroring from a Mac.
• Using your 4K Roku TV as an extended Mac display.
- Playing synchronized music on multiple AirPlay 2 devices, including 4K Roku TVs.
Apple Home app
Apple HomeKit controls compatible smart home lights, locks, thermostats, and other devices, including 4K Roku TVs. The Apple Home app lets you add your 4K Roku TV to your Apple HomeKit ecosystem. You can also interact with HomeKit-enabled devices by using Siri from your iPhone, iPad, Apple Watch, HomePod or Mac.
To enable your 4K Roku TV to work with the Apple Home app
- From your TV's Home screen, navigate to Settings > Apple AirPlay and HomeKit.
- Under HomeKit, select Set Up. Your TV will display a unique QR code.
- From your Apple device, open the Apple Home app and select Add Accessory.
- Use the Apple Home app to scan the QR code displayed on your TV and follow the instructions.
Some Apple Home things to try
On your Apple device, say:
• "Hey Siri, play jazz in the living room."
• "Hey Siri, mute the TV in the office."
• "Hey Siri, turn off the TVs in my home."
- Add your Roku TV to an Apple Home scene.
Find more ideas at https://www.apple.com/ios/home/
Adjusting TV settings
You can adjust most picture and sound settings while you are watching a program by pressing STAR * to open the Options menu. There are some additional picture and sound settings in the Settings menu.
In most cases, the changes you make apply only to the input you are using. The ANT input, each HDMI ^® input, and the AV input have their own settings that the TV remembers when you return to that input. The TV also separately remembers the settings you specify while viewing streaming content.
Settings menu
Use the Settings menu to adjust overall TV settings. Press HOME 📤 to go to the Home screen, and then navigate to Settings > TV picture settings.
You can adjust the following overall TV picture settings from the Settings screen:
- TV brightness - Provide a better viewing experience in darker or brighter rooms. Increases or decreases the TV's general brightness across all TV inputs.
Note: This setting is identical to the TV brightness setting you can access in the Options menu while watching a program.
- HDR notification - On select models only: Controls whether the TV displays a notification in the upper right corner of the screen for a few seconds when HDR or Dolby Vision content begins to play.
On - The TV displays a notification when HDR or Dolby Vision content begins to play.
- Off - The TV does not display a notification when HDR or Dolby Vision content begins to play.
Note: This setting does not affect the HDR or Dolby Vision notification that always appears in the program information banner. Press OK while watching a program to open the program information banner.
- Settings per input - Lists each TV input. Select an input, and then press STAR * to display the Options menu where you can adjust the input's settings while watching a live picture and listening to the sound from that input.
Tip: You don't have to go to the Settings menu first—you can display an input's Options menu and adjust its settings whenever you are watching the input by pressing STAR*.
Options menu
The Options menu for each TV input provides many settings for controlling the appearance of the picture and the quality of the audio. To view the Options menu, press STAR * whenever you are watching a TV input or streaming a video (except when you are viewing the program information banner). The Options menu is a panel that appears over the left side of the screen:

Typical Options menu
To adjust the settings on the Options menu, press UP or DOWN to highlight a setting, and then press LEFT or RIGHT to change the setting. You'll see the changes you make right away in picture appearance or audio quality.
Tip: When you highlight a setting, the header text explains the effect of its current value. When you begin to adjust a setting, the other options are hidden so you can see more of the screen. Even though the other settings are hidden, you can move the highlight up or down to adjust the other settings. As soon as you press UP or DOWN, the other settings become visible again.
Note: Some streaming channels assign STAR * to a different function (or no function at all), meaning it will not open the Options menu. In these cases, use a different channel, such as The Roku Channel, to configure options. The selected settings remain active for all streaming channels.
Options menu settings
- Sleep timer – Sets a timer that turns off the TV after the specific amount of time. This setting remains in effect even if you stop watching the current input.
- TV brightness - Affects the overall brightness of the picture. This setting applies across the entire TV; that is, to all TV inputs and is identical to the TV brightness setting under Settings > TV picture settings.
- Picture size - Adjusts the aspect ratio of the picture, enabling you to view a picture in its original format, or zoom or stretch it to fill the screen. The Auto setting has been found to produce the best picture in most cases.
- Picture mode – Provides picture presets for various viewing preferences. This setting applies to the currently-selected input only.
- Sound mode - Adjusts the sound quality output from the TV speakers. This setting applies across the entire TV; that is, to all TV inputs. It does not affect the sound quality for headphones, HDMI (ARC), HDMI (eARC), or SPDIF (TOSLINK) connectors.
- Closed captioning - Controls when you see captions. This setting is only offered for live TV, the AV input, and streaming videos. Any set value remains in effect across only these inputs.
Live TV - Set captions to off, always on, on only when the TV sound is muted, or on only during instant replay (when Live TV Pause has been enabled).
o AV input - Set captions to off, always on, or on only when the TV sound is muted.
o Streaming video channel - For streaming content that provides closed captions, set captions to off, always on, on only when the TV sound is muted, or on only during instant replay (for streaming content that supports instant replay). Note that some streaming channels have other methods for turning captions on and off. In these cases, the Closed captioning option does not appear on the Options menu.
Note: If the REPLAY button is not available on your remote, you can use this feature in the Roku mobile app. For more information, see Getting and using the Roku mobile app.
- Captioning track - Selects which caption track to display when closed captioning is on. This setting remains in effect on all inputs that provide captions.
- SAP - Selects whether to play a secondary audio program or multichannel television sound, and which choice to play. This setting applies only to live TV on digital channels.
• Picture settings - Shows the Picture settings menu. - Audio settings - Only on select models. Shows the Sound settings menu.
Tip: To dismiss the Options menu, just wait a few seconds without pressing any buttons. Or press * again to dismiss the menu immediately.
Picture settings
The Picture settings menu for each TV input provides settings for fine tuning the appearance of the picture. All of the settings in this menu apply only to the currently-selected input.
To use the Picture settings menu, first press STAR * to display the Options menu. Then select Picture settings.
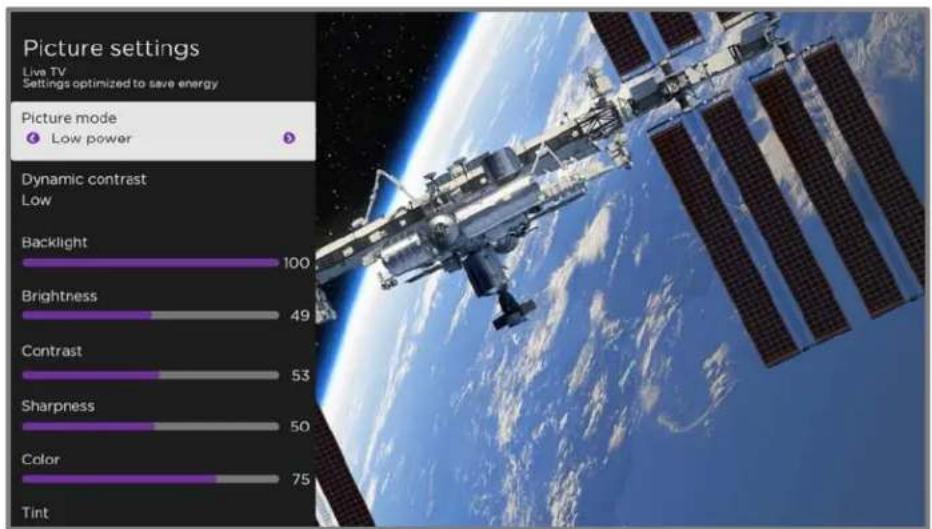
Typical Picture settings menu
Picture settings menu options
Note: Picture settings vary by brand and model. Not all settings are available on all TVs. Names of certain settings also vary by brand and might differ from the names listed here.
- Picture mode - Provides picture presets for various viewing preferences. This setting duplicates the one on the Options menu. When you change the Picture mode, other picture settings adjust accordingly. For example, setting the Picture mode to Vivid sets Brightness, Contrast, Sharpness, and other values to produce a very vibrant picture. Setting Picture mode to Movie changes the settings to produce a picture suitable for enjoying movies in a darkened room. If you make changes to the individual picture settings—for example, Contrast, or Sharpness—these settings are saved for the current input and the current picture mode. In this way, you can set HDMI 1 input's
Movie picture mode to use different settings than the HDMI 2 input's Movie picture mode and the Live TV input's Movie picture mode. Use Reset picture settings, described below, to return the input's selected picture mode to its original values.
- Local dimming - Only on select models Sets the amount of dimming applied to multiple "local" areas of the screen's backlight intensity. This setting can make dark areas darker without affecting the brightness of light areas.
- Dynamic contrast - Only on select models. Automatically adjusts the backlight level to achieve the optimum contrast and prevent excessive differences between light and dark areas of the screen.
- Micro contrast - Only on select models. Improves image contrast.
- Backlight - Adjusts the overall light intensity of the screen.
- Brightness - Adjusts the dark level of the picture.
- Contrast - Adjusts the white level of the picture.
- Sharpness – Adjusts the sharpness of edges in the picture.
- Color - Adjusts the saturation of colors in the picture. A setting of 0 removes all color and displays a black and white picture.
- Tint - Adjusts the color balance from green to red to obtain accurate colors in the picture.
- Color temperature - Adjusts the overall color tones in the picture from Normal to slightly more bluish (Cool) to slightly more reddish (Warm).
- Frame rate conversion - Only on select models: Each TV brand uses a different name for this option. Adjusts the amount of motion processing applied to the video signal. A higher setting results in more smoothing, but can cause undesirable picture artifacts in certain types of content Each Picture mode has a different default setting.
- Film mode - Only on select models: Each TV brand uses a different name for this option. When enabled, this feature reduces "judder" that is often present when 24 frame-per-second movies are upscaled to 60Hz TV standards. Film mode is On by default in Movie and HDR Dark picture modes, and Off by default in other picture modes.
- Blur reduction - Only on select 120Hz models: Each TV brand uses a different name for this option. Reduces blur, especially for fast-moving images such as sports.
- Black frame insertion - Only on select models that also have the local dimming feature. Each TV brand uses a different name for this option. Reduces motion blur caused by the refresh rate of the screen. Enabling this feature inserts black frames between picture frames in a way that improves the clarity of fast moving objects. It provides an improved viewing experience for video games and sporting events, but reduces the brightness of the picture. You can select settings of Low, Medium, High, or Off to achieve the desired picture quality.
- Game mode - Only on HDMI ^ and AV inputs: Controls whether Game mode is enabled. When On, the TV performs less image processing and has less input lag. When Off, the TV performs more image processing and has more input lag, which is less desirable for action games.
Only on select models: Auto Low Latency Mode (ALLM) detects when certain game consoles are connected to an HDMI input, and automatically configures the best settings for action games. When ALLM is active, the manual Game mode setting is not available.
- Reset picture settings - Returns all picture settings for the input's currently-selected Picture mode to their original values.
Auto Low Latency Mode (ALLM):
Only on select models: Auto Low Latency Mode (ALLM) detects when certain game consoles are connected to an HDMI input, and then automatically configures the best settings for action games when that input is selected. When ALLM is active, the manual Game mode setting is not available.
Variable refresh rate (VRR)
Only on select models: Variable refresh rate (VRR) allows a compatible game console or computer connected via HDMI to control the refresh rate of the TV. This feature helps to ensure that the TV does not begin to display a video frame until the video source has completely rendered it. The result is smoother image animation with a lower instance of stutter or tearing. Use of this feature requires that:
- Variable refresh rate is turned On in the HDMI settings for the input. This setting is Off by default.
- The HDMI mode is set to Auto or HDMI 2.0 in the HDMI settings for the input.
• Game mode is enabled.
• The connected device supports VRR.
Tip: To dismiss the Picture settings menu, just wait a few seconds without pressing any buttons. Or press STAR* again to dismiss the menu immediately.
Sound settings
Select TV brands and models have various sound settings available in the Options menu. Variations include:
- No sound settings
• Volume mode
• Dolby® Audio Processing - DTS® TruSurround
• DTS® Studio Sound - Sonic Emotion™ Premium
Volume mode (select models only)
To access Volume mode, first press STAR * to display the Options menu, then select Sound settings ^1 .

Sound settings menu for models with Volume modes
Tip: Some streaming channels assign STAR* to a different function, meaning it will not open the Options menu. In these cases, use a different channel to configure DTS® Studio Sound. The selected settings remain active for all streaming channels.
Sound settings menu - Volume mode
- Off - Volume mode is inactive and content volume is unmodified.
- Leveling - Provides a consistent volume level across different types of content, so that you need not change the volume every time you switch channels or when a commercial comes on.
- Night – Soft sounds, such as whispers, are increased while loud sounds, such as explosions, are decreased, making it easier to hear your TV at night without disturbing others.
- Dolby AC-4 Dialog Enhancement - Only on select models: Select On for AC-4 to enhance the dialog in content that supports the AC-4 audio format.
Sound settings - Dolby® Audio Processing (select models only)
Each TV input has separate settings for fine tuning sound quality. All of the settings in this menu apply only to the currently-selected input. To access the DAP settings, first press STAR * to display the Options menu, then select Sound settings.
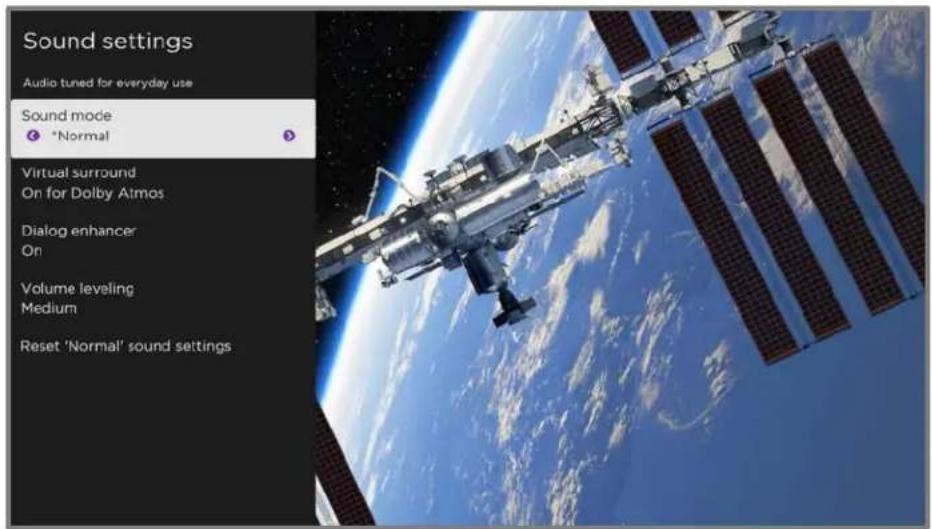
Sound settings menu for models with Dolby® Audio Processing
Tip: Some streaming channels assign STAR* to a different function, meaning it will not open the Options menu. In these cases, use a different channel to configure DTS® Studio Sound. The selected settings remain active for all streaming channels.
Sound settings menu- Dolby® Audio Processing
- Sound mode - Select from among various preset sound modes to improve speech, make music sound its best, boost bass or treble, or simulate a theater. Use Reset audio settings, described below, to return the input's current settings to their original values.
- Virtual surround Only on select models - Options vary by TV model. Simulates surround sound that otherwise would require installation of a surround sound audio system. Sometimes, the effect interferes with dialog clarity. Use the Dialog enhancer option to compensate.
- Dialog enhancer - Improves the clarity of speech when on.
- Dolby AC-4 Dialog Enhancement - Only on select models: Select On for AC-4 to enhance the dialog in content that supports the AC-4 audio format.
- Reset audio settings - Returns Virtual surround and Dialog enhancer settings to their default settings for the selected Sound mode.
Sound settings - DTS® TruSurround / DTS® Studio Sound (select models only)
Each TV input has separate settings for fine tuning sound quality. All of the settings in this menu apply only to the currently-selected input. To use the Sound settings menu, first press STAR * to display the Options menu. Then select Sound settings.

Sound settings menu for models with DTS® TruSurround/Studio Sound
Tip: Some streaming channels assign STAR* to a different function, meaning it will not open the Options menu. In these cases, use a different channel to configure DTS® Studio Sound. The selected settings remain active for all streaming channels.
Sound settings menu options - DTS® TruSurround / DTS® Studio Sound
- Sound mode - Select from among various preset sound modes to improve speech, make music sound its best, boost bass or treble, or simulate a theater. Use Reset audio settings, described below, to return the input's current settings to their original values.
- DTS TruSurround - Simulates surround sound that otherwise would require installation of a surround sound audio system. Sometimes, the effect interferes with dialog clarity. Use the Dialog Clarity option to compensate.
- Dialog Clarity - Available only when DTS TruSurround is On. Choose among Low, Medium, and High settings to improve the clarity of dialog when you are using the TruSurround feature.
- TruVolume - Minimizes annoying volume fluctuations in programs.
- Dolby AC-4 Dialog Enhancement - Only on select models: Select On for AC-4 to enhance the dialog in content that supports the AC-4 audio format.
- Reset audio settings - Returns DTS TruSurround, Dialog Clarity, and TruVolume settings, to their default settings for the selected Sound mode.
Sound settings - Sonic Emotion Premium (select models only)
This topic describes the Sound settings menu for TV models with Sonic Emotion Premium. Sonic Emotion™ Premium is an audio technology that enables your TV to produce a more immersive sound experience. Each TV input has separate settings for fine tuning sound quality. All of the settings in this menu apply only to the currently-selected input. To use the Sound settings menu, first press STAR * to display the Options menu. Then select Sound settings.
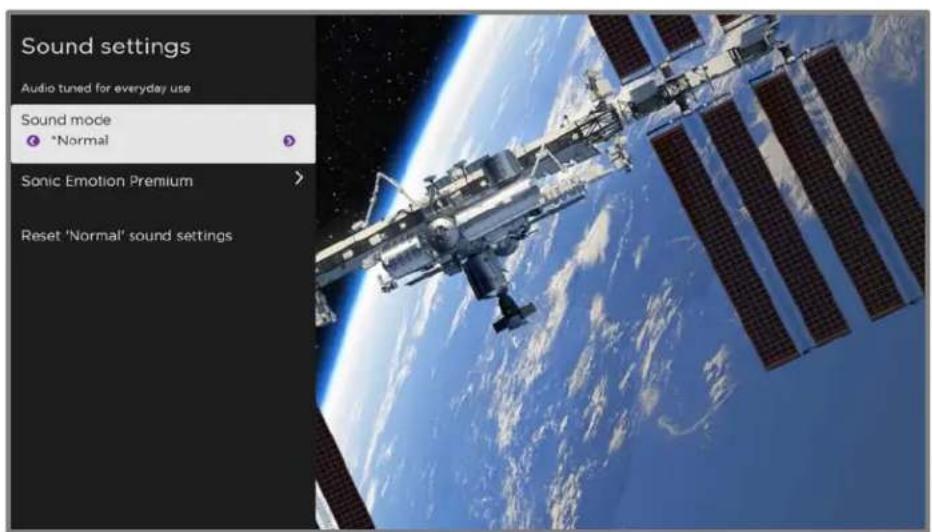
Sound settings menu for models with Sonic Emotion Premium
Tip: Some streaming channels assign STAR* to a different function, meaning it will not open the Options menu. In these cases, use a different channel to configure DTS® Studio Sound. The selected settings remain active for all streaming channels.
Sound settings menu options - Sonic Emotion Premium
- Sound mode – Select from among various preset audio modes to improve speech, make music sound its best, boost bass or treble, or simulate a theater. Use Reset audio settings, described below, to return the input's current settings to their original values.
- Sonic Emotion Premium - Displays a menu with individual Sonic Emotion audio settings, as described in Sonic Emotion.
- Dolby AC-4 Dialog Enhancement - Only on select models: Select On for AC-4 to enhance the dialog in content that supports the AC-4 audio format.
- Reset audio settings - Returns Sonic emotion settings to their default settings for the selected Sound mode.
Sonic Emotion settings
When you turn on Sonic Emotion from the Sound settings menu, these additional settings become available:
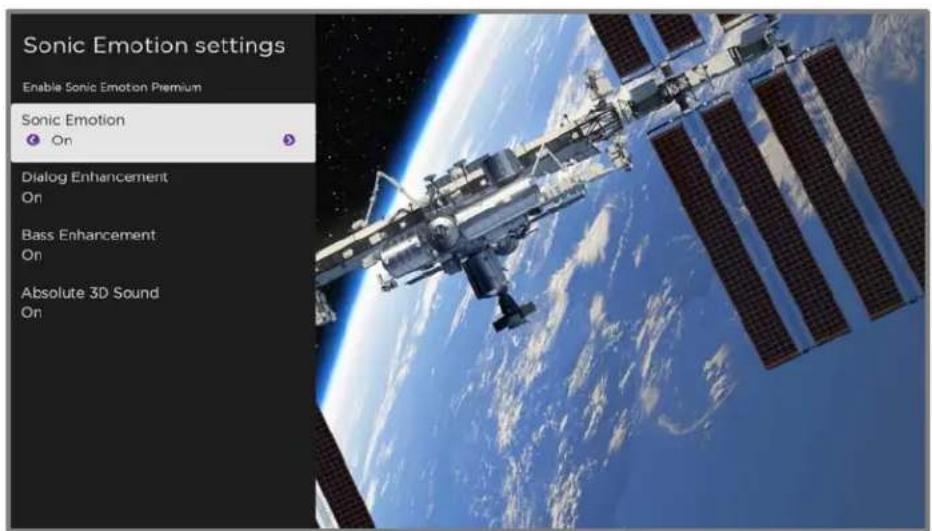
- Dialog Enhancement – Enhances your ability to hear and understand dialog in the program.
- Bass Enhancement – Enhances the low frequency sound component in the program.
- Absolute 3D Sound – Simulates sound from multiple speakers that would otherwise require installation of a surround sound audio system.
Expert Picture Settings (4K models only)
4K (UHD) TV models have additional picture settings for demanding home theater enthusiasts. Expert Picture Settings include gamma, noise reduction, 11-point white balance adjustment, and extended color space management.
You can access Expert Picture Settings only by using the Roku Mobile App on an iOS ^® or Android ^™ mobile device.
Changing privacy settings
Note: Privacy settings are not present on TVs operating in non-connected mode.
Advertising
Only in connected mode, by default your TV uses an advertising identifier to track your TV usage. You can change the privacy settings on your TV in two ways: resetting the advertising identifier and limiting ad tracking.
Reset the advertising identifier
Resetting the advertising identifier clears the prior usage history that your TV stores, and then begins tracking again. From that point forward, your new usage patterns affect the advertisements you see on your TV.
- From the Home screen menu, navigate to Settings > Privacy > Publicidad.
- Highlight Reset advertising identifier. Press STAR * to view more information about this option. When you finish reading the information, press OK to close the More Information window.
- Press OK to reset the advertising identifier, and then press OK again to dismiss the verification message.
Limit ad tracking
You can limit Roku's tracking of your usage behavior by limiting ad tracking. When you do, your TV will display ads that are not personalized based on your TV's advertising identifier.
- From the Home screen menu, navigate to Settings > Privacy > Publicidad.
- Highlight Limit ad tracking. Press STAR * to view more information about this option. When you finish reading the information, press OK to close the More Information window.
- Press OK to select the Limit ad tracking check box.
Note: If you perform a factory reset and then reconnect your TV, ad tracking is restored until you repeat these steps.
Microphone
Your Roku TV does not have a built-in microphone. However streaming channel providers can use the microphone on the Roku Voice remotes (only on select models) or on your mobile device when the Roku mobile app is running. You can control whether streaming channels have permission to use the microphone.
Note: These settings affect only streaming channel access to the microphone.
Channel microphone access
You can control which streaming channels have permission to use the microphone, giving you control over how the microphone is used by each streaming channel. The default setting is Prompt, so channels will not be able to turn on the microphone without your permission.
To change microphone access settings:
- From the Home screen menu, navigate to Settings > Privacy > Microphone.
-
Select Channel microphone access.
-
Choose one of the following settings:
-
Prompt – Display a notification the first time a streaming channel requests the use of the microphone. When such a notification appears, you can choose either Allow microphone access or Deny microphone access on a per-channel basis. If you choose to allow microphone access, you'll be prompted to confirm your choice by entering a numeric code that appears on the screen.
- Always allow - Do not prompt, but always allow any streaming channel to use the microphone.
- Never allow - Do not prompt, but never allow any streaming channel to use the microphone.
Channel permissions
After granting or denying microphone access on a per-channel basis, you can reset channel permissions to enable them to follow the system-wide setting you specify under Channel microphone access.
To reset channel permissions:
- From the Home screen menu, navigate to Settings > Privacy > Microphone.
- Select Channel permissions.
- Highlight Reset channel permissions, or highlight a specific listed channel, and then press OK to deny microphone access to all or to a specific channel.
Searching for something to watch
Searching for movies and programs across various streaming channels is one of the unique features of your Roku TV. Within a single search operation, you can search by:
- Movie name
• TV program name
• Actor or director name - Streaming channel name
- Interactive game name
- Popular quotes (in English), such as "May the Force be with you."
- Genre, including the special genres, "free" and "4K."
Note: Roku Search is only available if your TV is operating in connected mode and linked to a Roku account. Roku Search doesn't search across all streaming channels, but searches across lots of popular streaming channels. The actual channels it searches vary by locale.
How do I search?
You can search in several different ways:
- By using an on-screen keyboard that you navigate using the purple directional pad on your remote
- By typing on the Roku mobile app on your phone or tablet
- By speaking search phrases in English or Spanish using a Roku Voice remote, the Roku mobile app, Alexa, or Google Home Assistant.
Keyboard search using the remote
- Select Search on the Home screen menu.
- Use the purple directional pad to navigate the on-screen keyboard, entering a few characters of the search term.
Each additional character you enter narrows down the search, making the search results more relevant. You'll often see the results you are seeking after entering only a few letters. - When you see the program you are searching for, press RIGHT to highlight it. Continue pressing RIGHT to see more details about how to watch the program.
Voice Search from a Roku Voice remote
Only with models that have a Roku Voice Remote or Roku Enhanced Voice Remote
- Press and hold either VOICE or SEARCH, depending on your remote.
Hint: Tap the button to see on-screen tips about searching. Repeat to see a different set of tips.
- While holding down the button, say the name of a movie, TV program, actor, director, or genre (including the special genres, "free" and "4K"). Or say, for example, "What movie is this from 'May the Force be with you'," to search for a movie based on a popular quote.
Note: In Canada, voice searches are currently limited to English.
The TV lists the results of your search across many streaming channels.
- Press RIGHT to move the highlight into the list of search results.
- Press UP or DOWN to scroll through the list of search results to highlight the item you want to view.
Searching from the Roku mobile app
Use the free Roku mobile app on your compatible smartphone or tablet to make searching even faster. Use your mobile device's keypad to type more quickly and easily than with the on-screen keyboard on your TV. Or, search by touching the Voice Search icon and saying the name of the movie, TV program, actor, director, genre, streaming channel, or game.
When you use the Roku mobile app to search, search results are shown on your mobile device instead of on the TV screen. When you make a selection from the search results, the TV starts playing the selected program.
For more information, see Roku mobile app.
Searching with Google Assistant
Use your Google Home, Google Pixel phone, or the Google Home mobile app to search for programs:
- Link your Roku account to your Google account using the Google Home mobile app on your iOS or Android device.
- Start your command with "Hey Google" or "OK Google," and follow the command with "on Roku." Some examples:
• "Hey Google, show me documentaries on Roku."
- "OK Google, show me comedies on Roku."
Note: You also can issue commands to control your Roku TV. And, if you have enabled Fast TV Start on your TV, you can turn on your TV by saying, "OK Google, turn on Roku."
Searching with Amazon Alexa
Use your Amazon Echo Dot, Echo Plus, Echo Show, or the Amazon Alexa mobile app to search for programs:
-
Link your Roku account to your Amazon account using the Amazon Alexa app on your iOS or Android device.
-
Start your command with "Alexa," and follow the command with "on Roku." Some examples:
• "Alexa, turn up the volume on Roku."
- "Alexa, show me documentaries on Roku."
Note: You also can issue commands to control your Roku TV. And, if you have enabled Fast TV Start on your TV, you can turn on your TV by saying, "Alexa, turn on Roku."
Searching for free content
You'll discover an almost endless list of content through your Roku TV, and much of it is free. You can easily find free content by including the word "free" in your search. For example:
- Roku Voice Remote or Roku mobile app—Say, "Show me free comedies" or "Show me free romance," or simply, "Show me free programs."
- Google Home, Google Pixel phone, or the Google Home mobile app—Say “OK Google, show me free programs on Roku,” or “Hey Google, show me free documentaries on Roku.”
- Amazon Alexa—Say “Alexa, show me free miniseries on Roku” or “Alexa, show me free dramas on Roku.”
I found a program. Now what?
Now that you've highlighted the program, movie, actor, game, or streaming channel you were looking for, press RIGHT.
If your search result was an actor, director, or other item that does not represent a single item of content, you'll see another list to narrow down your search. Use the purple directional pad to find the program you want to watch.

• The streaming channel logo appears to the left of each result.
• HD means that the content is available in high-definition.
If your search result was a game or a streaming channel, you will see detailed information, images, and available actions, such as a list of results and the cost, if any, of using the item or channel.
Note: Some channels may require a paid subscription.
Recent Searches
The next time you use Search from the Home screen menu, the Search screen displays a list of recent search selections in place of the search instructions.
Using the recent search selections list makes it easy to quickly get to a previously found item, for example, to find another movie with the same actor, or another TV program in the same series.
Using the Roku Channel Store
Only in connected mode, either the Streaming Channels menu option or the Add Channels shortcut takes you to the Roku Channel Store, where you can add new subscription based and free streaming channels to your TV.
To make it easier to find what you want, the streaming channels in the Roku Channel Store are categorized by topic. Press UP and DOWN to highlight the category you want, and then press RIGHT to move the highlight into the grid of streaming channel tiles.
When you find a streaming channel you want to add or learn more about, highlight it and press OK to display more details.
- If the streaming channel you are adding is free, you can select Go to channel to start watching it immediately.
- If there is a one-time or recurring fee associated with using the streaming channel, you must agree to the terms and conditions, accept the fee, and—if you created one when you activated your Roku TV, enter your Roku PIN code to authorize the charges.
- If you already have a subscription to the channel—for example, you already subscribe to Netflix or you receive HBO through your cable TV provider—you must complete a different, simple authorization step to add the streaming channel.
You need only complete the authorization or activation step one time, when you initially add the streaming channel. After that, you just select the streaming channel tile from the Home screen to start watching. (Channel and content availability are subject to change. Charges may apply to your selection.)
Tip: New streaming channels are added continuously to the Roku Channel Store, so be sure to check back every now and then for new options.
Note: If you don't remember your PIN, or if you want to change whether you need to use a PIN to make purchases on your Roku account, see Roku account PIN.
Automatic Account Link
Some subscription channels take advantage of Automatic Account Link. If you have multiple Roku devices, channels that support this feature require you to supply your user name and password on only one device
Customizing your TV
There are several things you can do to personalize your TV.
Add TV inputs
As you use your TV, you might find that you need to add a TV input tile that you did not add during Guided Setup. To add a TV input:
- From the Home screen menu, navigate to Settings > TV inputs. Notice that the list of inputs is divided into two sections: Inputs being used and Inputs not used.
- Press UP or DOWN to highlight an input in the Inputs not used section of the list.
- Press RIGHT to move the highlight to Set up input.
- Press OK to add the input.
- Press HOME 🔒 to return to the Home screen. Notice that the input has been added to the top of the Home screen. If you want to move the input tile to a different position in the grid, see Rearrange tiles.
Add streaming channels
You can add streaming channels by searching in the Roku Channel Store from any of the following locations:
• Streaming channels option
• Search (including Roku Voice Search)
- Add Channels shortcut
New streaming channels are added to the bottom of the Home screen. If you want to move the channel tile to a different position in the grid, see Rearrange tiles
Hint: If you have multiple Roku devices, they all show the same set of streaming channels after their next daily update, unless the channel is not compatible with the device. So don't be surprised when you add a channel to your Roku TV and then see it the next day on your Roku Streaming Stick or Roku Premiere.
Rename inputs
Rather than trying to remember that your Blu-ray™ player is connected to HDMI 1 and your game console is connected to HDMI 3, you can rename the TV inputs to match the connected device.
Note: Renaming an input also changes the icon associated with it.
To rename an input, you can either:
- Highlight the input tile in the Home screen, and then press STAR * to display a list of options. From the list of options, select Rename input . Then select a new name and icon.
or
- From the Home screen, navigate to Settings > TV inputs. On the TV inputs screen, select the input you want to rename, select Rename, and then select a new name and icon from the provided list.
Rather than using the predefined names and icons, you can set a custom name and icon. To do so, scroll up or down to highlight Set custom name & icon, and then press OK. Follow the instructions on the screen to enter a name and select an icon for the input.
Press HOME 🔒 to return to the Home screen. The new name and icon are now in effect.
Remove unwanted tiles
It's easy to remove unused TV inputs and unwanted channel or app tiles. For example, if you never use the HDMI 3 input, or if you don't like the weather app you added from the Roku Channel Store, you can remove them from your Home screen.
Note: You also can remove the Live TV tile if you never use the TV tuner. But be aware that removing the Live TV tile also deletes the channel list. You'll have to set up the TV tuner again next time you want to view live TV. Instructions for setting up the TV tuner can be found in Setting up Live TV.
- To remove any tile, highlight the input tile in the Home screen, and then press STAR * to display a list of options. From the list of options, select Remove input . In the screen that follows, confirm you want to remove the input.
- Alternatively, to remove a TV input tile from the Home screen, navigate to Settings > TV inputs. On the TV inputs screen, select the input you want to remove, and then select Remove > Confirm. Then press HOME 🔒 to return to the Home screen.
Rearrange tiles
When you add a TV input tile, it's added at the top of your Home screen. When you add a new streaming channel, it's added at the bottom of your Home screen.
You can easily rearrange the order of the tiles on the Home screen to suit your viewing preferences. For example, you might want Live TV to be the first tile in your Home screen. But if you mostly watch one streaming channel, you might want its tile to be the first one on your Home screen.
-
In the Home screen, highlight one of the tiles you want to move.
-
Press STAR * to display a list of options for the type of tile you selected.
-
Select Move input or Move channel. The list of options disappears and the highlighted tile shows arrows indicating how it can be moved.
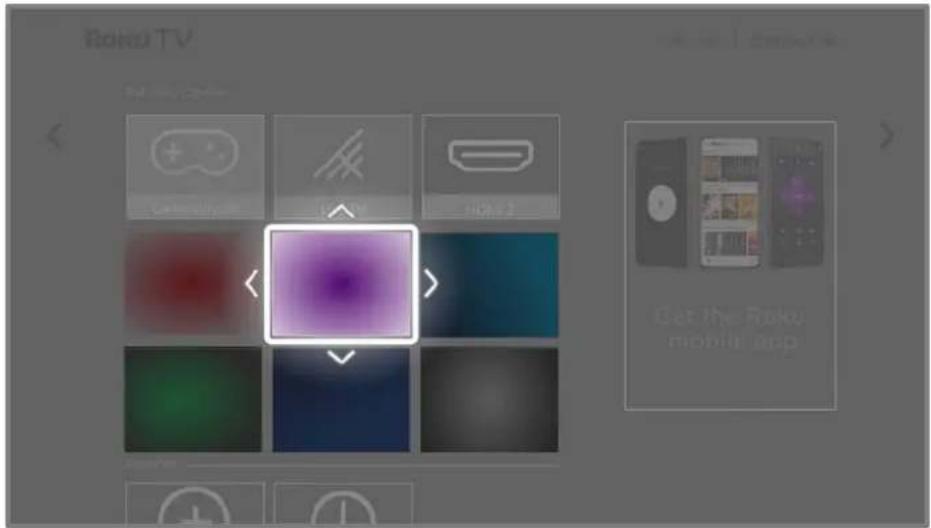
Note: A paid subscription or other payments may be required for some channels. Channel availability is subject to change and varies by country. Not all content is available in countries or regions where Roku® products are sold.
-
Use the purpole directional pad to move the highlighted tile to its new position. As you move the tile, it pushes other tiles out of its way.
-
Press OK to lock the tile into its new position.
-
Repeat these steps to move other tiles until you have arranged your Home screen to your liking.
Change the look and feel with themes
Only in connected mode, another way to customize your TV is to change its theme. The theme establishes the look and feel of the TV through colors, designs, fonts, wallpaper (background) and screensaver.
To change the theme, from the Home screen menu navigate to Settings > Theme. In the Themes screen, choose from the following options:
- Wallpapers – Select a wallpaper of your choice.
- Screensavers – Select a screensaver of your choice.
- Seasonal themes – Turn seasonal themes on or off. When this feature is on, Roku overrides your selected theme with a theme of their own choosing for various holidays and significant events. After the holiday or event passes, the TV reverts to your selected theme.
Edit live TV channel lineup
When you set up the TV tuner as described in Setting up Live TV, the TV adds all the channels with good signals that it can detect in your area. It's likely that you now have more channels than you want in your channel list.
To edit the channel lineup, from the Home screen, navigate to Settings > TV inputs > Live TV > Edit channel lineup. You'll see a screen listing all of your channels.
Adjacent to the list of channels is a miniature TV screen playing the highlighted channel's picture and sound.

Highlight each channel you want to hide, and then press OK to hide the channel.
Tip: If you need view the highlighted channel to decide whether to hide it, wait a couple of seconds for the TV to start playing the channel's picture and sound. If you've enabled parental controls and the program on the current channel is blocked, you won't see a picture or hear sound while editing the channel lineup.
Note: Repeating the tuner channel scan unhides all hidden channels.
Change menu volume
Menu sounds are the noises the TV makes to let you know it received your command. You can change the volume of these menu sounds or turn them off.
To adjust the menu volume, in the Home screen menu, navigate to Settings > Audio > Menu volume. Navigate to the right and then change the setting to Low, Medium, High, or Off.
Configure power settings
Power settings let you configure features related to how your TV's power settings work.
Power on settings
Power on settings tell the TV what to do when you turn on the power. To configure the power on settings, from the Home screen, navigate to Settings > System >
Power > Power on. Highlight the preferred power on location in the list, and then press OK.
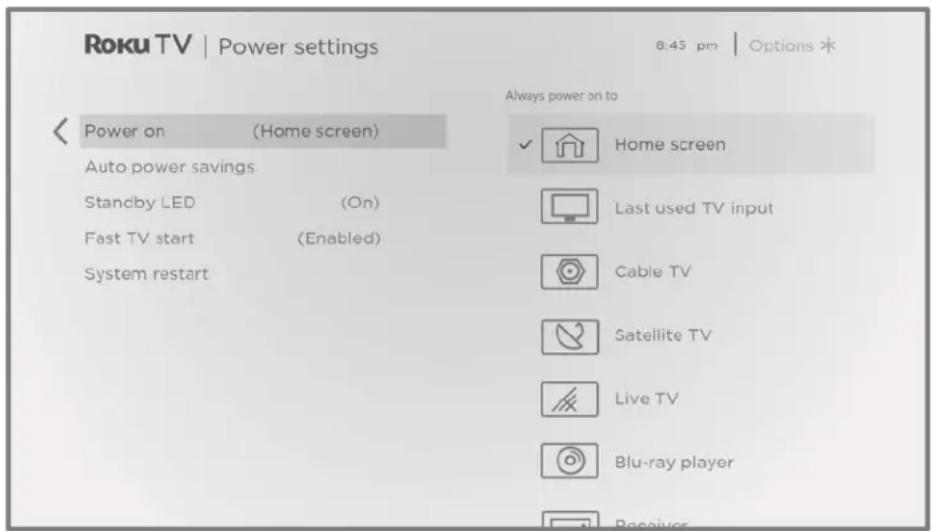
Auto power savings
To help you save energy, your TV can automatically turn itself off after a period of inactivity or a period during which no signal has been detected. It is factory-configured to do both of these things, but you can change these settings if needed.
To configure automatic power off, from the Home screen menu navigate to Settings > System > Power > Auto power savings. In the Power settings screen, highlight the following options and press OK to turn them on or off:
- Reduce power after 15 minutes - If no video or audio activity and no user interaction occur for 15 minutes, the TV automatically turns off the screen and sound.
- Turn off after 4 hours – If no video or audio activity and no user interaction occur for 4 hours, the TV goes into standby mode.
Standby LED On/Off
Normally, the status indicator is lit whenever the TV is in standby mode. If you prefer the status indicator to not be lit in standby mode, you can turn it off. To do so, from the Home screen, navigate to Settings > System > Power > Standby LED, and then select Off.
After making this change, the status indicator still performs all other indication functions.
Fast TV start
Only in connected mode, you can enable Fast TV start. As you might expect, Fast TV start lets you start watching your TV almost instantly after turning it on. But it also enables other convenient features, such as the ability to listen to certain music channels with the TV screen off and the convenience of being able to turn on and control your TV using voice commands.
Be aware that enabling Fast TV start makes your TV use somewhat more power when it is powered off to standby mode.
Changing caption settings
You can find caption settings under Settings > Captions.
- Off - No captions appear.
- On - Captions appear whenever they are available from the program source.
- On replay – Captions appear only when you use the replay option, and only when you are watching a streaming program that supports instant replay, watching a video through the Roku or USB media player, or watching a TV channel after enabling Live TV Pause.
- When mute – Captions appear only when the TV is muted.
Tips
- You can change the captions mode while watching a program. Press STAR * to display the Options menu, and then select Closed Captioning.
- Some streaming channels require you to enable captions through a setting within their channel even though you have turned on captions everywhere else.
Note: Once enabled, the captions mode applies to all inputs that support captions and remains enabled until you turn it off.
Captions preferred language
Select the language in which you want closed captioning to appear, when that language is available. If your preferred language is not available, then captioning reverts to the default language for the program, which usually is English.
Highlight the language you prefer, and then press OK to select it.
Other caption settings
- Text style - Choose from a list of fonts. As you move the highlight to each font, you can see a sample of the result in an adjacent panel.
-
Text edge effect – Choose from a list of edge effect styles, such as raised, depressed, and various shadows. As you move the highlight to each effect, you can see a sample of the result in an adjacent panel.
-
Text size – Choose from a list of sizes. As you move the highlight to each size, you can see a sample of the result in an adjacent panel.
- Text color - Choose from a list of colors for the text. As you move the highlight to each color, you can see a sample of the result in an adjacent panel.
- Text opacity - Choose from a list of opacity settings for the text. This setting determines how much the area behind the text shows through the text. A value of 100% blocks all of the content behind the text. As you move the highlight to each setting, you can see a sample of the result in an adjacent panel.
- Background color - Choose from a list of colors for the background area behind the text. As you move the highlight to each color, you can see a sample of the result in an adjacent panel. Note that you won't see any change unless you set the Background opacity to a value other than Off.
- Background opacity - Choose from a list of opacity settings for the background of the caption. This setting determines how much the area behind the caption background shows through the background. A value of 100% blocks all of the content behind the background. As you move the highlight to each setting, you can see a sample of the result in an adjacent panel.
- Window color - Choose from a list of colors for the window rectangle surrounding the entire caption. As you move the highlight to each color, you can see a sample of the result in an adjacent panel. Note that you won't see any change unless you set the Window opacity to a value other than Default (set by content) or Off.
- Window opacity - Choose from a list of opacity settings for the window rectangle surrounding the entire caption. This setting determines how much the area behind the caption window shows through the window. A value of 100% blocks all of the content behind the window. As you move the highlight to each setting, you can see a sample of the result in an adjacent panel.
Customize the Home screen
If you prefer to not see shortcuts on the Home screen, you can hide them.
To hide shortcuts:
- From the Home Screen menu, navigate to Settings > Home screen, and then press RIGHT.
- Select Shortcuts.
- Highlight Hide, and then press OK.
Once hidden, you can restore shortcuts by following the same steps, replacing Hide with Show.
Parental controls
Parental controls enable you to control whether the members of your household can view certain kinds of broadcast TV programs. When a program or feature is blocked, you can unblock it by entering a parental control PIN that only you know.
Note: Parental controls block content from the TV tuner and from streaming options, if any, on the Home screen menu. Parental controls do not block content on other TV inputs or content from streaming channels you add to your TV.
Creating a parental control PIN
The first time you access the Parental controls screen, you must create a new parental control PIN. Thereafter, whenever you want to change parental control settings, unblock programming that has been blocked, change the PIN, or disable parental controls, you must enter your parental control PIN.
Tip: Your parental control PIN has nothing to do with your Roku account PIN. You can make them the same if you want—this is entirely your choice.
To create a new parental control PIN, from the Home screen menu navigate to
Settings > Parental controls. The screen displays a numeric keypad. Use the purple directional pad to enter a four-digit code, and then press OK. Then repeat the process to enter the same PIN again, just to make sure you correctly entered the PIN you want to use.
Important: If you forget your parental control PIN, the only way to recover is to perform a factory reset operation, as explained in Factory reset everything.
Blocking Broadcast TV programs
For broadcast TV, parental controls use information embedded in the broadcast signal to determine whether to allow a program to be displayed. Parents can configure parental controls to block broadcast TV programs that meet or exceed a
specific rating, so they cannot be viewed or heard unless the correct parental control PIN is entered.
Note: Rating standards differ by country.
Enabling parental control of TV programs
The first step in blocking TV programs is to enable parental control of TV programs.
This setting is provided separately to make it easier for you to turn parental control of TV programs on and off without disturbing their settings. For example, your kids are going to summer camp for two weeks, and while they are gone, you don't want to have to deal with unblocking programs that you want to watch by entering your parental control PIN. All you need to do is clear Enable parental controls, and all TV programs are unblocked. When the kids return, select Enable parental controls again, and all of your parental control settings are restored in a single operation.
To enable parental control of TV programs:
- In the Home screen menu, navigate to Settings > Parental controls, and then enter your parental control PIN.
- In the Parental controls screen, navigate to TV tuner > Enable parental controls.
- Make sure the check box next to Enable parental controls is checked. If not, highlight it and press OK.
Blocking based on US TV ratings
Most broadcast US TV programs—other than movies—contain rating data that enables parental controls to block programs that parents don't want others to view. The ratings are divided into two groups that function independently:
- Youth group - TV-Y, TV-Y7
• Main group - TV-G, TV-PG, TV-14, TV-MA
Within each of these groups, the ratings interact such that if you block a particular level of content, the TV also blocks all content with a higher rating. Conversely, if you unblock a particular level of content, the TV also unblocks all content with a lower rating. For example, if you block TV-PG programs, the TV also blocks TV-14 and TV-
MA programs. If you subsequently unblock TV-14 programs, TV-PG programs are also unblocked, but TV-MA programs remain blocked.
Similarly, within the main group, content types can be individually blocked. For example, you can block just coarse language in programs with a TV-PG rating. If you do, then the TV also blocks programs with coarse language in the higher ratings (TV-14 and TV-MA). Subsequently unblocking coarse language in TV-14 ratings does not unblock coarse language in TV-MA programs, but it does unblock coarse language in TV-PG programs.
To block TV programs based on US television ratings:
- From the Home screen menu, navigate to Settings > Parental controls, and then enter your parental control PIN.
- In the Parental controls screen, navigate to TV tuner > TV ratings. Choose among the following settings:
- Entire ratings – Highlight the rating you want to block, and then navigate to the right and select the first option that blocks the entire rating level (and all higher rating levels).
- Individual content types - Highlight the rating that contains the content type you want to block, and then select the content types you want to block from among those listed. Remember that blocking a content type in one rating blocks the equivalent content type in all higher rating levels.
Blocking based on US movie ratings
Most movies in the US are rated by the Motion Picture Association of America, or MPAA, so the ratings are known as MPAA ratings. TV broadcast signals carry movie rating data that enables parental controls to block programs that parents don't want others to see. The ratings are:
• G - General audiences
• PG - Parental guidance suggested
• PG-13 – Parents strongly cautioned for children age 13 or younger
- R - Restricted
• NC-17 - Not for age 17 or younger
Unlike US TV ratings, there are no individual content types within the ratings. But like TV ratings, blocking movies with a particular rating also blocks movies with a higher rating, and unblocking movies with a particular rating also unblocks movies with a lower rating.
Tip: Blocking movies with an NC-17 rating also blocks programs with the now-obsolete X rating, which can still occur in the program data of older movies.
To block movies based on MPAA ratings:
- From the Home screen menu, navigate to Settings > Parental controls, and then enter your parental control PIN.
- In the Parental controls screen, navigate to TV tuner > Movie ratings.
- Select the rating level you want to block. You need only select one rating level, and all higher levels are automatically blocked.
Blocking based on Other ratings
Your TV can block programs having ratings that had not been defined when the TV was manufactured. It does this by detecting a new Rating Region Table in a program and then downloading the new table and displaying its rating in the Parental controls.
When the TV downloads a new Rating Region Table, it adds a new option to the list of rating types: Other ratings. If you see this option in the Parental controls screen, you have tuned to a station that has implemented a new rating table. Once the new rating table has been downloaded to the TV, it remains in the TV until it is factory reset, and you can configure blocking based on the new ratings.
New Region Rating Tables can have independent rating levels, or rating levels that interact in the same ways as the built-in US TV and MPAA Movie ratings.
Tip: If your TV downloads a new Region Rating Table, you'll have to experiment with its settings to understand how to use it.
Blocking based on Canadian English ratings
Canadian-English language and third-language programs that are broadcast in Canada are rated by the Action Group on Violence on Television, or AGVOT. TV broadcast signals carry rating data that enables parental controls to block programs
that parents don't want others to view based on content containing violence, language, sex, or nudity. The ratings are:
• C - Children under 8 years
• C8 - Children 8 years and older
• G - Generally suitable for all age groups
• PG - Parental guidance suggested for viewers under 14 years
• 14+ - Generally not suitable for viewers under 14 years
• 18+ – Generally not suitable for viewers under 18 years
Blocking content with a particular rating also blocks content with a higher rating, and unblocking content with a particular rating also unblocks movies with a lower rating.
To block programs based on AGVOT ratings:
- From the Home screen menu, navigate to Settings > Parental controls, and then enter your parental control PIN.
- In the Parental controls screen, navigate to TV tuner > Canadian English ratings.
- Select the rating level you want to block. You need only select one rating level, and all higher levels are automatically blocked.
Blocking based on Canadian French ratings
Canadian-French language programs that are broadcast in Canada are rated by Québec's Ministry of Culture and Communications. TV broadcast signals carry rating data that enables parental controls to block programs that parents don't want others to view based on content containing violence, language, sex, or nudity. The ratings are:
• G - Generally suitable for all age groups
- 8+ - Viewers 8 years and older
• 13+ - Viewers 13 years and older
• 16+ - Viewers 16 years and older
• 18+ - Adults only
Blocking content with a particular rating also blocks content with a higher rating, and unblocking content with a particular rating also unblocks movies with a lower rating.
To block programs based on Canadian-French ratings:
- From the Home screen menu, navigate to Settings > Parental controls, and then enter your parental control PIN.
- In the Parental controls screen, navigate to TV tuner > Canadian French ratings .
- Select the rating level you want to block. You need only select one rating level, and all higher levels are automatically blocked.
Blocking unrated programs
Some broadcast TV programs and movies do not have an assigned rating, and are considered to be “Unrated”. Whether or not such programs contain content that is objectionable to you cannot be determined. However, you can choose to block such programs.
To block all unrated broadcasts:
- From the Home screen menu, navigate to Settings > Parental controls, and then enter your parental control PIN.
- In the Parental controls screen, navigate to TV tuner > Block all unrated programs.
- Highlight Block all unrated programs and press OK. When blocking is enabled, the adjacent padlock icon changes from unlocked to locked.
Tip: Blocking programs that have not been assigned a rating does not block programs that specifically have been assigned a US TV rating of "None" (for example a broadcast of a local town council meeting). Programs that do not have an assigned rating display Rating NA (for "not applicable," meaning a rating is not needed).
In the absence of other ratings for a program, the parental controls do not consider the MPAA US movie rating N/A (MPAA rating not applicable to this content) and NR (applicable content not rated by the MPAA) to be ratings. In these cases, the TV handles the program as though it is unrated, blocking the program if Unrated programs blocking is enabled.
What happens when a TV program is blocked?
After you've set up parental controls, TV programs and movies are blocked:
- When you change channels and the new channel is playing a program whose rating exceeds your settings.
- When a new program comes on the channel you are watching and its rating exceeds your settings.
When a program is blocked by parental control settings, the TV displays a blocked message:

Whenever this blocked message appears, both the video and audio of the program are blocked, as well as program data that would normally appear in the area at the bottom of the screen.
To watch the blocked program, you need to know the PIN code defined when you enabled parental controls, as explained in Creating a parental control PIN.
- Press OK to select Unblock and display a PIN pad.

- Use the purple directional pad to enter your parental control PIN code, and then press OK to select Unblock everything.
Tip: To shield your parental control PIN from others in the room, press STAR * to hide the highlighted number. When you hide the highlight, you will have to count key presses to keep track of which number is selected.
After unblocking programs that have been blocked, all blocking is disabled for two hours or until you turn off the TV.
Changing the parental control PIN
To change your parental control PIN:
- From the Home screen menu, navigate to Settings > Parental controls, and then enter your parental control PIN.
- In the Parental controls screen, highlight Change PIN.
- Move the highlight into the adjacent keypad, and then use the purple directional pad to enter a four-digit code. Then repeat the process to enter the
same PIN again, just to make sure you correctly entered the PIN you want to use.
Resetting parental controls
So now your kids have grown up and gone away to college, and you no longer want to deal with blocked programs.
To erase all parental control settings:
- From the Home screen menu, navigate to Settings > Parental controls, and then enter your parental control PIN.
- In the Parental controls screen, highlight Reset parental controls.
- Follow the instructions on the screen to confirm that you want to erase all parental control settings.
Tip: Resetting parental controls also erases your parental control PIN.
More settings
This section describes the features and settings of the TV that were not covered in the other parts of this guide.
Guest Mode
Only in connected mode, when you enable Guest Mode, your guests can sign in to subscription channels using their own account credentials instead of using yours. Your guests' credentials are then automatically removed on the date they specify.
By enabling Guest Mode, your guests won't have access to your personal streaming channel accounts and won't be able use your Roku account to make purchases. Instead, your guests can safely access their own subscription channels. And they won't have to remember to sign out before they leave.
To enable Guest Mode:
- From the Home screen menu, navigate to Settings > System > Guest Mode.
- Select Enter Guest Mode.
- Use the purple directional pad to enter your Roku account PIN in the on-screen keypad.
- Select OK to confirm and put the TV into Guest Mode.
Note: You also can enable and disable Guest Mode remotely logging in to my.roku.com on your computer or smart phone, logging, in to your account, scrolling down to My linked devices, and then selecting Enable Guest Mode or Disable Guest Mode, respectively.
After you put your TV into Guest Mode, it is ready to welcome your guests, allowing them to select a sign-out date. On the home screen, they will find an assortment of default subscription channels They can enjoy free content from The Roku Channel and many others, or sign-in and watch movies and TV programs from their own subscriptions and saved content libraries. Your guests can use the Roku Channel
Store to find and add channels they watch at home with confidence that they automatically will be removed on their sign-out date.
For more information about the experience your guests will have when Guest Mode is enabled, see:
https://support.roku.com/article/360015612834--how-do-i-set-up-auto-sign-out-mode-for-my-guests-
To disable Guest Mode:
- Press HOME 🔒 to return to the Home screen menu.
- Navigate to Settings > System > Guest Mode.
- Select Exit Guest Mode.
- Use the purple directional pad to enter your Roku account PIN in the on-screen keypad.
- Select OK and confirm that you want to disable Guest Mode.
After you disable Guest Mode, all of your original settings are restored and your channels are reinstalled. You might need to sign in to your subscription channels again to access your content.
Note: Any game data that was stored on your Roku device is not restored.
Network settings
If needed, you can change your network settings at any time. For example, if you change the name of your wireless network (its SSID) or its password, you will need to change your TV's settings so that it can continue to connect. Also, if you decided not to connect to the Internet in Guided Setup, you can use network settings to connect at a later time.
To change network settings, from the Home screen menu, navigate to Settings >
Network, and then press RIGHT. At this point, you can choose from among the following options:
- About - Lists important information about your current network connection, such as status, connection type, IP addresses, and MAC address. This information is often useful when contacting customer support with connection issues.
- Check connection – Select your existing network connection type, and then press OK to start checking the network connection. The TV uses your current network information to reconfirm the wireless or wired network connection to the local network and the Internet connection.
- Set up connection – Select a network connection type, and then select the option to set up a new connection. Follow the on-screen instructions to complete the network connection. For help with each of the steps, see Network connection.
- Bandwidth saver – Enable or disable this feature as appropriate. If On, your TV prompts you to stop streaming if you haven't used the remote control within the past four hours. If you do not respond, streaming stops to save your data allocation and increase the network bandwidth available to other devices in your home. Change to Off to disable the automatic bandwidth saving feature.
Note: Some networks, such as those found in dorm rooms, hotels, and other public places, may require you to read and agree to terms, enter a code, or provide identifying information before letting you connect to the Internet. For more information, see Using your TV in a hotel or dorm room.
Postal code
Your TV needs to know your postal code so that it can display the correct channels and program guide information. It attempts to determine your location by using information from your Internet connection; however, the information available from this source is not always accurate. To ensure you have the most accurate program guide information, use the Postal code option to enter your correct code.
To set your correct postal code, from the Home screen menu, navigate to Settings > System > Postal code, and then pressing RIGHT. Use the on-purple directional pad to enter your postal code in the on-screen keypad, and then select OK.
Time settings
You can change time settings to suit your preferences. You can find the following settings by navigating from the Home screen menu to Settings > System > Time :
- Sleep timer – Set a time delay after which the TV will automatically shut off. This setting reflects the setting you can make in the Options menu from any TV input, as explained in Options menu settings. Note that the sleep timer setting is not input specific, and also can be set by using the Sleep timer shortcut in the Home screen grid.
Note: The sleep timer setting is not input specific, and also can be set by using the Sleep timer shortcut in the Home screen grid.
- Time zone – Correct time zone information is needed to correctly display program data. Choose whether to set the time zone automatically or manually, and if set manually, select your current time zone. Usually, a TV connected to the Internet can discover its own time zone automatically, but sometimes a TV that is not connected to the Internet cannot and so must be set manually. Initially, this setting is made when you set up the TV tuner, as explained in Setting up live TV.
- Clock format - Select whether to display time in a 12-hour or 24-hour format, or to turn off time display. This setting is available only on TVs that are connected to the Internet. Non-connected TVs do not display the time.
Scan again for live TV channels
There will be times when you need to create a new channel list. For example, you:
• Change cable providers
• Reorient your TV antenna
- Move to a different city with different channels
Whenever you need to update your TV channel list, you can repeat the channel scan.
Tip: Even if you don't change anything related to your TV channel reception, you should repeat the channel scan from time to time to make sure you are receiving all of the latest channels. Broadcasters add and remove channels, move channels to different parts of the spectrum, and change the power levels of their channels periodically.
Note: Repeating the tuner channel scan unhides all hidden channels.
To repeat the channel scan, highlight the Live TV tile on the Home screen, and then press STAR *. Next, select Scan for channels and press OK. After that, the screens and options that appear during this process are identical to those described in How do I set up the TV tuner?
HDMI ^® mode (4K models only)
On 4K (UHD) TVs, you can independently configure each HDMI ^® input to match the capabilities of the connected device. From the Home screen menu, navigate to Settings > TV inputs, and then select an enabled HDMI ^® input. Next, select HDMI mode and then select one of the following settings:
- Auto - Let the TV determine the best setting. Use this option unless your HDMI® device does not correctly communicate its HDMI® version information.
- HDMI 1.4 – Configure the input for compatibility with HDMI ^® version 1.4, which supports a maximum refresh rate of 30 Hz at full UHD resolution. Most HDMI ^® devices will work correctly with the TV in this mode.
- HDMI 2.0 – Configure the input for compatibility with HDMI ^ version 2.0, which supports a maximum refresh rate of 60 Hz at full UHD resolution. You must use this mode to view HDR content from the device connected to this HDMI ^ input. However, note that many older HDMI ^ devices do not work correctly when the TV's HDMI ^ input is set to this mode.
Control by mobile apps
You can choose the level of control you want to allow your TV to accept from external devices, such as smart phones, tablets, and virtual assistants. Device connect settings enable other devices, including the Roku mobile app, to control your TV over the local area network in your home.
To adjust the level of external control access:
-
From the Home screen menu, navigate to Settings > System > Advanced system settings > Control by mobile apps.
-
Select Network access.
-
Select one of the following settings:
- Default - Devices can connect only through a private network address, and accept commands only from other private network addresses on your
home network. This setting is suitable for most cases, including use of the Roku mobile app on your smartphone.
- Permissive - Devices can connect under all conditions, but accept commands only from private network addresses or the same subnetwork within your home network. This setting might be required when attempting to operate the TV from a third-party application, for example, one of the Internet of Things (IoT) applications such as ifttt.com.
- Disabled - Device connection is completely disabled. The TV does not accept external commands from any source, including the Roku mobile app.
Home theater configuration
Your TV has several features that make it an ideal TV for a home theater. But you might not notice them because they remain in the background until you decide to use them.
Turning off the TV speakers for home theater use
You can turn off the TV's built-in speakers if desired by changing the setting under Settings > Audio > Speakers and change the setting. However, if you use an HDMI ARC or eARC connection with CEC enabled, the TV automatically mutes its internal speakers when it sends sound to an external device. It also mutes all sound when you use the headphone jack on the TV, private listening through the Roku Enhanced Remote Control or the Roku mobile app.
Setting up a digital audio connection
To take advantage of your TV's advanced audio capabilities, connect it to an external amplifier, receiver, or soundbar by using either of these two digital audio connections:
- HDMI ARC or HDMI eARC - The HDMI ^ Audio Return Channel (ARC) or on select TVs only, the HDMI ^ Enhanced ARC (eARC) connector enables the TV to output digital audio on one of its HDMI ^ connectors.
HDMI (ARC)

The connected amplifier then can function simultaneously as an input source to the TV, if needed, without the need to use additional cables.
To use the ARC or eARC capability, you must connect an HDMI ^® cable from your amplifier's HDMI ^® ARC or eARC connector to the HDMI ARC or eARC connector on the TV. You also must do the following:
- Be sure your HDMI ^® cable is HDMI ^® certified.
- Enable HDMI ARC under Settings > System > Control other devices (CEC), as explained in Enable HDMI® ARC.
- S/PDIF optical - The S/PDIF optical connector outputs a digital audio signal. To use the optical output, connect a TOSLINK optical cable from the amplifier to the Optical or S/PDIF connector on the TV.

Important: To make sure the S/PDIF outputs audio reliably, you must turn off the TV's speakers. To do so, from the Home screen menu, navigate to Settings >Audio >Speakers and change the setting to Off.
Note: Dolby Audio™ support for Dolby Digital Plus™ format is not available through the S/PDIF optical output. This format is only available through the HDMI® ARC connection.
Tip: Even when you use S/PDIF for audio, the TV can correctly detect more audio formats if you connect HDMI® cable between the TV's ARC or eARC port and the receiver's ARC or eARC port.
Choosing an audio format
After making the required HDMI ^® ARC, eARC, or S/PDIF optical connection, go to Settings > Audio > S/PDIF and ARC option and select the audio format to use.
Choosing Auto detect is the easy solution, and generally provides good results. However, if you have a high-end sound system and want to make sure you are getting the best sound quality available in the programs you are watching, you can choose another setting.
- Auto detect - Automatically detects the incoming audio format and transcodes it to a compatible available format for the audio output (ARC, eARC, or S/PDIF).
- Auto passthrough – Passes through the input audio to the connected receiver without transcoding, sometimes resulting in better audio quality especially for high-end audio formats such as those that take advantage of the higher bandwidth of eARC, including Dolby MAT and Dolby Digital Plus 7.1, among others.
- PCM-Stereo – Always outputs pulse-code modulated stereo, regardless of input audio format.
- Dolby Digital - Converts all input formats to Dolby Digital.
- Dolby Digital Plus – Converts all input formats to Dolby Digital Plus.
- Dolby Digital - DTS - Converts all inputs except DTS to Dolby Digital. If DTS is detected and the receiver supports DTS, passes through the DTS audio without modification.
- Dolby Digital Plus - DTS - Converts all input formats except DTS to Dolby Digital Plus. If DTS is detected and the receiver supports DTS, passes through the DTS audio without modification.
Note: DTS audio formats are meant to be used with ARC, eARC, or S/PDIF connections to a DTS-capable home theater receiver. If you use one of the DTS options with the TV speakers, you might not hear any audio.
Turning off the TV screen while listening to music
Certain music channels enable you to turn off the TV screen while streaming music to your TV speakers, soundbar, or home theater receiver.
To turn off the TV screen on supported channels:
- Press STAR * to display the Options menu.
- Press DOWN to highlight Turn off display.
- Press OK.
Note: This feature is available only on select streaming audio channels, and only when the TV is operating in connected mode with Fast TV Start enabled. To enable Fast TV Start, from the Home screen menu, navigate to Settings > System > Power.
Controlling other devices through CEC
Consumer Electronics Control (CEC) enables your TV and other CEC-compatible home entertainment devices to control one another in various ways. First, the CEC-compatible devices must “discover” one another and report their capabilities. After this, one device can control another according to the features you enable. For example, playing a disc on a Blu-ray™ player could switch the TV to the Blu-ray™ player’s input. Or, powering off the TV could also power off the Blu-ray™ player and the home theater receiver.
Discover connected CEC devices
To discover CEC devices:
- Make sure that your CEC-compatible devices are connected to the TV with a certified High Speed HDMI ^® Cable that supports HDMI ^® ARC and CEC control.
- Turn on each device and make sure all devices are CEC enabled.
Tip: Some manufacturers have their own branded names for CEC functionality, so you might need to read the product documentation to correctly identify the CEC features of the device.
- On the TV's Home screen menu, navigate to Settings > System > Control other devices (CEC) and then select Search for CEC devices. Press OK to repeat the discovery process, if necessary.
When finished, the TV displays a list of CEC devices that are connected to each HDMI ^® input, as well as any devices that had previously been connected. The TV remembers the names of multiple CEC devices even when they are no longer connected. If the list is longer than the allowed space, press STAR * to see a complete list in a scrollable window.
Enable HDMI ^® ARC or eARC
HDMI® ARC, or on selected TVs, eARC, is the audio return channel that is available on one of the TV's HDMI® ports. The audio return channel enables you to send Dolby Audio™ or DTS audio content back to a home theater receiver that is also sending an audio and video signal into the TV. Using HDMI® ARC or eARC reduces the number of cables needed and controls the volume and mute state of the receiver while watching TV.
HDMI ^® ARC or eARC is disabled by default. To enable it, in the Home screen menu, navigate to Settings > System > Control other devices (CEC), and then highlight HDMI ARC.
Enable 1-touch play
1-touch play enables a device to control which TV input is active. For example, pressing Play on your Blu-ray™ player switches the TV to the Blu-ray™ input.
1-touch play is disabled by default. To enable 1-touch play, in the Home screen menu, navigate to Settings > System > Control other devices (CEC) and highlight 1-touch play. Press OK to enable or disable the feature.
Enable system standby
The system standby feature causes other devices to power off when you power off your TV. Depending on the CEC System Standby implementation, it also might enable connected devices to power off your TV when you power off the device.
System standby is disabled by default. To enable system standby, in the Home screen menu, navigate to Settings > System > Control other devices (CEC) and highlight System standby. Press OK to enable or disable the feature.
Restart the TV
You can restart the TV when necessary. Restarting has the same effect as unplugging the TV power and then plugging it in again.
To restart the TV, navigate to Settings > System > Power, and then select System restart. Highlight Restart, and then press OK to confirm restart.
While the TV restarts, the screen goes dark for a few seconds, and then displays the startup screen for a few more seconds. When the restart operation completes, the TV displays the activity you selected in Power on settings.
Reset the TV
You can choose to reset only the TV picture and audio settings to their original values, or perform a full factory reset to return the TV to the state it was in when you first unpacked and turned it on.
Reset audio/video settings
To reset only the TV picture and audio settings to their original values, navigate to Settings > System > Advanced system settings > Factory reset , and then highlight Reset TV audio/picture settings . Read the information on the screen to make sure you understand what the reset operation does.
To proceed with the reset operation, press PLAY/PAUSE ▶II three times in a row.
Factory reset everything
A full factory reset returns the TV's settings to their original state and removes all personally identifiable information from the TV. When finished, you must repeat Guided Setup, reconnecting to the Internet, re-linking your Roku account, and reloading any streaming channels. You also must repeat Live TV setup and input configuration.
Factory reset is the recommended choice if you want to transfer the TV to another owner, and it is the only choice if you want to switch from Store mode to Home mode (if you inadvertently selected Store mode during Guided Setup).
To perform a factory reset, navigate to Settings > System > Advanced system settings > Factory reset, and then highlight Factory reset everything. Read the information on the screen to make sure you understand what this reset operation does.
To proceed with the full factory reset, use the on-screen number pad to enter the code displayed on the screen, and then select OK to proceed.
When the factory reset operation completes, the TV restarts and displays the first Guided Setup screen.
What if I can't access the Factory Reset option?
It is possible for your TV to get into a state where you cannot access the various menus, including the menu option that lets you perform a factory reset operation. If that happens, you can force the TV to reset by following these steps.
Models with a RESET button
- Using a straightened paper clip or ball-point pen, press and hold the recessed RESET button on the TV connector panel.
- Continue to hold the RESET button for approximately 12 seconds.
When the reset cycle completes, the status indicator comes on dim. - Release the RESET button. The TV is now powered off.
- Turn on the TV and proceed through Guided Setup. See Guided Setup.
Models without a RESET button
- On the TV panel (not the remote) press and hold down the MUTE and POWER buttons.
- Unplug the TV power, and then plug it in while continuing to hold down the MUTE and POWER buttons.
- When you see the startup screen appear on the TV, release the buttons.
- Turn on the TV and proceed through Guided Setup. See Guided Setup.
Network connection reset
If you want to remove your network connection information without disturbing other settings, navigate from the Home screen to Settings > System > Advanced systems settings > Network connection reset, and then select Reset connection.
When you select this option, the TV removes your wireless network information, including the name of the connection (its SSID) and your wireless password, if any, and then it restarts. After restarting, your TV retains all of its other settings and its association with your Roku account.
After resetting your network connection, navigate from the Home screen to Settings > Network > Set up connection to set up your network connection and enjoy all of the benefits of your connected TV.
Roku account PIN
When you created your Roku account, you were given the opportunity to create a PIN code and to specify when it must be used. Roku lets you optionally require that users enter your PIN as an additional verification method when making purchases through the TV or adding items from the Roku Channel Store. In addition, you must have a Roku account PIN before you can enable or disable Guest Mode.
If you created a Roku account PIN and want to change it, or you don't remember your PIN, or if you didn't create a Roku account PIN and want to add one, you can easily make these changes.
- On a computer, tablet, or smartphone, use your web browser to go to https://my.roku.com and sign in.
After signing in, the My Account page appears.
-
Under PIN preference, click Update to open the Choose your PIN preferences page.
-
Skip this step if you just want to change your PIN. Otherwise, choose the option you prefer from among those listed:
- Require a PIN to make purchases or to add any item from the Channel Store.
- Require a PIN to make purchases.
-
Do not require a PIN to make purchases.
-
If you choose either of the first two options, enter your PIN twice in the appropriate boxes.
-
Click Save Changes to save your changes and return to the My Account page. Note that your current setting is described under PIN preference.
Update the TV
If your TV is operating in connected mode, it will automatically get updates from time to time. You don't need to do anything. But if you are aware that an update is available and you don't want to wait until the TV updates itself, you can manually check for updates.
If your TV is operating in non-connected mode, you can still get updates by using a USB flash drive.
You can download an updated User Guide that matches your Roku TV software version from the Roku web site at:
www.roku.com/support
To determine your current Roku TV software version, go to Settings > System > About , and then press OK or navigate to the right.
Checking for updates on a connected TV
If you're one of those people who has to have the latest, most up-to-date features the moment they are available, you can check for updates as often as you want.
To check for updates, navigate to Settings > System > System update, and then select Check now. The TV responds either with a message saying that your TV is up to date, or with a message saying that an update is available.
Follow the instructions on the screen to install the system update.
Note: Sometimes system updates install new system software, and other times they install new features for streaming channels. Therefore, you won't always see a change in the behavior of your TV after a system update.
Getting updates on a non-connected TV
If your TV is not connected to the Internet, you can still get system updates by using a USB flash drive and a computer with an Internet connection.
To get a system update, navigate to Settings > System > System update :
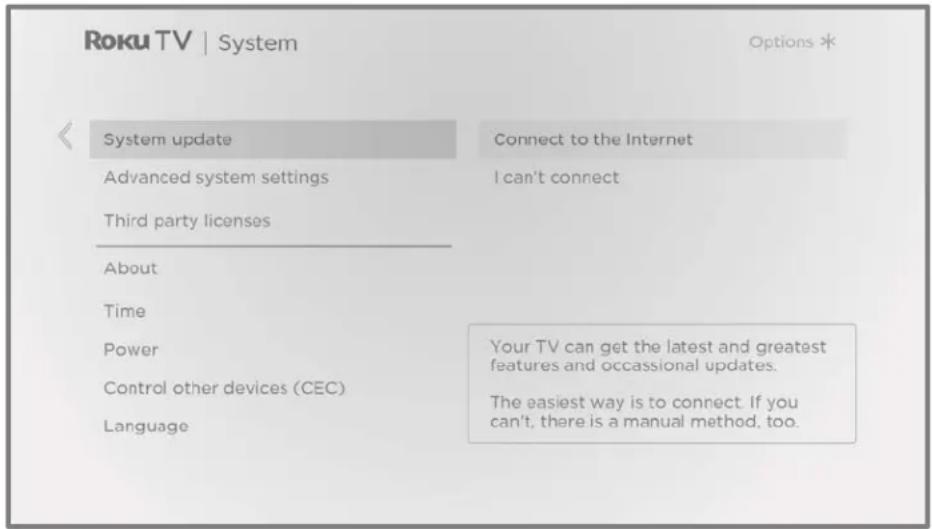
The System update screen on a non-connected TV gives you the opportunity to connect your TV to the Internet to automatically receive updates. We recommend this option if it is possible in your situation. To proceed, select Connect to the Internet and follow the instructions in What if I didn't connect my TV?
Otherwise, if you can't connect to the Internet, select I can't connect, and then follow the instructions on the screen. Here's a summary:
- On an Internet-connected computer, go to the web site displayed on the System update screen.
- On the USB Update web page, select the correct brand and model, and then click Next.
- Click Download Software, and then save the file to the root folder of a standard USB flash drive.
USB flash drive
Any normal USB flash drive will work, provided it has a FAT-16 or FAT-32 file system format. (This is the default for most flash drives.)
The size of the download is small—usually less than 100 MB—and so will fit on most any size flash drive you might have.
- When the download finishes, take the USB flash drive to the TV and plug it into the USB port. When you do, the TV validates the files on the flash drive and displays a 12-digit code.
- Write down the code and the web address, and take this information back to your Internet-connected computer.
- On the 12-digit code page, enter the code your TV displayed, and then click Next.
- On the 6-digit code page, write down the 6-digit code that appears, and then take it back to your TV.
12- and 6-digit codes
The USB update process uses a pair of codes to validate that you are authorized to install an update, and to ensure you are not attempting to install an old, unsupported version of the system software.
- Using the TV remote, select Next to move to the next screen, and then use the on-screen keyboard to enter the 6-digit code. When finished, select OK. The system update begins. Do not remove the USB flash drive until the TV restarts.
When the update finishes, the TV restarts. You can check the new version number by navigating to Settings > System > About.
Other devices
Mirror your phone or tablet
Only in connected mode, your TV has a feature called screen mirroring that lets you mirror your compatible smartphone or tablet on your TV. Share videos, photos, web pages, and more from compatible devices.
By default, your TV's screen mirroring mode is set to Prompt. In this mode, when your TV receives a screen mirroring request, it prompts you with the following options, unless you have previously selected Always allow or Never allow for the device:
- Always allow - Always accept mirrored content from the mobile device without additional prompting in the future for this device.
- Allow – Accept mirrored content from the mobile device this time only. Prompt again next time this device attempts to mirror content.
- Block - Do not accept mirrored content from the mobile device at this time. Prompt again next time this device attempts to mirror content.
• Always block - Never accept mirrored content from this mobile device.
Note: You can manage and change the list of devices that are set to Always allow or Never block by navigating from the Home screen menu to Settings > System > Screen mirroring > Screen mirroring devices.
- If you prefer to always allow all screen mirroring attempts without prompting, go to Settings > System > Screen mirroring, and then change the Screen mirroring mode to Always allow.
- If you prefer to never allow screen mirroring from any device, change the Screen mirroring mode to Never allow.
For information on which devices may work with screen mirroring and instructions on how to use it, go to the following link on the Roku web site:
go.roku.com/screenmirroring
Roku mobile app
Roku makes the Roku mobile app free for compatible iOS ^® and Android ^™ mobile devices.
The Roku mobile app is an alternative control center for your Roku TV, plus a way to stream Roku content while you are on the go. The Roku mobile app helps you find and add new Roku Channels, more easily search and find something to watch and even use your voice to search without typing.
Find more information and get the Roku mobile app by using the following link to the Roku web site:
go.roku.com/mobileapp
Private Listening on the Roku mobile app
Only on compatible Apple and Android devices, the Roku mobile app enables you to use headphones connected to your device to listen to streaming programs live digital TV channels. Make sure you have the latest version of the Roku mobile app before using this feature.
For more information, go to the following link on the Roku web site:
go.roku.com/privatelistening
Universal remotes
In many cases, you can program your cable or satellite universal remote to also control your TV. You will need to have instructions for programming the remote handy. Check with your cable or satellite provider for instructions.
For details on how to set up the TV to work with universal remotes, go to the following link on the Roku web site:
go.roku.com/universalremote
FAQ
For the latest answers to Frequently Asked Questions, visit the Roku support website: go.roku.com/support
Legal statement
Please note—Use of the Roku TV is governed by the Roku TV End User Agreement (see below). In addition, an end user online profile and billing account with Roku, Inc. ("Roku") on Roku's website ("Roku Account") is required to stream content via the Internet using your Roku TV. A Roku Account gives you access to movies, television shows, and other audio-visual entertainment in the "Roku Channel Store," a storefront of applications provided by Roku via your device's on-screen menu. After your Roku Account is created, you can link your Roku TV to your account. By using the Roku TV, you agree to the following disclaimer. For the avoidance of doubt, the content disclaimer set forth herein shall refer to all content and channels accessible and available on the Roku TV, including those available via the Roku® streaming platform, as well as broadcast cable.
Due to the various capabilities of the Roku TV, as well as limitations in the available content available therein, certain features, applications, and services may not be available on all Roku TV s, or in all territories. Some features on the Roku TV may also require additional peripheral devices or membership fees that are sold separately. Please visit the Roku, Inc. website for more information on the Roku TV and content availability. The services and availability of content on the Roku TV are subject to change from time to time without prior notice.
All content and services accessible through the Roku TV belong to third parties and are protected by copyright, patent, trademark and/or other intellectual property laws. Such content and services are provided solely for your personal noncommercial use. You may not use any content or services in a manner that has not been authorized by the content owner or service provider. Without limiting the foregoing, you may not modify, copy, republish, upload, post, transmit, translate, sell, create derivative works, exploit, or distribute in any manner or medium any content or services displayed through the Roku TV.
You expressly acknowledge and agree that your use of the Roku TV is at your sole risk and that the entire risk as to satisfactory quality, performance and accuracy is with you. The Roku TV and all third party content and services are provided "as is" without warranty of any kind, either express or implied. Roku expressly disclaims all warranties and conditions with respect to the Roku TV content and services, either express or, implied, including but not limited to, warranties of merchantability, of satisfactory quality, fitness for a particular purpose, of accuracy, of quiet enjoyment, and non-infringement of third party rights. Roku does not guarantee the accuracy, validity, timeliness, legality, or completeness of any content or service made available through the Roku TV and does not warrant that the Roku TV, content or services will meet your requirements, or that operation of the Roku TV will be uninterrupted or error-free. Under no circumstances, including negligence, shall Roku be liable, whether in contract or tort, for any direct, indirect, incidental, special or consequential damages, attorney fees, expenses, or any other damages arising out of, or in connection with, any information contained in, or as a result of the use of the device, or any content or service accessed by you or any third party, even if advised of the possibility of such damages.
Third party services may be changed, suspended, removed, terminated or interrupted, or access may be disabled at any time, without notice, and Roku makes no representation or warranty that any content or service will remain available for any period of time. Content and services are transmitted by third parties by means of networks and transmission facilities over which Roku has no control. Without limiting the generality of this disclaimer, Roku expressly disclaims any responsibility or liability for any change, interruption, disabling, removal of or suspension of any content or service made available through the Roku TV. Roku, the content providers, or the service providers may impose limits on the use of or access to certain services or content, in any case and without notice or liability. Any questions or requests for service relating to the content or services made available on the Roku TV should be submitted to the respective cable content or service provider or as described in the Roku TV User Guide.
In the event of a conflict between the Roku TV End User Agreement and the terms set forth in this Legal Disclaimer, the Roku TV End User Agreement shall prevail and control in all circumstances.
Manufactured under license from Dolby Laboratories. Dolby, Dolby Audio, and the double-D symbol are trademarks of Dolby Laboratories Licensing Corporation. Copyright 1992-2015 Dolby Laboratories. All rights reserved.
Dolby Audio
Dolby Vision™
Dolby, Dolby Vision, and the double-D symbol are trademarks of Dolby Laboratories. Manufactured under license from Dolby Laboratories. Confidential unpublished works. Copyright © 2013-2015 Dolby Laboratories. All rights reserved.
Dolby Audio
HDMI ^®
The terms HDMI ^ and HDMI ^ High-Definition Multimedia Interface, and the HDMI Logo are trademarks or registered trademarks of HDMI ^* Licensing LLC in the United States and other countries.
HDMI® HIGH DEFINITION MULTIMEDIA INTERFACE
Roku
Roku, Roku TV and the Roku logo are the trademarks or registered trademarks of Roku, Inc. All other trademarks and logos herein are the property of their respective owners.
Roku
LIMITED WARRANTY ONE (1) YEAR
Product Imported and Marketed by: P&F Mexicana S.A. De C.V. Av. Jaime Balmes No. 11, Torre A, Piso 1. Col.Polanco, I Sección. Miguel Hidalgo. CD de Mexico. Mexico. CP. 11510.
Technical assistance P&F Mexicana S.A. de C.V. Av. Jaime Balmes No. 11, Torre A piso 1 Col, Polanco | Sección, Miguel Hidalgo, CIUDAD DE MEXICO, MEXICO CP. 11510 Tel. (55) 1328 5220
Customer Information Center:
Mexico City (55) 5887 9736
Other Cities (800) 8391 989
Hours: Monday through Saturday from 10:00 to 18:00
Email: serviciophilips@pnfmex.com
Model ____ Serial Number ____
The warranty period for this product begins on: DAY____ MONTH____ YEAR____
For repair assistance, please go to the service center closest to your home (according to the attached list of authorized service centers) if you have any questions or concerns, please call our Customer Information Center, where we will gladly assist you in everything related to:
- Service for your Philips devices.
- Product information and Philips authorized service centers.
- Assistance with setup and use of your Philips brand product.
- Purchase information for Philips brand products and accessories.
In order to make the guarantee effective, no further requirements should be demanded than the presentation of the product and the corresponding policy, duly stamped by the establishment that sold it, or the invoice, receipt or voucher, which contains the specific data of the product object of the sale.
AUTHORIZED SERVICE CENTERS
| CITY | AREA CODE | PHONE NUMBER | |
| ACAPULCO, GRO | 744 | 483-20-30 | serproa@yahoo.com.mx |
| AGUASCALIENTES, AGS | 449 | 915- 81 -00 | jimsags@hotmail.com |
| CAMPECHE. CAMP 981 816 -04- 71 alex_jorge81@hotmail.com | |||
| PLAYA DEL CARMEN, Q ROO 894 267-27-27 servicioee@hotmail.com | |||
| CD.VICTORIA, TAMPS | 834 | 184-56-07 | eeii_smiller@yahoo.com.mx |
| CUERNAVACA, MOR | 777 | 313-90-92* 313-00-49 | centrodeservicio_hertz2@hotmail.com |
| LOS MOCHIS, SIN | 668 | 812 -05- 88 | electromorelos@gmail.com |
| CULIACAN, SIN 667 716 -51- 45 padilla_carrascoestela@hotmail.com | |||
| GUADALAJARA, JAL 33 reparaciondepantalla@jst@gmail.com | |||
| HERMOSILLO, SON | 662 | 302 85 61 | mayra_s@megared.net.mx; |
| MAZATLAN, SIN | 669 | 982 42 21 | e_santel@yahoo.com.mx |
| MERIDA, YUC | 999 | 928 59 05 | aevia2_007@hotmail.com |
| PACHUCA, HGO | 771 | 153 36 99 | zarateelec@gmail.com; |
| PUEBLA, PUE | 222 | 248 97 74 | centroelectronicopuebla@gmail.com |
| CDMX, ZONA ARAGON | 55 | 94 06 34 | philipservicio@hotmail.com |
| CDMX, ZONA NORTE | 55 | 67-26-10-90 | seguimiento1@tecdata.com.mx |
| CDMX, ZONA ORIENTE | 55 | 5544 16 00 | cselectromex@hotmail.com; |
| CDMX, ZONA PONIENTE | 55 | 58 12 44 12 | sca.serviciotv@gmail.com |
| MONTERREY, N.L. | 818 | 375 16 17 * 400 54 03 | citlalymatamoros@prodigy.net.mx; |
| OAXACA, OAX | 287 | 875 09 04 | zener10@prodigy.net.mx |
| ORIZABA, VER | 272 | 724 38 53 | orizaba_electronics@yahoo.com.mx |
| VERACRUZ, VER | 229 | 334 26 72 | jvl680304@gmail.com |
| QUERETARO, QRO | 442 | 216 10 09 | zenersaulphilips@yahoo.com.mx |
| SALTILLO, COAH | 844 | 284 40 65 | electronicadigital_07@hotmail.com |
| MEXICALI, BC | 686 | 561-98-08 * 561-98-18 | bajaelectronics2@gmail.com |
| TOLUCA, EDO.MEX | 722 | 207 11 26 | radioytv@hotmail.com |
| TUXTLA GUTIERREZ, CHIS | 961 | 224 0630 | supervisor1.rst@gmail.com; |
| URUAPAN, MICH | 452 | 524 08 38 | centro_electronico_philips@yahoo.com.mx |
WARRANTY
WARRANTY POLICY
THIS POLICY IS FREE
This device has been carefully designed and manufactured with the best materials under strict quality control, guaranteeing its proper functioning for the established time period for each device (see list at the bottom) from the time the customer receives the product.
This warranty includes the repair or free replacement of any part or component that eventually fails and the labor necessary for its repair, as well as transportation expenses reasonably incurred from our service center, which will be effective in any of our
Authorized service centers in the country.
If your device requires our warranty service, go to the service center closest to your home, have any questions, please call our CUSTOMER INFORMATION CENTER toll free throughout the republic at (800) 839 1989 where we will gladly indicate the authorized service center closest to your home.
P&F MEXICANA S.A. de C.V. Through its authorized service centers,
will repair and return your device to you within a period not exceeding 20 business days from the date of entry, printed on the service order of any of our authorized service centers.
The warranty policy covers any damage or damage possibly caused by the repair and / or transporting of the device inside our authorized service centers.
This policy will only be valid if it is filled out and sealed by the retailer, in case this policy is lost, you can make a warranty claim by presenting your purchase invoice.
THIS POLICY WILL NOT BE HONORED IN THE FOLLOWING CASES:
- When the product has been used in other conditions than normal.
- When the product has not been operated according to the instructions to use it.
- When the product has been altered or repaired by not authorized persons by the respective national manufacturer, importer, or responsible marketer.
WARRANTY PERIODS:
12 months- TVs with and without DVD digital video player, DVD digital video disc players, BLU-RAY digital video disc players, DVD digital video disc players, home theater systems, radio recorders with and without compact disc player, video projector (except lamp), mini audio systems, modular equipment, satellite reception antennas,
telephones, cordless telephones, auto stereos, electronic tablets, iPod dock and wireless speakers (Bluetooth). 6 months- Radio clocks, A.M./F.M radios, rechargeable batteries and MP3 digital audio players (internet) 90 days- Accessories, remote controls, speakers, microphones, headphones and reconstructed devices of LCD TV, DVD, Blu-ray, Audio Bars and Home Theater Systems.
PHILIPS
License
P&F MEXICANA S.A. de C.V. hereby offers to provide, upon request, a copy of the complete source code corresponding to the open source copyrighted code, on an "AS-IS" basis, used in this product for which such offer is requested by the respective licences. This offer is valid up to three years after the purchase of the product to anyone who receives this information. To obtain the source code, contact P&F MEXICANA S.A. de C.V. You must write to P&F MEXICANA S.A. de C.V. OSS Request, Av. Jaime Balmes # 11 Tower A Floor 1 Col. Polanco I Section, Miguel Hidalgo, CDMX, C.P. 11510. P&F MEXICANA S.A. de C.V. disclaims all warranties and representations with respect to such software and related source code, including quality, reliability, usability and accuracy, and also disclaims all express, implied, legal or otherwise, including without limitation, any implied warranties of title, non-infringement, merchantability or suitability for a particular purpose. P&F MEXICANA S.A. de C.V. is not obligated to make any correction to the source code or to the source code of the open source or to provide any support or assistance with respect to it. P&F MEXICANA S.A. from C.V. disclaims all liability arising from or related to the use of the software and / or source code.
TO OBTAIN ASSISTANCE...
Contact the customer care center at:
CD de Mexico (55) 5887 9736
Otras Ciudades (800) 8391 989
Table of Specifications
| Model | 32PFL4766/F8 | 40PFL4766/F8 | 50PFL5766/F8 | 5SPFL5766/F8 | 58PFL5666/F8 | 70PFL5666/F8 |
| Picture | ||||||
| Display screen type | HD (1366x768 pixels) | FHD (1920x1080 pixels) | UHD (3840x2160 pixels) | UHD (3840x2160 pixels) | UHD (3840x2160 pixels) | UHD (3840x2160 pixels) |
| Diagonal screen size / Aspect ratio | 32" (81.28cm)/ 16:9 | 40" (101.60cm)/ 16:9 | 50" (127.00cm)/ 16:9 | 55" (139.70cm)/ 16:9 | 58" (147.32cm)/ 16:9 | 70" (177.80cm)/ 16:9 |
| Viewing angle | 178° (V) / 178° (H) | 176° (V) / 176° (H) | 178° (V) / 178° (H) | 178° (V) / 178° (H) | 178° (V) / 178° (H) | 178° (V) / 178° (H) |
| Digital tuner / Integrated analog | ATSC (Digital) / NTSC (Analog) / Free-QAM | ATSC (Digital) / NTSC (Analog) / Free-QAM | ATSC (Digital) / NTSC (Analog) / Free-QAM | ATSC (Digital) / NTSC (Analog) / Free-QAM | ATSC (Digital) / NTSC (Analog) / Free-QAM | ATSC (Digital) / NTSC (Analog) / Free-QAM |
| Sound | ||||||
| Output power (RMS) | 8.0 W×2 | 8.0 W×2 | 10.0 W×2 | 10.0 W×2 | 10.0 W×2 | 10.0 W×2 |
| Equalizer | Yes (without Menu) | |||||
| Ease of Use | ||||||
| Screen Format Adjustments | Stretch / Zoom / Auto / Direct / Normal | |||||
| Playback Formats | JPEG, PNG, BMP | |||||
| Music Play Formats | MP3 | |||||
| Video Playback | H.264/262-MKV, MOV, MP4:VP9 | |||||
| Channel | ||||||
| Channel coverage | CH2 ~ CH69 AIR / CH1 ~ CH135 CABLE | |||||
| Channel access | On Home screen menu, selecting the Live TV tile, press Up and Down keys on your remote to change channels. | |||||
| Connectivity | ||||||
| Composite video input with audio L / R | x1 / RCA | x1 / RCA | x1 / mini | x1 / mini | x1 / mini | x1 / mini |
| HDMI input | x3 | x3 | x4 | x4 | x4 | x4 |
| USB | x1 | x1 | x1 | x1 | x1 | x1 |
| Ethernet | x0 | x0 | x1 | x1 | x1 | x1 |
| Audio Output - Digital | x1 / Optical | x1 / Optical | x1 / Optical | x1 / Optical | x1 / Optical | x1 / Optical |
| Headphone out | x1 1/8 inch (3,5mm) | x1 1/8 inch (3,5mm) | x1 1/8 inch (3,5mm) | x1 1/8 inch (3,5mm) | x1 1/8 inch (3,5mm) | x1 1/8 inch (3,5mm) |
| Wireless | ||||||
| Wireless LAN | The device is compatible with the wireless standards: IEEE 802.1 1a/b/g/n/ac | |||||
| Frequencies 0.9GHz | Not applicable | Not applicable | ||||
| Frequencies 2.4GHz | Yes | Yes | ||||
| Frequencies 5.7GHz | Yes | Yes | ||||
| Power | ||||||
| Mains Power | 120V ~ 50/60Hz | 120V ~ 50/60Hz | 120V ~ 50/60Hz | 120V ~ 50/60Hz | 120V ~ 50/60Hz | 120V ~ 50/60Hz |
| Power Consumption | 50W | 60W | 125W | 140W | 155W | 250W |
| Temperature | ||||||
| Ambient temperature | 41 °F to 104°F (5 °C to 40 °C) | |||||
Note : For more details, please visit www.philips.com/support
Comercialized by : P&F MEXICANA, S.A. de C.V.
Imported by : P&F MEXICANA, S.A. de C.V.
Av. Jaime Balmes No.11 Torre A Piso 1, Col. Polanco,
This product has been manufactured by and is sold under the responsibility of P&F Mexicana, S.A. de C.V., and P&F Mexicana, S.A. de C.V. is the warrantor in relation to this product.
The Philips trademark and the Philips Shield Emblem are registered trademarks of Koninklijke Philips N.V. used under license.
- www.philips.com/welcome
- Register online at www.philips.com/welcome today to get the most benefits from your purchase.
- \*Product safety notification
- \*Additional benefits
- Know these safety symbols
- CAUTION
- RISK OF ELECTRIC SHOCK DO NOT OPEN
- WARNING:
- CAUTION:
- PHILIPS
- CHILD SAFETY:
- PROPER TELEVISION PLACEMENT MATTERS
- THE CONSUMER ELECTRONICS INDUSTRY CARES
- TUNE IN TO SAFETY
- WALL OR CEILING MOUNT YOUR TELEVISION
- MOVING AN OLDER TELEVISION TO A NEW PLACE IN YOUR HOME
- Important safety instructions
- Note to the CATV system installer:
- Example of antenna grounding as per NEC - National Electric Code
- P&F Mexicana S.A. de C.V. is not liable for any accidents or injuries incurred while installing this product, including but not limited to those noted below:
- When installing the unit on the wall, allow this much space.
- Only for Mexico:
- Notice
- Pixel characteristics
- Warranty
- Positioning the TV
- Regulatory notices
- Environmental care
- End of life directives
- ▲Batteries usage
- Disposal of used batteries
- Downloading an electronic copy
- Preparing to move / ship the unit
- Copyright
- Contents
- Welcome....1
- Connections and setup....6
- Guided Setup....18
- The Home screen 30
- Benefits of connecting....33
- Setting up live TV 37
- Using your TV 43
- Using Apple AirPlay and the Apple Home app 59
- Adjusting TV settings....61
- Searching for something to watch....77
- Using the Roku Channel Store 82
- Customizing your TV 84
- Parental controls 95
- More settings....104
- Other devices....121
- FAQ 124
- Welcome
- The new standard in Smart TVs
- Get the most out of your new TV
- - Connect to the Internet
- - Pick your favorite streaming channels
- • Personalize your Home screen
- • Search for your favorite movie, TV program, actor, or director
- - Pause live TV
- • Control your TV with voice commands
- Connections and setup
- Connecting an antenna, cable, or satellite box
- Connecting external equipment with a composite AV video cable
- Connecting external equipment with an HDMI ® cable
- Connecting headphones or analog soundbar
- Connecting an AV receiver or digital soundbar
- Preparing for Internet connectivity
- AC power
- Roku remote batteries
- Roku TV remote
- Panel buttons
- Single button
- Three buttons
- Game-pad style joystick
- Four buttons
- Five buttons (with mute)
- Five buttons (without mute)
- Seven buttons
- Guided Setup
- Starting Guided Setup
- Roku TV
- Completing Guided Setup
- Network connection
- Other options
- Activation
- Why do I need a Roku account?
- Connect your devices
- Connect devices
- The Home screen
- Typical non-connected Home screen
- Personalize your Home screen
- Benefits of connecting
- Connecting brings out your TV's full potential!
- Take advantage of awesome features
- What is streaming?
- What if I didn't connect my TV?
- Setting up live TV
- How do I set up the TV tuner?
- Using your TV
- Status indicator
- Standby mode energy savings
- Watching live TV channels
- Changing channels
- Favorite Channels
- Mark your favorite channels
- Surf only your favorite channels
- Surf all channels again
- Remove a channel from your favorites
- Viewing program information
- Adjusting settings while watching a program
- Pausing live TV
- Requirements
- Enabling Live TV Pause
- Using Live TV Pause
- Notes about Live TV Pause
- Switching TV inputs
- Auto-detecting devices
- Adjusting audio/video settings
- Using Roku Voice commands
- Using Roku Voice remotes (select models only)
- Re-pairing your Roku Voice remote
- Checking the Roku Voice remote battery level
- Playing content from USB storage devices
- Auto player launch
- Playing content from local network media servers
- Setting up a payment method
- Using your TV in a hotel or dorm room
- About using your TV on a restricted public network
- Getting your Roku TV on line on a restricted public network
- Using Apple AirPlay and the Apple Home app
- Apple AirPlay
- Other AirPlay things to try
- Apple Home app
- Some Apple Home things to try
- Adjusting TV settings
- Settings menu
- Options menu
- Options menu settings
- Picture settings
- Picture settings menu options
- Auto Low Latency Mode (ALLM):
- Variable refresh rate (VRR)
- Sound settings
- Volume mode (select models only)
- Sound settings menu - Volume mode
- Sound settings - Dolby® Audio Processing (select models only)
- Sound settings menu- Dolby® Audio Processing
- Sound settings - DTS® TruSurround / DTS® Studio Sound (select models only)
- Sound settings menu options - DTS® TruSurround / DTS® Studio Sound
- Sound settings - Sonic Emotion Premium (select models only)
- Sound settings menu options - Sonic Emotion Premium
- Sonic Emotion settings
- Expert Picture Settings (4K models only)
- Changing privacy settings
- Advertising
- Reset the advertising identifier
- Limit ad tracking
- Microphone
- Channel microphone access
- Channel permissions
- Searching for something to watch
- How do I search?
- Keyboard search using the remote
- Voice Search from a Roku Voice remote
- Searching from the Roku mobile app
- Searching with Google Assistant
- Searching with Amazon Alexa
- Searching for free content
- I found a program. Now what?
- Recent Searches
- Using the Roku Channel Store
- Automatic Account Link
- Customizing your TV
- Add TV inputs
- Add streaming channels
- Rename inputs
- Remove unwanted tiles
- Rearrange tiles
- Change the look and feel with themes
- Edit live TV channel lineup
- Change menu volume
- Configure power settings
- Power on settings
- Auto power savings
- Standby LED On/Off
- Fast TV start
- Changing caption settings
- Tips
- Captions preferred language
- Other caption settings
- Customize the Home screen
- Parental controls
- Creating a parental control PIN
- Blocking Broadcast TV programs
- Enabling parental control of TV programs
- Blocking based on US TV ratings
- Blocking based on US movie ratings
- Blocking based on Other ratings
- Blocking based on Canadian English ratings
- Blocking based on Canadian French ratings
- Blocking unrated programs
- What happens when a TV program is blocked?
- Changing the parental control PIN
- Resetting parental controls
- More settings
- Guest Mode
- To enable Guest Mode:
- Network settings
- Postal code
- Time settings
- Scan again for live TV channels
- HDMI ® mode (4K models only)
- Control by mobile apps
- Home theater configuration
- Turning off the TV speakers for home theater use
- Setting up a digital audio connection
- Choosing an audio format
- Turning off the TV screen while listening to music
- Controlling other devices through CEC
- Discover connected CEC devices
- Enable HDMI ® ARC or eARC
- Enable 1-touch play
- Enable system standby
- Restart the TV
- Reset the TV
- Reset audio/video settings
- Factory reset everything
- What if I can't access the Factory Reset option?
- Models with a RESET button
- Models without a RESET button
- Network connection reset
- Roku account PIN
- Update the TV
- Checking for updates on a connected TV
- Getting updates on a non-connected TV
- USB flash drive
- 12- and 6-digit codes
- Other devices
- Mirror your phone or tablet
- Roku mobile app
- Private Listening on the Roku mobile app
- Universal remotes
- FAQ
- Legal statement
- Dolby Vision™
- HDMI ®
- Roku
- LIMITED WARRANTY ONE (1) YEAR
- WARRANTY POLICY
- THIS POLICY IS FREE
- THIS POLICY WILL NOT BE HONORED IN THE FOLLOWING CASES:
- WARRANTY PERIODS:
- License
Brand : PHILIPS
Model : 58PFL5666
Category : Television