
FAST 1201 V2 - Modem/Router SAGEM - Free user manual and instructions
Find the device manual for free FAST 1201 V2 SAGEM in PDF.


| Product type | ADSL2+ Modem/Router |
| Brand | SAGEM |
| Model | FAST 1201 V2 |
| Dimensions (L x W x H) | 200 x 130 x 40 mm |
| Weight | 300 g |
| Power supply | Power adapter 12V DC, 1A |
| Power consumption | 5 W max |
| Interfaces | 1 ADSL port, 4 Ethernet 10/100 ports, 1 USB 2.0 port |
| Supported ADSL standards | ADSL, ADSL2, ADSL2+ |
| Maximum ADSL data rate | 24 Mbit/s downstream, 1 Mbit/s upstream |
| Network protocols | PPPoA, PPPoE, IPoA, NAT routing, DHCP, DNS |
| Security | SPI firewall, MAC filtering, VPN pass-through |
| Router functions | NAT, DHCP server, port forwarding, DMZ |
| LED indicators | Power, ADSL, Ethernet (4), USB |
| Maintenance and cleaning | Unplug before cleaning. Use a soft, dry cloth. Do not use liquid or abrasive products. |
| Safety precautions | Do not expose to humidity or extreme temperatures. Do not block ventilation slots. |
| Spare parts and repairability | No user-serviceable parts. Repair only by authorized technician. |
| General information | Marketed from 2008. Manual available in French and English. |
Frequently Asked Questions - FAST 1201 V2 SAGEM
User questions about FAST 1201 V2 SAGEM
0 question about this device. Answer the ones you know or ask your own.
Ask a new question about this device
Download the instructions for your Modem/Router in PDF format for free! Find your manual FAST 1201 V2 - SAGEM and take your electronic device back in hand. On this page are published all the documents necessary for the use of your device. FAST 1201 V2 by SAGEM.
USER MANUAL FAST 1201 V2 SAGEM
natural_image
Black SAGEM wireless device with ventilation slots and ports (no visible text or symbols on body)Quick Installation Guide

SAGEM
Contents
1 CONTENTS OF THE PACK......2
2 CONNECTING YOUR MODEM 3
2.1 CONNECTING YOUR ROUTER....3
2.2 CONNECTING ADDITIONAL TELEPHONES 3
3 INSTALLATION FROM THE CD-ROM 4
3.1 INSTALLATION ON THE ETHERNET PORT 6
3.2 INSTALLATION ON THE USB PORT 7
3.3 REINSTALLING OR UNINSTALLING YOUR MODEM 8
4 TROUBLESHOOTING....9
4.1 STATUS OF THE LEDS ON THE FRONT 9
4.2 MODEM SUPERVISION 10
4.3 «DIAGNOSTICS» TOOL 11
5 SAFETY INSTRUCTIONS ....13
5 SAFETY INSTRUCTIONS (CONTD.) 14


SAGEM F@st™ 1201/1241 V2
Sagem CiomImunications thanks you for choosing the range of SAGEM F@st™ 1201/1241 V2 modems while hoping that it will provide you with full satisfaction.
SAGEM F@st™ 1201 V2 and SAGEM F@st™ 1241 V2 products adapt the ADSL function respectively on POTS (ITU G.992.1/3/5 - Appendix A) and on ISDN (ITU G.992.1/3/5 - Appendix B).
SAGEM F@st™ 1201 V2 and SAGEM F@st™ 1241 V2 equipment include an Ethernet interface (ETH) and an USB interface.
SAGEM F@st™ 1201 V2 and SAGEM F@st™ 1241 V2 products can be provided in «Bridged» or «Routed» version according to the ISP.
In addition, this modem will provide you with access to all the services provided by your ISP (Internet Service Provider), as shown in the diagram below.
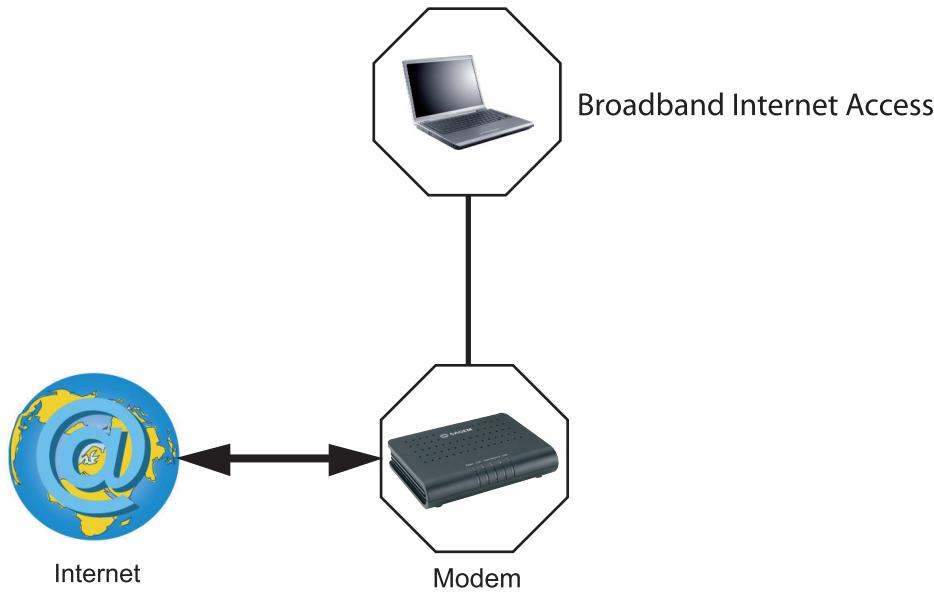
flowchart
graph TD
    A["Internet"] --> B["Modem"]
    B --> C["Broadband Internet Access"]
    C --> D["Computer icon"]
List of symbols used in this guide


Warns you about an action or a serious omission.
Provides you with important information you must take into account.
SAGEM F@st™ 1201/1241 V2
1 CONTENTS OF THE PACK
Before you start the installation make sure that the pack contains the following items:
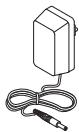
Power Supply
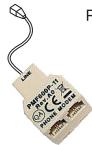
Filter/Splitter used to connect your telephone and your modem to your telephone line
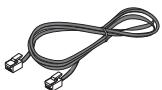
ADSL line cable used to connect your modem to your telephone line
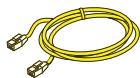
ETH cable used to connect your modem to the ETH port of your computer
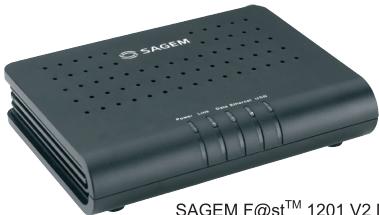
natural_image
Black SAGEM F802 wireless router device with ventilation slots and control buttons (no visible text or symbols on device body)SAGEM F@st™ 1201 V2 Modem
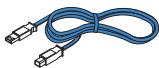
USB cable used to connect your modem to one USB port of your computer
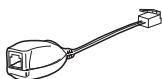
Microfilter
used to connect
another telephone
to your telephone line
(optional)

CD-ROM

Quick Installation Guide
Note: The modem can be either in white or black colour.
2 CONNECTING YOUR MODEM
2.1 CONNECTING YOUR ROUTER

Make sure that the modem is not connected to your computer before you start the installation from the CD-ROM.
Follow the procedure according to the stages described in the CD-ROM installation and connect your telephone in accordance with the drawing below:
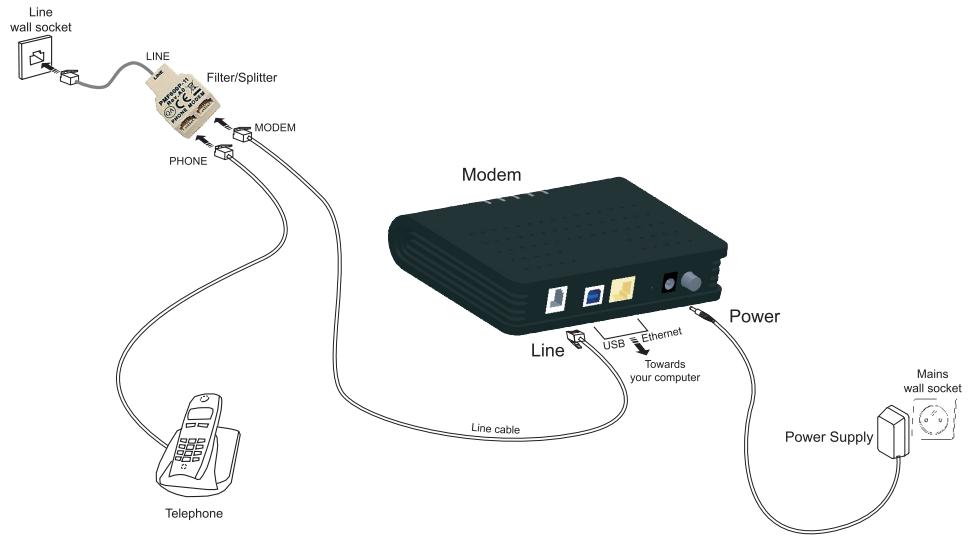
flowchart
graph TD
    A["Line wall socket"] --> B["LINE"]
    B --> C["Filter/Splitter"]
    C --> D["MODEM"]
    D --> E["PHONE"]
    E --> F["Modem"]
    F --> G["Line"]
    G --> H["Power Supply"]
    H --> I["Mains wall socket"]
    F --> J["Line cable"]
    J --> K["Telephone"]
    K --> L["Switch"]
    style A fill:#f9f,stroke:#333
    style F fill:#ccf,stroke:#333
    style G fill:#cfc,stroke:#333
    style H fill:#fcc,stroke:#333
    style I fill:#cff,stroke:#333
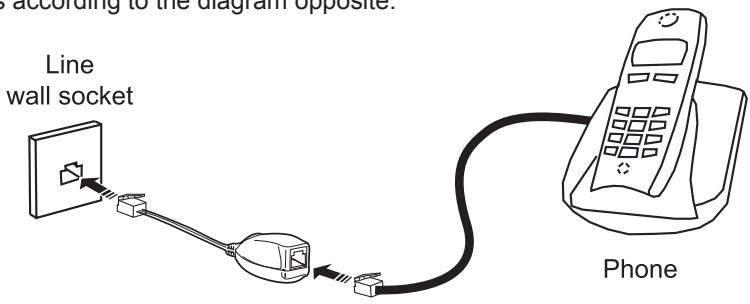
2.2 CONNECTING ADDITIONAL TELEPHONES
Make the connections according to the diagram opposite.
SAGEM F@st™ 1201/1241 V2
3 INSTALLATION FROM THE CD-ROM

Make sure that the modem is not connected to your computer before you start the installation from the CD-ROM.

The installation procedure described below was undertaken in Windows Vista™. Installation in other Windows® (98, ME, 2000 and XP) can be slightly different.
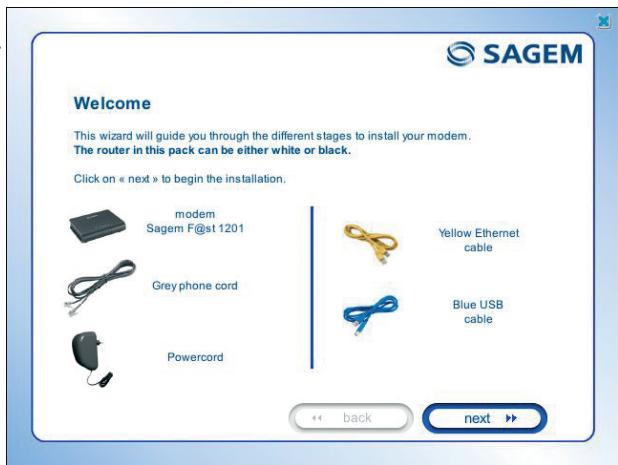
- insert the CD-ROM into the relevant drive; the screen opposite will appear:
- click on Next.
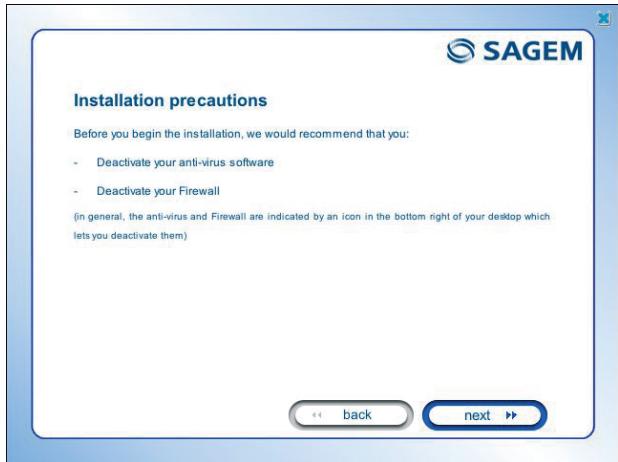
- The screen opposite describes the precautions to be taken during the installation.
- click on Next.
The screen opposite will appear.
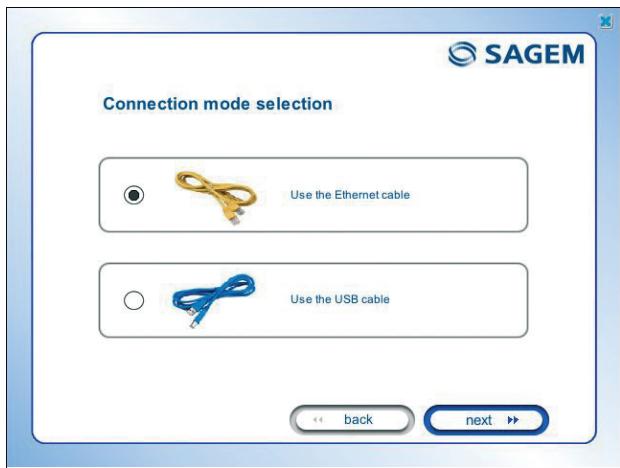
Select the mode of connection that you wish (Ethernet or USB) to connect your modem to your computer.
SAGEM F@st™ 1201/1241 V2
3.1 INSTALLATION ON THE ETHERNET PORT
If you selected «Use the Ethernet cable», click on Next.
Follow the instructions provided by the install screens by plugging in the modem supply, switching it on and connecting the ADSL line and then connect the modem to your computer using the yellow Ethernet cable.
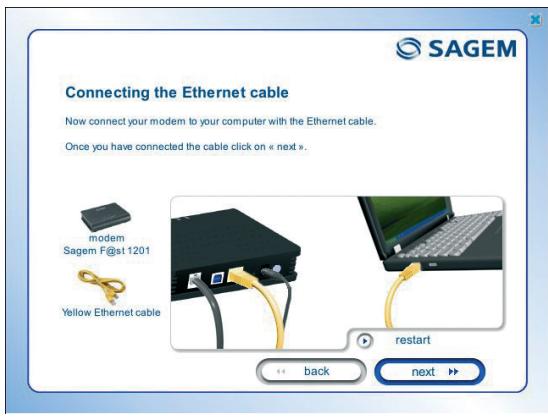
Once you have made these connections, an Internet connection screen will appear. You must enter your username then your connection password.
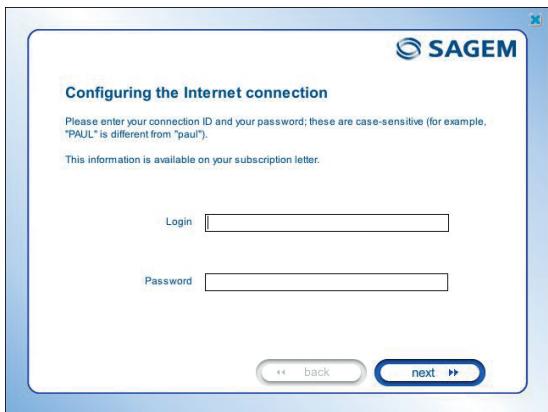

This information is provided by your Internet Service Provider (ISP).
Once you have entered the configuration parameters, a window will appear listing the different steps in the installation.
Once all these steps are complete, an end of the installation window will appear telling you that your modem has been correctly installed.
Click on finish.
You may now use your Internet access.
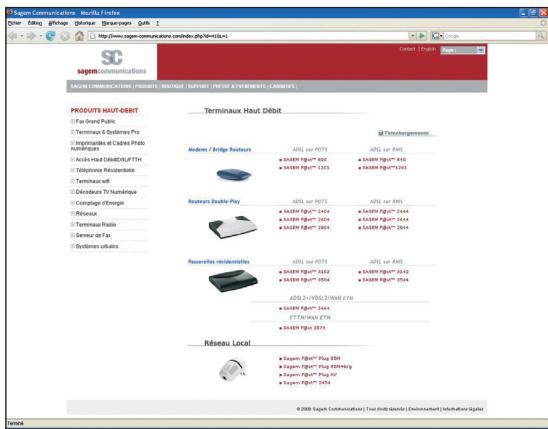
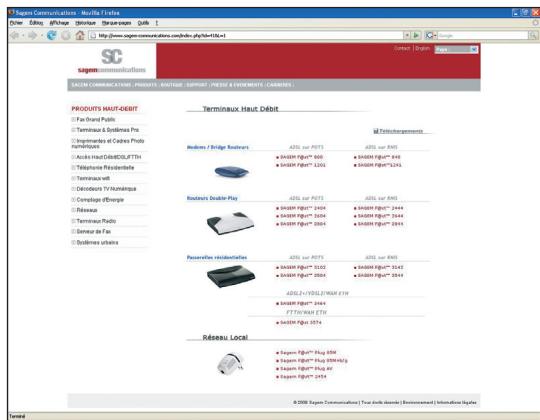
The "http://sagem-communications.com" site will open.
Follow the instructions provided by the install screens by plugging in the modem supply, switching it on and connecting the ADSL line and then connect the modem to your computer using the blue USB cable.
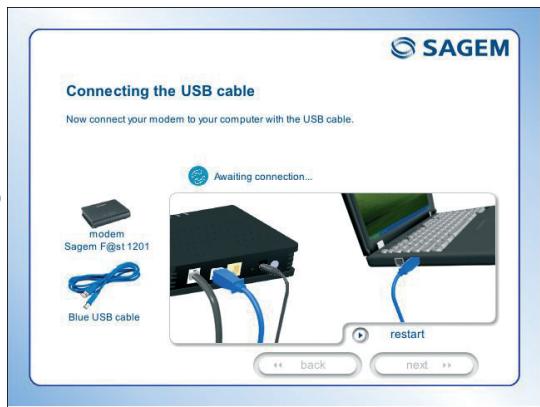
Once you have made these connections, an Internet connection screen will appear. You must enter your user name then your connection password.
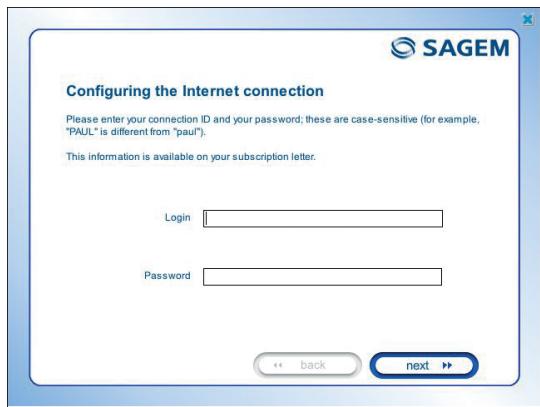

This information is provided by your Internet Service Provider (ISP).
Once you have entered the configuration parameters, a window will appear listing the different steps in the installation.
Once all these steps are complete, an end of the installation window will appear telling you that your modem has been correctly installed.
Click on finish.
You may now use your Internet access.
The "http://sagem-communications.com" site will open.
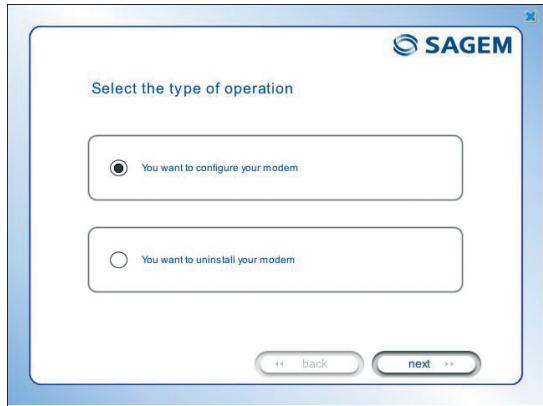
If your installation failed or that you want uninstall your modem, insert again your CD-ROM in the relevant drive; the following screen will appear:
Click on
«You want to configure your modem»" or «You want to uninstall your modem» according to your choice, then follow the instructions displayed on the screen.
4 TROUBLESHOOTING
Users can locate the fault using the following sources:
■ Status of the LEDs on the front,
Information accessible by your modem's built-in HTTP controller,
• Modem supervision,
• «Diagnostics» tools.
4.1 STATUS OF THE LEDS ON THE FRONT

All LEDs are green.
| Status | Power | Link | Data | Ethernet | USB |
| On steady | Power present | Synchronised ADSL line | Public address available | Active Ethernet link | Active USB link |
| Blinking | Failure detected at the time of starting | X | At WAN traffic rate | At LAN traffic rate | At LAN traffic rate |
| Blinking quickly | X | ADSL synchronisation training | X | X | X |
| Blinking slowly | X | ADSL line not connected | |||
| Off | Power not present | X | Public address unavailable or Bridge mode or ADSL down | Inactive Ethernet link | Inactive USB link |
4.2 MODEM SUPERVISION
This is displayed permanently in a box at the top right of each window in the HTTP configuration tool.
To access the configuration tool:
■ open your browser then enter the following in the address bar:
• the following URL : http://myrouter,
• or the following address : http://192.168.1.1 (see note).
■ A "Login" window will appear.
• enter admin in the «Username» field (see note).
• enter admin in the «Password» field (see note).
Note: This value is specific to the ISP.
You may now access your router's HTTP configuration tool.

LEDs
| ADSL | Green | ADSL line synchronised | |
| Yellow | ADSL line synchronising | ||
| Red | ADSL line not connected | ||
| Internet | Green | Connected | Public address (WAN) distributed to the modem |
| Yellow | Waiting for ISP | ADSL line synchronising | |
| Off | Adsl Down | Public address (WAN) not distributed to the modem or ADSL line not conneted | |
| Not configured | No VC (Virtual Channel) | ||
| Router rebooting | Modem is rebooting | ||
| Red | Access denied | Erroneous Login and/or password | |
Bit rate
| Down | Displays the nominal downlink bit rate |
| Up | Displays the nominal uplink bit rate |
Buttons
| refresh | Update the data displayed on the screen |
| reboot | Reboot your modem |
4.3 «DIAGNOSTICS» TOOL
To access this tool:
■ open the configuration tool (see the modem supervision section).
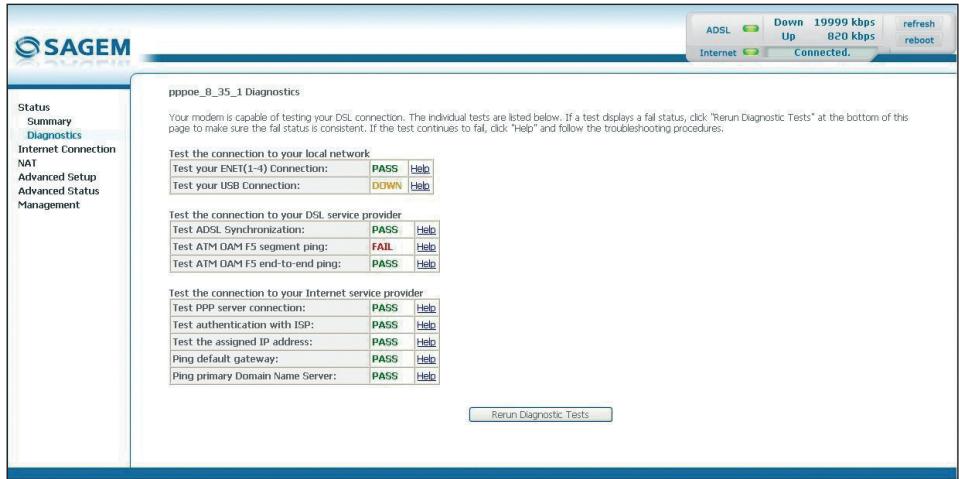
■ select the “Status” heading then the “Diagnostics” menu in the relevant list located in the left of each window, the following screen will appear:
SAGEM F@st™ 1201/1241 V2
The result of the tests carried out by your modem's configuration tool is displayed in the «Diagnostics» window. These tests relate to the connections to the LAN, your DSL Service Provider and your Internet Service Provider (ISP).

A hypertext link (help) enables the user to access contextual help. This help provides explanations about the status of the connection (PASS green, DOWN orange and FAIL red) and provides the appropriate repair procedures.
Connection status
| Status | Colour | Meaning |
| PASS | Green | indicates that the test was carried out correctly |
| DOWN | Orange | indicates that an interface (ETH or USB) was not detected |
| FAIL | Red | indicates that a test failed or that a command cannot be launched. |

If a test displays a «FAIL» status, click on «Help» then the «Rerun Diagnostic Tests» button at the bottom of the «Help» page to make sure that the test was suitable. If the test still displays «FAIL», you must follow the repair procedure displayed on this page.
IMPORTANT
If you are having trouble connecting to the Internet we recommend that you restart your modem or possibly return to the factory configuration using the procedures described below.
Restarting your modem
To restart your modem, click on the «reboot» button in the top right of your HTTP configuration tool's welcome page.
Returning to the factory configuration
To return to the factory configuration:
- in the top left of your HTTP configuration tool's welcome page select the Management heading then the Restore Default sub-menu in the Settings menu.
- or press and hold for about 15 seconds on the button marked «RESET» on the back of your modem.
5 SAFETY INSTRUCTIONS
Environment
- The modem should be installed and used inside a building.
• The room temperature should not exceed 45^ C. - The modem can be placed on a desktop or fixed vertically in its wall mounting.
- The modem should not be exposed to strong sunlight or placed near a substantial source of heat.
- The modem should not be placed in an environment where it would be subjected to considerable steam condensation.
- The modem should not be exposed to splashes of water.
- The modem's casing should not be covered.
- The modem and its peripherals should not be used for outdoor transmissions.
Power supply source
- The modem's mains adapter should not be covered.
- The modem comes with its own mains adapter. It should not be used with another adapter.
- This class II adapter does not need to be grounded (earthed). The connection to the electrical network should comply with the indications given on the label.
- Use a readily accessible mains outlet located near the modem. The power supply cord is 2 m long.
- Arrange the power supply cord in such a way as to avoid any accidental power cut to the modem.
- The modem is designed to be connected to a GG- (ground-to-ground) or GN- (ground-to-neutral) type power supply network.
- The modem is not designed to be connected to an electrical installation with IT type diagram (neutral connected to earth through an impedance).
- Protection against short-circuits and leaks between phase, neutral and earth should be provided by the building's electrical installation. The power supply circuit for this equipment should be fitted with 16 A overcurrent protection and differential protection.
- The modem should be connected to the mains via a readily accessible wall socket ensuring the electric cutting.
Maintenance
- It is prohibited to open the casing. This must be done only by qualified personnel approved by your supplier.
- Do not use liquid or aerosol cleaning agents.
SAGEM F@st™ 1201/1241 V2
5 SAFETY INSTRUCTIONS (CONTD.)
Safety level
| primary power source accessBipolar AC mains socket | HPV (Hazardous Primary Voltage circuit) |
| DC power supply accessMiniature fixed connector (Power) | SELV (Safety Extra Low Voltage) |
| Type B USB access (USB) | SELV |
| RJ45 Ethernet access (Ethernet) | SELV |
| RJ11 line access (Line) | TNV3 (Telecommunication Network Voltage level 3 circuit) |

Products bearing this symbol comply with EMC regulations as well as the Low Voltage Directive published by the Commission of the European Community (CEC).
EC Declaration
EC compliance declaration
Sagem Communications declares that the product named SAGEM F@st™ 1201 V2 or SAGEM F@st™ 1241 V2 complies with the demands of the European Community directives 1995/5/EC as well as with the essential demands of the directives 89/336/EEC dated 03/05/1989 and 73/23/EEC dated 19/02/1973.
The EC compliance declaration for the SAGEM F@st™ 1201 V2 and SAGEM F@st™ 1241 V2 is implemented within the framework of the R&TTE directive.
SAGEM F@st™ 1201 V2
Notes:
SAGEM F@st™ 1201/1241 V2

Registered trademarks
SAGEM F@st™ is a registered trademark of Sagem Communications.
SAGEM is a registered brand of SAFRAN Group.
Mac OS ^® is a registered trademark of Apple Computer, Inc.
Windows ^® is a registered trademark of Microsoft Corporation.
Copyright
Sagem Communications document. Reproduction and disclosure prohibited.
For further information on our products, Please visit our Web site at:
www.sagem-communications.com
253 156 400 ed. A
3 000 323 061 R11 000 01

sagemcommunications
- Contents
- SAGEM F@st™ 1201/1241 V2
- List of symbols used in this guide
- CONTENTS OF THE PACK
- CONNECTING YOUR MODEM
- CONNECTING YOUR ROUTER
- CONNECTING ADDITIONAL TELEPHONES
- INSTALLATION FROM THE CD-ROM
- INSTALLATION ON THE ETHERNET PORT
- TROUBLESHOOTING
- STATUS OF THE LEDS ON THE FRONT
- MODEM SUPERVISION
- Buttons
- «DIAGNOSTICS» TOOL
- IMPORTANT
- Restarting your modem
- Returning to the factory configuration
- SAFETY INSTRUCTIONS
- Environment
- Power supply source
- Maintenance
- SAFETY INSTRUCTIONS (CONTD.)
- EC Declaration
- SAGEM F@st™ 1201 V2
- Registered trademarks
- Copyright
Brand : SAGEM
Model : FAST 1201 V2
Category : Modem/Router