99-7019 - Kit d'installation radio Metra - Free user manual and instructions
Find the device manual for free 99-7019 Metra in PDF.

User questions about 99-7019 Metra
0 question about this device. Answer the ones you know or ask your own.
Ask a new question about this device
Download the instructions for your Kit d'installation radio in PDF format for free! Find your manual 99-7019 - Metra and take your electronic device back in hand. On this page are published all the documents necessary for the use of your device. 99-7019 by Metra.
USER MANUAL 99-7019 Metra
natural_image
Interior view of a car dashboard with digital displays and control knobs (no visible text or symbols)Mitsubishi Mirage 2017-2020
Mitsubishi Mirage G4 2018-2020
Visit MetraOnline.com for more detailed information about the product and up-to-date vehicle specific applications
KIT FEATURES
• ISO DIN radio provision with pocket
- High polished processing provides a gloss black finish that's similar to both the aftermarket radio and factory finish.
KIT COMPONENTS
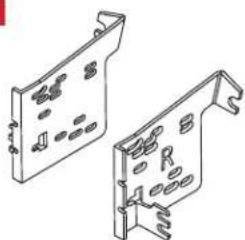
• A) Radio trim panel • B) Radio brackets • C) Pocket • D) Phillips screws (8)
AC

natural_image
Isometric line drawing of a rectangular panel or enclosure with no text or symbols[Non-Text]
natural_image
Technical line drawing of two mechanical components with mounting holes and fasteners (no text or symbols)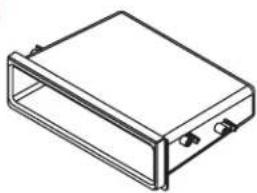
natural_image
Isometric line drawing of a rectangular electronic device with mounting holes (no text or symbols)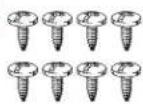
TABLE OF CONTENTS
Dash Disassembly 2
Kit Assembly 3
WIRING & ANTENNA CONNECTIONS (sold separately)
See metra-online.com or axxessinterfaces.com for audio and SWC interface options
Wiring harness: 70-7005
Antenna Adapter: Not required
TOOLS REQUIRED
- Panel removal tool • Socket wrench
• Phillips screwdriver
Attention! Let the vehicle sit with the key out of the ignition for a few minutes before removing the factory radio. When testing the aftermarket equipment, ensure that all factory equipment is connected before cycling the key to ignition.
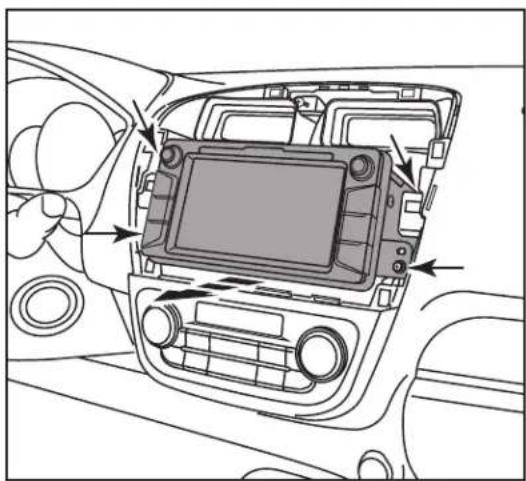
DASH DISASSEMBLY
- Unclip and remove the trim panel surrounding the radio including the vents. (Figure A)
- Remove (4) screws securing the radio. Slide the radio out, then unplug and remove. (Figure B)
Continue to Kit Assembly

natural_image
Interior view of a car dashboard with air vent and control panel (no text or symbols)(Figure A) (Figure B)
natural_image
Interior view of a car dashboard with an integrated touchscreen display and directional arrows indicating components (no text or symbols present)KIT ASSEMBLY
- Attach the radio brackets to the radio trim panel using (4) #(8) x 3/8" Phillips screws supplied. (Figure A)
- Attach the pocket to the brackets using the (4) supplied #8 x 3/8" Phillips screws. (Figure B)
- Slide the radio into the completed assembly, and then secure it to the assembly using screws supplied with the radio. (Figure C)
- Locate the factory wiring harness and antenna connector in the dash, and complete all necessary connections to the radio. Metra recommends using the proper mating adapter from Metra and/or AXXESS. Re-connect the negative battery terminal and test the radio for proper operation.
- Reassemble the dash in reverse order of disassembly.

natural_image
Diagram showing two views of a device with internal components, no text or symbols present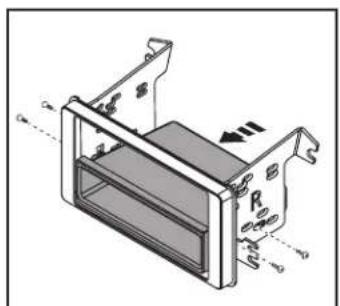
natural_image
Technical diagram of a mechanical housing or enclosure with mounting brackets and internal components (no text or symbols)
natural_image
Technical diagram of a device housing with labeled components and directional arrows (no readable text or symbols)(Figure C)(Figure A) (Figure B)
Having difficulties? We're here to help.

our Tech Support line at:
386-257-1187

mail at:
techsupport@metra-autosound.com
Tech Support Hours (Eastern Standard Time)
Monday - Friday: 9:00 AM - 7:00 PM
Saturday: 10:00 AM - 7:00 PM
Sunday: 10:00 AM - 4:00 PM

KNOWLEDGE IS POWER
Enhance your installation and fabrication skills b enselling in the most recognized and respected
mobile electronics school in our industry.
Log onto www.installerinstitute.com or call
600-354-8782 for more information and take steps toward a better tomorrow.
Metra recommends MECP certified technicians