STAR-LIGHT AHD DWC-V7753 - Camera Digital Watchdog - Free user manual and instructions
Find the device manual for free STAR-LIGHT AHD DWC-V7753 Digital Watchdog in PDF.


| Product Type | Analog High Definition (AHD) Mini Outdoor Dome Camera |
| Image Sensor | 1/2.7" CMOS, 2.0 Megapixel |
| Resolution | 1080p (1920x1080) at 30fps |
| Lens | Fixed 3.6mm |
| IR Distance | 50 ft (15.24 m) on IR models |
| Minimum Illumination | 1.0 Lux (Color), 0 Lux (B&W with IR) |
| Day/Night | True Day/Night with Mechanical IR Cut Filter |
| Video Output | AHD 1080p/720p selectable, BNC and secondary BNC |
| OSD Control | Via coaxial cable using UTC (Up-the-Coax) |
| Smart Features | STAR-LIGHT, Smart DNR, HME, BLC, DRC, Defog |
| Privacy Zones | 4 programmable zones |
| Motion Detection | 4 zones with adjustable sensitivity |
| Housing Material | Aluminum |
| Dimensions | 105 x 60.7 mm (4.13 x 2.38 in) |
| Weight | 0.95 lbs (0.43 kg) |
| Power Requirements | DC 12V, 3.12W max (IR on) |
| IP Rating | IP67 (Weather and Dust Resistant) |
| Operating Temperature | -20°C to 50°C (-4°F to 122°F) |
| Certifications | FCC, CE, RoHS |
| Warranty | 5 years on camera, 1 year on IR LEDs |
| Included Accessories | Mounting template, screws, anchors, L-wrench, manual |
| Cleaning Instructions | Use a soft cloth moistened with mild detergent |
| Safety Precautions | Do not open or modify; avoid humidity, dust, high temperature |
Frequently Asked Questions - STAR-LIGHT AHD DWC-V7753 Digital Watchdog
User questions about STAR-LIGHT AHD DWC-V7753 Digital Watchdog
0 question about this device. Answer the ones you know or ask your own.
Ask a new question about this device
Download the instructions for your Camera in PDF format for free! Find your manual STAR-LIGHT AHD DWC-V7753 - Digital Watchdog and take your electronic device back in hand. On this page are published all the documents necessary for the use of your device. STAR-LIGHT AHD DWC-V7753 by Digital Watchdog.
USER MANUAL STAR-LIGHT AHD DWC-V7753 Digital Watchdog
ANALOG HIGH DEFINITION Mini Outdoor Dome Camera
DWC-V7753TIR
DWC-V7753
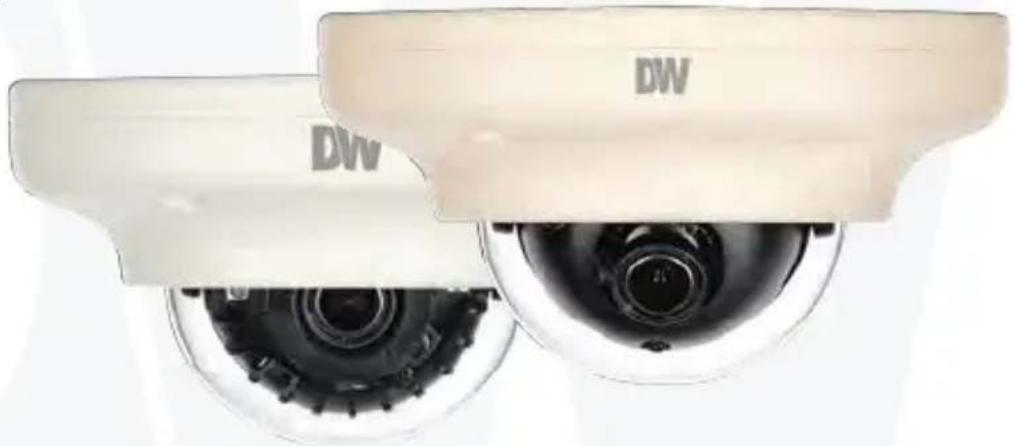
natural_image
Two identical white surveillance cameras with black dials, labeled 'DW' on the top (no additional text or symbols visible)
STAR-LIGHT AHD™ Analog High Definition
ABOUT MANUAL
Before installing and using the camera, please read this manual carefully.
Be sure to keep it handy for future reference.
PRECAUTIONS
■ Do not open or modify.
- Do not open the case except during maintenance and installation, for it may be dangerous and can cause damages.
■ Do not put objects into the unit.
- Keep metal objects and flammable substances from entering the camera. It can cause fire, short-circuits, or other damages.
■ Be careful when handling the unit.
■ To prevent damages, do not drop the camera or subject it to shock or vibration.
■ Do not install near electric or magnetic fields.
■ Protect from humidity and dust.
■ Protect from high temperature.
■ Be careful when installing near the ceiling of a kitchen or a boiler room, as the temperature may rise to high levels.
- Cleaning:
To remove dirt from the case, moisten a soft cloth with a soft detergent solution and wipe.
■ Mounting Surface:
The material of the mounting surface must be strong enough to support the camera.
FCC COMPLIANCE
This equipment has been tested and found to comply with the limits for a Class B digital device, pursuant to part 15 of the FCC rules. These limits are designed to provide reasonable protection against harmful interference, when the equipment is operated in a residential environment. This equipment generates, uses, and radiates radio frequency energy; and if it is not installed and used in accordance with the instruction manual, it may cause harmful interference to radio communications.
WARNING: Changes or modifications are not expressly approved by the manufacturer.
TABLE OF CONTENTS
Introduction Features 4
Parts and Descriptions 5
Dimensions 6
Installation ____ Inside the Box ____ 7
Installation Instructions 8
Installation using Mount Bolt & Nut ____ 9
Connecting to Monitors 10 ____
Control Board 11
Adjusting the Camera Angle____ 12
Module OSD Menu 13-28
Troubleshooting 29
Warranty Information 30-31
Specifications 32-33
FEATURES\*
■ Analog High Definition (AHD) HD over Coax Technology
■ STAR-LIGHT™ Super Low Light Technology
■ 1/2.7" CMOS Sensor
■ 1080P Resolution at 30fps
■ Fixed Lens 3.6mm
■ Smart IR™ with Intelligent Camera Sync. 50ft Range (IR models)
■ Smart DNR™ 3D Digital Noise Reduction
■ Highlight Masking Exposure (HME)
■ True Day/Night Mechanical IR Cut Filter
■ Secondary Video-BNC Output
■ OSD Control via Coax Cable using UTC
■ Programmable Privacy Zones
■ Auto Gain Control (AGC)
■ Back Light Compensation (BLC)
■ Dynamic Range Compressor (DRC) Reveals Low Light Detail
■ Auto White Balance (AWB)
■ IP67 Certified (Weather Resistant)
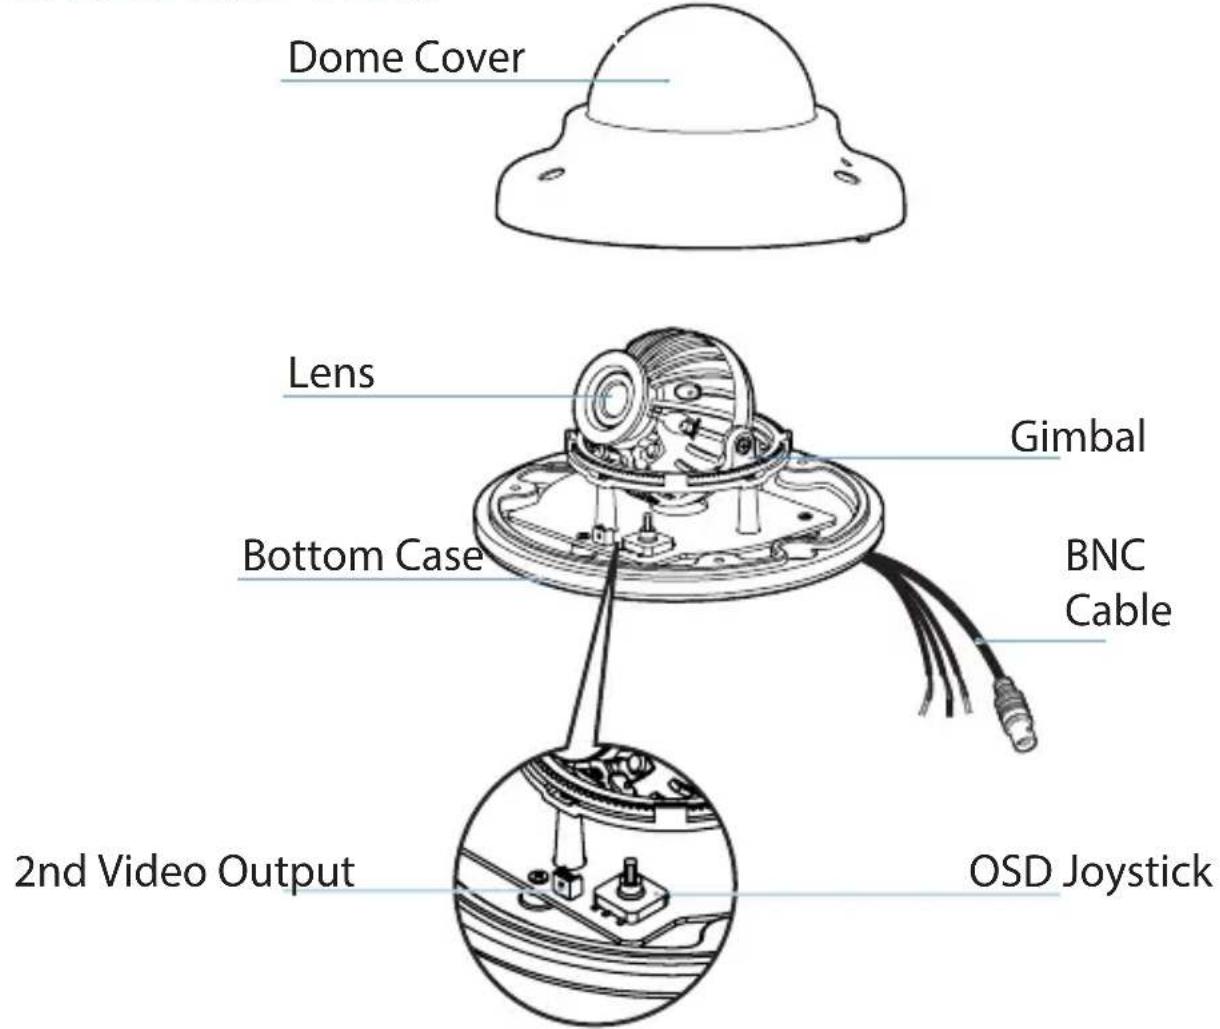
PARTS & DESCRIPTION*
DIMENSIONS IN MILLIMETERS (IN)\*
105.0
60.7
32.5
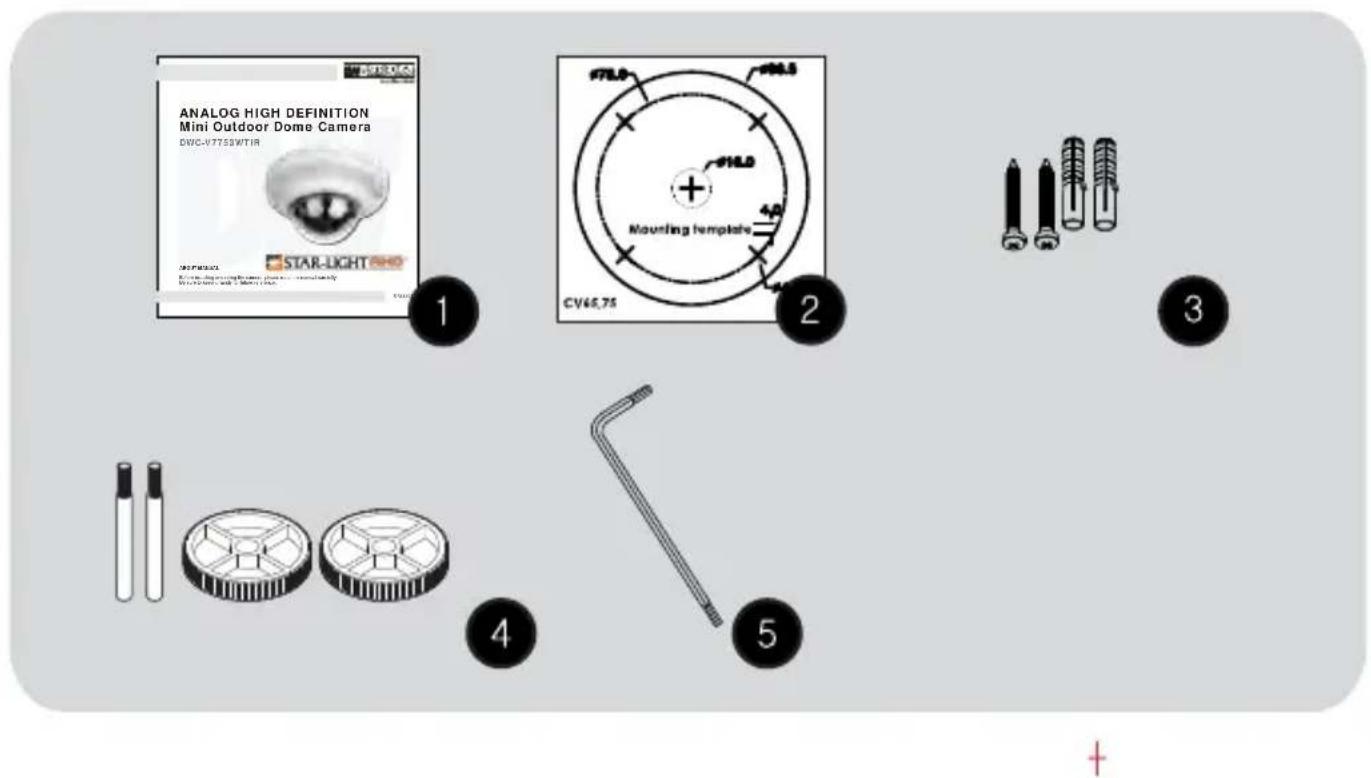
INSIDE THE BOX\*
Included with Bullet Camera:
1 User Manual
2 Mounting Template
3 2 Machine Screws and 2 Dry Wall Anchors
4 Mounting Bolt & Nut
5 L-Wrench
INSTALLATION INSTRUCTIONS\*
- Detach the camera's cover dome from the camera's module by unscrewing the three cover dome screws using the L-Wrench.
- Use the camera or mounting template to mark and drill the necessary holes in the wall or ceiling.
- Pull wires through and make connections.
- Using three (3) included screws, mount and secure the camera to the wall or ceiling.
- Secure the camera's cover dome onto the camera base and remove the protecting film to complete the installation.
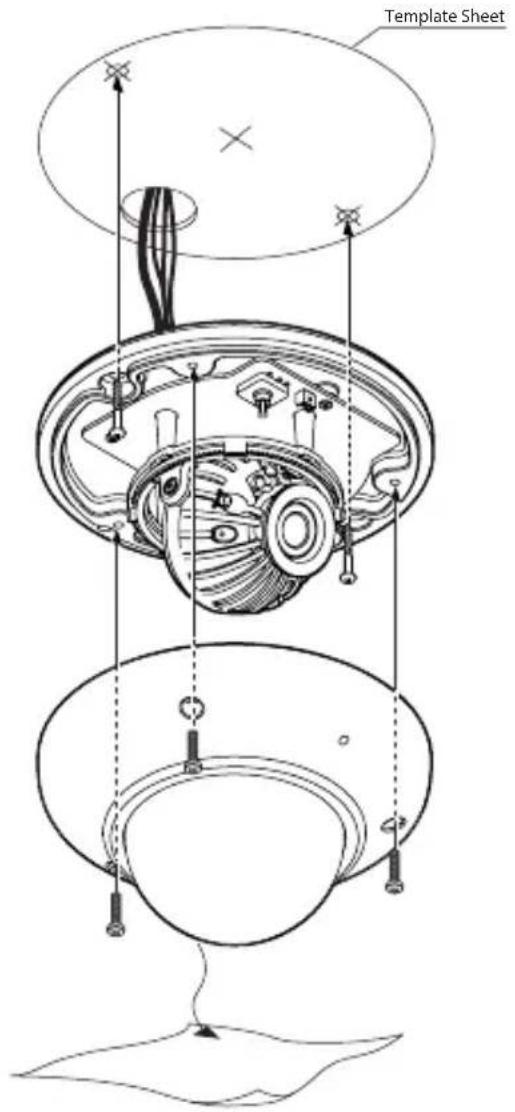
INSTALLATION USING MOUNT BOLT & NUT\*
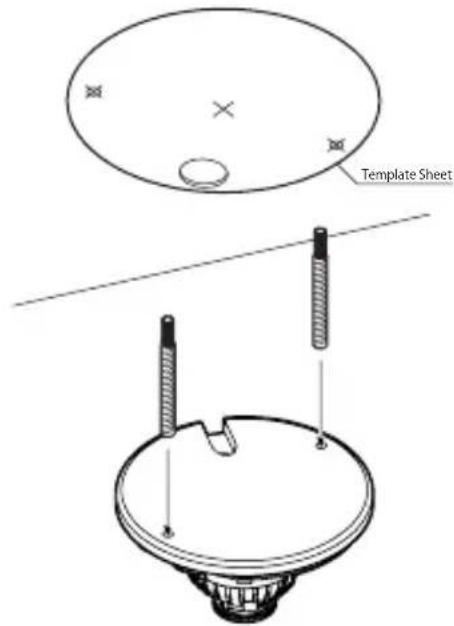
- Detach the camera's cover dome from the camera's module by unscrewing the three cover dome screws.
- Using the camera or mounting template, mark and drill the necessary holes in the wall or ceiling.
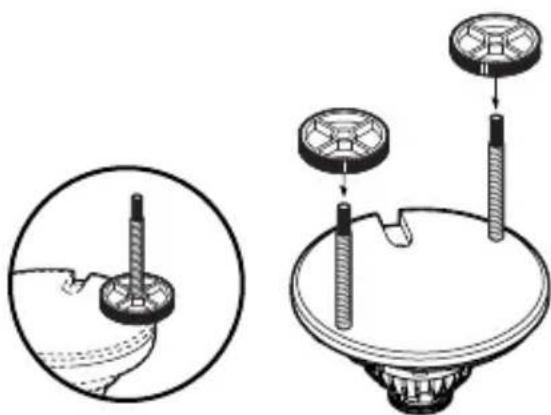
- Secure the two long mounting screws to the camera's base.
- Pull wires through and make connections.
- Mount the camera to the mounting surface using the 2 mounting nuts.
- Secure the camera's cover dome onto the camera base to complete the installation.
natural_image
Diagram showing a mechanical assembly with two components and a magnified inset of a cylindrical component (no text or symbols)CONNECTING TO MONITORS\*
Use the diagram below to connect to a Monitor or CRT Monitor properly.
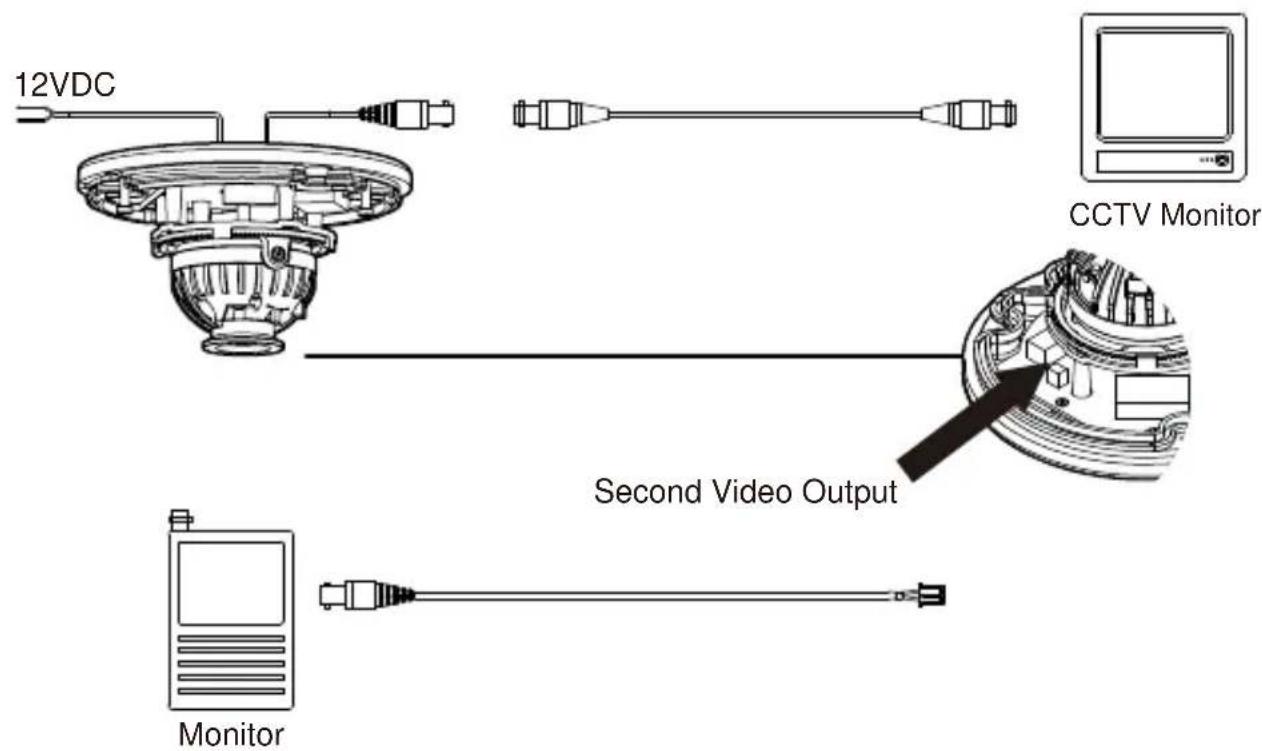
■ Power Connection - 12VDC Voltage.
■ All cameras are equipped with a second video output for on-site configuration.
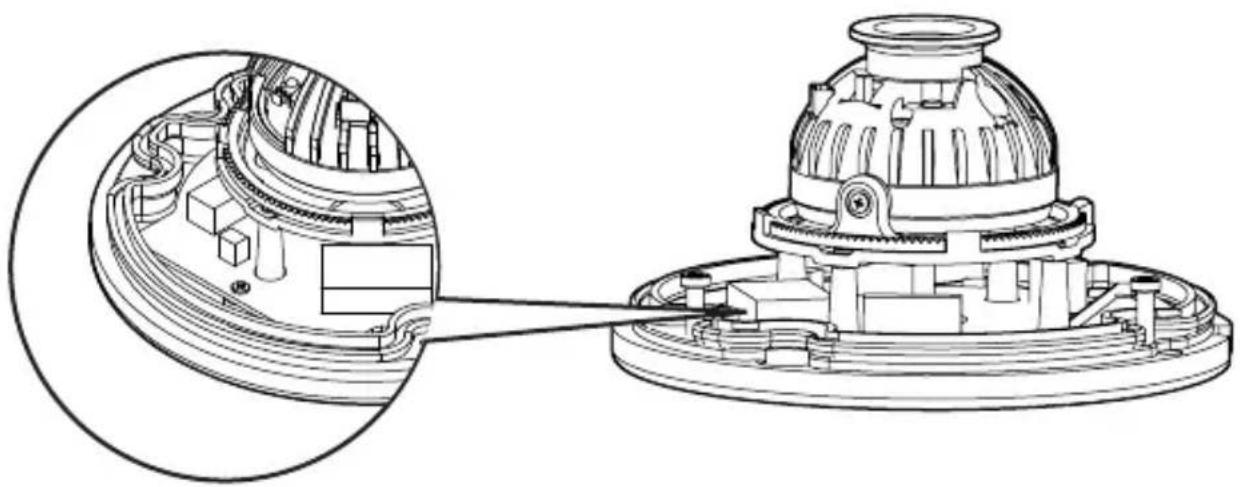
CONTROL BOARD\*
natural_image
Technical line drawing of a mechanical assembly with internal components and a close-up view of a component (no text or symbols)1 Remove the camera's dome cover to access the camera module and OSD joystick.
2 Use the Joystick to control the camera's OSD options.
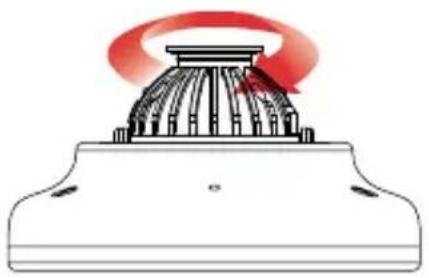
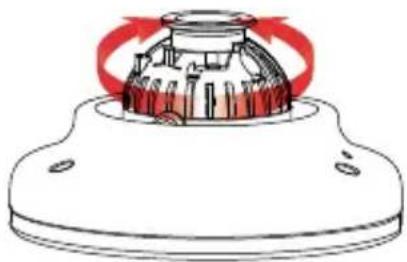
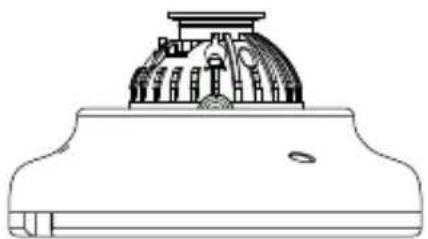
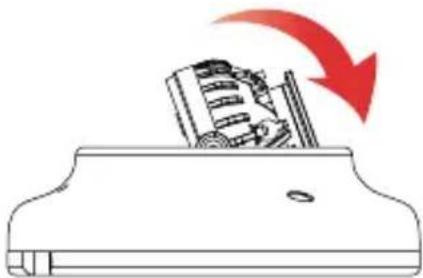
ADJUSTING THE CAMERA ANGLE\*
natural_image
Illustration of a dome-shaped structure with a red circular highlight on top, resembling a stylized roof or emblem (no text or symbols)1 Rotation 360^
natural_image
Diagram of a mechanical component with red arrows indicating rotation or flow, no text or symbols present2 Panning 360°
natural_image
Technical line drawing of a mechanical component with a dome-like top and base (no text or symbols)3 Tilting 70° IR LED
natural_image
Diagram of a printer with a paper roll being inserted, showing a red arrow indicating process (no text or symbols present)MODULE OSD MENU*
| LENS | EXPOSURE | BACKLIGHT | WHITE BALANCE |
 | SHUTTER/1/30~1/50000/X2~X30AGC0~15STAR-LIGHTOFF/AUTO X2~X30BRIGHTNESS1~100DRCOFF/AUTO/ON (0~8)DEFOGOFF/AUTORETURN | 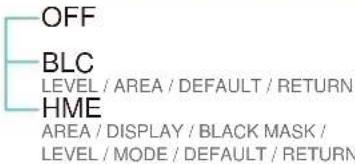 | 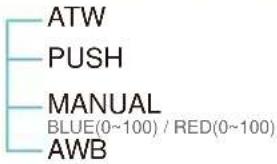 |
| DAY & NIGHT | NR (Noise Reduction) | SPECIAL | ADJUST |
 |  |  | ;  |
| EXIT | |||
 |
NOTE
This camera supports OSD control via coaxial cable using UTC signal. You can access and control the camera's OSD menu using the DVR and no additional cabling.
LENS
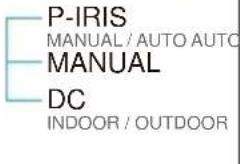
MANUAL Manual mode supports the fixed board lens or the manual iris lens.
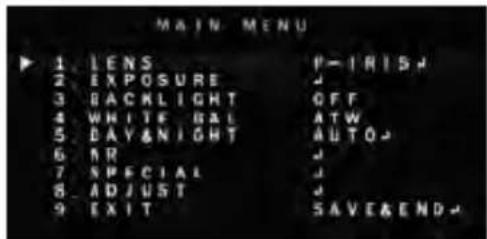
P-IRIS If the camera includes a P-Iris lens, you can select this option to adjust the lens and iris settings.
If P-Iris is selected, adjust the following:
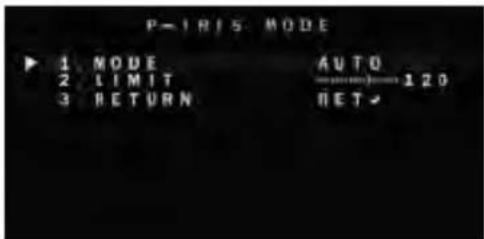
MODE: Select from AUTO or MANUAL. If AUTO is selected, the camera's iris and lens will be adjusted automatically.
LIMIT: If MANUAL is selected, the camera's iris can be adjusted manually using the
LIMIT value.
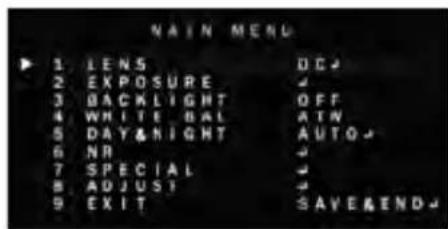
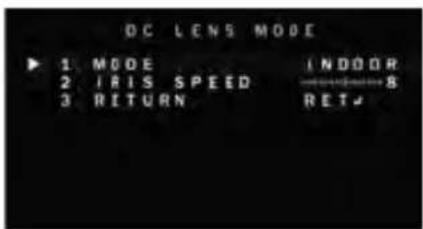
DC DC lens mode allows you to setup the camera for indoor or outdoor modes.
If DC is selected, adjust the following options:
MODE: Select from INDOOR or OUTDOOR
IRIS SPEED: Set the reaction speed of the camera's iris.
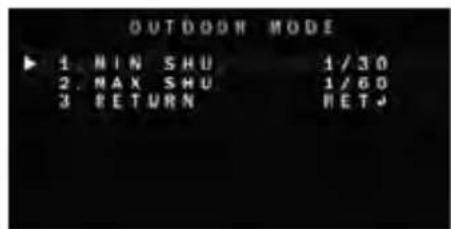
If OUTDOOR mode is selected, you can adjust the minimum and maximum shutter speed. By default, the MIN SHU is set to 1/30. The MAX SHU can be adjusted as needed. The lower the number, the darker the image will appear in bright areas.
EXPOSURE
SHUTTER
Set the camera's shutter speed from the available options (AUTO/1/30\~1/50000/x2\~x30/FLK) If Iris is set to AUTO in the lens menu, the camera's shutter will be set automatically and the values in this menu will not be adjustable.
If Iris is set to AUTO in the lens menu, the camera's shutter speed will be deactivated.
AGC AUTO GAIN CONTROL
0\~15 AGC enhances the picture brightness in low light conditions. A higher level AGC setting makes the images brighter; however, it could increase the amount of noise.
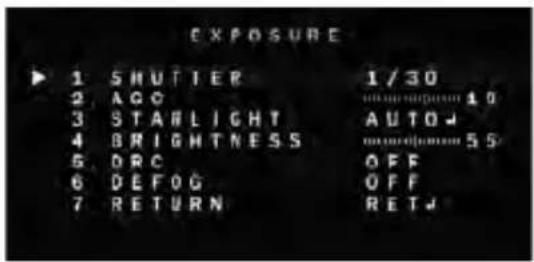
STARLIGHT Automatically activates slow shutter function when the image is too dark.
OFF/AUTO/ High values are not recommended as they may cause the image to lag.
x2 \~ x30 To adjust the STAR-LIGHT values, select AUTO and enter the sub-menu.
Starlight menu cannot be controlled if the SHUTTER setting is above 1/60.
If AGC is set to 0, the STAR-LIGHT menu will be inactive.
BRIGHTNESS Adjust the camera's brightness from 0\~15.
0 \~ 100 The higher the number, the brighter the image will appear.
EXPOSURE (CONT.)
DRC DYNAMIC RANGE COMPRESSOR
DRC enables dark areas in images to become more visible without overexposing the bright areas to create one perfect image. Select from: OFF / ON / AUTO. If ON is selected, adjust the DRC value from 0 \~ 8.
NOTE: If DEFOG is enabled, DRC settings are set automatically and will not be available for adjustment.
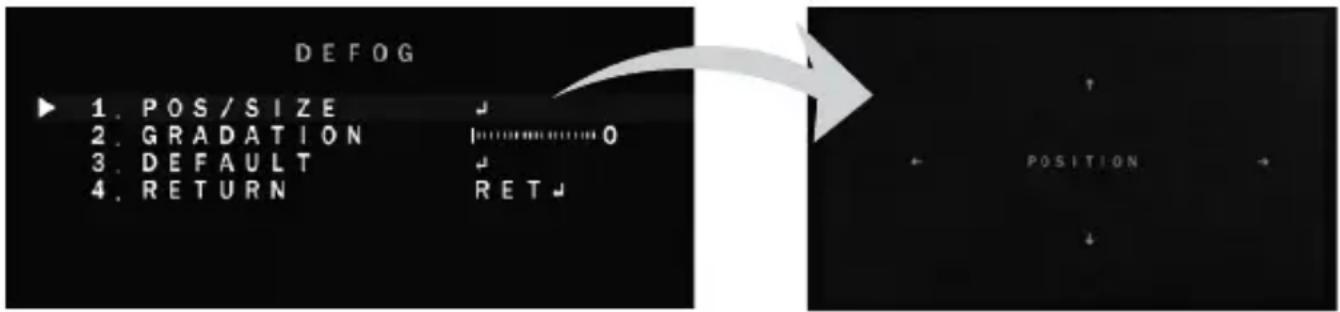
DEFOG Allows the camera to process a scene that is obscured by fog or weather conditions and provides a visibly improved image.
- POS/SIZE: Set the location and size of the defog mask. Use the joystick controller on the camera's board to adjust the De-Fog zone's position. Press the enter key and use the joystick controller to adjust the zone's size.
- GRADATION: Sett the DEFOG level from 0 \~ 2. The higher the number, the stronger the Defog mask will be.
- DEFAULT: Return the Defog settings to their default values.
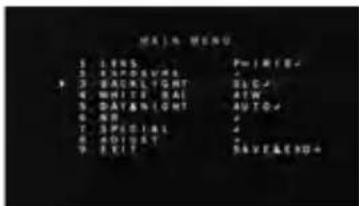
BACKLIGHT
BLC BACK LIGHT COMPENSATION
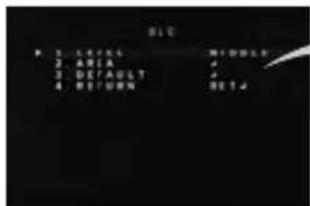
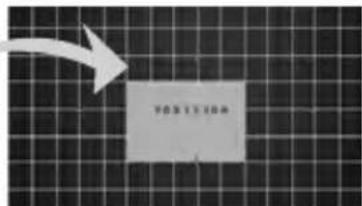
If BLC is selected, adjust the size and position of the mask:
- Level: Set the BLC levels LOW / MIDDLE / HIGH
- AREA: Use the joystick controller on the camera's board to adjust the zone's position. Press the enter key and use the joystick controller to adjust the zone's size.
- DEFAULT: Return the BLC settings to their original default values.
HME HIGHLIGHT MASKING EXPOSURE
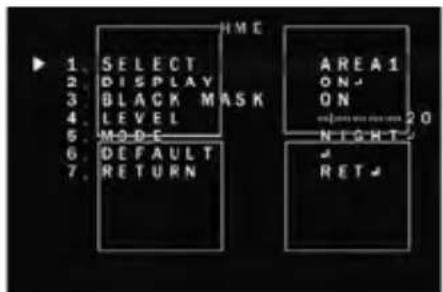
HME allows objects to appear clearly on the screen by masking extremely bright areas.
- SELECT: The camera supports up to four (4) different HME zones. Select which zone to setup.
- DISPLAY: For the selected zone, select ON to adjust its position and size. Use the joystick controller on the camera's board to adjust the zone's position. Press the enter key and use the joystick controller to adjust the zone's size.
- BLACK MASK: Select whether the HME mask will display in black on the camera's view.
- LEVEL: Set the working range of the HME. The higher the value, the HME mask will appear only around bright sources. Set the value from 0 \~ 100. Default value is 20.
- MODE: Select whether the HME mask will appear during night mode only or all day. If the zone is set to night mode, the zone will appear based on the AGC setting value.
- DEFAULT: Return the settings to their original default values.
WHITE BALANCE
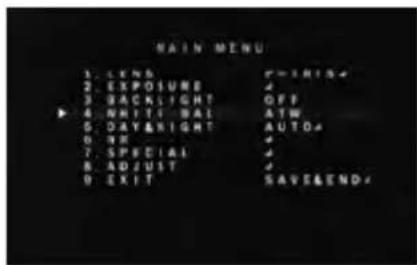
ATW Auto Tracking White Balance Control mode compensates for color temperature changes between 2400K ^° and 11000K ^° .
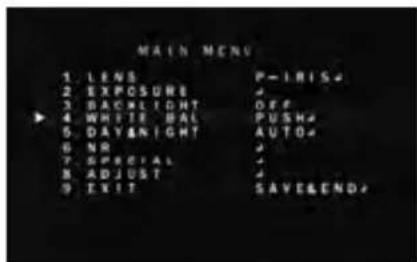
PUSH Push fixes the white balance based on the current lighting automatically. To use this function, press the ENTER key for five (5) seconds.
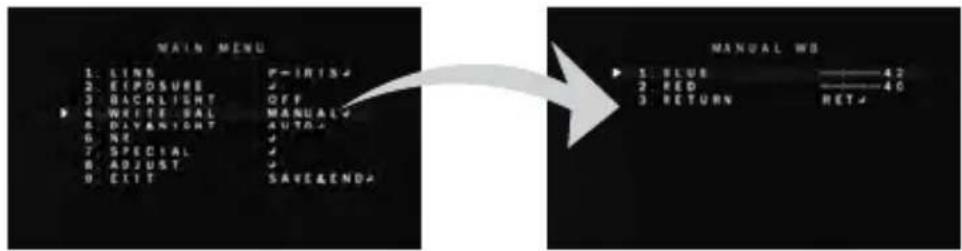
MANUAL Control the white balance manually by changing RED and BLUE.
RED: Adjusts the low color temperature in the image between 0 \~ 100. The default value is 42. BLUE: Adjusts the low color temperature in the image between 0 \~ 100. The default value is 40.
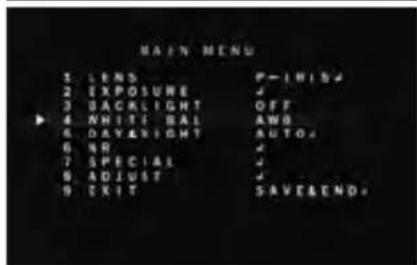
AWB Auto White Balance Control mode compensates for color temperature changes lower than 2500K ^° and higher than 12000K ^° .
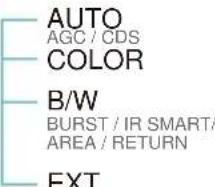
DAY & NIGHT
AUTO / Day/ Night switch is based on the CDS levels (IR models) or AGC levels (non-IR models).
COLOR / The camera always stays in day/color mode.
B&W/ The camera always stays in night/B&W mode.
EXT The camera's Day & Night settings are set according to an external IR LED board.
AUTO
For cameras with no IR LED Built-in:
- D -> N Threshold (AGC): Set when the camera switches from day to night mode by the AGC value. When the camera detects AGC levels beyond the set threshold, it will switch from color to B/W.
- D -> N Delay (AGC): Set a delay for the camera when switching from day to night mode.
- N -> D Threshold (AGC): Set when the camera switches from night to day mode by the AGC value. When the camera detects AGC levels beyond the set threshold, it will switch from B/W to color.
- N -> D Delay (AGC): Set a delay for the camera when switching from night to day mode.
For cameras with IR LED Built-in:
- D -> N Threshold (CDS): Set when the camera switches from day to night mode. The lower the value, the camera will require less light (more darkness) to switch to Night Mode.
- D -> N Delay (CDS): Set a delay for the camera when switching from day to night mode.
- N -> D Threshold (CDS): Set when the camera switches from night to day mode. The lower the value, the camera will require less light (more darkness) to switch to Night Mode.
- N -> D Delay (CDS): Set a delay for the camera when switching from night to day mode.
- EXT LED: AUTO: The LEDs are enabled/ disabled by the CDS Sensor on the LED Board.
OFF: The camera's LEDs are disabled manually.
DAY & NIGHT (CONT.)
COLOR
If COLOR mode is selected, the camera's display will always appear in color, regardless of the lighting condition.
B/W
- BURST: Select to enable or disable color burst when the camera switches from color to B/W.
- IR SMART (0\~15): Enable Smart IR and set the level. Higher values will make Smart IR stronger.
- AREA: Set the Smart IR's zone. Use the joystick controller on the camera's board to adjust the zone's position. Press the enter key and use the joystick controller to adjust the zone's size.
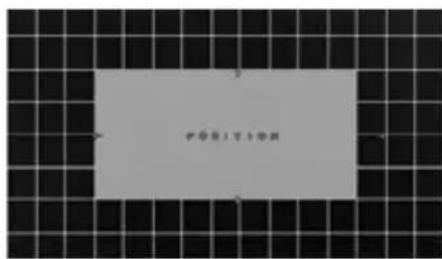
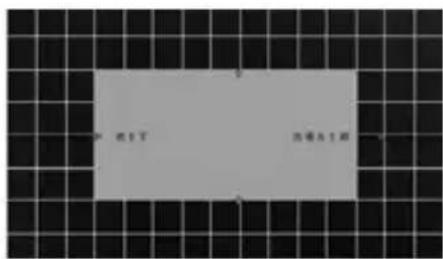
The Day & night settings are set according to a CDS sensor in an external IR LED board.
- D -> N Delay: Set a delay for the camera when switching from day to night mode.
- N -> D Delay: Set a delay for the camera when switching from day to night mode.
- EXT LED: AUTO: The LEDs are enabled/ disabled by the CDS Sensor on the LED Board. OFF: The camera's LEDs are disabled manually.
- NIGHT S/W: Based on the CDS settings in the external LED board, set the value for LOW / HIGH.
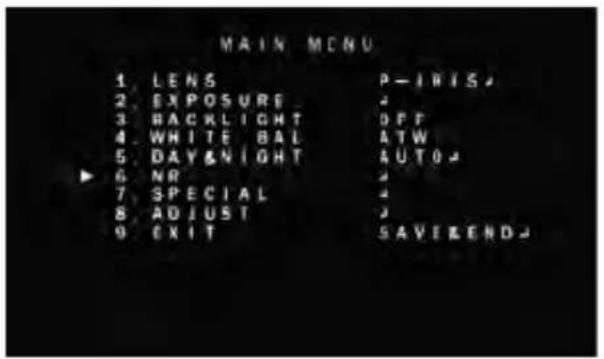
NR
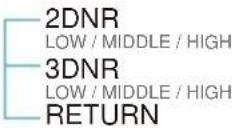
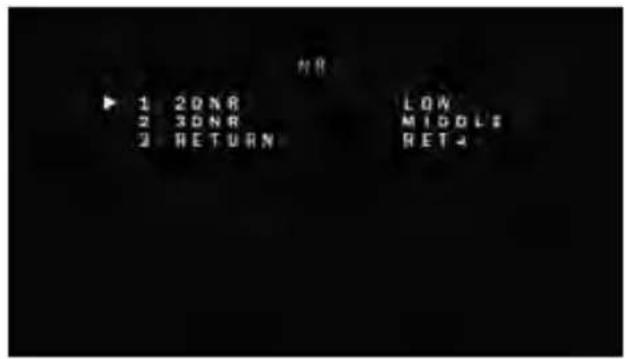
Smart DNR 3D DIGITAL NOISE REDUCTION
3D-DNR reduces the noise on the screen in low light conditions and allows for clearer images, even at night.
2DNR Set the Digital Noise Reduction values for general illumination. Select from LOW / MIDDLE / HIGH. If the 2DNR settings are set to HIGH, image sharpness may be affected.
3DNR Set the Digital Noise Reduction values for very low light situations. Select from LOW / MIDDLE / HIGH. If the 3DNR settings are set to HIGH, lagging issues may appear when motion occurs.
SPECIAL
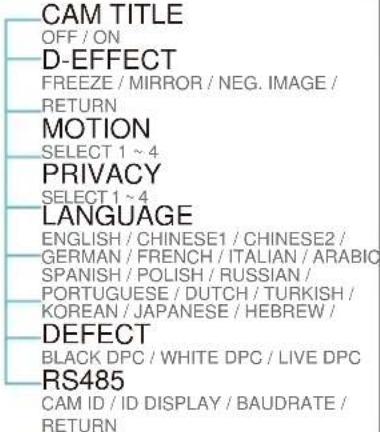
CAM. TITLE
Add a name to the camera. Set the title by using the OSD joystick.
D-EFFECT
FREEZE Freeze image from the camera at the selected moment. MIRROR Reflects the camera: OFF / MIRROR / V-FLIP / ROTATE NEG. IMAGE Display the camera's view in negative colors.
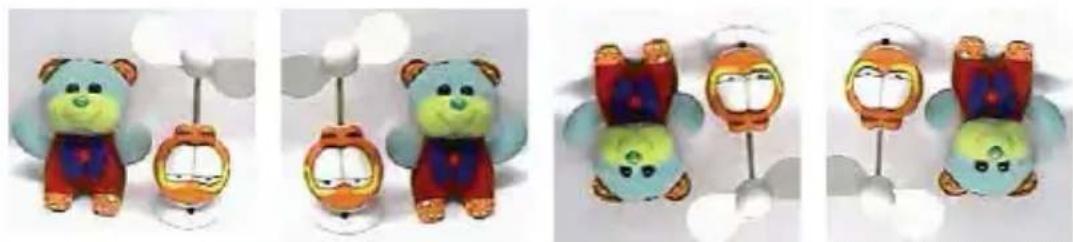
Mirror & Flip ONFlip ONMirror ONMirr
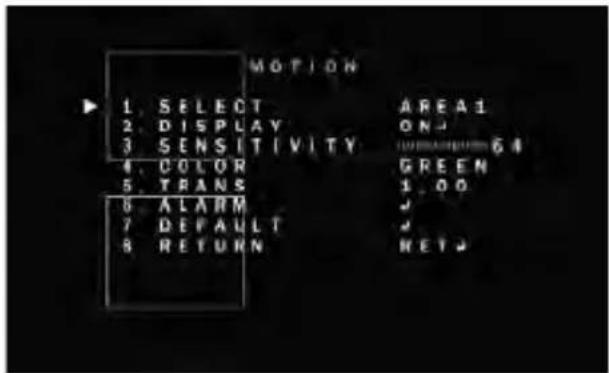
MOTION
- SELECT: The camera supports up to 4 separate motion detection areas. Select which one to adjust.
- DISPLAY: For the selected zone, select ON to adjust its position and size. Use the joystick controller on the camera's board to adjust the zone's position. Press the enter key and use the joystick controller to adjust the zone's size.
- SENSITIVITY: Set the camera's sensitivity to motion. The higher the value, the more sensitive the camera is to motion.
- COLOR: Set the color for the motion zone. Select from green, blue, white, or red.
- TRANS: Set the zone's transparency. The lower the number, the more transparent the zone will appear on the camera's display.
- DEFAULT: Reset the motion detection settings to their default values.
SPECIAL (CONT.)
MOTION
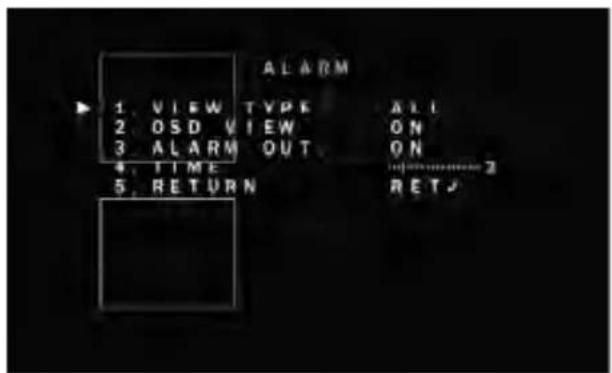
- ALARM:
VIEW TYPE: When motion is detected, select from the following display options:
- OFF - do not display motion alarm
- ALL - Show all motion zones when motion alarm is detected.
- BLOCK - show the area where motion is detected as a solid block.
- OUTLINE - Show the area where motion is detected as an outline only.
OSD VIEW: If enabled, ALARM will appear on the screen when motion is detected.
ALARM OUT: The camera supports 3.3V alarm output. When motion is detected, an alarm output can be triggered if enabled.
TIME: Set the dwell time after motion is detected. Values are in seconds.
SPECIAL (CONT.)
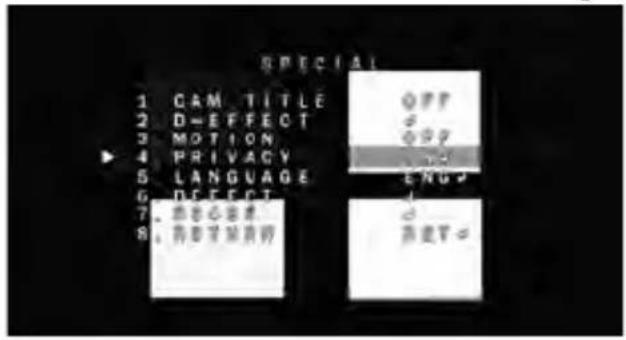
PRIVACY
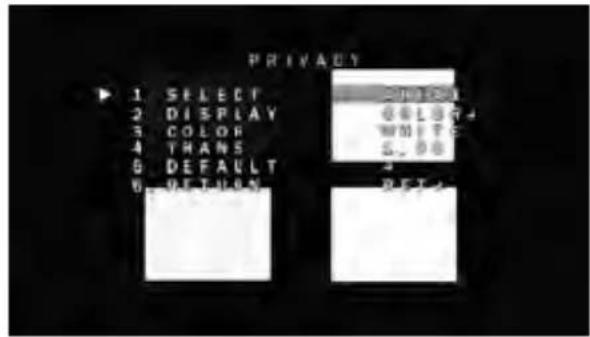
- SELECT: The camera supports up to 4 separate privacy zones. Select which one to adjust.
- DISPLAY: There are three types of privacy masks you can apply. Select from MOSAIC, INV., or COLOR.
- MOSAIC: The privacy mask will appear as a mosaic over the camera's image.
- INV.: The privacy mask will appear as a negative of the image behind it, reversing the colors and brightness.
- COLOR: The privacy mask will appear as a block of color according to the settings in the COLOR menu.
To adjust the zone's position and size, once the type of mask is selected, use the joystick controller on the camera's board to adjust the zone's position. Press the enter key and use the joystick controller to adjust the zone's size.
- COLOR: If COLOR is selected under the display options, set the color for the motion zone. Select from white, black, red, blue, yellow, green, cyan, or user. If user is selected, the mask's color will default to dark green.
- TRANS: Set the zone's transparency. The lower the number, the more transparent the zone will be.
- DEFAULT: Reset the motion detection settings to their default values.
SPECIAL (CONT.)
LANGUAGE
Select from the available options: English, Chinese 1, Chinese 2, German, French, Italian, Spanish, Polish, Russian, Portuguese, Dutch, Turkish, Korean, Japanese, Arabic, or Hebrew.
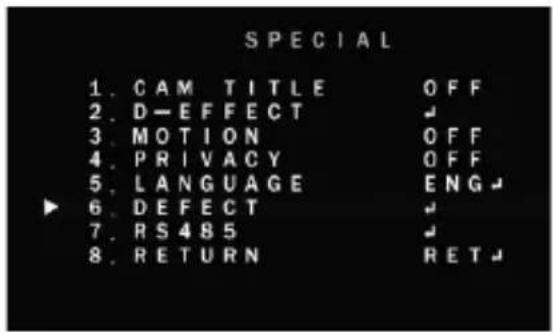
DEFECT
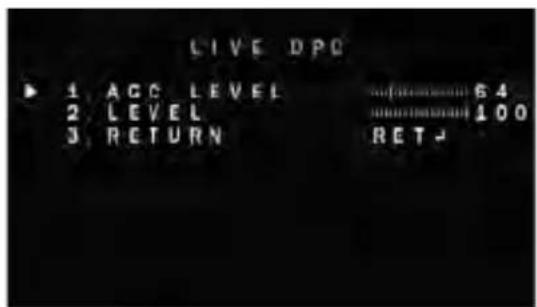
- LIVE DPC:
- AGC LEVEL: Set the AGC levels for the Live DPC.
- LEVEL: Set the level of Live DPC based on the AGC levels.
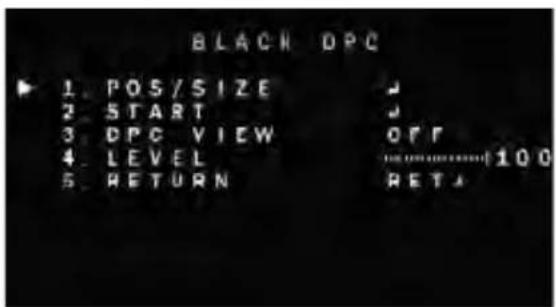
- BLACK DPC
- POS / SIZE: Set the size and position for
the DPC Zone. Use the joystick controller on the camera's board to adjust the zone's position. Press the enter key and use the joystick controller to adjust the zone's size.
- START: Press START to begin the DPC test. The screen will get bright and compensate for the black defect.
- DPC VIEW: Show the Defect pixels which have been compensated.
- LEVEL: Set the range of DPC application.
SPECIAL (CONT.)
DEFECT (CONT.)
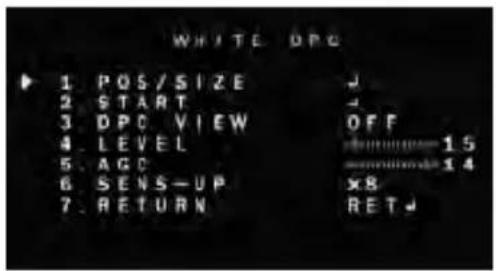
- WHITE DPC
- POS / SIZE: Set the DPC Zone. Use the joystick' controller on the camera's board to adjust the zone's position. Press the enter key and use the joystick controller to adjust the zone's size.
- START: Press START to begin the DPC test. The screen will get bright and compensate for the black defect.
- DPC VIEW: Show the Defect pixels which have been compensated.
- LEVEL: Set the range of DPC application.
- AGC: Set the value level for AGC while DPC is on.
- SENS-UP: Sent the value level of Sens-Up while DPC is on.
RS485
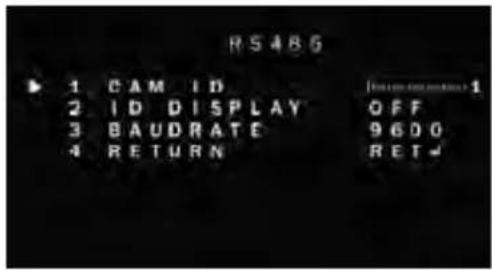
- CAM ID: Set the camera's ID from 0\~255.
- ID DISPLAY: Select to show or hide the camera ID on the screen.
- BAUDRATE: Set the camera's baudrate. Select from: 2400/4800/9600/19200/38400. Default is 9600.
ADJUST
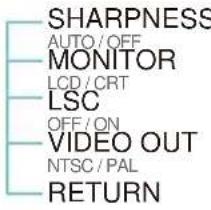
SHARPNESS
Set the sharpness of the image. The Sharpness values can be increased or lowered according to the AGC levels in the camera's view. If AUTO is selected, adjust the following values:
- LEVEL: Set the sharpness level. The higher the number, the sharper the image will appear.
- START AGC: Select the AGC value where the image's sharp lines may start to appear smeared in low light.
- END AGC: Select end AGC value for sharpness smearing in low light. Once the AGC values pass the set END AGC, the image's sharp lines will no longer appear smeared if the
environment gets darker.
MONITOR
Adjust the camera's signal according to the monitor you are using.
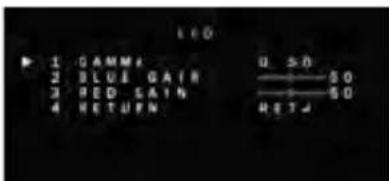
- LCD Mode: If using an LCD monitor, adjust the following settings:
- GAMMA: Set the gamma level from 0.45 \~ 1.00. 0.55 is default setting.
- BLUE GAIN: Set the blue levels form 0 \~ 100.
- RED GAIN: Set the red levels form 0 \~ 100.
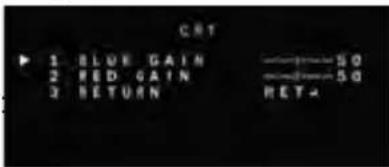
- CRT Mode: If using an CRT monitor, adjust the following settings
- BLUE GAIN: Set the blue levels form 0 \~ 100.
- RED GAIN: Set the red levels form 0 \~ 100.
LSC
The LSC function improves the brightness around the lens. Select whether to enable or disable according to the camera's image.
VIDEO OUT
The camera's video output is set by default to NTSC. If you need to change the camera's video output, select from NTSC or PAL. Reboot the camera after making any changes to the video signal settings.
EXIT
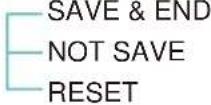
SAVE & END
Save all changes made to the camera's settings and exit the OSD menu.
NOT SAVE
Exit the OSD menu without saving any changes made to the camera's settings.
RESET
The camera's settings will be reset to their factory default values once you exit the OSD menu.

TROUBLESHOOTING
Before sending your camera for repair, check the following or contact our technical specialist.
FOR NO VIDEO
Check the coaxial cable and make sure it is connected securely.
Check the lens' iris adjustment at the camera's OSD menu.
Check the power supply and make sure the camera has the proper voltage and current.
FOR OUT-OF-FOCUS VIDEO
Check the clear dome cover and the lens for dirt or fingerprints. Use a soft cloth and gently clean. Check the lens' manual focal and zoom adjustment. The use of a field test monitor is recommended.
WARRANTY INFORMATION\*
Digital Watchdog (referred to as “the Warranter”) warrants the Digital Watchdog Camera against defects in materials or workmanship as follows:
LABOR: For the initial five (5) years and one (1) year on IR LED from the original purchase date, if the camera is determined to be defective, the Warranter will repair or replace the unit with a new or refurbished product at its option at no charge.
PARTS: In addition, the Warranter will supply replacement parts for the initial five (5) years and one (1) year on IR LED.
To obtain warranty or out of warranty service, please contact a Technical Support Representative at 1-866-446-3595 Monday through Friday from 9:00AM to 8:00PM Eastern Standard Time.
A purchase receipt or other proof of the original purchase date is required before warranty service is rendered. This warranty only covers failures due to defects in materials and workmanship which arise during normal use. This warranty does not cover damage which occurs in shipment or failures which are caused by products not supplied by the Warranter or failures which result from accident, misuse, abuse, neglect, mishandling, misapplication, alteration, modification, faulty installation, set-up adjustments, improper antenna, inadequate signal pickup, maladjustment of consumer controls, improper operation, power line surge, improper voltage supply, lightning damage, rental use of the product or service by anyone other than an authorized repair facility or damage that is attributable to acts of God.
LIMITS & EXCLUSIONS\*
There are no express warranties except as listed. The warranter will not be liable for incidental or consequential damages (including damage to recording media without limitation) resulting from the use of these products or arising out of any breach of the warranty. All express and implied warranties, including the warranties of merchantability and fitness for particular purpose, are limited to the applicable warranty period set forth above.
Some states do not allow the exclusion or limitation of incidental or consequential damages, or limitations on how long an implied warranty lasts, so the exclusions or limitations listed above may not apply to you. This warranty gives you specific legal rights, and you may also have other rights that vary from state-to-state.
If the problem is not handled to your satisfaction, then write to the following address:
Digital Watchdog, Inc. ATTN: RMA Department 5436 W. Crenshaw Street Tampa, FL 33634
Service calls which do not involve defective materials or workmanship as determined by the Warranter, in its sole discretion, are not covered. Costs of such service calls are the responsibility of the purchaser.
SPECIFICATIONS*
| IMAGE | |
| Image Sensor 1/2.7" CMOS Sensor | |
| Active Pixels 1920(H) x 1080(V) | |
| Scanning System Progressive scan | |
| Frequency | 60Hz/50Hz |
| Signal Technology 2.0 Megapixel AHD | |
| Synchronization | Internal |
| Resolution | 1920x1080 (1080p) |
| Minimum Scene Illumination F1.4 (30IRE): 1.0Lux [Color] | |
| F1.4 (30IRE): 0 Lux [B&W] | |
| S/N Ratio | 55dB |
| Video Output AHD 1080p30fps/720p60fps/720p30fps | |
| LENS | |
| Focal Length | 3.6mm |
| Lens Type Fixed Lens | |
| IR Distance 50ft (DWC-V7753TIR Models) | |
| OPERATIONAL | |
| Shutter Speed 1/30(25)-1/30,000 | |
| Backlight OFF / BLC / HME | |
| STAR-LIGHT OFF, x2 -x30 | |
SPECIFICATIONS*
| OPERATIONAL (CONT.) | |
| Digital Noise Reduction Off, Low, Middle, High | |
| White Balance Auto / Push / Manual / AWB | |
| Day and Night Auto / Color / B/W / EXT | |
| Auto Gain Control 0 ~ 15 | |
| Motion Detection Yes | |
| Privacy Zones 4 Privacy Zones | |
| Sharpness 0 ~ 10 | |
| Gamma 0.45 ~ 1.00 | |
| UTC | Yes |
| ENVIRONMENTAL | |
| Operating Temperature -20°C ~ 50°C (-4°F ~ 122°F) | |
| Operating Humidity No more than 90% (Non-Condensing) | |
| IP Rating IP67 (Weather and Dust Resistant) | |
| Other Certifications FCC, CE, ROHS | |
| ELECTRICAL | |
| Power Requirements DC12V | |
| Power Consumption LED Off: 3.06W, 255mA | |
| LED On: 3.12W, 309mA | |
| MECHANICAL | |
| Housing Material Aluminum | |
| Dimensions 105 x 60.7mm (4.13 x 2.38 in) | |
| Weight | 0.95lbs |
*Specification is subject to change without prior notice.
MEMO*
MEMO*

DIGITAL
WATCHDOG®
Complete Surveillance Solutions
5436 W Crenshaw St. Tampa, FL 33634
Tel:866-446-3595/813-888-9555
Fax:813-888-9262
www.Digital-Watchdog.com
technicalsupport@dwcc.tv
Technical Support Hours: Monday-Friday
9:00am to 8:00pm EST
- ANALOG HIGH DEFINITION Mini Outdoor Dome Camera
- ABOUT MANUAL
- PRECAUTIONS
- FCC COMPLIANCE
- TABLE OF CONTENTS
- FEATURES\*
- DIMENSIONS IN MILLIMETERS (IN)\*
- INSIDE THE BOX\*
- Included with Bullet Camera:
- INSTALLATION INSTRUCTIONS\*
- INSTALLATION USING MOUNT BOLT & NUT\*
- CONNECTING TO MONITORS\*
- CONTROL BOARD\*
- ADJUSTING THE CAMERA ANGLE\*
- NOTE
- LENS
- EXPOSURE
- SHUTTER
- AGC AUTO GAIN CONTROL
- EXPOSURE (CONT.)
- DRC DYNAMIC RANGE COMPRESSOR
- BACKLIGHT
- BLC BACK LIGHT COMPENSATION
- HME HIGHLIGHT MASKING EXPOSURE
- WHITE BALANCE
- DAY & NIGHT
- AUTO
- DAY & NIGHT (CONT.)
- COLOR
- B/W
- NR
- Smart DNR 3D DIGITAL NOISE REDUCTION
- SPECIAL
- TITLE
- D-EFFECT
- MOTION
- SPECIAL (CONT.)
- PRIVACY
- LANGUAGE
- DEFECT
- DEFECT (CONT.)
- RS485
- ADJUST
- SHARPNESS
- MONITOR
- LSC
- VIDEO OUT
- EXIT
- SAVE & END
- NOT SAVE
- RESET
- TROUBLESHOOTING
- FOR NO VIDEO
- FOR OUT-OF-FOCUS VIDEO
- WARRANTY INFORMATION\*
- LIMITS & EXCLUSIONS\*
- DIGITAL
- WATCHDOG®
Brand : Digital Watchdog
Model : STAR-LIGHT AHD DWC-V7753
Category : Camera