FreeSpace Adjustable Tile Bridge - Speaker BOSE - Free user manual and instructions
Find the device manual for free FreeSpace Adjustable Tile Bridge BOSE in PDF.

User questions about FreeSpace Adjustable Tile Bridge BOSE
0 question about this device. Answer the ones you know or ask your own.
Ask a new question about this device
Download the instructions for your Speaker in PDF format for free! Find your manual FreeSpace Adjustable Tile Bridge - BOSE and take your electronic device back in hand. On this page are published all the documents necessary for the use of your device. FreeSpace Adjustable Tile Bridge by BOSE.
USER MANUAL FreeSpace Adjustable Tile Bridge BOSE
natural_image
Three metal frame structures with circular cutouts, shown against a white background (no text or symbols)FreeSpace FS2C & FS4CE
Adjustable Tile Bridge
Installation Guide....2
Important Safety Instructions
Please read and keep all safety and use instructions.
This product is intended for installation by professional installers only! This document is intended to provide professional installers with basic installation and safety guidelines for this product in typical fixed-installation systems. Please read this document and all safety warnings before attempting installation.
WARNINGS/CAUTIONS:

All Bose products must be installed in accordance with local, state, federal and industry regulations. It is the installer's responsibility to ensure installation of the loudspeakers and mounting system is performed in accordance with all applicable codes, including local building codes and regulations. Consult the local authority having jurisdiction before installing this product.

Unsafe mounting or overhead suspension of any heavy load can result in serious injury or death, and property damage. It is the installer's responsibility to evaluate the reliability of any mounting method used for their application. Only professional installers with the knowledge of proper hardware and safe mounting techniques should attempt to install any loudspeaker overhead.

Do not mount on surfaces that are not sturdy, or that have hazards concealed behind them, such as electrical wiring or plumbing. Ensure the bracket is installed by a qualified professional installer and in accordance with local building codes.
Regulatory Information
Date of Manufacture: The eighth digit in the serial number indicates the year of manufacture; "7" is 2007 or 2017.
China Importer: Bose Electronics (Shanghai) Company Limited, Part C, Plant 9, No. 353 North Riying Road, China (Shanghai) Pilot Free Trade Zone
EU Importer: Bose Products B.V., Gorslaan 60, 1441 RG Purmerend, The Netherlands
Taiwan Importer: Bose Taiwan Branch, 9F-A1, No. 10, Section 3, Minsheng East Road, Taipei City 104, Taiwan. Phone Number: +886-2-2514 7676
Bose Corporation Headquarters: 1-877-230-5639
Bose and FreeSpace are trademarks of Bose Corporation.
©2020 Bose Corporation. No part of this work may be reproduced, modified, distributed or otherwise used without prior written permission.
Warranty Information
This product is covered by a limited warranty. For warranty details, visit PRO.BOSE.COM.
Using a Safety Cable
Some regional construction codes require the use of a secondary method of securing loudspeakers to support structures to provide additional safety. Choose a mounting position, method, and hardware consistent with local building codes and regulations.
Bose recommends using (1) a safety wire as a secondary securing mechanism. See the diagram below for safety attachment points.
Follow the manufacturer's instructions for any secondary securing mechanism implemented.
natural_image
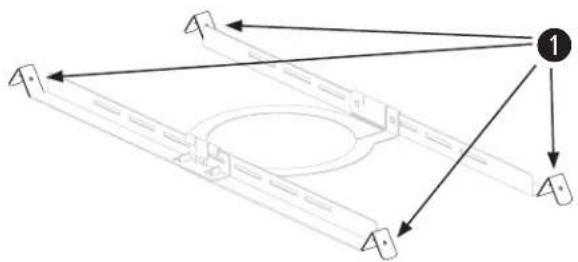
Pure mechanical assembly diagram showing a frame structure with arrows indicating direction (no text or symbols)Package Contents
FreeSpace FS2C Tile Bridge Pack
natural_image
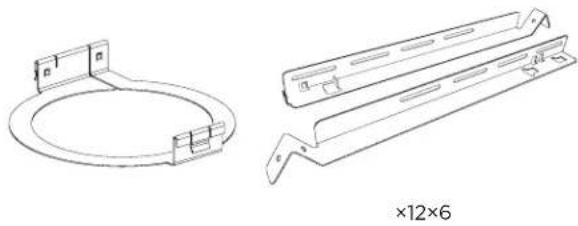
Technical line drawings of two metal bracket components, one circular and one rectangular, with no text or symbols present.FreeSpace FS4CE Tile Bridge Pack
natural_image
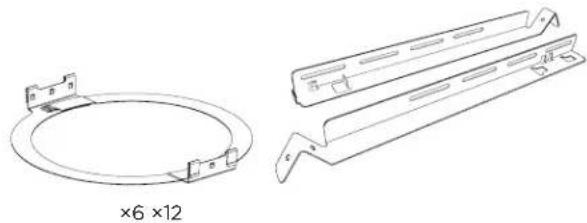
Technical line drawing of two mechanical components: a circular ring and a multi-layered plate assembly (no text or symbols)Product Dimensions
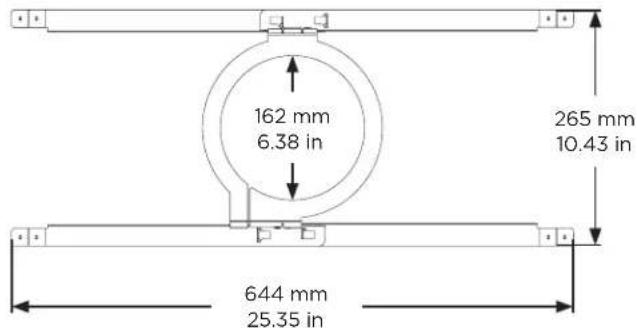
FreeSpace FS2C
0.72 kg (1.59 lb)
text_image
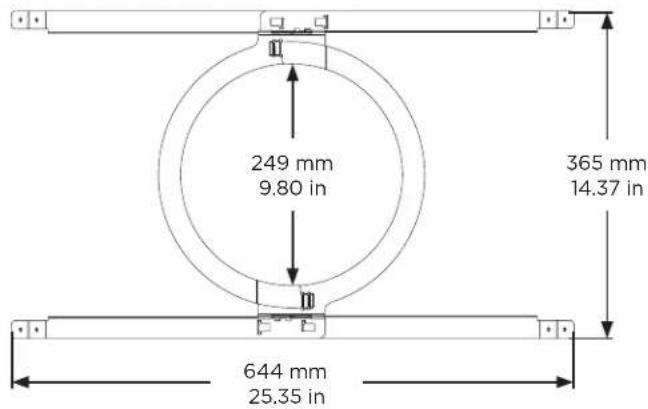
162 mm 6.38 in 265 mm 10.43 in 644 mm 25.35 inFreeSpace FS4CE
0.86 kg (1.90 lb)
text_image
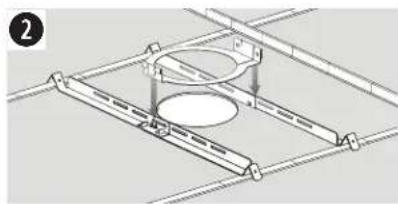
249 mm 9.80 in 365 mm 14.37 in 644 mm 25.35 inAssembling the Tile Bridge
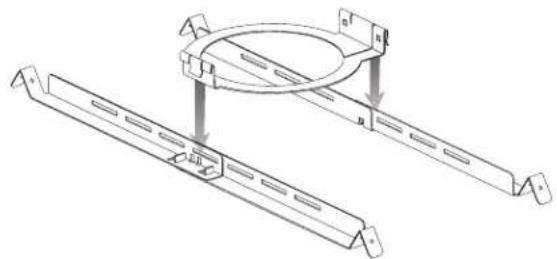
- Align the rails and insert the tabs into the slots.
- Pull the rails outward to secure them together.
Note: If you are installing in a hard ceiling, assemble the tile bridge after inserting the rails and ring through the hole cutout.
- Align the rails parallel to each other and press the tile bridge ring down to secure the ring to the rails.
1

text_image
Technical diagram showing mechanical assembly with labeled components A and B, including directional arrows and annotations.2

natural_image
Diagram of a vehicle's side profile with directional arrows indicating movement (no text or symbols)3
natural_image
Technical line drawing of two mechanical components with mounting brackets and a circular component, no text or symbols presentInstalling a Tile Bridge in Acoustic Ceiling Tile
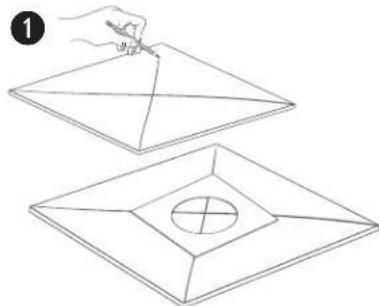
Cutting the Ceiling Tile
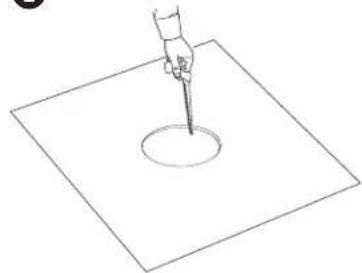
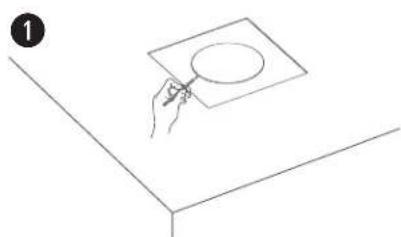
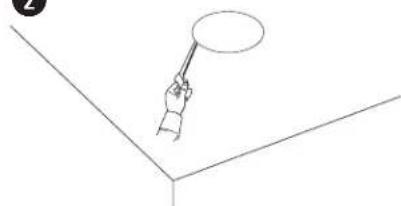
- Remove the tile and use the template included with your loudspeaker to trace a loudspeaker hole onto the tile. To center the template on the tile, draw an X by connecting the corners diagonally and center the template using the crossing point.
- Cut a hole into the tile.
Installing the Tile Bridge
- Place the assembled tile bridge across the ceiling grid. If necessary, adjust the tile bridge so the rails rest on the ceiling grid.
- Replace the tile in the ceiling.
For instructions on loudspeaker installation, see the Mounting the Loudspeaker section in the appropriate loudspeaker installation guide.
natural_image
Line drawing of two geometric shapes with a hand holding a pencil, one containing a circle and the other a square (no text or symbols)2
natural_image
Simple line drawing of a hand holding a pipette above a square base with a circular hole (no text or symbols)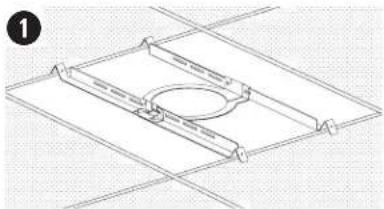
natural_image
Pure technical line drawing of a mechanical component with no text or symbols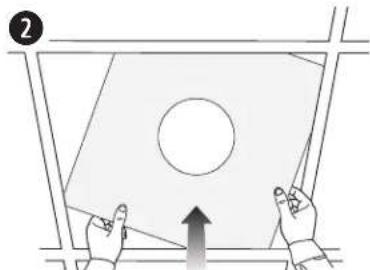
natural_image
Diagram showing two hands interacting with a tilted rectangular panel, one pointing upward and the other holding a circle (no text or symbols)Installing a Tile Bridge in Hard Ceiling (Existing Construction)
Cutting the Ceiling
- Use the template to trace a hole onto the ceiling.
- Cut a hole into the ceiling.
Installing the Tile Bridge
- Insert the tile bridge rails and ring through the hole and place the rails parallel to each other across the ceiling grid or ceiling furring.
- Assemble the tile bridge.
For instructions on loudspeaker installation, see the Mounting the Loudspeaker section in the appropriate loudspeaker installation guide.
natural_image
Simple line drawing of a hand holding a square object with a circle on top, placed on a table (no text or symbols)2
natural_image
Simple line drawing of a hand holding a pointer above a 3D coordinate axis (no text or symbols)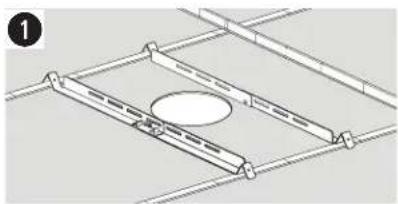
natural_image
Technical line drawing of a structural frame with supports and a central oval component (no text or symbols)