LKEC2031LS - Pump Elkay - Free user manual and instructions
Find the device manual for free LKEC2031LS Elkay in PDF.

| Product Type | Water Pump |
| Brand | Elkay |
| Model | LKEC2031LS |
| Dimensions (H x W x D) | 12.5 x 6.5 x 6.5 inches |
| Weight | 4.2 lbs |
| Power Supply | 115 V, 60 Hz, 1.5 A |
| Flow Rate | 0.5 GPM |
| Max Head | 8 feet |
| Functions | Automatic shut-off, dry run protection, quiet operation |
| Maintenance | Clean pump head and impeller regularly; ensure inlet strainer is clear |
| Safety | UL listed, incorporates thermal overload protection |
| Spare Parts | Replacement impeller, o-rings, and motor available |
| Repairability | Field-serviceable design; user manual includes exploded view and parts list |
| General Information | Designed for use with Elkay water coolers and dispensers |
Frequently Asked Questions - LKEC2031LS Elkay
User questions about LKEC2031LS Elkay
0 question about this device. Answer the ones you know or ask your own.
Ask a new question about this device
Download the instructions for your Pump in PDF format for free! Find your manual LKEC2031LS - Elkay and take your electronic device back in hand. On this page are published all the documents necessary for the use of your device. LKEC2031LS by Elkay.
USER MANUAL LKEC2031LS Elkay
You choose the flow rate!
This faucet ships with an eco-friendly 1.5GPM flow regulator installed.
If you desire higher flow rate, a 2.2GPM flow regulator has also been included in the box.
Switching the flow regulator is simple! See the "Flow Regulator Replacement" section for details.

natural_image
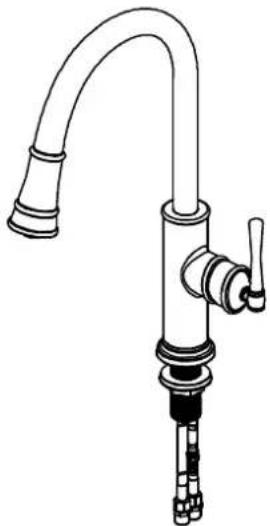
Line drawing of a standard kitchen faucet with handle and spout (no text or symbols)INCLUDES:


OPTIONAL 2.2GPM FLOW REGULATOR
natural_image
Line drawing of a kitchen faucet with handle and faucet (no text or symbols)RECOMMENDED TOOLS:
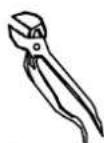
Groove joint pliers
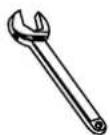
Wrench

(2) 1/2 in Supply Lines
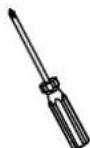
Screwdriver

Sealant Tape

Plumber's Putty
SAVE FOR CONSUMER
WARNING: Please carefully read and properly follow the instructions for installation found in this manual.
STEPS:
1
text_image
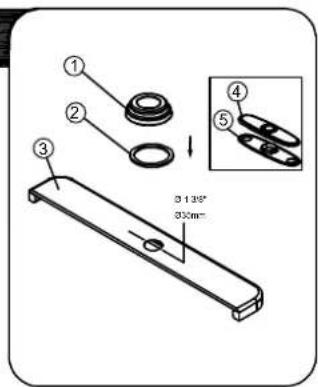
① ② ③ ④ ⑤ 3138° 330mmShut off water supplies. Clean sink surface. Place washer ② and flange ① on the sink ③. If you do not use flange, please use escutcheon ④ and gasket ⑤ to replace flange and washer.
2
text_image
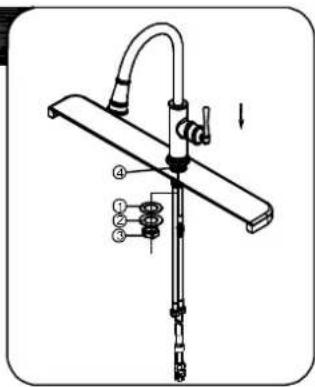
Technical diagram of a mechanical device with labeled parts and directional arrow indicating motion or assemblyPlace faucet through the hole in top of sink. From underside, assemble rubber washer ①, metal washer ② and nut ③ onto long shank ④ and tighten nut ③. Firmly tighten the nut ③ to metal washer ②. Do not overtighten.
3

text_image
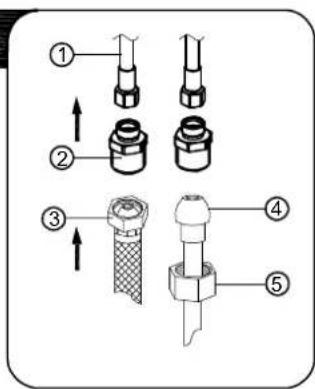
Diagram of a mechanical device with labeled parts, showing a lever and adjustment mechanism.From underneath the sink, align block ① and tabs ② on quick connects. Push quick connect housing firmly upward and snap onto receiving block. Pull down moderately to ensure connection has been made. If it is necessary to remove quick connect, squeeze tabs on hose between index finger and thumb, then pull down to disconnect. After connecting the hose, install the weight ③ at the lowest point of the hose.
4
text_image
Technical diagram showing five labeled mechanical or electrical component assemblies with arrows indicating direction or movement.Make connections to water lines with 3/8" female compression supply hoses.
5
natural_image
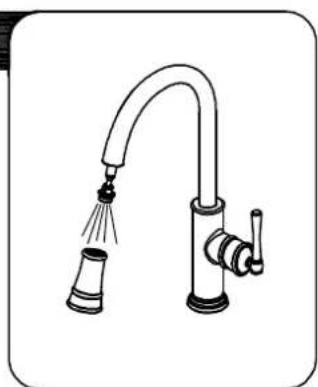
Line drawing of a kitchen faucet with showerhead and handle (no text or symbols)Important: after installation is completed, turn on hot and cold water supplies. Pull the hose assembly out of the spout and remove the spray head by unscrewing it from the hose counterclockwise. Be sure to hold the end of the hose down into the sink and turn the faucet on to the warm position where it mixes hot and cold water. Flush water lines for one minute. Check for leaks. Re-tighten any connections if necessary, but do not overtighten. Reinstall spray head by hand tightening it back onto the spray hose.
CARTRIDGE REPLACEMENT
1
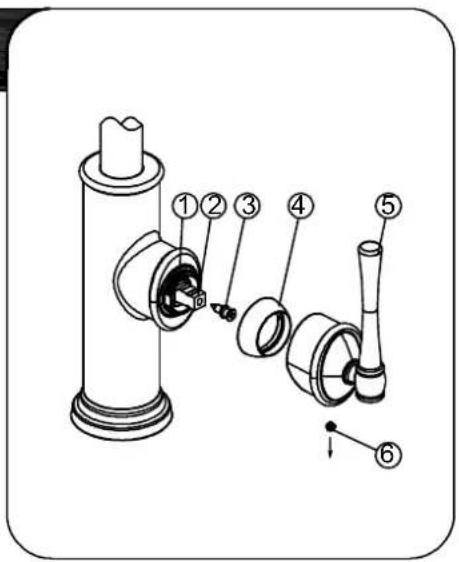
text_image
Technical diagram of a mechanical assembly with numbered parts, likely illustrating a valve or pump mechanism.Shut off water supply! With valves in "closed" position, unscrew fastener ⑥ and remove handle (5) from valve stem ②. Loosen the screw ③ from valve stem ②. Loosen the cap ④ from the sleeve ①.
2
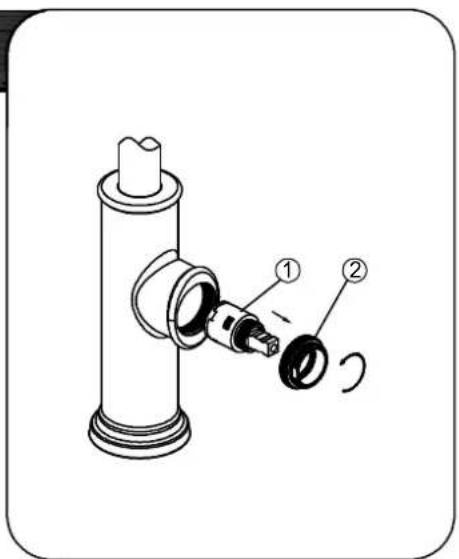
text_image
Technical diagram of a mechanical device with labeled parts, showing internal components and motion indicators.Loosen sleeve ① by turning it counter-clockwise and lift out the cartridge ②. Position the cartridge back to the faucet body and retighten the cartridge nut. Reinstall the handle.
FLOW REGULATOR REPLACEMENT


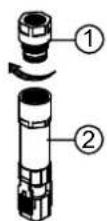
The faucet ships with a 1.5GPM aerator installed. An optional 2.2 GPM aerator is also included in the box. To switch the flow rate of the faucet:
- Disassemble the quick connect assembly by separating the connector ① and quick connect ②.
- Replace 1.5 GPM connector(green) with the 2.2GPM connector.
- Reinstall quick connect assembly.
CARE AND CLEANING INSTRUCTIONS
Congratulations on your purchase of an Elkay product.
Although your product is extremely durable, attention should be given to the care, cleaning and maintenance of this product. Cleaning agents and abrasives may cause damage, which may result in oxidation and discoloration.
By following these simple guidelines for proper care and cleaning, it will give you years of enjoyment:
TO CLEAN: Simply wipe gently with a damp cloth and blot dry with a soft towel. A common rule of thumb is: when you dry off, dry off your product.
- Avoid build-up of soap, toothpaste or mineral deposits, as these tend to have an adverse effect on the appearance of the product.
- NEVER use cleaning products of any kind on this product - especially those containing ammonia, bleach or alcohol - or those with any form of abrasive.
FOR CARE AND MAINTENANCE:
- The water in certain areas of the world can be very caustic - standing water around the product can cause damage. Be sure to remove standing water with a dry, soft cloth as soon as possible.
- For polished brass finishes, as often as once a week, you can apply a paste wax or special, non-abrasive, brass coating (DO NOT APPLY POLISH).
- Before applying a protective coating, gently brush the entire fixture using a soft tooth brush. This will remove any dirt or deposit build-up.
• These simple steps will add temporary protective coating to your faucet and extend the life of the finish.
Failure to follow care and cleaning will void your warranty. For additional information, please visit elkayusa.com.
WARRANTY
ELKAY LIMITED LIFETIME WARRANTY
ELKAY LIMITED LIFETIME WARRANTY
Elkay warrants that all parts and finishes of the Elkay Residential brand faucets are free from defects in materials and workmanship for the life of the product, if purchased after 1996. This warranty covers the original consumer purchaser of the product only.
If the product should leak or drip during normal use, Elkay will provide, free of charge, a replacement cartridge. For other defects in material or workmanship, Elkay will, at its option, supply replacement parts (or if no longer available a comparable product). Elkay reserves the right to examine product in question and its installation prior to replacement.
What is not covered:
- Damage caused by accident, negligence, misuse, abuse, improper installation or operation or failure to follow care or installation instructions enclosed with your product.
- Damage occurring during shipment of the product (claims must be presented to the carrier).
- Normal wear and tear.
- Labor charges, costs of removal and reinstallation, and any damages to other property.
- All industrial, commercial and business use whose purchasers are hereby extended a limited lifetime on mechanical parts and 5 years on finish.
What you must do to obtain warranty service:
Either write to Elkay, attention Customer Care, 2222 Camden Court, Oak Brook, IL 60523 or call 1-800-223-5529. Please provide date of purchase and installation, description of nature of the defect, and model number or description of model and/or component part.
THIS LIMITED WARRANTY IS EXPRESSLY IN LIEU OF ANY OTHER WARRANTIES, EXPRESSED IMPLIED, ARISING BY LAW OR OTHERWISE, INCLUDING WITHOUT LIMITATION, ANY IMPLIED WARRANTY OF MERCHANTABILITY OR FITNESS FOR A PARTICULAR PURPOSE. THIS LIMITED WARRANTY MAY NOT BE ALTERED, VARIED, OR EXTENDED, EXCEPT BY A WRITTEN INSTRUMENT EXECUTED BY ELKAY. THE REMEDY OF REPAIR OR REPLACEMENT AS PROVIDED UNDER THIS LIMITED WARRANTY IS EXCLUSIVE. IN NO EVENT SHALL THE MANUFACTURER BE LIABLE FOR ANY CONSEQUENTIAL OR INCIDENTAL DAMAGES TO ANY PERSON, WHETHER OR NOT OCCASIONED BY NEGLIGENCE OF ELKAY, INCLUDING WITHOUT LIMITATION DAMAGES FOR LOSS OF USE, COSTS PROPERTY DAMAGE OR OTHER MONETARY LOSS.
Some states do not allow the exclusion or limitation of incidental or consequential damages or limitations on how long an implied warranty lasts, so the above limitations or exclusions may not apply. This warranty gives you specific legal rights and you may also have other rights which vary from state to state.
This warranty covers product installed in the United States and Canada.
REPLACEMENT PARTS
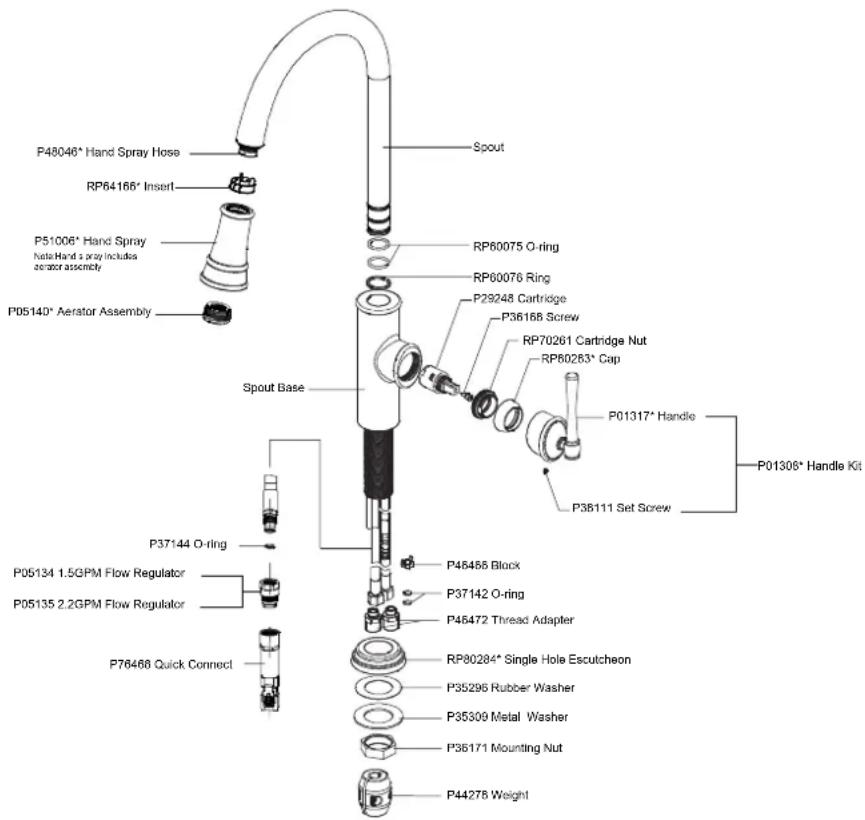
text_image
P48046* Hand Spray Hose RP64166* Insert P51006* Hand Spray Note Hand Spray Includes scator assembly P05140* Aerator Assembly Spout RP60075 O-ring RP60076 Ring P29248 Cartridge P36168 Screw RP70261 Cartridge Nut RP60263* Cap Spout Base P01317* Handle P38111 Set Screw P01306* Handle Kit P37144 O-ring P45455 Block P37142 O-ring P45472 Thread Adapter RP80284* Single Hole Escutcheon P35296 Rubber Washer P35309 Metal Washer P36171 Mounting Nut P44278 Weight P05134 1.5GPM Flow Regulator P05135 2.2GPM Flow Regulator P76466 Quick ConnectNOTE:*- REQUIRES FINISH DESIGNATION