KUDH24SE - Dishwasher KITCHENAID - Free user manual and instructions
Find the device manual for free KUDH24SE KITCHENAID in PDF.

User questions about KUDH24SE KITCHENAID
0 question about this device. Answer the ones you know or ask your own.
Ask a new question about this device
Download the instructions for your Dishwasher in PDF format for free! Find your manual KUDH24SE - KITCHENAID and take your electronic device back in hand. On this page are published all the documents necessary for the use of your device. KUDH24SE by KITCHENAID.
USER MANUAL KUDH24SE KITCHENAID
Dishwasher's Features ... 4
Start Up Guide .... 5
Loading Your
Dishwasher 7
Washing Special
Items 10
Using the Dispensers ... 11
Operating Your
Dishwasher 14
Caring for Your
Dishwasher 18
Solving Common
Dishwashing
Problems 21
Troubleshooting ..... 24
Requesting Assistance
or Service 26
Index 28
Warranty 29
In the U.S.A. for assistance or service, call the Consumer Assistance Center:
1·800·422·1230
In Canada for assistance or service, see page 2.
A NOTE TO YOU
Thank you for buying a KITCHENAID\* appliance!
KITCHENAID designs the best tools for the most important room in your house. To ensure that you enjoy many years of trouble-free operation, we developed this Use and Care Guide. It contains valuable information concerning how to operate and maintain your new appliance properly and safely. Please read it carefully.
Also, please complete and mail the enclosed Product Registration Card.
In the U.S.A.
For assistance or service
Call the Consumer Assistance Center toll free 1-800-422-1230
Throughout Canada for assistance
Call the Consumer Assistance Centre toll free 1-800-461-5681
8:30 a.m. - 6 p.m. (EST)
Throughout Canada for service
Call toll free 1-800-807-6777
8 a.m. - 6 p.m. (EST)
If you need assistance or service, first see the "Troubleshooting" section of this book. After checking "Troubleshooting," additional help can be found by checking the "Requesting Assistance or Service" section, or by calling one of the telephone numbers above.
When calling, you will need to know your appliance's complete model number and serial number. You can find this information on the model and serial number label (see diagram on page 4).
Keep this book and the sales slip together in a safe place for future reference. You must provide proof of purchase or installation date for in-warranty service.
Model Number
Builder/Dealer Name
Serial Number
Address
Date Installed
Phone
UNDERSTANDING DISHWASHER SAFETY
Your safety is important to us.
This guide contains safety symbols and statements. Please pay special attention to these symbols and follow any instructions given. Here is a brief explanation of the use of the symbol.

This symbol alerts you to hazards such as fire, electrical shock, or other injuries.
IMPORTANT SAFETY INSTRUCTIONS
WARNING – When using the dishwasher, follow basic precautions, including the following:
- Read all instructions before using the dishwasher.
- Use the dishwasher only for its intended function.
- Use only detergents or rinse agents recommended for use in the dishwasher, and keep them out of the reach of children.
- When loading items to be washed:
1) Locate sharp items so that they are not likely to damage the door seal.
2) Load sharp knives with the handles up to reduce the risk of cut-type injuries.
- Do not wash plastic items unless they are marked "dishwasher safe" or the equivalent. For plastic items not so marked, check the manufacturer's recommendations.
- Do not touch the heating element during or immediately after use.
- Do not operate the dishwasher unless all enclosure panels are properly in place.
- Do not tamper with controls.
- Do not abuse, sit on, or stand on the door or dish racks of the dishwasher.
• To reduce the risk of injury, do not allow children to play in or on the dishwasher.
• Under certain conditions, hydrogen gas may be produced in a hot water system that has not been used for two weeks or more. HYDROGEN GAS IS EXPLOSIVE. If the hot water system has not been used for such a period, before using the dishwasher turn on all hot water faucets and let the water flow from each for several minutes. This will release any accumulated hydrogen gas. As the gas is flammable, do not smoke or use an open flame during this time.
- Remove the door to the washing compartment when removing an old dishwasher from service or discarding it.
- For a grounded, cord connected dishwasher:
GROUNDING INSTRUCTIONS
The dishwasher must be grounded. In the event of a malfunction or breakdown, grounding will reduce the risk of electrical shock by providing a path of least resistance for electric current. The dishwasher is equipped with a cord having an equipment-grounding conductor and a grounding plug. The plug must be plugged into an appropriate outlet that is installed and grounded in accordance with all local codes and ordinances.
WARNING – Improper connection of the equipment-grounding conductor can result in a risk of electrical shock. Check with a qualified electrician or service representative if you are in doubt whether the dishwasher is properly grounded. Do not modify the plug provided with the dishwasher; if it will not fit the outlet, have a proper outlet installed by a qualified electrician.
- For a permanently connected dishwasher:
GROUNDING INSTRUCTIONS
The dishwasher must be connected to a grounded metal, permanent wiring system, or an equipment-grounding conductor must be run with the circuit conductors and connected to the equipment-grounding terminal or lead on the dishwasher.
- SAVE THESE INSTRUCTIONS -
KNOWING YOUR DISHWASHER'S FEATURES
Below is an illustration of your appliance with the parts and features called out. To help you find information on specific parts or features quickly, page references are included.
Parts and Features
text_image
Water inlet opening Model and serial number label Lower rack (p. 8) Heating element Detergent dispenser (p. 11) Vent Upper spray arm Upper rack (p. 7) Silverware basket (p. 9) 4-way HYDROSWEEP* spray arm (p. 18) Overflow protection float (p. 18) Rinse agent dispenser (p. 13)Before using your dishwasher
WARNING

Fire Hazard
Do not use an extension cord. Doing so can result in death, fire, or electrical shock.
WARNING

Electrical Shock Hazard
Electrically ground dishwasher.
Connect ground wire to green ground nut in terminal box.
Failure to do so can result in death or electrical shock.
WARNING

Tip Over Hazard
Do not use dishwasher until completely installed.
Do not push down on open door.
Doing so can result in serious injury or cuts.
• Install where dishwasher is protected from the elements. Protect against freezing to avoid possible rupture of fill valve. Such ruptures are not covered by the warranty. See winter storage information on page 19.
• Install and level dishwasher on a floor that will hold the weight, and in an area suitable for its size and use.
- Remove all shipping plugs from hoses and connectors (such as the cap on the drain outlet) before installing. See Installation Instructions for complete information.
START UP GUIDE
Using your new KITCHENAID* dishwasher is simple. Follow the steps below to get started. For more information on specific steps and additional safety information, see the page(s) next to the step you would like to know more about.
NOTE: Before using your dishwasher, remove all hang tags, temporary labels, and packaging materials. Please also read the entire Use and Care Guide as it contains important operating and safety information.
How to use your dishwasher
Fast and easy start up
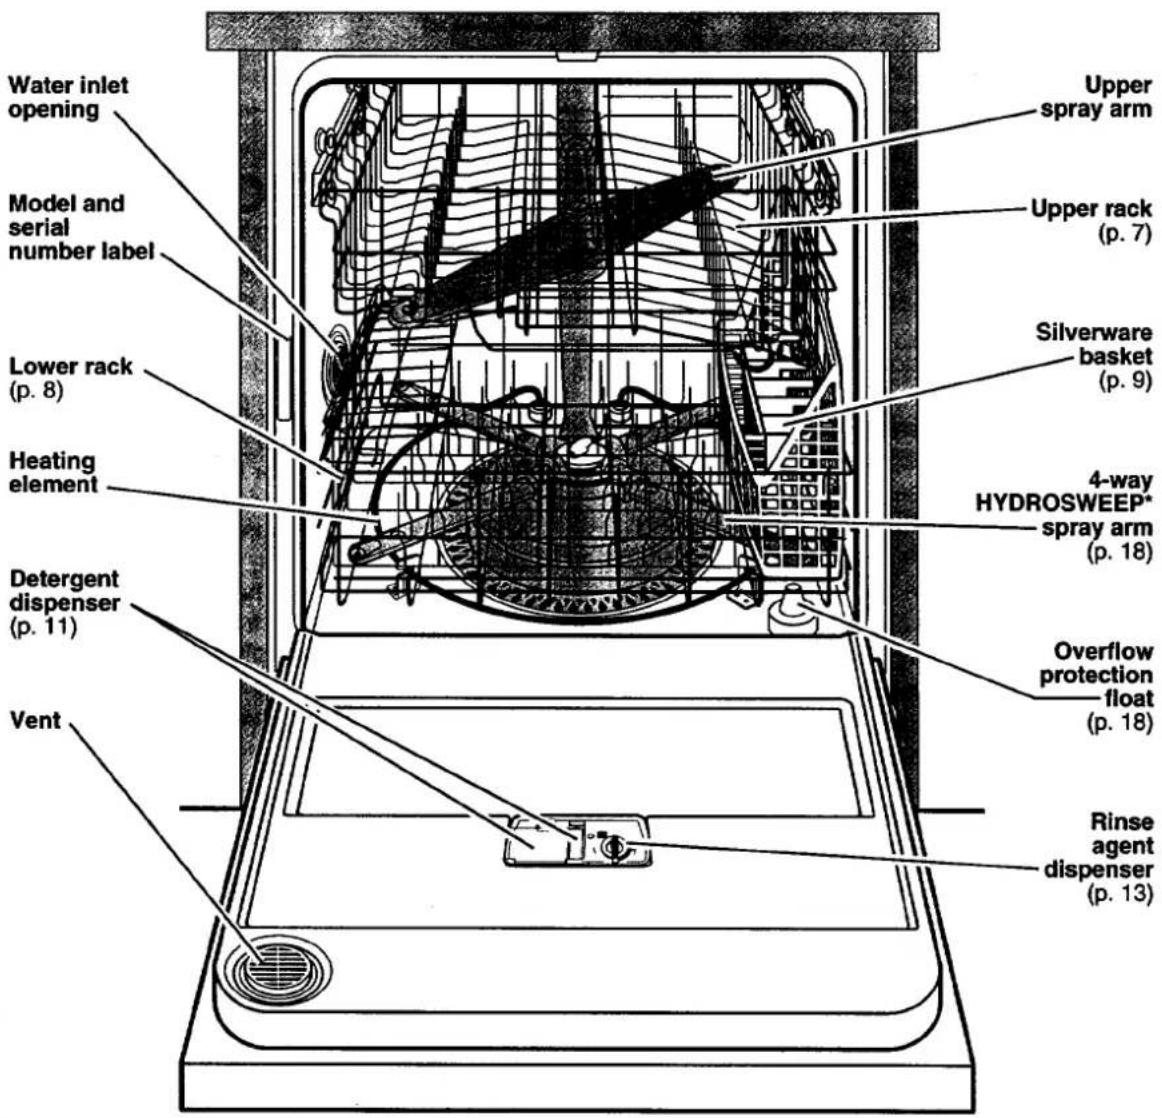
- Load the dishwasher. See pages 7-9.
natural_image
Line drawing of hands using a tool to cut or mark a grid pattern (no text or symbols)- Spin the upper spray arm. It should turn
natural_image
Diagram of a boat navigating between two water channels with an arrow indicating direction (no text or labels)freely. Check the lower spray arm also to make sure it turns freely.
- Add detergent. See pages 11-12.
natural_image
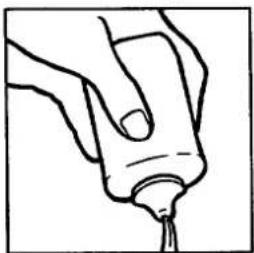
Simple line drawing of a funnel pouring liquid into a container (no text or symbols)- Add rinse agent if needed. See page 13.
natural_image
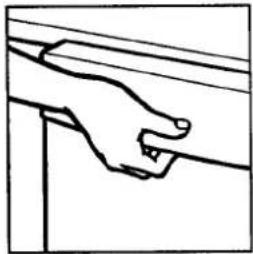
Line drawing of a hand holding a small object with a pointed tip (no text or symbols)- Push door firmly when closing.
natural_image
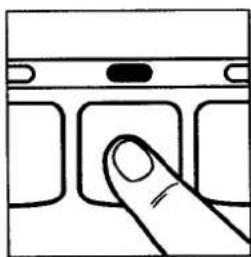
Line drawing of a hand gripping a wall, no text or symbols present- Press the desired Wash Selection pad.
natural_image
Simple line drawing of a finger pressing a button on a device panel (no text or symbols)See the "Cycle selection chart" on page 14. Then press the desired Option(s) pad(s). See page 15 for "Option selections."
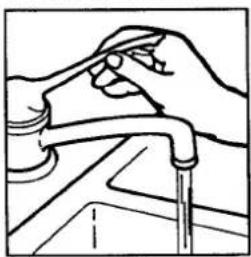
- Run hot water at sink nearest dishwasher
natural_image
Line drawing of hands using a tool to handle a pipe or valve (no text or symbols present)until water is hot. Turn off water. See page 17.
- Press the Start pad. The cycle will begin.
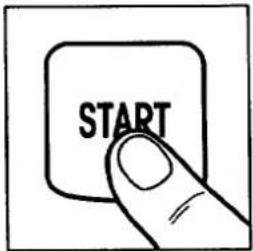
text_image
STARTNOTE: The dishwasher remembers the last cycle and option(s) you selected. You only have to press the Start pad if you want to use the same cycle and option(s).
LOADING YOUR DISHWASHER
This section tells you how to properly load your dishwasher for the best washing and rinsing results.
Preparing to load the dishwasher
- Scrape leftover food, bones, toothpicks, and other hard items from dishes. It is not necessary to rinse dishes before putting them into the dishwasher.
-
Load dishes so soiled surfaces face the spray (down or inward). It is important for the water spray to reach all soiled surfaces.
• Take care when loading heavy pots or pans into the dishwasher. They can dent the stainless steel interior of the door if they are dropped or bumped. -
Make sure pot lids and handles, pizza pans, cookie sheets, etc., do not touch interior walls or interfere with the spray arm rotation.
- Run a Rinse Only cycle to keep dishes moist if you do not plan to wash them soon. Foods like eggs, rice, pasta, spinach, and cooked cereals may be hard to remove if they are left to dry.
Loading the upper rack
The upper rack is designed for cups, glasses, and other small items.
- Load cups and glasses in the upper rack only, in the rows between the prongs. Placing them over the prongs can cause them to chip or break.
- China, crystal, and other delicate items must not touch each other during dishwasher operation. Damage may occur.
- Place items so open ends face down for best cleaning and draining.
-
Load plastic items securely in the upper rack only. Wash only plastic items marked "dishwasher safe."
-
Secure lightweight items so they don't overturn during washing. Wedge lightweight items against one another or overlap them with heavier dishes.
- Load bowls in the center section for best stability.
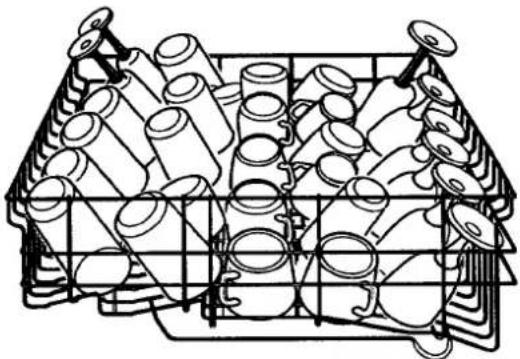
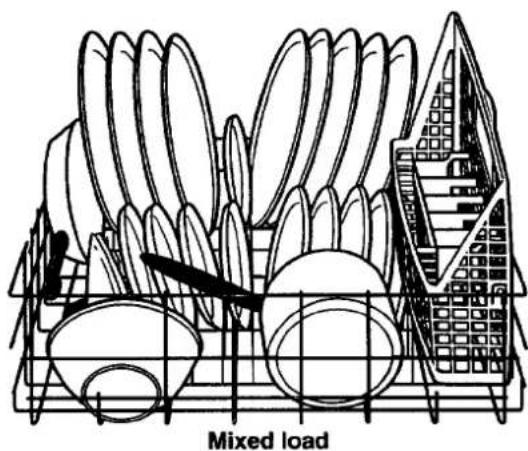
natural_image
Line drawing of a container filled with various cylindrical objects, no text or symbols presentCup and glass load
natural_image
Technical line drawing of a mechanical assembly with cylinders, gears, and shafts (no text or labels)Mixed load
LOADING YOUR DISHWASHER
Loading the lower rack
Lower rack loading tips
The lower rack is designed for plates, pans, casseroles, and utensils.
- Load items with cooked-on or dried-on food in the lower rack with soiled surfaces facing in toward the spray.
- For maximum capacity and stability of an all-plate load, stagger or overlap small plates with large ones.
- Load plates side to side along with pots, pans, and large cookware, as shown.
- Do not put small items in the lower rack if they are not secured in place.
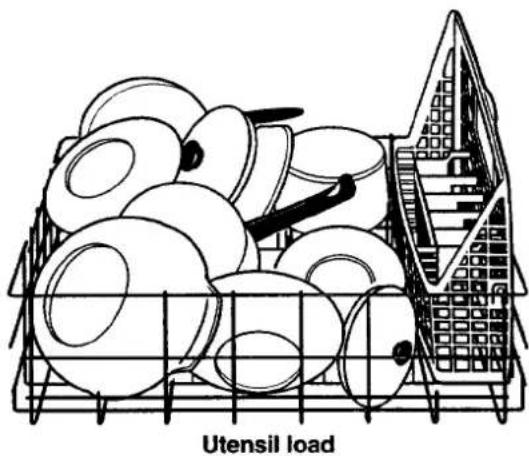
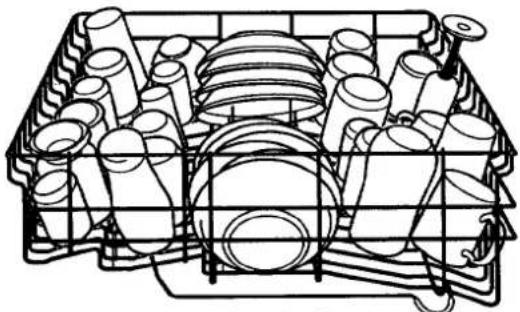
text_image
Utensil load- Load soup, cereal, and serving bowls in the rack in a variety of ways depending upon their size and shape. Load bowls securely between the rows of prongs. Do not nest bowls because the spray won't reach their surfaces.
- Do not load items between the bottom rack and the side of the dishwasher tub. This can block the water inlet opening.
natural_image
Diagram of a mixed load system with circular components and a building structure (no text or symbols)LOADING YOUR DISHWASHER
Loading the silverware basket
- Load the silverware basket while it is in the lower rack or take the basket out for loading on a counter or table.
- Mix items in each section of the basket – some pointing up and some down.
IMPORTANT: Always load sharp items (knives, skewers, forks, etc.) pointing down.
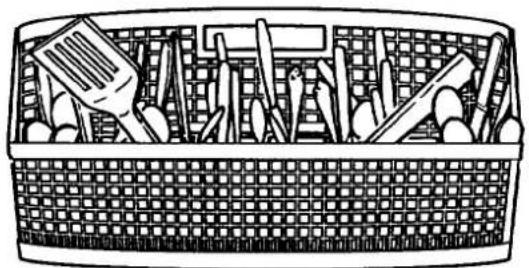
natural_image
Illustration of a woven basket filled with various household items including a spoon, fork, and drawer (no text or symbols)- Load forks and spoons so they don't nest together. Water spray cannot reach nested items.
- The silverware basket can also be removed for easy unloading. Unload or remove the basket before unloading the upper rack to avoid spilling water droplets on the silverware.
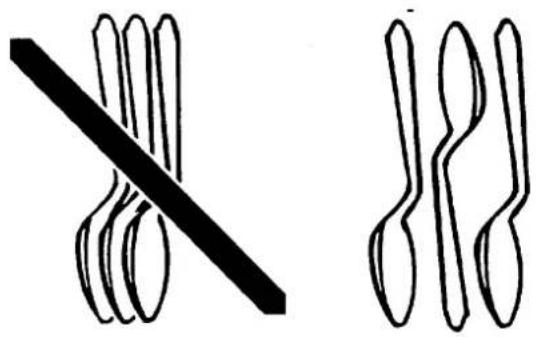
natural_image
Two abstract line drawings of crossed, curved shapes resembling stylized letters or symbols (no text or symbols present)NOTES:
- Don't load silver or silver-plated silverware with stainless steel. These metals can be damaged by contact with one another during washing.
- Some foods (such as salt, vinegar, milk products, fruit juices, etc.) can pit or corrode silverware if left on for long periods of time. Use the Rinse Only cycle when silverware is not washed immediately after use.
If you have any doubts about washing a particular item, check with the manufacturer to see if it is dishwasher safe.
| MATERIAL | DISHWASHER SAFE? | EXCEPTIONS/SPECIAL INFORMATION |
| Aluminum | Yes | High water temperature and detergents may affect finish of anodized aluminum. All aluminum will darken when washed in the dishwasher. This does not affect pan performance. |
| Disposable Aluminum | No | Do not wash throw-away aluminum pans in the dishwasher. These might shift during washing and transfer black marks to dishes and other items. |
| Bottles and Cans | No | Wash bottles and cans by hand. Labels attached with glue can loosen in your dishwasher, clog spray arms or the pump, and will reduce washing performance. |
| Cast Iron | No | Seasoning will be removed and iron will rust. |
| China/ Stoneware | Yes | Always check manufacturer's recommendations before washing. Antique, hand-painted, or over-the-glaze patterns may fade. Gold leaf can discolor or fade. |
| Crystal | Yes | Always check manufacturer's recommendations before washing. Some types of leaded crystal can etch with repeated washings. |
| Gold | No | Gold-colored flatware will discolor. |
| Glass | Yes | Milk glass will yellow with repeated washings. |
| Hollow- Handle Knives | No | Handles of some knives are attached to the blade with adhesives which may loosen if washed in the dishwasher. |
| Pewter, Brass, and Bronze | No | High water temperatures and detergent can discolor or pit finish. |
| Plastics | Yes | Always check manufacturer's recommendations before washing. Plastics vary in their capacity to withstand high water temperatures and detergents. Load plastics in top rack only. |
| Disposable Plastics | No | Cannot withstand high water temperatures and detergents. |
| Stainless Steel | Yes | Run a Rinse Only cycle if not washing immediately. Prolonged contact with food containing salt, vinegar, milk products, or fruit juice could damage finish. |
| Sterling Silver or Silver Plate | Yes | Run a Rinse Only cycle if not washing immediately. Prolonged contact with food containing salt, acid, or sulfide (eggs, mayonnaise, and seafood) can damage finish. |
| Tin | No | Can rust. |
| Wooden Ware | No | Wash by hand. Always check manufacturer's recommendations before washing. Untreated wood can warp, crack, or lose its finish. |
USING THE DISPENSERS
For best washing results, it is important to use the correct amount of detergent and a rinse agent. Read this section for information on using both properly.
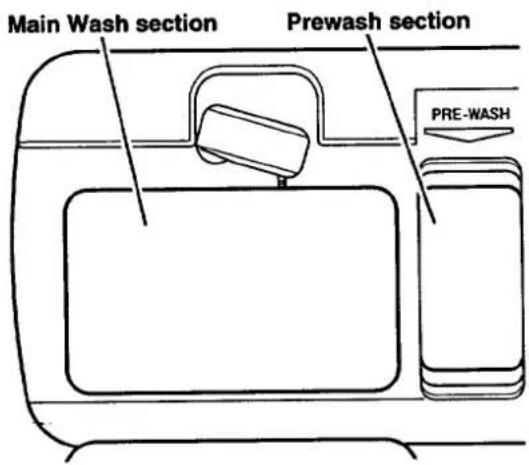
The detergent dispenser
The detergent dispenser has 2 sections. The smaller Prewash section empties detergent into the dishwasher when you close the door. The larger Main Wash section empties detergent into the dishwasher during the wash cycle.
- If the dispenser cover is closed, open the cover by rotating the blue button down.
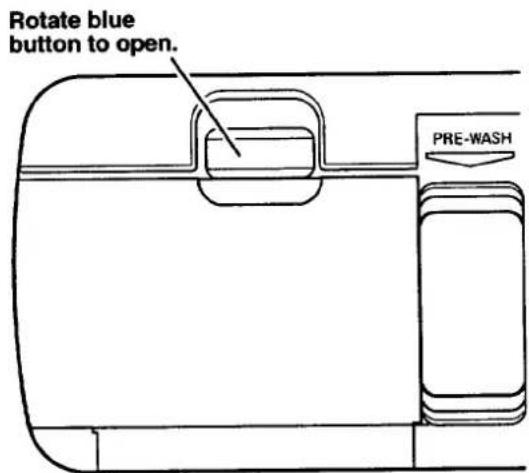
text_image
Rotate blue button to open. PRE-WASH- Fill the Main Wash section with detergent. The amount of detergent needed depends on the amount of food soil on the dishes and water hardness. See the detergent usage chart on page 12.
- Close the dispenser cover and fill the Prewash section.
NOTE: Do not use detergent with the Rinse Only cycle.
text_image
Main Wash section Prewash section PRE-WASH
USING THE DISPENSERS
Using the detergent dispenser
What type of detergent to use
- Use automatic dishwasher detergent only. NOTE: Never use soap, hand-dishwashing detergent, or laundry detergent. These products will produce excessive suds which could cause flooding and reduce washing performance.
-
Follow manufacturer's instructions when using powdered, liquid, or gel dishwasher detergents. Concentrated (Ultra) powdered detergents usually call for lower usage than do standard powdered detergents.
-
Add detergent to the dispenser just before starting the dishwasher.
- Keep detergent container tightly closed in a cool, dry place, out of the reach of children. After opening, a box of detergent should stay fresh for about 1 month. Detergent exposed to moisture over a period of time might become caked and ineffective.
How much detergent to use
| WATER HARDNESS | AMOUNT OF DETERGENT |
| Soft to Medium Hard Water0-6 grains per gallon | For normal loads:Partially fill the Main Wash section (2 tablespoons or 30 grams)Fill the Prewash section (2 tablespoons or 30 grams)NOTE: Add only 1 tablespoon or 15 grams of detergent to the Prewash section if dishes are prerinsed or water is very soft.For heavily soiled loads:Fill the Main Wash section (3 tablespoons or 45 grams)Fill the Prewash section (2 tablespoons or 30 grams) |
| Medium to Hard Water7-12 grains per gallon | Fill the Main Wash section (3 tablespoons or 45 grams)Fill the Prewash section (2 tablespoons or 30 grams) |
| Different brands of dishwasher detergent have different amounts of phosphorus for softening water. If you have hard water and use a detergent with a phosphorous content of less than 8.7%, you may need to use more detergent, or use a detergent with a phosphorous content higher than 8.7%. | Excessive amounts of detergent combined with soft water may cause etching of glassware.NOTE: Water hardness may change over a period of time. Contact your local water utility or area water softening company to determine your water hardness, or order water hardness test strip part number 4171690 through the Consumer Assistance Center. |
USING THE DISPENSERS
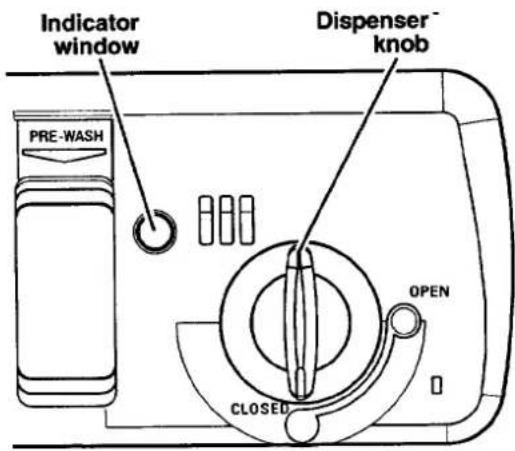
Using the rinse agent dispenser
A rinse agent prevents water from forming droplets that can dry as spots or streaks. It also improves drying by allowing water to drain off of the dishes during the final rinse by releasing a small amount of the rinse agent into the rinse water. Your dishwasher is designed to use a liquid rinse agent. Do not use a solid or bar-type rinse agent.
Filling the dispenser
The rinse agent dispenser holds 5.2 fluid ounces of rinse agent. Under normal conditions, this will last for about 3 months. You do not have to wait until the dispenser is empty to refill it. Try to keep it full, but be careful not to overfill it.
- Make sure the dishwasher door is fully open.
- Turn the dispenser knob to Open and lift it out.
- Add rinse agent until the indicator window looks full. If you overfill, the excess rinse agent may overflow the dispenser and cause oversuding during the wash cycle.
- Clean up any spilled rinse agent with a damp cloth.
- Replace the dispenser knob and turn it to Closed.
Rinse agent setting
The amount of rinse agent released into the final wash can be adjusted. The factory setting is at 2. For most water conditions set the adjuster to 1 or 2. If there are rings or calcium (hard water) spots on dishes, try a higher setting (4, 5, or 6).
To adjust setting
Remove the dispenser knob, then turn the adjuster inside the dispenser to the desired setting.
text_image
Indicator window Pre-WASH Dispenser knob OPEN CLOSED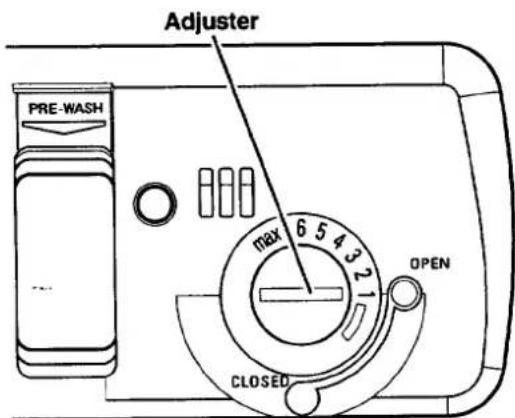
text_image
Adjuster PRE-WASH max 6 5 4 3 2 OPEN CLOSEDOPERATING YOUR DISHWASHER
This section tells you how to operate the dishwasher. Operating your dishwasher properly enables you to obtain the best possible results.
Cycle selection chart
The dishwasher will wash and dry dishes according to the selections you make on the control panel. The dishwasher remembers the last cycle and option(s) you selected. You only have to press the Start pad if you want to use the same cycle and options.
Heavily soiled dishes
When washing later
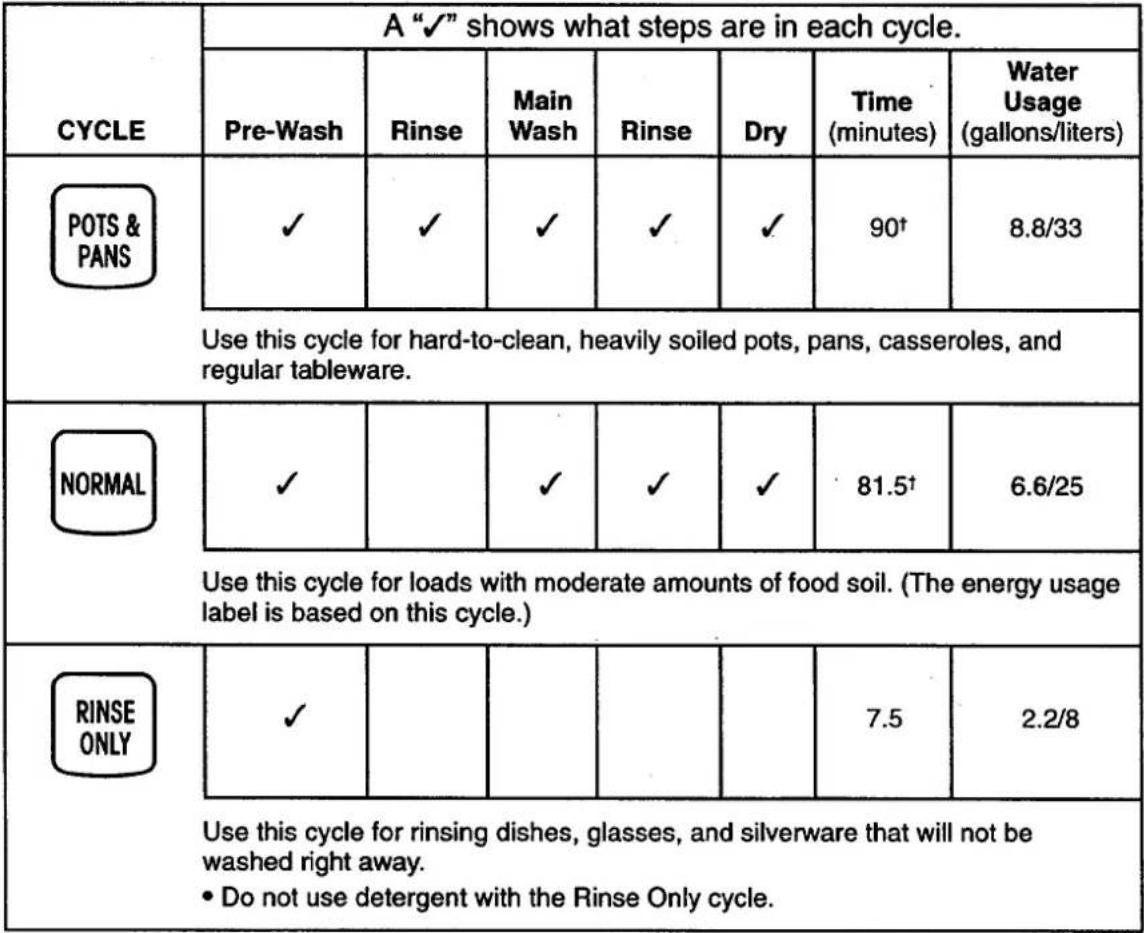 |
^† Expect longer cycle times if water entering the dishwasher is not hot enough.
OPERATING YOUR DISHWASHER
Canceling a cycle
You can cancel a cycle anytime during the cycle.
-
Press the Cancel pad once, then wait. CANCEL The Cancel light will glow. There is a 5-second pause between the time Cancel is pressed and draining begins.
-
Let the dishwasher drain completely.
Option selections
Press a pad to select an option. If you change your mind, press the pad again to turn the option off. To select a different option, press another pad.
High Temp. Wash
Select this option, and water will heat during the main wash for better cleaning of heavily soiled dishes. Water heating is automatic in the wash portions and final rinse of the Pots
& Pans cycle, and in the final rinse of the Normal and Light China cycles.
Energy Saver Dry
Use this option to air dry dishes without heat.
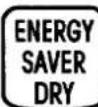
For best results, keep the rinse agent dispenser filled. Under certain conditions (hard water, empty rinse agent dispenser, plastic items in the
load, etc.) you might find some water left on plastics, dishes, and silverware.
Control panel lights
Clean Light
The Clean light glows when a cycle has

finished. All other lights will turn off. The Clean light will turn off when you open the door.
Water Heating Light
The Water Heating light glows while water in
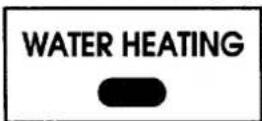
the dishwasher is heating. Wash or rinse action continues while the water heats.
OPERATING YOUR DISHWASHER
Select the wrong cycle?
Changing a setting
During the first 2 minutes of a cycle
Press new Wash Selection and Option pads.
After the first 2 minutes of a cycle
- Press the Cancel pad to drain any water and to reset the control.
CANCEL
-
Open the door and check the detergent dispenser to be sure it is properly filled for the new cycle.
-
Close the door.
-
Press new Wash Selection and Option pads, then press the Start pad.
Adding dishes during a cycle
You can add an item to the dishwasher during the first 10 minutes of the cycle.
-
Unlatch the door to stop the cycle. Wait a moment for the spray action to stop before opening the door.
-
Open the door and add the dishes.
-
Close the door.
-
The dishwasher will start automatically after a 5-second pause when you close the door.
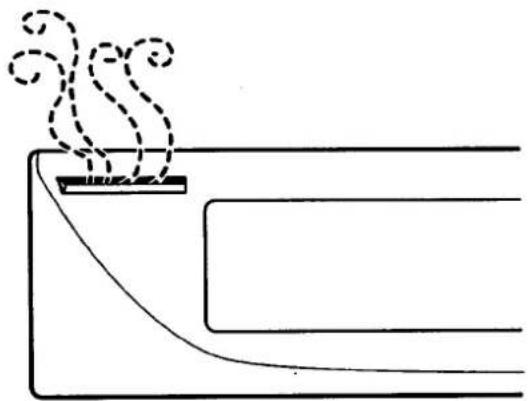
Drying system
During drying, vapor escapes through the vent at the upper left corner of the door. This is normal. The vapor is the result of moisture in the dishwasher being removed during drying.
IMPORTANT: The vapor is hot. Do not touch the vent during drying.
natural_image
Simple line drawing of a container with liquid and smoke rising, no text or symbols presentOPERATING YOUR DISHWASHER
Quiet operating tips
To avoid thumping and clattering noises during operation:
- Make sure lightweight load items are secured in the rack.
- Make sure pot lids and handles, pizza pans, cookie sheets, etc., do not touch the dishwasher sides or interfere with the spray arm rotation.
- Where possible, load items so they do not touch one another.
NOTE: Keep sink drain plugs inserted during dishwasher operation to prevent noise transfer through drains.
Normal operating sounds
Some normal sounds you might hear while the dishwasher is running:
- The fill valve opening or closing and the sound of water entering the dishwasher.
- Items being ground up in the food disposer.
- Wash/rinse action of water spray. To minimize noise of water circulating on dishes, see "Loading your dishwasher," on pages 7-9.
• Water being pumped out during drain portion of a cycle.
• Detergent cup opening.
- Pump motor starting.
Energy saving tips
- Set your home water heater to provide a minimum of 120°F (49°C) incoming water to the dishwasher.
To check water temperature:
- Run hot water at the faucet closest to your dishwasher. Set a cup under the faucet, and place a candy or meat thermometer in it.
- Run hot water for at least 1 minute into the
cup, allowing the water to overflow. Check the temperature. If the water temperature is below 120°F (49°C), have a qualified person raise the
thermostat setting on your water heater.
- Run the dishwasher only with a full load.
- Use only the cycle and options that you need.
- Run the dishwasher during off-peak hours if your utility company offers reduced rates on electricity during specific times of day.
- Run the dishwasher at night during the summer to reduce daytime heat buildup in your home.
- Do not rinse dishes before loading.
- Use the Energy Saver Dry option.
CARING FOR YOUR DISHWASHER
Your new dishwasher is designed to give you many years of dependable service. However, there are a few things you are expected to do in order to maintain your dishwasher properly. This section tells you how to clean and care for your dishwasher.
HYDROSWEEP\* wash system
Water filtered for cleaner dishes
The HYDROSWEEP Wash System in your dishwasher provides excellent cleaning results. The wash water is continuously filtered by a triple filtration and soil collector system to prevent food particles from redepositing on clean dishes.
The filter
The filter continuously filters the wash water and traps the food particles that have been removed from the dishes. A small amount of water will always remain under the filter to keep the pump seal moist.
The water jets
The food particles are removed from the Ultra-Fine filter by 2 water jets that are located underneath the 4-way HYDROSWEEP arm.
The coarse strainer
A coarse strainer will prevent bones, pits, and other large objects from entering the pump system. You should periodically check the strainer for such items that may have mistakenly entered the dishwasher.
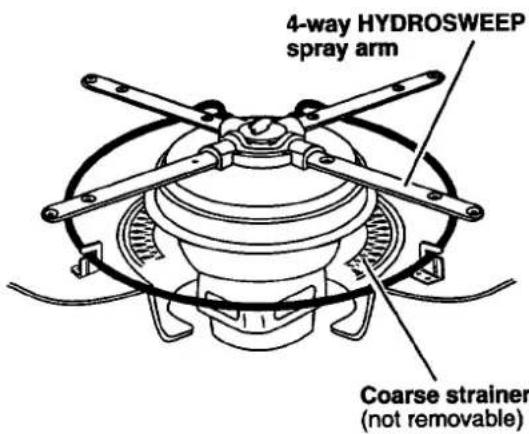
text_image
4-way HYDROSWEEP spray arm Coarse strainer (not removable)Overflow protection float
The overflow protection float in the front right corner of the dishwasher tank prevents the dishwasher from overflowing. The float must be in place for the dishwasher to operate. Check under the float for objects that may prevent the float from moving up or down.

natural_image
Simple line drawing of a crossed object with a diagonal black line crossing through it (no text or symbols)Check under overflow protection float
CARING FOR YOUR DISHWASHER
Cleaning your dishwasher
Cleaning the interior
If mineral deposits from hard water accumulate on the interior of your dishwasher, clean with a damp cloth or follow the instructions indicated in "Removing spots and film" on page 23.
- Do not clean the dishwasher interior until it has cooled.
- Do not use any type of cleanser that may cause foaming or sudsing. Use cleansers made for stainless steel products.
- Run the dishwasher through a Normal cycle with detergent after you are finished cleaning the interior.
Cleaning the exterior
Wipe the control panel, front, and sides with a damp cloth, then dry. Never use detergents or abrasive cleansers which may damage the finish.
Storing your dishwasher
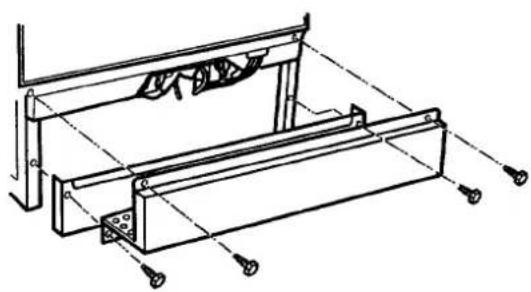
Storing for the winter
Protect your dishwasher and water lines against freezing if they are exposed to freezing temperatures in a seasonal dwelling. Refer to the Installation Instructions and have a qualified person do the following:
- Close the door.
- Turn off electrical power supply to the dishwasher.
- Remove the 4 screws attaching access panel and lower panel to dishwasher using a 14 " hex socket, nut driver, or Phillips screwdriver. Remove panels and set panels aside on a protective surface.
-
Shut off the water supply. Place a pan under the fill valve and disconnect at both inlet and outlet sides. Drain water into pan.
-
Place a pan under the check valve outlet and disconnect the flexible tubing at the check valve. Drain the machine water into pan. Leave the fill and check valves disconnected.
To restore service, reconnect the fill valve and the flexible tubing at the check valve. Turn on the electrical power supply and the water supply. Close and latch the door. Select the Normal cycle and let the machine complete the cycle. Check connections to make sure they are watertight and do not leak.
natural_image
Technical line drawing of a mechanical frame assembly with mounting holes and structural supports (no text or symbols)
text_image
Water outlet Water inletCARING FOR YOUR DISHWASHER
Storing your dishwasher (cont.)
Storing for the summer
Protect your dishwasher during the summer months by turning off the water supply and electrical power connected to the dishwasher.
The drain air gap
Prevent water backup
Check the drain air gap anytime your dishwasher isn't draining well.
Some state or local plumbing codes require the addition of a drain air gap between a built-in dishwasher and the home drain system. This device protects your dishwasher against water backing up into it when a drain clogs.
The drain air gap is usually located on top of the sink or countertop near the dishwasher. To order drain air gap (part number 300096), contact your local KitchenAid dealer. You can also call 1-800-422-1230 in the U.S.A., or 1-800-807-6777 in Canada.
NOTE: The drain air gap is an external plumbing device that is not part of your dishwasher. The warranty provided with your dishwasher does not cover service costs directly associated with the cleaning or repair of the external drain air gap.
To clean the drain air gap:
Clean the drain air gap periodically to ensure proper drainage of your dishwasher. Follow the drain air gap cleaning instructions provided by the manufacturer. With most types, you lift off the chrome cover, unscrew the plastic cap, and then check for any buildup of soil. Clean, if necessary.
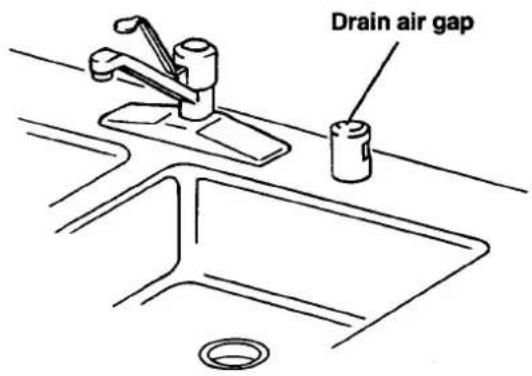
text_image
Drain air gapSOLVING COMMON DISHWASHING PROBLEMS
This section explains how you can handle minor performance problems. Check this list before calling for service. If you can't solve your dishwasher's problem, review the "Troubleshooting" chart on pages 24-25 before calling for service information.
Dishes are not cleaned completely
| PROBLEM | CAUSE | SOLUTION |
| Food soil left on dishes | Slowdown of spray arm due to high suds | Use only recommended dishwasher detergents, not soap or laundry detergents. Do not overfill the rinse agent dispenser. Wipe up any spills before running a cycle. |
| Improper loading | Follow the loading instructions on pages 7-9. | |
| Insufficient fill due to low water pressure | Your home water pressure should be 20 to 120 psi (138-828 kPa) for a proper dishwasher fill. You may need a booster pump on the water supply if the pressure is too low. | |
| Use of incorrect, too little, or ineffective detergent | Use recommended dishwasher detergents and specified amounts only (see page 12 for amounts), but never use less than 1 table-spoon. For effective cleaning, use only fresh detergent and store it tightly closed in a cool, dry place. | |
| Detergent cakes in dispenser | Add detergent just before starting the dishwasher. Use fresh detergent and remove any caked detergent before filling the dispenser. | |
| Water temperature too low | Set your water heater to ensure that the water entering the dishwasher is at least 120°F (49°C). See page 17 for recommended procedure under “Energy saving tips.” | |
| Spotting and filming | Hard water or high mineral content in water | Use rinse agent to help eliminate spotting and filming. To remove hard water film, see “Removing spots and film” on page 23. |
| Water temperature is too low | Set your water heater to ensure that the water entering the dishwasher is at least 120°F (49°C). See page 17 for recommended procedure under “Energy saving tips.” | |
| Use of incorrect detergents | Use only recommended dishwasher detergents. | |
| Incorrect amount of detergent | Heavy soil or hard water usually require the use of extra detergent. See page 12 for recommended detergent amounts. |
Get the cleanest dishes possible
continued on next page
SOLVING COMMON DISHWASHING PROBLEMS
| PROBLEM | CAUSE | SOLUTION |
| Spotting and filming (cont.) | Use of ineffective detergents | For effective cleaning, use fresh dishwasher detergent and store it tightly closed in a cool, dry place. Throw away any lumpy detergent. |
| Insufficient fill due to low water pressure | Your home water pressure should be 20 to 120 psi (138-828 kPa) for a proper dishwasher fill. You may need a booster pump on the water supply if the pressure is too low. | |
| Silica film or etching (silica film is a white milky looking deposit; etching is a cloudy film) | Rinse agent not used | Fill the rinse agent dispenser. See the instructions on page 13. |
| A water chemical reaction with certain types of glassware – usually caused by some combination of soft or softened water, alkaline washing solutions, insufficient rinsing, excessive detergent, and over-loading the dishwasher. | You may have to hand wash these items to eliminate this problem completely. Silica film and etching are permanent marks and cannot be removed. To slow down the reaction, you can try using as little detergent as possible and a liquid rinse agent. Also, underload the dishwasher to allow thorough rinsing, and use the Energy Saver Dry option. | |
| White spots on cookware with non-stick finish | Seasoning removed by dishwasher detergents | Reseason your cookware after a dishwasher washing. See cookware manufacturer's instructions, or coat pan with cooking oil and wipe clean with a paper towel. |
Dishes do not dry completely
| PROBLEM | CAUSE | SOLUTION |
| Dishes are not dry | Water temperature is too low | Set your water heater to ensure that the water entering the dishwasher is at least 120°F (49°C). See page 17 for recommended procedure under “Energy saving tips”. |
| Water does not drain off of dishes. | Do not overload the dishwasher so that the water can drain off the dishes adequately, and use a liquid rinse agent to help speed drying. See pages 7-9 for proper loading instructions. Do not use the Energy Saver Day option. | |
| Rinse agent not used | Fill the rinse agent dispenser. See page 13 for instructions. | |
| Plastics | Some plastics might need to be towel dried. | |
| Energy Saver Dry option used | Do not use the Energy Saver Dry option on the next load of dishes. |
SOLVING COMMON DISHWASHING PROBLEMS
Dishes are damaged during cycle
| PROBLEM | CAUSE | SOLUTION |
| Chipping of dishes | Improper loading | Load dishes and glasses so they are stable and do not strike together while washing.Moving the racks in and out smoothly will also minimize chipping.NOTE: Hand wash some types of china and glassware, such as antiques and feather-edged crystal. |
| Black or gray marks on dishes | Aluminum items touching dishes | Load aluminum pieces so that they will not rub against dishes during washing. Do not wash throw-away aluminum items in the dishwasher.You can remove aluminum markings by using a mild abrasive cleanser. |
Removing spots and film
Keep the rinse agent dispenser filled with a liquid rinse agent. A rinse agent prevents water from forming droplets and drying as spots or streaks.
To remove spots and film on dishes and glasses, or hard water film/lime buildup on the interior of the dishwasher, you may use white vinegar with the following procedure:
- Load clean dishes and glasses in the dishwasher in regular manner. Do not load silverware or other metals in the dishwasher.
-
Put 2 cups of household vinegar in a glass or dishwasher-safe measuring cup, and stand it upright in the bottom rack.
-
Close the door.
- Select the Normal cycle and Energy Saver Dry option, then press Start. Do not use detergent. Allow the dishwasher to complete the entire cycle.
NOTE: This procedure is intended for occasional use only. Vinegar is an acid and excessive use may damage your dishwasher.
TROUBLESHOOTING
Before calling for service ...
If your appliance fails to operate, review the following list and the "Solving Common Dishwashing Problems" section on pages 21-23 before calling your dealer. This could save you the cost of a service call.
Dishwasher is not operating properly
| PROBLEM | CHECK THE FOLLOWING |
| Dishwasher does not run or stops during a cycle | Is the door tightly closed?Has the cycle been set correctly? See page 6.Has a household fuse or circuit breaker blown or tripped?Is the water supply turned on?If the motor has stopped because of an overload, it will automatically reset itself within a few minutes. If the motor does not start, call for service. |
| Dishwasher will not fill | Is the overflow protection float stuck in "up" position? It should move up and down freely. Press down to release. See page 18. |
| Dishwasher seems to run too long | Is the incoming water temperature low? The dishwasher will run longer while water automatically heats or if the High Temp. Wash option has been selected. Set your water heater to ensure that the water entering the dishwasher is at least 120°F (49°C). |
| Water remains in dishwasher | Wait for the cycle to finish. A small amount of water remaining is normal.Check the drain air gap (if installed). If it is clogged, follow the manufacturer's cleaning instructions. See page 20. |
| Detergent remains in covered detergent cup | Use fresh detergent and store it tightly closed in a cool, dry place. Throw away any lumpy detergent.Wait for the cycle to complete itself.Overflow protection float should move up and down freely. See page 18. |
| White residue appears on front of access panel | Some detergents foam a lot and can build up on the access panel.Try using less detergent or a different brand to reduce foaming and eliminate buildup. |
| Odor in the dishwasher | Run a Rinse Only cycle at least once or twice a day until a full load is accumulated. |
Having problems?
TROUBLESHOOTING
Noises
PROBLEM
CHECK THE FOLLOWING
Grinding, grat- ing, crunching, or buzzing sounds
Has a hard object entered the pump? The sound should stop when the object is ground up. If it does not stop after the next cycle, call for service. See page 17 for "Normal operating sounds."
Vapor appears
PROBLEM
CHECK THE FOLLOWING
Vapor from door
This is normal when dishwasher is in the drying portion of a cycle. See "Drying system" on page 16.
REQUESTING ASSISTANCE OR SERVICE
Before calling for assistance or service, please check "Troubleshooting" on pages 24-25. It may save you the cost of a service call. If you still need help, follow these instructions.
If you need assistance or service in the U.S.A. ...
Help is at your fingertips
Call the KitchenAid Consumer Assistance

Center toll free: 1-800-422-1230.
When calling: Please know the purchase date, and the complete model
and serial number of your appliance (see page 2). This information will help us to better respond to your request.
Our consultants provide assistance with:
- Features and specifications on our full line of appliances.
• Installation information. -
Use and maintenance procedures.
-
Accessory and repair parts sales.
- Do-it-yourself repair help.
- Specialized customer assistance (Spanish speaking, hearing impaired, limited vision, etc.).
• Referrals to local dealers, service companies, and repair parts distributors.
KitchenAid service technicians are trained to fulfill the product warranty and provide after-warranty service, anywhere in the United States.
To locate the authorized KitchenAid service company in your area, you can also look in your telephone directory Yellow Pages.
If you need replacement parts ...
If you need to order replacement parts, we recommend that you only use factory authorized parts. These parts will fit right and work right, because they are made with the same precision used to build every new
KITCHENAID* appliance. To locate factory authorized replacement parts in your area, call our Consumer Assistance Center telephone number or your nearest authorized service center.
For further assistance ...
If you need further assistance, you can write to KitchenAid with any questions or concerns at:
KitchenAid Brand Home Appliances
Consumer Assistance Center c/o Correspondence Dept.
2000 North M-63
Benton Harbor, MI 49022-2692
Please include a daytime phone number in your correspondence.
If the dealer, authorized servicer, and KitchenAid have failed to resolve your problem, you can contact the Major Appliance Consumer Action Program (MACAP). MACAP is a group of independent consumer experts that voices consumer views at the highest levels of the major appliance industry. MACAP will in turn inform us of your action.
Major Appliance Consumer Action Program 20 North Wacker Drive Chicago, IL 60606
REQUESTING ASSISTANCE OR SERVICE
If you need assistance or service in Canada ...
For assistance throughout Canada, call the KitchenAid Canada Consumer Assistance Centre toll free, 8:30 a.m. – 6. p.m. (EST): 1-800-461-5681.
When calling:
Please know the purchase date, and the complete model and serial number of your appliance (see page 2). This information will help us to better respond to your request.
Our consultants provide assistance with:
- Features and specifications on our full line of appliances.
• Referrals to local dealers. - Use and maintenance procedures.
For service throughout Canada, call KitchenAid Canada toll free, 8 a.m. - 6 p.m. (EST): 1-800-807-6777.
• Service, and accessory and repair parts sales.
KitchenAid service technicians are trained to fulfill the product warranty and provide after-warranty service, anywhere in Canada.
To locate the authorized KitchenAid service company in your area, you can also look in your telephone directory Yellow Pages.
If you need replacement parts ...
If you need to order replacement parts, we recommend that you only use factory authorized parts. These parts will fit right and work right, because they are made with
the same precision used to build every new KITCHENAID* appliance. To locate factory authorized replacement parts in your area, call your nearest authorized service centre.
For further assistance ...
If you need further assistance, you can write to KitchenAid Canada with any questions or concerns at:
Consumer Relations Department
KitchenAid Canada
1901 Minnesota Court
Mississauga, Ontario L5N 3A7
Please include a daytime phone number in your correspondence.
INDEX
This index is alphabetical. Look for the word or phrase you are interested in, then look for the page number.
TOPIC PAGE TOPIC PAGE
ASSISTANCE
In Canada 27
In U.S.A. 26
CLEANING
Exterior 19
Interior 19
MAINTENANCE
Cleaning 19
Drain air gap....20
Overflow protection float 18
Storing....19
HYDROSWEEP* wash system 18
COMMON WASHING PROBLEMS
Solving 21-23
CONTROL PANEL LIGHTS 15
CYCLE
Canceling 15
Selection chart 14
DETERGENT
How much 12
What type 12
Adding dishes during cycle 16
Canceling cycle 15
Changing setting 16
Starting 6
DISPENSER
Detergent 11
Rinse agent 13
DRAIN AIR GAP 20
DRYING SYSTEM....16
ENERGY
Saving 17
FEATURES/PARTS 4
FILM/SPOTS
Removing 23
LOADING
Lower rack 8
Preparing to load 7
Silverware basket 9
Upper rack 7
LOWER RACK 8
NOISES
Normal operating sounds 17
Quiet operating tips 17
OPERATING 14-17
OPTIONS
Selecting 15
OVERFLOW PROTECTION 18
PARTS/FEATURES 4
RESPONSIBILITIES
Owner 2
RINSE AGENT
Using 13
SAFETY 3
SILVERWARE BASKET 9
SPECIAL ITEMS
Washing tips 10
SPOTS/FILM
Removing 23
START UP GUIDE 5
STORING 19
TROUBLESHOOTING 24
UPPER RACK
Loading 7
VAPOR....16
WARRANTY 29
WATER
Checking temperature 17
DISHWASHER WARRANTY
| LENGTH OF WARRANTY: | KITCHENAID WILL PAY FOR: | KITCHENAID WILL NOT PAY FOR: |
| ONE YEAR FULL WARRANTY FROM DATE OF INSTALLATION. | Replacement parts and repair labor to correct defects in materials or workmanship. Service must be provided by an authorized KitchenAid - servicing outlet. | A. Service calls to:1. Correct the installation of the dishwasher.2. Instruct you how to use the dishwasher.3. Replace house fuses or correct house wiring.4. Correct house plumbing.B. Repairs when dishwasher is used in other than normal home use.C. Damage resulting from accident, alteration, misuse, abuse, improper installation, or installation not in accordance with local electrical and plumbing codes.D. Any labor costs during the limited warranty.E. Replacement parts or repair labor costs for units operated outside the United States.F. Pickup and delivery. This product is designed to be repaired in the home.G. Repairs to parts or systems caused by unauthorized modifications made to the appliance.4/96 |
| SECOND - THROUGH FIFTH - YEAR LIMITED WARRANTY FROM DATE OF INSTALLATION. | Replacement parts for the one-third horsepower motor if defective in materials or workmanship.Replacement parts for the electronic controls if defective in materials or workmanship.Replacement parts for the heating element if defective in materials or workmanship. | |
| LIFETIME WARRANTY FROM DATE OF INSTALLATION. | Replacement parts and repair labor for the stainless steel tub or inner door if the tub or inner door develops water leak caused by rust through as a result of defective materials or workmanship. |
KITCHENAID DOES NOT ASSUME ANY RESPONSIBILITY FOR INCIDENTAL OR CONSEQUENTIAL DAMAGES. Some states do not allow the exclusion or limitation of incidental or consequential damages, so this exclusion or limitation may not apply to you. This warranty gives you specific legal rights and you may also have other rights which may vary from state to state or province to province.
Outside the United States or Canada, a different warranty may apply. For details, please contact your authorized KitchenAid dealer.
If you need assistance or service, first see the "Troubleshooting" section of this book. After checking "Troubleshooting", additional help can be found by checking the "Requesting Assistance or Service" section. In the U.S.A., call our Consumer Assistance Center at 1-800-422-1230. In Canada, call KitchenAid Canada at one of the telephone numbers listed on page 2.
KitchenAid
Benton Harbor, MI, U.S.A. 49022-2692
NOTES
LIBRARY:
Received
Copied
Entered
LIS ____ NRPDS ____
Received
Scanned
Batch # 98080157