AY11218 - Binoculars Barska - Free user manual and instructions
Find the device manual for free AY11218 Barska in PDF.


| Product Type | Binoculars |
| Brand | Barska |
| Model | AY11218 |
| Magnification | 10x |
| Objective Lens Diameter | 25mm |
| Prism Type | Porro |
| Focus System | Center focus |
| Eye Relief | 12mm |
| Field of View | 126m at 1000m |
| Minimum Focus Distance | 5m |
| Lens Coating | Fully coated |
| Waterproof | No |
| Fogproof | No |
| Dimensions (Width x Height) | 120mm x 110mm |
| Weight | 350g |
| Color | Black |
| Warranty | 1 year limited warranty |
| Included Accessories | Carrying case, neck strap, lens cloth |
| Intended Use | Bird watching, sports, outdoor activities |
| Country of Origin | China |
Frequently Asked Questions - AY11218 Barska
User questions about AY11218 Barska
0 question about this device. Answer the ones you know or ask your own.
Ask a new question about this device
Download the instructions for your Binoculars in PDF format for free! Find your manual AY11218 - Barska and take your electronic device back in hand. On this page are published all the documents necessary for the use of your device. AY11218 by Barska.
USER MANUAL AY11218 Barska
BARSKA warrants your microscope to be free from defects in materials and workmanship for one (1) year. BARSKA will repair or replace such product or part thereof which, upon inspection by BARSKA, is found to be defective in materials or workmanship. As a condition to the obligation of BARSKA to repair or replace such product, the product must be returned to BARSKA together with proof-of-purchase satisfactory to BARSKA.
The Proper Return Merchandise Authorization Number (RMA) must be obtained from BARSKA in advance of return. Call BARSKA at (909) 445-8168 to receive the number to be displayed on the outside of your shipping container.
All returns must be accompanied by a written statement setting forth the name, address, and daytime telephone number of the owner, together with a brief description of any claimed defects. Parts or product for which replacement is made shall become the property of BARSKA.
The customer shall be responsible for all costs of transportation and insurance, both to and from BARSKA, and shall be required to prepay such costs.
BARKA shall use reasonable efforts to repair or replace any microscope covered by this warranty within thirty days of receipt. In the event repair or replacement shall require more than thirty days, BARKA shall notify the customer accordingly. BARKA reserves the right to replace any product which has been discontinued from its product line with a new product of comparable value and function.
This warranty shall be void and of no force of effect in the event a covered product has been modified in design or function, or subjected to abuse, misuse, mishandling or unauthorized repair. Further, product malfunction or deterioration due to normal wear is not covered by this warranty.
BARSKA DISCLAIMS ANY WARRANTIES, EXPRESS OR IMPLIED, WHETHER OF MERCHANTABILITY OF FITNESS FOR A PARTICULAR USE, EXCEPT AS EXPRESSLY SET FORM HEREIN. THE SOLE OBLIGATION OF BARKSA UNDER THIS LIMITED WARRANTY SHALL BE TO REPAIR OR REPLACE THE COVERED PRODUCT, IN ACCORDANCE WITH THE TERMS SET FORTH HEREIN. BARKSA EXPRESSLY DISCLAIMS ANY LOST PROFITS, GENERAL, SPECIAL, INDIRECT OR CONSEQUENTIAL DAMAGES WHICH MAY RESULT FROM BREACH OF ANY WARRANTY, OR ARISING OUT OF THE USE OR INABILITY TO USE ANY BARKSA PRODUCT. ANY WARRANTIES WHICH ARE IMPLIED AND WHICH CANNOT BE DISCLAIMED SHALL BE LIMITED IN DURATION TO A TERM OF ONE YEAR FROM THE DATE OF ORIGINAL RETAIL PURCHASE.
Some states do not allow the exclusion or limitation of incidental or consequential damages or limitation on how long an implied warranty lasts, so the above limitations and exclusions may not apply to you.
This warranty gives you specific legal rights, and you may also have other rights which vary from state to state.
BARSKA reserves the right to modify or discontinue, without prior notice to you, any model or style microscope.
If warranty problems arise, or if you need assistance in using your microscope contact:
BARSKA
Customer Service Department
Tel. (909) 445-8168
Fax. (909) 445-8169
e-mail: service@barska.com
Monday-Friday 8:30AM-5:30PM PST
NOTE: This warranty is valid to U.S.A. customers who have purchased this product from an authorized BARSKA dealer in the U.S.A.

855 Towne Center Drive Pomona, CA 91767
Tel: 888-666-6769 Fax: 909.445.8169
www.barska.com

BARSKA®
MICROSCOPE USER MANUAL
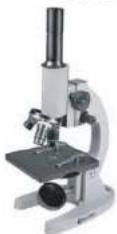
MODEL AY11240
40X,100X,400X
COMPOUND MONOCULAR
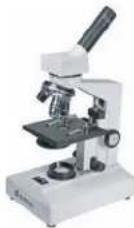
MODEL AY11238
40X,100X,400X
COMPOUND MONOCULAR

MODEL AY11228
20X,40X
STEREO BINOCULAR
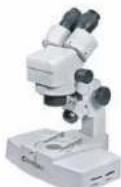
MODEL AY11232
7X-45X
STEREO ZOOM
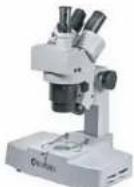
MODEL AY11230
20X,40X
STEREO TRINOCULAR
MODEL AY11236
40X,100X,400X,1000X
COMPOUND

MODEL AY11234
7X-45X
ZOOM STEREO
TRINOCULAR
©2013 BANCSA UXCG
Priced in China
•
INDEX
Maintenance.... 1
Model AY11240/Model AY11238.... 2-5
Model AY11228/Model AY11232....6-9
Model AY11230/Model AY11234.... 10-13
Model AY11236.... 14-18
Warranty Information...... Back Cover
IMPORTANT NOTES
Congratulations on your purchase of this high quality BARSKA microscope. With proper care, this microscope will provide many years of use. Please read the following instructions before operating this instrument.
- Do not attempt to disassemble the instrument. This product has been carefully assembled at the factory and should only be examined by a factory-trained technician.
- This instrument should only be used in an environment with an indoor temperature range of 32^ F to 104^ F.
- Do not use this instrument in an environment with a lot of dust. Cover the instrument when not in use.
- Do not subject the instrument to shock.
MAINTENANCE
Proper care and storage of this instrument is essential. Please read the following guidelines:
- Keep the instrument in a dry and moisture-free location.
- Do not expose to acid, alkali fumes or moisture.
- Keep optical parts clean and free of dust. To clean optical parts gently wipe with lens cleaning tissue and a mixture of alcohol and diethyl ether. Depending on weather conditions, the following are the recommended mixture ratios:
Wet weather: 1:2
Dry Weather: 1:1
- After use, cover the instrument with the plastic dust cover.
- If instrument is to be stored for an extended period of time, remove the eyepiece and oculars and store in a moisture-proof container.
1

BARSKA®
MODEL AY11240/AY11238
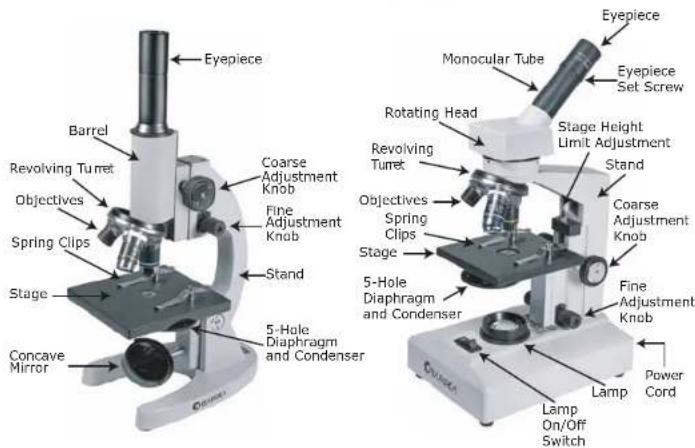
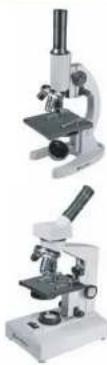
Model AY11240 Model AY11238
MICROSCOPE USAGE
BARSKA Model AY11240 and Model AY11238 are designed for biological studies such as specimen examination. They can also be used for examining bacteria and for general clinical and medical studies. Simple design and use is especially useful for school classroom instruction.
CONSTRUCTION
BARSKA Model AY11240 is a fixed tube type. For comfortable observation, the arm can be easily tilted at any angle from 90° vertical to 45° level. It is also equipped with a coarse adjustment and fine adjustment as well as a space limiter to protect the objective from contacting and damaging the specimen. BARSKA Model AY11238 features a monocular tube that is slanted at a 45° angle. The head rotates 360°. The Eyepiece Set Screw prevents the eyepiece from falling out of the tube.

BARSKA®
2
SPECIFICATIONS
Model AY11240
- Length of mechanical tube: 160mm
- Conjugate distance between object and image: 195mm
- 5-Hole Diaphragm and Condenser: N.A. 0.65
- Plain concave mirror diameter: 50mm
- Stage Size: 115mm x 125mm
- Fine adjustment range: 2mm
- Weight: 7.72 lbs.
- Dimensions: 12.797" x 8.467" x 18.703"
Model AY11238
- Length of mechanical tube: 160mm
- Conjugate distance between object and image: 195mm
- 5-Hole Diaphragm and Condenser: N.A. 0.65
- Illumination: Input 110V or 200V; Output: 20W
- Stage Size: 110mm x 115mm
- Fine adjustment range: 2mm
- Coarse Adjustment Range: 25mm
- Weight: 8.81 lbs
- Dimensions: 10.625" x 7.281" x 15.75"
Objective Specifications - Model AY11240/AY11238
| Classification | Optical System | Magnification | Numerical Aperture | Working Distance |
| Achromatic Objective | Dry | 4x Adjustable Focus | 0.1 | 37.42mm |
| Dry | 10x | 0.25 | 7.14mm | |
| Dry | 40x Spring Adjustable Focus | 0.65 | 0.57mm |
Eyepiece Specifications
| Classification | Magnification | Field of View (FOV) Diameter |
| Plain Field Eyepiece | 10x | Model AY11240 18mm |
| 10x | Model AY11238 25mm |
Total Magnification
| Magnitude Eyepiece | |
| Objective | 10x |
| 4x | 40x |
| 10x | 100x |
| 40x (s) | 400x |
PARTS LIST
Model AY11240
| Name | Qty | |
| Microscope Stand | 1 | |
| Achromatic Objective | 4x | 1 |
| 10x | 1 | |
| 40x (s) | 1 | |
| Plain Concave Mirror1 | ||
| Plastic Dust Cover1 | ||
| 10x Wide Field Eyepiece 1 | ||
| Lens Cleaning Tissue1 | ||
| Specification1 | ||
| Inspection Certificate1 | ||
| Packing List 1 | ||
Model AY11238
| Name Qty | ||
| Microscope Stand | 1 | |
| Achromatic Objective | 4x | 1 |
| 10x | 1 | |
| 40x (s) | 1 | |
| 10x Wide Field Eyepiece 1 | ||
| Plastic Dust Cover1 | ||
| Spare Bulb 1 | ||
| Lens Cleaning Tissue1 | ||
| Specification1 | ||
| Inspection Certificate1 | ||
| Packing List 1 | ||
OPERATION
Model AY11240 Model AY11238
- Remove components from package. Identify all parts before assembling.
- Attach 4x, 10x and 40x objectives to revolving turret.
- Place the specimen on the stage and secure with spring clips. NOTE: The cover glass must face upward (the thinner glass is the cover glass), otherwise when the 40x objective is used the specimen cannot be observed. Observation is best when the thickness of the cover glass is 0.1-1.1mm and the cover glass is 0.17mm.
- Adjust the stand to an angle that provides comfortable observation.
- Rotate and adjust concave mirror to light the field of view. NOTE: Do not reflect the Sun with the mirror. This can cause serious eye injury or permanent eye damage.
-
Observe the specimen using the lowest magnification objective first. The 4x objective provides a larger field of view to search specimen.
-
Remove components from package. identify all parts before assembling.
- Attach 4x, 10x and 40x objectives to revolving turret. 3. Place the specimen on the stage and secure with spring clips. NOTE: The cover glass must face upward (the thinner glass is the cover glass), otherwise when the 40x objective is used the specimen cannot be observed. Observation is best when the thickness of the cover glass is 0.1-1.1mm and the cover glass is 0.17mm.
- Plug power cord into an electrical outlet. Turn microscope lamp ON.
- Observe the specimen using the lowest magnification objective first. The 4x objective provides a larger field of view to search specimen.
OPERATION (cont.)
Model AY11240 Model AY11238
- To clearly see the outline of the specimen, rotate the coarse adjustment knob and lower the barrel to the space limiter.
-
Rotate the fine adjustment knob until the image is in sharp focus. When using other objectives, rotate the fine focus adjustment until the image is in focus.
-
To clearly see the outline of the specimen, rotate the coarse adjustment knob and lower the barrel to the space limiter.
- Rotate the fine adjustment knob until the image is in sharp focus. When using other objectives, rotate the fine focus adjustment until the image is in focus.
USING THE 5-HOLE DIAPHRAGM
- To obtain the best contrast for observing, match the hole size to the objective that is being used to view the specimen.
- Each hole has a corresponding number from 1 to 5. 1 is the smallest hole; 5 is the largest hole.
Use the following guidelines to match the hole number to the objective that you have selected:
40x objective: Use #5 hole
10x objective: Use #4 or #3 hole
4x objective: Use #2 or #1 hole
COARSE KNOB ADJUSTMENT - Model AY11240
- The coarse adjustment knob has an adjustable heavy-light nut (See Fig.1).
- To adjust the knob loosen or tighten the nut. NOTE: Adjusting the nut too tight will make focusing difficult. Adjusting the nut too loose will cause the tube to slide.
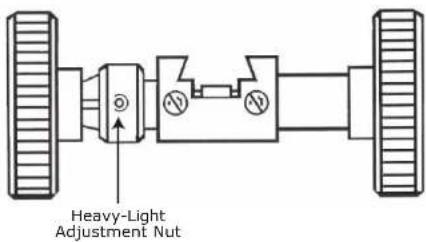
Fig. 1- Coarse Adjustment Knob

BARSKA®
MODEL AY11228/AY11232

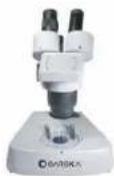
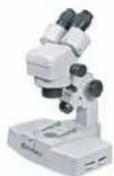
Model AY11228 Model AY11232
MICROSCOPE USAGE
BARSKA Model AY11228 and Model AY11232 are designed for biological studies such as specimen examination. They can also be used for examining bacteria and for general clinical and medical studies. Simple design and use is especially useful for school classroom instruction.
CONSTRUCTION
BARSKA Model AY11228 is a fixed power stereo microscope. It is constructed with two optical paths at the same angle. It is equipped with transmitted illumination and oblique illumination. By using this instrument, the user can observe and enlarge the right side stereo image. BARSKA Model AY11232 is a zoom stereo microscope. The object being viewed is enlarged through two identical sized sets of right and left eye lenses. The zoom provides different magnification and features an inversion system which allows the image to be viewed normally and right side up.

BARSKA®
SPECIFICATIONS
Model AY11228
- Interpupillary Adjustment: 55mm - 75mm
- Working Stage Diameter: 95mm
- Focus Knob Adjustment Range: 60mm
- Elevator Adjustment Range: 110mm
- Right Diopter Adjustment Range: +4 to -6 dopters
- Illumination:
Input Voltage: 110V AC or 220V
Output: Oblique illumination: 12V 10W Halogen Lamp
Model AY11232
- Interpupillary Adjustment: 55mm - 75mm
- Working Stage Diameter: 95mm
- Focus Knob Adjustment Range: >50mm
- Elevator Adjustment Range: 110mm
- Diopter Adjustment Range: +/- 5 diopters
- Illumination:
Input Voltage: 110V AC or 220V
Transmitted Illumination: 12V 10W Halogen Lamp
Output: Oblique Illumination: 12V 10W Halogen Lamp
Optical Specifications - Model AY11228
| Total Magnification | Objective Magnification | & Field Diameter (mm) | Working DistanceEy |
| 20x, 40x | 2x, 4x 90mmWide Field 10x, 20mm |
Optical Specifications - Model AY11232
| Objective Zoom Scale | ||||||
| Accessory Large Objective | - | 0.5x | 0.75x | 1.5x 2x | ||
| Working Distance (mm) | 95 | 156 | 02 44 | 30 | ||
| WF10x/20mm | Total Magnification | 7x-45x | 3.5x-22.5x | 5.3x-33.8x | 10.5x-67.5x | 14x-90x |
| Field of View Objective Dia. (mm) | 28.6-4.4 | 57.2-8.8 | 38.1-5.9 | 19.0-2.9 | 14.3-2.2 | |
| WF12.5x/18mm | Total Magnification | 8.8x-56x | 4.4x-28x | 6.6x-42x | 13.2x-84x | 17.6x-112x |
| Field of View Objective Dia. (mm) | 25.7-4.0 | 51.4-8 | 34.3-5.3 | 17.1-2.7 | 12.9-2.0 | |
| WF15x/16mm | Total Magnification | 10.5x-67.5x | 5.3x-33.8x | 7.9x-58.6x | 15.7x-101x | 21x-135x |
| Field of View Objective Dia. (mm) | 22.9-3.6 | 45.8-7.2 | 30.5-4.8 | 15.3-24 | 11.5-1.8 | |
| WF20x/12mm | Total Magnification | 14x-90x | 7x-45x | 10.5x-67.5x | 21x-135x | 28x-180x |
| Field of View Objective Dia. (mm) | 17.0-2.7 | 34.0-5.4 | 22.7-3.6 | 11.3-1.8 | 8.5-1.4 | |
| WF25x/9mm | Total Magnification | 17.5x-112.5x | 8.8x-56.3x | 13x-84.4x | 26.3x-169x | 35x-225x |
| Field of View Objective Dia. (mm) | 12.9-2.0 | 25.8-4.0 | 17.2-2.7 | 8.6-1.3 | 6.5-1.0 | |

BARSKA®
PARTS LIST
Model AY11228
| Name | Qty |
| Binocular Body (incl. 2x, 4x obj.) | 1 |
| 10x Wide Field Eyepiece 2 | |
| Eyeshade | 2 |
| 10V 10W Halogen Lamp12V 10W Halogen Lamp w/cup | 1 ea.(spare) |
| Fuse 2A (spare) | 1 |
| Lens Cleaning Tissue1 | |
| Dust Cover1 | |
| Black/White Working Stage1 | |
| Specifications | 1 |
| Packing Slip | 1 |
| Quality Inspection Certificate1 |
Model AY11232
| Name | Qty |
| Binocular Body (incl. 2x, 4x obj.) | 1 |
| 10x Wide Field Eyepiece 2 | |
| Eyeshade | 2 |
| 12V 10W Halogen Lamp12V 10W Halogen Lamp w/cup | 1 ea.(spare) |
| Fuse 2A (spare) | 1 |
| Lens Cleaning Tissue1 | |
| Dust Cover1 | |
| Specifications | 1 |
| Packing Slip | 1 |
| Quality Inspection Certificate1 |
OPERATION
Model AY11228 Model AY11232
- Remove components from package. identify all parts before assembling.
- Tighten the knob on the stand to prevent the elevator from sliding down.
- Fix the binocular body on the stand with the tightening screw.
- Check the input voltage to ensure that it conforms to the microscopes requirement.
SELECTING THE ILLUMINATION
- Depending on microscope use, select oblique or transmitted illumination.
- The Brightness Adjustment knobs change the oblique or transmitted light independently. The transmitted illuminator fluorescent lamp cannot be adjusted.
- The angle of the oblique lamp can be adjusted to ensure optimum lighting of the sample.

BARSKA®
- Remove components from package, identify all parts before assembling.
- Check the input voltage to ensure that it conforms to the microscopes requirement.
- Depending on microscope use, select oblique or transmitted illumination.
- The Brightness Adjustment Knobs change the oblique or transmitted light independently. The transmitted illuminator fluorescent lamp cannot be adjusted.
- The angle of the oblique lamp can be adjusted to ensure optimum lighting of the sample.
SELECTING THE ILLUMINATION
CHANGING THE INTERPUPILLARY DISTANCE
- The distance between the observer's pupils is the interpupillary distance.
- To adjust the interpupillary distance rotate the prism caps until both eyes coincide with the image in the eyepiece.
OPERATION (cont.)
Model AY11228 Model AY11232
SELECTING OBJECTIVE MAGNIFICATION
- There are two objectives. The lower magnification objective has a greater depth of field and view.
- In order to observe the specimen easily use the lower magnification objective first. Then, by rotating the case, the magnification can be changed.
CHANGING THE INTERPUPILLARY DISTANCE
- The distance between the observer's pupils is the interpupillary distance.
- To adjust the interpupillary distance rotate the prism caps until both eyes coincide with the image in the eyepiece.
FOCUSING
- Remove the lens protective cover.
- Place the specimen on the working stage.
- Focus the specimen with the left eye first while turning the focus knob until the image appears clear and sharp.
- Rotate the right eyepiece ring until the images in each eyepiece coincide and are sharp and clear.
CHANGING THE BULB
- Disconnect the power cord from the electrical outlet before changing the bulb.
- When the bulb is cool, remove the oblique illuminator cap and remove the halogen bulb with cap.
- Replace with a new halogen bulb.
- Open the window in the base plate and replace the halogen lamp or fluorescent lamp of transmitted illuminator.
[Non-Text]
FOCUSING
- Turn the focusing knob away or toward you until a clear image is viewed.
- If the image is unclear, adjust the height of the elevator up or down, then turn the focusing knob again.
ZOOM MAGNIFICATION
- Turn the zoom magnification knob to the desired magnification and field of view.
- In most situations, it is recommended that you focus at the lowest magnification, then move to a higher magnification and re-focus as necessary.
- If the image is not clear to both eyes at the same time, the diopter ring may need adjustment.
DIOPTER RING ADJUSTMENT
- To adjust the eyepiece for viewing with or without eyeglasses and for differences in acuity between the right and left eyes, follow the following steps:
a. Observe an image through the left eyepiece and bring a specific point into focus using the focus knob.
b. By turning the diopter ring adjustment for the left eyepiece, bring the same point into sharp focus.
c. Then bring the same point into focus through the right eyepiece by turning the right diopter ring.
d. With more than one viewer, each viewer should note their own diopter ring position for the left and right eyepieces, then before viewing set the diopter ring adjustments to that setting.
CHANGING THE BULB
- Disconnect the power cord from the electrical outlet.
- When the bulb is cool, remove the oblique illuminator cap and remove the halogen bulb with cap.
- Replace with a new halogen bulb.
- Open the window in the base plate and replace the halogen lamp or fluorescent lamp of transmitted illuminator.

BARSKA®
MODEL AY11230/AY11234
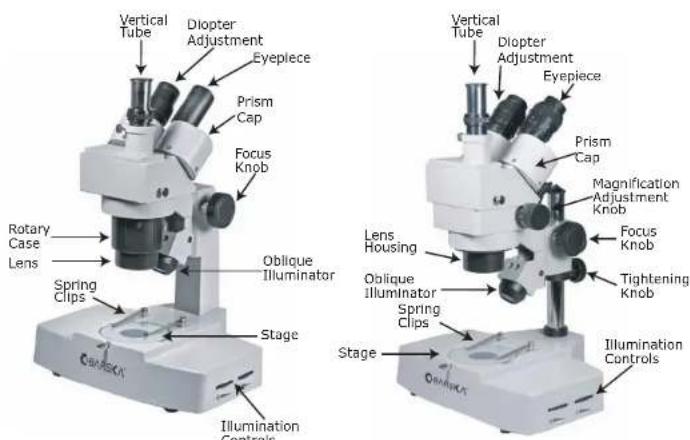
Model AY11230 Model AY11234
MICROSCOPE USAGE
BARSKA Model AY11230 and Model AY11234 are trinocular microscopes designed for biological studies such as specimen examination. They can also be used for examining bacteria and for general clinical and medical studies. Simple design and use and the vertical tube make them is useful for school classroom instruction.
CONSTRUCTION
BARSKA Model AY11230 is a fixed power trinocular stereo microscope. It is constructed with two optical paths at the same angle. It is equipped with transmitted illumination and oblique illumination. By using this instrument, the user can observe and enlarge the right side stereo image. BARSKA Model AY11234 is a zoom trinocular stereo microscope. The object being viewed is enlarged through two identical sized sets of right and left eye lenses. The zoom provides different magnification and features an inversion system which allows the image to be viewed normally and right side up.

BARSKA®
SPECIFICATIONS
Model AY11230
-
Interpupillary Adjustment: 55mm - 75mm
-
Working Stage Diameter: 95mm
-
Focus Knob Adjustment Range: 60mm
-
Elevator Adjustment Range: 110mm
-
Right Diopter Adjustment Range: +4 to -6 dopters
-
Illumination:
Input Voltage: 110V AC or 220V
Output: Oblique illumination: 12V 10W Halogen Lamp
Model AY11234
-
Interpupillary Adjustment: 55mm - 75mm
-
Working Stage Diameter: 95mm
-
Focus Knob Adjustment Range: >50mm
-
Elevator Adjustment Range: 110mm
-
Diopter Adjustment Range: +/- 5 diopters
-
Illumination:
Input Voltage: 110V AC or 220V
Output: Oblique Illumination: 12V 10W Halogen Lamp
Transmitted Illumination: 12V 10W Halogen Lamp

natural_image
Two identical microscope devices shown from top and bottom views (no text or labels visible)Optical Specifications - Model AY11230
| Total Magnification | Objective Magnification | & Field Diameter (mm) | Working DistanceEy |
| 20x, 40x | 2x, 4x 90m | mWide Field 10x, 20mm |
Optical Specifications - Model AY11234
| Objective Zoom Scale | ||||||
| Accessory Large Objective | - | 0.5x | 0.75x | 1.5x 2x | ||
| Working Distance (mm) | 95 | 156 | 102 44 | 30 | ||
| WF10x/20mm | Total Magnification | 7x-45x | 3.5x-22.5x | 5.3x-33.8x | 10.5x-67.5x | 14x-90x |
| Field of View Objective Dia. (mm) | 28.6-4.4 | 57.2-8.8 | 38.1-5.9 | 19.0-2.9 | 14.3-2.2 | |
| WF12.5x/18mm | Total Magnification | 8.8x-56x | 4.4x-28x | 6.6x-42x | 13.2x-84x | 17.6x-112x |
| Field of View Objective Dia. (mm) | 25.7-4.0 | 51.4-8 | 34.3-5.3 | 17.1-2.7 | 12.9-2.0 | |
| WF15x/16mm | Total Magnification | 10.5x-67.5x | 5.3x-33.8x | 7.9x-58.6x | 15.7x-101x | 21x-135x |
| Field of View Objective Dia. (mm) | 22.9-3.6 | 45.8-7.2 | 30.5-4.8 | 15.3-24 | 11.5-1.8 | |
| WF20x/12mm | Total Magnification | 14x-90x | 7x-45x | 10.5x-67.5x | 21x-135x | 28x-180x |
| Field of View Objective Dia. (mm) | 17.0-2.7 | 34.0-5.4 | 22.7-3.6 | 11.3-1.8 | 8.5-1.4 | |
| WF25x/9mm | Total Magnification | 17.5x-112.5x | 8.8x-56.3x | 13x-84.4x | 26.3x-169x | 35x-225x |
| Field of View Objective Dia. (mm) | 12.9-2.0 | 25.8-4.0 | 17.2-2.7 | 8.6-1.3 | 6.5-1.0 | |

BARSKA®
PARTS LIST
Model AY11230
| Name | Qty |
| Binocular Body (Incl. 2x, 4x obj.) | 1 |
| 10x Wide Field Eyepiece 2 | |
| Eyeshade | 2 |
| 10V 10W Halogen Lamp12V 10W Halogen Lamp w/cup | 1 ea.(spare) |
| Fuse 2A (spare) | 1 |
| Lens Cleaning Tissue1 | |
| Dust Cover1 | |
| Black/White Working Stage1 | |
| Specifications | 1 |
| Packing Slip | 1 |
| Quality Inspection Certificate1 |
Model AY11234
| Name | Qty |
| Binocular Body (incl. 2x, 4x obj.) | 1 |
| 10x Wide Field Eyepiece 2 | |
| Eyeshade | 2 |
| 12V 10W Halogen Lamp12V 10W Halogen Lamp w/cup | 1 ea.(spare) |
| Fuse 2A (spare) | 1 |
| Lens Cleaning Tissue1 | |
| Dust Cover1 | |
| Specifications | 1 |
| Packing Slip | 1 |
| Quality Inspection Certificate1 |
OPERATION
Model AY11230 Model AY11234
- Remove components from package, identify all parts before assembling.
- Tighten the knob on the stand to prevent the elevator from sliding down.
- Fix the binocular body on the stand with the tightening screw.
- Check the input voltage to ensure that it conforms to the microscopes requirement.
SELECTING THE ILLUMINATION
- Depending on microscope use, select oblique or transmitted illumination.
- The Brightness Adjustment knobs change the oblique or transmitted light independently. The transmitted illuminator fluorescent lamp cannot be adjusted.
- The angle of the oblique lamp can be adjusted to ensure optimum lighting of the sample.

BARSKA®
- Remove components from package, identify all parts before assembling.
- Check the input voltage to ensure that it conforms to the microscopes requirement.
SELECTING THE ILLUMINATION
- Depending on microscope use, select oblique or transmitted illumination.
- The Brightness Adjustment Knobs change the oblique or transmitted light independently. The transmitted illuminator fluorescent lamp cannot be adjusted.
- The angle of the oblique lamp can be adjusted to ensure optimum lighting of the sample.
CHANGING THE INTERPUPILLARY DISTANCE
- The distance between the observer's pupils is the interpupillary distance.
- To adjust the interpupillary distance rotate the prism caps until both eyes coincide with the image in the eyepiece.
OPERATION (cont.)
Model AY11230
SELECTING OBJECTIVE MAGNIFICATION
- There are two objectives. The lower magnification objective has a greater depth of field and view.
- In order to observe the specimen easily use the lower magnification objective first. Then, by rotating the case, the magnification can be changed.
CHANGING THE INTERPUPILLARY DISTANCE
- The distance between the observer's pupils is the interpupillary distance.
- To adjust the interpupillary distance rotate the prism caps until both eyes coincide with the image in the eyepiece.
FOCUSING
- Remove the lens protective cover.
- Place the specimen on the working stage.
- Focus the specimen with the left eye first while turning the focus knob until the image appears clear and sharp.
- Rotate the right eyepiece ring until the images in each eyepiece coincide and are sharp and clear.
CHANGING THE BULB
- Disconnect the power cord.
- When the bulb is cool, remove the oblique illuminator cap and remove the halogen bulb with cap.
- Replace with a new halogen bulb.
- Open the window in the base plate and replace the halogen lamp or fluorescent lamp of transmitted illuminator.
USING THE VERTICAL TUBE - MODELS AY11230/11234
- The vertical tube can be used for instructional viewing or to photograph the image with a digital camera or a micro TV unit
- Loosen the retention screw, then rotate the adjustment ring to change the length of the vertical tube.
- Make sure that both the images in
Model AY11234
FOCUSING
- Turn the focusing knob away or toward you until a clear image is viewed.
- If the image is unclear, adjust the height of the elevator up or down, then turn the focusing knob again.
ZOOM MAGNIFICATION
- Turn the zoom magnification knob to the desired magnification and field of view.
- In most situations, it is recommended that you focus at the lowest magnification, then move to a higher magnification and re-focus as necessary.
- If the image is not clear to both eyes at the same time, the diopter ring may need adjustment.
DIOPTER RING ADJUSTMENT
- To adjust the eyepiece for viewing with or without eyeglasses and for differences in acuity between the right and left eyes, follow the following steps:
a. Observe an image through the left eyepiece and bring a specific point into focus using the focus knob.
b. By turning the diopter ring adjustment for the left eyepiece, bring the same point into sharp focus.
c. Then bring the same point into focus through the right eyepiece by turning the right diopter ring.
d. With more than one viewer, each viewer should note their own diopter ring position for the left and right eyepieces, then before viewing set the diopter ring adjustments to that setting.
CHANGING THE BULB
- Disconnect the power cord from the electrical outlet.
- When the bulb is cool, remove the oblique illuminator cap and remove the halogen bulb with cap.
- Replace with a new halogen bulb.
- Open the window in the base plate and replace the halogen lamp or fluorescent lamp of transmitted illuminator.

BARSKA®
MODEL AY11236
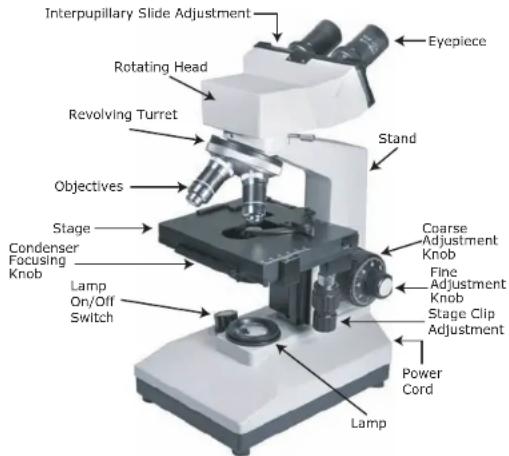
Model AY11236
MICROSCOPE USAGE
BARSKA Model AY11236 is a powerful fixed power compound microscope designed for biological studies such as specimen examination. It can also be used for examining bacteria and for general clinical and medical studies and other scientific uses.
CONSTRUCTION
BARKA Model AY11236 is a fixed power compound microscope. It is constructed with two optical paths at the same angle. It is equipped with transmitted illumination. By using this instrument, the user can observe specimens at magnification from 40x to 1000x by selecting the desired objective lens. Coarse and fine focus adjustments provide accuracy and image detail. The rotating head allows the user to position the eyepieces for maximum viewing comfort and easy access to all adjustment knobs.

BARSKA®
SPECIFICATIONS
- Length of mechanical tube: 160mm
- Conjugate distance between object and image: 195mm
- Condenser: Abbe; numerical aperture: NA1.25 (oil immersion)
- Illumination: Input 110V or 200V; Output: 20W
- Fine adjustment range: .002mm
- Coarse Adjustment Range: 20mm
- Shift or Mechanical Stage: Longitude - 40mm; Transversal - 70mm
- Condenser Elevation Range: 15mm
- Iris diaphragm aperture: 2mm-30mm
Objective Specifications
| Classification | Working System | Magnification | Optical Aperture | Distance |
| Achromatic Objective | Dry | Focus | 0 | |
| Dry | 0 | |||
| Dry | 40x Spring Adjustable Focus | 0.65 | 0.57mm | |
| Oil Immersion | Adjustable Focus | 1.25 0.18mm | 100x Spring |
Note: For oil immersion, please use the index of refraction 1.515 oil
Eyepiece Specifications
| Classification | Magnification | F | ield of View (FOV) Diameter |
| Plain Field Eyepiece | 10x 18mm |
Total Magnification
| Magnitude | Eyepiece |
| Objective | |
| 4x | 40x |
| 10x | 100x |
| 40x (s) | 400x |
| 1000x100x (oil,s) |
PARTS LIST
| Name | Qty | |
| Microscope Stand | 1 | |
| Achromatic Objective | 4x (parfocal distance adjustable) | 1 |
| 10x | 1 | |
| 40x (s) (parfocal distance adjustable) | 1 | |
| 100x (oil,s) (parfocal distance adjustable) | 1 | |
| 10x Wide Field Eyepiece w/Pointer | 2 | |
| Abbe Condenser NA1.25 | 1 | |
| Plastic Dust Cover | 1 | |
| Spare 6V20W Halogen Bulb | 1 | |
| Lens Cleaning Tissue | 1 | |
| Cedar Oil | 1 | |
| 4AmFuse (spare) | 1 | |
| Specification | 1 | |
| Inspection Certificate | 1 | |
| Packing List | 1 | |
OPERATION
- Remove all components from package. Identify all parts before assembling instrument.
- Attach 4x, 10x and 40x objectives by screwing into revolving turret. Tighten and secure to maximum finger pressure only.
- Place the specimen on the stage and secure with spring clips. NOTE: The cover glass must face upward (the thinner glass is the cover glass), otherwise when the 40x objective is used the specimen cannot be observed. Observation is best when the thickness of the cover glass is 0.1-1.1mm and the cover glass is 0.17mm.
- Plug power cord into an electrical outlet. Turn microscope lamp ON.
- Observe the specimen using the lowest magnification objective first. The 10x objective provides a larger field of view making it easier to search the specimen.
OPERATION (cont.)
- Adjust the interpupillary distance by using the eyepiece interpupillary slide adjustment.
- Observe using the right eyepiece adjusting the coarse and fine focus and adjust the diopter ring until image is clear and sharp.
- Observe with the left eyepiece and adjust the diopter ring until image is clear and sharp.
- Rotate the fine focus adjustment when using other objectives. NOTE: This instrument is equipped with patent objectives so the precision or parfocalization is very high.

Fig. 1 - Objective Parts
-
If the image is in focus with the 10x objective, you can select other objectives and observe the specimen even if the fine adjustment knob has not been used by using the following method (See Fig. 1):
-
Unscrew the 40x or 100x objective and remove from turret.
- Remove the mark sleeve.
- Turn the ring on the objective to adjust its parfocal distance.
- Re-insert the objective and compare with the 10x.
- Adjust until the 40x and 100x objectives image is clear.
USING THE CEDAR OIL
- Drop some cedar oil on to the top of the 100x objective when the 100x objective is being used. NOTE: To maintain a good quality image, rotate the turret right and left several times to eliminate bubbles in the cedar oil.
- After finishing the observation, wipe off the cedar oil.
- Do not use the 40x objective until you have wiped off all of the cedar oil.

BARSKA®
OPERATION (cont.)
ADJUSTING THE CONDENSER APERTURE
- The numerical aperture of the condenser should match the numerical aperture of the objective being used.
-
To make sure that the objectives are imaging properly (especially the 40x and 100x), follow this procedure:
-
Take off the eyepiece.
- Look through the eyepiece.
- The smallest circle or light that you can see is the eyepiece's exit pupil.
- Adjust the aperture of the iris diaphragm in the condenser to 70% or 80% for the best contrast for observation (See Fig. 2.).
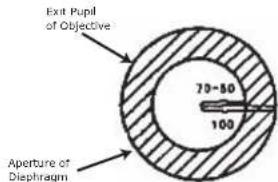
Fig. 2 - Condenser Diaphram Aperture
TROUBLESHOOTING
| Problem | P | ossible Cause | S |
| 1. Image not clear. | 1. Specimen is in incorrect position.2. Lens is dirty.3. Cedar oil not placed on immersion objective.4. Bubbles in Cedar oil.5. Cedar oil on 40x objective.6. Iris diaphragm open too wide. | 1. Re-position specimen.2. Clean lens.3. Put a drop of Cedar oil on immersion objective.4. Rotate turret several times to eliminate bubbles.5. Clean 40x objective.6. Reduce size of iris diaphragm. | |
| 2. Poor illumination. | 1. Condenser position is incorrect.2. Lens is dirty.3. Specimen is not placed level. | 1. Re-position condenser.2. Clean lens.3. Re-position specimen so it is level. | |
| 3. Illumination not bright. | 1. Iris diaphragm opening too small.2. Position of condenser too low.3. Lens is dirty. | 1. Open iris diaphragm wider.2. Raise condenser.3. Clean lens. | |
| 4. Cannot focus at high magnification. | 1. Specimen is in incorrect position. | 1. Re-position specimen. | |
| 5. Objective lenses touch specimen. | 1. Stage is too high. | 1. Re-position stage. |

BARSKA®
- MICROSCOPE USER MANUAL
- INDEX
- IMPORTANT NOTES
- MAINTENANCE
- MICROSCOPE USAGE
- CONSTRUCTION
- SPECIFICATIONS
- Model AY11240
- Model AY11238
- PARTS LIST
- OPERATION
- Model AY11240 Model AY11238
- OPERATION (cont.)
- USING THE 5-HOLE DIAPHRAGM
- COARSE KNOB ADJUSTMENT - Model AY11240
- MODEL AY11228/AY11232
- Model AY11228
- Model AY11232
- Model AY11228 Model AY11232
- SELECTING THE ILLUMINATION
- CHANGING THE INTERPUPILLARY DISTANCE
- SELECTING OBJECTIVE MAGNIFICATION
- FOCUSING
- CHANGING THE BULB
- ZOOM MAGNIFICATION
- DIOPTER RING ADJUSTMENT
- MODEL AY11230/AY11234
- Model AY11230
- Model AY11234
- Model AY11230 Model AY11234
- USING THE VERTICAL TUBE - MODELS AY11230/11234
- USING THE CEDAR OIL
- ADJUSTING THE CONDENSER APERTURE
Brand : Barska
Model : AY11218
Category : Binoculars