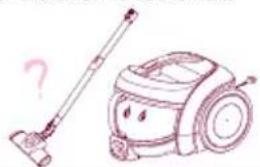
V-CE661HTV - Vacuum Cleaner LG - Free user manual and instructions
Find the device manual for free V-CE661HTV LG in PDF.

| Product Type | Vacuum Cleaner |
| Brand | LG |
| Model | V-CE661HTV |
| Color | White / Green |
| Type | Canister (Bagless) |
| Power Consumption | 1600 W |
| Suction Power | 350 Air Watts |
| Dust Capacity | 2.5 L (Cyclone) |
| Filtration System | HEPA H13 Washable Filter |
| Noise Level | 79 dB(A) |
| Cord Length | 6 m (Automatic Rewind) |
| Operating Radius | 9 m |
| Weight | 5.5 kg (Body only) |
| Dimensions (W x D x H) | 400 x 300 x 250 mm |
| Attachments Included | Crevice tool, Upholstery brush, Floor brush, Dusting brush |
| Motor Type | Digital Inverter Motor (10-year warranty) |
| Dust Bag Required | No (Bagless) |
| Overheat Protection | Yes (Auto shut-off) |
| Filter Cleaning | Washable (Every 3 months) |
| Repairability Index | 8.2 / 10 |
Frequently Asked Questions - V-CE661HTV LG
User questions about V-CE661HTV LG
0 question about this device. Answer the ones you know or ask your own.
Ask a new question about this device
Download the instructions for your Vacuum Cleaner in PDF format for free! Find your manual V-CE661HTV - LG and take your electronic device back in hand. On this page are published all the documents necessary for the use of your device. V-CE661HTV by LG.
USER MANUAL V-CE661HTV LG
| Model | V-CE661HTV .CYEPLGT | ||
| Language | English+Chinese | ||
| Page | 30 | Color(cover/body) | 2/1 |
| Material | Weight 100g | Size(W*H) | 150 x 220(mm) |
| Date | 2009.1.16 | Designer | Ge Yang |
| Part No. | MFL57903805 | Description | Owner's manual |
Chage Record
| No. | Date | Change content | ECO No. | Designer | Confirm | |
| 1 | ||||||
| 2 | ||||||
| 3 | ||||||
| 4 | ||||||
| 5 | ||||||
| 6 | ||||||
| 7 | ||||||
| 8 | ||||||
| 9 |
使用说明书

natural_image
Interior view of a hotel room with a person in white robe standing near a window overlooking a cityscape and greenery (no visible text or symbols)吸尘器
强劲吸力
V-CE661HTV
text_image
Illustration showing a plastic bottle emitting a flame next to a car with a 'No' symbol, likely indicating no chemical hazard or absence of chemical hazard.natural_image
Illustration of a girl in pink dress flying with a string attached to her (no text or symbols)
警告
natural_image
Line drawing of a vacuum cleaner with handle and arm (no text or symbols)natural_image
Illustration of a human spine with multiple ribbeds emitting smoke (no text or symbols)natural_image
Cartoon illustration of a smiling robot with arms and legs, waving, next to a faucet (no text or symbols)natural_image
Illustration of a cartoon-style vacuum cleaner with hands and a lit fuse (no text or symbols)
警告
natural_image
Line drawing of a vacuum cleaner connected to a power cord (no text or symbols)natural_image
Line drawing of a vacuum cleaner with no visible text or symbolsnatural_image
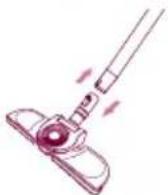
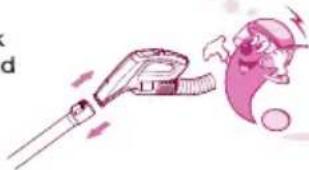
Illustration of a handheld device and a vacuum cleaner with motion lines indicating airflow (no text or symbols)
注意
非专业维修人员请勿开机修理。

natural_image
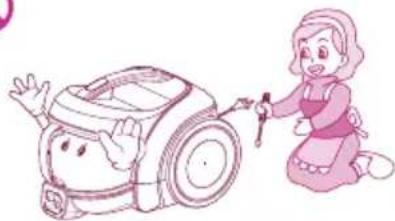
Illustration of a girl kneeling beside a robotic vacuum cleaner (no text or symbols present)natural_image
Cartoon illustration of a washing machine with a 'no' symbol on the left, next to an open door (no text or symbols on the robot or door)natural_image
Illustration of a vacuum cleaner connected to a vase with tubing (no text or symbols)natural_image
Illustration of a woman pouring liquid into a bucket next to an electric vacuum cleaner (no text or symbols)natural_image
Illustration of a girl waving next to a hand washing a mop (no text or symbols)部分名称与连接方法
natural_image
Illustration of a clipboard with arrows indicating movement, no text or symbols present- 薄被、毛毯

natural_image
Illustration of a clipboard with arrows indicating movement, no text or symbols presentnatural_image
Line drawing of a hand holding a small device with a lid open, no text or symbols present② 握住集尘桶手柄,取下集尘桶。

natural_image
Illustration of a hand holding two gloves above a trash bin with plastic pieces falling out (no text or symbols)打开集尘桶的盖子,倒掉灰尘。
text_image
Diagram illustrating eye contact with a device, showing eye highlighted and pointing to the device's lens area.1 检查灰尘分离器内部是否有灰尘。

natural_image
Illustration of a hand cleaning a pink circular object with a mesh filter (no text or symbols)2 握住灰尘分离器盖的手柄拆卸盖子。
natural_image
Illustration of a hand pouring liquid into a trash bin (no text or symbols)3 倒掉灰尘。

natural_image
Illustration of a hand holding a pink hat with a woven basket (no text or symbols)4 堵住灰尘分离器盖的小孔,抖掉灰尘。
清洗方法清洗方法
natural_image
Illustration of a showerhead spraying water onto a bucket and a pink bag (no text or symbols)natural_image
Illustration of three objects: a bench, a funnel, and a ring, arranged within a circular frame (no text or symbols)natural_image
Illustration of hands cleaning a mechanical component with a magnified inset showing the close-up of the component (no text or symbols)natural_image
Illustration of a hand holding a bucket with a close-up inset showing the cable being inserted (no text or symbols)2 安装灰尘分离器和集尘桶。
natural_image
Line drawing of a vacuum cleaner with open lid and handle (no text or symbols)3 将集尘桶安装在吸尘器上。
natural_image
Line drawing of a hand using a brush to clean or adjust a small device (no text or symbols present)natural_image
Illustration of a vacuum cleaner's internal components, showing open and closed views (no text or symbols)natural_image
Illustration of a device with mesh pattern and magnified view showing hand holding a pink object (no text or symbols)natural_image
Illustration of a faucet pouring liquid into a container with a lid, showing fluid flow (no text or symbols)1 冲洗干净
natural_image
Illustration of hands cleaning a pink cloth with a small object nearby (no text or symbols)2 彻底去除水分

natural_image
Illustration of three pink devices in a circular frame, one lying flat, one open, and one closed (no text or symbols)natural_image
Illustration of two views of a robotic vacuum cleaner with open lid and handle (no text or symbols)natural_image
Line drawing of a hand using a handheld vacuum cleaner to handle a cylindrical device (no text or symbols)4 握住主机的移动手柄,盖上吸尘器盖。
拆卸方法拆卸方法
natural_image
Illustration of a hand pouring liquid from a container into a granular substance (no text or symbols)安装方法安装方法

text_image
喀哒1 抖动排气过滤器进行清洁。
natural_image
Illustration of a smiling girl with pink hair and rosy cheeks, enclosed in a circular frame (no text or symbols)natural_image
Illustration of a hand holding a bandaged device with a magnified inset showing the cable being inserted (no text or symbols)① 按住主机盖按钮,打开主体盖。

natural_image
Illustration of a device with a grid pattern and a magnified inset showing a finger pressing a button (no text or symbols)natural_image
Diagram of a vacuum cleaner with open lid and internal components, shown from two views (no text or labels)natural_image
Illustration of a hand holding a pen with arrows indicating process (no text or symbols)4 取出电机保护过滤器。
清洗方法
(用凉水清洗)
natural_image
Illustration of a faucet pouring liquid into a container with a smaller dish, showing water droplets (no text or symbols)1 用流动水冲洗干净

natural_image
Illustration of a hand cleaning a pink cloth with a griddle and a small device (no text or symbols)② 彻底去除水分。
natural_image
Illustration of a pink and white object with a folded paper, next to a smartphone (no text or symbols)natural_image
Cartoon illustration of a smiling car with arms and legs, no text or symbols present机体出现异味。
震动刷头不运作或震幅过小。
natural_image
Simple line drawing of a vacuum cleaner and a handheld device (no text or symbols)Product specifications 16
Attention before using the appliance 17\~18
Assembling and adjusting the Cleaner 19
Parts description and assembly
Accessories
Nozzle, Crevice 20
Using and cleaning the Sani Punch 21
Using the Sani Punch
How to clean the inhaler of the bed cleaner
How to separate or empty the dust box 22
How to empty the dust separator
How to clean and assemble the dust box
and separator 23
Cleaning
Assembling
How to separate, clean and assemble the
protection filter of the motor 24
Disassembling
Cleansing
How to separate, clean and assemble exhaust filter 25
Disassembling
Cleansing
Assembling
Check before reporting the trouble 26\~28
Packing List 29
Product specifications
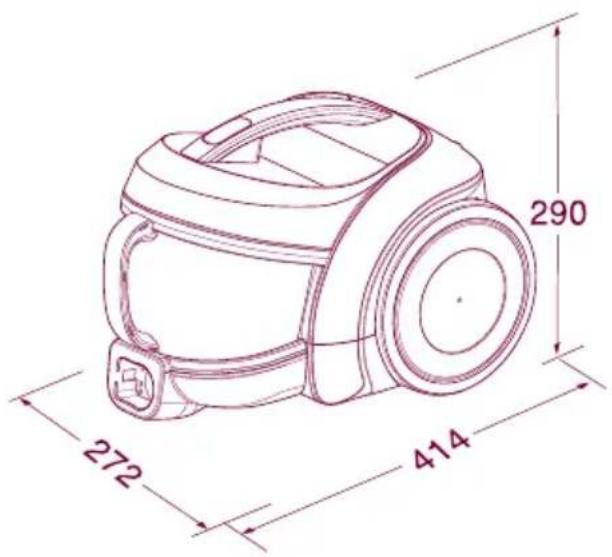
text_image
272 414 290Model: V-CE661HTV
220V\~50Hz
IEC: 1400W
MAX: 1600W
Suction Power: 320W
Net Weight: 5.3Kg
Dust Capacity: 1.5L
Dimension: 272mm x 414mm x 290mm
This appliance complies with the
following GB Directives:
GB4706.1-2005
GB4706.7-2004
GB17625.1-2003
GB4343-2003
※ You will not be informed otherwise of any changes in appearance and standard deriving for improvement of product quality.
Attention before using the appliance
Please read all the following information, which contains important instructions for the safety, the use of the appliance.

DANGER
May immediately cause serious injury or death.

WARNING
May possibly cause serious injury or death.

ATTENTION
May possibly cause losses of property or light injury.

DANGER
Do not pick up anything that is burning or smoking, such as cigarettes, matches or hot ashes.

text_image
Illustration showing a plastic bottle with a flame next to a car, accompanied by a prohibition symbol and a cartoon character.Please turn off the power before pulling out the plug to prevent fire or electric shock. Never handle plug or appliance with wet hands. (Do not use the appliance on the power above 220V.)

natural_image
Illustration of a girl waving to a streetlamp with a no-smoking symbol (no text or numbers present)
WARNING
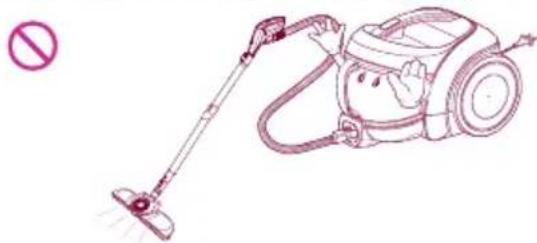
Avoid picking up hard, sharp objects with the cleaner. They may damage the cleaner and the tank.
Do not vacuum the objects like hair ball or big paper ball, otherwise the hose is possibly blocked up. Please clear the hose in time when it is blocked.

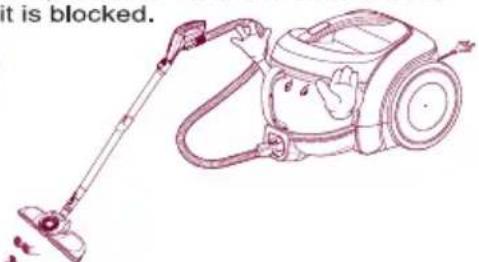
text_image
it is blocked.Independently use a socket when the current is ≥15A. It may cause fire when many electric appliances share one socket. In order to avoid the needless danger, you had better not use the prolonged thread of power cord. The current at most 6A is allowed

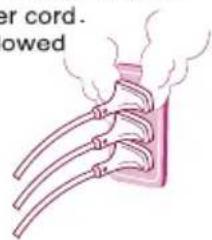
text_image
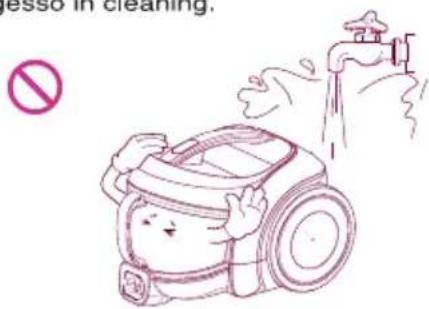
per cord. lowedTo avoid the danger of fire or electric shock, do not vacuum liquid, blade, flammable substances, or small particles like cement and gesso in cleaning.
text_image
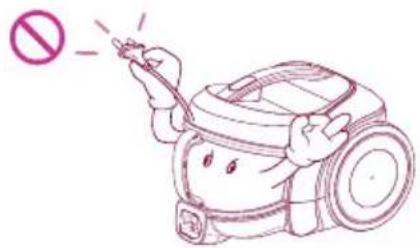
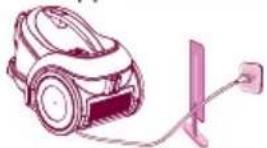
esso in cleaning.Unplug cleaner when not in use. Turn off all controls before unplugging.
text_image
Illustration of a hand holding a tool with a prohibition symbol in the background, indicating no usage or prohibition.Attention before using the appliance

WARNING
Do not let the power cord near the electric heater or other heat source, lest that the cleaner should be deformed or it should cause fire. Do not use the appliance when the power cord or plug is damaged. The damaged power cord or plug must be replaced in the approved service station.

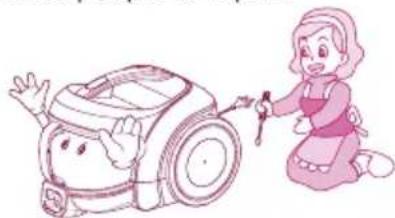
Close supervision is necessary when any appliance is used by or near children. Do not allow vacuum cleaner to be used as a toy or to run unattended at any time.


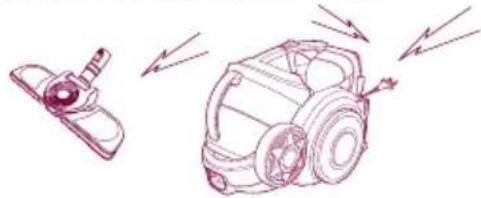
Do not operate the appliance for long when the nozzle inlet or nozzle outlet is blocked, which may have it deformed or damaged.
natural_image
Line drawing of a vacuum cleaner with a handle and no visible text or symbolsIn using the appliance, pay attention to the electrostatic effect generated on the telescopic tube and cleaner body.
natural_image
Line drawing of a robotic vacuum cleaner with motion arrows indicating engine or vibration (no text or symbols)
ATTENTION
Do not allow the non-professional maintenance people to repair.

natural_image
Illustration of a girl kneeling beside a baby washing a baby vacuum cleaner (no text or symbols present)Do not pull or carry by cord, use cord as a handle, close door on cord or pull cord around sharp edges or corners. Do not run appliance over cord. Keep cord away from heated surfaces.


natural_image
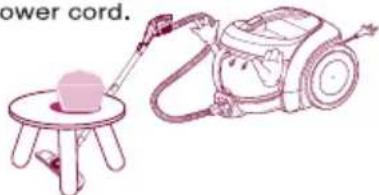
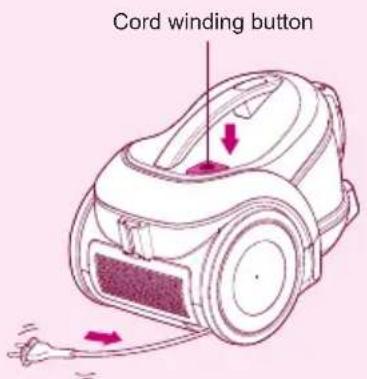
Illustration of a cartoon-style vacuum cleaner next to a door (no text or symbols)In winding the power cord, hold the plug before pressing the button of the cord reel. Do not pull the power cord beyond the red warning line, other wise the power cord may be damaged or unable to be wound up. Pay attention to the plug in winding the cord to avoid damaging the surrounding objects.
natural_image
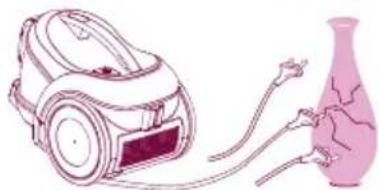
Illustration of a vacuum cleaner connected to a pink vase (no text or symbols)Do not bend, stamp on, or drag the hose. Do not continue to use the hose if it is damaged.
Do not use any heavy or sharp object to press the power cord.

natural_image
Illustration of a vacuum cleaner with a pink bulb mounted on a small stand, connected to a power cord (no text or symbols present)Do not use without dust tank or filters in place. Change tank frequently when picking up very fine materials such as powder.
natural_image
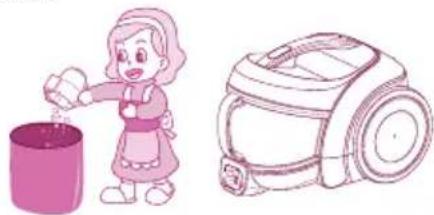
Illustration of a girl pouring liquid from a bucket next to a vacuum cleaner (no text or symbols)Keep hair, loose clothing, fingers, feet and all parts of body away from the nozzle or movable portion.
natural_image
Illustration of a girl waving next to a hand washing a mop (no text or symbols)Parts description and assembly

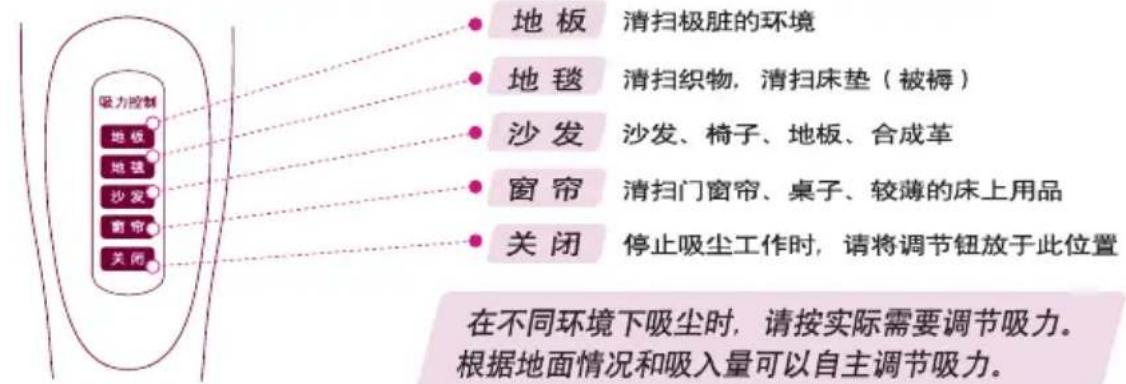
地板 cleaning the dirtiest environment.
- 地毯 cleaning fabrics and mattress (bedding).
- 沙发 cleaning sofa, chair, floor.
窗帘 cleaning door and window curtain, table, and light blanket.
- 关闭 Adjusting to “关闭” when you stop operating the appliance.
When cleaning under different environment, adjust the suction level according to practical need.

text_image
Control button Telescopic tube Flexible Hose Cord winding ButtonAccessories

- Conner Nozzle
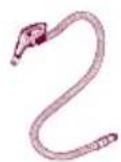
- Hose

- Telescopic tube

• Sani Punch
Nozzle, Crevice
Nozzle, Crevice
Nozzle, Crevice can be used for cleaning the place hard to reach.
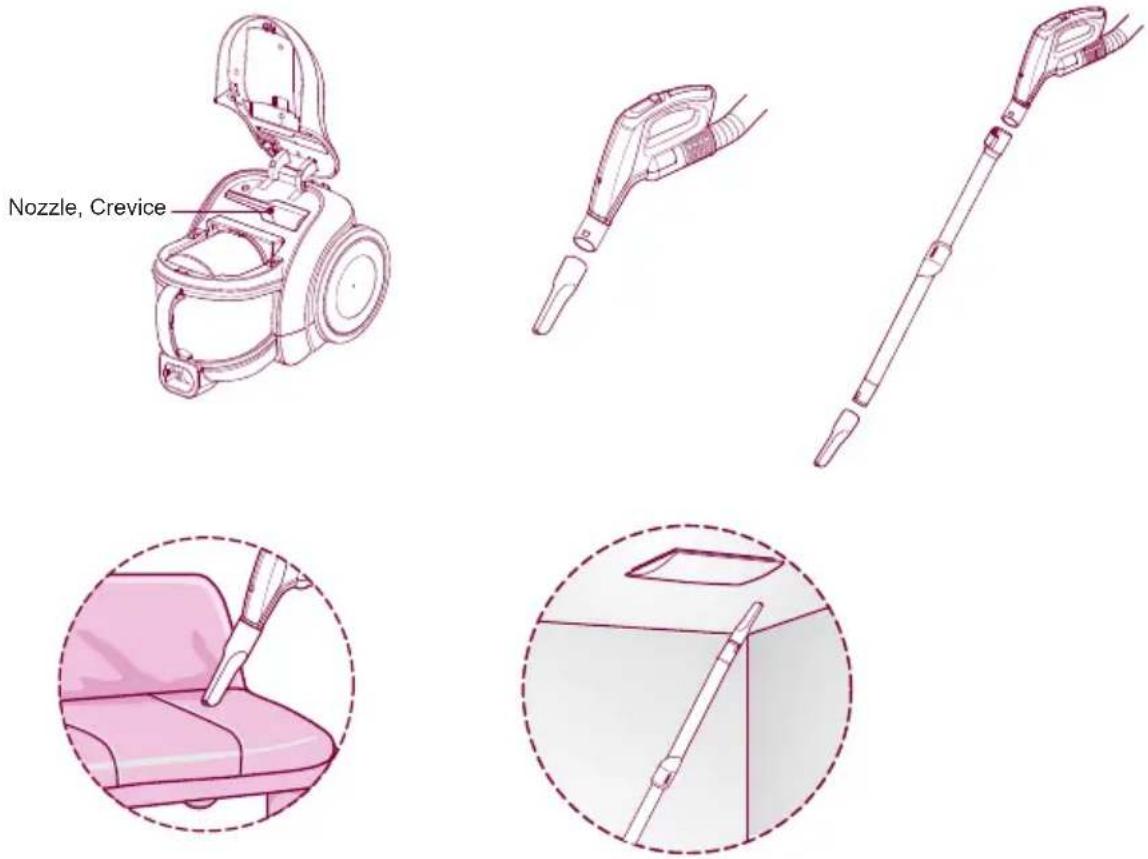
Using and cleaning the Sani Punch
Using the Sani Punch

text_image
Use it as shown in the diagram Assembling Connect to Tube Connect to Hose Effective cleaningUsing

Set the suction power control switch to "地毯" before vacuuming. Depending on the type of bedding, handing may be awkward or it may cause a lot of noise. If this is the case, adjust the suction power control switch to a lower setting.
• bed, bedding, heavy blanket

natural_image
Illustration of a pen writing on a scroll with pink arrows indicating direction (no text or symbols present)• Light blanket & sheet
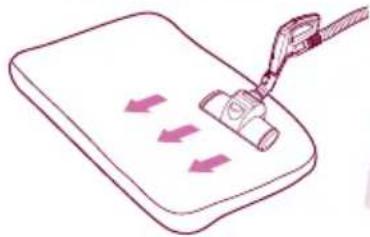
natural_image
Illustration of a hand holding a tool interacting with a clipboard, showing directional arrows (no text or symbols)To increase cleaning efficiency for light blankets, lay on top of a bulky blanket and then clean.
- If the punch bar does not move, lift the nozzle slightly off the surface.
- If it does not move, even after doing this, check if the suction power is too low or if the nozzle base is clogged with a foreign object.
• This Sani Punch nozzle is for effective cleaning of beds and blankets to remove mites and dust.
Cleaning the Sani Punch
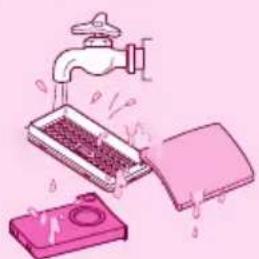
▶ Follow the instruction below for through washing.
(Do not soak the entire body of the vacuum nozzle in water, it may cause the vibrator to malfunction)
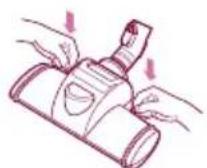
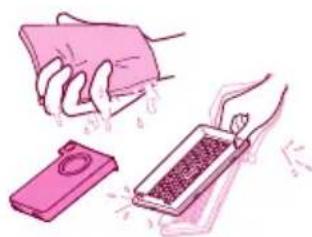
1 Press the button on the rear side of the vacuum nozzle to separate the bottom plate.
② Wipe all the soiled parts of the vacuum nozzle body with a cloth.
③ Wash the removed bottom plate with water and dry it..

4 Insert the attachment projections on bottom plate to the vacuum nozzle grooves.
- Since the vibrator inside is composed of precision parts, never disassemble the body. Be careful not to let foreign objects clog the air suction part on top of the vacuum nozzle.
- Since removal of the punch bar may cause performance problems, do not warp or remove it.
- Attach the bottom plate properly before using. Without this bottom plate, it may not function.
- Since this vacuum nozzle has been made exclusively for cleaning beds, blankets and upholstery, use it only for these cleaning purposes. (Using it to clean the floor may result soiling it or a drop in performance, do not use it for such purposes.)
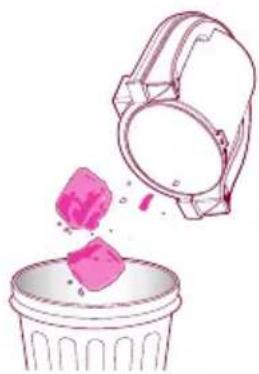
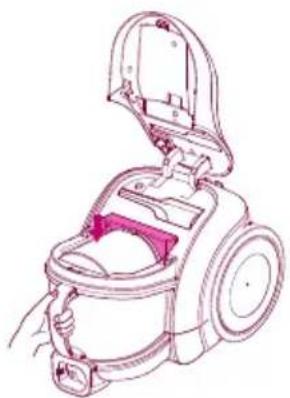
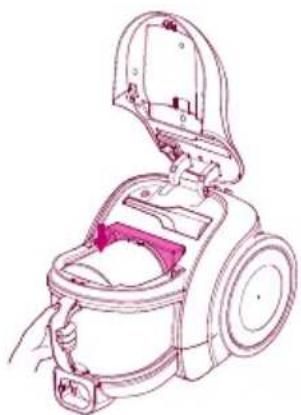
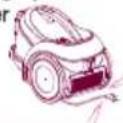
How to separate or empty the dust box

Warning: • Empty the box when the dust settles up to the MAX line.
- Too much dust beyond this line may reduce the inhaling power.
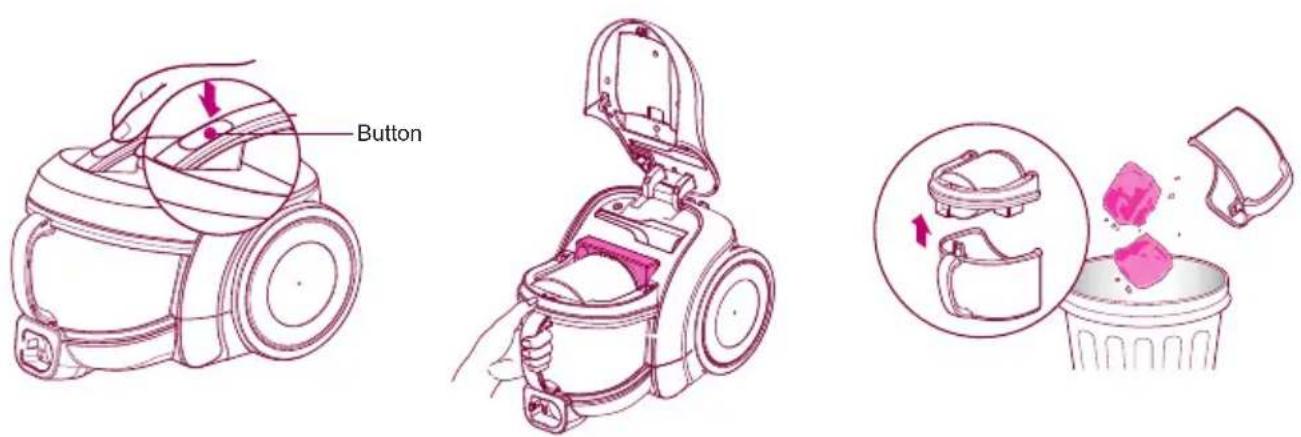
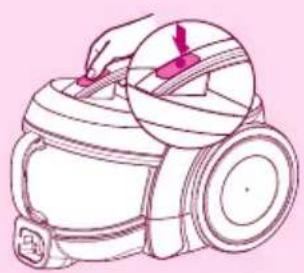
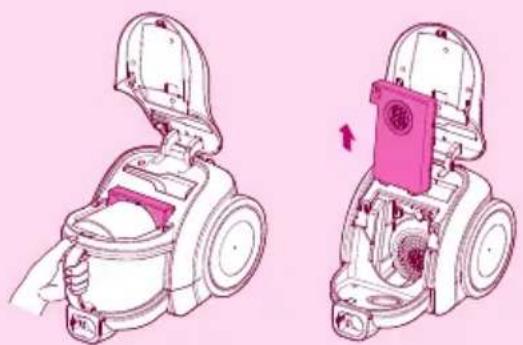
1 Uncover by pressing the button.
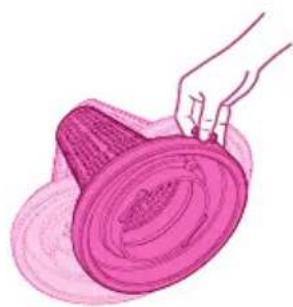
2 Detach the dust box by holding its handle. Empty the dust box.
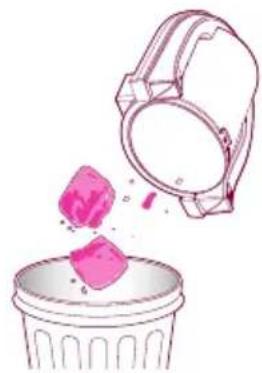
How to empty the dust separator

Warning: • Check the inside of the dust separator when cleaning the dust box.
- Clean the inside of the dust separator, because too much foreign substance such as waste paper or plastic in the dust separator may reduce the inhaling power.

text_image
Diagram illustrating eye anatomy with a magnified view of the inner ear and eyelid, labeled in English.
natural_image
Illustration of hands cleaning a pink circular object with a handle (no text or symbols)1 Check if the dust has settled in the dust separator. Separate the cover by holding its handle.
natural_image
Illustration of a hand pouring liquid into a trash bin (no text or symbols)3 Empty the separator.
natural_image
Illustration of a hand holding a pink hat over a circular object (no text or symbols)4 Remove the dust from the small holes in the cover of the separator.
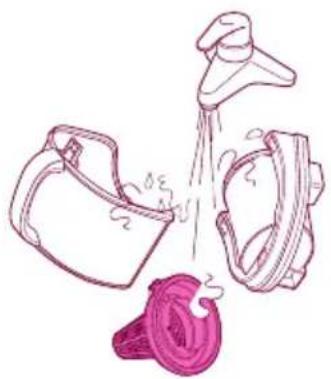
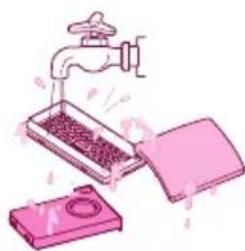
How to clean and assemble the dust box and separator
CleaningCleaning

natural_image
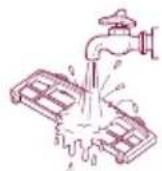
Illustration of a showerhead spraying water into a bucket and a pink bag (no text or symbols)- Cleanse the dust box, separator and its cover with running water.
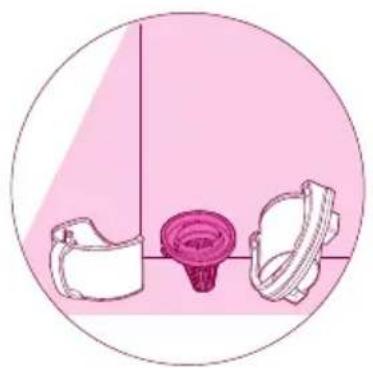
natural_image
Illustration of three white objects with a pink funnel and a pink ring, set against a solid pink circular background (no text or symbols)- Dry them in the well-ventilated shade for a day before using.
AssemblingAssembling
natural_image
Illustration of hands cleaning a mechanical component with a magnified inset showing the process (no text or symbols)1 Attach the cover by inserting the spiral in the cover into the groove.
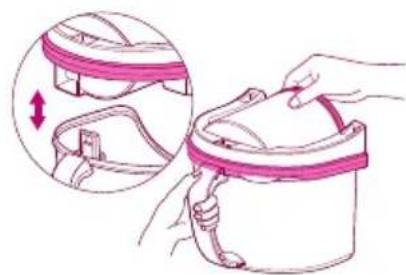
natural_image
Illustration of a hand holding a pink-colored bucket with a handle, showing a close-up of the handle and a magnified inset of the cable (no text or symbols)2 Assemble the dust separator and box.
natural_image
Line drawing of a vacuum cleaner with open lid and handle (no text or symbols)3 Attach the assembled dust box to the body of the cleaner.

natural_image
Line drawing of a hand using a brush to handle a small cylindrical device (no text or symbols)2 Cover the cleaner by holding the carrying handle of the body.
Warning: • If you move the cleaner by holding the carrying handle with the cover not fully closed, the cover may open, causing damage to the parts and the dust box. So check if the cover has been properly closed.
- If you use the cleaner without assembling the cover of the dust separator, it will increase the noise and reduce the inhaling power when cleaning. So check the assembling once again.
How to separate, clean and assemble the protection filter of the motor
Disassembling
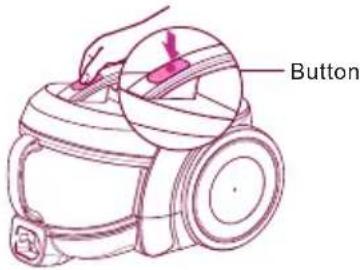
text_image
Button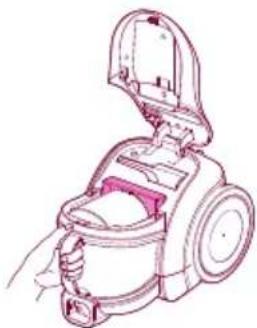
natural_image
Line drawing of a vacuum cleaner with handle and lid (no text or symbols)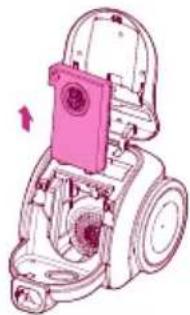
natural_image
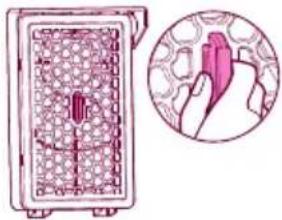
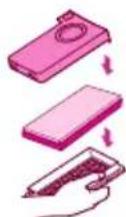
Mechanical component diagram showing a motor assembly with no visible text or symbols1 Uncover by pressing the button. Detach the protection filter of the motor from the body after disassembling the dust box.
natural_image
Illustration of a device with a grid pattern and an inset showing a hand holding a pen (no text or symbols)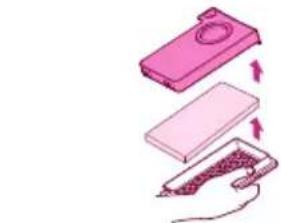
natural_image
Illustration of a device with a pink component and a stack of red objects, showing internal components (no text or symbols)3 Separate it from the filter cover by holding the handle of the case.
4 Detach the filter.
Cleansing
natural_image
Illustration of a faucet pouring liquid into a tray with a pink plastic container (no text or symbols)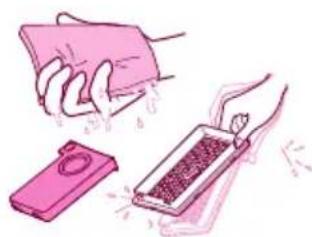
natural_image
Illustration of a hand cleaning a pink cloth with a small device nearby (no text or symbols)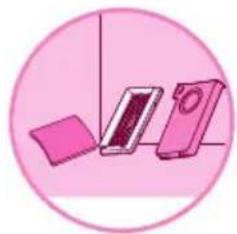
natural_image
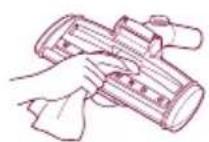
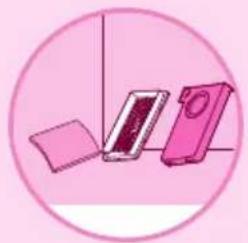
Illustration of three pink devices in a circular frame, one lying flat, one open, and one closed (no text or symbols)1 Clean with running water.
2 Remove the water completely.
3 Dry in the well-ventilated shade for a day before using.
Warning: Assembling is done in reverse order of disassembling. If you use the cleaner without assembling the protection filter of the motor, noise increases and dust gets into the motor when cleaning, thus leading to the shorter life of the cleaner. So check the assembling once again.


natural_image
Illustration of two views of a mechanical device with open lid and internal components (no text or symbols)
natural_image
Line drawing of a hand holding a small device with a handle, no text or symbols present1 Put the filter into the case.
2 Cover the filter.
3 Mount the assembled filter and assemble the dust box.
4 Cover the cleaner by holding the carrying handle of the body.
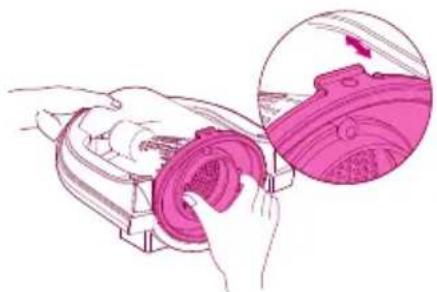
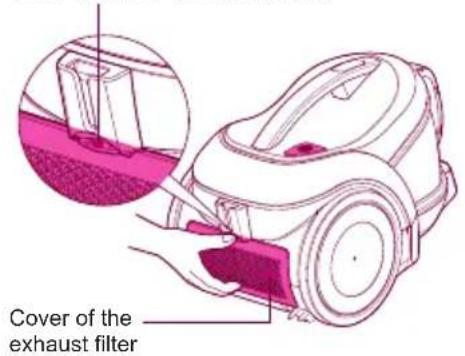
How to separate, clean and assemble exhaust filter
Disassembling
The exhaust filter should be cleaned at least once half a year. Allow exhaust filter to dry in a shaded location for a dry.
Cover button of the exhaust filter
text_image
Cover of the exhaust filter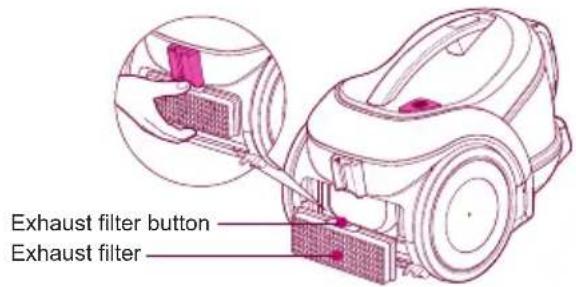
text_image
Exhaust filter button Exhaust filterCleansing

natural_image
Illustration of a hand pouring liquid from a container onto a surface, with no text or symbols present.Assembling

natural_image
Illustration of a vacuum cleaner with a mesh chamber and exhaust pipe (no text or symbols)1 Shake off the exhaust filter.
2 Insert the exhaust filter and join the cover properly until you hear the click of the button.

natural_image
Illustration of a cartoon girl with pink hair and a smiling face, enclosed in a pink circular frame (no text or symbols)How to keep the cleaner after using
text_image
Cord winding button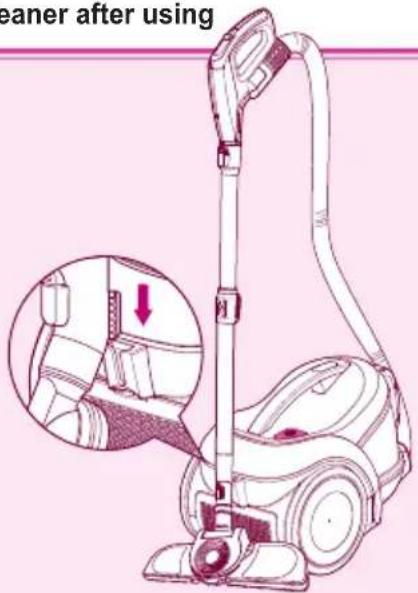
text_image
cleaner after using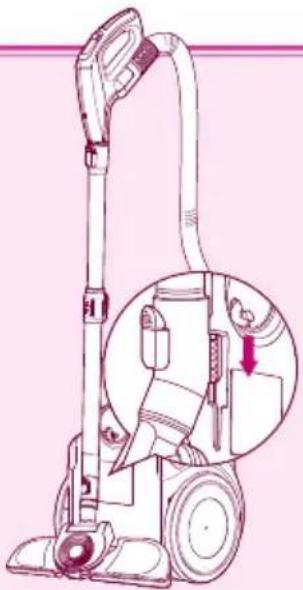
natural_image
Line drawing of a vacuum cleaner with a magnified inset showing the component detail (no text or symbols)• The cord winds up when you press the button.
- Insert the spiral of the inhaler into the groove in the back or at the bottom of the body.
Check before reporting the trouble
You won't be happy to waste money by calling for service when there is no trouble with the cleaner. Here is good advice to follow for trouble shooting before calling for service. Read the instructions carefully, and you can remove the trouble by yourself.
If inhaling is not well done?
Stage 1
Check if the control button of the inhaling power has been put to "MAX".
Stage 2
Clean the protection filter of the motor.
12p
Disassembling
natural_image
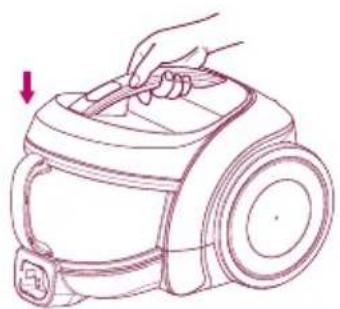
Line drawing of a handheld device with a magnified inset showing a red tool interacting with the lid (no text or symbols)1 Uncover the body by pressing the button of the cover.

natural_image
Illustration of a device with a grid pattern and a magnified view of a hand holding a pink object (no text or symbols)Separate the filter from the cover by holding the handle of the case.
natural_image
Technical illustration of a mechanical device with two views showing internal components (no text or symbols)2 Detach the protection filter of the motor from the body after disassembling the dust box.

natural_image
Illustration of a hand holding a pen with arrows indicating process (no text or symbols)4 Detach the protection filter of the motor.
Cleansing (with cold water)

natural_image
Illustration of a faucet pouring liquid into a tray with a pink container, showing water droplets (no text or symbols)1 Cleanse it with running water.

natural_image
Illustration of a hand cleaning a pink cloth with a small device, no text or symbols present2 Remove the water completely.
natural_image
Illustration of a smartphone and its packaging, no text or symbols present3 Dry it in the well-ventilated shade for a day before using.
If you have a problem
If a minor problem occurs, it usually can be solved quite easily when the cause is found by using the check list below.
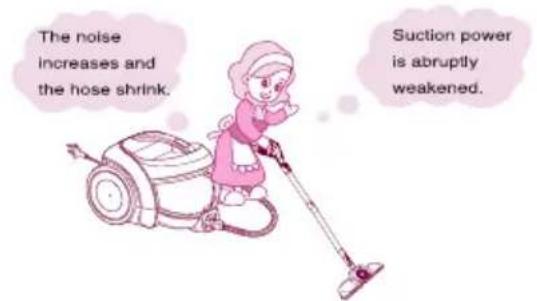
Problem:
text_image
The noise increases and the hose shrink. Suction power is abruptly weakened.Help:

Check the dust tank and suction inlet.
Solution
1 Dust tank full. (到达MAX处) Empty dust tank.

Is it full? Empty the dust tank in time!
② Motor filter dirty.
Clean the motor filter with brush and water, allow to dry and replace in cleaner.

Is the filter OK? Then check the suction inlet.
3 When checking the suction inlet, adjust the suction level to the maximum.
First step
Turn cleaner off and disconnect from electrical outlet, then disconnect nozzle from telescopic tube. Check if it is blocked, and remove any blockages.
If there is still a problem, proceed the second step.
Second step
Disconnect the telescopic tube from hose. Check if it is blocked, and remove any blockages.
If there is still a problem, proceed the third step.
natural_image
Illustration of a medical or laboratory procedure showing a syringe and a syringe with motion arrows (no text or symbols)Third step
Plug cleaner in, turn on, and check hose end for suction. Remove any obstructions.
If there is also a problem, clean the filter.

If you have a problem
Please check before notifying malfunction
If you doubt the product meets with malfunction, please check the cause of such malfunction before contacting with the after-sales service center or agent, so as to ensure efficiency of repair.
Malfunction
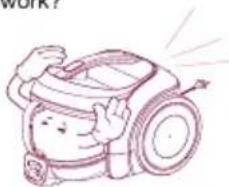
The vacuum does not work?

The vacuum does not work?
natural_image
Cartoon illustration of a smiling robot with arms raised, no text or symbols presentPeculiar smell exists inside the vacuum cleaner

Vibration brush head does not work or the amplitude of vibration is too small.
natural_image
Simple line drawing of a vacuum cleaner and a compact device (no text or symbols)The power cord can not be scrolled thoroughly into the vacuum cleaner or the power cord can not be fully pulled.
The vacuum cleaner or the discharged air is too heat.

Inner wall of the hose is too dirt.
Check
• Is the plug inserted?
• Is the socket powered on?
• If the hose inserted?
- If the motor heat protection opened?
Troubleshooting
- Insert the plug tight (This product is applicable for 220V)
- Verify the power of socket is on
- Insert the hose tight
-
Restart in 2 hours
-
When the vacuum cleaner's suction is too large or the motor is under high speed running, they do not belong to the abnormal conditions. So, please use the vacuum cleaner properly.
- If it is the noise rather than the normal motor sound, please phone the repair center.
• The duster collector is filled up.
• The filter is clogged.
• Suction inlet is jammed.
- Drawtube is clogged.
- Hose is clogged.
• Clean out the dust collector.
- Purge the sponge filter with water and air-dry in the shady and cool place for one day.
• Take out the sucked objects before use.
Take out the objects inside the drawtube before use.
• Take out the objects inside the hose before use.
- When the motor is running, the rubber band used for fixing the motor will produce a little smell due to the heat, but it will not affect the operation or damage the machine.
-
When the machine sucks some water accidentally or the dust collector is not cleaned for a long period of time, the peculiar smell will be produced. So, clean up the dust collector timely.
-
The vibration brush head is used for cleaning the fabric such as bedclothes and sofa.
- The sani punch head shall be used for cleaning the carpet.
- Check whether the chassis is properly.
- When cleaning the thin fabric, please pad the thick bedclothes hereunder.
- As cleaning the carpet, sometimes, the machine may not work due to affection from the carpet materials. So, please carry out the operation as required
-
Please confirm whether obstruction exists at the dust collector and suction inlet.
• The amplitude of vibration may be reduced due to the decrease of suction. -
Pull out part of the power cord and then re-scroll it.
- Please put forth your strength to pull out the power cord, which will not be damaged.
- The power cord entwined inside the machine or it is caused by high temperature in the summer.
- The cord is bended inside the machine or not coiled around the winder. After the winder is started, the normal operation could be realized.
• Is the suction normal?
- The heat air discharged from the machine is arising from the heat produced by motor. So, the temperature is normal, please use the machine continuously.
- Never suck the water because after mixing of the water and dust, the tube wall will be polluted and the motor will be damaged.
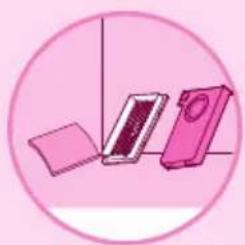
Packing List
Vacuum Cleaner 1
Owner's Manual 1
Sani Punch 1
Hose 1
Telescopic tube 1
Conner Nozzle 1
请打电话

LG电子
400-819-9999
售后热线
热线 一号通
LG 电子 (天津)电器有限公司
地址: 中国·天津市北辰区兴淀公路
传真:022-26903476
邮编: 300402