Pick your language and provide your email: we'll send you a specifically translated version.
This manual is not available in your language
Product Type
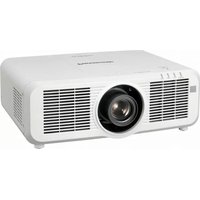
DLP Projector
Model
PT-MW530LE
Brand
Panasonic
Native Resolution
WXGA (1280 x 800)
Brightness
4500 lumens
Contrast Ratio
2000:1
Lamp Life
Up to 5000 hours (Normal mode)
Keystone Correction
Vertical: +/- 40°, Horizontal: +/- 30°
Lens Shift
Vertical: 0-60%, Horizontal: +/- 10%
Optical Zoom
1.8x motorized
Input Ports
HDMI x 2, VGA x 2, Composite x 1, S-Video x 1, RJ-45, RS-232C
Dimensions (W x H x D)
498 x 145 x 398 mm
Weight
7.5 kg
Power Consumption
320 W (Normal mode), 0.5 W (Standby)
Noise Level
35 dB (Normal mode), 29 dB (Eco mode)
Lamp Type
UHM lamp, 280 W
Warranty
3 years (standard)
Operating Temperature
0°C to 45°C
Maintenance
Replace air filter every 1000 hours, clean with a soft cloth
Safety Features
Auto power off, overheat protection, security lock slot
Spare Parts
Lamp unit, air filter, remote control available
Repairability
Replacement of lamp and filter by user; other repairs by authorized service
Frequently Asked Questions - PT-MW530LE PANASONIC
How do I replace the lamp in my PT-MW530LE?
Turn off the projector and unplug it. Allow the lamp to cool for at least 1 hour. Open the lamp cover on the side, unscrew the lamp module, and pull it out. Install the new lamp module, screw it in, and close the cover. Reset the lamp timer in the menu.
What is the recommended cleaning procedure for the air filter?
Clean the air filter every 1000 hours of use. Turn off and unplug the projector. Remove the filter cover, take out the filter, and vacuum or wash it with water. Let it dry completely before reinstalling. Replace the filter if it is damaged.
How can I adjust the keystone correction?
Press the KEYSTONE button on the remote. Use the arrow keys to adjust vertical and horizontal keystone. Alternatively, go to Menu > Display > Keystone to enter precise values. The PT-MW530LE offers +/-40° vertical and +/-30° horizontal correction.
Why is my projector not turning on?
Check the power cord connection and ensure the power outlet is working. Verify that the lamp cover is properly closed. If the LAMP indicator flashes, the lamp may need replacement. Also check the temperature; if overheating, the projector will shut down.
Can I mount the projector on the ceiling?
Yes, the PT-MW530LE supports ceiling mounting. Use a Panasonic-approved ceiling mount bracket. Ensure the mount is securely attached to a solid ceiling structure. The projector has a screw hole pattern for standard mounts. Consult the manual for proper installation.
What input sources are supported?
The projector supports HDMI, VGA (computer), composite video, S-Video, and component video (via adaptor). Audio input is through RCA or 3.5mm jack. For network control, use the RJ-45 port. The projector automatically detects active sources.
How do I connect the projector to a wireless network?
This model does not have built-in Wi-Fi. To use wireless, connect an optional Panasonic Wireless Module (ET-WML100) to the USB port. Then go to Menu > Network and configure the wireless settings. Alternatively, use a wired LAN via the RJ-45 port.
What is the maximum image size?
With a 1.8x zoom lens, you can project from 50 to 400 inches (diagonal). The optimal size for a given distance is calculated using the projectors throw ratio of 1.53-2.73:1. For example, at 3 meters, you get a 100-180 inch image.
How do I reset the lamp timer?
After replacing the lamp, go to Menu > Option > Lamp Timer Reset. Select Yes to confirm. This clears the previous lamp hours. Always reset after each lamp replacement to track lamp life accurately.
What should I do if the image is blurry?
First, adjust the focus ring on the lens. If still blurry, check the lens shift and keystone settings. Ensure the projector is perpendicular to the screen. Clean the lens with a soft, dry cloth. If the issue persists, the lens or DLP chip may need service.
User questions about PT-MW530LE PANASONIC
0 question about this device. Answer the ones you know or ask your own.
Ask a new question about this device
No questions yet. Be the first to ask one.
Download the instructions for your Video projector in PDF format for free! Find your manual PT-MW530LE -
PANASONIC and take your electronic device back in hand. On this page are published all the documents necessary for the use of your device. PT-MW530LE by PANASONIC.
USER MANUAL PT-MW530LE PANASONIC
Operating Instructions
Functional Manual
LCD Projector
Commercial Use
Model No. PT-MZ670
PT-MW630
PT-MZ570
PT-MW530
natural_image
Illustration of a projector with visible fan and screen (no text or symbols)
Thank you for purchasing this Panasonic product.
■ This manual is common to all the models regardless of suffixes of the Model No.
for India
D: The standard zoom lens supplied
● for Asia (except for Taiwan, Korea) / Oceania
A: The standard zoom lens supplied LA: The lens sold separately
for Taiwan
A: The standard zoom lens supplied
for Korea
Without L: The standard zoom lens supplied
With L: The lens sold separately (PT-MZ670L, PT-MZ570L only)
● for other countries or regions
Without L: The standard zoom lens supplied With L: The lens sold separately
■ Before operating this product, please read the instructions carefully and save this manual for future use.
■ Before using this product, be sure to read "Read this first" (pages 5 to 15).
LinkRay™
Contents
Read this first!
Chapter 1 Preparation
Precautions for use
Lens protection material 20
Cautions when transporting 20
Cautions when installing 20
Security 23
Notes regarding the wireless LAN 23
Light ID 24
DIGITAL LINK 25
Application software supported by the projector 25
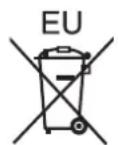
Disposal 25
Storing 25
Cautions on use 26
Accessories 27
Optional accessories 28
About your projector 29
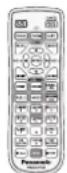
Remote control 29
Projector body 31
Preparing the remote control 34
Inserting and removing the batteries 34
When using the multiple projectors....34
Connecting the remote control to the projector with a cable 34
Chapter 2 Getting Started
Setting up
Installation mode 36
Parts for installation (optional)....37
Projected image and throw distance 38
Adjusting adjustable feet 48
Removing/attaching the projection lens 49
Removing the projection lens 49
Attaching the projection lens 50
Attaching the Wireless Module 51
Attaching the Wireless Module 51
Connecting 52
Before connecting....52
Connecting example: AV equipment 53
Connecting example: Computers 54
Connecting example using DIGITAL LINK....55
Chapter 3 Basic Operations
Switching on/off the projector
Connecting the power cord ....
Power indicator 20
Switching on the projector
When the initial setting screen is displayed 61
Making adjustments and selections 65
Switching off the projector
Projecting
Selecting the input signal
Adjusting the focus, zoom, and lens shift 68
Moving the lens position to the home position .....69
Adjustment range by the lens position shift (optical shift)
Using the USB memory
Notes on use
USB memory that can be used with the projector....70
Attaching the USB memory 70
Removing the USB memory 71
Operating with the remote control 72
Using the shutter function 72
Using the mute function 72
Adjusting the volume 73
Using the freeze function 73
Using the on-screen display function 73
Using the automatic setup function 74
Using the screen adjustment function 74
Using the digital zoom function 75
Switching the image aspect ratio 36 76
Using the presentation timer function 76
Using the function button 76
Displaying internal test pattern 76
Using the status function 77
Using the ECO management function 77
Setting ID number of the remote control 77
Chapter 4 Settings
Menu navigation 80
Navigating through the menu 80
Main menu 81
Sub-menu 82
[PICTURE] menu 85
[PICTURE MODE] 85
[CONTRAST] 85
[BRIGHTNESS] 85
[COLOR] 86
[TINT] 86
[COLOR TEMPERATURE] 86
[GAMMA] 87
[DAYLIGHT VIEW]......88
[SHARPNESS] 88
[NOISE REDUCTION] 88
[DYNAMIC CONTRAST] 89
[SYSTEM SELECTOR]......89
[POSITION] menu 90
[SHIFT] 90
[ASPECT] 90
[ZOOM] 91
[CLOCK PHASE] 92
[REALTIME KEYSTONE] 92
[SCREEN ADJUSTMENT] 93
[ADVANCED MENU] menu 96
[DIGITAL CINEMA REALITY] 96
[BLANKING] 96
[INPUT RESOLUTION]......97
[CLAMP POSITION] 97
[RASTER POSITION] 98
[DISPLAY LANGUAGE] menu....99
Changing the display language....99
[DISPLAY OPTION] menu....100
[COLOR ADJUSTMENT]....100
[COLOR CORRECTION]....100
[SCREEN SETTING] 101
[AUTO SIGNAL]....101
[AUTO SETUP]....101
[RGB IN] 102
[HDMI IN]....103
[DIGITAL LINK IN]......104
[ON-SCREEN DISPLAY]....105
[CLOSED CAPTION SETTING] (only when NTSC signal is input)....108
[SIGNAL SEARCH]......108
[BACK COLOR]....109
[STARTUP LOGO]....109
[SHUTTER SETTING]....109
[P-TIMER]....110
[FREEZE]....111
[DIGITAL ZOOM]....111
[PROJECTOR SETUP] menu ____
[PROJECTOR ID]
[PROJECTION METHOD]
[ECO MANAGEMENT]
[LightID]
[INITIAL STARTUP]
[STARTUP INPUT SELECT]....
[DATE AND TIME]
[SCHEDULE]
[RS-232C]
[REMOTE1 MODE]
[FUNCTION BUTTON]
[LENS CALIBRATION]
[AUDIO SETTING] 123
[FILTER COUNTER] 125
[DC OUT] 126
[STATUS] 126
[DATA CLONING] 127
[SAVE ALL USER DATA] 130
[LOAD ALL USER DATA] 130
[INITIALIZE] 130
[SERVICE PASSWORD] 131
[TEST PATTERN] menu....132
[TEST PATTERN]....
[SIGNAL LIST] menu 133
Registering new signals 133
Renaming the registered signal 133
Deleting the registered signal 133
Protecting the registered signal 134
Expanding signal lock-in range 134
Sub memory 135
[SECURITY] menu 136
[SECURITY PASSWORD] 136
[SECURITY PASSWORD CHANGE] 136
[DISPLAY SETTING] 136
[TEXT CHANGE] 137
[MENU LOCK] 137
[MENU LOCK PASSWORD]......137
[CONTROL DEVICE SETUP] 138
[CONTROL DEVICE PASSWORD CHANGE] 139
[NETWORK/USB] menu
[DIGITAL LINK MODE]....140
[DIGITAL LINK STATUS] 140
[DIGITAL LINK MENU]....141
[WIRED LAN] 141
[WIRELESS LAN] 142
[PROJECTOR NAME] 146
[NETWORK CONTROL] 146
[MEMORY VIEWER]......146
[Panasonic APPLICATION]....148
[MIRRORING] 150
[NETWORK STATUS]....151
Chapter 5 Operations
Network connection
Connecting via wired LAN 155
Connecting with the wireless LAN 157
Web control function 159
Computer that can be used for setting....159
Accessing from the web browser 159
Projecting with Panasonic APPLICATION input 179
Application that can be used....179
Connecting the device 179
Ending the connection with the device....179
Description of the standby screen 180
Using the moderator mode in the Panasonic APPLICATION input....181
Projecting with MIRRORING input 182
Connecting the device 182
Ending the connection with the device....183
Using the moderator mode in the MIRRORING input 183
Operating with the web browser 184
Description of the [MODERATOR MODE] page 185
Projecting with MEMORY VIEWER input....186
Images that can be played back with the Memory Viewer function....186
Displaying the Memory Viewer screen....187
Operating the Memory Viewer screen....187
Playing back still images 189
Playing back movies....190
Description of the Memory Viewer screen....192
Playing back using the contents list....193
Using the pairing function 194
Pairing the USB memory 194
Chapter 6 Maintenance
Light source/temperature/filter indicators 197
When an indicator lights up 197
Maintenance140placement
Before performing maintenance/replacement ..... 199
Maintenance
Replacing the unit
Troubleshooting
FAQ
Wireless LAN connection
Mirroring connection
[SELF TEST] display
Chapter 7 Appendix
Technical information
PJLink protocol 210
Control commands via LAN 211
154 terminal 214
terminal 217
Operating [MENU LOCK PASSWORD] 217
List of compatible signals
Specifications 220
Dimensions 225
Precautions for attaching the Ceiling Mount Bracket 226
Index 227
Read this first!
WARNING: THIS APPARATUS MUST BE EARTHED.
WARNING: To prevent damage which may result in fire or shock hazard, do not expose this appliance to rain or moisture.
This device is not intended for use in the direct field of view at visual display workplaces. To avoid accommodating reflexions at visual display workplaces this device must not be placed in the direct field of view.
The equipment is not intended for used at a video workstation in compliance BildscharbV.
The sound pressure level at the operator position is equal or less than 70 dB (A) according to ISO 7779.
WARNING:
Remove the plug from the mains socket when this unit is not in use for a prolonged period of time.
To prevent electric shock, do not remove cover. No user serviceable parts inside. Refer servicing to qualified service personnel.
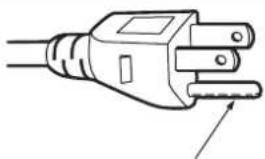
Do not remove the earthing pin on the mains plug. This apparatus is equipped with a three prong earthing-type mains plug. This plug will only fit an earthing-type mains socket. This is a safety feature. If you are unable to insert the plug into the mains socket, contact an electrician. Do not defeat the purpose of the earthing plug.
WARNING:
This equipment is compliant with Class A of CISPR32.
In a residential environment this equipment may cause radio interference.
(for Taiwan)
WARNING:
This equipment complies with the Class A standard of CISPR32.
This is Class A information technology equipment that may cause radio frequency interference when used in a residential environment, in which the user will be required to take certain appropriate countermeasures.
CAUTION: To assure continued compliance, follow the attached installation instructions. This includes using the provided power cord and shielded interface cables when connecting to computer or peripheral devices. Also, any unauthorized changes or modifications to this equipment could void the user's authority to operate this device.
This is a device to project images onto a screen, etc., and is not intended for use as indoor lighting in a domestic environment.
Directive 2009/125/EC
WARNING: TO REDUCE THE RISK OF FIRE OR ELECTRIC SHOCK, DO NOT EXPOSE THIS PRODUCT TO RAIN OR MOISTURE.
WARNING: RISK OF ELECTRIC SHOCK. DON'T OPEN
Indicated on the projector
The lightning flash with arrowhead symbol, within an equilateral triangle, is intended to alert the user to the presence of uninsulated “dangerous voltage” within the product’s enclosure that may be of sufficient magnitude to constitute a risk of electric shock to persons.
The exclamation point within an equilateral triangle is intended to alert the user to the presence of important operating and maintenance (servicing) instructions in the literature accompanying the product.
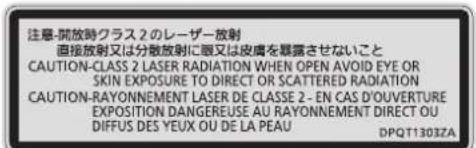
WARNING: Do not look at the light emitted from the lens while the projector is being used. As with any bright source, do not stare into the direct beam.
RG2
Indicated on the projector
RG2 IEC 62471-5:2015
Notice on laser
(for USA and Canada)
This projector is the Class 3R laser product that complies with IEC 60825-1:2007.
(Inside of product)
Indicated on the projector
(for India)
This projector is the Class 1 laser product that complies with IEC/EN 60825-1:2014.
(for other countries or regions)
This projector is the Class 1 laser product that complies with IEC/EN 60825-1:2014.
CAUTION: Use of controls or adjustments or performance of procedures other than those specified herein may result in hazardous radiation exposure.
CAUTION (North/Middle/South America/Taiwan)
Power Supply: This Projector is designed to operate on 100 V - 240 V, 50 Hz/60 Hz AC, house current only.
CAUTION: The AC power cord which is supplied with the projector as an accessory can only be used for power supplies up to 125 V. If you need to use higher voltages than this, you will need to obtain a separate 250 V power cord. If you use the accessory cord in such situations, fire may result.
CAUTION (North/Middle/South America/Taiwan)
This equipment is equipped with a three-pin grounding-type power plug. Do not remove the grounding pin on the power plug. This plug will only fit a grounding-type power outlet. This is a safety feature. If you are unable to insert the plug into the outlet, contact an electrician. Do not defeat the purpose of the grounding plug.
natural_image
Line drawing of an electrical plug with a terminal socket and cable (no text or symbols)
Do not remove
natural_image
Line drawing of an electrical outlet plug with a screw and two leads (no text or symbols)
WARNING (USA and Canada)
Not for use in a computer room as defined in the Standard for the Protection of Electronic Computer/Data Processing Equipment, ANSI/NFPA 75.
For permanently connected equipment, a readily accessible disconnect device shall be incorporated in the building installation wiring.
For pluggable equipment, the socket-outlet shall be installed near the equipment and shall be easily accessible.
NOTIFICATION (Canada)
This class A digital apparatus complies with Canadian ICES-003.
For USA-California Only
This product contains a CR Coin Cell Lithium Battery which contains Perchlorate Material – special handling may apply.
See www.dtsc.ca.gov/hazardouswaste/perchlorate
FCC NOTICE (USA)
Verification
Model Number: PT-MZ670 / PT-MZ670L / PT-MW630 / PT-MW630L /
PT-MZ570 / PT-MZ570L / PT-MW530 / PT-MW530L
Trade Name: Panasonic
Responsible Party: Panasonic Corporation of North America
Address: Two Riverfront Plaza, Newark, NJ 07102-5490
This device complies with Part 15 of the FCC Rules.
Operation is subject to the following two conditions:
(1) This device may not cause harmful interference, and (2) this device must accept any interference received, including interference that may cause undesired operation.
Caution:
This equipment has been tested and found to comply with the limits for a Class A digital device, pursuant to part 15 of the FCC Rules. These limits are designed to provide reasonable protection against harmful interference when the equipment is operated in a commercial environment. This equipment generates, uses, and can radiate radio frequency energy and, if not installed and used in accordance with the instruction manual, may cause harmful interference to radio communications. Operation of this equipment in a residential area is likely to cause harmful interference in which case the user will be required to correct the interference at his own expense.
FCC Warning:
To assure continued compliance, follow the attached installation instructions. This includes using the provided power cord and shielded interface cables when connecting to computer or peripheral devices. Also, any unauthorized changes or modifications to this equipment could void the user's authority to operate this device.
IMPORTANT: THE MOLDED PLUG
FOR YOUR SAFETY, PLEASE READ THE FOLLOWING TEXT CAREFULLY.
This appliance is supplied with a molded three pin mains plug for your safety and convenience. A 13 amp fuse is fitted in this plug. Should the fuse need to be replaced, please ensure that the replacement fuse has a rating of 13 amps and that it is approved by ASTA or BSI to BS1362.
Check for the ASTA mark 🍐 or the BSI mark 🍽 on the body of the fuse.
If the plug contains a removable fuse cover, you must ensure that it is refitted when the fuse is replaced. If you lose the fuse cover, the plug must not be used until a replacement cover is obtained. A replacement fuse cover can be purchased from an Authorized Service Center.
If the fitted molded plug is unsuitable for the mains socket in your home, then the fuse should be removed and the plug cut off and disposed of safely. There is a danger of severe electrical shock if the cut off plug is inserted into any 13 amp socket.
If a new plug is to be fitted, please observe the wiring code as shown below. If in any doubt, please consult a qualified electrician.
WARNING: THIS APPLIANCE MUST BE EARTHED.
IMPORTANT: The wires in this mains lead are colored in accordance with the following code:
Green - and - Yellow: Earth
Blue: Neutral
Brown: Live
As the colors of the wire in the mains lead of this appliance may not correspond with the colored markings identifying the terminals in your plug, proceed as follows.
The wire which is colored GREEN - AND - YELLOW must be connected to the terminal in the plug which is marked with the letter E or by the Earth symbol 12 or colored GREEN or GREEN - AND - YELLOW.
The wire which is colored BLUE must be connected to the terminal in the plug which is marked with the letter N or colored BLACK.
The wire which is colored BROWN must be connected to the terminal in the plug which is marked with the letter L or colored RED.
How to replace the fuse: Open the fuse compartment with a screwdriver and replace the fuse.
Importer's name and address within the European Union
Panasonic Marketing Europe GmbH
Panasonic Testing Centre
Winsbergring 15, 22525 Hamburg, Germany
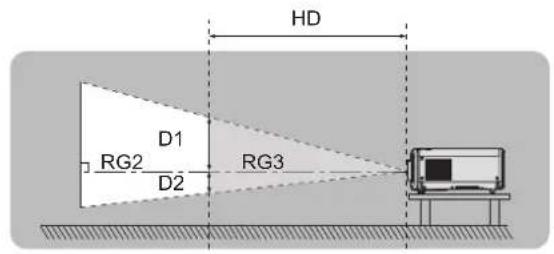
Hazard distance (IEC 62471-5)
The distance at which the level of exposure has dropped to the level of the applicable Exposure Limit Value is known as the hazard distance or safety distance.
Do not look or stare into the light beam from a distance closer than the hazard distance (RG3 = risk group 3).
Beyond this distance the light beam is considered to be safe. (RG2 = risk group 2)
RG3 level is considered to be a hazard to the eyes from direct radiation.
RG2 level does not pose any optical hazard and can be safely used in all situations.
Hazard Distance Hazard Distance
(Unit: m)
Lens HD
^1
D1 ^2 max. D2
^2 max. D3
^2 max. D4
^2 max.
ET-ELW21 < 1.0 0.97 0.97 1.13 1.13
ET-ELW22 < 1.0 0.89 0.89 1.03 1.03
ET-ELW20 < 1.0 0.62 0.62 0.72 0.72
Standard Zoom Lens/ET-ELS20
< 1.0 0.47 0.47 0.55 0.55
ET-ELT20 < 1.0 0.29 0.29 0.34 0.34
ET-ELT21 1.9 0.34 0.34 0.39 0.39
*1 Hazard Distance
*2 D1, D2, D3, and D4 change in accordance with projection lens shift amount. Each number in this table is worst case.
Note
• Each table complies with IEC 60825-1 (2014) and IEC 62471-5 (2015)
THIS PROJECTOR MAY BECOME RG3 FOR PROFESSIONAL USE
ONLY AND ARE NOT INTENDED FOR CONSUMER USE WITH
INTERCHANGEABLE PROJECTION LENS ET-ELT21.
REFER TO THE OPERATING INSTRUCTIONS FOR HAZARD
DISTANCE BEFORE OPERATION.
CE PROJECTEUR PEUT DEVENIR RG3 POUR UNE UTILISATION
PROFESSIONNELLE UNIQUEMENT ET N'EST PAS DESTINÉ À UNE
UTILISATION DOMESTIQUE AVEC L'OBJECTIF DE PROJECTION
INTERCHANGEABLE ET-ELT21.
CONSULTEZ LE MANUEL D'UTILISATION ET PRENEZ
CONNAISSANCE DE LA DISTANCE DU RISQUE AVANT DE
L'UTILISER.
DIESER PROJEKTOR KANN AUSSCHLIESSLICH FÜR DIE
PROFESSIONELLE VERWENDUNG ALS RG3 EINGESTUFT
WERDEN UND IST MIT DEM AUSTAUSCHPROJEKTIONSOBJEKTIV
ET-ELT21 NICHT FÜR DIE VERWENDUNG DURCH VERBRAUCHER
KONZIPiert.
BEACHTEN SIE VOR DER BEDIENUNG DIE
BEDIJENSGANLEITUNG IN BEZUG AUF DEN
GEFAHRDUNGSABSTAND.
ДАННЫЙ ПРОЕКТОР МОЖЕТ ВХОДИТЬ В ГРУПГУ РИСКА
RG3 - ТОЛЬКО ДЛЯ ПРОФЕССИОНАЛЬНОГО
ИСПОЛЬЗОВАНИЯ, И ОН НЕ ПРЕДНАЗНАЧЕН ДЛЯ
ИСПОЛЬЗОВАНИЯ ПОТРЕБИТЕЛЯМИ СО СМЕННЫМ
ПРОЕКЦИОННЫМ ОБЪЕКТИВОМ ET-ELT21.
ПЕРЕД НАЧАЛОМ РАБОТЫ ОБРАТИТЕСЬ К ИНСТРУКЦИЯМ ПО
ЭКСПЛУАТАЦИИ, ЧТОБЫ УЗНАТЬ ПРО ОПАСНОЕ
РАССТОННИЕ.
이 프로젝터는 투사 렌즈 ET-ELT21과 함께 사용하는 경우, 전문가
전용인 RG3 등급으로 되며, 일반 소비지용이 아닙니다.
작동하기 전에 위험 거리에 대해서는 사용 설명서를 참조하십시오.
DPQT1307ZA
WARNING:
POWER
The wall outlet or the circuit breaker shall be installed near the equipment and shall be easily accessible when problems occur. If the following problems occur, cut off the power supply immediately.
Continued use of the projector in these conditions will result in fire or electric shock, or will cause visual impairment.
If foreign objects or water get inside the projector, cut off the power supply.
If the projector is dropped or the cabinet is broken, cut off the power supply.
If you notice smoke, strange smells or noise coming from the projector, cut off the power supply.
Please contact an Authorized Service Center for repairs, and do not attempt to repair the projector yourself.
During a thunderstorm, do not touch the projector or the cable.
Electric shocks can result.
Do not do anything that might damage the power cord or the power plug.
If the power cord is used while damaged, electric shocks, short-circuits or fire will result.
- Do not damage the power cord, make any modifications to it, place it near any hot objects, bend it excessively, twist it, pull it, place heavy objects on top of it or wrap it into a bundle.
Ask an Authorized Service Center to carry out any repairs to the power cord that might be necessary.
Do not use anything other than the provided power cord.
Failure to observe this will result in electric shocks or fire. Please note that if you do not use the provided power cord to ground the device on the side of the outlet, this may result in electric shocks.
Completely insert the power plug into the wall outlet and the power connector into the projector terminal.
If the plug is not inserted correctly, electric shocks or overheating will result.
- Do not use plugs which are damaged or wall outlets which are coming loose from the wall.
Do not handle the power plug and power connector with wet hands.
Failure to observe this will result in electric shocks.
Do not overload the wall outlet.
If the power supply is overloaded (ex., by using too many adapters), overheating may occur and fire will result.
Clean the power plug regularly to prevent it from becoming covered in dust.
Failure to observe this will cause a fire.
If dust builds up on the power plug, the resulting humidity can damage the insulation.
If not using the projector for an extended period of time, pull the power plug out from the wall outlet.
Pull the power plug out from the wall outlet and wipe it with a dry cloth regularly.
■ ON USE/INSTALLATION
Do not place the projector on soft materials such as carpets or sponge mats.
Doing so will cause the projector to overheat, which can cause burns, fire or damage to the projector.
Do not set up the projector in humid or dusty places or in places where the projector may come into contact with oily smoke or steam.
Using the projector under such conditions will result in fire, electric shocks or deterioration of components. Oil may also distort the plastic and the projector could fall such as when mounted on the ceiling.
Do not install this projector in a place which is not strong enough to take the full weight of the projector or on top of a surface which is sloped or unstable.
Failure to observe this will cause projector to fall down or tip over the projector, and severe injury or damage could result.
Do not install the projector in a location where people pass through.
People may bump into the projector or trip on the power cord, which may result in fire, electric shock, or injury.
Do not cover the air intake/exhaust ports.
Doing so will cause the projector to overheat, which can cause fire or damage to the projector.
Do not place the projector in narrow, badly ventilated places.
Do not place the projector on cloth or papers, as these materials could be drawn into the air intake port.
Provide at least 1 m (39-3/8") of space between any walls or objects and the exhaust port, and at least 50 cm (19-11/16") of space between any walls or objects and the intake port.
WARNING:
Do not look at or place your skin into the light emitted from the lens while the projector is being used. Do not enter the projection luminous flux using an optical device (such as magnifier or mirror).
Doing so can cause burns or loss of sight.
Strong light is emitted from the projector's lens. Do not look at or place your hands directly into this light.
Be especially careful not to let young children look into the lens. In addition, turn off the power and disconnect the power plug when you are away from the projector.
Do not project an image with the lens cover attached.
Doing so can cause fire.
Never attempt to remodel or disassemble the projector.
High voltages can cause fire or electric shocks.
- For any inspection, adjustment and repair work, please contact an Authorized Service Center.
Do not allow metal objects, flammable objects, or liquids to enter inside of the projector. Do not allow the projector to get wet.
Doing so may cause short circuits or overheating, and result in fire, electric shock, or malfunction of the projector.
Do not place containers of liquid or metal objects near the projector.
If liquid enters inside of the projector, consult your dealer.
• Particular attention must be paid to children.
Use the ceiling mount bracket specified by Panasonic.
Using the ceiling mount bracket other than the specified one will result in falling accidents.
- Attach the supplied safety cable to the ceiling mount bracket to prevent the projector from falling down.
Installation work such as mounting the projector on the ceiling should only be carried out by a qualified technician.
If installation is not carried out and secured correctly, it can cause injury or accidents, such as electric shocks.
ACCESSORIES
Do not use or handle the batteries improperly, and refer to the following.
Failure to observe this will cause burns, batteries to leak, overheat, explode or catch fire.
Do not use unspecified batteries.
Do not charge dry cell batteries.
Do not disassemble dry cell batteries.
Do not heat the batteries or place them into water or fire.
Do not allow the + and – terminals of the batteries to come into contact with metallic objects such as necklaces or hairpins.
Do not store or carry batteries together with metallic objects.
Store the batteries in a plastic bag and keep them away from metallic objects.
Make sure the polarities (+ and −) are correct when inserting the batteries.
Do not use a new battery together with an old battery or mix different types of batteries.
Do not use batteries with the outer cover peeling away or removed.
If the battery fluid leaks, do not touch it with bare hands, and take the following measures if necessary.
Battery fluid on your skin or clothing could result in skin inflammation or injury.
Rinse with clean water and seek medical advice immediately.
Battery fluid coming in contact with your eyes could result in loss of sight.
In this case, do not rub your eyes. Rinse with clean water and seek medical advice immediately.
Do not allow children to reach the batteries.
Accidentally swallowing them can cause physical harm.
- If swallowed, seek medical advice immediately.
Remove the depleted batteries from the remote control promptly.
• Leaving them in the unit may result in fluid leakage, overheating, or explosion of the batteries.
CAUTION:
POWER
When disconnecting the power cord, be sure to hold the power plug and power connector.
If the power cord itself is pulled, the lead will become damaged, and fire, short-circuits or serious electric shocks will result.
When not using the projector for an extended period of time, disconnect the power plug from the wall outlet.
Failure to do so may result in fire or electric shock.
Before replacing the projection lens, be sure to turn off the power and disconnect the power plug from the wall outlet.
Unexpected projection of light may cause injury to eyes.
Replacing the projection lens without removing the power plug may result in electric shock.
Disconnect the power plug from the wall outlet before carrying out any cleaning and replacing the unit. Failure to do so may result in electric shock.
■ ON USE/INSTALLATION
Do not place heavy objects on top of the projector.
Failure to observe this will cause the projector to become unbalanced and fall, which could result in damage or injury. The projector will be damaged or deformed.
Do not put your weight on this projector.
You could fall or the projector could break, and injury will result.
- Be especially careful not to let young children stand or sit on the projector.
Do not place the projector in extremely hot locations.
Doing so will cause the outer casing or internal components to deteriorate, or result in fire.
• Take particular care in locations exposed to direct sunlight or near heaters.
Do not place your hands in the openings beside the optical lens, while shifting the lens.
Failure to observe this could cause injury.
Do not install the projector in a location where salt pollution or corrosive gas may occur.
Doing so may result in falling due to corrosion. Also, it may result in malfunctions.
Do not stand in front of the lens while the projector is being used.
Doing so can cause damage and burns to clothing.
- Strong light is emitted from the projector's lens.
Do not place objects in front of the lens while the projector is being used.
Do not block the projection by placing an object in front of the projection lens.
Doing so can cause fire, damage to an object, or malfunction of the projector.
- Strong light is emitted from the projector's lens.
Always disconnect all cables before moving the projector.
Moving the projector with cables still attached can damage the cables, which will cause fire or electric shocks to occur.
Never plug headphones and earphones into terminal.
Excessive sound pressure from headphones and earphones can cause hearing loss.
When mounting the projector on the ceiling, keep mounting screws and power cord from contact with metal parts inside the ceiling.
Contact with metal parts inside the ceiling can cause electric shocks.
CAUTION:
ACCESSORIES
When not using the projector for an extended period of time, remove the batteries from the remote control.
Failure to observe this will cause the batteries to leak, overheat, catch fire or explode, which may result in fire or contamination of surrounding area.
MAINTENANCE
Do not attach the air filter unit while it is wet.
Doing so may result in electric shock or malfunctions.
• After you clean the air filter units, dry them thoroughly before reattaching them.
Ask your dealer about cleaning inside the projector every 20 000 hours of usage as an estimated duration.
Continuous use while dust is accumulated inside the projector may result in fire.
- For cleaning fee, ask your dealer.
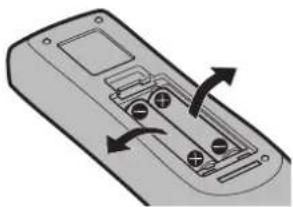
To remove the battery
Remote Control Battery
Press the guide and lift the cover.
Remove the batteries.
natural_image
Illustration of a remote control panel with arrows indicating clockwise or directional movement (no text or symbols)
Brazil Only
Brasil Apenas
natural_image
Diagram of a remote control panel with arrows indicating clockwise movement (no text or symbols)
Trademarks
•SOLID SHINE is a trademark of Panasonic Corporation.
- Panasonic owns patents relating to Light ID technology in Japan and other countries.
- "LinkRay" and the icon are trademarks of Panasonic Corporation.
- Wi-Fi, Wi-Fi Direct™ and Miracast™ are registered trademarks or trademarks of Wi-Fi Alliance.
- Windows and Internet Explorer are registered trademarks or trademarks of Microsoft Corporation in the United States and other countries.
• Mac, macOS, and Safari are trademarks of Apple Inc., registered in the United States and other countries.
- PJLin ^M is a registered trademark or pending trademark in Japan, the United States, and other countries and regions.
- The terms HDMI and HDMI High-Definition Multimedia Interface, and the HDMI Logo are trademarks or registered trademarks of HDMI Licensing Administrator, Inc. in the United States and other countries.
• RoomView and Crestron RoomView are registered trademarks of Crestron Electronics, Inc.
Crestron Connected™ and Fusion RV are trademarks of Crestron Electronics, Inc.
- HDBase™ is a trademark of HDBaseT Alliance.
- IOS is a trademark or registered trademark of Cisco in the U.S. and other countries and is used under license.
- Android is a trademark of Google Inc.
- QR code is a registered trademark of DENSO WAVE INCORPORATED.
- Adobe, Adobe Flash Player, and Adobe Reader are trademarks or registered trademarks of Adobe Systems Inc. in the United States and/or other countries.
- Some of the fonts used in the on-screen menu are Ricoh bitmap fonts, which are manufactured and sold by Ricoh Company, Ltd.
- This product is licensed under AVC Patent Portfolio License, VC-1 Patent Portfolio License, and MPEG-4 Visual Patent Portfolio License, and following actions except for the personal or non-profit use are not licensed.
- Recording the image information in compliance with the AVC standard, the VC-1 standard, and the MPEG-4 Visual standard (AVC/VC-1/MPEG-4 video hereafter)
- Playing back the AVC/VC-1/MPEG-4 video recorded by consumer practicing in a private activity, or AVC/VC-1/MPEG-4 video acquired from the licensed provider
For details, refer to the website of MPEG LA, LLC (http://www.mpegla.com).
- All other names, company names, and product names mentioned in this manual are trademarks or registered trademarks of their respective owners.
Please note that the and symbols are not specified in this manual.
Software information regarding this product
This product incorporates the following software.
(1) The software which is developed independently by or for Panasonic Corporation
(2) The software owned by third party and licensed to Panasonic Corporation
(3) The software which is licensed under the GNU GENERAL PUBLIC LICENSE Version2.0 (GPL V2.0)
(4) The software which is licensed under the GNU LESSER GENERAL PUBLIC LICENSE Version2.1 (LGPL V2.1)
(5) Open source software which is not licensed under the GPL V2.0 and LGPL V2.1
The software categorized as (3) (5) , the license is available in accordance with gnu general public license and gnu lesser general public license respectively, it is distributed in the hope that it will be useful, but without any warranty, without even the implied warranty of merchantability or fitness for a particular purpose. As for the terms and conditions, please refer to the software license of the supplied CD-ROM.
If you wish to ask any questions as to the software, please contact (oss-cd-request@gg.jp.panasonic.com) by email.
■Illustrations in this manual
Illustrations of the projector, screen, and other parts may vary from the actual product.
Illustrations displayed on the computer screen may differ depending on the computer type and its operating system.
Illustrations of the projector with the power cord attached are only examples. The shape of the supplied power cords varies depending on the country where you purchased the product.
■Reference pages
- Reference pages in this manual are indicated as (→ page 00).
Term
- In this manual, the "Wireless/wired remote control unit" accessory is referred to as "Remote control".
Features of the Projector
Quick Steps
For details, refer to the corresponding pages.
High luminance and high contrast
▶ With a unique optical system which uses a new-generation laser light source, and the laser light source drive system, high luminance of 6 500 lm ^1 and high contrast of 3 000 000:1 ^2 are achieved even with its compact size.
*1 A value for PT-MZ670 and PT-MW630. A value for PT-MZ570 and PT-MW530 is 5 500 lm.
*2 When [PICTURE MODE] is set to [DYNAMIC], and [DYNAMIC CONTRAST] is set to [1] or [2]
Easy and highly flexible setup
In addition to the lens replacement method and equipping of the lens shift, usage in a wide range of application is made possible by supporting a wide range of interfaces such as DIGITAL LINK, and by supporting the 360° installation utilizing the characteristics of solid-sate light source.
Long life and high reliability
The maintenance cost for long-term operation is reduced by the unique light source cooling control technology and improvement of the dust resistance.
Set up the projector.
(→ page 36)
Connect with external devices.
(→ page 52)
Connect the power cord.
(→ page 58)
Switch on the projector.
(→ page 60)
Make initial settings.
(→ page 61)
- Take this step when you switch on the power for the first time after purchasing the projector.
Select the input signal.
(→ page 67)
Adjust the image.
(→ page 68)
Chapter 1 Preparation
This chapter describes things you need to know or check before using the projector.
Precautions for use
Lens protection material
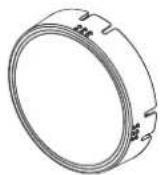
If you purchased the projector with the standard zoom lens, remove the lens protection material before use, and store it for the future use. Move the lens position to the home position and attach the lens protection material when transporting.
If you purchased the projector with the lens sold separately, remove the lens hole cover before use, and store it for the future use. Move the lens position to the home position, remove the projection lens, and attach the lens hole cover when transporting.
For the steps to move the lens position to the home position, refer to "Moving the lens position to the home position" (→ page 69).
natural_image
Line drawing of a projector with ventilation grilles and a circular vent, showing internal components (no text or symbols)
Lens protection material
natural_image
Line drawing of a projector with ventilation grilles and a circular vent (no text or symbols)
Lens hole cover
Cautions when transporting
When transporting the projector, hold it securely by its bottom and avoid excessive vibration and impacts. They may damage the internal components and result in malfunctions.
Do not transport the projector with the adjustable feet extended. Doing so may damage the adjustable feet.
Cautions when installing
■Do not set up the projector outdoors.
The projector is designed for indoor use only.
■Do not set up the projector in the following locations.
Places where vibration and impacts occur such as in a car or vehicle: Doing so may cause damage to internal components or malfunction.
Location close to sea or where corrosive gas may occur: The projector may fall due to corrosion. Also, failure to do so may shorten the life of the components and result in malfunction.
Near the exhaust of an air conditioner: Depending on the conditions of use, the screen may fluctuate in rare cases due to the heated air from the air exhaust port or the hot or cooled air from the air conditioner. Make sure that the exhaust from the projector or other equipment, or the air from the air conditioner does not blow toward the front of the projector.
Places with sharp temperature fluctuations such as near lights (studio lamps): Doing so may shorten the life of the light source, or result in deformation of the projector due to heat, which may cause malfunctions. Follow the operating environment temperature of the projector.
Near high-voltage power lines or near motors: Doing so may interfere with the operation of the projector.
■ Ask a qualified technician or your dealer for the installation work such as installing to a ceiling, etc.
To ensure projector performance and safety, ask a qualified technician or your dealer when installing to a ceiling or in a high place.
■ Ask a qualified technician or your dealer to install the cable wiring for DIGITAL LINK connection.
Image and sound may be disrupted if cable transmission characteristics cannot be obtained due to inadequate installation.
■ The projector may not work properly due to strong radio wave from the broadcast station or the radio.
If there is any facility or equipment which outputs strong radio waves near the installation location, install the projector at a location sufficiently far from the source of the radio waves. Or, wrap the LAN cable connected to the terminal using a piece of metal foil or a metal pipe which is grounded at both ends.
■ Focus adjustment
The high clarity projection lens is thermally affected by the light from the light source, making the focus unstable in the period just after switching on the power. It is recommended that images be projected continuously for at least 30 minutes before the focus is adjusted.
■ Do not install the projector at an altitude of 2 700 m (8 858') or higher above sea level.
■ Do not use the projector in a location that the ambient temperature exceeds 45 °C (113 °F).
Using the projector in a location that the altitude is too high or the ambient temperature is too high may reduce the life of the components or result in malfunctions.
■Projection in all 360° direction is possible.
360° vertically 360° horizontally 360° tilted
(combination of vertical and horizontal)
■Cautions when setting up the projector
Use the adjustable feet only for the floor standing installation and for adjusting the angle. Using them for other purposes may damage the projector.
When installing the projector with a method other than the floor installation using the adjustable feet or the ceiling installation, use the four screw holes for ceiling mount (as shown in the figure) to fix the projector. (Screw diameter: M6, tapping depth inside the projector: 12 mm (15/32"), screw tightening torque: 4 ± 0.5 N·m) In such case, make sure that there is no clearance between the screw holes for ceiling mount on the projector bottom and the setting surface by inserting spacers (metallic) between them.
Positions of screw holes for ceiling mount and adjustable feet
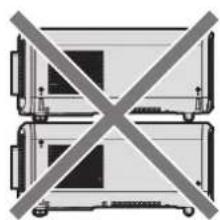
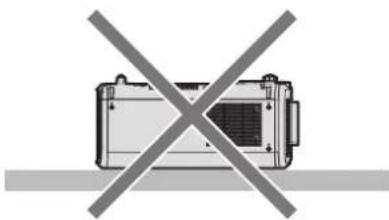
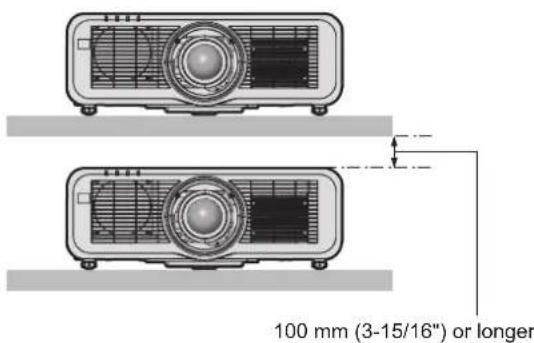
- Do not stack projectors on top of each other.
- Do not use the projector supporting it by the top.
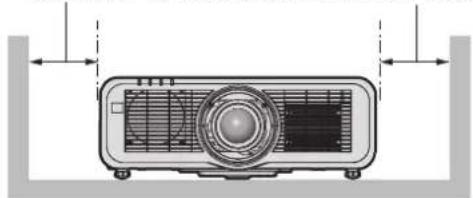
Do not block the ventilation ports (intake and exhaust) of the projector.
Prevent hot and cool air from the air conditioning system to blow directly to the ventilation ports (intake and exhaust) of the projector.
natural_image
Two stacked electronic devices with a diagonal line crossing through them, no text or symbols present.
natural_image
Exterior view of a modern office building (no signage)
500 mm (19-11/16") or longer 500 mm (19-11/16") or longer
natural_image
Diagram of a projector with ventilation grilles and fan array (no text or labels)
Do not install the projector in a confined space.
When installing the projector in a confined space, provide air conditioning or ventilation separately. Exhaust heat may accumulate when the ventilation is not enough, triggering the protection circuit of the projector.
Panasonic takes no responsibility for any damage to the product caused by an inappropriate choice of location for installing the projector, even if the warranty period of the product has not expired.
Security
When using this product, take safety measures against the following incidents.
Personal information being leaked via this product
Unauthorized operation of this product by a malicious third party
Interfering or stopping of this product by a malicious third party
Take sufficient security measures.
- Make your password difficult to guess as much as possible.
- Change your password periodically. The password can be set in the [SECURITY] menu → [SECURITY PASSWORD CHANGE] or the [NETWORK/USB] menu → [Panasonic APPLICATION] → [PASSWORD CHANGE].
- Panasonic Corporation or its affiliate companies will never ask for your password directly. Do not divulge your password in case you receive such inquiries.
- The connecting network must be secured by a firewall, etc.
- Set a password for the web control and restrict the users who can log in. A password for the web control can be set in the [Change password] page of the web control screen.
■Security when using the wireless LAN product
The advantage of a wireless LAN is that information can be exchanged between a computer or other such equipment and a wireless access point using radio waves, instead of using a LAN cable, as long as you are within range for radio transmissions.
On the other hand, because the radio wave can travel through an obstacle (such as a wall) and is accessible from anywhere within a given range, following problems may occur if security setting is insufficient.
•Transmitted data may be intercepted
A malicious third part may intentionally intercept radio waves and monitor the following transmitted data.
-Personal information such as your ID, password, credit card number
-Content of an Email
- Illegally accessed
A malicious third party may access your personal or corporate network without authorization and engage in the following types of behavior.
-Retrieve personal and/or secret information (information leak)
- Spread false information by impersonating a particular person (spoofing)
- Overwrite intercepted communications and issue false data (tampering)
- Spread harmful software such as a computer virus and crash your data and/or system (system crash)
Since most wireless LAN adapters or access points are equipped with security features to take care of these problems, you can reduce the possibility of these problems occurring when using this product by making the appropriate security settings for the wireless LAN device.
Some wireless LAN devices may not be set for security immediately after purchase. To decrease the possibility of occurrence of security problems, be sure to make all security related settings according to the operation instructions supplied with each wireless LAN device before using a wireless LAN device.
Depending on the specifications of the wireless LAN, a malicious third party may be able to break security settings by special means.
Panasonic asks customers to thoroughly understand the risk of using this product without making security settings, and recommends that the customers make security settings at their own discretion and responsibility.
Notes regarding the wireless LAN
Radio wave in the 2.4 GHz/5 GHz band is used when the wireless LAN connection function of the projector is used. The license of wireless station is not required, but understand the following when using.
To use the wireless LAN function with the projector, it is necessary to attach the optional Wireless Module (Model No.: ET-WM300).
For details on how to attach the optional Wireless Module (Model No.: ET-WM300), refer to "Attaching the Wireless Module" (→ page 51).
■Do not use close to other wireless devices.
Following devices may be using radio wave in the same bandwidth as the projector. Using the projector close to these devices may cause the communication to be disabled or the communication speed to slow down due to interference of radio wave.
- Microwave oven, etc.
Industrial, scientific, or medical devices, etc.
In-plant wireless station for identifying moving vehicles used in the manufacturing lines at a plant
Specified low power wireless station
■ Do not use cell phone, television, or radio as much as possible close to the projector.
Cell phone, television, or radio is using radio wave with different bandwidth from the projector, so there is no effect on the wireless LAN communication or the send/receive on these devices. However, noise may occur in the audio or video due to the radio wave from the projector.
■ Radio wave for wireless LAN communication does not go through the reinforcing bars, metal, or concrete.
The projector can communicate through wall or floor made of wood or glass (excluding the glass with metal mesh embedded), but it cannot communicate through wall or floor made of reinforcing bars, metal, or concrete.
■ Do not use the projector as much as possible in a location where static electricity is generated.
The communication via wireless LAN or wired LAN may be prone to disruption when the projector is used in a location where static electricity or noise is generated.
There is a rare case that the LAN connection may not be established due to static electricity or noise, so in such case, turn off the projector, remove the source of problematic static electricity or noise, and turn the projector back on.
This device is restricted to indoor use when operated in the 2.412 to 2.472 GHz band, in the 5.18 to 5.825 GHz frequency range (Channels 36 to 165).
■Using the projector outside the country
Note that depending on countries or regions there are restrictions on the channels and frequencies at which you can use the wireless LAN.
Light ID
Light ID is one of the visible light communication technologies to transfer information with fast speed and stability using flashing of light. This projector is equipped with a function to transmit the Light ID signal, and following usage is possible by utilizing the LinkRay Light ID solution service provided by Panasonic.
- By receiving the Light ID signal transmitted by the projector using the camera on a device (smartphone/tablet) and a dedicated application software, the contents linked to that Light ID signal are acquired and displayed on the screen of the device.
For details, visit the Panasonic website (https://panasonic.net/cns/LinkRay/).
Note
A separate contract is necessary to use the LinkRay Light ID solution service.
The smartphone application software "LinkRay - Light ID Solution" is required.
Search and download "LinkRay" from App Store or Google Play. For the latest information of devices that the operation has been verified, visit the Panasonic website (https://panasonic.net/cns/LinkRay/).
■Notes regarding Light ID function
The projected image may flicker when the Light ID signal is transmitted, but this is caused luminance change during the transmission of the Light ID, and it is not a malfunction.
A striped pattern may generate on the recorded image when the projected image is recorded by a camera, etc.
- The light output will decrease while the Light ID function is used.
- The Light ID signal may become difficult to receive by a device (smartphone/tablet) in following cases.
When strong light such as outside light is illuminating on the projected screen
When a Light ID transmitting device other than this projector is installed nearby
-When receiving a signal in a location far from the screen
When receiving a signal in a location that is angled against the screen
When the light reflection loss is large due to the screen characteristics
-When the size of the projected image is small
-When the displayed projected image is dark
When using a laser format bar code reader, take care not to illuminate the bar code reading surface with the projection light or its reflected light. Doing so may cause bar code reader not to read or misread.
The Light ID function of the projector is not guaranteed to operate on all devices.
DIGITAL LINK
“DIGITAL LINK” is a technology to transmit the video, audio, Ethernet, and serial control signals using a twisted pair cable by adding unique functions by Panasonic to the HDBaseT™ communication standard formulated by HDBaseT Alliance.
This projector supports the optional Panasonic DIGITAL LINK output supported device (Model No.: ET-YFB100G, ET-YFB200G) and peripheral devices by other manufacturers (twisted-pair-transmitters such as the "XTP transmitter" of Extron Electronics) based on the same HDBaseT™ standard. For the devices of other manufacturers that the operation has been verified with this projector, visit the Panasonic website (https://panasonic.net/cns/projector/). Note that the verification for devices of other manufacturers has been made for the items set by Panasonic Corporation, and not all the operations have been verified. For operation or performance problems caused by the devices of other manufacturers, contact the respective manufacturers.
Application software supported by the projector
The projector supports following application software. For details or downloading each application software, visit the Panasonic website (https://panasonic.net/cns/projector/).
- Logo Transfer Software
This application software transfers the original image, such as company logo, which is projected at the start, to the projector.
•Smart Projector Control
This application software sets and adjusts the projector connected via LAN using a smartphone or a tablet.
•Multi Monitoring & Control Software
This application software monitors and controls the multiple display devices (projector and flat panel display) connected to an intranet.
•Early Warning Software
This plug-in software monitors the status of the display devices and their peripherals within an intranet, and notifies of abnormality of such equipment and detects the signs of possible abnormality. “Early Warning Software” is preinstalled in the “Multi Monitoring & Control Software”. To use the early warning function of this plug-in software, install “Multi Monitoring & Control Software” in the PC to be used. By enabling the early warning function, it will notify of the approximate time to replace the consumables for the display devices, to clean each part of the display devices, and to replace the components of the display devices, allowing to execute maintenance in advance.
The early warning function can be used by registering maximum of 2048 display devices free of charge for 90 days after installing the “Multi Monitoring & Control Software” into a PC. To continuously use after the 90 days, it is necessary to purchase the license of “Early Warning Software” (ET-SWA100 Series) and perform the activation. Also, depending on the type of license, the number of display devices that can be registered for monitoring varies. For details, refer to the Operating Instructions of “Multi Monitoring & Control Software”.
•Wireless Manager ME6.4
This application software transmits the computer screen to the projector via wireless LAN or wired LAN. Simultaneous projection from one computer to multiple projectors, or simultaneous projection from multiple computers to one projector is possible.
- Plug and Share
This application software makes it possible to project the computer screen with the projector easily by omitting the selection of the device when connecting the computer via network by pairing a projector and a computer using the USB memory.
•Wireless Projector
This application software for iOS/Android is used to project files such as PDF or image by transmitting to the projector via wireless LAN.
Disposal
To dispose of the product, ask your local authorities or dealer for correct methods of disposal. Also, dispose of the product without disassembling.
Storing
To store the projector, store in a dry room.
Cautions on use
■To get a good picture quality
In order to view a beautiful image in higher contrast, prepare an appropriate environment. Draw curtains or blinds over windows and turn off any lights near the screen to prevent outside light or light from indoor lamps from shining onto the screen.
■ Do not touch the surface of the projection lens with your bare hands.
If the surface of the projection lens becomes dirty from fingerprints or anything else, this will be magnified and projected onto the screen.
■LCD panel
The LCD panel is manufactured by a technology with extremely high precision, but there may be missing pixels or pixels that is constantly illuminated in a rare case. Note that these phenomenon are not malfunction.
Also, a residual image may remain in the image of the LCD panel when a still image is projected for long time, and in such case, project a full white image for 1 hour or longer. Note that the residual image may not be completely erased.
■Optical parts
The replacement cycle for the optical parts such as the LCD panel or polarization plate may become shorter even if it is used for less than one year when the ambient temperature is high or in an environment with large amount of dust or cigarette smoke. For details, consult your dealer.
Light source
The light source of the projector uses lasers, and has the following characteristics.
- Depending on the operating environment temperature, the luminance of the light source will decrease.
The higher the temperature becomes, the more the luminance of the light source decreases.
- The luminance of the light source will decrease by duration of usage.
If brightness is noticeably reduced and the light source does not turn on, ask your dealer to clean inside the projector or replace the light source unit.
■Computer and external device connections
When connecting a computer or an external device, read this manual carefully regarding the use of power cords and shielded cables as well.
Accessories
Make sure that the following accessories are provided with your projector. Numbers enclosed in < > show the number of accessories.
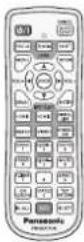
Wireless/wired remote control unit <1>
(N2QAYA000150)
For Taiwan
(1JP1RZ970) <1>
CD-ROM <1>
(1JK1MZ670U)
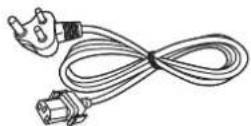
Power cord
(TXFSX01RXQZ)
(TXFSX01RXRZ)
(TXFSX01RWDZ)
(TXFSX02UTRZ)
(Operating Instructions are included.)
AAA/R03 or AAA/LR03 battery <2>
(For remote control unit)
Lens cover <1>
(Only models with lens)
(6103626291)
Attention
• After unpacking the projector, discard the power cord cap and packaging material properly.
- Do not use the supplied power cord for devices other than this projector.
- For missing accessories, consult your dealer.
- Store small parts in an appropriate manner, and keep them away from small children.
Note
The type and number of the supplied power cords vary depending on the country or region where you purchased the product.
The model numbers of accessories are subject to change without prior notice.
Optional accessories
Optional accessories (product name) Model No.
Projection lens
Zoom Lens ET-ELW20, ET-ELT20, ET-ELS20
*1, ET-ELT21, ET-ELW22
Fixed-focus Lens ET-ELW21
Ceiling Mount Bracket
ET-PKD120H (for High Ceilings)ET-PKD120S (for Low Ceilings)ET-PKE301B (Projector Mount Bracket)*2
Early Warning Software(Basic license/3-year license)
ET-SWA100 Series*3
Digital Interface Box ET-YFB100G
DIGITAL LINK Switcher ET-YFB200G
Replacement Filter Unit ET-RFM100
Wireless Module ET-WM300
*4
*1 This product can be purchased in the U.S., Canada and the European Communities.
This product is equivalent to the standard zoom lens attached to the projector models with standard zoom lens.
*2 When the projector is mounted to the existing Ceiling Mount Bracket (in combination with the Model No.: ET-PKD120H (for High Ceilings) or ET-PKD120S (for Low Ceilings), and the Model No.: ET-PKE300B (Projector Mount Bracket)), it is necessary to replace the drop-prevention wire rope with the one corresponding to this projector. Consult your dealer.
Drop-prevention set (service model no.: DPPW1004ZA/X1)
*3 The suffix of the Model No. differs according to the license type.
*4 This product cannot be purchased in some countries. For details, contact your dealer.
Note
- The model numbers of optional accessories are subject to change without prior notice.
About your projector
Remote control
■ FrontTop
■ Bottom
1 Power <|/|> button
(①: Standby, | : Power on)
Sets the projector to the state where the projector is turned off (standby mode) when the switch on the projector is set to and in projection mode.
Sets the projector to projection mode when the power is switched off (standby mode).
2 Remote control indicator
Blinks if any button in the remote control is pressed.
3 Lens buttons (, , )
Adjusts the focus, zoom, and lens shift of the lens.
(→ page 68)
4
Other manuals PANASONIC
Discover other manuals and user guides for the brand PANASONIC
💬 Hi! I'm your manual assistant.I know your PANASONIC PT-MW530LE.
How can I help you? (use, settings, error codes, maintenance, explaining a step from the manual, etc.)💡 Examples :
• How do I use it ?
• Error code E3 ?
• How do I clean it ?