
Cool LX-910D - Laminator BROTHER - Free user manual and instructions
Find the device manual for free Cool LX-910D BROTHER in PDF.


| Product Type | Cold pressure laminator |
| Model | Brother Cool LX-910D |
| Dimensions (W x D x H) | 357 mm x 293 mm x 195 mm (14.1" x 11.5" x 7.7") |
| Weight (without cartridge and adapter) | 4.7 kg (10.4 lbs) |
| Power Supply | AC adapter included, 120V±10% (60Hz), output DC 18V 700mA |
| Processing Method | Cold pressure (no heat) |
| Document Width Range | 2.17" - 8.50" (55 mm - 216 mm) |
| Document Length Range | 3.54" - 39.4" (90 mm - 1000 mm) |
| Document Thickness Range | 0.004" - 0.01" (0.1 mm - 0.2 mm) |
| Feed Speed | 0.75"/sec (19 mm/sec) |
| Cutting System | Auto cross cutting with paper size detection; manual cut button |
| Cut Modes | Border (4.5 mm margin), No Border (1.5 mm margin), Off |
| Supported Film Cartridges | 9.0" (A4) and 4.8" (A6) width; double-side, adhesive-back, magnetic-back |
| Auto Sheet Feeder | Yes, single document at a time |
| Corner Cutter | Built-in automatic corner cutter |
| Maintenance | Clean with soft dry cloth; replace side cutter units (SC-2) and corner cutter tray (CC-1) as needed |
| Safety Precautions | Do not touch blades; use only provided AC adapter; unplug during storms; avoid water |
| Noise Level (stand-by) | 35 dB |
| Included Accessories | Film cartridge (double-side), AC adapter, owner's manual, compatible accessory list, CD-ROM (PrintMaster Gold) |
| Spare Parts Available | Film refills (LC-D9R, etc.), side cutter units (SC-2), corner cutter tray (CC-1) |
Frequently Asked Questions - Cool LX-910D BROTHER
User questions about Cool LX-910D BROTHER
0 question about this device. Answer the ones you know or ask your own.
Ask a new question about this device
Download the instructions for your Laminator in PDF format for free! Find your manual Cool LX-910D - BROTHER and take your electronic device back in hand. On this page are published all the documents necessary for the use of your device. Cool LX-910D by BROTHER.
USER MANUAL Cool LX-910D BROTHER
COOL LAMINATOR Owner's Manual

brother®
FCC NOTICE
This equipment has been tested and found to comply with the limits for a Class B digital device, pursuant to Part 15 of the FCC Rules. These limits are designed to provide reasonable protection against harmful interference in a residential installation. This equipment generates, uses and can radiate radio frequency energy and, if not installed and used in accordance with the instructions, may cause harmful interference to radio communications. However, there is no guarantee that interference will not occur in a particular installation. If this equipment does cause harmful interference to radio or television reception, which can be determined by turning the equipment off and on, the user is encouraged to try to correct the interference by one or more of the following measures:
- Reorient or relocate the receiving antenna.
- Increase the separation between equipment and receiver.
- Connect the equipment into an outlet on a circuit different from that to which the receiver is connected.
- Consult the dealer or an experienced radio/TV technician for help.
This equipment has been certified to comply with FCC standards, which are applied to the U.S.A. only.
Changes or modifications not expressly approved by Brother Industries, Ltd. could void the user's authority to operate the equipment.
Statement
Under the terms of an agreement with Xyron, Inc., the purchase or other acquisition of this product confers no right or license to use the product in the Retroreflective Field.
Fax-Back System
Brother Customer Service has installed an easy-to-use Fax-Back System, so you can get instant answers to common technical questions and product information for all Brother products. This system is available 24 hours a day, 7 days a week. You can use the system to send faxes to any fax machine, not just the one from which you are calling.
If you can't resolve a difficulty with your laminator using this manual, call our Fax-Back System, and follow the voice prompts to receive faxed instructions about using the system and an index of Fax-Back subjects.
USA: 1-800-521-2846
Brother on the World Wide Web
You can find more information about Brother products, from product specification sheets to Frequently Asked Questions (FAQs), on the World Wide Web. Visit us at
http://www.brother.com
For Customer Service
USA: 1-877-BROTHER (276-8437) (voice)
1-901-379-1210 (fax)
Corporate Headquarters
Brother International Corporation
100 Somerset Corporate Boulevard
Bridgewater, NJ 08807-0911 USA
Service Center Locations
If you need a local service center, please call 1-800-284-HELP (4357) to locate the authorized service center near you. Note: Be sure to call the Service Center before your visit. Service Centers do not provide operational assistance.
Ordering Accessories and Supplies (in the USA)
For best quality results use only genuine Brother accessories, available at most Brother retailers. If you cannot find the accessory you need and you have a Visa, MasterCard, Discover, or American Express credit card, you can order accessories directly from Brother. (In the USA, you can visit us online for a complete selection of Brother accessories and supplies available for purchase.)
USA: 1-888-879-3232 (voice)
1-800-947-1445 (fax)
http://www.brothermall.com
| Description Model Number | |
| Double-side Laminate | |
| 9" wide film cartridge (20m/65.6ft. long) LC-D9 | |
| 9" wide refill roll (20m/65.6ft. long) LC-D9R | |
| 4.8" wide film cartridge (20m/65.6ft. long) LC-D5 | |
| 4.8" wide refill roll (20m/65.6ft. long) LC-D5R | |
| Adhesive Back Laminate | |
| 9" wide film cartridge (20m/65.6ft. long) LC-A9 | |
| 9" wide refill roll (20m/65.6ft. long) LC-A9R | |
| 4.8" wide film cartridge (20m/65.6ft. long) LC-A5 | |
| 4.8" wide refill roll (20m/65.6ft. long) LC-A5R | |
| Magnetic Back Laminate | |
| 9" wide film cartridge (4m/13.1ft. long) LC-M9 | |
| 9" wide refill roll (10m/32.8ft. long) LC-M9R | |
| 4.8" wide film cartridge (4m/13.1ft. long) LC-M5 | |
| 4.8" wide refill roll (10m/32.8ft. long) LC-M5R | |
| Other Accessories | |
| Replacement Ceramic Side Cutters (2 blades) SC-2 | |
| Replacement Corner Cutter Tray CC-1 | |
Table of Contents
Getting started 4
Features 4
Precautions....5
Package list....6
Part names....7
Outside of the machine....7
Inside of the machine....7
Control Panel 8
Film Cartridge....8
Setup 9
Installing the film cartridge....9
Turning the machine on/off 10
About film rolls 12
Film-supply maintenance....12
Replacing the film cartridge 13
Installing/replacing the film roll in the cartridge....16
Document Size 19
The Auto Sheet Feeder 19
The Auto Cross Cutting System....19
Operating the machine....20
How to define the cutting position (creating borders)....22
Auto Cut Mode – Border 22
Auto Cut Mode – No Border 22
Auto Cut Mode – Off 22
Manual feeding and manual cutting 23
Corner cutting 24
Corner cutter dust box 25
Regular maintenance and troubleshooting....26
Regular maintenance....26
Paper jams 26
Replacing the side cutter units....29
Replacing the corner cutter tray....31
Troubleshooting....32
Specifications....33
Index....34
Appendix (About PrintMaster Gold Software)......36
Getting Started....38
Viewing/Printing PrintMaster Gold user's manual 41
The World of PrintMaster Gold 42
THE HUB SCREEN 42
The workspace....43
Getting started
Thank you for purchasing a Brother Cool Laminator. This machine has been designed to be easy to use, but can be utilized to its fullest potential by taking some time to read this owner's manual.
Features
- Depending upon the type of film used, this machine turns a variety of documents into professional, self-adhesive stickers, dual-sided, coated lamination sheets, magnetic signs etc.
- In addition to output from computers and word processors, you can laminate hand-written sheets, clippings from magazines, photographs or any other type of document.
- Your documents are perfectly coated to protect them from water, dust, tearing, yellowing, and to create a professional, high quality finish.
- No heat is required. The unique cold pressure method and specially formulated adhesives make the operation safe, easy and fast.
- You can start laminating immediately after turning the power on (no warm-up time is necessary).
- Heat sensitive items, such as thermal paper and photographs can be used safely.
- This machine has an auto sheet feeder and auto cross cutting mechanism. Automatic width and length detection ensures that the built-in mechanism sizes your finished documents precisely.
• Film is easily installed and replaced.
• Supports widths of up to 8.5" US Letter (A4 - 210mm) size.
Precautions
To avoid personal injury or damage to the machine, please pay close attention to the CAUTION and WARNING notices in this manual. They are there for your safety, as well as to point out actions that might cause damage to your machine.

WARNING:
- Do not attempt to repair or disassemble this equipment yourself. The warranty will be voided if this machine is not repaired by authorized service personnel.
- Do not touch the blades inside of the machine.
- Use only the AC adapter that was supplied with the machine. Using the wrong AC adapter may damage the machine and will void the warranty.

CAUTION:
- Do not pull the power cord. To disconnect it, always grasp the plug itself.
- Do not place the machine under direct exposure to sunlight and other sources of heat, excessive moisture, or dust.
- If any liquid is spilled onto the machine, unplug the machine from its power source and consult with authorized service personnel.
- Unplug the machine during a lightning storm.
- Do not place heavy objects on the machine.
- Keep the back and sides of the machine clear of obstructions to prevent overheating.
- Use only a soft, dry cloth to clean the machine (do not use chemicals, solvents, or detergents)
- To avoid electrical interference, do not place the machine close to a radio receiver or television.
- Do not turn the machine off while operating except in the event of a malfunction.
- Turn the machine off in the event of a malfunction.
- If you use adhesive back laminate film, do not attach the laminated output to one's skin, or the sensitive surface of objects.
- The laminated documents are not easily digested. Great care should be taken to prevent accidental ingestion by infants or the elderly.
- The laminated film contains the UV resistance materials. However, the color of the documents may fade if the documents are printed with liquid type ink.
Solid type ink is recommended to prevent the document from fading.
- The laminated document may be wrinkled or damaged if it is placed under a heavy object.
- Do not put or locate the magnetic back laminate output close to the floppy disks or music tapes. The data on the disks or tapes will be damaged.
- Brother can not be held liable for loses or damage of items used in the laminator machine.
- Under the terms of an agreement with Xyron, Inc., the purchase or other acquisition of this product confers no right or license to use the product in the Retroreflective Field.

IMPORTANT OPERATIONAL PRECAUTIONS:
- Select Cut Mode Off when laminating sensitive or irregularly shaped documents.
- Do not insert your precious and valuable items into the machine.
Package list
① Machine 1
② Film cartridge 1 (Double side laminate type)
③ AC adapter 1
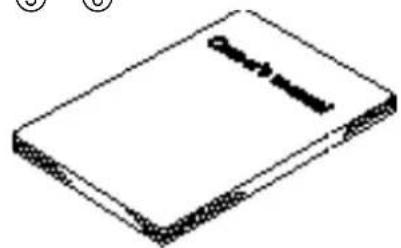
④ Owner's manual 1
⑤ Compatible accessory list
⑥ Supplemental PC software (CD-ROM) 1

natural_image
Technical line drawing of a mechanical device with no visible text or symbols②

natural_image
Line drawing of a printer with internal components (no text or symbols)③

natural_image
Simple line drawing of a cable and connector (no text or symbols)④
④ ⑤ ⑥
natural_image
Simple line drawing of a closed book with a bookmark (no text or symbols)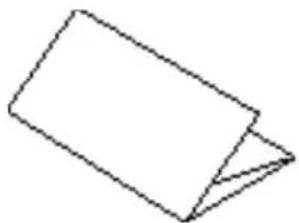
natural_image
Simple line drawing of a folded paper or document (no text or symbols)
natural_image
Simple geometric diagram with a diamond shape containing an oval (no text or symbols)Part names
Outside of the machine
DC connector Located on the left, backside of the machine. Aperture for the AC adapter.
Top cover For replacing the film cartridge and cutter units.
Viewing window Located on the top cover. Allows you to make sure that the correct type of film cartridge is loaded into the machine.
Document tray Where documents to be laminated are placed.
Document supporter Supports the document for insertion.
Document guide Aligns the left edge of the paper for proper document insertion.
Control panel Power switch and function button area.
Document output Location where the document exits the machine.
Corner cutter slot Allows you to trim the corners of your document after laminating. Corners of a document are automatically trimmed after insertion into the corner cutter slot.
Corner cutter tray The corner of your laminated document is placed on this tray to position it into the corner cutter slot.
Corner cutter dust box Collects trimmings from the corner cutter.
AC adapter Plugs into an electrical outlet and the DC connector on the machine.
Inside of the machine
Film cartridge Contains the roll film. The label on the cartridge identifies the film type.
You can use 9.0 inch (A4) or 4.8 inch (A6) width LC cartridges with this machine.
Roller release lever Releases the roller.
Roller holder lock button Locks the roller holder.
Roller holder Holds the roller unit.
Side cutter arm Arm for the side (vertical) cutter unit.
Side cutter units Blades for side (vertical) cutting.
Top/bottom cutter units Blades for top/bottom (horizontal) cutting.
Roller Feeds the document into the unit.

Control Panel
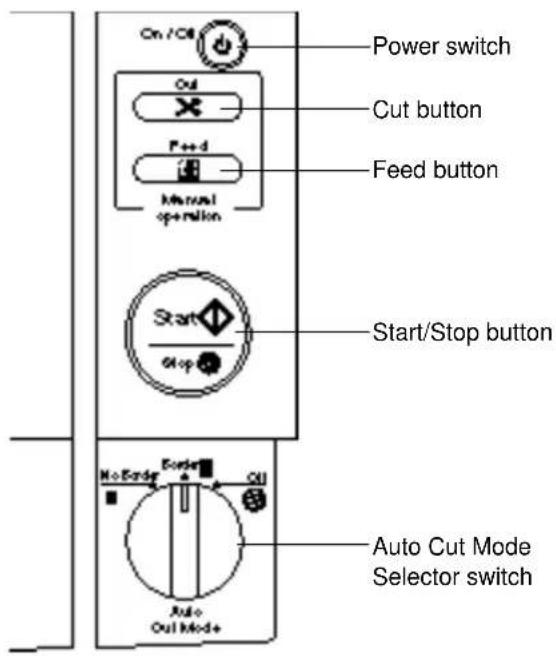
POWER SWITCH On/Off Turns the machine on/off.
✗ (cut button) Cuts the document in the current position.
Feed Use to feed the document manually.
Start/Stop Use this button to start or stop an operation.
The green LED indicates that the machine has power, and is turned on.
Auto Cut Mode selector switch
- Border The machine will cut the film with about a 0.18" (4.5mm) margin from each edge of the document.
- Leaves an extra margin of laminate.
- No Border The machine will cut the film with a margin that is approximately 0.06" (1.5mm) from each edge of the document.
- Trims the laminate close to the document.
-Off Turns the cutting mode off.
Film Cartridge
Cutting line Cuts the excess film on this line to install the cartridge properly.
Shutter Lifts the shutter upward to open the film cartridge cover.
Shutter button Locks the film cartridge cover and returns the shutter to original position.
Film slit The top edge of film appears from this film slit.


Installing the film cartridge

natural_image
Technical line drawing of a mechanical device with a curved arrow indicating rotation or movement (no text or symbols)(1) Open the top cover.

natural_image
Technical line drawing of a mechanical device with a magnified inset showing a close-up of the component (no text or symbols present)(2) Push the roller release lever (green color) and lift the roller holder upwards.

natural_image
Line drawing of a hand pressing down on a mechanical device with a downward arrow indicating compression (no text or symbols present)(3) Carefully install the film cartridge, square end down. Match the arrow symbol to install new cartridge.
Note
-Make sure that the shutter of the cartridge is closed when installing the cartridge.
- Check the position of the top edge of the film before installing the cartridge. It should be aligned with the cutting line of the cartridge. If necessary, cut away any excess film.
- Make sure that the film is on the lower roller and that the top edge of the film is placed under the side cutter units.

natural_image
Line drawing of a mechanical device with arrows indicating motion or assembly (no text or symbols)(4) Return the roller holder to the original position and press the roller holder lock buttons (purple color) as illustrated. You will hear the roller holder click into place. Press the roller holder further to secure the roller unit.
natural_image
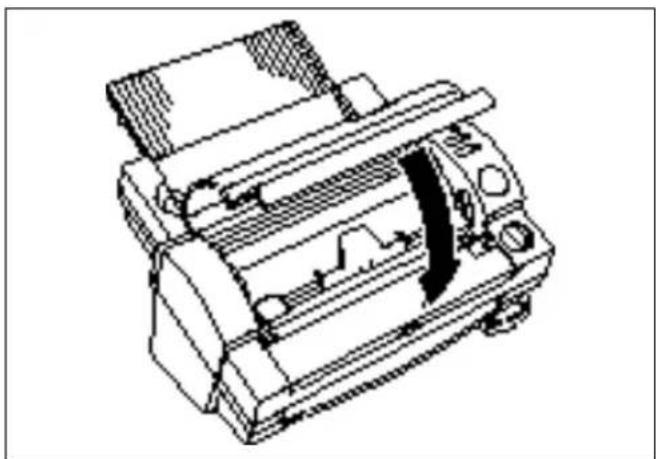
Technical line drawing of a mechanical device with internal components and a black arrow indicating direction (no text or symbols)(5) Close the top cover.
natural_image
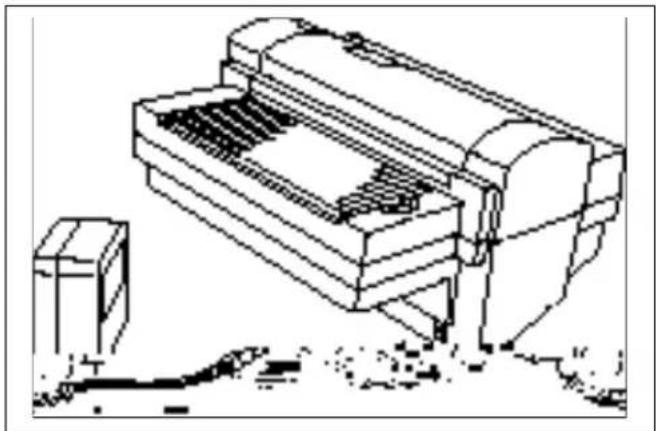
Line drawing of a mechanical device with gears and a base, no text or symbols presentTurning the machine on/off
(1) Connect the plug of the AC adapter into the DC connector.
(2) Plug the AC adapter into an electrical outlet.

(3) Press the power switch on the control panel to turn it on. The green Start button will light up. If the machine does not respond, check the connection of the AC adapter.
Press the power switch again to turn the machine off.

WARNING:
Do not plug your machine into an electrical outlet until it has been completely assembled.
Do not try to disassemble or repair this equipment yourself. Service should be performed by authorized personnel only. Warranties will be voided if the unit is repaired by unauthorized technicians.
Never touch the surface of the blades when installing the film cartridge.

CAUTION:
Do not turn the machine off during the laminating process.
The machine should be turned off during operation only in the event of a malfunction.
About film rolls
There are a variety of different roll film types that have been designed to meet your needs.

This machine supports 9.0 inch (A4) or 4.8 inch (A6) width cartridges.
Use only Brother authorized film cartridges or film refills. The above mark appears on all packages of authorized film cartridges or film refills that are compatible with the machine. Brother cannot be held responsible for any problem arising from the use of unauthorized supplies.
Depending upon the type of film used, this machine turns a variety of documents into professional, self-adhesive stickers and double-sided, coated lamination sheets etc. Please refer to the compatible accessory list packaged with this machine for details.
This machine is supplied with a Double Side Lamination Film Cartridge. For other types of film rolls, please contact your local Brother dealer.
Film-supply maintenance
The colored tapes appear when the film supply begins to run out. Please replace the film roll as soon as you notice these tapes.
If the colored tapes appear, replace the film immediately. Please refer to 'Replacing the film cartridge' page 11 or 'Installing/replacing the film roll in the cartridge' page 13 to replace the films.
A standard film roll produces about 30 US letter (A4) size sheets.
Please refer to the compatible accessory list for other supply information.
Note
The colored tapes can be peeled off.
Replacing the film cartridge

WARNING:
Never touch the surface of the blades when installing/replacing the film cartridge.

natural_image
Technical line drawing of a mechanical device with a curved arrow indicating motion or force (no text or symbols)(1) Turn the power off and open the top cover.

natural_image
Technical line drawing of a mechanical device with a magnified inset showing internal components (no text or symbols)(2) Push the roller release lever (green color) and lift the roller holder upwards.
natural_image
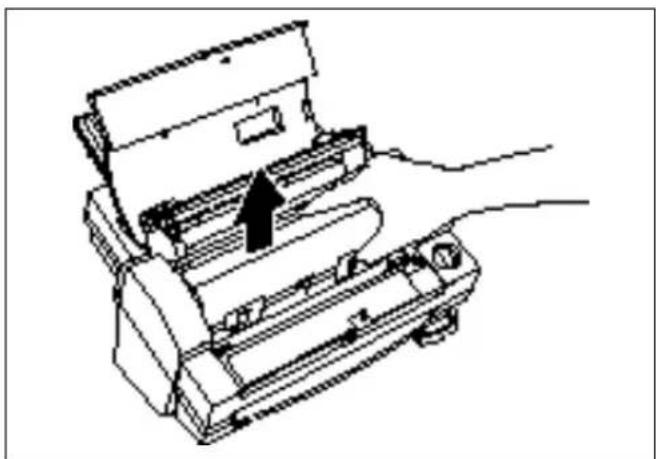
Line drawing of a mechanical device with an arrow indicating a component (no text or symbols present)(3) Remove the film cartridge carefully.

natural_image
Line drawing of a printer or printer with a hand inserting a paper into it, showing no text or symbols.(4) Install the new film cartridge carefully.
Note
-Make sure that the shutter of the cartridge is completely closed when installing the cartridge.
-Check the position of the top edge of the film before installing cartridge. It should be aligned with the cutting line of the cartridge. If necessary, cut away any excess film.
-Make sure that the film is on the lower roller and that the top edge of the film is placed under the side cutter units.
natural_image
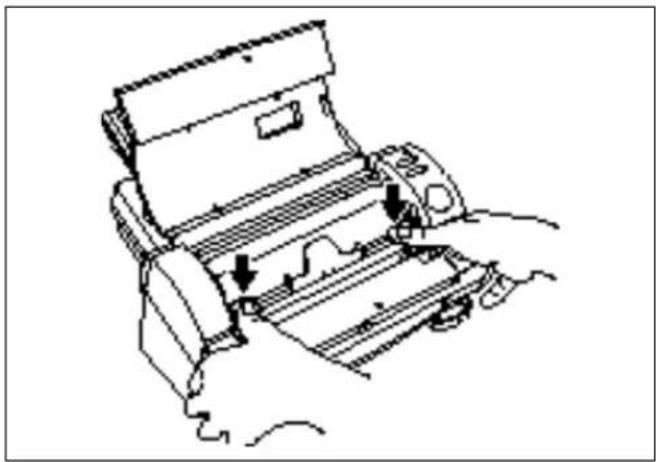
Line drawing of a mechanical device with arrows indicating motion or assembly (no text or symbols)(5) Return the roller holder to the original position and press the roller holder lock buttons (purple color) as illustrated. You will hear the roller holder click into place. Press the roller holder further to secure the roller unit.

natural_image
Technical line drawing of a mechanical device with internal components and a black arrow indicating direction (no text or symbols)(6) Close the top cover.
(7) Turn the power on. Press the Feed button until you can see the edge of the film to remove any slack from the film.
Note
-The condition of the currently installed cartridge can be viewed through the window in the top cover.
-Store the film cartridge at below 113°F (45°C).
Installing/replacing the film roll in the cartridge
Cartridges can be recycled by replacing the film roll. Be sure to use Brother-authorized LC film refills only. Refill cartridges using the following instructions:

natural_image
Line drawing of a hand pressing down on a mechanical device with an arrow indicating the process (no text or symbols present)(1) Remove the film cartridge from the machine. Do not grab the shutter when removing the film cartridge from the machine.

natural_image
Technical diagram of a battery pack with internal components and directional arrows (no text or labels)(2) Open the shutter of the film cartridge by sliding the shutter in the direction of the arrows until it locks into place. Open the film cartridge by gently separating the clear top cover from the gray bottom cover as indicated by the arrow on the clear top cover.

natural_image
Technical line drawing of a mechanical device with springs and gears, no visible text or symbols(3) Remove the old film roll from the cartridge.

natural_image
Line drawing of a hand operating a mechanical device with a downward arrow indicating motion (no text or symbols)(4) Take the new roll of film from the sealed package. Holding the yellow colored plastic side holders of the film roll. Set the film into the cartridge as illustrated. The film can only be placed into the cartridge in the proper direction.
Note
Remove the separator sheet between film rolls before setting the rolls.
Do not grasp the rolls when installing.

natural_image
Line drawing of a hand holding a battery pack with arrows indicating direction (no text or symbols)(5) Close the film cartridge. Make sure that the edge of the film sticks out of the film slit.
natural_image
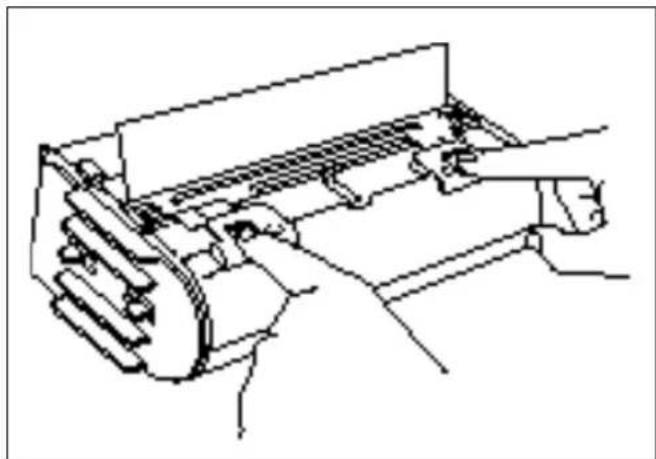
Line drawing of a printer or printer with no visible text, numbers, or symbols(6) Press on the two shutter catches marked "PUSH" to release the shutter.
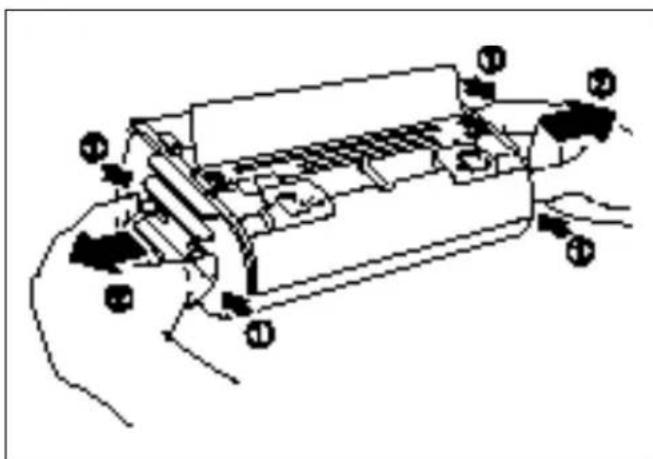
(7) Remove the side holders (yellow color) of the film roll by squeezing the projections and pulling out.

natural_image
Technical line drawing of a mechanical device with no visible text or symbols(8) Check the position of the top edge of film. It should be aligned with the cutting line of the cartridge. If any film extends beyond the cutting line, cut away the access film as illustrated before installing the cartridge.
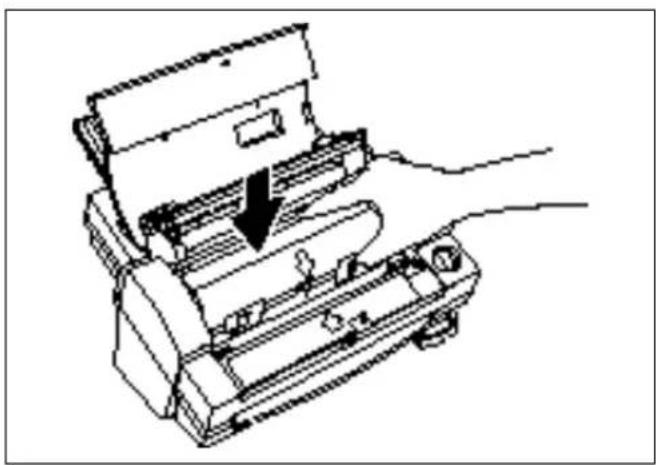
natural_image
Line drawing of a printer's internal structure being inserted, with a hand holding the printer (no text or symbols present)(9) Install the cartridge into the machine.

natural_image
Line drawing of a mechanical device with arrows indicating motion or force (no text or symbols)(10) Return the roller holder to the original position and press the roller holder lock buttons (purple color) as illustrated. You will hear the roller holder click into place. Press the roller holder further to secure the roller unit.

natural_image
Technical line drawing of a mechanical device with internal components and a black arrow indicating direction (no text or symbols)(11) Close the top cover.
(12) Turn the power on. Press the Feed button until you can see the edge of the film to remove any slack from the film.

CAUTION:
To prevent the film from drying out, never open the sealed pack until you are ready to install the cartridge.
Document Size
The size of the document that you wish to laminate should not be larger (or smaller) than the width that your machine can accommodate. The document should be between 2.2 and 8.5 inches (55 and 216mm) wide and between 3.54 and 39.4 inches (90 and 1000mm) long. The paper thickness should be between 10 lbs. and 30lbs. (0.1mm and 0.2mm). Only one document at a time can be loaded onto the document tray.
| Paper width | Maximum 8.5" (216mm) | |
| Minimum 2 | 2" (55mm) | |
| Paper length | Maximum | 39.4" (1000mm) |
| Minimum | 3.5" (90mm) | |
| Paper thickness 0.1mm - 0.2mm | ||
Business card-size paper should be inserted vertically into the machine as illustrated below.

natural_image
Technical line drawing of a mechanical assembly showing two views (top and side), no text or symbols present.The laminating process is interrupted if the inserted document length is more than 13.8" (350 mm). The color of Start button will be changed to orange. Press Start to restart the process.

CAUTION:
Do not insert documents that are curled, wrinkled, folded or ripped into the machine. Documents must be free of staples, paper clips, glue, correction fluid and sticky tape. Do not insert fabric materials into the machine.
The Auto Sheet Feeder
The Auto Sheet Feeder automatically feeds your document into the machine, one sheet at a time. Load only a single document at a time onto the document tray
The Auto Cross Cutting System
The Auto Cross Cutting System automatically detects the width and length of the inserted document. The built-in mechanism precisely cuts each edge of the document.

IMPORTANT INFORMATION:
- Select Cut Mode Off when laminating sensitive or irregularly shaped documents.
Operating the machine
Laminate documents, Create magnetic signs, and laminate with adhesive back:
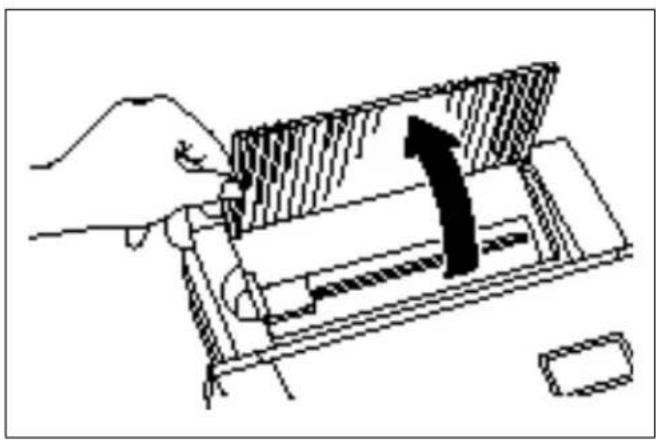
natural_image
Hand operating a mechanical device with a black arrow indicating direction (no text or symbols)(1) Open the document supporter.

natural_image
Line drawing of a hand holding a piece of paper or document, with no visible text or symbols(2) Load the document to be laminated onto the document tray. Documents should usually be loaded face up.
TIP When using adhesive backed laminating film, documents that are placed face down on the document tray can be made into window stickers.

natural_image
Technical line drawing of a mechanical assembly with no visible text or symbols(3) Align the paper with the tab on the right and slide the document guide until it touches the edge of the document. Always position the longest edge of the document to the right.

(4) Select the Cut Mode by using Auto Cut Mode selector switch. Please refer to 'How to define the cutting position' page 19.

natural_image
Pure electrical circuit lines without any symbols(5) Press Start.
The document is fed into the machine. The machine will automatically start to detect the top and side edges of the document. The green light of the Start button will blink during the finishing process. The top edge of the film will automatically be cut off when the Cut Mode is selected.
Note
The buzzer sounds if the document was not set properly. Reset the document and press Start again.
(6) The document is ejected through the document output area when the process is complete. If the document is longer than 13.8", the job will stop and the "Start" button blinks orange. Press "Start" to continue the process.

CAUTION:
Do not attempt to remove or pull on the document while the machine is operating.
Do not turn the machine off during a job except in the event of a malfunction.
Do not place the next document on the document tray until the current operation is completed.
Note
To stop the operation, press Start. (The button will light up red.) Press Start again to restart the operation or use Feed and ✗ to feed/cut the document manually.
To avoid the accidental cut off, you will have to press ✗ more than 2 seconds.

natural_image
Simple line drawing of a hand holding a curved object with two fingers (no text or symbols)Note
If you use adhesive back laminate film, the back surface of laminated document will be the liner to be peeled off. To mount the laminated document on a surface for display, peel of the liner as illustrated.
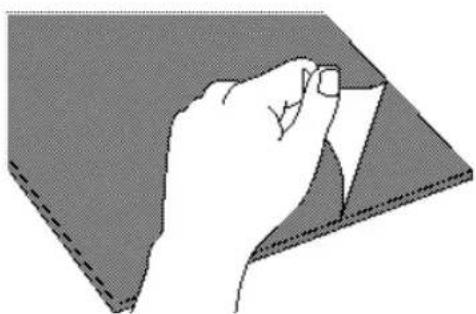
natural_image
Illustration of a hand holding a piece of paper or tape, partially visible against a textured gray background (no text or symbols)Note
If you use the magnetic back laminate film, you can put the output on the metal surface objects.
The back surface of laminated output (magnet side) will be the liner to be peeled off.
Please peel off the liner gently as illustrated when putting the output sheet.
How to define the cutting position (creating borders)
The Auto Cross Cutting System automatically detects the size of your document and cuts each edge. The cutting position can be adjusted to create a margin on each edge of the laminated document.
Auto Cut Mode - Border
This mode is ideal for or protecting documents from water or dust.
To create a margin on each edge of your document...
(1) Change the position of the dial switch on the control panel to Border.
(2) Set the document on the document tray and press Start. The document will be cut with about a 0.18" - 0.20" (4.5 - 5mm) margin on each edge of the paper.
| Cutting Position | ||
| Top | Top of paper 0.20 | “± 0.06” (5mm ±1.5mm) |
| Bottom | Bottom of paper 0.20 | “± 0.06” (5mm ±1.5mm) |
| Right | Right edge of paper 0.18 | “± 0.06” (4.5mm ±1.5mm) |
| Left | Left edge of paper 0.18 | “± 0.06” (4.5mm ±1.5mm) |

Auto Cut Mode - No Border
This mode is ideal for making stickers.
To generate a document without margins on each edge...
(1) Change the position of the dial switch on the control panel to No Border.
(2) Set the document on the document tray and press Start. The document will be cut without margins (approximately 0.04"- 0.06" or 1 - 1.5mm from each edge of the document).
| Cutting Position | ||
| Top | Top of paper 0.06 | “ ± 0.06” (1.5mm ± 1.5 mm) |
| Bottom | Bottom of paper 0.06 | “ ± 0.06” (1.5mm ± 1.5 mm) |
| Right | Right edge of paper 0.04 | “ ± 0.06” (1mm ± 1.5 mm) |
| Left | Left edge of paper 0.04 | “ ± 0.06” (1mm ± 1.5 mm) |

Auto Cut Mode - Off (for sensitive documents)
Use this mode to prevent any part of the document from being cut away during the finishing process.
(1) When Off is selected, the machine will laminate the document without cutting the edges. The document is processed and ejected from the machine.
(2) Press ✗ to cut the document manually
Manual feeding and manual cutting
You can feed and cut the document manually using the Cool Laminator.
natural_image
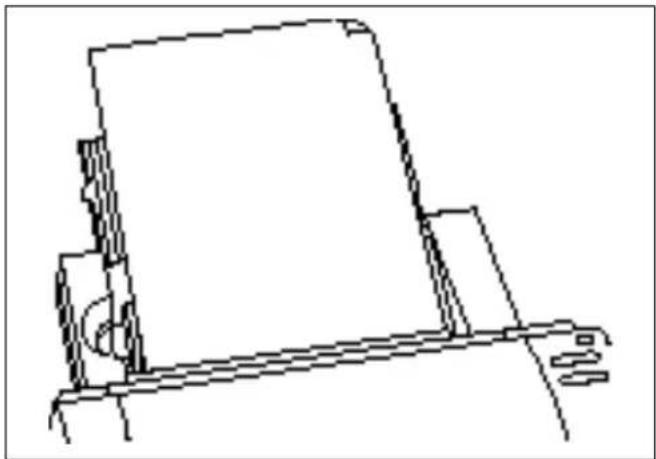
Line drawing of a mechanical assembly with a bracket and mounting base (no text or symbols)(1) Set the document on the document tray.
natural_image
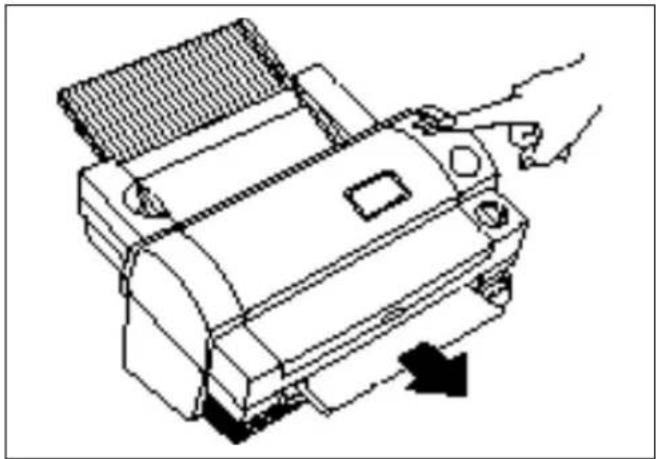
Line drawing of a printer with a hand operating it, showing no text or symbols(2) Press "Feed" to feed the document manually. The "Feed" button is a self-repeating key. The document will continue to be fed until the "Feed" button is released. Keep pressing the "Feed" button until you see the end of the document.

natural_image
Line drawing of a printer with a hand operating it (no text or symbols present)(3) Press ✗ (cut button). The document will be cut at its current position. If you cannot remove the document from the machine after this procedure, use the Feed button and press ✗ (cut button).
Note
-For safety, the exact cutting position is not visible from outside of the machine.
-To avoid accidentally cutting through your document, it is recommended that you press only after the document has been completely ejected from the machine.
- Never remove a document from the machine by force. If necessary, use scissors.
Corner cutting
After laminating, you can trim each corner of the document.
(1) Insert a corner of the document into the corner-cutter slot.
(2) The machine will automatically trim the corner of the document.
(3) Remove the document from the slot.
Note
The maximum thickness of the original document (before lamination) that the corner cutter unit can cut is 0.2mm.
Do not use the corner cutter to trim the magnet back output.

natural_image
Line drawing of a hand pressing down on a mechanical component (no text or symbols)Corner cutter dust box
The trimmings from the corner cutter are collected in the corner cutter dust box located just below the corner cutter slot. Pull the dust box towards you to discard the trimmings and set the box back into its original position.
Regular maintenance and troubleshooting
You can keep your machine in optimum condition by cleaning it on a regular basis.
Regular maintenance
Avoid small debris and objects
Be careful not to let anything slip into the machine, especially metal objects such as paper clips and staples. For optimum lamination results, do not place the machine and cartridges in a dusty environment.
Cleaning
Never use volatile liquids such as thinner or benzene to clean the exterior surface of the machine. Use only a soft cloth dampened with a mild detergent solution.
Paper jams
The machine will sound an alarm if a document jams while going through the feeder. The Start button will blink in red.
Clearing a document jam
(1) Turn the machine off.

natural_image
Technical line drawing of a mechanical device with a black arrow indicating rotation or movement (no text or symbols)(2) Open the top cover.

natural_image
Technical line drawing of a mechanical device with a magnified inset showing a hand interacting with a component (no text or symbols present)(3) Push the roller release lever (green color) and lift the roller holder upwards.

natural_image
Line drawing of a hand pressing a mechanical component with an arrow indicating the process (no text or symbols present)(4) Remove the film cartridge from the machine.
Note
Use scissors or ✗ button to extract the jammed film and remove the film cartridge, if necessary.
natural_image
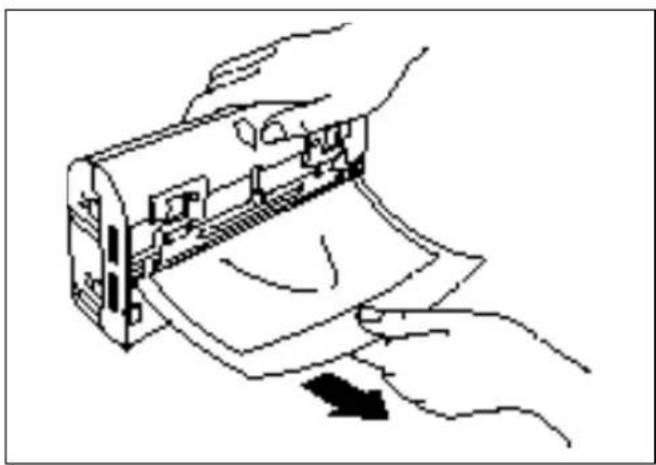
Illustration of hands inserting a card into a device (no text or symbols visible)(5) Remove the document from the film slit of the cartridge.
Note
Do not pull the document from the opposite side.
natural_image
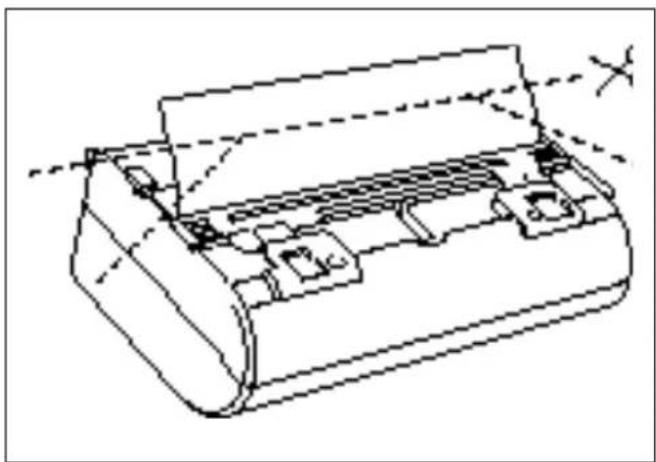
Technical line drawing of a mechanical device with no visible text or symbols(6) Remove any excess laminating film by cutting along the engraved "cutting line" on the cartridge before reinserting the cartridge.
Note
Make sure that the shutter of the cartridge is closed. If open, push the shutter button to close the shutter.
natural_image
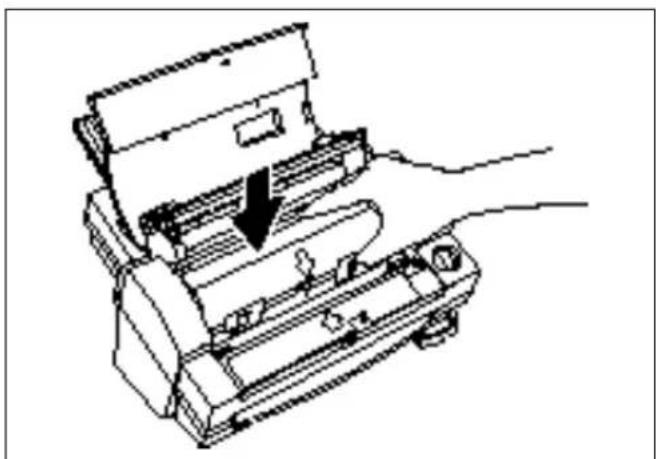
Line drawing of a hand pressing down on a mechanical device with a downward arrow indicating motion (no text or symbols)(7) Set the film cartridge into the machine.
Note
Make sure that the film is set properly.

natural_image
Line drawing of a mechanical device with arrows indicating motion or force (no text or symbols)(8) Return the roller holder lock button (purple color) to its original position until it clicks into place.

natural_image
Technical line drawing of a mechanical device with internal components and a directional arrow (no text or symbols)(9) Close the top cover.
(10)Turn the power on. Press Feed button until you can see the edge of the film to remove any slack from the film.

CAUTION:
Do not touch the surface of the blade when removing a jammed document. This procedure must be done with great care to avoid personal injury.
Replacing the side cutter units
Cutter performance will decline as blades are dulled through use or become coated with adhesives. Use the following operation to replace the side cutter units.

CAUTION:
Do not touch the surface of the blade when replacing the cutter units. Handle the blades with great care to avoid personal injury.
Side cutter units (SC-2)
(1) Turn the machine off.

natural_image
Technical line drawing of a mechanical device with a curved arrow indicating motion or force (no text or symbols)(2) Open the top cover.

(3) Push the roller release lever (green color) and lift the roller holder upwards.

natural_image
Diagram of a printer or printer with a magnified view of the printer's internal structure (no text or symbols present)(4) Push the yellow colored tab of side cutter unit to release the lock as illustrated.

natural_image
Technical line drawing of a printer or printer with no visible text, numbers, or symbols(5) Slide the old side cutter to the center. Remove the side cutter.

natural_image
Technical line drawing of a mechanical device with no visible text or symbols(6) Slide the new side cutter to secure it in the side cutter holder.

natural_image
Technical line drawing of a printer with a magnified inset showing the printer's handle (no text or symbols present)(7) Lift the tab to lock the side cutter into place.
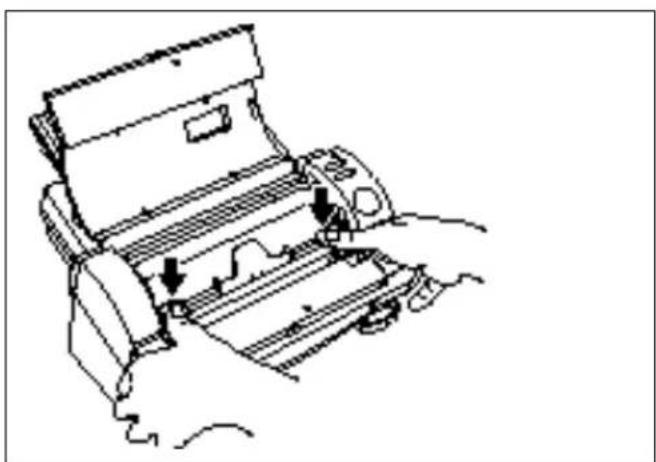
natural_image
Line drawing of a mechanical device with arrows indicating motion or force (no text or symbols)(8) Return the roller holder lock button (purple color) to its original position.
Note If side cutter units are not installed properly, the roller holder cannot be returned to the original position. Make sure that film cartridge is set firmly when returning the roller holder to its original position.

natural_image
Technical line drawing of a mechanical device with internal components and a black arrow indicating a specific section (no text or symbols present)(9) Close the top cover.
(10) Turn the power on. Press Feed button until you can see the edge of the film to remove any slack from the film.
Replacing the corner cutter tray
The cutter performance will decline as blades are dulled.
You can improve it by changing the corner cutter tray.
The both sides of corner cutter can be used. Before using new corner cutter tray, try to remove the corner cutter tray as shown below and reinsert it after changing the surface of tray upside down.
Use the following operation to replace the corner cutter tray when necessary.

natural_image
Line drawing of a hand using a tool to adjust or install a mechanical component (no text or symbols present)Corner Cutter Tray (Corner cutter tray CC-1)
(1) Remove the corner cutter tray as illustrated.
(2) Install the new corner cutter tray.
Note
Use Brother authorized cutter units (SC-2 or CC-1) only.
Other cutter units, (top/bottom cutter unit and the upper blade of the corner cutter) are not replaceable.
Please consult your dealer if these cutter units become damaged.
Troubleshooting
| Problem Cause | Solution | |
| No activity after the machine has been turned on. | The AC adapter is not connected properly. | Check that the machine is plugged into a power source. |
| The top cover is not completely closed. Close | the top cover. | |
| The document will not feed into the machine and alert buzzer sounds (two times). | The document was not set properly. | Reset the document properly and press Start again. |
| The document is too thick or too thin. | The minimum and maximum thickness of paper that can be used with this machine are 0.1mm-0.2mm. | |
| The document is wrinkled or curled. Curled, wrinkled documents cannot be laminated. | ||
| The width of the document is too narrow or too wide. | The width of the document must be between 2.2" (55mm) and 8.5" (216mm). | |
| Job stops during processing, the Start button blinks (in red) and the alert buzzer sounds. | The document is too small. | Documents must be at least 3.5" (90mm) long. |
| The wrong film cartridge is installed. (US Letter/A4 paper cannot be laminated when a 4.8 inch/A6 film cartridge is installed in the machine.) | Install the proper film cartridge. | |
| The length of the document is too long. | The length of the document must be less than 39.4" (1000mm). | |
| The film has run out. | Change the film cartridge. | |
| The document is jammed. Remove the jammed document. | ||
| Job stops during processing, the Start button blinks in orange. | Document length is more than 13.8" (350mm) long. | Press Start to restart the process. |
| Output quality is poor. | The document is too thick or too thin. | The minimum and maximum thickness of paper that can be used with this machine are 0.1mm - 0.2mm. |
| The document is wrinkled or curled. Curled, wrinkled documents cannot be laminated. | ||
| The document is too small. | Documents must be at least 2.2" (55mm) wide and 3.5" (90mm) long. | |
| The document will not feed straight. | The document guide is not set properly. Set the document guide properly. | |
| The document is not cut after processing. | The cutter units are not installed properly. | Check if the cutter units are installed in the machine properly. |
| The thickness of the paper is too thick. | The maximum thickness of paper that can be used with this machine is 0.2mm. | |
| The cutter units have been damaged. | Replace the cutter units. You can replace the side cutter units and corner cutter tray. It is not possible to replace the top/bottom cutter. If these cutter units do not work properly, please consult your dealer. | |
| Auto Cut Mode Off is selected. | Change the setting of the Auto Cut Mode selector switch. | |
| The cutting position is not accurate (top/bottom) | The paper sensor is damaged. Please consult your dealer. | |
| Stickers will not stick. | Sticker film has not been loaded. | Use Brother Sticker Film Roll LC-A9 or LC-A5. |
| The liner of the sticker has not been peeled away. | Remove the liner. | |
| The surface that the sticker is meant to adhere to is dirty or rough. | Wipe the surface or try another surface. | |
| The Start button blinks (in red) and the alert buzzer sounds when the machine is turned on. | The film cartridge is not installed properly or an incompatible film cartridge is installed. | Install the film cartridge properly. Use Brother authorized film cartridges and film refills only. |
| The proper AC adapter is not being used. Use a Brother authorized AC adapter. | ||
| The Start button blinks (in red) and the alert buzzer sounds when the top cover is closed | The film cartridge is not installed properly or an incompatible film cartridge is installed. | Install the film cartridge properly. Use Brother authorized film cartridge and film refills only. |
Specifications
Model number: LX-900/LX-910D
Processing method: Cold pressure method
Power supply: AC adapter (included)
USA 120V±10% (60Hz)
Output DC 18V 700mA
Min./max. width of document:
2.17" - 8.50" (55mm - 216mm)
Min./max. length of document:
3.54" - 39.4" (90mm - 1000mm)
Min./max. thickness of document:
0.004" - 0.01" (0.1mm - 0.2mm)
Film: Refillable cartridge film
Film type:
LC-D9 (9.0"/A4 width double-side laminate)
LC-A9 (9.0"/A4 width adhesive-back laminate)
LC-M9 (9.0"/A4 width magnetic-back laminate)
LC-D5 (4.8"/A6 width double-side laminate)
LC-A5 (4.8"/A6 width adhesive-back laminate)
LC-M5 (4.8"/A6 width magnetic-back laminate)
Max number of output/cartridge:
LC-D9/A9: About 60 sheets 11.7"/A4 paper
LC-D5/A5: About 100 sheets7"/A6 paper
LC-M9: About 12 sheets 11.7"/A4 paper
LC-M5: About 20 sheets 7"/A6 paper
Document feed speed:
0.75"/sec. (19mm/sec.)
Cutting system: Built-in cutting system with paper size detection
Side cutter units (replaceable)
Top/bottom cutter unit (non-replaceable)
Life of the cutter:
Corner cutter unit (replaceable – lower only)
Side cutter units 984 feet (300m)
Top/Bottom cutter unit About 5000 sheets (used with adhesive back laminate film)
Corner cutter unit (Upper) 20,000 times
Corner cutter tray 3,000 times
Noise level:
35 dB (stand-by mode)
Unit dimensions:
357mm (W) * 293mm (D) * 195mm (H) (14.1" * 11.5" * 7.7")
Unit weight (not including film
cartridge and AC adapter) 4.7kg (10.4 lbs.)
A
AC adapter....6,10,11,32
Adhesive back laminate film....21
Adhesive sticker 12
Alert buzzer....32
Auto Cross Cutting System 19,22
Auto Cut Mode Border 22
Auto Cut Mode No Border....22
Auto Cut Mode Off.... 5,22,32
Auto Cut Mode selector switch 8,22,32
B
Border....8,22
Brother Sticker Film Roll....32
Business card-size paper....19
Buzzer....21
C
Cartridge 8,9
Cartridge cover....15
Compatible accessory list....6
Control panel.... 7,11,22
Corner cutter 25
Corner cutter dust box....7,25
Corner cutter slot....7,24
Corner cutter tray....7,31
Corner cutter unit....25
Cut button....8
Cutter unit....28,32
Cutting line 8,9,17
Cutting Position 22
D
DC connector 7,10
Dial switch....22
Document guide 7,20,32
Document jam 26
Document output 7
Document supporter 7,20
Document tray....7,20,21,22,23
Dust box....25
E
Electrical outlet 10,11
F
Feed button.... 8,14,23,28,31
Film cartridge......6,9,11,12,13,14,15,16,27,32
Film cartridge cover.... 8
Film refill 12
Film roll....12,15,16
Film slit 8,27
Function button 7
L
LED 8
Lower roller....9
M
Margin 22
N
No Border 8
O
Owner's manual.... 6
P
Paper jam 26
Paper length 19
Paper thickness 19
Paper width.... 19
Plastic side holder....8,16
Professional, self-adhesive stickers.... 12
Power switch....7,8,11
Projection....8,16
R
Roll film....7,16
Roller....7
Roller holder 7,9,10,14,26,29,30
Roller holder lock button.... 7,10,14,28,30
Roller release lever 7,9,13,26,29
Roller unit 7,14
S
Setup 9
Shutter 8,9,14,15,16,27
Shutter button.... 8,16,27
Side cutter....30
Side cutter arm 7
Side cutter holder....30
Side cutter unit....7,9,14,28,29,30
Side holder....16
Start button....11,21,26,32
Start/Stop button....8
Stickers 32
Supplemental PC software (CD-ROM) ......6
T
The Auto Cross Cutting System....19
The Auto Sheet Feeder....19
Top cover 7,9,10,13,14,26,28,29,31,32
Top/bottom cutter units....7
Type of paper 19
V
Viewing window 7
Appendix (About PrintMaster Gold Software)
Mindscape and PrintMaster are registered trademarks and the Mindscape logo is a trademark of The Learning Company.
Adobe and Acrobat are trademarks of Adobe system Incorporated.
Windows is a registered trademark of Microsoft corp. in the U.S. and other countries.
IBM is a registered trademark of International Business Machine, Inc.
You don't need a computer to use the Cool Laminator. However, if you have a computer and printer, the bundled PC software, PrintMaster Gold makes it easy to produce beautiful projects you'll love to show around. Simply choose from PrintMaster Gold's selection of beautiful, ready-to-print designs, make any changes you want, and you're ready to print. It's really that easy!
Note:
Each time when you use PrintMaster, you will have to insert the PrintMaster Gold CD-ROM to your PC.
If you have any technical problems with this software, please contact the technical service department of the software company Mindscape.
The list of Mindscape Technical Support is as follows.
Before installing, check the system requirements listed below to make sure your computer is able to work with PrintMaster Gold.
System Requirements
PrintMaster Gold performs on any computer with the following features:
• IBM PC with a 486DX2 66 MHz (or higher)
• Windows 95, Windows 98, Windows 3.1x/Windows for Workgroups (running in 386 Enhanced Mode)
• 8Mb or more of RAM (16Mb recommended)
• 30Mb or more of free hard disk space
• Double-speed or better CD-ROM drive
• Microsoft mouse or 100% compatible
• Sound Blaster or 100% compatible sound card (recommended)
• Hayes or 100% compatible modem (optional)
Print Support: PrintMaster Gold provides the highest resolution output possible on all back & white or color printers supported by Windows. Be sure you have enough color ink cartridges before printing. We suggest you print out your projects on the best paper (usually glossy) your printer will support.
Graphics Support: PrintMaster Gold provides a large selection of spectacular full color CGM, TIFF, PSD, and JPG images and works with all other popular graphic formats: PCX, TIF, GIF, WMF, BMP, and Kodak Photo CD.
Font Support: PrintMaster Gold will work with any other True Type fonts that are installed in Windows.
Starting PrintMaster Gold in Windows 95/98
Follow these step-by-step instructions to install PrintMaster Gold onto your hard disk.
When running under Windows 95 or 98, the PrintMaster Gold CD-ROM provides support for the autorun feature as described below:
-
Insert the PrintMaster Gold CD-ROM into your CD-ROM drive and the installation program will automatically start.
-
Proceed to the next section entitled, Installing PrintMaster Gold.
If the Windows 95 or 98 autorun is not currently enabled on your system, then begin the PrintMaster Gold installation as follows:
- From the Start menu click Run.
- At the command line specify the drive letter where the PrintMaster Gold CD-ROM is located and type INSTALL (Example: D:INSTALL). Press ENTER or click OK to proceed.
- Proceed to the next section entitled, Starting PrintMaster Gold.
Starting PrintMaster Gold in Windows 3.1x or Windows for Workgroups
Follow these step-by-step instructions to install PrintMaster Gold onto your hard disk.
- Open the Program Manager's File menu and select Run.
- Specify the drive where the CD-ROM is located and type INSTALL (Example: D:INSTALL) for the Command Line and press ENTER or click OK to proceed.
- Proceed to the next section entitled, Installing PrintMaster Gold.
Installing PrintMaster Gold
- Click the Install button or press ENTER to continue the installation.
The PrintMaster Gold Installation screen appears with the default drive and directory, which you may change or accept as shown. - Click Continue or press ENTER to install PrintMaster Gold into the default directory, C:\PMW. or Click the Custom button to install PrintMaster Gold into the drive and directory of your choice.
Launching PrintMaster Gold after installing:
In Windows 95/98:
- Start Windows in the usual manner. The installation process creates a new menu group for PrintMaster Gold in the Program section of the Start menu.
- Click Start on the bottom left side of the window.
- Click Programs, then open the PrintMaster Gold group and click the PrintMaster Gold icon.
NOTE:
You can also double-click the PrintMaster Gold icon in the PrintMaster Gold group window.
To use the autorun feature in Windows 95/98:
- Start windows in the usual manner.
- Insert the PrintMaster Gold CD-ROM. The autorun feature in Windows 95/98 will automatically start the program.
- Click Run to proceed past the title screen.
In Windows 3.1x
- Open the Program Manager and double-click the PrintMaster Gold subdirectory.
- Double-click the PrintMaster Gold icon.
Removing PrintMaster Gold
To remove an existing version of PrintMaster Gold from your computer, use the Uninstall feature. If you have a previous version of PrintMaster Gold, we suggest you remove it first.
NOTE:
Removing PrintMaster Gold will also remove any previous projects and address books you have created in the PMW directory. If you would like to save these, please save the files into another directory.
In Windows 95/98
- Click the Start button at the bottom left of the screen. A popup menu will appear.
- Find your PrintMaster Gold group submenu. In it, click the Remove PrintMaster Gold icon.
- Follow the on-screen instructions. PrintMaster Gold will be removed from your hard drive.
Or,
- Start Windows 95/98.
- Insert the PrintMaster Gold CD-ROM.
- When the PrintMaster Gold opening screen appears, click Remove. Then, follow the on screen directions.
In Windows 3.1x
- Find the PrintMaster Gold group on the Program Manager.
- Double-click the group to open its contents.
- Double-click the Uninstall icon.
- Follow the on-screen instruction. PrintMaster Gold will be removed from your hard drive.
Reinstalling PrintMaster Gold
Though unlikely, PrintMaster Gold files may become corrupted and the program may not run properly. If so, you can reinstall PrintMaster Gold, which cleans out all old files and restores original functionality.
In Windows 95/98
- Start Windows 95/98.
- Insert the PrintMaster Gold CD-ROM.
- When the PrintMaster Gold opening screen appears, click Reinstall, then follow the on-screen instructions.
NOTE:
Reinstalling will delete all of your stored projects in Your Own file.
In Windows 3.1
- In the PrintMaster Program group, click Install.
- Follow the onscreen directions. PrintMaster Gold will reinstall all programs and art files over the old files.
NOTE:
Reinstalling will delete all of your stored projects in Your Own file.
Viewing/Printing PrintMaster Gold user's manual
The full contents of user's manual is stored in the PrintMaster Gold CD-ROM.
Please install the Adobe Acrobat Reader to see the online manual.
How to install the Adobe Acrobat Reader
- Double click the file Ar32e301 in the Acrobat 3 folder on the CD-ROM.
- Please proceed the operation.
System Requirements.
X86- based personal computer (386 minimum 486, pentium, or pentium pro recommended)
Microsoft Windows 3.1x, 95, 98
4MB application RAM
5MB hard disk space plus 7MB additional temporary disk space available during installation.
How to open the manual
- Double click the file manual.pdf in the PrintMaster Gold CD-ROM. The full contents of manual will be displayed on the screen.
Note
The program Acrobat Reader should in installed on your PC to open the file. Please refer to the above section.
The World of PrintMaster Gold
This section introduces you to the PrintMaster Gold environment. As soon as you open the program, you'll notice PrintMaster Gold has several interrelated areas, each with it's own individual purpose and look. Each area-including the Hub, Art Gallery, Sentiments Gallery, With Help Designer, and Workspace-offers you different tools to help create a unique card, calendar, or newsletter. If you are a new user, we suggest you first browse through the features in each area to get a basic understanding of the creative possibilities in PrintMaster Gold.
THE HUB SCREEN
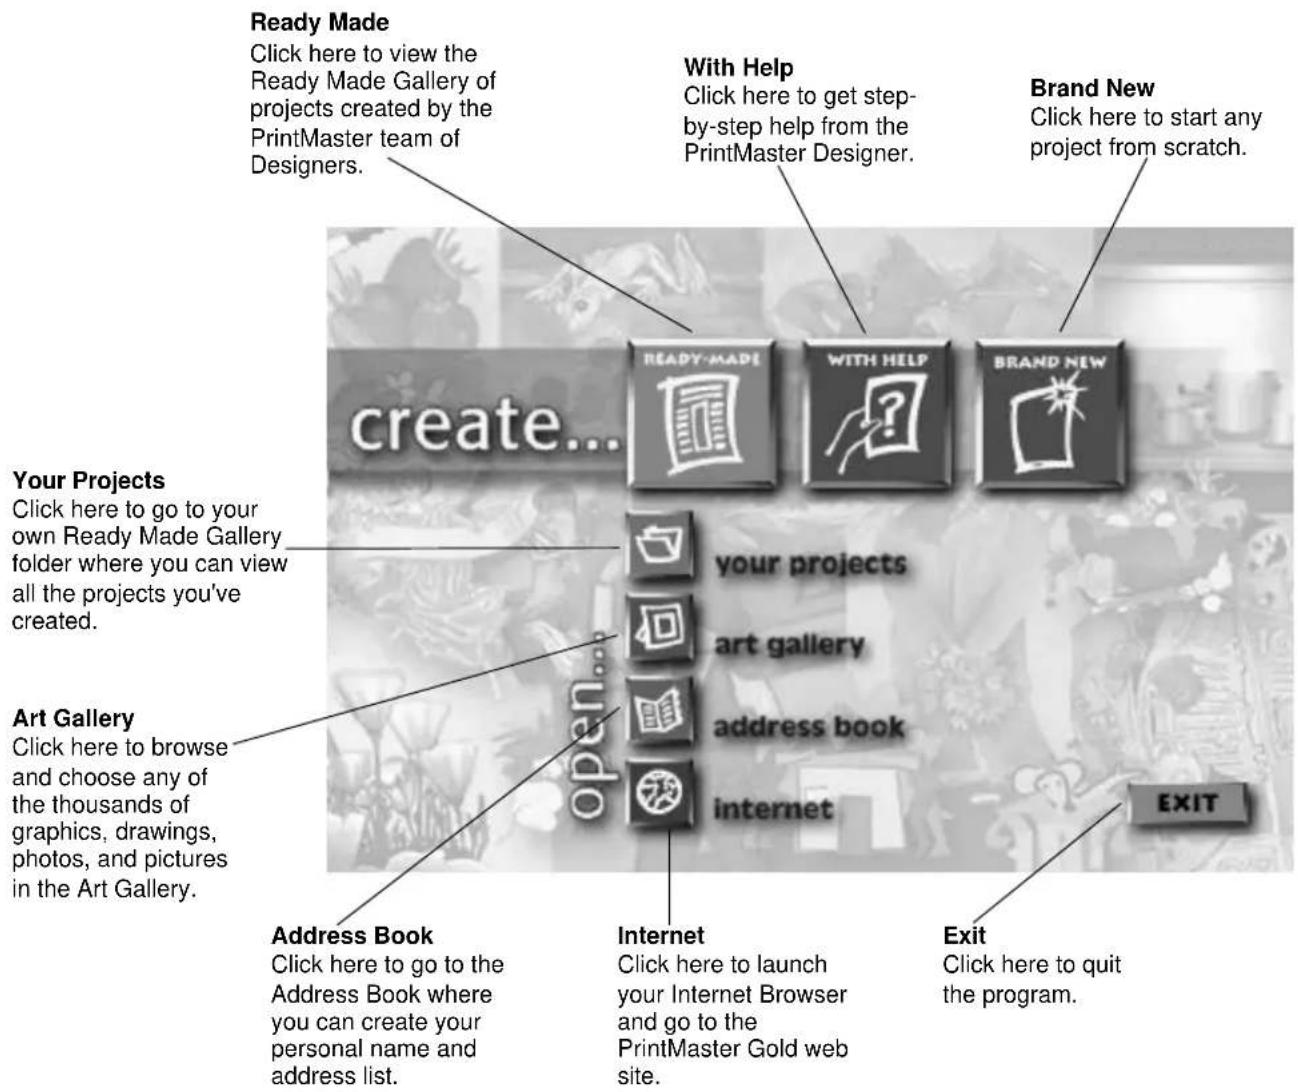
After you launch PrintMaster Gold, the first thing you will see is the Hub screen. The Hub is where you can choose the kind of help you want creating a project, choose to work on a Ready Made, view art in the Art Gallery, or launch your Internet browser and go to the PrintMaster Gold Web site.
Once you have decided on the type of project you would like to work on, click one of the buttons above to go there. You can always return to the Hub by closing the project you are working on, or clicking Back in the With Help windows.
The workspace
The Workspace is your own personal drafting board, with all the text, drawing, and editing tools you'll need to make a beautiful project. Here, you can put the finishing touches on your project, add new pictures, type in your personal message, and print.
Below, we will introduce you to the main menu bar and the five toolbars in the Workspace. We suggest you browse through them to get an idea of the possibilities, then jump right in and start designing.

Menu Bar:

File
Edit
View
Add
Format
Arrange
Tools
Sound
Window
Help
Like most Windows applications, PrintMaster Gold has a menu bar at the top of the screen. The menu bar provides access to all PrintMaster Gold command features, including File, Edit, View, Format, and Sound functions.
Use your mouse (or the ALT key) to pull down these menus to see their contents. (See the section entitled: Mouse and Keyboard Conventions later on in this guide for more details).
Add Toolbar
The Add toolbar holds all the tools you need to add graphics, sentiments, and your own art to your project. To hide or display the Add toolbar, access the View menu, the Toolbar/Add Bar.

Add a picture Click here to go to the PrintMaster Art Gallery. In the Art Gallery, you can choose from thousands of graphics, pictures, photos, and borders for your project. Select or Double-click a picture preview in the Art Gallery and your selection will be placed on your project in the Workspace.
Add a Sentiment Click here to view the thousands of fun, sentimental, warm, and serious sentiments we've gathered in the Sentiments Gallery. Search by type or keyword for the sentiment you want, then select the sentiment and it will be inserted into your project automatically.
Text Box Click here to add text to your project. After clicking this button, your cursor will turn into a 'text' crosshair. You can then either drag (with the mouse button down) across the project to create a text box, or just click once on the project and start typing.
Line Click this tool to draw a straight line on your project. To keep your line horizontal, perpendicular, or at a 45-degree angle, hold down the shift key while you drag the cursor across your project.
Rectangle Use this tool to create a rectangle on your project. by holding down the shift key, your box will be held to a perfect square.
Ellipse Use this tool to create an ellipse. By holding down the shift key, your drawing will be held to a perfect circle.
Shape Click on this tool to view a wide selection of shapes you can place on your project. Once you have selected a shape from the pop-up menu, drag your cursor across the project to determine its size. You can keep the shape's original proportion by holding down the shift key while you drag.
Free Draw This tool acts like a pencil, letting you draw any design or line you want on your project. You can modify the width of the Free Draw tool with the Line Width tool in the modify toolbar.
Modify Toolbar
Use the Modify toolbar to make adjustments to your art and text. With these tools, you can easily change the color of text and pictures, change line widths, add shadows, and crop pictures.
To hide or display the Modify toolbar, access the View menu, then Toolbars/Modify Bar.
Color Use the tool to add color to your pictures and text. First select the picture or text you want to color, then select this tool. You will then see a selection of colors to choose from.
Line Width Use this tool to change the line width of your drawing or the outside border of a shape.
Line Color Use this tool to change color of the border line of a picture.
Shadow Use this tool to add a shadow to your text or shapes.
Shadow Color Use this tool to choose the color of the shadow behind your text or shapes.
Crop Use this tool to crop out the part of a picture or shape you do not want to see. Just select the picture you want to crop, click on this tool, and then move the handles on the picture to only show the part you want to see. Or, you can move the picture within its 'window'. The picture will still be intact, but you will only be able to see a portion of it.

Place Toolbar
The Place toolbar is a selection of automatic tools for working with all objects in PrintMaster Gold. With these tools, you can easily select pictures partially hidden behind another, group together objects you want to move as one, or flip pictures horizontally and vertically.
To hide or display the Place toolbar, access the View menu, then Toolbars/Place Bar.
Forward One Click this tool once to bring the active object up one level.
Backward One Click this tool once to push the active object back one level.
Send to Front Click this tool to bring the active object to the top of a stack of overlapping objects.
Send to Back Click this tool to send the active object to the bottom of a stack of overlapping objects.
Group Use this tool to group several objects together. First select all the pieces you want to _group by clicking on them one by one while holding down the shift key, then click on group. The grouped objects will now act as one.
Ungroup Click this tool to ungroup several objects you have previously grouped.
Mirror This tool flips the active object horizontally.
Flip This tool flips the active object vertically.
Center on Page This tool centers the active object in the middle (half way between the top and bottom and left and right sides) of the project.

Status bar
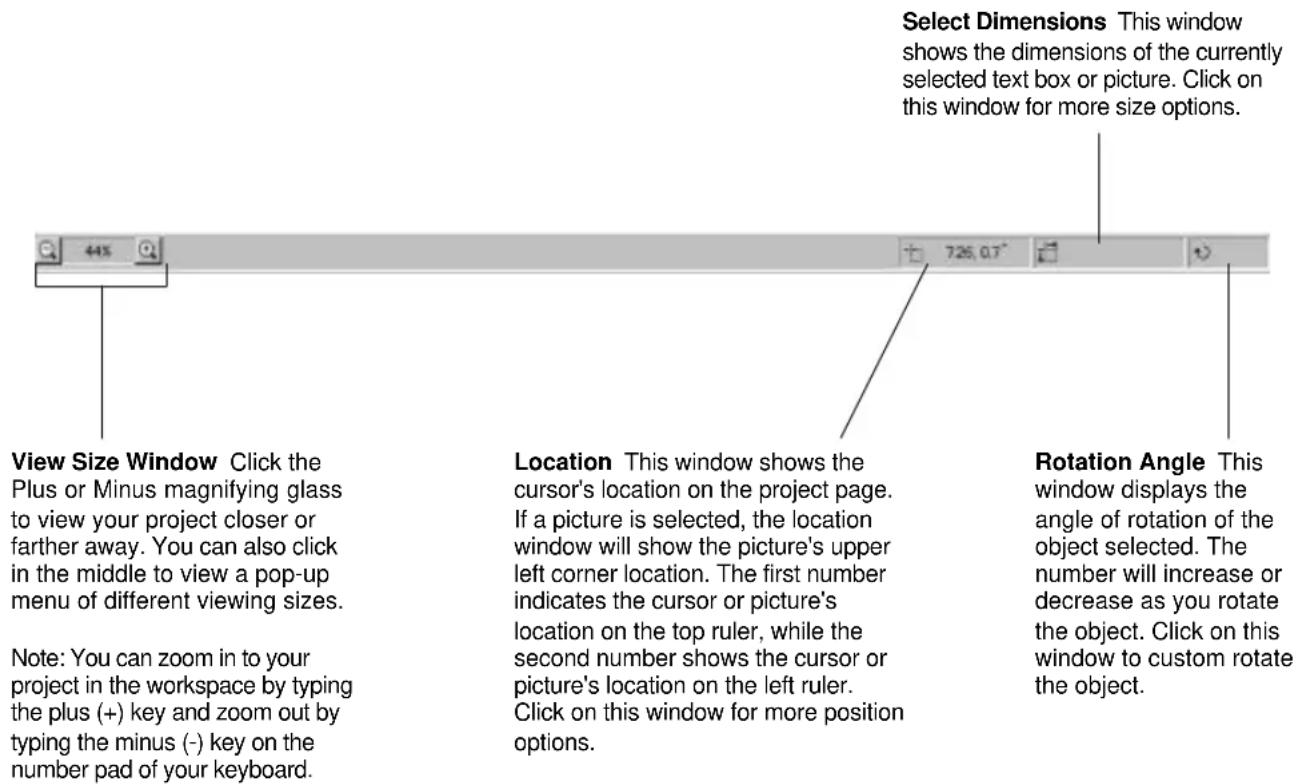
The Status toolbar is displayed at the bottom of the PrintMaster Gold window. Use this area to change your view of your project or to check the accuracy of your measurements.
To hide or display the Status toolbar, access the View menu, then Toolbars/Status Bar.
View Side Window Click either the left arrow or the right arrow to see the different sides of your project. You can also click directly in the middle of the View Side window to see a pop-up menu of different views.
Note: only available in cards, brochures, and newsletters.
Zoom to Area - This option changes the cursor into a magnifying glass, allowing you to drag across just the area you want to view close-up.
- Select this option and position the magnifying glass to the left and above of the object you want to magnify.
- Hold down the left mouse button and drag the magnifying glass across and down the layout screen until the item of focus is enclosed in a box. Then release the mouse button.
- COOL LAMINATOR Owner's Manual
- FCC NOTICE
- Statement
- Fax-Back System
- Brother on the World Wide Web
- For Customer Service
- Corporate Headquarters
- Service Center Locations
- Ordering Accessories and Supplies (in the USA)
- Table of Contents
- Getting started
- Features
- Precautions
- WARNING:
- CAUTION:
- IMPORTANT OPERATIONAL PRECAUTIONS:
- Package list
- Part names
- Outside of the machine
- Inside of the machine
- Control Panel
- Auto Cut Mode selector switch
- Film Cartridge
- Installing the film cartridge
- Note
- Turning the machine on/off
- About film rolls
- Film-supply maintenance
- Replacing the film cartridge
- Installing/replacing the film roll in the cartridge
- Document Size
- The Auto Sheet Feeder
- The Auto Cross Cutting System
- IMPORTANT INFORMATION:
- Operating the machine
- Press Start.
- How to define the cutting position (creating borders)
- Auto Cut Mode - Border
- Auto Cut Mode - No Border
- Auto Cut Mode - Off (for sensitive documents)
- Manual feeding and manual cutting
- Corner cutting
- Corner cutter dust box
- Regular maintenance and troubleshooting
- Regular maintenance
- Avoid small debris and objects
- Cleaning
- Paper jams
- Replacing the side cutter units
- Side cutter units (SC-2)
- Replacing the corner cutter tray
- Corner Cutter Tray (Corner cutter tray CC-1)
- Specifications
- A
- B
- C
- D
- E
- F
- L
- M
- N
- O
- P
- R
- S
- T
- V
- Appendix (About PrintMaster Gold Software)
- System Requirements
- Starting PrintMaster Gold in Windows 95/98
- Starting PrintMaster Gold in Windows 3.1x or Windows for Workgroups
- Installing PrintMaster Gold
- Launching PrintMaster Gold after installing:
- In Windows 95/98:
- To use the autorun feature in Windows 95/98:
- In Windows 3.1x
- Removing PrintMaster Gold
- In Windows 95/98
- Or,
- Reinstalling PrintMaster Gold
- In Windows 3.1
- Viewing/Printing PrintMaster Gold user's manual
- How to install the Adobe Acrobat Reader
- System Requirements.
- How to open the manual
- The World of PrintMaster Gold
- THE HUB SCREEN
- The workspace
- Menu Bar:
- Add Toolbar
- Modify Toolbar
- Place Toolbar
- Status bar
Brand : BROTHER
Model : Cool LX-910D
Category : Laminator