11846 - Unspecified LMP - Free user manual and instructions
Find the device manual for free 11846 LMP in PDF.

User questions about 11846 LMP
0 question about this device. Answer the ones you know or ask your own.
Ask a new question about this device
Download the instructions for your Unspecified in PDF format for free! Find your manual 11846 - LMP and take your electronic device back in hand. On this page are published all the documents necessary for the use of your device. 11846 by LMP.
USER MANUAL 11846 LMP
Material needed (not included):
- Screwdriver for recessed head screws (PH2)
- 8x Rack Nut
- 8x Rack Screw

Attention! The two slide rails must be separated before you start the installation. The inner slide rail must be seperated from the outer (see below).

natural_image
Two metallic electronic components with blue arrows pointing to their ends, no visible text or symbols.
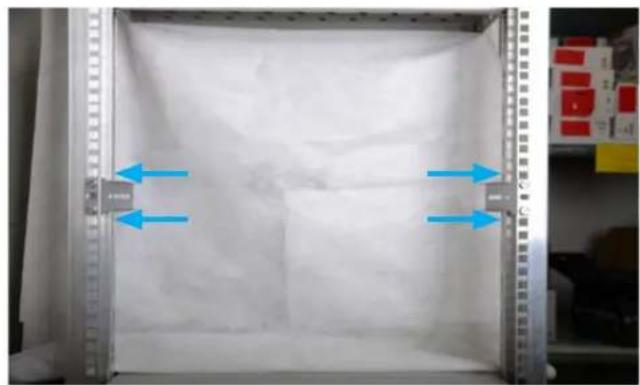
4x Metal Bracket
8x Rack Screws (not included)
8x Rack Nut (not included)
Attach the four metal bracket to the rack at the desired position. You may use two screws and nuts for each bracket to attach it firmly (not included).
natural_image
Interior view of a laboratory or storage unit with blue arrows indicating flow direction (no visible text or symbols)
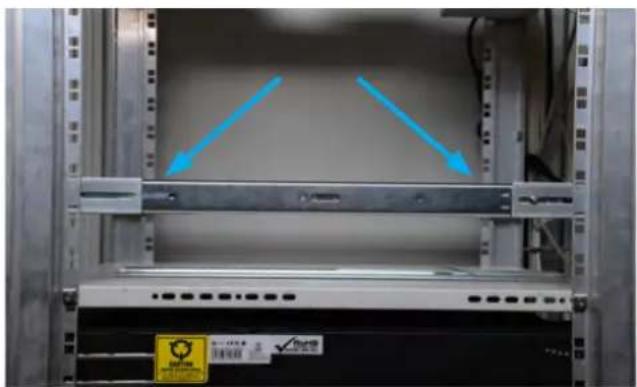
2x Rack Slide Rails (outer Slide Rails)
Insert the two outer slide rails to the brackets.
natural_image
Interior view of a server rack with two blue arrows pointing to a panel, no visible text or symbols on the equipment or background.Important! Make sure that the outer slide rail is mounted at the very end of the Bracket as shown in the picture (needed at the front bracket only).
natural_image
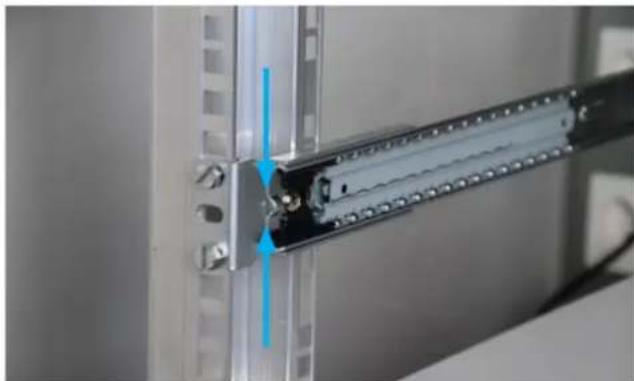
Close-up of a metallic mechanical assembly with a blue arrow indicating a component (no visible text or symbols)5 2x Screws (8 mm) 2x Washer 2x Nut
natural_image
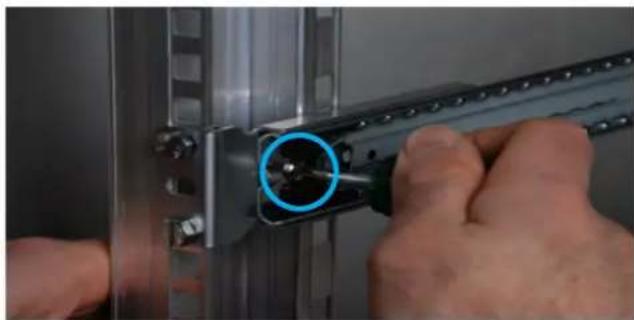
Close-up of hands using a tool to adjust or install a metal bracket component (no visible text or symbols)Attach the Slide Rail with an 8 mm screw to the bracket.
Important! The screw's head must face inwards as shown in the picture!
6 2x Screws (8 mm) 2x Washer 2x Nut
natural_image
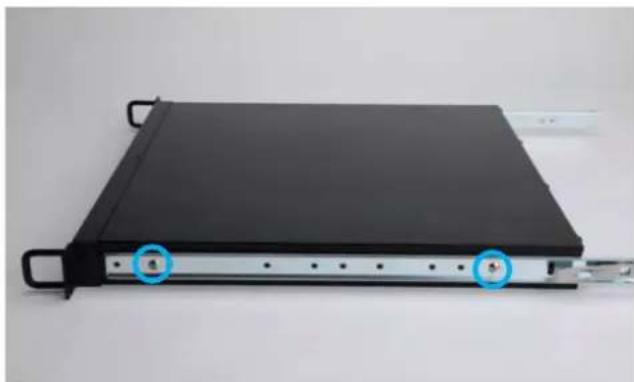
Close-up of a hand using a screwdriver to adjust a metal bracket (no text or symbols visible)4x Screw (5 mm) Attach the inner slide rail to the LMP iRack as shown in the picture. Use the screws 5 mm.
natural_image
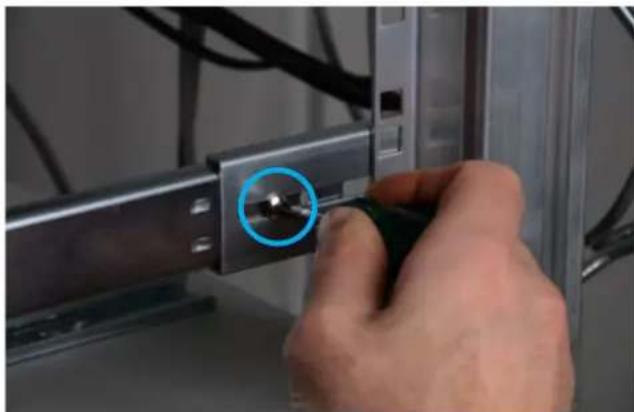
Black rectangular electronic device with two blue circular annotations pointing to ports, mounted on a silver frame (no visible text or symbols)8 Make sure that the slide rail is attached at the very top (up to the iRack's bracket).

natural_image
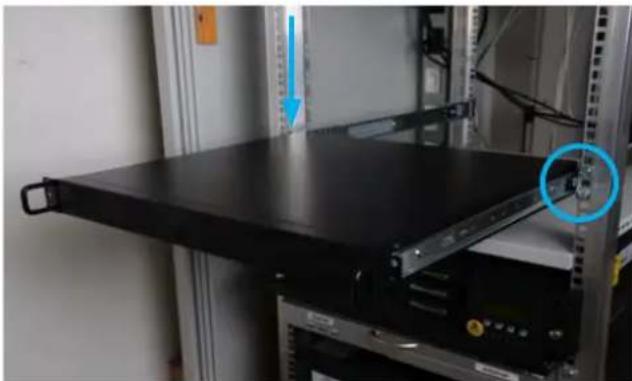
Close-up of a black mechanical component with a blue arrow pointing to a circular feature, no visible text or symbols.9 Info: When installing the LMP iRack for the first time, you may have to overcome a resistance. Push the LMP iRack to the back.
natural_image
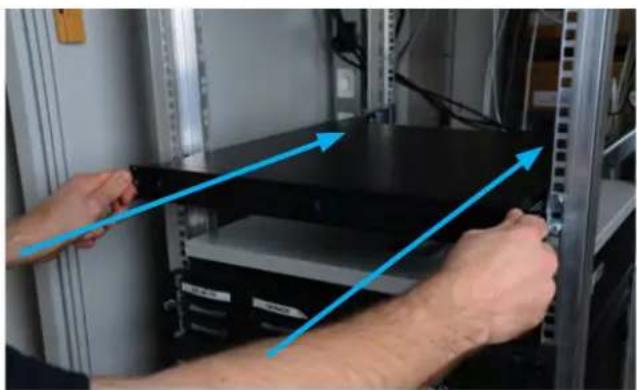
Person installing a black server rack with blue directional arrows indicating assembly or data flow (no text or symbols visible)10 Slide Rail safety lock.
natural_image
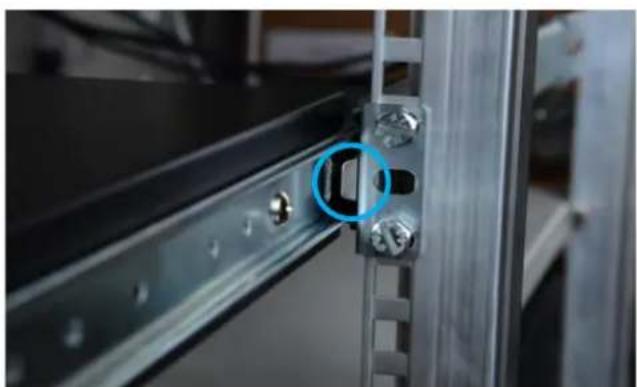
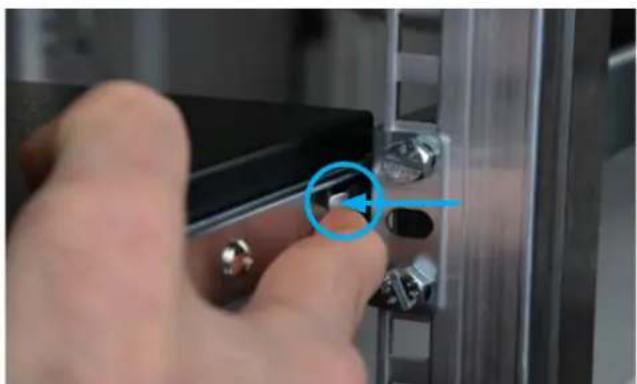
Close-up of a metallic mechanical bracket with a blue circular annotation highlighting a small component (no text or symbols visible)11 To fully remove the LMP iRack, you must unlock the safety lock by pushing inwards with a finger on the safety lock. You may pull the LMP iRack out of the rack.
natural_image
Close-up of a hand pressing a button on a metal panel (no text or symbols visible)12
LMP iRack safety locks.
natural_image
Black server rack with a blue circular annotation highlighting a component, mounted on a metal shelf (no visible text or symbols)13
To open the lid of the LMP iRack, you must unscrew the five screws as shown in the picture.
natural_image
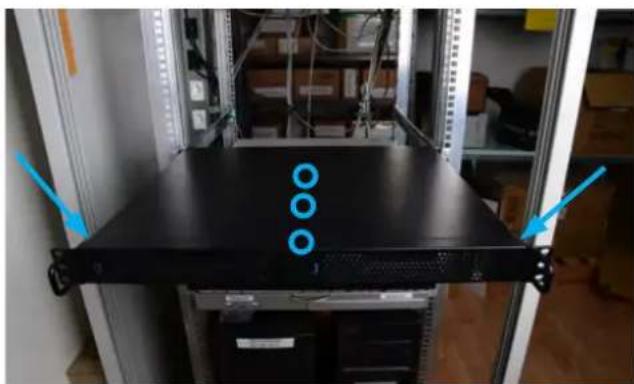
Front view of a server rack with three blue circular markers on top, mounted on a black platform (no visible text or symbols)14
After opening the lid, you have full access to the inner part of the LMP iRack. You may perform any service on your Mac mini now.

natural_image
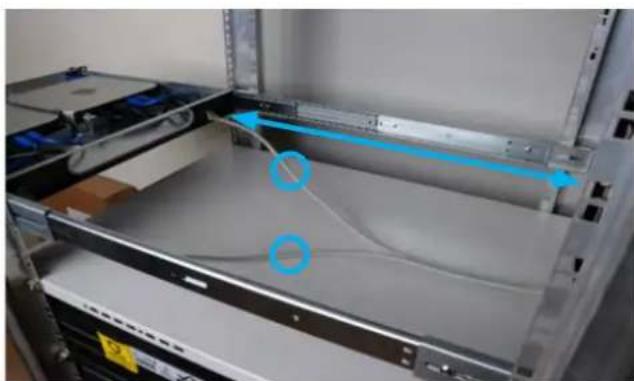
Interior view of a server rack with multiple racks and a central rack-mounted unit (no visible text or labels)15
Info: Be aware that the length of the cables in the back of the LMP iRack should be at least 0.5 m.