
P55W v4 - Laptop GIGABYTE - Free user manual and instructions
Find the device manual for free P55W v4 GIGABYTE in PDF.


| Product Type | Laptop |
| Brand | Gigabyte |
| Model | P55W v4 |
| Processor Type | Intel Core i7 (estimated) |
| Display Size | 15.6 inches (estimated) |
| Memory (RAM) | 8GB or 16GB DDR3 (estimated) |
| Storage | HDD or SSD (estimated) |
| Optical Drive | DVD-RW |
| Webcam | Yes, with LED indicator |
| TouchPad | Yes, with hotkey toggle |
| Keyboard Backlight | Yes, toggle with Fn+F12 |
| Ports | VGA, HDMI, Ethernet (RJ-45), 2x USB, audio jacks, SD card reader |
| Power Adapter Input | 100-240Vac, 50-60Hz |
| Power Adapter Output | 19.5V DC |
| Battery Type | Lithium-ion (built-in, not user-replaceable) |
| Operating System | Windows 7 or Windows 8.1 (estimated) |
| Hotkeys | Fn combinations for volume, brightness, display toggle, webcam, airplane mode, etc. |
| Software | Gigabyte Smart Manager, Smart USB Backup |
| Warranty | Refer to warranty card or Gigabyte support website |
| Safety Warning | Do not remove built-in lithium battery; use grounded outlet |
Frequently Asked Questions - P55W v4 GIGABYTE
User questions about P55W v4 GIGABYTE
0 question about this device. Answer the ones you know or ask your own.
Ask a new question about this device
Download the instructions for your Laptop in PDF format for free! Find your manual P55W v4 - GIGABYTE and take your electronic device back in hand. On this page are published all the documents necessary for the use of your device. P55W v4 by GIGABYTE.
USER MANUAL P55W v4 GIGABYTE
natural_image
Close-up of a black gigas laptop with visible circuitry and front panel (no text or symbols on body)Congratulations on your purchase of the GIGABYTE Notebook.
This manual will help you to get started with setting up your notebook. The final product configuration depends on the model at the point of your purchase. GIGABYTE reserves the right to amend without prior notice. For more detailed information, please visit our website at www.gigabyte.com
Using GIGABYTE Notebook for the First Time
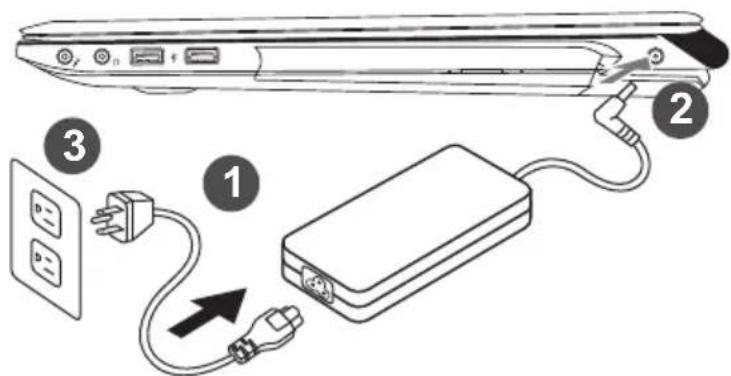
1 Connect the power cord to the AC adapter.
2 Connect the AC adapter to the DC-in jack on the right side of the notebook.
3 Connect the power cord to the power outlet.

IMPORTANT
- Ensure that your Notebook PC is connected to a grounded power adapter before turning it on for the first time.
- When using your Notebook PC on power adapter mode, the socket outlet must be near to the unit and easily accessible.
- Locate the input/output rating label on your Notebook PC and ensure that it matches the input/output rating information on your power adapter. Some Notebook PC models may have multiple rating output currents based on the available SKU.
• Power adapter information: Input voltage: 100-240Vac, - Input frequency: 50-60Hz, - Rating output voltage: 19.5V
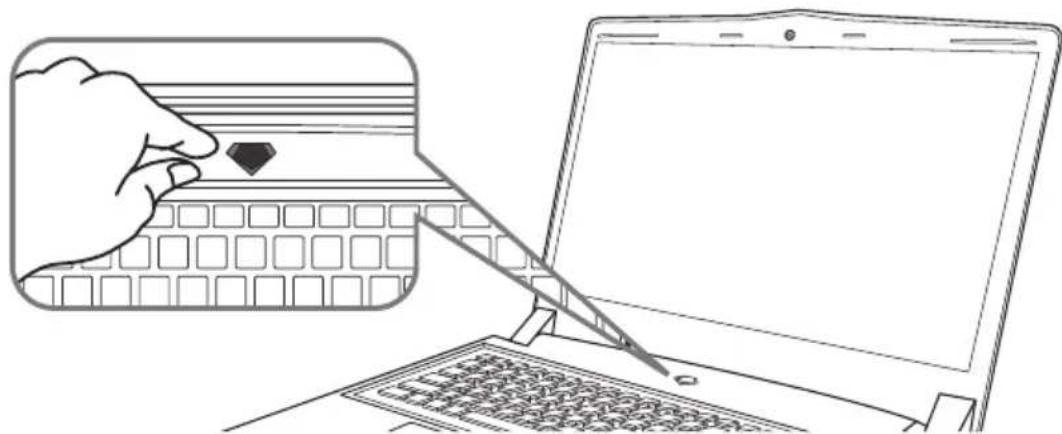
Switching on the Power
After you turn on the Notebook for the very first time, do not turn it off until the operating system has been configured. Please note that the volume for the audio will not function until Windows ^® Setup has completed.
Booting Up the Notebook for the First Time
Depending on your configuration, the Microsoft ^® Windows ^® Boot Screen will be the first screen that you will see as the notebook starts up. Follow the on-screen prompts and instructions and enter your personal information to complete the setup of the Windows ^® Operating System.
Your GIGABYTE Notebook Tour
Top View
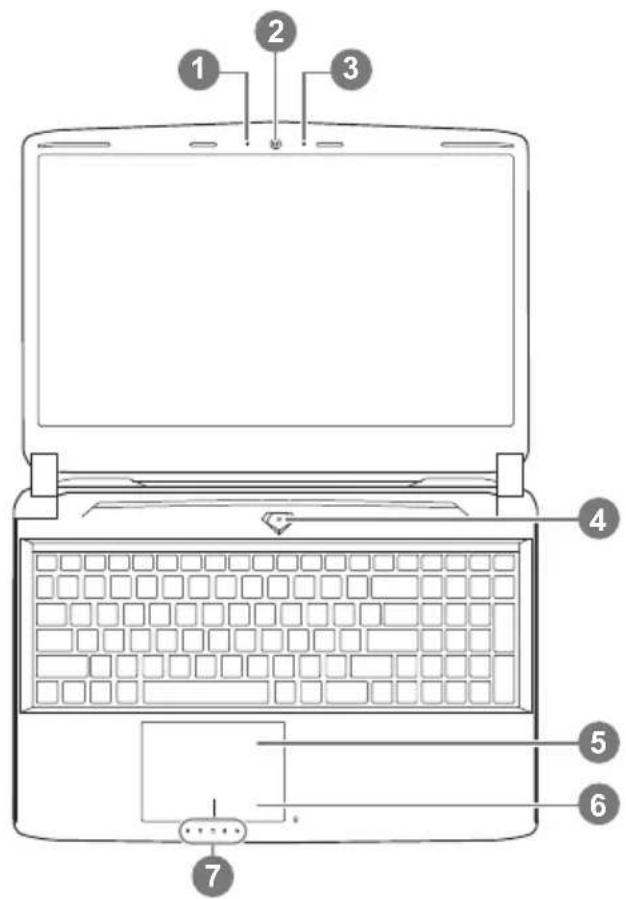
1 Webcam Status LED Indicator
2 Webcam
3 Microphone
4 Power Button
5 TouchPad
6 Battery Indicator Button ①
7 LED Indicators ②
① Right-click to show the remaining power percentage.
As shown below, the battery life indicator is available when the laptop is shut down, in stand-by or hibernation. (Battery mode)
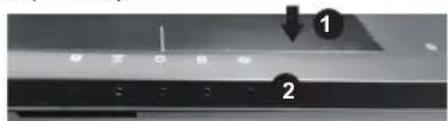
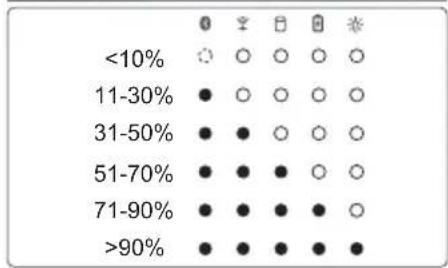
② 8 Bluetooth Status LED
Wireless Lan Status LED
8 HDD Status LED
Battery Status LED
Power Status LED
Left View
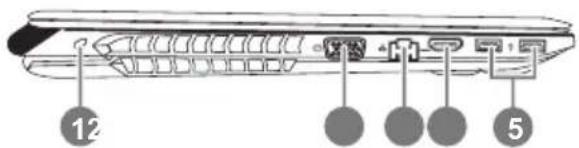
1 Kensington Lock Slot
2 D-sub (VGA) Port
3 Ethernet Port
4 HDMI Port
5 USB Port
Right View
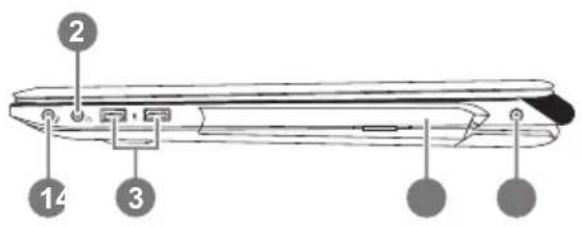
1 Microphone Jack
2 Headphone Jack
3 USB Port
4 Optical Disc Drive
5 DC-in Jack
Base View
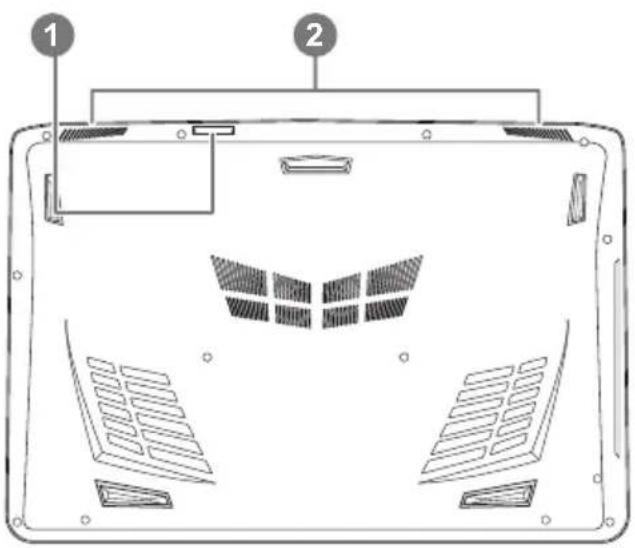
1 SD Card Reader
2 Speakers

Warning:
DO NOT remove the built-in lithium battery. For any service needs, please contact your local GIGABYTE Authorized Service Center.
Hotkeys
The computer employs hotkeys or key combinations to access most of the computer's controls like screen brightness and volume output. To activate hotkeys, press and hold the
Hotkey Function Description
| ▶/II | Fn + ~ Playback Media Playback control. | ||
| [WW27] | Fn + F1 Touchpad Toggle Turn the internal touchpad ON/OFF | ||
| [0147] | Fn + F2 LCD Toggle | Turn LCD OFF(Press a key to or use TouchPad to turn on) | |
| [0002] | Fn + F3 Speaker Toggle Turn the sperker ON/OFF | ||
| [80HC] | Fn + F4 Sleep Toggle Put the computer in Sleep mode | ||
| [0374] | Fn + F5 Volume Down Decrease the sound Volume | ||
| [222W] | Fn + F6 Volume Up | Increase the sound Volume | |
| [3X87] | Fn + F7 Display Toggle | Switch display output between the display screen, external monitor (if connected) and both. | |
 | Fn + F8 Brightness Down Decrease the screen brightness | ||
| [24X8] | Fn + F9 Brightness Up | Increase the screen brightness | |
 | Fn + F10 | Webcam | Turn the internal webcam ON/OFF. |
 | Fn + F11 | Airplane Mode Toggle | Turn the Airplane Mode ON/OFF*This function is only available in certain region |
| [6W28] | Fn + F12 | Keyboard Backlight Toggle | Turn the keyboard backlight ON/OFF |
GIGABYTE Software Application
■ GIGABYTE Smart Manager
You can activate GIGABYTE Smart Manager by double clicking on the shortcut icon on the desktop if the machine you purchased has the operation system built-in. GIGABYTE Smart Manager is an icon-based control interface, enabling users to intuitively access common system setup as well as GIGABYTE exclusive utilities. Please be noted that the GIGABYTE Smart Manager interface, icons, utilities and software versions may vary based on the purchased models. Please operate GIGABYTE Smart Manager according to the actual version built-in.
Smart USB Backup Guide (Original: Recovery Image USB)

WARNING
● You can backup original recovery image through this application in case of losing by device damage.
- You can backup original recovery image to USB disk and restore the system if any storage system replacement with the recovery USB disk.
Before you restore the system through the recovery USB disk, please make sure that you have already made the backup of your data.
- Please DO NOT shut down or un-plug the system when performing backup through recovery USB disk.
1
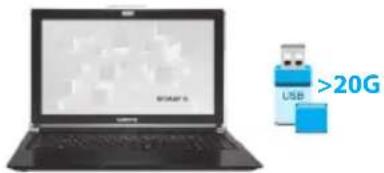
- Please plug in the USB disk which is at least 20GB in capacity to make the original image (backup the data in USB first. All data will be eliminated during the creation of recovery USB disk)
2
- Insert the driver disk to your optical drive and run the install of "Smart USB Backup" (for none-ODD model, please use USB ODD device or download from http://www.gigabyte.com
3
- Run the "Smart USB Backup" after finishing the install.
4
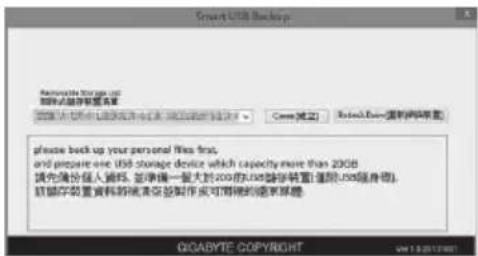
- Select your USB disk from the dropdown list and start to create the recovery USB disk.
5
- The window will pop out when the creation of recovery disk is done.
- Please press F12 on starting the system when you need to restore the system. Select "boot from recovery USB disk" and the system will be restored.
- The time needed for restore will be around 30 mins(time needed may vary by USB disk model).
System Recovery (Restore your laptop operating system)
When something is going wrong with the laptop operating system, the storage of the laptop has a hidden partition containing a full back up image of the operating system that can be used to restore the system to factory default settings.

Note
- If the storage has been switched or the partition deleted, the recovery option will no longer be available and a recovery service will be needed.
- The recovery function is only available on devices with O/S preinstalled. Devices with DOS do not have the recovery function.
Launch System Recovery
The system recovery feature is preinstalled before the laptop is shipped from the factory. The option menu allows you to launch the Windows recovery tool to reinstall the operating system to factory default.
The brief introduction below will show you how to start the recovery tool and restore your system.

All ready to go
Make sure your PC is plugged in. This will take a few minutes.
Windows 7 Recovery Guide
1
Turn off and restart the laptop.
2
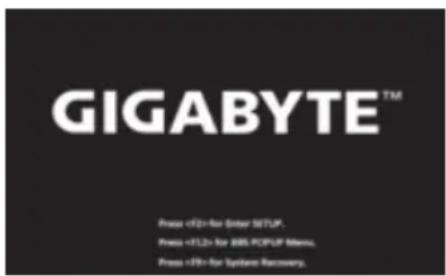
During the laptop turn on process, press and hold F9 key to launch the tool.
3
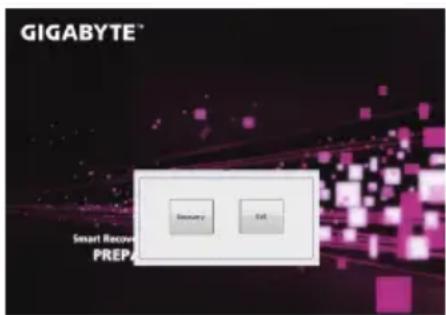
The recovery will be activated and you will see the option buttons on the window. Click on "Recovery" to start it.

Caution
Once the “Recovery” is selected, your personal data and files will be deleted after the laptop starts restoring, and the operating system will be reset to factory default settings.
4
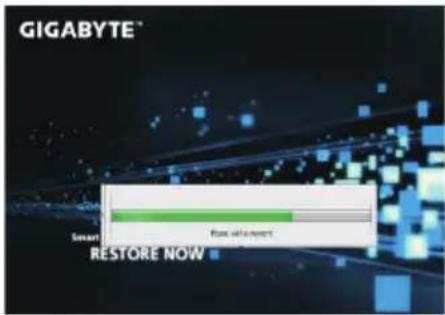
A progress indicator bar will show on the window when the recovery process is running. Please make sure the AC-adapter is plugged in and do not turn off the laptop.
5

Reboot the laptop after the system recovery is complete.
Windows 8.1 Recovery Guide
1
Turn off and restart the laptop.
2
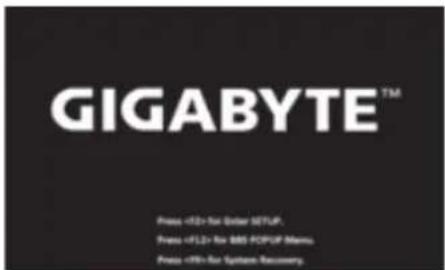
During the laptop turn on process, press and hold F9 key to launch the tool.
3

Choose "Troubleshoot" to enter the recovery settings. (Also you can choose "Continue" to exit recovery system and continue to Windows 8.1 for files or data backup.)

There are two options for system recovery
- Refresh your PC
You can refresh your laptop to improve the system stability without losing your files.
- Reset your PC
If you want to remove all of your files, you can reset your PC completely.
Caution: All personal data and files will be lost.
4

- Choose "Refresh your PC"
Choose an account to continue.

Here are what will happen
- Your files and personalization settings won't be changed.
- Your PC settings will be restored to factory default settings.
- Apps from Windows Store will be kept.
- Apps you installed from discs or websites will be removed.
- A list of removed apps will be saved on your desktop.

■choose "Reset your PC"
▶ Just remove my files
Only personal data and files will be removed, but computer settings will be kept.
▶ Fully clean the drive
The drive will be completely restored to factory default settings. It takes more time. > [Click on "Reset" to execute recovery function.]

Here are what will happen
- All of your personal files and apps will be removed.
- Your PC settings will be restored to factory default settings.

■ Advanced options

System Restore
Use a restore point recorded on your PC to restore Windows.

System Image Recovery
Recover Windows using a specific system image file.

Automatic Repair
Fix problems that keep Windows from loading.

Command Prompt
Use the Command Prompt for advanced trobleshooting.

UEFI Firmware Settings
Change settings in your PC's UEFI firmware.

Startup Settings
Change Windows Startup behavior.
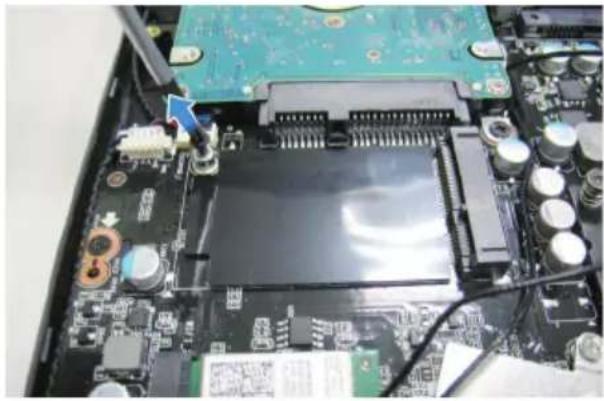
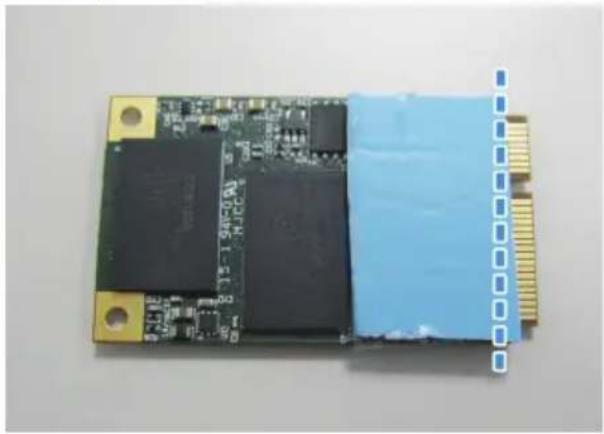
Installing the Thermal Pad for mSATA SSD on P55
If you want to install mSATA SSD on your P55, we strongly recommend that you should read this instruction first in order not to installation fail. We(GIGABYTE) won't be responsible for any damage from installation of SSD either by individual or vendor. So please RE-CONSIDER it before installation, thanks!
1
natural_image
Close-up of an electronic circuit board with a green circuit board and internal components, showing no visible text or symbols.• Take out your mSATA SSD
2
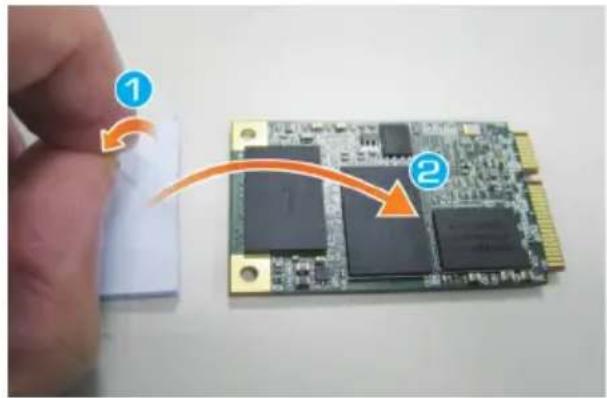
• Take out the thermal pad.
3-1
natural_image
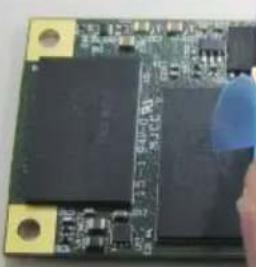
Close-up of a circuit board with black and blue components, no visible text or symbols- Paste on mSATA SSD as following figure. Note the position of goldfinger and paste the thermal pad align with goldfinger
natural_image
Close-up of a circuit board with visible components and gold contacts (no text or symbols)
natural_image
Close-up of a hand holding a blue object with an orange arrow pointing to it, next to a small metallic component (no visible text or symbols)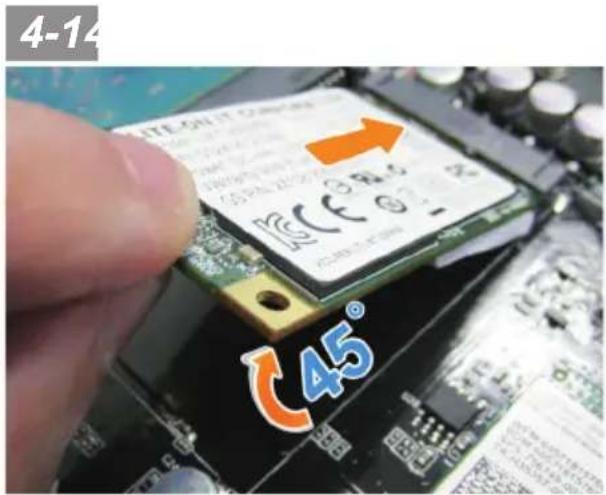
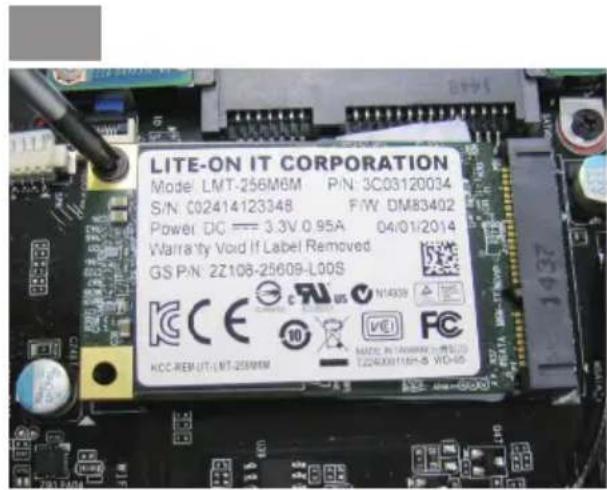
- Insert the SSD to mSATA slot and tighten the screw.
CAUTION
- GIGABYTE will take no responsibility for any customer induced damages during installing. We suggest that you send your notebook to an authorized GIGABYTE service center if any question. Making any charges depends on local conditions. Website: http://www.gigabyte.com/index.aspx
Appendix
■ Warranty & Service:
Warranty and service and related information please refer to the warranty card or GIGABYTE service website as the below link:
http://www.gigabyte.com/support-downloads/technical-support.aspx
■ FAQ:
FAQ (Frequent Asked Questions) please refer to the below link: http://www.gigabyte.com/support-downloads/faq.aspx
- Congratulations on your purchase of the GIGABYTE Notebook.
- Using GIGABYTE Notebook for the First Time
- IMPORTANT
- Switching on the Power
- Booting Up the Notebook for the First Time
- Your GIGABYTE Notebook Tour
- Right View
- Base View
- Warning:
- Hotkeys
- GIGABYTE Software Application
- ■ GIGABYTE Smart Manager
- Smart USB Backup Guide (Original: Recovery Image USB)
- WARNING
- 1
- 2
- 3
- 4
- 5
- System Recovery (Restore your laptop operating system)
- Note
- Launch System Recovery
- All ready to go
- Windows 7 Recovery Guide
- Caution
- Windows 8.1 Recovery Guide
- There are two options for system recovery
- - Choose "Refresh your PC"
- Here are what will happen
- ■choose "Reset your PC"
- ▶ Just remove my files
- ▶ Fully clean the drive
- ■ Advanced options
- System Restore
- System Image Recovery
- Automatic Repair
- Command Prompt
- UEFI Firmware Settings
- Startup Settings
- Installing the Thermal Pad for mSATA SSD on P55
- Appendix
- ■ Warranty & Service:
- ■ FAQ:
Brand : GIGABYTE
Model : P55W v4
Category : Laptop