X3 Soul Mini - Smartphone Allview - Free user manual and instructions
Find the device manual for free X3 Soul Mini Allview in PDF.


| Product Type | Digital Camera (Smartphone) |
| Model | Allview X3 Soul Mini |
| Effective Pixels | Approx. 7.1 million |
| Image Sensor | 1/2.5-inch type CCD |
| Optical Zoom | 6x (35-210mm equivalent) |
| Digital Zoom | Approx. 4x (combined up to 24x) |
| LCD Monitor | 2.5-inch, approx. 115,000 pixels |
| Shooting Modes | Auto, Program AE, Shutter Priority, Aperture Priority, Manual, Portrait, Landscape, Night Scene, Special Scene, Movie |
| Image Stabilization | Lens shift type (Continuous/Shoot Only/Panning/Off) |
| Dimensions (W x H x D) | 97.5 x 66.5 x 41.2 mm |
| Weight (body only) | Approx. 210 g |
| Power Source | 2 AA-size alkaline or NiMH batteries (optional AC adapter) |
| Memory Card Support | SD, SDHC, MultiMediaCard |
| Battery Life (CIPA standard) | Approx. 100 images (alkaline), approx. 360 images (NiMH) |
| Flash Range | 55 cm – 3.5 m (W), 55 cm – 2.5 m (T) (Auto ISO) |
| Shutter Speed Range | 15 – 1/2000 sec |
| White Balance | Auto, Day Light, Cloudy, Tungsten, Fluorescent, Fluorescent H, Underwater, Custom |
| Self-timer | 10 sec, 2 sec, Custom |
| Continuous Shooting Speed | Approx. 1.7 shots/sec (Large/Fine) |
| Operating Temperature | 0 – 40 °C |
| Operating Humidity | 10 – 90% |
| Interface | USB 2.0 Hi-Speed, Audio/Video output |
Frequently Asked Questions - X3 Soul Mini Allview
User questions about X3 Soul Mini Allview
0 question about this device. Answer the ones you know or ask your own.
Ask a new question about this device
Download the instructions for your Smartphone in PDF format for free! Find your manual X3 Soul Mini - Allview and take your electronic device back in hand. On this page are published all the documents necessary for the use of your device. X3 Soul Mini by Allview.
USER MANUAL X3 Soul Mini Allview
natural_image
Silver Canon 470 LCD camera with visible lens and control buttons (no text or symbols on body)Before Using the Camera
Shooting
Playback/Erasing
Print/Transfer Settings
Viewing Images on a TV set
Troubleshooting
List of Messages
Appendix
Advanced
Camera User Guide
This guide explains camera features and procedures in detail.
DiG!C II

PictBridge

DIRECT PRINT

BUBBLE JET DIRECT
Exif Print

DPOF

Main Features
Shooting
- 6x optical zoom with shift-method image stabilizer
- Avoid the effects of camera shake or blurry subjects when shooting by using a high ISO speed
● Automatically adjusts shooting settings to match particular conditions
● Changes specific image colors to shoot (Color Accent, Color Swap) - Use the separately sold wide converter, tele-converter, close-up lens or waterproof case when shooting
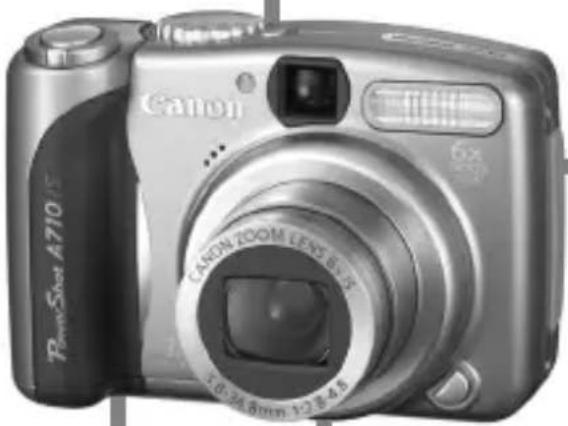
natural_image
Exterior view of a Canon 4710 LCD camera with visible lens and control buttons (no text or symbols on body)Playback
● Plays back automatically using the Auto Play function
Editing
- Adds effects to still images with My Colors
Printing
● Makes printing easy with the Print/Share button
- Also supports non-Canon brand PictBridge compliant printers
Uses of Recorded Images
- Effortlessly transfer them to a computer with the Print/Share button
Conventions Used in this Guide
Icons appearing next to or below titles indicate the shooting modes in which the procedure can be used.
Mode switch
Postcard Mode
Shooting Mode


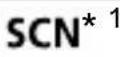
SCN


PT
v Av M
* Unavailable shooting modes are shown grayed out.
See Functions Available in Each Shooting Mode (p. 134).
- In this guide, the Basic Camera User Guide is referred to as the Basic Guide, and the Advanced Camera User Guide is referred to as the Advanced Guide.

This mark denotes issues that may affect the camera's operation.

This mark denotes additional topics that complement the basic operating procedures.
You can use SD memory cards, SDHC memory cards and MultiMediaCards with this camera.
These cards are collectively called memory cards in this guide.

Use of genuine Canon accessories is recommended.
This product is designed to achieve excellent performance when used with genuine Canon accessories. Canon shall not be liable for any damage to this product and/or accidents such as fire, etc., caused by the malfunction of non-genuine Canon accessories (e.g., a leakage and/or explosion of a battery pack). Please note that this warranty does not apply to repairs arising out of the malfunction of non-genuine Canon accessories, although you may request such repairs on a chargeable basis.
Table of Contents
Items marked with a ★ are lists or charts that summarize camera functions or procedures.
Handling Precautions .... 5
Please Read. 5
Safety Precautions 6
Preventing Malfunctions 11
Before Using the Camera – Basic Operations ..... 12
Using the LCD Monitor 12
Information Displayed on the LCD Monitor 13
Using the Viewfinder 16
Power Saving Function 17
★ Menus and Settings .... 18
★ Menu List 20
Resetting Settings to Their Default Values. 25
Formatting Memory Cards 26
Shooting 27
Changing the Recording Pixels and Compression (Still Images) 27
Setting the Image Stabilizer Function. 28
Using the Digital Zoom/Digital Tele-Converter . . . . . . . . . . 29
Continuous Shooting 31
Postcard Mode 32
Embedding the Date in the Image Data 33
Setting the Display Overlays 34
Movie Shooting 35
Shooting Panoramic Images (Stitch Assist) 39
P Program AE 40
Tv Setting the Shutter Speed 41
Av Setting the Aperture....42
M Manually Setting the Shutter Speed and Aperture ..... 43
Selecting an AF Frame. 44
Shooting Hard-to-Focus Subjects (Focus Lock, AF Lock, Manual Focus) 46
Locking the Exposure Setting (AE Lock) 48
Locking the Flash Exposure Setting (FE Lock) .....49
Switching between Metering Modes .....50
Adjusting the Exposure Compensation....51
Adjusting the Tone (White Balance) .....52
Shooting in a My Colors Mode .....55
Changing the Color .57
Adjusting the ISO Speed. 62
Switching between Flash Adjustment Settings .....63
Compensating the Flash Adjustment / Flash Output. . . . . . . .63
Switching the Timing at which the Flash Fires .....64
Setting the Auto Rotate Function .....65
Creating an Image Destination (Folder) .....66
Resetting the File Number .....68
Playback/Erasing ....70
Magnifying Images 70
Viewing Images in Sets of Nine (Index Playback) .....71
Jumping to Images 72
Viewing Movies 73
Editing Movies....74
Rotating Images in the Display . . . . . . . . . . . . . . . . . . . . . . . . . . . . . . . . . . . . . . . . . . . . 76
Adding My Colors Effects . . . . . . . . . . . . . . . . . . . . . . . . . . . . . . . . . . . . . . . . . . . . . . 77
Attaching Sound Memos to Images . . . . . . . . . . . . . . . . . . . . . . . . . . . . . . . . . . . . . . . . . 79
Automated Playback (Auto Play) .....80
Protecting Images ....81
Erasing All Images 82
Print Settings/Transfer Settings....83
Setting the DPOF Print Settings . . . . . . . . . . . . . . . . . . . . . . . . . . . . . . . . . . . . . . . . . . . . . . . . . . . . . . 83
Setting the DPOF Transfer Settings .....86
Viewing Images on a TV set 88
Troubleshooting 89
Camera 89
When the power is turned on . . . . . . . . . . . . . . . . . . . . . . . . . . . . . . . . . . . . . . . . . . . . . . . . . . . . . . . . . 89
LCD monitor 90
Shooting 91
Shooting movies .....95
Playback 96
Battery 97
TV monitor output. 98
Printing with a direct print compatible printer ..... 98
List of Messages 99
Appendix 103
Battery Handling....103
Handling the Memory Card 105
Using the Power Kits (Sold Separately) ..... 107
Using the Lenses (Sold Separately)....110
Using an Externally Mounted Flash (Sold Separately)....114
Replacing the Date Battery 116
Camera Care and Maintenance 118
Specifications 119
Index. 130
★ Functions Available in Each Shooting Mode ..... 134
Please Read
Test Shots
Before you try to photograph important subjects, we highly recommend that you shoot several trial images to confirm that the camera is operating and being operated correctly.
Please note that Canon Inc., its subsidiaries and affiliates, and its distributors are not liable for any consequential damages arising from any malfunction of a camera or accessory, including memory cards, that results in the failure of an image to be recorded or to be recorded in a way that is machine readable.
Warning Against Copyright Infringement
Please note that Canon digital cameras are intended for personal use and should never be used in a manner that infringes upon or contravenes international or domestic copyright laws and regulations. Please be advised that in certain cases the copying of images from performances, exhibitions, or commercial properties by means of a camera or other device may contravene copyright or other legal rights even if the image was shot for personal use.
Warranty Limitations
For information on your camera's warranty, please refer to the Canon European Warranty System (EWS) Booklet supplied with your camera.
For Canon Customer Support contacts, please see the rear of the European Warranty System (EWS) Booklet.
Camera Body Temperature
If your camera is used for prolonged periods, the camera body may become warm. Please be aware of this and take care when operating the camera for an extended period.
About the LCD Monitor
The LCD monitor is produced with extremely high-precision manufacturing techniques. More than 99.99% of the pixels operate to specification. Less than 0.01% of the pixels may occasionally misfire or appear as red or black dots. This has no effect on the recorded image and does not constitute a malfunction.
Video Format
Please set the camera's video signal format to the one used in your region before using it with a TV monitor (p. 88).
Language Setting
Please see the Basic Guide (p. 7) to change the language setting.
Safety Precautions
- Before using the camera, please ensure that you read the safety precautions described below and in the “Safety Precautions” section of the Basic Camera User Guide. Always ensure that the camera is operated correctly.
- The safety precautions noted on the following pages are intended to instruct you in the safe and correct operation of the camera and its accessories to prevent injuries or damage to yourself, other persons and equipment.
● Equipment refers to the camera, battery, battery charger (sold separately) and compact power adapter (sold separately).
Warnings
Equipment
| ● Do not look directly into the sun or at bright light sources through the camera's viewfinder.Doing so can damage your eyesight. |
| ● Store this equipment out of the reach of children and infants.Accidental damage by a child could result in serious injury.● Wrist strap: Placement of the strap around the child's neck could result in asphyxiation.● Memory card: It may be swallowed accidentally. If this occurs, contact a doctor immediately. |
| ● Do not attempt to disassemble or alter any part of the equipment that is not expressly described in this guide.● To avoid the risk of high-voltage electrical shock, do not touch the flash portion of the camera if it has been damaged.● Stop operating the equipment immediately if it emits smoke or noxious fumes.● Do not allow the equipment to come into contact with, or become immersed in, water or other liquids. If the exterior comes into contact with liquids or salt air, wipe it dry with a soft, absorbent cloth.Continued use of the equipment may result in fire or electrical shock. Immediately turn the camera power off and remove the camera batteries or unplug the power code from the power outlet. Please consult your camera distributor or the closest Canon Customer Support Help Desk. |
| ● Do not use substances containing alcohol, benzine, thinners or other flammable substances to clean or maintain the equipment.● Do not cut, damage, alter or place heavy items on the power cord.● Use only recommended power accessories.● Remove the power cord on a regular periodic basis and wipe away the dust and dirt that collects on the plug, the exterior of the power outlet and the surrounding area.● Do not handle the power cord if your hands are wet.Continued use of the equipment may result in fire or electrical shock.Battery |
| ● Do not place the batteries near a heat source or expose it to direct flame or heat.● The batteries should not be immersed in water or sea water● Do not attempt to disassemble, alter or apply heat to the batteries.● Avoid dropping or subjecting the batteries to severe impacts that could damage the casing.● Use only recommended batteries and accessories.Use of batteries not expressly recommended for this equipment may cause explosions or leaks, resulting in fire, injury and damage to the surroundings. In the event that a battery leaks and the eyes, mouth, skin or clothing contact these substances, immediately flush with water and seek medical assistance. |
| ● Disconnect the battery charger and compact power adapter from both the camera and the power outlet after recharging or when not in use to avoid fire and other hazards.● Do not place anything, such as tablecloths, carpets, bedding or cushions, on top of the battery charger while it is charging.Continued use over a long period may cause the units to overheat and distort, resulting in fire. |
| ● When recharging the Canon AA-size NiMH batteries, use only a specified battery charger.● The compact power adapter is designed for exclusive use with this equipment. Do not use it with other products.There is a risk of overheating and distortion which could result in fire or electrical shock. |
| ● Before you discard a battery, cover the terminals with tape or other insulators to prevent direct contact with other objects.Contact with the metallic components of other materials in waste containers may lead to fire or explosions. |
| Others |
| ● Do not trigger the flash in close proximity to human or animal eyes. Exposure to the intense light produced by the flash may damage eyesight.In particular, remain at least one meter (39 inches) away from infants when using the flash. |
| ● Keep objects that are sensitive to magnetic fields (such as credit cards) away from the speaker of the camera.Such items may lose data or stop working. |
| ● Exercise due caution when screwing on the separately sold wide converter, tele-converter, close-up lens and conversion lens adapter.If they loosen, fall off and shatter, the glass shards may cause injury. |

Cautions
| Equipment |
| ● Be careful not to bang the camera or subject it to strong impacts or shocks that could lead to injury or damage the equipment when wearing or holding it by the strap. |
| ● Do not store the equipment in humid or dusty areas.● Do not allow metal objects (such as pins or keys) or dirt to contact the charger terminals or plug.Such conditions could lead to fire, electrical shock or other damage. |
| ● Avoid using, placing or storing the equipment in places subject to strong sunlight or high temperatures, such as the dashboard or trunk (boot) of a car.● Do not use the equipment in a manner that exceeds the rated capacity of the electrical outlet or wiring accessories. Or, do not use the equipment if the cable or plug is damaged, or if the plug is not fully inserted into the power outlet.● Do not use in locations with poor ventilation.The above-mentioned can cause leakage, overheating or explosion, resulting in fire, burns or other injuries. High temperatures may also cause deformation of the casing. |
| ● When not using the camera for extended periods of time, remove the batteries from the camera or battery charger and store the equipment in a safe place.If the batteries are left inside the camera, damage caused by leakage may occur. |
| ● Do not connect compact power adapters or battery chargers to devices such as electrical transformers for foreign travel because it may lead to malfunctions, excessive heat generation, fire, electric shock or injury. |
| Flash |
| ● Do not operate the flash with dirt, dust or other items stuck to the surface of the flash.● Be careful not to cover the flash with your fingers or clothing when shooting.The flash may be damaged and emit smoke or noise. The resulting heat build-up could damage the flash. |
| ● Do not touch the surface of the flash after taking several pictures in rapid succession.Doing so could result in burns. |
Preventing Malfunctions
Avoid Strong Magnetic Fields
- Never place the camera in close proximity to electric motors or other equipment generating strong electromagnetic fields.
Exposure to strong magnetic fields may cause malfunctions or corrupt image data.
Avoid Condensation Related Problems
- When moving the equipment rapidly from cold to hot temperatures, you can avoid condensation by placing the equipment in an airtight, resealable plastic bag and letting it adjust to temperature changes slowly before removing it from the bag.
Moving the equipment rapidly from cold to hot temperatures may cause condensation (water droplets) to form on its external and internal surfaces.
If Condensation Forms Inside the Camera
- Stop using the camera immediately.
Continued use may damage the equipment. Remove the memory card and batteries or compact power adapter from the camera and wait until the moisture evaporates completely before resuming use.
Using the LCD Monitor
1
Press

DISP.
● The display mode changes as follows with each press.
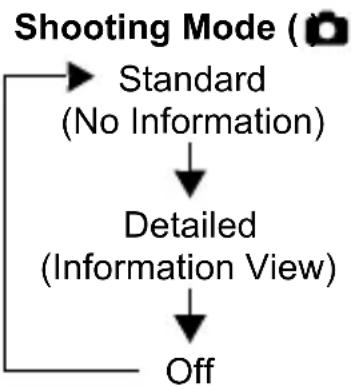
flowchart
graph TD
    A["Shooting Mode (☐)"] --> B["Standard\n(No Information)"]
    B --> C["Detailed\n(Information View)"]
    C --> D["Off"]
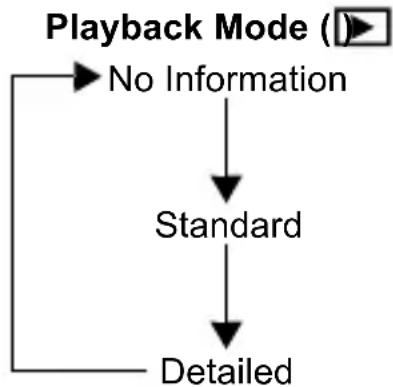
flowchart
graph TD
    A["Playback Mode ()"] --> B["No Information"]
    B --> C["Standard"]
    C --> D["Detailed"]
- The shooting information displays for approximately 6 sec. when a setting is changed, regardless of the selected display mode.

- The LCD monitor on or off setting is retained even after the camera power is turned off.
- The LCD monitor does not shut off in the SCN, /A /S or /mode.
- The LCD monitor will not switch to the detailed display in the index playback mode (p. 71).
Night Display
When shooting in dark conditions, the camera automatically brightens the LCD monitor to suit the brightness of the subject*, making it easier to frame the subject.
* The movements of the subject will appear irregular in the LCD monitor. The recorded image will not be affected. The brightness of the image displayed in the monitor, and the brightness of the actual image recorded will be different.
Information Displayed on the LCD Monitor
Shooting Information (Shooting Mode)
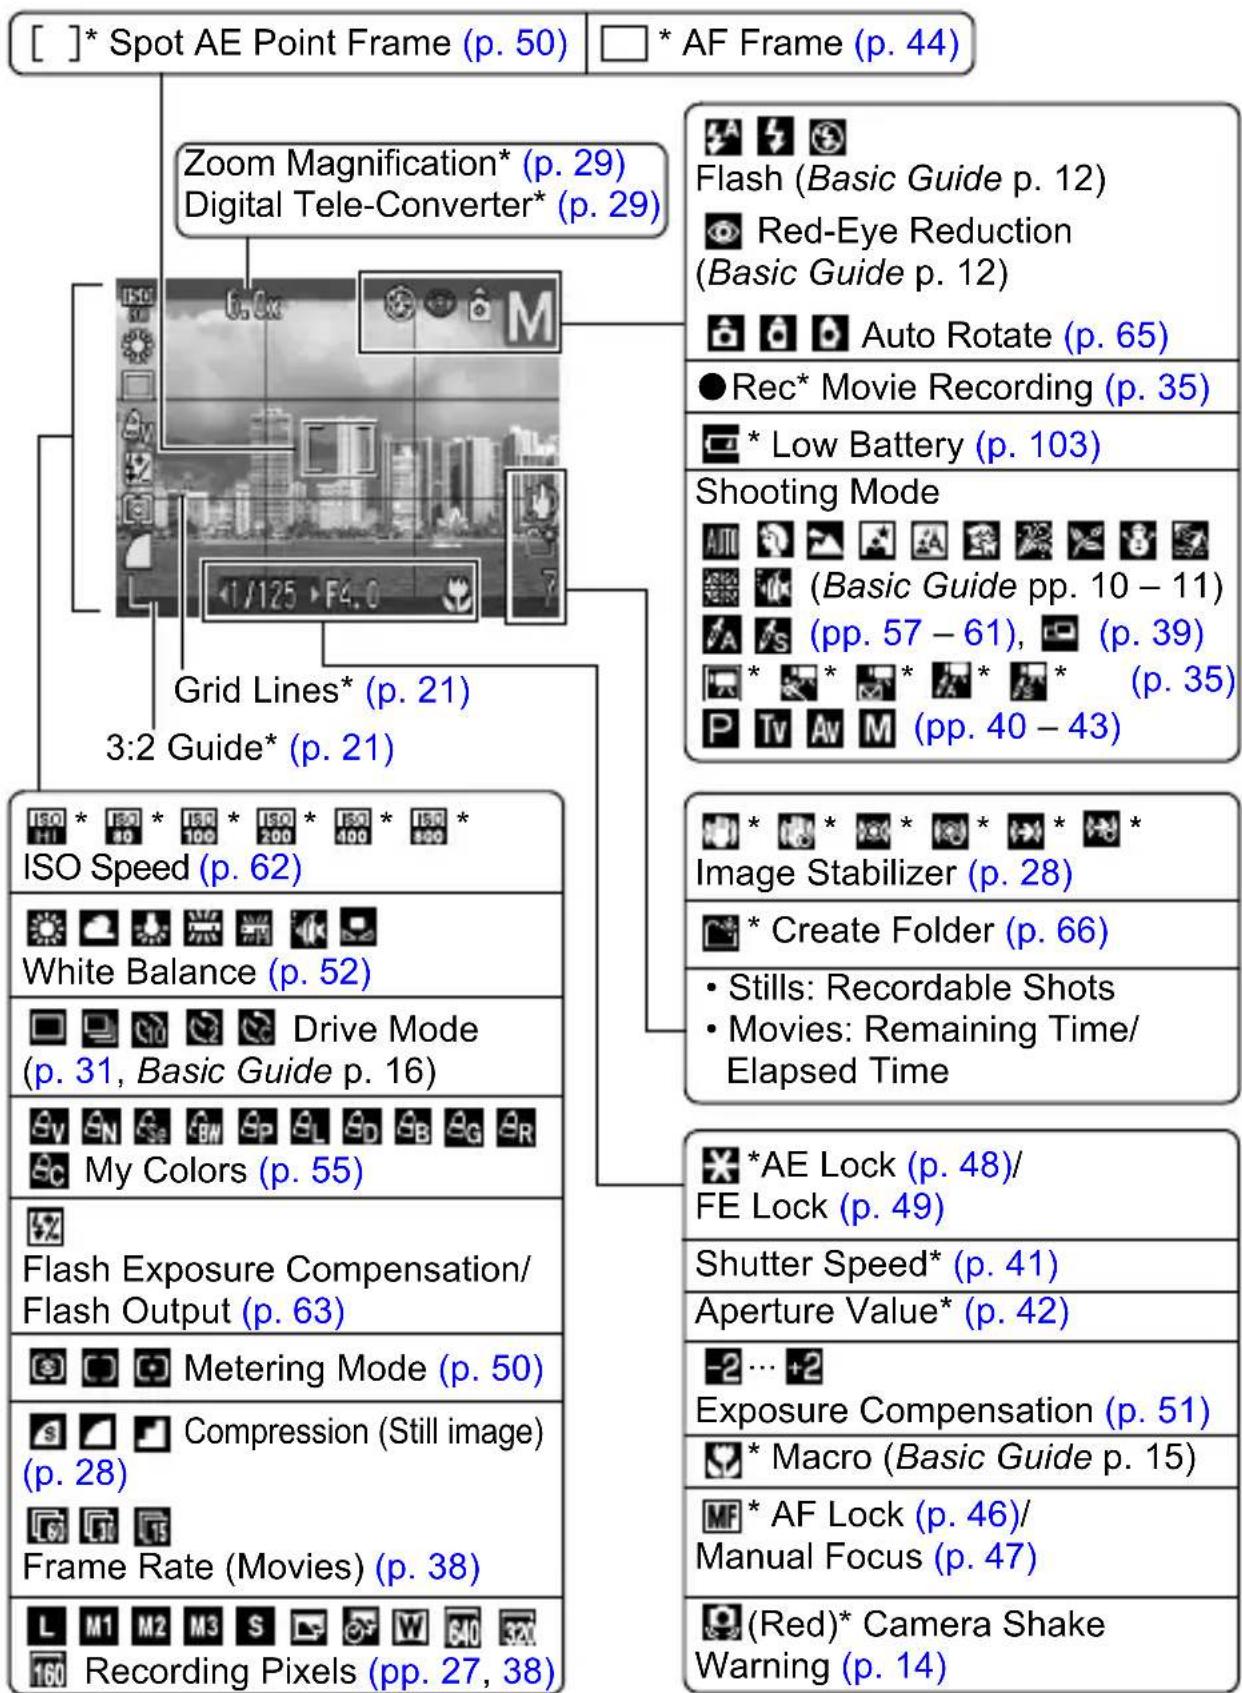
flowchart
graph TD
    A["Spot AE Point Frame (p. 50)"] --> B["Zoom Magnification* (p. 29)"]
    A --> C["Digital Tele-Converter* (p. 29)"]
    A --> D["Grid Lines* (p. 21)"]
    A --> E["3:2 Guide* (p. 21)"]
    A --> F["ISO Speed (p. 62)"]
    A --> G["White Balance (p. 52)"]
    A --> H["Drive Mode (p. 31, Basic Guide p. 16)"]
    A --> I["My Colors (p. 55)"]
    A --> J["Flash Exposure Compensation/Flash Output (p. 63)"]
    A --> K["Metering Mode (p. 50)"]
    A --> L["Compression (Still image) (p. 28)"]
    A --> M["Frame Rate (Movies) (p. 38)"]
    A --> N["Recording Pixels (pp. 27, 38)"]

    O["AF Frame (p. 44)"] --> P["Flash (Basic Guide p. 12)"]
    O --> Q["Red-Eye Reduction (Basic Guide p. 12)"]
    O --> R["Auto Rotate (p. 65)"]
    O --> S["Rec* Movie Recording (p. 35)"]
    O --> T["Low Battery (p. 103)"]
    O --> U["Shooting Mode"]
    O --> V["(Basic Guide pp. 10 - 11)"]
    O --> W["(pp. 57 - 61), (p. 39)"]
    O --> X["(p. 35)"]
    O --> Y["P TV AV M (pp. 40 - 43)"]
    O --> Z["Image Stabilizer (p. 28)"]
    O --> AA["Create Folder (p. 66)"]
    O --> AB["Stills: Recordable Shots"]
    O --> AC["Movies: Remaining Time/Elapsed Time"]
    O --> AD["*AE Lock (p. 48)/FE Lock (p. 49)"]
    O --> AE["Shutter Speed* (p. 41)"]
    O --> AF["Aperture Value* (p. 42)"]
    O --> AG["-2 ... +2"]
    O --> AH["Exposure Compensation (p. 51)"]
    O --> AI["* Macro (Basic Guide p. 15)"]
    O --> AJ["AF Lock (p. 46)/Manual Focus (p. 47)"]
    O --> AK["(Red"]* Camera Shake Warning (p. 14)]
* Appears even if the LCD monitor is set to Standard display.

If the indicator blinks orange and the camera shake warning icon 📁splays, this indicates that a slow shutter speed may have been selected due to insufficient illumination. Use the following methods to shoot:
- Set the IS mode to any setting other than [off] (p. 28)
- Raise the ISO speed (p. 62)
- Select a setting other than (flash off)
- Attach the camera to a tripod or other device
Playback Information (Playback Mode)
Standard
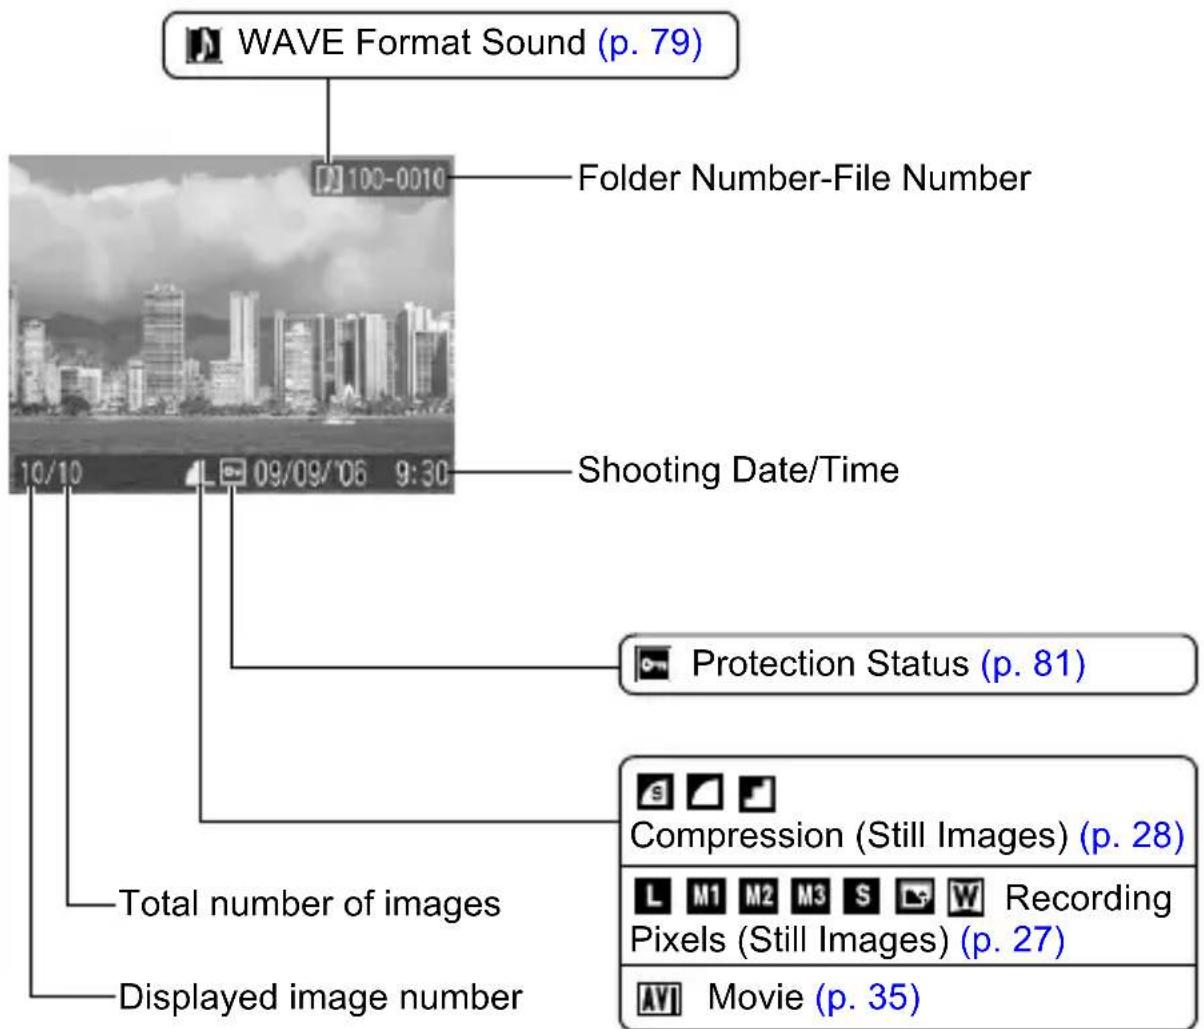
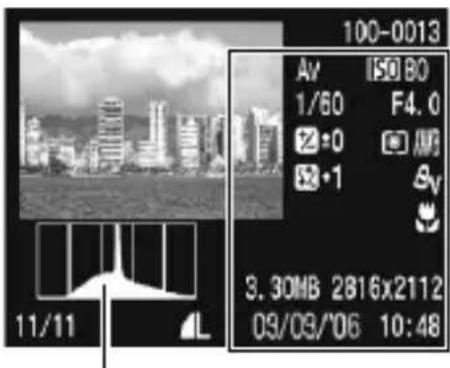
Histogram
| Histogram | ISO H1 ISO 80 ISO 100 ISO200 ISO400ISO800 ISO Speed (p. 62) |
| Aperture Value (p. 42) | |
| Metering Mode (p. 50) | |
| White Balance (p. 52) | |
| My Colors (p. 55) | |
| My Colors (Playback) (p. 77) | |
| Shooting Mode(AUTO A S (Basic Guide pp. 10 – 11)(p. 39) P TV AV M (pp. 40 – 43) | |
| Shutter Speed (p. 41) | |
| Recording Pixels/Frame Rate(Movies) (p. 38) | Image with a My Colors effect(p. 77) |
| Exposure Compensation (p. 51) | MF AF Lock (p. 46)/Manual Focus(p. 47) |
| Flash Output (p. 63) | Macro (Basic Guide p. 15) |
| File size | |
| Recording Pixels (Still Image) (p. 27)Movie Length (Movies) (p. 35) |
* Appears with images taken in the Color Accent or Color Swap shooting modes.
The following information may also be displayed with some images.
| A sound file in a format other than the WAVE format is attached or the file format is not recognized. | |
| JPEG image not conforming to Design rule for Camera File System Standards (p. 120) | |
| RAW image | |
| Unrecognized data type |

● Information for images shot on other cameras may not display correctly.
• Overexposure Warning
In the following cases, overexposed portions of the image blink.
- When reviewing an image right after shooting in the LCD monitor (information view)
- When using the detailed display mode of the Playback mode
Histogram Function
The histogram is a graph that allows you to check the brightness of the image. The greater the bias toward the left in the graph, the darker the image. The greater the bias toward the right, the brighter the image.
If the image is too dark, adjust the exposure compensation to a positive value. Similarly, adjust the exposure compensation to a negative value if the image is too bright (p. 51).
Sample Histograms
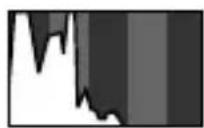
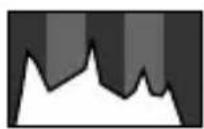
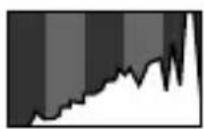
Balanced ImageDark Image Bright Image
Using the Viewfinder
The viewfinder can be used to conserve power by turning the LCD monitor off (p. 12) while shooting.
Power Saving Function
This camera is equipped with a power saving function. The power will shut off in the following circumstances. Press the power button again to restore power.
| Shooting Mode Powers | down approximately 3 minutes after the last control is accessed on the camera. The LCD monitor automatically turns off 1 minute* after the last control is accessed even if [Auto Power Down] is set to [Off]. Press any button other than the power button or change the camera orientation to turn the LCD monitor back on. |
| Playback Mode Connected to a Printer | Powers down approximately 5 minutes after the last control is accessed on the camera. |
* This time can be changed.

● The power saving function will not activate during an Auto Play or while the camera is connected to a computer.
● The power saving function settings can be changed (p. 22).
Menus and Settings
Menus are used to set the shooting, playback and print settings as well as such camera settings as the date/time and electronic beep.
The following menus are available.
- FUNC. Menu
● Rec., Play, Print, Set up and My Camera Menus
FUNC. Menu
Sets many of the functions commonly used during shooting.
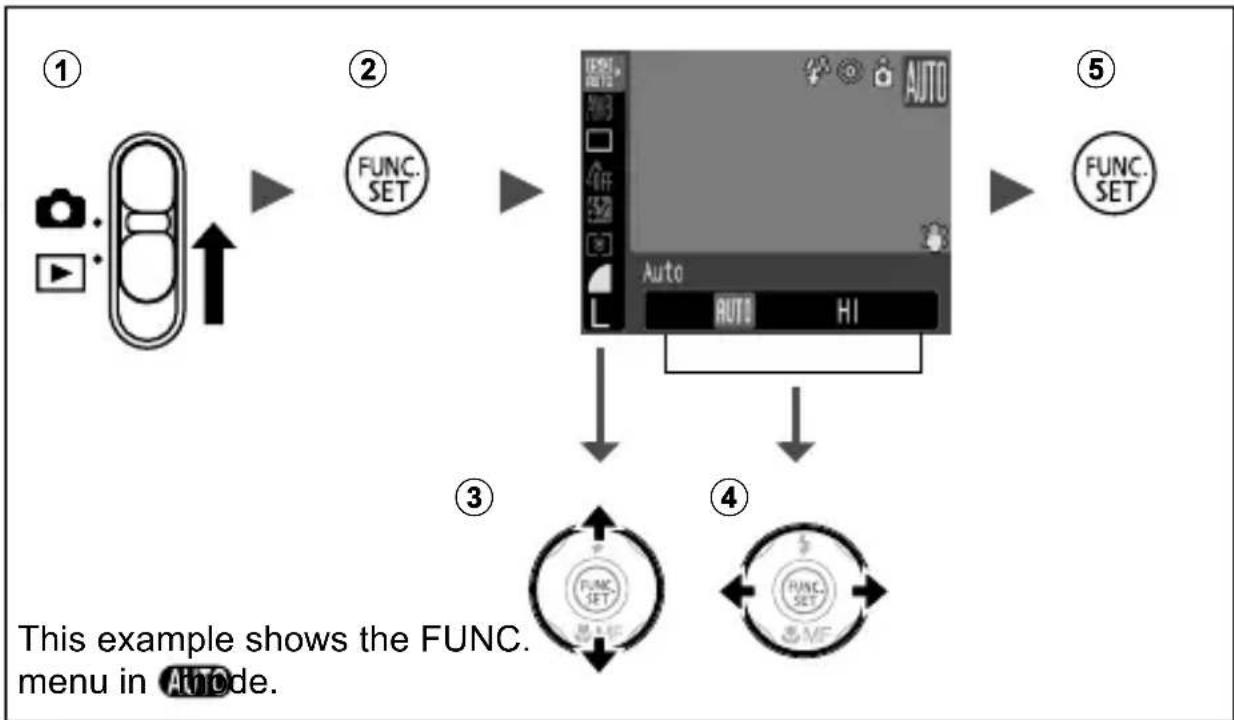
flowchart
graph TD
    A["①"] --> B["②"]
    B --> C["③"]
    C --> D["④"]
    D --> E["⑤"]
    style A fill:#f9f,stroke:#333
    style B fill:#ccf,stroke:#333
    style C fill:#cfc,stroke:#333
    style D fill:#fcc,stroke:#333
    style E fill:#ffc,stroke:#333
① Set the mode switch to shooting).
②Press the FUNC./SET button.
③Use the ▲r button to select a menu item.
- Some items may not be selectable in some shooting modes.
④Use the ◆r button to select an option for the menu item.
- You can select further options with the MENU button for some options.
• After selecting an option, you can press the shutter button to shoot immediately. After shooting, this menu will appear again, allowing you to adjust the settings easily.
⑤Press the FUNC./SET button.
Rec., Play, Print, Set up and My Camera Menus
Convenient settings for shooting, playback or printing can be set with these menus.
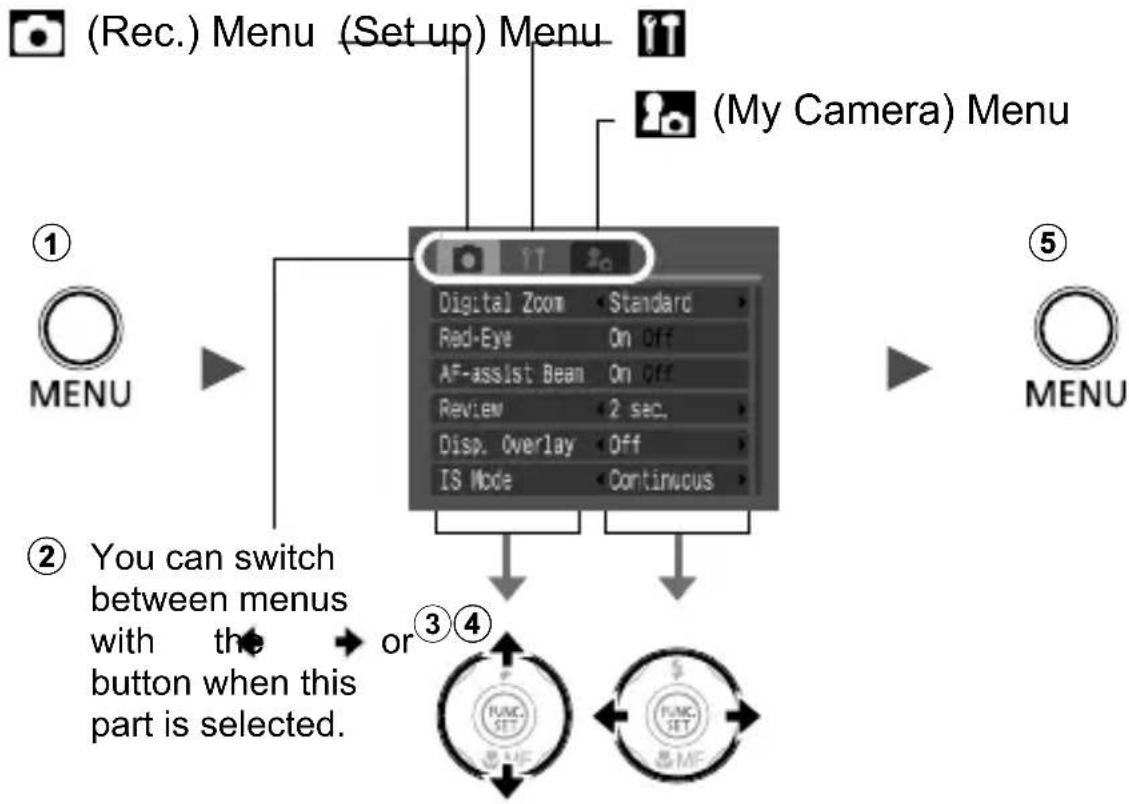
flowchart
graph TD
    A["(Rec.) Menu (Setup) Menu"] --> B["① MENU"]
    B --> C["② You can switch between menus with the button when this part is selected."]
    C --> D["③ or ④ Display Overlay Off IS Mode Continuous"]
    D --> E["⑤ MENU"]
    style A fill:#f9f,stroke:#333
    style E fill:#f9f,stroke:#333
• This example shows the Rec. menu in AVode.
• In playback mode, the Play, Print, Set up and My Camera menus display.
①Press the MENU button.
② Use the ◆ or button to switch between menus.
- You can also use the zoom lever to switch between menus.
③Use the ♠r button to select a menu item.
- Some items may not be selectable in some shooting modes.
④Use the ◆r button to select an option.
- Menu items followed by an ellipsis (...) can only be set after pressing the FUNC./SET button to display the next menu. Press the FUNC./SET button again to confirm the setting.
⑤Press the MENU button.
Menu List
FUNC. Menu
The icons shown below are the default settings.
| Menu Item | Reference Page | Menu Item | Reference Page | ||
 | ISO Speed | p. 62 |  | Metering Mode | p. 50 |
 | White Balance | p. 52 |  | Compression (Still image) | p. 28 |
 | Drive Mode | p. 31, Basic Guide p. 16 |  | Frame Rate (Movie) | p. 38 |
 | My Colors p. 55 Recording Pixe |  | (Still image) | p. 27 | |
 | +/- (Flash)/ Flash Output | p. 63 |  | Recording Pixels (Movie) | |
Rec. Menu ( )
*Default setting
| Menu Item Options Reference Page | ||
| AF Frame AiAF*/Center/FlexiZone p. 44 | ||
| Digital Zoom On*/Off 1.5x/1.9x(In standard movie mode:On*/Off) | p. 29 | |
| Flash Sync 1st-curtain*/2nd-curtain p. 64 | ||
| Slow Synchro | On/Off* | Basic Guide p. 14 |
| Flash Adjust | Auto*/Manual | p. 63 |
| Red-Eye | On*/Off | Basic Guide p. 12 |
| Spot AE Point | Center*/AF Point | p. 50 |
| MF-Point Zoom | On*/Off | p. 47 |
| AF-assist Beam | On*/Off | - |
| Review | Off/2*-10 seconds/Hold | Basic Guide p. 9 |
| Save Original | On/Off* | p. 61 |
| Menu Item Options | Reference Page |
| Disp. Overlay Off*/Grid Lines/3 : 2 Guide/Both (Movie mode: Off*/Grid Lines) | p. 34 |
| IS Mode Continuous*/Shoot Only/Panning/Off | p. 28 |
| Converter None*/WC-DC58N/TC-DC58N/250D | Set up when shooting using the [IS Mode] by attaching the teleconverter, wide converter or close-up lens, sold separately (p. 113). |
| Date Stamp Off*/Date/Date & Time p. 33 |
Play Menu (▶)
| Menu Item Reference Page | |
| Auto Play p. 80 | |
| My Colors p. 77 | |
| Sound Memo p. 79 | |
| Protect p. 81 | |
| Rotate p. 76 | |
| Erase all p. 82 | |
| Transfer Order p. 86 | |
Print Menu ( )
| Menu Item Reference Page | |
| p. 83 | |
| Select Image & Qty. | |
| Select All Images | |
| Clear All Selections | |
| Print Settings | |
*Default setting
| Menu Item Options Reference | Page | |
| Mute On/Off* | Set to [On] to silence all operation sounds except for the warning sounds (Basic Guide p. 8). | |
| Volume Off/1/2*/3/4/5 | Adjusts the volume of the start-up sound, operation sound, self-timer sound, shutter sound and playback sound. The volume cannot be adjusted if [Mute] is set to [On]. | |
| Start-up Vol. | Adjusts the volume of the start-up sound when the camera is turned on. | |
| Operation Vol. | Adjusts the volume of the operation sound that beeps when any button other than the shutter button is pressed. | |
| Selftimer Vol. | Adjusts the volume of the self-timer sound played 2 sec. before the shutter is released. | |
| Shutter Volume | Adjusts the volume of the sound played when the shutter releases. The shutter sound does not play when a movie is recording. | |
| Playback Vol. | Adjusts the volume of moviesounds and sound memos. | |
| Power Saving p. 17 | ||
| Auto Power Down | On*/Off Sets wh | whether or not the camera automatically powers down after a set period of time elapses without the camera being operated. |
| Display Off | 10 sec./20 sec./30 sec./1 min.*/2 min./3 min. | Sets the length of time before the LCD monitor turns off when no camera operation is performed. |
| Date/Time Basic Guide p. 7 | ||
| Format You can also select a low level format (p. 26). | ||
| Menu Item | Options | Reference Page |
| File Numbering | Continuous*/ Auto Reset | p. 68 |
| Create Folder p. 66 | ||
| Create New Folder | Check mark (On)/ No check mark (Off) | Creates a folder during the next shooting session. |
| Auto Create Off*/Daily/ Monday- Sunday/ Monthly | You can also set an auto creation time. | |
| Auto Rotate On*/Off p. 65 | ||
| Distance Units m/cm* / ft/in | Sets the units for the MF indicator distance unit (p. 47). | |
| Lens Retract 1 minute* / 0 seconds | Sets the lens retraction timing when switching from shooting mode to playback mode. | |
| Language Basic Guide p. 7 | ||
| Video System NTSC/PAL p. 88 | ||
| Print Method Auto*/ See below* | 1. | |
| Reset All | p. 25 | |
*1 The connection method with the printer can be changed. Although it is normally not necessary to change the setting, select when borderless printing an image shot in Widescreen) mode on wide size paper using Canon compact photo printer SELPHY CP730/CP720/CP710/CP510. As this setting will be stored to memory even when the power is turned off, to print using an image size other than return the mode to [Auto] (however, the connection method cannot be changed while connected to a printer).
My Camera Menu ( )
The camera's start-up image and start-up sound, operation sounds, self-timer sounds, and shutter sounds are called "My Camera settings". You can also use the supplied software to upload your computer's images and sounds to the camera.
*Default setting
| Menu Item Options | |
| Start-up Image When the power is turned on, the start-up image appears. | |
| Start-up Sound When the power is turned on, a start-up sound is played. | |
| Operation Sound When a button other than the shutter button is pressed, an operation sound will be played. | |
| Selftimer Sound While shooting in self-timer mode, a sound will be played two seconds before the shutter releases. | |
| Shutter Sound A sound will be played when the shutter button is fully pressed. The shutter sound does not play when a movie is recording. | |
| Settings On*/Off | |

z See the supplied Software Starter Guide for more information on creating and adding to the My Camera settings.
z A computer is required to restore the My Camera settings to the defaults. Use the supplied software (ZoomBrowser EX/ImageBrowser) to restore the default settings to the camera.
1 (Set up) Menu [Reset All].
See Menus and Settings (p. 19).
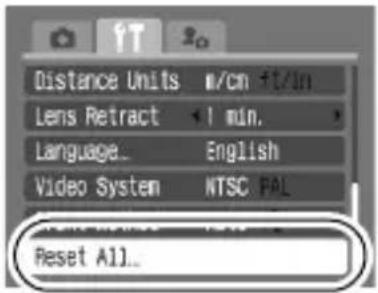
2 Select [OK] and press
![Allview X3 Soul Mini - Select [OK] and press - 1](/content/2026/06/1176638/images/3b7b5cbedda3a8bd587856d0a36f924928de652f7ad5822308104858e1300163.jpg)
![Allview X3 Soul Mini - Select [OK] and press - 2](/content/2026/06/1176638/images/6b75b2b78a47fa8e78baca0a08ae82c461fdc3d8539df682aae7014b5dcf980e.jpg)
-
Settings cannot be reset when the camera is connected to a computer or to a printer.
● The following cannot be reset. -
Shooting mode
- The [Date/Time], [Language] and [Video System] options in the Set up) menu (pp. 22, 23)
- White balance data recorded with the custom white balance function (p. 53)
- Colors specified in the [Color Accent] (p. 58) or [Color Swap] (p. 59) modes
- Newly registered My Camera settings
Formatting Memory Cards


You should always format a new memory card or one from which you wish to erase all images and other data.

Please note that formatting (initializing) a memory card erases all data, including protected images and other file types.
1 (Set up) Menu [Format].
See Menus and Settings (p. 19).
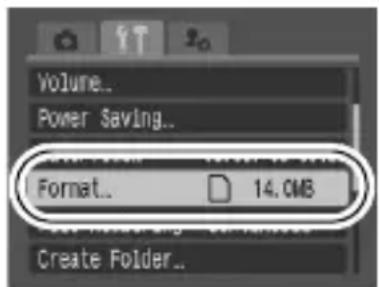
2 Select [OK] and press
- To perform a low level format, use the ↑ button to select [Low Level Format] and the ← or button to add a check mark.
- You can stop formatting a card when [Low Level Format] is selected by pressing the FUNC./SET button. You can without problem when formatting is halt be erased.
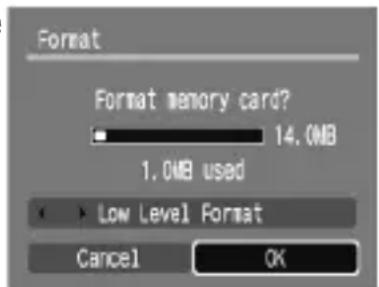
![Allview X3 Soul Mini - Select [OK] and press - 2](/content/2026/06/1176638/images/8169e7dcc83e86c9cc5e145cc8b251112c345b9e12b1a155480534a1af914a4a.jpg)
- This operation is not available in mode.
- Low Level Format
We recommend you select [Low Level Format] when you think that the recording/reading speed of a memory card has dropped. A low level format may require 2 to 3 minutes with some memory cards.
Changing the Recording Pixels and Compression (Still Images)
Shooting Mode





1
FUNC. Menu ▶ (Compression)/ \* (Recording Pixels).
See Menus and Settings (p. 18).
* Default setting.
- Use the or button to select compression settings/recording pixels and press the FUNC./SET button.

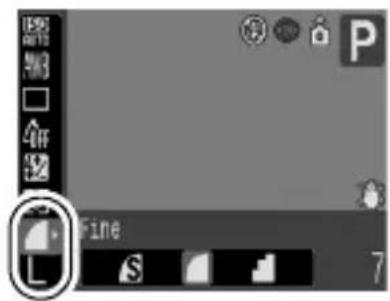
Approximate Values for Recording Pixels
| Recording Pixels Purpose* | |||
| L(Large) | 3072 x 2304 pixels | High | Printing to about A3 size (Approx. 297 x 420 mm (11.7 x 16.5 in.)) |
| M1(Medium 1) | 2592 x 1944 pixels | Printing to about A4 size (Approx. 210 x 297 mm (8.3 x 11.7 in.))Printing to about Letter-size 216 x 279 mm (8.5 x 11 in.) | |
| M2(Medium 2) | 2048 x 1536 pixels | Printing to about A5 size (Approx. 149 x 210 mm (5.9 x 8.3 in.)) | |
| M3(Medium 3) | 1600 x 1200 pixels | Print postcard-size prints 148 x 100 mm (6 x 4 in.)Print L-size prints 119 x 89 mm (4.7 x 3.5 in.) | |
| S(Small) | 640 x 480 pixels | Send images as e-mail attachments or shoot more images | |
| or(Postcard) | 1600 x 1200 pixels | Print postcard-size prints 148 x 100 mm (6 x 4 in.)Print L-size prints 119 x 89 mm (4.7 x 3.5 in.) | |
| W(Widescreen) | 3072 x 1728 pixels | Print on wide paper (Records at a 16:9 width-to-height aspect ratio. Areas that will not be recorded appear on the LCD monitor as a black border.). | |
* Paper sizes vary according to region.
Approximate Values for Compression Settings
| Compression Purpose | ||
| Superfine | High Quality | Shoot higher quality images |
| Fine Shoot normal quality images | ||
| Normal Shoot noimages | ||

● See Image Data Sizes (Estimated) (p. 126).
● See Memory Cards and Estimated Capacities (p. 124).
Setting the Image Stabilizer Function
Shooting Mode

The lens shift type image stabilizer function allows you to minimize the camera shake effect (blurred images) when you shoot distant subjects that have been magnified or when you shoot in dark conditions without a flash.
| Continuous | You can check the effect of the IS mode on image blur on the LCD monitor since the IS mode runs continually. This makes it easier to compose images and focus on subjects. |
| Shoot Only | IS mode is only activated when the shutter button is pressed, so subjects will be captured with reduced blur even if their movements on the LCD monitor are not smooth. This option is not available in themode. |
| Panning | This option only stabilizes the effect of up and down camera motions on the image. This option is recommended for shooting objects moving horizontally. This option is not available in themode. |
1
(Rec.) Menu [IS Mode] [Continuous]\*/ [Shoot Only]/[Panning]/[Off].
See Menus and Settings (p. 19).
* Default setting.
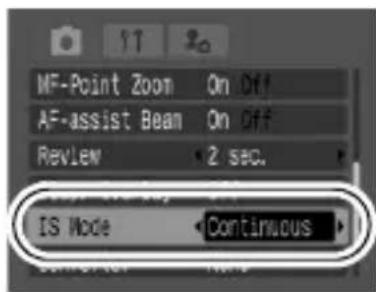
The following icons appear on the LCD monitor.
| [Continuous] | [Shoot Only] | [Panning] | [Converter] setting in Rec. menu | Reference Page |
| None | p. 113 | |||
| WC-DC58N/TC-DC58N/250D |
![Allview X3 Soul Mini - (Rec.) Menu [IS Mode] [Continuous]\*/ [Shoot Only]/[Panning]/[Off]. - 2](/content/2026/06/1176638/images/b0c6e112c14d3230a1e43d5855e264bfdca4756b7ec83741b110cc72f49a8747.jpg)
- If you select [Shoot Only] or [Panning] in shooting mode (still images) and then switch to mode, the setting will change to [Continuous].
- Camera shake may not be fully corrected when shooting with slow shutter speeds, such as with evening shots. Use of a tripod is recommended.
- If camera shake is too strong, it may not be fully corrected.
- Hold the camera horizontally while panning (stabilization does not work when the camera is held vertically).
Using the Digital Zoom/Digital Tele-Converter

Shooting Mode





*1 Cannot be set in and modes.
*2 Digital tele-converter cannot be set.
You can combine digital zoom with optical zoom when shooting. The available shooting characteristics and focal lengths (35mm film equivalent) are as follows:
| Selection Focal Length Shooting Characteristics | ||
| Standard 35 – 840 mm | Enables shooting at zoom factors of up to 24x with digital and optical zoom combined. In this setting is only available in Standard mode. | |
| Off 35 – 210 mm | Enables shooting without digital zoom. | |
| 1.5x 52.5 – 315 mm | Digital zoom is fixed at the selected zoom factor, and the focal length shifts to maximum telephoto. This enables a faster shutter speed and less chance of camera shake than a shot taken at the same angle of view with [Standard] or [Off]. | |
| 1.9x 66.5 – 399 mm | ||

- The digital zoom cannot be used when the LCD monitor is turned off.
- The digital zoom cannot be used in or (postcard), or (Widescreen) modes.
1
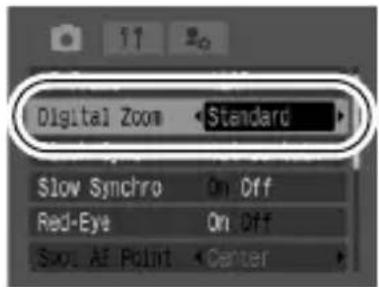
(Rec.) Menu [Digital Zoom] [Standard]\*/ [Off]/[1.5x]/[1.9x].
See Menus and Settings (p. 19).
* Default setting.
- When using [Standard]: See Shooting with the Digital Zoom (p. 30).
- When using [1.5x], [1.9x]: See Shooting with the Digital Tele-Converter (p. 31)
Shooting with the Digital Zoom
2
Press the zoom lever toward [and] shoot.
● The combined digital and optical zoom setting will display in the LCD monitor.
- Based on the number of recording pixels set, the Safety Zoom feature calculates the maximum zoom factor
beyond which image quality will begin to deteriorate. The digital zoom pauses at this zoom factor for a moment, and appears on the LCD monitor.
If you press the zoom lever toward [▲] again, you can zoom in even closer.
In this case, the zoom factor color has the following meanings:
- White: optical zoom
- Yellow: digital zoom (non-deteriorative)
- Blue: digital zoom (deteriorative)
- Press the zoom lever toward to zoom out.
![Allview X3 Soul Mini - Press the zoom lever toward [and] shoot. - 1](/content/2026/06/1176638/images/d895c79c1c85a10eaf6e5bb80740da6198648aafb85fa893aaf3a0052222b4a0.jpg)
natural_image
Gray square image with no visible text, numbers, or symbolsShooting with the Digital Tele-Converter
2 Adjust the angle of view with the zoom lever and shoot.
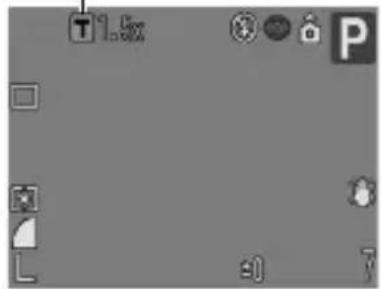
- Tappears on the LCD monitor.
- Depending on the number of recording pixels set, image quality may deteriorate ( and the zoom factor appear in blue).
Digital tele-converter
natural_image
Blank grayscale image with no visible text, symbols, or identifiable objectsAbout the Digital Tele-Converter
The digital tele-converter feature uses digital zoom to achieve the effects of a tele-converter (a lens used in telephoto shooting).
Continuous Shooting
Shooting Mode








*1 Cannot be set in and moves.
In this mode, the camera shoots continuously while the shutter button is held down.
If you use the recommended memory card*2, you can shoot continuously (smooth continuous shooting) at a set shooting interval until the memory card is full (p. 124).
\*2 Recommended Memory Card:
Super high-speed SDC-512MSH memory card (sold separately) to which low-level formatting (p. 26) is conducted immediately before shooting.
• This reflects standard shooting criteria established by Canon. Actual results may vary according to the subject and shooting conditions.
• Even if continuous shooting suddenly stops, the memory card may not be full.
1 FUNC. Menu ▶ (Drive Mode)
See Menus and Settings (p. 18).
* Default setting.

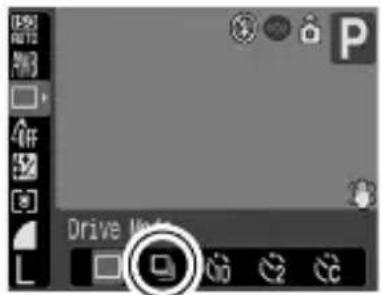
2 Shoot.
● The camera will continue to record successive images while the shutter button is held down. Recording will cease when the shutter button is released.
To Cancel Continuous Shooting
Follow procedure 1 to display


● The interval between shots lengthens when the built-in memory of the camera fills.
- If the flash is used, the interval between shots lengthens because the flash must charge.
Postcard Mode
Shooting Mode


SCN


P Tv
Av M
You can shoot images with the optimal settings for postcards by composing them inside the print area (width-to-height ratio of approximately 3:2) shown in the LCD monitor.
1
FUNC. Menu▶(Recording Pixels) (Postcard).
See Menus and Settings (p. 18).
* Default setting.
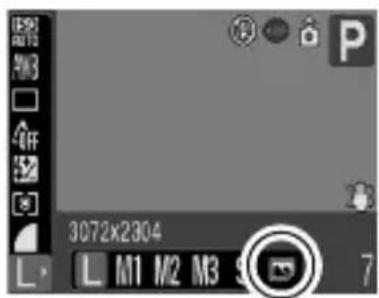
- The recording pixels are set to M3 (1600 x 1200) and the compression to ▲(Fine).
● The area that will not get printed grays out.

The digital zoom and digital tele-converter cannot be used in this mode.

For printing instructions, refer to the Direct Print User Guide.
Embedding the Date in the Image Data
You can embed the date in image data when (Postcard) is selected.
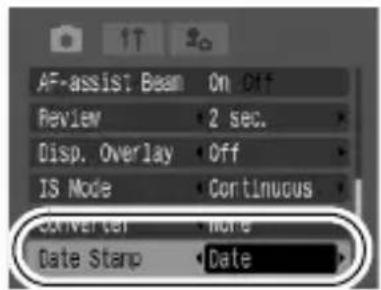
1
(Rec.) Menu [Date Stamp] [Off]\*/[Date]/[Date & Time].
See Menus and Settings (p. 19).
* Default setting.
- LCD monitor display
![Allview X3 Soul Mini - (Rec.) Menu [Date Stamp] [Off]\*/[Date]/[Date & Time]. - 1](/content/2026/06/1176638/images/a37a72a0c93582ebeb581ce9e3d188b9ae0b6d13e4ce287cf2c21d0248c852e1.jpg)
: [Date]/[Date & Time]
![Allview X3 Soul Mini - (Rec.) Menu [Date Stamp] [Off]\*/[Date]/[Date & Time]. - 3](/content/2026/06/1176638/images/9ee3d08f4eeae3b566b8f38dd34f56847538ce8daab15a1aa76252006fdc045b.jpg)
- Ensure that the camera's date/time is set beforehand (p. 22).
- The date stamp cannot be deleted from the image data once it has been embedded.
Setting the Display Overlays

Shooting Mode





*1 Only [Grid Lines] can be set.
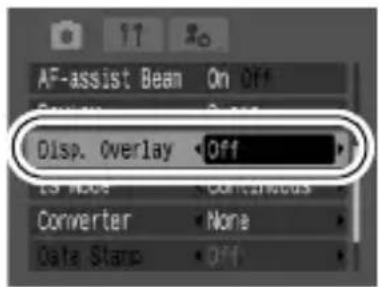
You can display vertical and horizontal grid lines, a 3:2 print area guide, or both on the LCD monitor while shooting to help check the position of your subject.
| Grid Lines | Displays grid lines to divide the screen into 9 parts.Helps confirm the vertical and horizontal positioning of the subject. |
| 3:2 Guide | Helps confirm the print area for a 3:2 print.* ^2 Areas outside the printable area are grayed out. |
| Both | Displays both the grid lines and the 3:2 guide simultaneously. |
*2 Images are still recorded at the standard aspect ratio of 4:3.
1
(Rec.) Menu [DISP. Overlay] [Off]\*/[Grid Lines]/[3:2 Guide]/[Both].
See Menus and Settings (p. 19).
* Default setting.
![Allview X3 Soul Mini - (Rec.) Menu [DISP. Overlay] [Off]\*/[Grid Lines]/[3:2 Guide]/[Both]. - 2](/content/2026/06/1176638/images/c21e7822175196ab700177f5aff152ab55734eb14127b19232352c5c58885fb8.jpg)
The grid lines and 3:2 guide will not be recorded in the image.
| Movie Shooting | |
| Shooting Mode | AUTO SCN P Tv Av M |
The following movie modes are available.
For information on the recording pixels and frame rate in each mode, refer to “Recording Pixels and Frame Rates” (p. 38).
| Standard | |
| You can select the recording pixels and frame rate and record until the memory card is full (when a super high-speed memory card is used, such as the recommended SDC-512MSH).The digital zoom can be used while shooting in this mode (p. 29). | |
| • Maximum Size: 1 GB/movie* | |
| Fast Frame Rate | |
| Use this mode to record fast moving subjects, such as in sports photography. | |
| • Maximum Clip Length: 1 minute | |
| Compact | |
| Since there are few recording pixels and also the data size is small, this mode is convenient for sending movies as e-mail attachments or when the memory card capacity is low. | |
| • Maximum Clip Length: 3 minutes | |
| Color Accent, Color Swap | |
| You can have only the specified color remain and change all others into black and white, or change a specified color into a different color. (pp. 58, 59).As with the Standard mode, you can select the recording pixels and frame rate and record until the memory card is full (when a super high-speed memory card is used, such as the recommended SDC-512MSH). | |
| • Maximum Size: 1 GB/movie* | |
- The recording time will differ according to the memory card used (p. 124).
* Even if the size of the movie data has not reached 1 GB, recording may stop when a shooting time of 1 hour has elapsed.
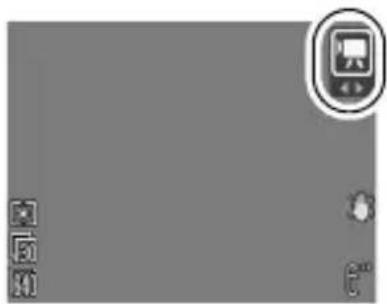
1 Select a movie mode using the ← or button.
natural_image
Blank gray canvas with a small icon of a computer monitor and control buttons (no text or symbols)- In mode, you can change the recording pixels and frame rate (p. 37).
- FoA and mode procedures, see “Changing the Color” (p. 57).
2 Shoot.
- Pressing the shutter button halfway automatically sets the exposure, focus and white balance settings.
- Pressing the shutter button fully starts recording video and sound simultaneously.
- During shooting, the recording time and [Rec] appear on the LCD monitor.
-
Pressing the shutter button fully again stops recording. Recording will stop automatically under the following circumstances.
-
When the maximum recording time elapses
- When the built-in memory or memory card becomes full

- You are recommended to use a memory card that has been formatted in your camera to shoot movies (p. 26). The memory card supplied with the camera may be used without further formatting.
● Be careful of the following while recording.
- Do not touch the microphone (Basic Guide p. 1).
- Do not press any buttons other than the shutter button. The sound that buttons make will be recorded in the movie.
- The camera will automatically adjust the exposure and white balance to suit the shooting conditions during recording. Please note, however, that the sounds made by the camera automatically adjusting the exposure may also be recorded.
● The focus and optical zoom settings remain fixed for subsequent frames at the values selected for the first frame.
- Do not point the camera at the sun when shooting.

QuickTime 3.0 or later is required to play back movies (Data type: AVI/Compression method: Motion JPEG) on a computer. QuickTime (for Windows) is included on the Canon Digital Camera Solution Disk. On the Macintosh platform, this program is standard with Mac OS X or later.
Changing Recording Pixels and Frame Rates (Movies)
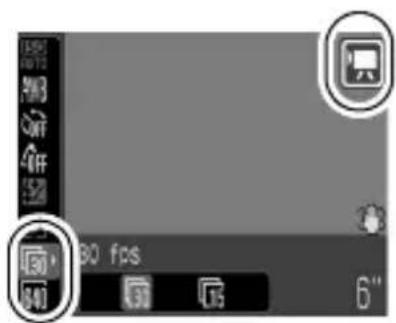
You can change the recording pixels and frame rate when the movie mode is set to (Standard), (Color Accent) or (Color Swap).
1
FUNC. Menu ▶ (Frame Rate)/ \* (Recording Pixels).
See Menus and Settings (p. 18).
* Default setting.
- Use the or button to select a frame rate/recording pixels and press the FUNC./SET button.


Recording Pixels and Frame Rates
Frame rates indicate the number of frames recorded or played back each second. The higher the frame rate, the smoother the appearance of motion.
| Recording Pixels | Frame Rate (frames/sec.) | ||||
| L60 | L30 | L15 | |||
 | Standard | 640 x 480 pixels | - ○* | 1 | ○ |
 | Color Accent | ||||
 | Color Swap | 320 x 240 pixels | - ○ | ○ | |
 | Fast Frame Rate*2 | 320 x 240 pixels | ○ | - | |
 | Compact*2 | 160 x 120 pixels | - - ○ | ||
*1 Default setting.
*2 The recording pixels and frame rate are fixed.

● See Image Data Sizes (Estimated) (p. 126).
● See Memory Cards and Estimated Capacities (p. 124).
Shooting Panoramic Images (Stitch Assist)
Shooting Mode

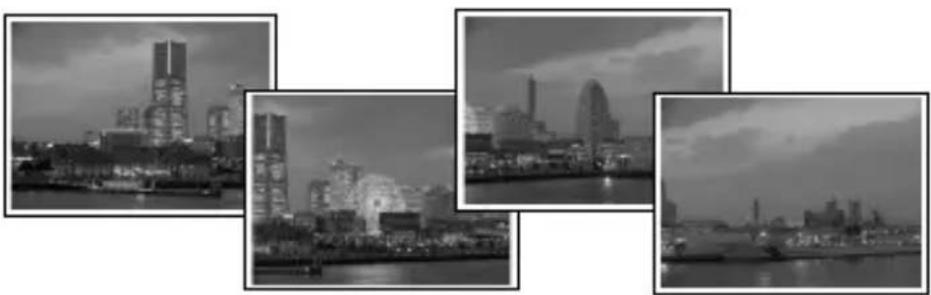
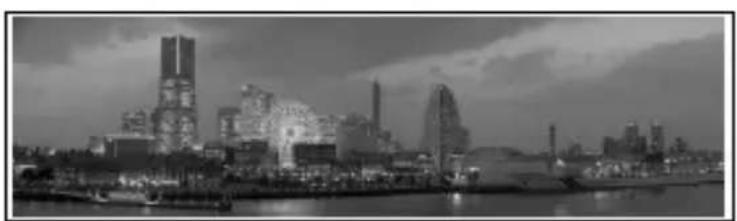
Stitch Assist can be used to shoot overlapping images that can later be merged (stitched) to create one panoramic image on a computer.
natural_image
Black-and-white cityscape collage showing illuminated skyscrapers and waterfront scenes (no visible text or signage)The overlapping seams of several adjacent images can be joined into a single panoramic image.
natural_image
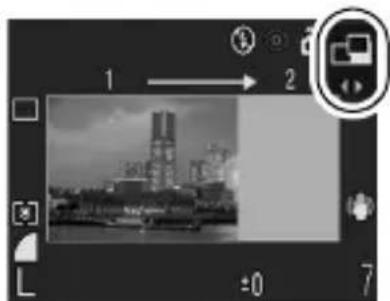
Black-and-white cityscape featuring modern skyscrapers and waterfront, no visible text or signage1 Use the or button to select a shooting direction.
- You can select from the following two shooting directions.
- → Left to right horizontally
- ← Right to left horizontally
natural_image
Black-and-white photo of a waterfront cityscape with a tower and boats, no visible text or symbols2 Shoot the first image in the sequence.
- The exposure and white balance are set and locked with the first image.
3 Compose the second image so that it overlaps a portion of the first and shoot.
- You can press the + or - button to return to the previously recorded image to retake the shot.
● Minor discrepancies in the overlapping portions can be corrected when the images are stitched together.
4 Repeat the procedure for additional images.
● A sequence may contain up to 26 images.
- Press the FUNC./SET button after the last shot.

- You cannot display the images on a TV when shooting in Stitch Assist mode.
- The settings for the first image are applied to the second image onward (except for Macro setting).

- Use PhotoStitch, a supplied software program, to merge the images on a computer.
- When the button is pressed, you can switch between the items which you can set.
- Exposure compensation/Shooting direction selection
P Program AE

Shooting Mode

The camera automatically sets the shutter speed and aperture value to match the brightness of the subject.
- When a correct exposure cannot be obtained, the shutter speed and aperture values are shown in red on the LCD monitor when the shutter button is pressed halfway. Use the following shooting methods to obtain the correct exposure and make them show in white.
- Using the flash
- Changing the ISO speed
- Changing the metering method
Tv Setting the Shutter Speed

Shooting Mode

When you set the shutter speed, the camera automatically selects an aperture value to match the brightness of the subject. Faster shutter speeds allow you to catch an instantaneous image of a moving subject, while slower speeds create a flowing effect and allow you to shoot without a flash in dark areas.

- If the aperture value is shown in red, the image is underexposed (insufficient light) or overexposed (too much light). Use the ◆ or button to adjust the shutter speed until the aperture value shows in white.
- The nature of CCD image sensors is such that noise in the recorded image increases at slow shutter speeds. This camera, however, applies special processing to images shot at shutter speeds slower than 1.3 seconds to eliminate the noise, thereby producing high-quality images. (However, a certain amount of processing time may be required before the next image can be shot.)
- The nature of CCD image sensors is such that noise in the recorded image increases at slow shutter speeds. This camera, however, applies special processing to images shot at shutter speeds slower than 1.3 seconds to eliminate the noise, thereby producing high-quality images. (However, a certain amount of processing time may be required before the next image can be shot.)

● The aperture value and shutter speed change according to the zoom state as follows
| Shooting Mode | Aperture Value | Shutter Speed (seconds) | |
| Maximum Wide Angle | M | f/2.8 – 3.5 15 | - 1/1500 |
| Tv | f/2.8 – 3.5 15 | - 1/1250 | |
| M, TV | - 8.0 15 – 1/2000 | 0 | |
| Maximum Telephoto | M | f/4.8 – 6.3 15 | - 1/1500 |
| Tv | f/4.8 – 6.3 15 | - 1/1250 | |
| M, TV | - 8.0 15 – 1/2000 | 0 |
- The fastest shutter speed for flash synchronization is 1/500 second. The camera automatically resets the shutter speed to 1/500 second if a faster speed is selected.
Shutter Speed Display
● The following shutter speeds can be set. 1/160 indicates 1/160 second. Also, 0"3 indicates 0.3 second and 2" indicates 2 seconds.
15" 13" 10" 8" 6" 5" 4" 3"2 2"5 2" 1"6 1"3 1" 0"8 0"6 0"5 0"4 0"3 1/4 1/5 1/6 1/8 1/10 1/13 1/15 1/20 1/25 1/30 1/40 1/50 1/60 1/80 1/100 1/125 1/160 1/200 1/250 1/320 1/400 1/500 1/640 1/800 1/1000 1/1250 1/1500* 1/1600 1/2000
* Only in the M shooting mode
Av Setting the Aperture

Shooting Mode

The aperture adjusts the amount of light entering through the lens. When you set the aperture value, the camera automatically selects a shutter speed to match the brightness.
Selecting a lower aperture value (opening the aperture) allows you to blur the background and create a beautiful portrait. A higher aperture value (closing it) brings the entire range from foreground to background into focus. The larger the aperture value, the greater the range of the image brought into clear focus.

- If the shutter speed is shown in red, the image is underexposed (insufficient light) or overexposed (too much light). Adjust the aperture value using the ◆ or button until the shutter speed display turns to white.
- Some aperture values may not be available with certain zoom positions (p. 41).

In this mode, the shutter speed range with synchronized flash is 1/60 second to 1/500 second. The aperture value setting may therefore be changed automatically to match the synchronized flash speed even if its value was set previously.
Aperture Value Display
● The larger the aperture value, the smaller the lens aperture.
F2.8 F3.2 F3.5 F4.0 F4.5 F4.8 F5.0 F5.6 F6.3 F7.1 F8.0
M Manually Setting the Shutter Speed and Aperture

Shooting Mode

You can manually set the shutter speed and aperture to shoot images.
- When you press the shutter button halfway, the difference between the standard exposure* and the selected exposure appears on the LCD monitor. If the difference is more than ±2 stops, “-2” or “+2” appears in red.
* Standard exposure levels are calculated by measuring light according to the currently selected metering mode.

- If you wish to change the exposure, select shutter speed or aperture using the button, then adjust the value using the button.
- If the zoom is adjusted after these values are set, the aperture value may change in accordance with the zoom position (p. 41).
- The LCD monitor's brightness matches the selected shutter speed and aperture value.
When you select a fast shutter speed or shoot a subject in a dark place, the image will always be bright if the flash is set to (Flash on, with red-eye reduction) or (Flash on).
Selecting an AF Frame

Shooting Mode



SCN*


P Tv
Av M
* Cannot be set in and modes.
The AF frame indicates the area of the composition on which the camera focuses. You can set the AF frame in the following ways.
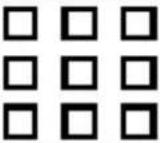 | AiAF | The camera automatically selects between 9 AF frames to focus on according to the shooting conditions. |
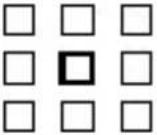 | Center | The camera focuses using the center AF frame. This is convenient for making sure the focus is exactly where you want it. |
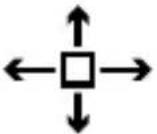 (Desired position) (Desired position) | FlexiZone(Manual setting) | Mode dial: P/TV Av MYou can move the AF frame manually to the desired position. This is convenient for focusing accurately on your chosen subject to obtain the composition you desire. |
1
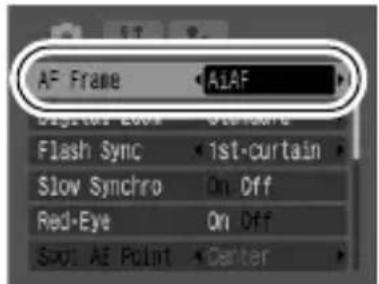
(Rec.) Menu [AF Frame] [AiAF]\*/ [Center]/[FlexiZone].
See Menus and Settings (p. 19).
* Default setting.
- When [FlexiZone] is selected (p. 45).
![Allview X3 Soul Mini - (Rec.) Menu [AF Frame] [AiAF]\*/ [Center]/[FlexiZone]. - 2](/content/2026/06/1176638/images/e55b9a98c2f5b2b73471cc7555ed8e643cfa8a57354d24ff27c21d002e4e4d4b.jpg)
● [FlexiZone] cannot be selected when the LCD monitor is off.
- The AF frame appears as follows (when the LCD monitor is on) when the shutter button is pressed halfway.
- Green : Shooting preparations complete
- Yellow : Focusing difficulty*
* It will not be displayed when the AF frame is set to [AiAF].
Selecting an AF Frame Manually (when [FlexiZone] is selected)
1 Turn on the LCD monitor.
2 Press the ☐ button several times until the AF frame turns green.
- Depending on the shooting mode, you can switch between the following setting options by pressing the button.
| P | Exposure compensation/AF frame |
| Tv | Shutter speed/Exposure compensation/AF frame |
| Av | Aperture value/Exposure compensation/AF frame |
| M | Shutter speed/Aperture value/AF frame |
3 Use the ↑, ↓or←button to move the AF frame to the desired position and press the ➕button.
- If you hold down the button, the AF frame will return to the original position (center) (at the same time, the setting options will switch as shown in the above table).

- When [Spot AE Point] is selected as the light metering mode, you can use the selected AF frame as the Spot AE Point (p. 50).
- It cannot be selected while manual focus is being used (p. 47).
- The AF frame returns to the center when the camera's power is turned off.
Shooting Hard-to-Focus Subjects
(Focus Lock, AF Lock, Manual Focus)

Shooting Mode


SCN*


P Tv
Av M
* Cannot be used in mode.
It may be difficult to focus on the following types of subjects.
● Subjects with extremely low contrast to the surroundings
- Scenes with a mixture of near and far subjects
- Subjects with extremely bright objects at the center of the composition
● Subjects that are moving quickly
- Subjects through glass: Try to shoot as close to the glass as possible to reduce the chances of light reflecting back off the glass.
Shooting with the Focus Lock
1 Aim the camera so that an object at the same focal distance as the main subject is centered in the viewfinder or in the AF frame displayed on the LCD monitor.
2 Press the shutter button halfway to lock the focus.
3 Keep the shutter button pressed halfway while you recompose the image and press the shutter button all the way to shoot the image.
Shooting with the AF Lock
1 Turn on the LCD monitor.
2 Aim the camera so that an object at the same focal distance as the main subject is centered in the AF frame.
3 Press and hold the shutter button halfway and press the Mutton.
- The icon and the MF indicator will appear on the LCD monitor.
4 Re-aim the camera to compose the shot as desired and shoot.
To Release the AF Lock
Press the Mf tton.

● The AF lock cannot be used in the AU and modes.
- When shooting with the focus lock or AF lock using the LCD monitor, setting [AF Frame] to [Center] (p. 44) makes shooting easier since the camera focuses using the center AF frame only.
● The AF frame will not appear in mode.
- The AF lock is convenient because you can let go of the shutter button to compose the image. Moreover, the AF lock is still effective after the picture is taken, allowing you to capture a second image with the same focus.
Shooting in Manual Focus Mode
The focus can be manually set.
1 Turn on the LCD monitor.
2 Press the MButton several times to display. MF
● The MF indicator is displayed.
- When the (Rec.) menu's [MF-Point Zoom] is set to [On], the portion of the image in the AF frame will appear magnified*.
* The image will not appear magnified in mode, when the digital zoom or digital tele-converter is activated or when a TV is used as the display.
* Can also be set so that the image displayed is not magnified (p. 20).
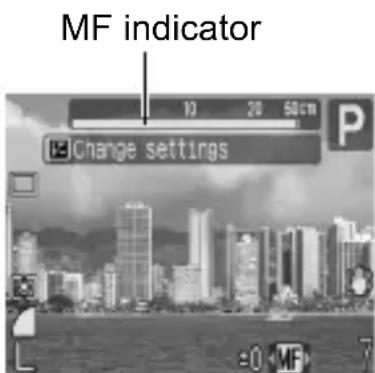
- Depending on the shooting mode, pressing the button will switch between the setting items as follows:
| Exposure compensation/ | |
| SCN | SCN mode/Exposure compensation*/MF |
| mode/MF | |
| Tv | Shutter speed/Exposure compensation/MF |
| Av | Aperture value/Exposure compensation/MF |
| M | Shutter speed/Aperture value/MF |
* Cannot be set in the modes.
3 Press the ◀or button and adjust the focus.
● The MF indicator shows approximate figures. Use them as a shooting guideline only.
To Cancel the Manual Focus
Press the M Fton.

The manual focus cannot be used in the modes.


Locking the Exposure Setting (AE Lock)
Shooting Mode

P Tv Av
You can set the exposure and focus separately. This is effective when the contrast is too strong between the subject and background or when a subject is backlit.

You must set the flash to ☐The AE lock cannot be set if the flash fires.
1 Turn on the LCD monitor.
2 Focus on the part of the subject on which you wish to lock the exposure setting.
3 Press and hold the shutter button halfway and press the 📄 button.
- The icon will display.
4 Re-aim the camera to compose the shot as desired and press the shutter button fully.
To Release the AE Lock
Press a button other than the ◆ or button.

You can use the FE lock when using the flash (p. 49).
Locking the Flash Exposure Setting (FE Lock)
Shooting Mode

AUTO SCN P Tv Av M
You can lock the flash exposure so that the exposure settings are correctly set regardless of the composition of your subject.
1 Turn on the LCD monitor.
2 Press the button and set it to flash on).
3 Focus on the part of the subject on which you wish to lock the flash exposure setting.
4 Press and hold the shutter button halfway and press the 📄 button.
● The flash will pre-fire and will display.
5 Re-aim the camera to compose the shot as desired and press the shutter button fully.
To Release the FE Lock
Press a button other than the ◆ or button.

The FE lock function is not available when [Flash Adjust] is set to [Manual] (p. 63)
Switching between Metering Modes

Shooting Mode

1 FUNC. Menu ▶ (valuative)
See Menus and Settings (p. 18).
* Default setting.
- Use the or button to select the metering mode and press the FUNC./SET button.
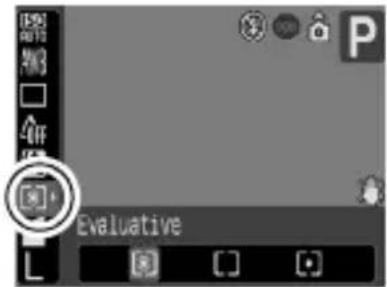
Metering Methods
| Evaluative | Appropriate for standard shooting conditions, including backlit scenes. The camera divides images into several zones for metering. It evaluates complex lighting conditions, such as the position of the subject, the brightness, the direct light, and the backlighting, and adjusts the settings to the correct exposure for the main subject. | |
| Center Weighted Average | Averages the light metered from the entire frame, but gives greater weight to the subject matter at the center. | |
| Spot Meters the area within the spot AE point frame. | ||
| Center | Locks the spot AE point frame to the center of the LCD monitor. | |
| AF Point | Moves the spot AE point to the same position as the selected AF frame/Locks the spot AE point to the center of the LCD monitor | |
Lock the spot AE point to the center of the LCD monitor/Move the spot AE point to the same position as the selected AF frame
1
(Rec.) Menu [Spot AE Point] [Center]\*/[AF Point]
See Menus and Settings (p. 19).
* Default setting.
- When [Spot AE Point] is set to [Center], the spot AE point frame appears at the center of the LCD monitor.
- When [Spot AE Point] is set to [AF Point], it appears inside the selected AF frame.
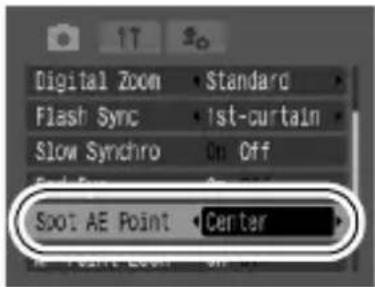
![Allview X3 Soul Mini - (Rec.) Menu [Spot AE Point] [Center]\*/[AF Point] - 2](/content/2026/06/1176638/images/93acb0c20f9068d3b8bcdbf4769deeaba5516ec337f2154c642767faaa4a008e.jpg)
[AF Point] can only be selected when the AF frame is set to [FlexiZone] (p. 44).
![Allview X3 Soul Mini - (Rec.) Menu [Spot AE Point] [Center]\*/[AF Point] - 3](/content/2026/06/1176638/images/7cc768c8983e7bee9faa017c9fb27b08664e81f43f8874604f19917d867ec7ea.jpg)
Adjusting the Exposure
Compensation

Shooting Mode

* Cannot be set in and moves.
Adjust the exposure compensation to a positive value to avoid making the subject too dark when it is backlit or shot against a bright background. Adjust the exposure compensation to a negative value to avoid making the subject too bright in night shots or when shot against a dark background.
1
Turn on the LCD monitor.
2 Press the ☐ button several times until the exposure compensation bar is displayed.
- Use the + or + buttons to adjust the exposure compensation and press the + button.
- Depending on the shooting mode, pressing the 📄 button will switch between the setting items as follows:
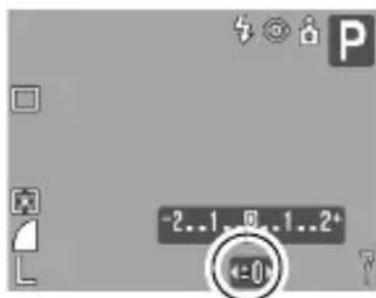
| SCN | SCN mode/Exposure compensation |
| Shooting direction selection/Exposure compensation | |
| Tv | Shutter speed/Exposure compensation/AF frame* |
| Av | Aperture value/Exposure compensation/AF frame* |
| P | Exposure compensation/AF frame* |
* The AF frame can only be selected when [AF frame] is set to [FlexiZone] (p. 44)
To Cancel the Exposure Compensation
Follow procedure 2 to restore the compensation value to [0].
Adjusting the Tone (White Balance)

Shooting Mode


* Cannot be set in and modes.
Normally, the 🐘Auto) white balance setting selects an optimal white balance. When the 🐘Auto) setting cannot produce natural looking colors, change the white balance using a setting appropriate for the light source.
See Menus and Settings (p. 18).
* Default setting.
- Use the or button to select a white balance setting and press the FUNC./SET button.
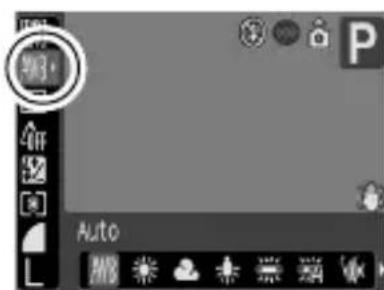
White Balance Settings
 | Auto Settings are automatically set by the camera. | |
 | Day Light For recording outdoors on a bright day. | |
 | Cloudy | For recording under overcast, shady or twilight skies. |
 | Tungsten | For recording under tungsten and bulb-type 3-wavelength fluorescent lighting. |
 | Fluorescent | For recording under warm-white, cool-white or warm-white (3-wavelength) fluorescent lighting. |
 | ||
 | Fluorescent H | For recording under daylight fluorescent, or daylight fluorescent-type 3-wavelength fluorescent lighting. |
 | Underwater | Appropriate for shooting images underwater with the Waterproof Case WP-DC6 (sold separately). This mode yields image data in the optimal white balance to record images with natural hues by reducing the bluish tone. |
 | ||
 | ||
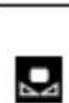 | Custom | For recording with the optimal white balance data memorized in the camera from a white-colored object, such as white paper or cloth. |

The white balance setting cannot be adjusted when is selected for My Colors.


Using the Custom White Balance
You can set a custom white balance to obtain the optimal setting for the shooting conditions by having the camera evaluate an object, such as a piece of white paper or cloth, or a photo-quality gray card that you wish to establish as the standard white color.
In particular, take a custom white balance reading for the following situations that are difficult for the AWB (Auto) setting to detect correctly.
● Shooting close-ups (Macro)
● Shooting subjects of monotone color (such as sky, sea or forest)
● Shooting with a particular source of light (such as a mercury-vapor lamp)
1
FUNC. Menu \* (Auto) (Custom).
See Menus and Settings (p. 18).
* Default setting.
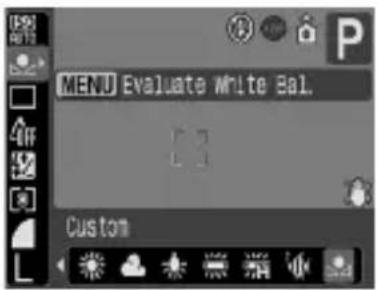
2
Aim the camera at a piece of white paper or cloth and press 📄
MENU
- If you are viewing it with the LCD monitor, ensure that the center frame is completely filled with the white image. If you are using the optical viewfinder, ensure that the entire field is filled. However, the center frame will not appear when the zoom factor is 7.1x or higher or when 📁 displayed.

- You are recommended to set the shooting mode to and the exposure compensation setting to [± 0] before setting a custom white balance.
The correct white balance may not be obtained when the exposure setting is incorrect (image appears completely black or white).
- Shoot with the same settings as when reading the white balance data. If the settings differ, the optimal white balance may not be set.
In particular, the following should not be changed.
- ISO Speed
- Flash
Setting the flash to on or off is recommended. If the flash fires when reading the white balance data with the flash set to 📄Auto) or (A 📄b 📌th red-eye reduction), make sure that you also use the flash when you shoot.
- Since the white balance data cannot be read in Stitch Assist mode, preset the white balance in another shooting mode beforehand.
You can change the look of an image when it is shot.
My Colors Settings
 | My Colors Off | Records normally with this setting. |
 | Vivid | Emphasizes the contrast and color saturation to record bold colors. |
 | Neutral | Tones down the contrast and color saturation to record neutral hues. |
 | Sepia Records in sepia tones. | |
 | B/W Records in black and white. | |
 | Positive Film | Use this option to make red, green or blue colors more intense like the Vivid Red, Vivid Green or Vivid Blue effects.It can produce intense natural-appearing colors like those obtained with positive film. |
 | Lighter Skin Tone* | Use this option to make skin tones lighter. |
 | Darker Skin Tone* | Use this option to make skin tones darker. |
 | Vivid Blue | Emphasize blue tints.Use to make blue subjects, such as the sky or ocean, more vivid. |
 | Vivid Green | Emphasize green tints.Use to make green subjects, such as mountains, new growth, flowers and lawns, more vivid. |
 | Vivid Red | Emphasize red tints.Use to make red subjects, such as flowers or cars, more vivid. |
 | Custom Color | Use this option to adjust the balance between contrast, sharpness, saturation, reds, greens, blues and skin tones*. It can be used to make subtle adjustments, such as making blue colors more vivid or face colors brighter. |
* If the image contains colors that are the same as human skin, those colors will also be changed.
You may not obtain the expected results depending on the skin color.
1 FUNC. Menu\* (My Colors Off).
See Menus and Settings (p. 18).
* Default setting.
- Use the or button to select a My Colors mode.
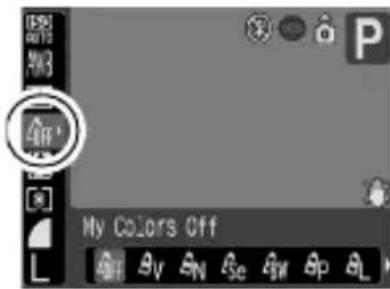
2 Shoot.
- Mode
See Setting the Camera to a Custom Color Mode (p. 56).
- Modes other than
Press the FUNC./SET button. The display will return to the shooting screen and you can shoot.
Setting the Camera to a Custom Color Mode
1 (Custom Color) ▶ MENU
See Menus and Settings (p. 18).
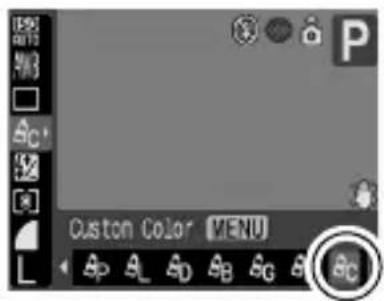
2 Use the ↗ or button to select [Contrast], [Sharpness], [Saturation], [Red], [Green], [Blue] or [Skin Tone] and the ↕ or ↗ button to adjust it.
● The altered color will display.
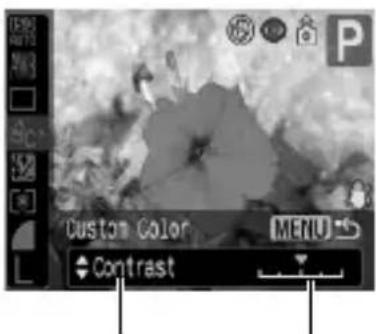
Select an item
Adjust
3

● This completes the setting.
If you press the MENU button at this point, you will return to the screen where you can select a My Colors mode.

Allows you to easily transform the colors in an image when shooting. This feature can be used for both still shots and movies, and offers you the enjoyment of staging image and movie effects. However, depending on the shooting conditions, there are occasions when the image may appear rough, or you may not obtain the desired color. Therefore, before you shoot important subjects, we recommend that you shoot trial images and check the results. Moreover, when shooting still images, the camera will record both the My Colors image as well as the original unaltered image when [Save Original] (p. 61) is set to [On].
 | Color Accent | Use this option to have only the color specified in the LCD monitor remain and to transform all others to black and white. |
 | Color Swap | Use this option to transform a color specified in the LCD monitor into another. Only one different color can be selected. You cannot choose from among multiple colors. |

Depending on the scene shot, ISO speed may rise and image noise may increase.
Shooting in the Color Accent Mode
1
Still image: sor button
Movie: 📄 button
See Selecting a Shooting Mode in (Basic Guide p. 9)
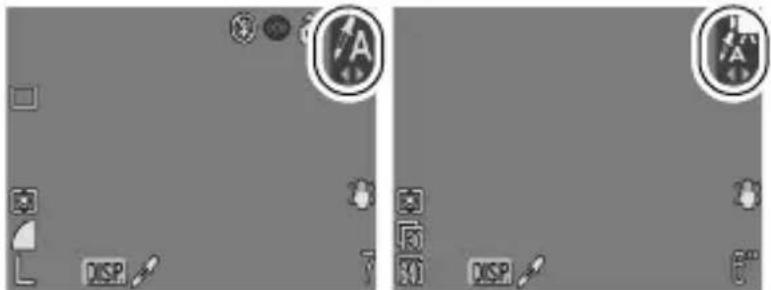
Still image Movie
2

DISP.
- The camera will switch to color input mode and the display will alternate between the original image and the color accent image (using the previously set color).
3
Aim the camera so that the color you wish to retain appears at the center of the LCD monitor and press the ◀button.
● Only one color can be specified.
- You can use the or button to specify the range of colors that are retained.
-5: Only takes the color that you want to retain.
+5: Also takes colors close to the one that you want to retain.
4
Press Ⓜ to complete the setting, then shoot.
DISP.

● The default color accent is green.
● You may not obtain the expected results if you use the flash.
- The specified color accent is retained even if the camera's power is turned off.
Shooting in the Color Swap Mode
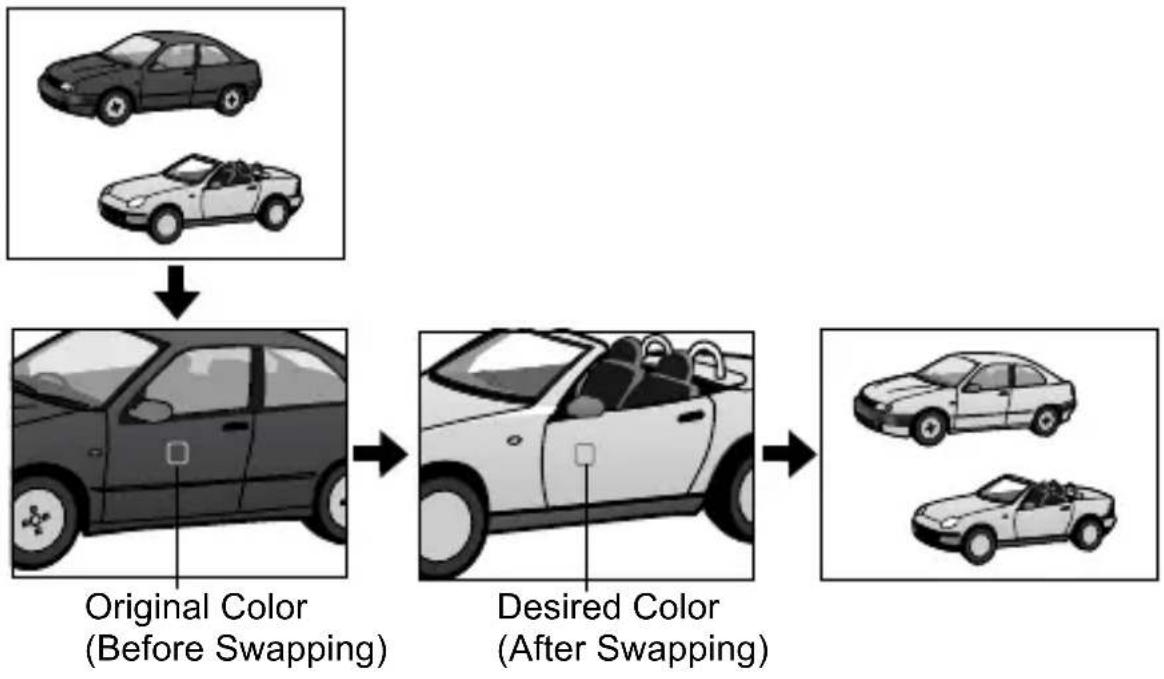
flowchart
graph TD
    A["Original Color (Before Swapping)"] --> B["Desired Color (After Swapping)"]
    B --> C["Car 1"]
    B --> D["Car 2"]
1
Still image: sor button
Movie: Or button
See Selecting a Shooting Mode in (Basic Guide p. 9)
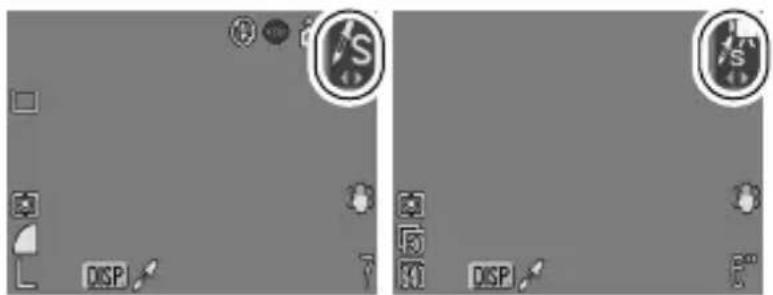
Still image Movie
2

- The camera will switch to color input mode and the display will alternate between the original image and the color swap image (using the previously set color).
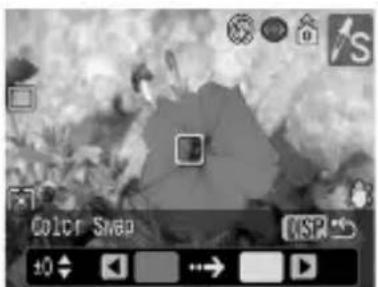
Still image
| 3 | Aim the camera so that the original color appears at the center of the LCD monitor and press the ←button.Only one color can be specified.You can use the → or ↓button to specify the range of colors that are swapped.-5: Only takes the color that you want to swap.+5: Also takes colors close to the one that you want to swap. |
| 4 | Aim the camera so that the desired color appears at the center of the LCD monitor and press the ➕button.Only one color can be specified. |
| 5 | Press ☐ to complete the setting, then shoot. |

- The default setting for color swap mode will change green into white.
● You may not obtain the expected results if you use the flash. - The colors specified in the color swap mode are retained even if the camera's power is turned off.
Changing the Save Method for the Original Image
When shooting still images in the Color Accent or Color Swap mode, you can specify whether to record the original image (the image before altering the color) in addition to the color-altered image.
1
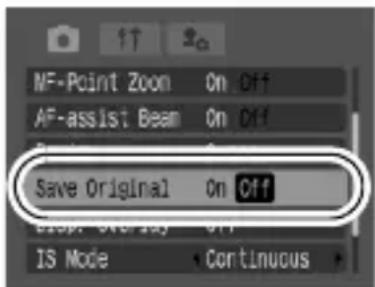
(Rec.) Menu [Save Original] [On]/[Off]\*.
See Menus and Settings (p. 19).
* Default setting.
- If [On] is selected, the two images will be numbered consecutively with the altered image shot with the color accent on color swap setting following the original.
![Allview X3 Soul Mini - (Rec.) Menu [Save Original] [On]/[Off]\*. - 2](/content/2026/06/1176638/images/1999a5bff60ceac9531cb1b12e23df21dc9a1b9c26c84780c690b57ecea130d1.jpg)
When [Save Original] is Set to [On]
- Only the color accent or color swap-altered image is shown in the LCD monitor during shooting.
- The image that appears in the LCD monitor immediately after recording is the altered image shot with the color accent or color swap setting. If you erase the image at this point, the original image is erased along with the altered image. Exercise adequate caution before deleting an image.
- Since two images are recorded with each shot, the number of shots remaining is approximately half the number displayed when this function is set to [Off].
Adjusting the ISO Speed

Shooting Mode
AUTO SCN P Tv Av M
Raise the ISO speed to use a fast shutter speed when you wish to reduce the effects of camera shake or avoid blurry subjects, or to turn the flash off when shooting in a dark area.
1 FUNC. Menu (Auto).
See Menus and Settings (p. 18).
- Use the or button to select an ISO speed and press the FUNC./SET button.
- Selecting sets the optimal ISO speed according to the light level when shooting. Since the ISO speed setting will automatically be raised in dark places, the camera will select a faster shutter speed and reduce the chances of camera shake.
- Selecting ISO (High ISO Auto)* sets a higher sensitivity than for ISO as the shutter speed becomes even faster, camera shake and blurred photos caused by subject movement will be reduced even more than when shooting the same scene in ISO.
* Noise may increase in the captured image compared to

ISO Speed Settings
Switching between Flash Adjustment Settings
Shooting Mode


Although the built-in flash will fire with automatic flash adjustments (except in the Mmode), it is also possible to set it so that it fires without any adjustments.
1 (Rec.) Menu [Flash Adjust] [Auto]\*/ [Manual].
See Menus and Settings (p. 19).
* Default setting.
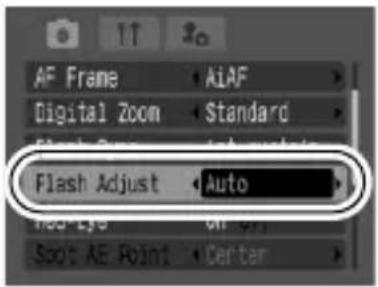
Compensating the Flash Adjustment / Flash Output
Shooting Mode


| +/- (Flash)(Flash ExposureCompensation) | When the shooting mode is set to, , For when [Flash Adjust] is set to [Auto](p. 63) in Tor mode, settings can be adjusted in 1/3-stop increments in the range of -2 to +2 stops.You can combine the flash exposure compensation with the camera's exposure compensation function to achieve creative effects which compensate for background exposure. |
| Flash Output | When Shooting mode is set to or when [Flash Adjust] is set to [Manual] in Tor mode(p. 63), the flash output can be controlled in three steps, starting from FULL, when shooting. |
1
FUNC. Menu ▶(▶ - (Flash))/ Flash Output).
See Menus and Settings (p. 18).
- Adjust the compensation/output using the ◆ or button and press the FUNC./SET button.
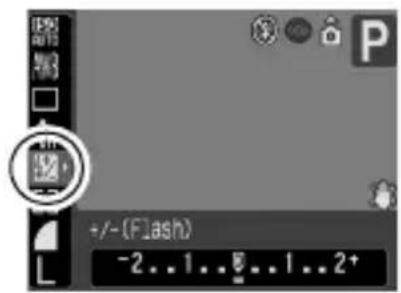
Example:
Flash Exposure
Compensation
Switching the Timing at which the Flash Fires

Shooting Mode

| 1st-curtain | The flash fires right after the shutter opens, regardless of the shutter speed. Usually, the 1st-curtain is used when shooting. |
| 2nd-curtain | The flash fires right before the shutter closes. Compared with the 1st-curtain, the flash fires later and allows you to shoot images in which, for example, a car's taillights seem to trail off behind. |
1
(Rec.) Menu [Flash Sync] [1st-curtain]\*/[2nd-curtain].
See Menus and Settings (p. 19).
* Default setting.
![Allview X3 Soul Mini - (Rec.) Menu [Flash Sync] [1st-curtain]\*/[2nd-curtain]. - 1](/content/2026/06/1176638/images/fa4244e23eac723e02e49191ec80bd6b250601230d929798566011e41c8fa492.jpg)
natural_image
Black-and-white photo of a car on a circular road with motion blur, no visible text or symbolsImage shot with the 1st-curtain setting
![Allview X3 Soul Mini - (Rec.) Menu [Flash Sync] [1st-curtain]\*/[2nd-curtain]. - 2](/content/2026/06/1176638/images/abd097a9aa13f9ce27d9f03a18d07928acc320e244dbe6263de7b29bc9eb4560.jpg)
natural_image
Black-and-white photo of a car speeding past a circular structure at night (no visible text or symbols)Image shot with the 2nd-curtain setting
Setting the Auto Rotate Function


Shooting Mode





Your camera is equipped with an Intelligent Orientation sensor that detects the orientation of an image shot with the camera held vertically and automatically rotates it to the correct orientation when viewing it in the LCD monitor.
1
In (Set up) Menu [Auto Rotate] [On]\*/ [Off].
See Menus and Settings (p. 19).
* Default setting.
- When the Auto Rotate function is set to [On] and the LCD monitor is set to the detailed display mode during
shooting,
![Allview X3 Soul Mini - In (Set up) Menu [Auto Rotate] [On]\*/ [Off]. - 1](/content/2026/06/1176638/images/8efb5893b928d27cad5e39edb5d50fffd18b595915ce80a58775d4554e8835bc.jpg)
(norma)
(right
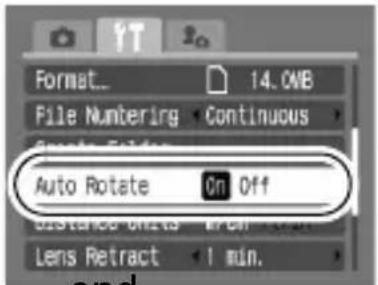
is down) or
![Allview X3 Soul Mini - In (Set up) Menu [Auto Rotate] [On]\*/ [Off]. - 3](/content/2026/06/1176638/images/cfd815b75be2e5027f5a42a6c58e77de488fe25e56b5635f1355f9975b8350cf.jpg)
left end is down) will appear in the display.
![Allview X3 Soul Mini - In (Set up) Menu [Auto Rotate] [On]\*/ [Off]. - 4](/content/2026/06/1176638/images/e90ce6d27bc4073f681c76123944742624f28dff32649bb9d796cacd789dfdfc.jpg)
- This function may not operate correctly when the camera is pointed straight up or down. Check that the arrow pointing in the right direction and if it is not, then set the Auto Rotate function to [Off].
- Even if the Auto Rotate function is set to [On], the orientation of images downloaded to a computer will depend upon the software used to download the images.
![Allview X3 Soul Mini - In (Set up) Menu [Auto Rotate] [On]\*/ [Off]. - 5](/content/2026/06/1176638/images/707f506a1426c2200b994327c2835c6d13b8f848d34439e4647575d99ae76f10.jpg)
- When the camera is held vertically to shoot, the Intelligent Orientation sensor judges the upper end to be “up” and the lower end to be “down”. It then regulates the optimal white balance, exposure and focus for vertical photography. This function operates regardless of the on/off status of the Auto Rotate function.
Creating an Image Destination (Folder)


Shooting Mode


You can create a new folder at any time and the recorded images will be automatically saved to that folder.
| Create New Folder | Creates a new folder the next time you shoot images. To create an additional folder, insert the check mark again. |
| Auto Create | You can also specify a date and time if you wish to create a new folder using a shooting time after the specified date and time. |
1 (Set up) Menu [Create Folder].
See Menus and Settings (p. 19).
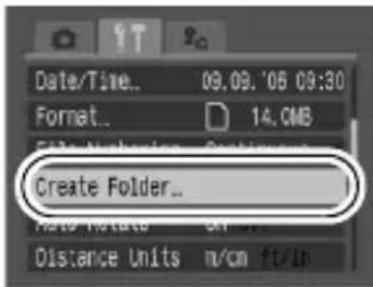
Creating a Folder the Next Time You Shoot.
2 Use the or button to check mark [Create New Folder] ▶ ○
● displays in the LCD monitor. The symbol will cease to display after the new folder is created.
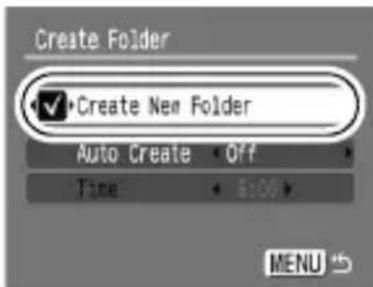
Setting the Day or Time for Automatic Folder Creation.
2
Select a day for the [Auto Create] option and a time in the [Time] option ▶ ○
● [icon] displays when the specified time arrives. The symbol will cease to display after the new folder is created.
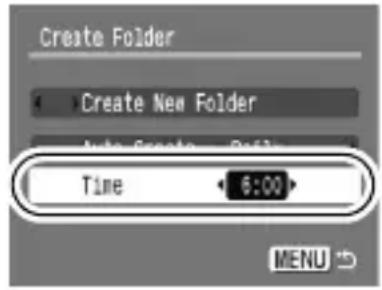
![Allview X3 Soul Mini - Select a day for the [Auto Create] option and a time in the [Time] option ▶ ○ - 2](/content/2026/06/1176638/images/9f5fef8ac283b0c43ea1370bfb38c8ded608f7188fb00d5e50c7049ab54df994.jpg)
Up to 2000 images can be saved into one folder. A new folder will automatically be created when you record more than that number even if you are not creating new folders.
Resetting the File Number

Shooting Mode

The images you shoot are automatically assigned file numbers. You can select how the file number is assigned.
1
(Set up) Menu [File Numbering] [Continuous]\*/ [Auto Reset].
See Menus and Settings (p. 19).
* Default setting.
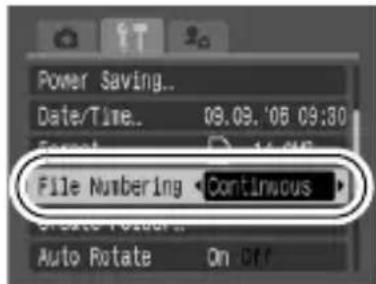
File Number Reset Function
| Continuous | A number one higher than the last one recorded is assigned to the next image. This is convenient for managing all your images together on a computer because you avoid file name duplication when changing folders or memory cards.** When a blank memory card is used. If a memory card with recorded data is used, the 7-digit number for the last recorded folder and image is compared with the last one on the card, and the larger of the two is utilized as the basis for new images. |
| Auto Reset | The image and folder number are reset to the starting value (100-0001).* This is convenient for managing images on a folder-by-folder basis.* When a blank memory card is used. If a memory card with recorded data is used, the number following the 7-digit number for the last recorded folder and image on the card is utilized as the basis for new images. |
File and Folder Numbers
Recorded images are assigned consecutive file numbers starting with 0001 and ranging up to 9999, while folders are assigned numbers starting with 100 and ranging up to 999. Up to 2,000 images can be saved into a single folder.
| New Folder Created | Memory Card Exchanged for Another | |
| Continuous | Memory Card 1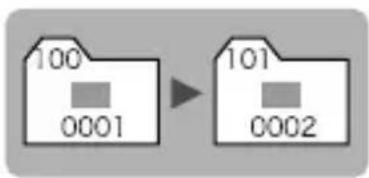 | Memory Card 1 Memory Card 2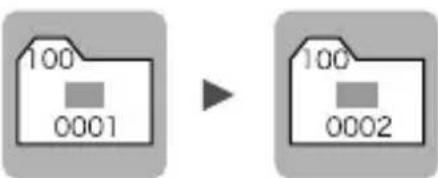 |
| Auto Reset | Memory Card 1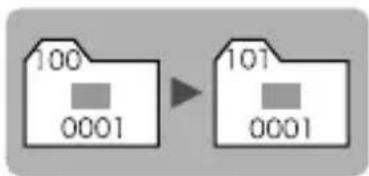 | Memory Card 1 Memory Card 2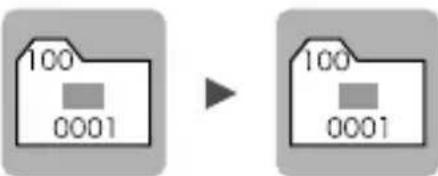 |
- Images may be saved to a new folder when there is insufficient free space even if the total number of images in a folder is less than 2,000 because the following types of images are always saved together into the same folder.
- Images from continuous shooting
- Self-timer images (custom)
- Stitch Assist mode images
- Color Accent and Color Swap still images. (When [Save Original] is set to [On])
● Images cannot be played back when the folder numbers are duplicated or image numbers are duplicated within folders.
- Please refer to the Software Starter Guide for information regarding folder structures or image types.
Please also see the Basic Camera User Guide (p. 18).

Magnifying Images

1
Press the zoom lever toward 🔒
- SE will display and a magnified portion of the image will display.
● Images can be magnified up to a factor of approximately 10x.
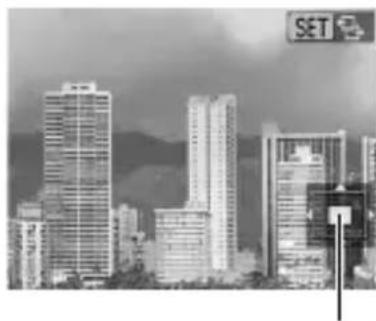
natural_image
Black-and-white cityscape featuring modern high-rise buildings with a visible 'SET' sign in the corner (no other text or symbols)Approximate Location of the Displayed Area
2
Use the ↑, ↓or← button to move around the image.
- If you press the FUNC./SET button while in magnified display, the camera switches to image advance mode and
SET ☐ will display. You can use the ◀ or button to advance to the next or previous image at the same level of magnification. The image advance mode is cancelled when you press the FUNC./SET button again.
● You can change the magnification level with the zoom lever.
To Cancel the Magnified Display
Press the zoom lever toward 📄You can also cancel it immediately by pressing the MENU button.)

Movie frames and index playback images cannot be magnified.

Viewing Images in Sets of Nine
(Index Playback)

1 Press the zoom lever toward
- Up to nine images can be viewed at once in index playback.
- Use the , or button to change the image selection.
Selected Image
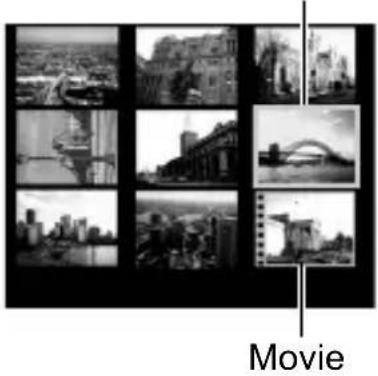
natural_image
Grid of black-and-white photos showing urban and rural landscapes, including a city skyline, bridge, and buildings (no text or symbols)Switching between Sets of Nine Images
The jump bar will display if you press the zoom lever toward ☐ while in index playback and you can switch the display between sets of nine images.
- Use the + or + button to move to the previous or next set of 9 images.
- Hold the FUNC./SET button down and press the ◆ or button to jump to the first or last set.
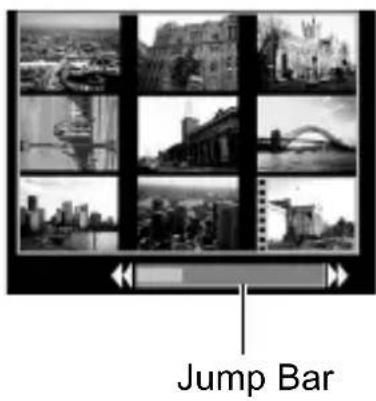
To Return to Single Image Playback
Press the zoom lever toward Q

Jumping to Images

When you have many images recorded onto a memory card, it is handy to use the five search keys below to jump over images to find the object of your search.
| Jump 10 Images Jumps over 10 images at a time. | |
| Jump 100 Images Jumps over 100 images at a time. | |
| Jump Shot Date Jumps to the first image of each shooting date. | |
| Jump to Movie Jumps to a movie. | |
| Jump to Folder Jumps to the first image of each folder. |
1
In single image playback mode, press the 📄 button.
● The camera will switch to jump search mode.
● The screen sample will vary slightly according to the search key.
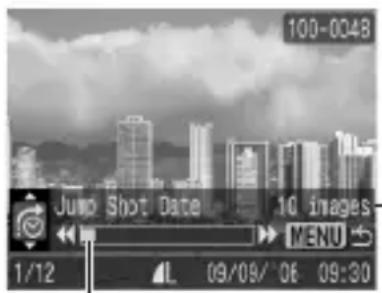
Location of image currently being displayed
Number of images matching search key
2
Use the ↕ or button to select a search key and press the ↕ or button.
To Return to Single Image Playback
Press the MENU button.
Viewing Movies


Movies cannot be played in the index playback mode.
1 Display a movie and press
- Images with aSETIcon are movies.
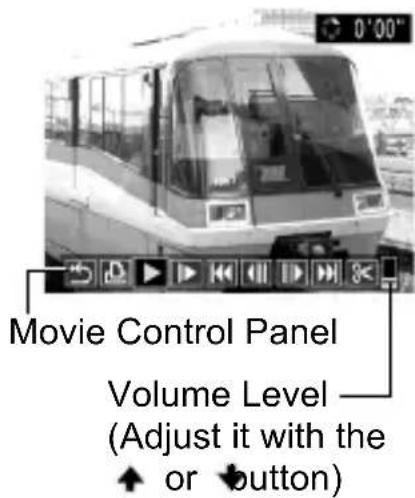
2 Select Play) and press .

● The movie will pause if you press the FUNC./SET button during playback. It will resume when you press the button again.
- When playback ends, the movie stops at the last frame displayed. Press the FUNC./SET button to display the movie control panel.
Operating the Movie Control Panel
| Ends playback and returns to single image playback | |
| Prints (An icon will display when a printer is connected. See the Direct Print User Guide for details.) | |
| Play | |
| Slow Motion Playback (You can use thebutton to slow down or thebutton to speed up playback.) | |
| Displays the first frame | |
| Previous Frame (Rewinds if theFUNC./SETbutton is held down.) | |
| Next Frame (Fast Forwards if theFUNC./SETbutton is held down.) | |
| Displays the last frame | |
| Edit (Switches to movie editing mode.) (p. 74) |

- Use the television's controls to adjust the volume when playing a movie on a TV set (p. 88).
● The sound cannot be played in slow motion playback.
Editing Movies

You can delete portions of recorded movies.

Movies that are protected or less than 1 second long cannot be edited.
1
Select Edit) in the movie control panel and press

● The movie editing panel and the movie editing bar will display.
Movie Editing Panel
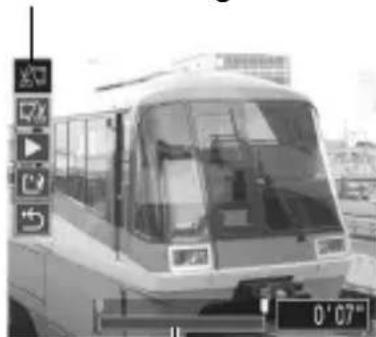
natural_image
Front view of a modern subway car with visible windows and side-mounted control buttons (no readable text or symbols)Movie Editing Bar
2
Use the ↑or button to select (Ct Beginning) or Cut End) and the o\* → button to specify the cut point ( ).
- To check a temporarily edited movie, select ▶(Play) and press the FUNC./SET button.
- Selecting (Exit) cancels the edit and restores the movie control panel.
3
Select Save) and press . FUNC. SET
4
Select [New File] or [Overwrite] and press
![Allview X3 Soul Mini - Select [New File] or [Overwrite] and press - 1](/content/2026/06/1176638/images/895710d73ed918c6b64280ee452dbcf3543b592e9df63793d48f9e4748d62709.jpg)
- [New File] saves the edited movie under a new file name. The pre-edit data is left unchanged.
Note, if you press the FUNC./SET
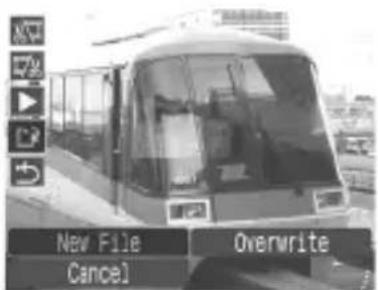
button while saving the movie, saving is cancelled.
● [Overwrite] saves the edited movie with its original name. The pre-edit data is lost.
- When there is not enough space left on the memory card, only [Overwrite] can be selected.
![Allview X3 Soul Mini - Select [New File] or [Overwrite] and press - 3](/content/2026/06/1176638/images/1309adee547d865eca10947240ea581934ce511e3bb4e6a96b703ef02b34d387.jpg)
It may take approximately 3 minutes to save an edited movie. If the batteries run out partway through, edited movie clips cannot be saved. When editing movies, it is recommended to use new AA-size alkaline batteries or fully charged AA-size NiNH batteries (sold separately) or the AC Adapter Kit ACK800 (sold separately) (p. 109).
Rotating Images in the Display

Images can be rotated clockwise 90^ or 270^ in the display.
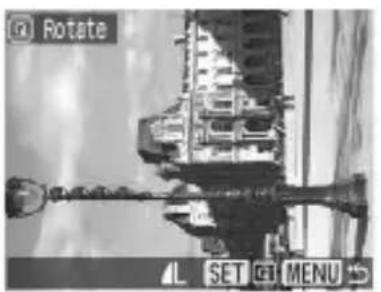
natural_image
Close-up of a mechanical component with rotating parts and a metallic shaft (no visible text or symbols)Original
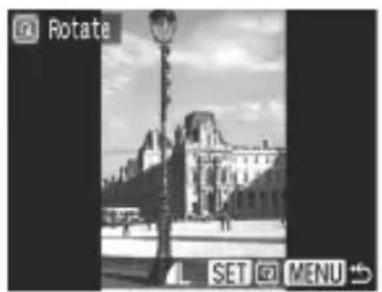
natural_image
Black-and-white street scene with historic building and lamppost under cloudy sky (no visible text or symbols)90^
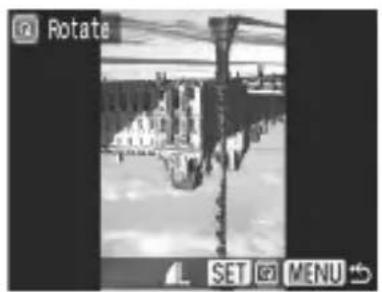
natural_image
Black and white photo of a cityscape with trees and buildings, no visible text or symbols270^
1
(Play) Menu
See Menus and Settings (p. 19).
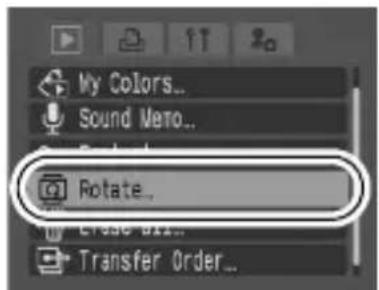
2
Use the ◀or button to select an image to rotate and press Ⓜto rotate it.
- Cycle through the 90°/270°/original orientations with each press of the FUNC./SET button.
● This also can be set in the index playback mode.

● Movies cannot be rotated.
- When images are downloaded to a computer, the orientation of images rotated by the camera will depend upon the software used to download the images.
Adding My Colors Effects

You can add effects to recorded images (stills only) using the My Colors function. The following selection of My Colors effects is available. For details, see p. 55.
 | Vivid Lighter Skin Tone |  | |
 | Neutral Darker Skin Tone |  | |
 | Sepia Vivid Blue |  | |
 | B/W Vivid Green |  | |
 | Positive Film Vivid Red |  |
1
(Play) Menu
See Menus and Settings (p. 19).
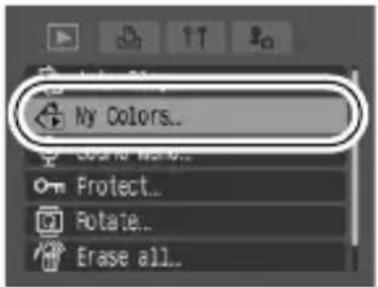
2
Use the ◀or button to select an image, and press FUNC.SET
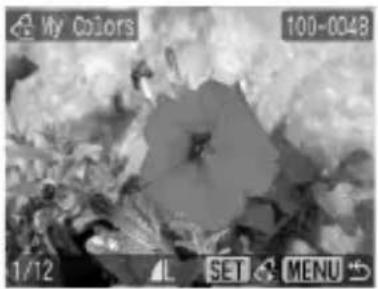
natural_image
Black and white photo of a flower with blurred background (no text or symbols)3 Use the ◀or button to select the My Colors type, and press ⒽUNC.SET
● The displayed image will reflect the My Colors effect.
- You can press the zoom lever toward Q to check the image at a higher magnification. While the image is zoomed, you can press the FUNC./
SET button to switch between the image transformed with the My Colors effect and the original non-transformed image.
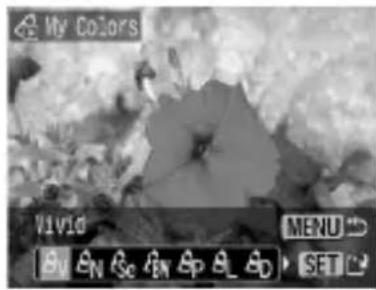
4 Select [OK], and press
- The newly saved image transformed with the My Colors effect will be the last one in the list.
- To continue adding effects to other images, repeat the procedures from Step 2 onward.
5 Press and select [Yes] or [No], then press
![Allview X3 Soul Mini - Press and select [Yes] or [No], then press - 1](/content/2026/06/1176638/images/08ec1ca67070be78bbb1e8678aa3161b6bd436020d470fd8fe38e580e70047df.jpg)
- Selecting [Yes] displays the image transformed with the My Colors effect, while [No] returns you to the Play menu.
![Allview X3 Soul Mini - Press and select [Yes] or [No], then press - 3](/content/2026/06/1176638/images/1daba122fde98e4b576357888eebb21af680ee0c8624c02a911bb971e2c0e03b.jpg)
- The My Colors function will not work if there is insufficient space on the memory card.
- Although My Colors effects can be added any number of times to an image, the image quality will gradually deteriorate with each application and the intended colors may not be achieved.
- Color in images taken using My Colors (p. 55) in shooting mode and images edited with the My Colors function in playback mode may differ slightly.
Attaching Sound Memos to Images

In playback mode (including single image playback and index playback), you can attach sound memos (up to 1 min.) to an image. The sound data is saved in the WAVE format.
1

See Menus and Settings (p. 19).
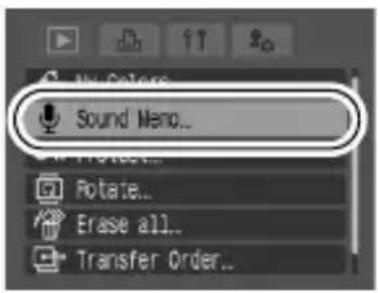
2
Use the or button to select an image to which to attach a sound memo and press

● The sound memo control panel will display.
3
Select (Record) and press .
● The elapsed time and the remaining time display.
- Pressing the FUNC./SET button pauses the recording. Pressing it again resumes recording.
- Up to 1 minute of recordings can be added to any one image.

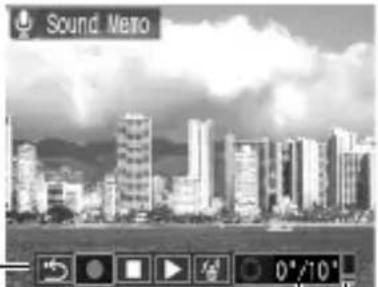
natural_image
Black-and-white cityscape photo with modern high-rise buildings and cloudy sky (no visible text or symbols)Sound Memo Panel
Elapsed Time/— Remaining Time
Volume
(Adjust it with the
or button)
Sound Memo Panel
| Exit | |
| Record | |
| Pause | |
| Play | |
| EraseSelect [Erase] in the confirmation screen and press the FUNC./SET button. |

● You cannot attach sound memos to movies.
● Sound memos for protected images cannot be erased.
Automated Playback (Auto Play)

Use this feature to automatically play back all of the images in the memory card. The LCD monitor displays each image for approximately 3 seconds.
1
(Play) Menu
See Menus and Settings (p. 19).
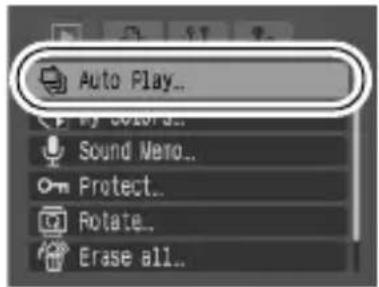
2
Press FUNC SET
● During automated playback, the following functions are possible:
- Pausing/resuming the Auto Play: Press the FUNC./SET button
- Fast forwarding/rewinding: Press the or button (hold down the button to switch between images more rapidly)
- Stopping the Auto Play: Press the MENU button
Protecting Images

You can protect important images and movies from accidental erasure.
1

See Menus and Settings (p. 19).
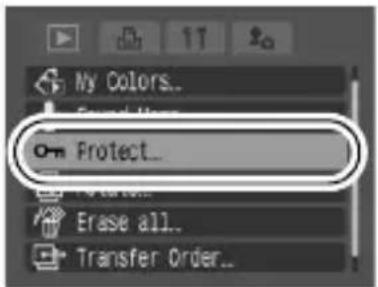
2
Use the or button to select an image to protect and press FUNC.SET
- Pressing the FUNC./SET button again cancels the setting.
- You can also protect images in the index playback mode.
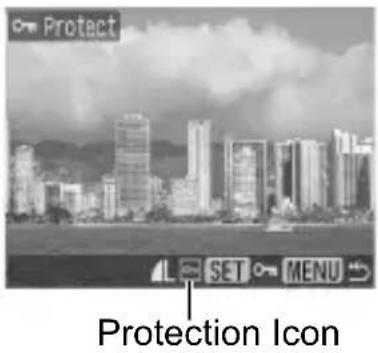
Erasing All Images


- Note that erased images cannot be recovered. Exercise adequate caution before erasing an image.
● Protected images cannot be erased with this function.
1
(Play) Menu
See Menus and Settings (p. 19).
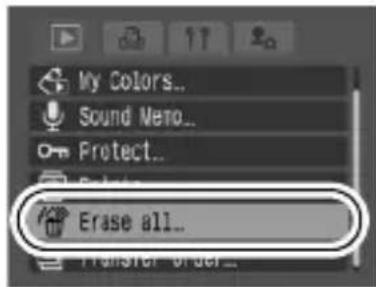
2
Select [OK] and press
![Allview X3 Soul Mini - Select [OK] and press - 1](/content/2026/06/1176638/images/c60d6395b8db2996fd19d797fbae334782171519598ed3adbebf649ff55a8342.jpg)
● To exit instead of erasing, select [Cancel].
![Allview X3 Soul Mini - Select [OK] and press - 2](/content/2026/06/1176638/images/d64f41c9658fcbda5253a2627dbc288e5ec48c499712337bf3b893db41176651.jpg)
Please format the memory card when you want to erase not only image data but also all the data contained on the memory card (p. 26).
Setting the DPOF Print Settings

You can select images on a memory card for printing and specify the number of print copies in advance using the camera. The settings used on the camera comply with the Digital Print Order Format (DPOF) standards. This is extremely convenient for printing on a direct print compatible printer, or for sending the images to a photo developing service that supports DPOF.
The 📄con may display for a memory card with print settings set by a different DPOF-compliant camera. These settings will be overwritten by those set by your camera.
Single Images
1

(Print) Menu [Select Image & Qty.] .
![Allview X3 Soul Mini - (Print) Menu [Select Image & Qty.] . - 1](/content/2026/06/1176638/images/c94516a1cd9f432871c05e99e422c8a9efa61cbc9ce71469d1a26600092e4e0f.jpg)
![Allview X3 Soul Mini - (Print) Menu [Select Image & Qty.] . - 2](/content/2026/06/1176638/images/4465b39e9173b5b62ef229c02cfcd56177db033ef2814d77c6fd2d6d1171fc53.jpg)
See Menus and Settings (p. 19).
- Selecting [Clear All Selections] cancels all print settings.
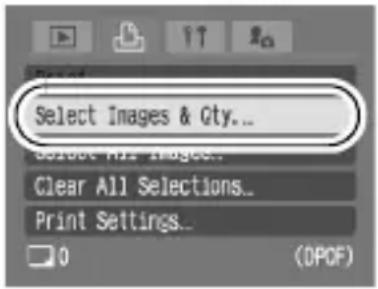
2 Use the ← or button to select images for printing.
- Selection methods differ for the Print Type settings (p. 85).
- standard)/ (Bo)
Select an image, press the FUNC./SET button and use the ↗ or ↓ button to select the number of print copies (up to 99).
Number of Print Copies
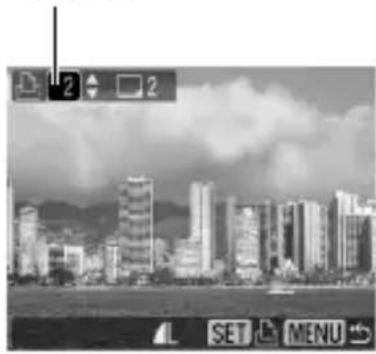
natural_image
Black-and-white cityscape photo with modern high-rise buildings and cloudy sky (no visible text or symbols)- (Index)
Select an image and press the FUNC./SET button to select or deselect it.
- You can also select images in the index playback mode.
- If the camera is connected to a printer, the button will light in blue while
images are being selected. At this time, press the button, confirm that [Print] is selected, and when the FUNC./SET button is pressed, printing will begin.
Index Print Selection
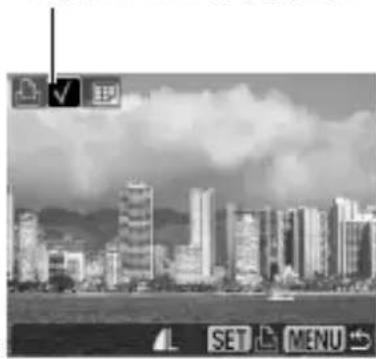
natural_image
Black-and-white cityscape photo showing modern high-rise buildings with a cloudy sky in the background (no visible text or symbols)All the Images on a Memory Card
1 (Print) Menu [Select All Images].
See Menus and Settings (p. 19).
● One copy of every image will be set to print.
- Selecting [Clear All Selections] cancels all print settings
- When the camera is connected to a printer, the button will light blue. At this time, press the button, confirm that [Print] is selected, and when the FUNC./SET button is pressed, printing will begin.
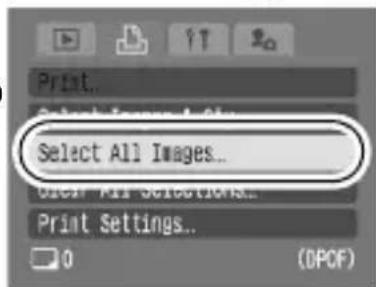
2 Select [OK] and press FUNC. SET
![Allview X3 Soul Mini - Select [OK] and press FUNC. SET - 1](/content/2026/06/1176638/images/004afb5884ccca139d9d3a71fbe3dcc18c2b96312d8ee2bd1872192a81fb936d.jpg)
● The output of some printers or photo developing services may not reflect the specified print settings.
● Print settings cannot be set for movies.
![Allview X3 Soul Mini - Select [OK] and press FUNC. SET - 2](/content/2026/06/1176638/images/0d84bbbb9181c24c801bbaea64f85e70a530dec44b4cb3d140ca2a00cf863f0a.jpg)
● Images are printed in order according to the file number.
● A maximum of 998 images can be selected.
- When [Print Type] is set to [Both], the number of copies can be set. When it is set to [Index], the number of copies cannot be set (only one copy will be printed).
Setting the Print Style
After setting the print style, select the images for printing. The following settings can be selected.
*Default setting
| Print Type | Standard* | Prints one image per page. | |
| Index | Prints the selected images together at a reduced size in an index format. | ||
| Both | Prints the images in both the standard and index formats. | ||
 | Date (On/Off*) Adds the date to the print. | ||
 | File No. (On/Off*) Adds the file number to the print. | ||
| Clear DPOF data (On*/Off) | Clears all print settings after the images print. | ||
1

(Print) Menu [Print Settings]
See Menus and Settings (p. 19).
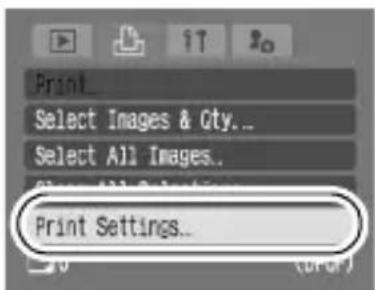
2
Use the ↗ or button to select [Print Type], [Date], [File No.], [Clear DPOF data] and then use the ↕ or button specify the settings.

- The Date and File No. settings change according to the Print Type as follows.
- Index
[Date] and [File No.] cannot be set to [On] at the same time.
- Standard or Both
[Date] and [File No.] can be set to [On] at the same time, however, the printable information may vary between printers.
- Images dated using (Postcard Date Imprint mode) (p. 33) are always printed with the date, regardless of the [Date] setting. As a result, if [Date] is also set to [On], the date will end up being printed twice on these images.
- Dates print in the style specified in the [Date/Time] menu (p. 22, Basic Guide p. 7).
Setting the DPOF Transfer Settings

You can use the camera to specify settings for images before downloading to a computer. Refer to the Software Starter Guide for instructions on how to transfer images to your computer.
The settings used on the camera comply with the Digital Print Order Format (DPOF) standards.
The icon may display for a memory card with transfer settings set by a different DPOF-compliant camera. These settings will be overwritten by those set by your camera.
1

(Play) Menu



See Menus and Settings (p. 19).
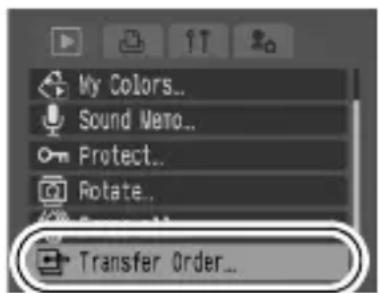
Single Images
2 Select [Order] and press
![Allview X3 Soul Mini - Select [Order] and press - 1](/content/2026/06/1176638/images/83deb52035a4b74cdeed9546be6b178e092aef6556a3fee06ff99465a605d0e5.jpg)
- Selecting [Reset] cancels all transfer order settings.
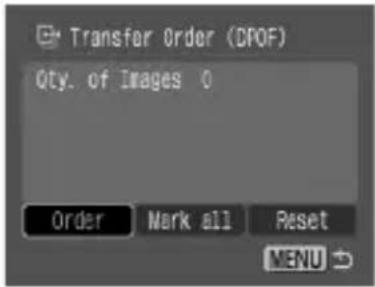
3 Use the or button to select an image to transfer and press FUNC.SET
- Pressing the FUNC./SET button again deselects the setting.
- You can also select images in the index playback mode.
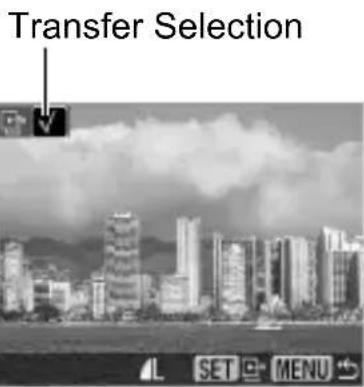
All the Images on a Memory Card
2 Select [Mark all] and press
![Allview X3 Soul Mini - Select [Mark all] and press - 1](/content/2026/06/1176638/images/b544228138eb4e4defbd9ae7db0ffce44bff0210163d6e74412307fb3ffc6f65.jpg)
- Selecting [Reset] cancels all transfer order settings.
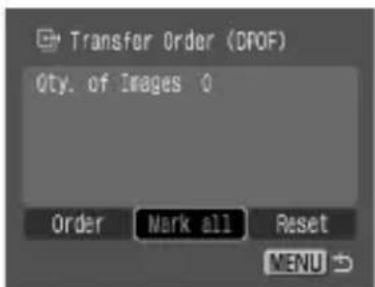
3 Select [OK] and press
![Allview X3 Soul Mini - Select [OK] and press - 1](/content/2026/06/1176638/images/60f022e8b1f975ea8d4ce59ca5ffb4cece59a5f382e7f067a0a78b5852947863.jpg)
![Allview X3 Soul Mini - Select [OK] and press - 2](/content/2026/06/1176638/images/b965913a8cf555d2113eb2b36ceb3315c8d2b1aca3c79ee3d615f94d6bae5295.jpg)
● Images are transferred in order according to the file number.
● A maximum of 998 images can be selected.
Viewing Images on a TV set
You can shoot or play back images on a television with the supplied AV cable.
1 Turn off the camera and the TV.
2 Connect the AV cable to the camera's A/V OUT terminal.
- Open the terminal cover by slipping a fingernail under the right edge and plug the AV cable in all the way.
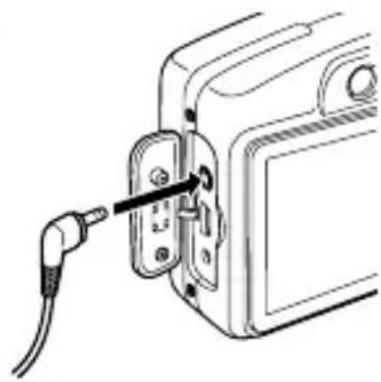
natural_image
Line drawing of a cable inserted into a device with a connector (no text or symbols)3 Plug the other ends of the AV cable to the VIDEO IN and AUDIO IN jacks on the TV.
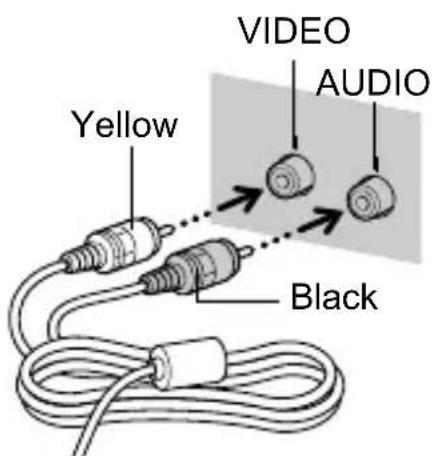
4 Turn on the TV and switch it to video mode.
5 Turn on the camera.

The video output signal can be switched (NTSC or PAL) to accommodate different regional standards (p. 23). The default setting varies between regions.
- NTSC: Japan, U.S.A., Canada, Taiwan and others
- PAL: Europe, Asia (excluding Taiwan), Oceania and others If the video system is set incorrectly, the camera output may not display properly.
Camera
Camera will not operate.
| Power is not turned on. | ● Press the power button (Basic Guide p. 8). |
| Memory card slot/battery cover is open. | ● Confirm that the memory card slot /battery cover is securely closed (Basic Guide p. 5). |
| Batteries are loaded in the wrong direction. | ● Reload the batteries in the correct direction (Basic Guide p. 5). |
| Batteries are not the right type. | ● Use only unused AA-size alkaline batteries or Canon AA-size NiMH batteries (p. 103). |
| Battery charge is low and the camera will not operate. (“Change the batteries” message displays). | ● Replace the camera batteries with 2 unused or fully charged batteries (p. 103).● Use the AC Adapter Kit ACK800 (sold separately) (p. 109). |
| Poor contact between camera and battery terminals. | ● Wipe the battery terminals with a clean dry cloth.● Reload the batteries several times. |
Sounds come from the camera interior.
| The camera’s horizontal/ vertical orientation was changed. | ● The camera’s orientation mechanism is operating. There is no malfunction. |
When the power is turned on
"Card locked!" message appears.
The SD memory card's or SDHC memory card's write protect tab is set to "Write protect".
- When recording to, erasing from or formatting the memory card, slide the write protect tab upward (p. 105).
The Date/Time menu appears.
The lithium date/time battery charge is depleted.
- Replace the lithium date/time battery (p. 116).
LCD monitor
The display darkens.
The image in the LCD monitor will darken in strong sunlight or bright light.
- This is a normal occurrence in devices containing CCDs and does not constitute a malfunction. This image will not be recorded when shooting still photos, but it will be recorded when shooting movies.
Display flickers.
Display flickers when shot under fluorescent lighting.
- This is not a camera malfunction (flickering recorded in movies, but not in still images).
A bar of light (red, purple) appears on the LCD monitor.
Sometimes appears when shooting a bright subject, such as the sun or other light source.
- This is a normal occurrence in devices containing CCDs and does not constitute a malfunction. This bar of light will not be recorded when shooting still photos, but it will be recorded when shooting movies.

appears.
A slow shutter speed has likely been selected because of insufficient lighting.
- Set the IS Mode to any setting other than [Off] (p. 28).
- Raise the ISO speed (p. 62) or set the flash to any setting other than (flash off) (Basic Guide p. 12), or secure the camera to something, such as a tripod.

appears.
This displays when using a memory card that has print settings or transfer settings set by other DPOF-compliant cameras.
● These settings will be overwritten by those set by your camera (p. 83).
Noise displays./Subject's movements are irregular.
Camera automatically lightened the image displayed on the LCD monitor to make it easier to see when shooting in a dark area (p. 12).
- There is no effect on the recorded image.
Shooting
Camera will not record.
| Mode switch is set to ( playback). | ● Set the mode switch to (shooting) (Basic Guide p. 8). |
| Flash is charging. ● When | the flash is charged, the indicator will light orange.Shooting is now possible (Basic Guide p. 4). |
| Memory card is full. | ● Insert a new memory card (Basic Guide p. 5).● If required, download the images to a computer and erase them from the memory card to make space. |
| Memory card is not formatted correctly. | ● Format the memory card (p. 26).● If reformatting does not work, the memory card logic circuits may be damaged. Consult the nearest Canon Customer Support Help Desk. |
SD memory card or SDHC memory card is write protected.
- Slide the write protect tab upward (p. 105).
Image Seen in viewfinder vs. recorded image
Usually the recorded image contains more of the scene than is seen in the viewfinder.
- Confirm the actual image size with the LCD monitor. Use the LCD monitor when taking close-up shots (p. 12).
Image is blurred or out of focus.
AF-assist Beam is set to [Off].
- In dark places where it is difficult for the camera to focus, the AF-assist Beam will emit to assist focusing. As the AF-assist Beam will not function when turned off, set it [On] to activate it (p. 20). Take care not to obstruct the AF-assist Beam with your hand when used.
The camera moves when the shutter button is pressed.
- Set the IS Mode to any setting other than [Off] (p. 28).
- Setting the self-timer to seconds) delays the shutter release for 2 seconds after the shutter button is pressed and allows the camera to stop shaking, thus preventing a blurred image (Basic Guide p. 16). Even better results can be obtained by placing the camera on a stable surface or by using a tripod to shoot.
Subject is out of focal range.
● Shoot with the subject at the correct shooting distance (p. 119).
The subject is hard to focus on.
- Use the focus lock, AF lock or manual focus to shoot (p. 46).
Subject in recorded image is too dark.
| Insufficient light for shooting. | ● Set the flash to 📋 (Flash on) (Basic Guide p. 12). |
| The subject is underexposed because the surroundings are too bright. | ● Set the exposure compensation to a positive (+) setting (p. 51).● Use the AE lock or spot metering functions (pp. 48, 50). |
| Subject is too far away for flash to reach. | ● Shoot within correct shooting distance of the subject when using the built-in flash (p. 120).● Raise the ISO speed and then shoot (p. 62). |
Subject in recorded image is too bright, or image flashes white.
| Subject is too close, making the flash too strong. | ● Shoot within correct shooting distance of the subject when using the built-in flash (p. 120). |
| The subject is overexposed because the surroundings are too dark. | ● Set the exposure compensation to a negative (−) setting (p. 51).● Use the AE lock or spot metering functions (pp. 48, 50). |
| Too much light is shining directly into the camera, or is being reflected off the subject. | ● Change the shooting angle. |
| Flash is set to on. ● Set the flash to (Flash d)(Basic Guide p. 12). | |
Image contains noise.
ISO speed is too high. ● Higher ISO speeds and (High
ISO Auto) setting may increase image noise. For higher image quality, use as low an ISO speed as possible (p. 62).
- In A 20 10 A 3nd modes in the mode, the ISO speed increases and noise can appear.
White dots appear on the image.
Light from the flash has reflected off dust particles or insects in the air. This is particularly noticeable when shooting using the wide angle or when you increase the aperture value in the aperture-priority AE mode.
● This is a phenomenon that occurs with digital cameras and does not constitute a malfunction.
Eyes appear red.
Light is reflected back from the eyes when the flash is used in dark areas.
- Use the (red-eye reduction) mode (Basic Guide p. 12). For this mode to be effective, the subject must be looking right at the red-eye reduction lamp. Try asking them to look directly at the lamp.
- Even better results can be obtained by increasing the lighting in indoor settings or approaching closer to the subject. The shutter will not activate for approximately 1 second after the red-eye reduction lamp fires in order to improve the effect.
Continuous shooting slows down.
The memory card's performance has dropped.
- To enhance the continuous shooting performance, you are recommended to format the memory card in the camera after you save all its images to your computer (p. 26).
Recording images to memory card takes a long time.
Memory card was formatted in another device.
- Use a memory card formatted in your camera (p. 26).
Lens will not retract.
Memory card slot/battery cover was opened with power on.
● After closing the memory card slot/battery cover, turn the power on then back off (Basic Guide p. 5).
Shooting movies
The recording time may not display properly or shooting may stop unexpectedly.
The following types of memory cards are used.
- Slow recording cards.
- Cards formatted on a different camera or a computer.
- Cards which have had images recorded and erased repeatedly.
- Although the recording time may not display properly during shooting, the movie will be recorded correctly on the memory card. Recording time will display properly if you format the memory card in this camera (excluding slow recording memory cards) (p. 26).
“!” displayed on the LCD monitor in red and shooting automatically stopped.
There is insufficient free space in the camera's built-in memory.
● Try the following procedures.
- Format the card with a low level format before shooting (p. 26)
- Lower the recording pixels or the frame rate (p. 37)
- Use a high-speed memory card (SDC-512MSH, etc.)
Zoom does not operate.
Zoom lever was pressed while shooting in movie mode.
- Operate the zoom before shooting in movie mode (Basic Guide p. 12). Note the digital zoom is available while shooting, but only in Standard movie mode.
Playback
Cannot play back.
You attempted to play back images shot with another camera or images edited with a computer.
- Computer images that cannot be played back will play back if they are added to the camera using the supplied software program ZoomBrowser EX or ImageBrowser.
File name was changed with a computer or file location was changed.
- Set the file name or location on the file format/structure of the camera. (Refer to the Software Starter Guide for details).
Movies cannot be edited.
Some movies shot with another camera cannot be edited.
Movies do not play back correctly.
Movies recorded with high recording pixels and frame rates may momentarily stop playing if played on slow reading memory cards.
You may experience frame dropping and audio breakup when playing back a movie on a computer with insufficient system resources.
Movies recorded at the (Fast Frame Rate) setting and with the video signal set to the PAL format, may play back with a frame rate lower than the recorded one when output to a TV or video. You can play every frame by using the slow motion playback.
- To check the images at the original frame rate, you are recommended to play the movie back on the camera's LCD monitor or on a computer.
Reading images from memory card is slow.
Memory card was formatted in another device.
- Use a memory card formatted in your camera (p. 26).
Battery
Batteries consumed quickly.
| Batteries are not the right type. | ● Use only unused AA-size alkaline batteries or Canon AA-size NiMH batteries (p. 103). |
| Battery capacity drops due to low ambient temperatures. | ● If shooting in a cold location, warm the batteries such as by placing them in your pocket before using them. |
| Battery terminals are dirty. ● | Wipe the terminals well with a dry cloth before use. ● Reload the batteries several times. |
If using Canon AA-size NiMH batteries
| As the batteries have not been used for over a year, their recharging capacity has decreased. | ● Their charging performance should return to normal after fully recharging and fully depleting them over several times. |
| Battery life has been exceeded. | ● Replace both batteries with new ones. |
TV monitor output
Image is distorted or not showing on TV monitor.
| Incorrect video system setting. | ● Set the video system to the appropriate setting, NTSC or PAL, for your TV (p. 23). |
| Shooting in Stitch Assist mode. | ● The output will not appear on a TV in Stitch Assist mode. Shoot in a different shooting mode (Basic Guide p. 9). |
Printing with a direct print compatible printer
Cannot print
| The camera and printer are not properly connected. | ● Securely connect the camera and printer with the specified cable. |
| The printer power is not turned on. | ● Turn on the printer power. |
| The print connection method is not correct. | ● In them (Set up) menu, select [Print Method] and select [Auto] (p. 23). |
List of Messages
The following messages may appear on the LCD monitor during shooting or playback. Please refer to the Direct Print User Guide for the messages that display during a printer connection.
Busy...
Image is being recorded to, or read from, memory card. The playback mode is starting up.
No memory card
You turned on the camera without a memory card installed, or with a memory card installed in the wrong orientation (Basic Guide p. 5).
Card locked!
The SD memory card or SDHC memory card is write-protected.
Cannot record!
You attempted to shoot an image without a memory card installed, with a memory card installed in the wrong orientation, or attempted to attach a sound memo to a movie.
Memory card error
There may be something wrong with the memory card. By formatting the malfunctioning memory card with the camera, you may be able to continue using it. However, if this error message appears even when using the supplied memory card, contact your Canon Customer Support Help Desk as there may be a problem with the camera.
Memory card full
Memory card is full of images and no more can be recorded or saved. Or no more image settings or sound memos can be recorded.
Naming error!
The image could not be created because there is an image with the same name as the folder that the camera is attempting to create, or the highest possible file number has already been reached. In the Set up menu, set [File Numbering] to [Auto Reset]; alternatively, save all the images you wish to retain onto a computer, then reformat the memory card. Please note that formatting will erase all the existing images and other data.
Change the batteries
Battery charge is insufficient to operate the camera. Replace both batteries immediately with unused AA-size alkaline batteries or fully charged Canon AA-size NiMH batteries.
No image
No images recorded on memory card.
Image too large
You attempted to play back an image larger than 4992 x 3328 pixels or with a large data size.
Incompatible JPEG format
You attempted to play back an incompatible JPEG image (edited with a computer, etc.).
RAW
You attempted to play back a RAW image.
Unidentified Image
You attempted to play back an image with corrupted data, an image with a recording type specific to another manufacturer's camera, or an image that has been downloaded to a computer and altered.
Cannot magnify!
You attempted to magnify an image recorded in a different camera or data type, an image edited with a computer, or a movie.
Cannot rotate
You attempted to rotate an image recorded in a different camera or data type, an image edited with a computer, or a movie.
Incompatible WAVE format.
A sound memo cannot be added to this image since the data type of the existing sound memo is incorrect.
Cannot modify image
You attempted to apply a My Colors effect to a movie or an image recorded in a different camera.
Cannot transfer!
When transferring images to your computer using the Direct Transfer menu, you attempted to select an image with corrupted data or an image taken with another camera. You may have also attempted to select a movie when [Wallpaper] was selected in the Direct Transfer menu.
Protected!
You attempted to erase or edit a protected image, movie or sound memo.
Too many marks
Too many images have been marked with print settings or transfer settings. Cannot process any more.
Cannot complete!
Could not save the print or transfer settings.
Unselectable image
You attempted to set the print settings for a non-JPEG image.
Communication error
The computer was unable to download the image due to the large amount of images (approx. 1000) stored on the memory card.
Lens error, restart camera
An error was detected while the lens was in motion, and the power has been automatically turned off. This error can occur if you hold the lens while it is in motion or you operate it in a location with excessive dust or sand in the air. Try turning the power back on, and resume shooting or playback. If this message continues to display, contact your Canon Customer Support Help Desk as there may be a problem with the lens.
Exx
(xx: number) Camera detected error. Turn the power off and then back on, then shoot or play back. A problem exists if the error code reappears. Note the number and contact your Canon Customer Support Help Desk. If an error code displays directly after taking a picture, the shot may not have been recorded. Check image in playback mode.
Battery Handling
Battery Charge
The following icon and message will display.

Battery charge is low. If using the camera for an extended period, replace the batteries as soon as possible.
Change the batteries
Batteries are fully depleted and the camera can no longer operate. Replace the batteries immediately.
Battery Handling Precautions
- This camera uses AA-size alkaline batteries or Canon AA-size NiMH batteries (sold separately).
While it is possible to use AA-size nickel-cadmium batteries, performance is unreliable and their use is not recommended. - Since the performance of alkaline batteries may differ according to brand, the operating time of the batteries you purchase may not be as long as the batteries that came with the camera.
- When using the camera under low temperature conditions or over long periods, you are recommend to use of Canon AA-size NiMH batteries (sold separately).
Camera operating time may shorten at low temperatures when alkaline batteries are used. Also due to their specifications, alkaline batteries may expire faster than NiMH batteries.
● Never mix unused and partially used batteries.
The partially used batteries may leak. - Do not install the batteries with their terminals (⊕ and)⊖ reversed.
-
Do not mix batteries of different types or from different manufacturers.
-
Before installing the batteries, wipe the battery terminals well with a dry cloth.
If the battery terminals are soiled with oil from one's skin or other dirt, the number of recordable images may be considerably diminished, or reduced usage time. - At low temperatures, battery performance may be reduced and the low battery icon (i) may appear earlier than usual.
Under these conditions, restore the battery performance by warming it in a pocket immediately before use. - Do not put the batteries into a pocket together with metallic items such as a key ring.
The batteries may be short circuited. - When not using the camera for long periods, remove the batteries from the camera and store them separately.
If the batteries are left inside the camera, the camera may become damaged from battery leakage.

WARNING
Never use damaged batteries or batteries whose outer seal is completely or partially missing or peeled off, as there is risk that such batteries may leak, overheat, or burst. Always check the seals on store-bought batteries before loading them, as some batteries may come with defective seals. Do not use batteries with defective seals.
Never use batteries that look like this.

Batteries with all or part of the seal (electrical insulation sheath) peeled off.
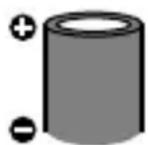
The positive electrode (plus terminal) is flat.
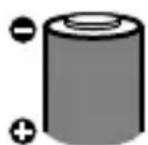
The negative terminal is correctly formed (protruding from the metal base), but the seal does not extend up over the edge of the metal base.
Handling the Memory Card
SD memory card or SDHC memory card Write Protect Tab
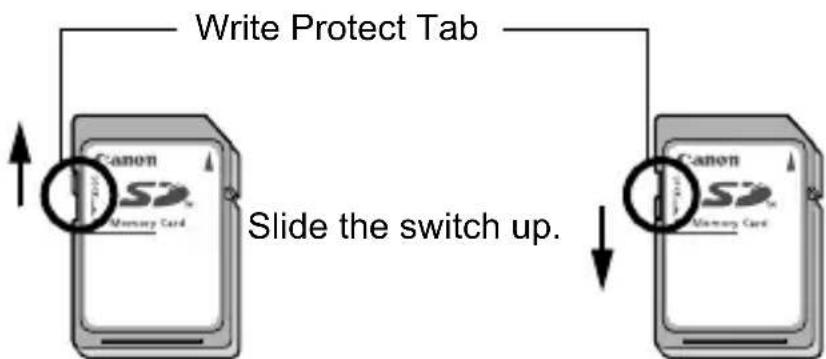
Slide the switch down (you can protect the images and other data on the card)
Writing/Erasing Possible Writing/Erasing Impossible
Cautions When Handling
● Memory cards are high-precision electronic devices. Do not bend them, apply force to them, or subject them to shocks or vibration.
- Do not attempt to disassemble or alter the memory card.
- Do not allow dirt, water or foreign objects to contact the terminals on the back of the card. Do not touch the terminals with your hands or metal objects.
- Do not peel away the original label on the memory card or cover it with another label or sticker.
- When writing on the memory card, do not use a pencil or ball-point pen. Only use a soft point pen (e.g. felt-tip pen).
- Do not use or store memory cards in the following locations.
- Locations subject to dust or sand
- Locations subject to high humidity and high temperatures
- Since some or all of the data recorded on the memory card may be corrupted or erased by electrical noise, static electricity or card malfunction, making a backup copy of important data is recommended.
Formatting
- Please note that formatting (initializing) an memory card erases all data, including protected images.
- You are recommended to use memory cards that have been formatted in your camera.
- The card supplied with the camera may be used without further formatting.
- When the camera is malfunctioning, a corrupted memory card might be the cause. Reformatting the memory card may solve the problem.
- When a non-Canon brand memory card is malfunctioning, reformatting it may solve the problem.
- Memory cards formatted in other cameras, computers, or peripheral devices may not operate correctly in this camera. When that happens, reformat the memory card with this camera.
- If formatting in the camera does not work properly, turn the camera off and re-insert the memory card. Then turn the camera back on and format again.
- Be careful when transferring or disposing of a memory card. Formatting or erasing the data on a memory card merely changes the file management information on the card and does not ensure that its contents are completely deleted.
When disposing of a memory card, take precautions, such as physically destroying the card, to prevent personal information leaks.
Using the Power Kits (Sold Separately)
Using Rechargeable Batteries (Battery and Charger Kit CBK4-300)
This kit includes a battery charger and four rechargeable AA-size NiMH (nickel metal hydride) batteries. Charge batteries as shown below. Recharging is also possible using two batteries.
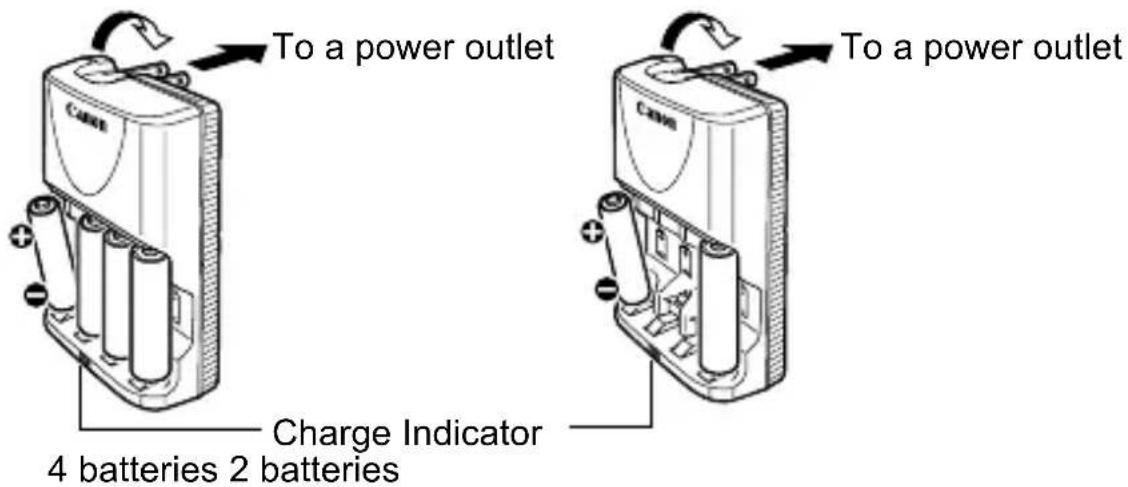
• After inserting the batteries, plug the charger (CB-5AH) into an outlet, or attach the power cord to the charger (CB-5AHE, not shown) and plug the other end into an outlet.
- Do not insert and charge additional batteries once charging has begun.
- The charge indicator blinks while charging, then remains lit when charging is finished.

- The CB-5AH/CB-5AHE battery charger can only be used to charge Canon AA-size NiMH batteries NB-3AH and NB-2AH. Please do not attempt to charge other type of battery.
- Do not mix batteries with different purchase dates or different charge states. When recharging batteries, always recharge both of them at the same time.
- Do not attempt to recharge fully charged batteries, as doing so may reduce or impair battery performance. Also, do not charge batteries for more than 24 consecutive hours.
- Do not recharge batteries in enclosed areas that tend to retain heat.
- Do not recharge the batteries until the LCD monitor displays the “Change the batteries” message. Repeatedly recharging batteries before they become fully depleted may cause batteries to lose capacity.
- Wipe the battery terminals well with a dry cloth in the following situations, as the terminals may be soiled with oil from one's skin or other dirt:
- If the battery usage time has considerably diminished
- If the number of recordable images has considerably diminished
- When charging the batteries (insert and remove the batteries two or three times before charging)
- When charging completes in a space of a few minutes (the battery charger indicator remains lit)
- You may not be able to fully charge the batteries due to their specifications right after purchase or after long periods of nonuse. If this happens, after fully charging them, use the batteries until their charge is depleted. After doing this several times, battery performance will be restored.
- If you store batteries for a long period of time (about 1 year), it is recommended that you fully deplete the batteries in the camera and to then store them at room temperature (0 to 30°C/32 to 90°F) in low humidity. Storing them in a fully charged condition can shorten their lifespan or degrade their performance.
Again, if you do not use batteries for more than 1 year, fully charge them once a year and deplete them in the camera before storing them.
- If the battery usage time has become considerably low despite wiping the terminals and charging them until the battery charger indicator remains lit, this may indicate that the batteries have reached the end of their lifespan.
Replace them with new batteries. If you are purchasing new batteries, look for Canon AA-size NiMH batteries.
● Leaving batteries in the camera or charger may result in damage from battery leakage. When not in use, remove the batteries from the camera or charger and store them in a cool, dry location.

- It takes approximately 4 hours 40 minutes for the charger to fully recharge the batteries after they have been depleted.
When two batteries are placed on each side of the charger, recharging will take approximately two hours (as determined by testing at Canon facilities).
Charge batteries in an environment where the temperature is in the range of 0 to 35°C (32 to 95°F).
● The charging time varies according to the ambient temperature and to the battery charge state.
- The battery charger may emit noise while charging. This is not a malfunction.
● Battery/Charger Kit CBK4-200 can also be used.
Using the AC Adapter Kit ACK800
It is best to power the camera with AC Adapter Kit ACK800 (sold separately) when you are using it for long periods of time or connecting it to a computer.

Turn the camera power off before connecting or disconnecting the AC adapter.
1
Connect the power cord to the compact power adapter first and then plug the other end into the power outlet.
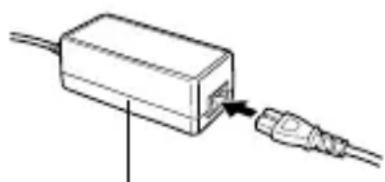
natural_image
Simple line drawing of a rectangular device connected to a cable with an attached plug (no text or symbols)Compact Power Adapter CA-PS800
2
Open the terminal cover and attach the cord to the DC IN terminal.
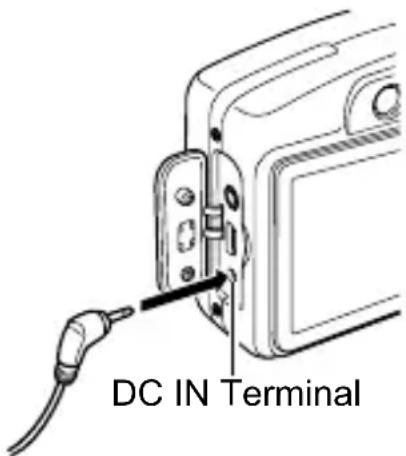
Using the Lenses (Sold Separately)
The camera supports use of the separately sold Wide Converter WC-DC58N, Tele-converter TC-DC58N and Close-up lens 250D (58mm). In order to attach these lenses, you also need to use the separately sold Conversion Lens Adapter LA-DC58G.

- When attaching the wide converter, tele-converter or close-up lens be sure to screw it on securely. If they come loose, they may fall from the lens adapter, posing risk of injury from shattered glass.
- Never look into the sun or into strong light through the wide converter, tele-converter or close-up lens as this can result in blindness or impairment of vision.

- If you use the flash when shooting with these attachments, the outer area of the recorded image (especially lower right corner) will come out relatively dark.
- When using the tele-converter, please set the focal length to the telephoto end. At other zoom settings, the image will appear as if its corners have been cut off.
- When using the wide converter, please set the camera to the wide angle end.
- If you use the viewfinder for shooting, a portion of the view will be blocked by these attachments. Please use the LCD monitor.
■Wide Converter WC-DC58N
Use this converter for taking wide-angle shots. The wide converter changes the focal length of the camera body's lens by a factor of 0.7x (the thread diameter is 58 mm).
■Tele-converter TC-DC58N
This lens is used for taking telephoto shots. The lens changes the focal length of the camera body's lens by a factor of 1.75x. (the thread diameter is 58 mm).

It is not possible to attach a lens hood or filter to the wide converter or tele-converter.
■Close-up lens 250D (58mm)
This lens makes taking macro shots easy. In the normal mode, close-up shots can be taken when the distance from the front of the lens to the subject is 18 to 25cm (7.1 to 9.8 in.) at maximum telephoto.
Shooting area (during macro mode)
| Distance from the front of the lens to the subject | Shooting area | |
| Telephoto end | 18 cm (7.1 in.) | 36 X 27 mm (1.4 X 1.1 in.) |
■Conversion Lens Adapter LA-DC58G
This is a lens adapter required for attaching the wide converter, tele-converter and close-up lens.
It can be separated into front and rear sections.
- To attach the Wide Converter WC-DC58N, or Tele-converter TC-DC58N.
Detach the front section of the conversion lens adapter, and attach only the rear section to the camera.
● To attach the Close-up lens 250D
Attach the conversion lens adapter to the camera with the front and rear sections combined.
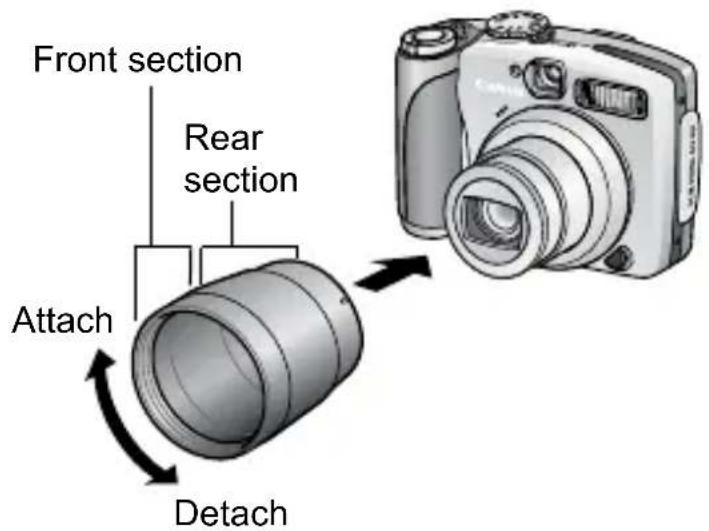
Attaching a Lens
1 Be sure that the camera is turned off.
2 Press the ring release button and hold it down, and turn the ring in the direction of the arrow.
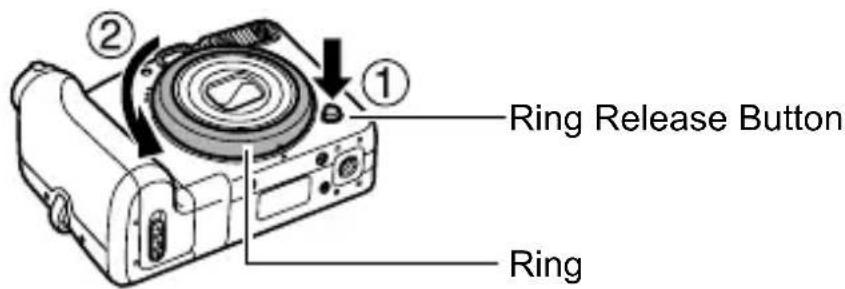
3 When the mark on the camera and the mark on the ring are aligned, lift off the ring.
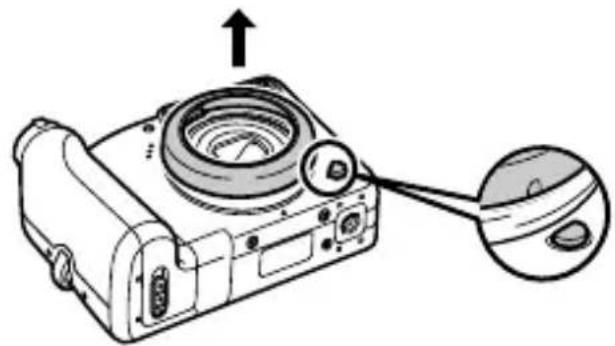
natural_image
Diagram of a camera with an arrow pointing to the top view of the lens (no text or symbols present)4 Detach the front section of the conversion lens adapter (p. 111).
- When using the close-up lens, attach the conversion lens adapter to the camera with the front and rear sections combined.
5 Align the ● mark on the conversion lens adapter with the Ⓞ mark on the camera, and turn the adapter in the direction of the arrows as far as the △ mark on the camera.
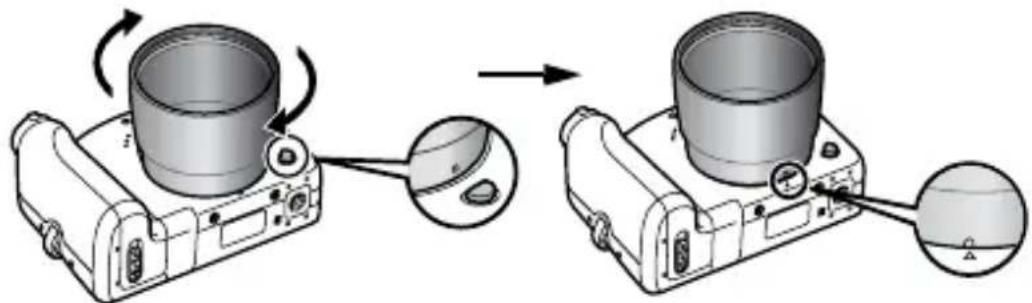
natural_image
Diagram showing a device being processed with a cylindrical component, illustrating the process (no text or symbols present)● To remove the conversion lens adapter, turn the adapter in the opposite direction with holding down the ring release button.
6
Set the lens on the adapter, and turn it in the indicated direction to attach it securely.
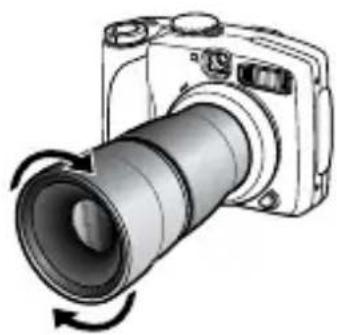
natural_image
Illustration of a digital camera with a lens and rotating button (no text or symbols)
- Completely remove all dust and dirt from conversion lenses with a lens blower brush before use. The camera may focus on any dirt that remains.
- Be careful when handling the lenses since it is easy to get finger prints on them.
- Be careful not to drop the camera or adapter when removing the ring.
- When using these lens attachments, you should not shoot images in mode. It will not be possible to use the PhotoStitch software from your computer to accurately stitch the images together.
Converter Settings
Settings for when shooting using [IS Mode] (p. 28) with the separately sold Wide Converter WC-DC58N, Tele-converter TC-DC58N or Close-up lens 250D attached.
1
(Rec.) Menu [Converter] [Off]\*/ [WC-DC58N]/[TC-DC58N]/[250D].
See Menus and Settings (p. 19)
* Default setting.
- Select the attached converter.
![Allview X3 Soul Mini - (Rec.) Menu [Converter] [Off]\*/ [WC-DC58N]/[TC-DC58N]/[250D]. - 1](/content/2026/06/1176638/images/5b6011885022e51a24c5683d3b48131b47fdb4610b31b629fe9028316611b285.jpg)
When you remove the converter from the camera, return the converter setting to [Off].
Using an Externally Mounted Flash (Sold Separately)
High-Power Flash HF-DC1
This flash is used to supplement the camera's built-in flash when the subject is too far away for proper illumination. Use the following procedures to affix the camera and High-Power Flash to the supporting bracket. Please read the instructions accompanying the flash along with this explanation.
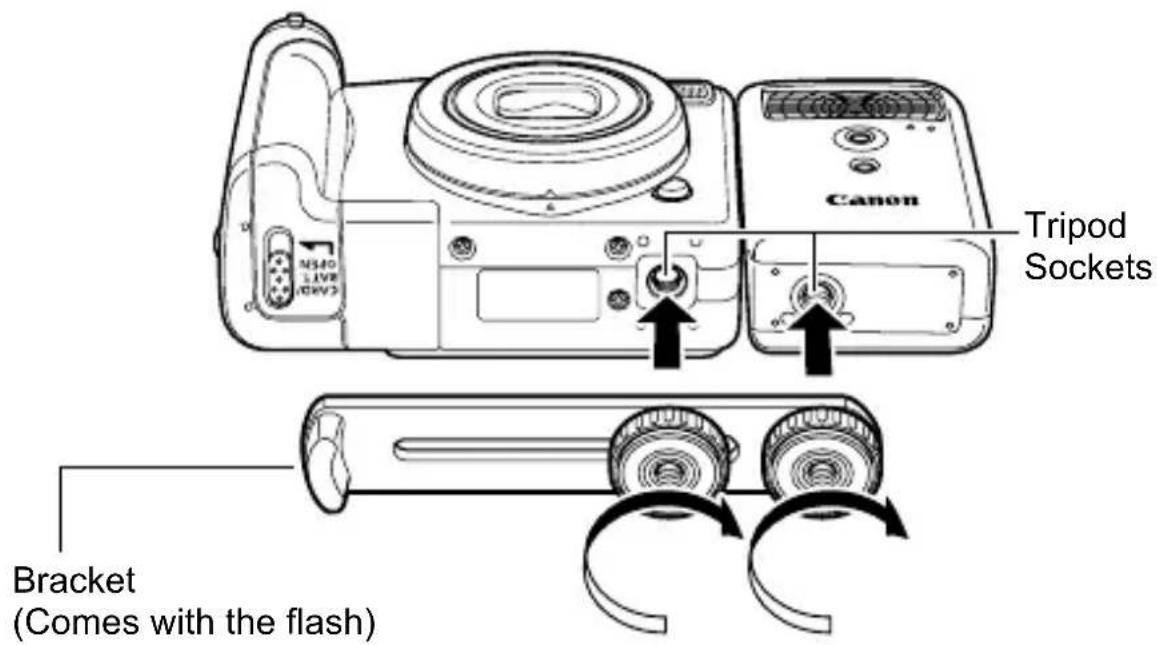

● The High-Power Flash will not fire in the following situations:
- When shooting in Mode
- When Flash Sync is set to [2nd-curtain]
- When Flash Adjust is set to [Manual]
- The flash charge time will lengthen as the battery charge gets weaker. Always set the power/mode switch to [OFF] when you finish using the flash.
- Be careful not to touch the flash window or sensor windows with your fingers while the flash is in use.
● The flash may fire if another flash is being used in close proximity.
● The High-Power Flash may not fire outdoors in daylight or when there are no reflective items.
- For continuous shooting, although the flash fires for the first shot, it does not fire for subsequent shots.
- Fasten the attachment screws securely so that they do not loosen. Failure to do so may lead to the dropping of the camera and flash resulting in damage to both.

- Before attaching the bracket to the flash, check that the lithium battery (CR123A or DL123) is installed.
- To illuminate the subjects properly, install the flash so that it is up against the side of the camera and parallel with the camera's front panel.
● A tripod can be used even when the flash is attached.
■Batteries
● Charge becomes Severely Limited
If the battery usage time has considerably diminished, wipe the battery terminals well with a dry cloth. The terminals may be dirty from fingerprints.
● Usage in Cold Temperatures
Get a spare generic lithium battery (CR123A or DL123). You are recommended to place the spare battery in your pocket to warm it up before switching it for the battery in the flash.
● Non-Use over Extended Periods
Leaving batteries in the High-Power Flash could allow the battery fluid to leak, damaging the product. Remove the batteries from the High-Power Flash and store them in a cool, dry place.
Replacing the Date Battery
If the Date/Time menu appears when the camera power is turned on, the date battery charge is low and the date and time settings have been lost. Please purchase a lithium coin battery (CR1220) and replace it as follows.
Please note that the first date battery may appear to expire relatively quickly after you purchase the camera. This is because it is installed in the camera at the point of manufacture, not when you make the purchase.

Be particularly careful to keep the date batteries out of the reach of children. Seek medical assistance immediately if a child swallows a battery since corrosive battery fluids can damage the stomach or intestinal walls.
1 Confirm that the camera is turned off.
2 Slide the memory card slot / battery cover lock and open the cover.
3 Hook your nail onto the date battery holder and lightly pull it up.
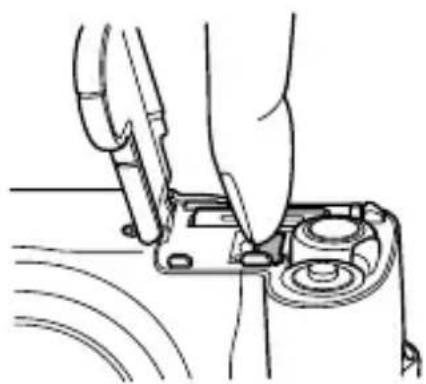
natural_image
Line drawing of a hand using a tool to adjust or install electronic components (no text or symbols visible)4 Remove the battery holder in the direction indicated by the arrow.
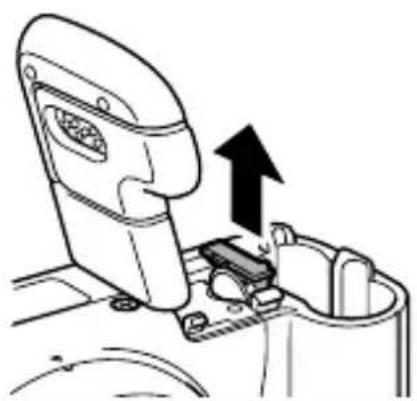
natural_image
Diagram of a robotic arm with directional arrows indicating movement or force (no text or symbols present)5 Remove the battery by pulling it up in the direction indicated by the arrow.
(-) Side
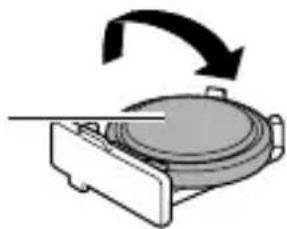
natural_image
Diagram of a mechanical device with a rotating arrow indicating rotation (no text or symbols)6 Insert a new battery with the (-) side facing up.
7 Replace the battery holder and close the memory card slot/battery cover.
8 When the Date/Time menu appears, set the date and time (Basic Guide p. 7).

After purchasing the camera and turning on the power for the first time, although the Date/Time menu will appear, you do not need to replace the date battery.
If you ever dispose of your camera, first remove the date battery for recycling according to the recycling system of your country.
Camera Care and Maintenance
Never use thinners, benzine, synthetic cleansers or water to clean the camera. These substances may distort or damage the equipment.
Camera Body
Gently wipe dirt off the camera body with a soft cloth or eyeglass lens wiper.
Lens
First use a lens blower brush to remove dust and dirt, then remove any remaining dirt by wiping the lens lightly with a soft cloth.

Never use synthetic cleansers on the camera body or lens. If dirt remains, contact the closest Canon Customer Support Help Desk as listed on the rear of the European Warranty System (EWS) Booklet.
Viewfinder and LCD Monitor
Use a lens blower brush to remove dust and dirt. If necessary, gently wipe with a soft cloth or an eyeglass lens wiper to remove stubborn dirt.

Never rub or press strongly on the LCD monitor. These actions may damage it or lead to other problems.
Specifications
All data is based on Canon's standard testing methods. Subject to change without notice.
PowerShot A710 IS
| (W): Max. wide angle (T): Max. telephoto | |
| Camera Effective Pixels : Approx. 7.1 million | |
| Image Sensor : 1/2.5-inch type CCD (Total number of pixels: Approx. 7.4 million) | |
| Lens : 5.8 (W) – 34.8 (T) mm(35mm film equivalent: 35 (W) – 210 (T) mm)f/2.8 (W) – f/4.8 (T) | |
| Digital Zoom : Approx. 4.0x (Up to approx. 24x in combination with the optical zoom) | |
| Optical Viewfinder : Real-image zoom viewfinder | |
| LCD Monitor : 2.5-inch type, low-temperature polycrystalline silicon TFT color LCD, approx. 115,000 pixels (Picture coverage 100%) | |
| AF System : TTL autofocusAF lock and Manual focus are availableFocusing frame: 9-point (AiAF) / 1-point (AF)** Fixed to center or FlexiZone AF | |
| Shooting Distance (From the front of the lens) | : Normal: 55 cm (1.8 ft.) – infinityMacro: 1 – 55 cm (W)(0.39 in. – 1.8 ft. (W))Manual focus: 1 cm (0.39 in.) – infinity (W), 55 cm (1.8 ft.) – infinity (T) |
| Shutter : Mechanical shutter + electronic shutter | |
| Shutter Speeds : 15 – 1/2000 sec.The shutter speed varies depending on the shooting mode.Slow shutter speeds of 1.3 sec. or slower operate with noise reduction. | |
| Image Stabilization : Lens shift typeContinuous/Shoot Only*/Panning*/Off* Still images only | |
| Metering System : Evaluative, Center-weighted average or Spot* *Fixed to center or linked to the AF frame | |
| Exposure Compensation | : ±2 stops in 1/3-stop increments |
| ISO speed : Auto*, High ISO Auto*, ISO 80/100/200/400/800 equivalent* Camera automatically sets the optimal speed. | |
| White Balance : Auto, Day Light, Cloudy, Tungsten, Fluorescent, Fluorescent H, Underwater or Custom | |
| Built-in Flash : Auto*, on*, off* Red-eye reduction is available.FE Lock, Slow Synchro, 2nd-curtain Synchro and flash output settings are available. | |
| Flash Range | : Normal: 55 cm – 3.5 m (1.8 – 11 ft.) (W), 55 cm – 2.5 m (1.8 – 8.2 ft.) (T)Macro: 30 – 55 cm (12 in. – 1.8 ft.) (W)(ISO speed : Auto) |
| Flash Exposure Compensation | : ±2 stops in 1/3-stop increments |
| Shooting Modes : AutoCreative zone:Program, Shutter-speed priority, Aperture priority, ManualImage zone:Portrait, Landscape, Night Scene, Special Scene ^1 , Stitch Assist and Movie ^2 1 Night Snapshot, Kids&Pets, Indoor, Foliage, Snow, Beach, Fireworks, Underwater, Color Accent and Color Swap. ^2 Standard, Fast Frame Rate, Compact, Color Accent and Color Swap. | |
| Continuous Shooting : Approx. 1.7 shots/sec. (Large/Fine mode) | |
| Self-timer : Activates shutter after an approx. 10-sec./approx. 2-sec. delay, Custom Timer | |
| Recording Media : SD memory card/SDHC memory card/MultiMediaCard | |
| File Format : Design rule for camera file system and DPOF compliant | |
Data Type (Still images) : Exif 2.2 (JPEG)*
Sound memos: WAVE (monaural)
(Movies) : AVI (Image data: Motion JPEG; Audio data: WAVE (monaural))
* This digital camera supports Exif 2.2 (also called “Exif Print”). Exif Print is a standard for enhancing the communication between digital cameras and printers. By connecting to an Exif Print-compliant printer, the camera’s image data at the time of shooting is used and optimized, yielding extremely high quality prints.
Compression: Superfine, Fine, Normal
Number of (Still images) : Large: 3072 x 2304 pixels
Recording Medium 1: 2592 x 1944 pixels
Pixels Medium 2: 2048 x 1536 pixels
Medium 3: 1600 x 1200 pixels
Small: 640 x 480 pixels
Postcard: 1600 x 1200 pixels
Widescreen: 3072 x 1728 pixels
(Movies) : Standard, Color Accent and Color Swap:
640 x 480 pixels (30 frames/sec., 15 frames/sec.)
320 x 240 pixels (30 frames/sec., 15 frames/sec.)
Recording can continue until the memory card is full* (can record up to a maximum of 1GB at one time)**
Fast Frame Rate: (can record for 1 min.)
320 x 240 pixels (60 frames/sec.)
Compact: (can record for 3 min.)
160 x 120 pixels (15 frames/sec.)
* Using super high-speed memory cards (SDC-512 MSH recommended).
** Even if the clip size has not reached 1GB, recording will stop at the moment the clip length reaches 1 hour. Depending on the volume and data writing speed of the memory card, recording will stop after one hour of continuous recording even if the recorded data volume has not reached 1GB.
| Playback Modes : Single (histogram displayable), Index (9 thumbnail images), Magnified (approx. 10x (max.) in LCD monitor, advance or reverse through magnified images possible), Jump (it is possible to jump to every tenth or hundredth image, to the first image of each shooting date, to movies or to the first image in each folder. In index playback mode, it displays 9 images at once.), Auto Play, My Colors (playback), Sound memos (up to 1 min.) or Movie (edit/slow motion play back possible). | |
| Direct Print | : PictBridge compliant, and Canon Direct Print and Bubble Jet Direct compatible |
| My Camera Settings : Start-up image, start-up sound, operation sound, self-timer sound, and shutter sound. | |
| Interface : USB 2.0 Hi-Speed (mini-B), PTP (Picture Transfer Protocol)Audio/Video output (NTSC or PAL selectable, monaural audio) | |
| Power Source : 2 AA-size alkaline batteries2 AA-size NiMH batteries NB4-300 (sold separately)AC Adapter Kit ACK800 (sold separately) | |
| Operating Temperatures | : 0 – 40 °C (32 – 104 °F)(0 – 35 °C (32 – 95 °F) when NB-3AH is used.) |
| Operating Humidity : 10 – 90% | |
| Dimensions(excluding protrusions) | : 97.5 x 66.5 x 41.2 mm(3.84 x 2.62 x 1.62 in.) |
| Weight(camera body only) | : Approx. 210 g (7.41 oz.) |
Battery Capacity
| Number of Images Shot | Playback Time | ||
| LCD Monitor On (Based on the CIPA standard) | LCD Monitor Off | ||
| AA-size Alkaline Batteries (included with the camera) | Approx. 100 images | Approx. 500 images | Approx. 7 hours |
| AA-size NiMH Batteries (NB-3AH (fully charged)) | Approx. 360 images | Approx. 900 images | Approx. 10 hours |
- The actual figures will vary according to the shooting conditions and settings.
● Movie data is excluded. - At low temperatures, the battery performance may diminish and the low battery icon may appear very rapidly. In these circumstances, the performance can be improved by warming the battery in a pocket before use.
Test Conditions
Shooting: Normal temperature (23°C ±2°C/73°F ±3.6°F), normal relative humidity (50% ±20%), alternating wide angle end and telephoto end shots at 30 second intervals with the flash fired once every two shots and the camera power turned off after every tenth shot. Power is left off for a sufficient amount of time*, then the power is turned back on and the testing procedure is repeated.
- A Canon-brand memory card is used.
* Until the battery returns to normal temperature
Playback: Normal temperature (23°C ±2°C/73°F ±3.6°F), normal relative humidity (50% ±20%), continuous playback at 3 seconds per image.

See Battery Handling Precautions (p. 103).
Memory Cards and Estimated Capacities
☐: Card included with the camera
| Recording Pixels | Compression | 16MB SDC-128M | SDC-512MSH | |
| L (Large)3072 x 2304 pixels | 4 | 4 | 0 | |
| 7 | 6 | 4 | ||
| 16 | 134 520 | |||
| M1 (Middle 1)2592 x 1944 pixels | 5 | 4 | 9 | |
| 10 | 87 339 | |||
| 21 | 173 671 | |||
| M2 (Middle 2)2048 x 1536 pixels | 9 | 7 | 6 | |
| 16 | 136 529 | |||
| 33 | 269 1041 | |||
| M3 (Middle 3)1600 x 1200 pixels | 14 | 121 471 | ||
| 26 | 217 839 | |||
| 50 | 411 1590 | |||
| S (Small)640 x 480 pixels | 56 | 460 1777 | ||
| 88 | 711 2747 | |||
| 138 | 1118 4317 | |||
| (Postcard)1600 x 1200 pixels | 26 | 217 839 | ||
| W (Widescreen)3072 x 1728 pixels | 6 | 5 | 3 | |
| 10 | 86 335 | |||
| 21 | 177 686 | |||
- Capable of smooth continuous shooting (p. 31) when card has been formatted with a low level format.
- This reflects standard shooting criteria established by Canon. Actual results may vary according to the subject and shooting conditions.
Movie
☐:Card included with the camera
| Recording Pixels | Frame Rate | 16MB | SDC-128M | SDC-512MSH | |
[28c5]Standard  Color Swap Color Swap |  640 x 480 pixels 640 x 480 pixels |  | 7 sec. | 1 min.4 sec. | 4 min.9 sec. |
 | 15 sec. | 2 min.7 sec. | 8 min.14 sec. | ||
 320 x 240 pixels 320 x 240 pixels |  | 22 sec. | 3 min.1 sec. | 11 min.42 sec. | |
 | 43 sec. | 5 min.55 sec. | 22 min.53 sec. | ||
 Fast Frame Rate Fast Frame Rate | [YSW7]320 x 240 pixels |  | 11 sec. | 1 min.32 sec. | 5 min.59 sec. |
 Compact Compact |  160x 120 pixels 160x 120 pixels | [4SY6] | 1 min.47 sec. | 14 min.29 sec. | 55 min.57 sec. |
* Maximum movie clip length at 📋: 1 min., at 📋: 3 min. The figures indicate the maximum continuous recording time.
Image Data Sizes (Estimated)
| Recording Pixels | Compression | |||
 |  |  | ||
 | 3072 x 2304 pixels 3 | 045 KB 1897 KB | 902 KB | |
 | 2592 x 1944 pixels 2 | 503 KB 1395 KB | 695 KB | |
 | 2048 x 1536 pixels 1 | 602 KB 893 KB | 445 KB | |
 | 1600 x 1200 pixels 1 | 002 KB 558 KB | 278 KB | |
 | 640 x 480 pixels 249 | KB 150 KB 84 | KB | |
 | 1600 x 1200 pixels — | 558 KB — | ||
 | 3072 x 1728 pixels 2 | 304 KB 1420 KB | 678 KB | |
| Recording Pixels Frame Rate File size | ||||
 Standard Standard |  640 x 480 pixels 640 x 480 pixels |  | 1920 KB/sec. | |
 Color Accent Color Accent |  | 960 KB/sec. | ||
 Color Swap Color Swap |  320 x 240 pixels 320 x 240 pixels |  | 660 KB/sec. | |
 | 330 KB/sec. | |||
 Fast Frame Rate Fast Frame Rate |  320 x 240 pixels 1320 Ksec. 320 x 240 pixels 1320 Ksec. | |||
 Compact 160 x Compact 160 x |  pixels 120 KB/sec. pixels 120 KB/sec. |  | ||
MultiMediaCard
| Interface Compatible | with MultiMediaCard standards |
| Dimensions | 32.0 x 24.0 x 1.4 mm (1.3 x 0.9 x 0.06 in.) |
| Weight Approx. 1.5 g | (0.05 oz.) |
SD Memory Card
| Interface Compatible | with SD memory card standards |
| Dimensions 32.0 x 24 | .0 x 2.1 mm (1.3 x 0.9 x 0.1 in.) |
| Weight Approx. 2 g (0.07 oz.) | |
NiMH Battery NB-3AH
(Supplied with the separately sold NiMH Battery NB4-300 set or the Battery and Charger Kit CBK4-300)
| Type AA-size nickel metal hydride battery | |
| Nominal Voltage 1.2 V DC | |
| Typical Capacity 2500 mAh (min.: 2300 mAh) | |
| Cycle Life Approx. 300 times | |
| Operating Temperatures | 0 – 35 °C (32 – 95 °F) |
| Dimensions Diameter | 14.5 mm (0.57 in.)Length: 50.0 mm (1.97 in.) |
| Weight Approx. 30 g (1.06 oz.) | |
Battery Charger CB-5AH/CB-5AHE
(Supplied with the separately sold Battery and Charger Kit CBK4-300)
| Rated Input 100 – 240 V AC (50/60 Hz),16 VA (100 V) - 21 VA (240 V) | |
| Rated Output 565 mA* | ^1 , 1275 mA*2 |
| Charging Time Approx. 4 hours 40 min.* | ^1 , Approx. 2 hours*2 |
| OperatingTemperatures | 0 – 35 °C (32 – 95 °F) |
| Dimensions 65.0 x 105.0 x 27.5 mm (2.56 x 4.13 x 1.08 in.) | |
| Weight (body only) Approx. 95 g (3.35 oz.) | |
*1 When charging four NB-3AH batteries
*2 When charging two NB-3AH batteries loaded one on each side of the battery charger
Compact Power Adapter CA-PS800
(Included with the separately sold AC Adapter Kit ACK800)
| Rated Input 100 – 240 V AC (50/ 60 Hz) | |
| Rated Output 3.15 V DC, 2.0 A | |
| Operating Temperatures | 0 – 40 °C (32 – 104 °F) |
| Dimensions 42.6 x 10⁴ | 4.0 x 31.4 mm (1.68 x 4.09 x 1.24 in.) |
| Weight Approx. 180 g | (6.35 oz.) (excluding power cord) |
Wide Converter WC-DC58N (Sold Separately)
| Magnification Approx. | 0.7x |
| Focal Length*1 | 24.5 mm (35mm film equivalent) |
| Focusing Range*1 | Approx. 25 cm (9.8 in.) – infinity (W)*2 |
| Thread Diameter 58 mm standard filter thread*3 | |
| Dimensions Diameter: | 94.5 mm (3.72 in.)Length: 54.9 mm (2.16 in.) |
| Weight Approx. 275 g | (9.70 oz.) |
Tele-converter TC-DC58N (Sold Separately)
| Magnification Approx. | 1.75x |
| Focal Length*4 | 368 mm (35mm film equivalent) |
| Focusing Range*4 | Approx. 1.8 m (5.9 ft.) – infinity (T)*2 |
| Thread Diameter 58 mm standard filter thread*3 | |
| Dimensions Diameter: | 75.0 mm (2.95 in.)Length: 50.0 mm (1.97 in.) |
| Weight Approx. 185 g | (6.53 oz.) |
Close-up Lens 250D 58 mm (Sold Separately)
| Focusing Range (from front of lens) | 18 – 25 cm (7.1 – 9.8 in.) (W/T) |
| Thread Diameter 58 mm standard filter thread*3 | |
| Dimensions Diameter: 60.0 mm (2.36 in.)Length: 12.0 mm (0.47 in.) | |
| Weight Approx. 80 g (2.82 oz.) | |
Conversion Lens Adapter LA-DC58G (Sold Separately)
| Thread Diameter 58 mm standard filter thread | |
| Dimensions (Front part) | Diameter: 62.6 mm (2.46 in.)Length: 10.8 mm (0.43 in.) (Rear part) Diameter: 62.3 mm (2.45 in.)Length: 43.3 mm (1.70 in.) |
| Weight Front part: Approx. 7 g (0.25 oz.)Rear part: Approx. 23 g (0.81 oz.) | |
(W): Max. wide angle (T): Max. telephoto
*1 When mounted on PowerShot A710 IS (Max. wide angle)
*2 From front of the mounted tele-converter.
*3 Conversion Lens Adapter LA-DC58G is required when mounted on PowerShot A710 IS
*4 When mounted on PowerShot A710 IS (Max. telephoto)
Numerics
1st-curtain 64
2nd-curtain 64
3:2 Guide 34
A
AC Adapter Kit ACK800...... 109
AE Lock 48
AF Frame.... 13, 44
AF Lock 46
AF-assist Beam 20, 92
AiAF 20,44
Aperture Value 41, 42, 43
Auto Play 80
Auto Rotate Function 65
AV Cable 88
B
Battery
Battery Capacity 123
Charging 107
Handling 103
Installing ...... Basic 5
C
Color Accent Mode 58
Color Swap Mode.... 59
Compression 28
Continuous Shooting 31
Create Folder 66
Creative Zone ...... Basic 11
Custom White Balance 53
D
Date/Time ...... Basic 7
Digital Tele-Converter 29
DIGITAL Terminal
...... Basic 1, Basic 27
Digital Zoom 29
Direct Transfer...... Basic 30
Distance Units 23
Downloading Images to a
Computer...... Basic 24
DPOF Print Order
Print Style 85
Selecting Images 83
DPOF Transfer Order...... 86
E
Erasing
All Images 82
Single Images...... Basic 19
Exposure.... 51
F
FE Lock.... 49
File Number...... 14, 68, 85
Flash...... Basic 12
FlexiZone 44
Focus
Lock 46
Manual 47
Frame Rate 38
FUNC./SET 18, Basic 3
G
Grid Lines.... 34
H
HF-DC1.... 114
Histogram...... 16
I
Image Data Sizes (Estimated) 126
Image Zone ...... Basic 10
Index Playback 71
Indicator ...... Basic 4
Interface Cable
...... Basic 22, Basic 27
ISO Speed 62
J
Jump (Image Search)...... 72
L
Landscape ...... Basic 10
Language ...... Basic 7
LCD Monitor
Night Display 12
Playback Information...... 14
Shooting Information...... 13
Using the LCD Monitor...... 12
Lens
Conversion Lens Adapter 111, 112
Tele-converter 110
Wide Converter.... 110
M
Macro ...... Basic 15
Magnifying 70
Maintenance 118
Manual Focus 47
Memory Card
Estimated Capacities...... 124
Formatting 26
Handling 105
Inserting ...... Basic 5
Menu
FUNC. Menu.... 18, 20
MENU Button...... 19, Basic 3
Menus and Settings ..... 18, 19
My Camera Menu 19,24
Play Menu.... 19, 21
Print Menu 19, 21
Rec. Menu 19, 20
Set up Menu.... 19, 22
Messages 99
Metering Modes 50
MF-Point Zoom 20,47
Mode Switch
...... Basic 3, Basic 8, Basic 18
Movie
Editing 74
Playback 73
Shooting 35
Mute 22
My Colors 55
My Colors Effects 77
N
Night Scene ...... Basic 10
0
Overexposure Warning 16
P
Playback...... Basic 18
Portrait ...... Basic 10
Postcard Date Imprint Mode ..... 32
Postcard Mode 32
Power Button ..... Basic 3, Basic 8
Power Saving 17,22
Print/Share Button
...... Basic 3, Basic 22, Basic 30
Printing 83, Basic 22
Protect 81
R
Recording Pixels 20
Red-Eye Reduction .. 12, Basic 14
Reset All 25
Resume Playback ...... Basic 18
Review 20, Basic 9
Rotate 76
s
Safety Zoom.... 30
Save Original 61
Self-Timer ...... Basic 16
Shooting Mode
Auto...... Basic 10
Creative Zone ...... Basic 11
Av.... 42
M.... 43
P 40
Tv....41
Functions Available ...... 134
Image Zone...... Basic 10
Shutter Button ...... Basic 3
Fully...... Basic 9
Halfway...... Basic 8
Shutter Speed 41, 42, 43
Smooth Continuous Shooting ... 31
Sound Memo 79
Special Scene Mode...... Basic 10
Spot AE Point Frame ..... 13, 50
Stitch Assist 39
System Requirements .... Basic 25
T
Telephoto...... Basic 12
Troubleshooting 89
V
Video Output System...... 88
W
White Balance 52
Wide Angle ...... Basic 12
Wrist Strap ...... Basic 2
Z
Zoom 29, Basic 12
Disclaimer
- While every effort has been made to ensure that the information contained in this guide is accurate and complete, no liability can be accepted for any errors or omissions.
- Canon reserves the right to change the specifications of the hardware and software described herein at anytime without prior notice.
- No part of this guide may be reproduced, transmitted, transcribed, stored in a retrieval system, or translated into any language in any form, by any means, without the prior written permission of Canon.
- Canon makes no warranties for damages resulting from corrupted or lost data due to a mistaken operation or malfunction of the camera, the software, SD memory cards (SD cards), personal computers, peripheral devices, or use of non-Canon SD cards.
Trademark Acknowledgments
• Macintosh, Mac OS and QuickTime are trademarks of Apple Computer Inc., registered in the United States and/or other countries.
- Micro® and Windows® are either registered trademarks or trademarks of Microsoft Corporation in the United States and/or other countries.
• The SDHC logo is a trademark.
Functions Available in Each Shooting Mode
The following chart shows the functions and settings available in each shooting mode.
○ Setting available (● Default setting) △ Setting can only be selected for the first image (▲: Default setting).
- (Shaded Area): Setting is retained even when the camera power is shut off.
(1) The recording pixels and frame rates for the Movie mode (p. 38)
(2) The following functions cannot be set in the mode.
- The [Auto] and [On] setting for the flash
- Red-eye reduction function
- AF-assist beam
- AF frame selection (AF frame will be fixed to a single point at the center.)
- A F l o c k
- Manual focus
- MF-Point zoom
- Macro mode
The following functions cannot be set in the mode.
- AF frame selection (AF frame will be fixed to a single point at the center).
- Macro mode
The following settings cannot be accomplished for (Color Accent) and (Color Swap).
- Continuous Shooting
- Custom Self-timer
- Digital Zoom
- Digital Tele-Converter
- Exposure Compensation
- My Colors
(3) The default flash setting will be [Auto] in the ,A , , ,
modes, and [Flash off] in the ✗, modes/s
(4) Slow Synchro will be fixed to [On] in the , or (1) modes.
(5) Operation is possible during shooting (only during standard).
(6) Automatically set by the camera.
(7) Settings cannot be made when My Colors is set to move.
(8) Settings cannot be set in the , 7 modes.
(9) Only [Grid Lines] can be set in the modes.
(10) [Shoot Only] and [Panning] cannot be set in the mode.
Canon
- Advanced
- Camera User Guide
- Main Features
- Shooting
- Playback
- Editing
- Printing
- Uses of Recorded Images
- Conventions Used in this Guide
- Postcard Mode
- See Functions Available in Each Shooting Mode (p. 134).
- Use of genuine Canon accessories is recommended.
- Table of Contents
- Handling Precautions .... 5
- Before Using the Camera – Basic Operations ..... 12
- Shooting 27
- Playback/Erasing ....70
- Print Settings/Transfer Settings....83
- Viewing Images on a TV set 88
- Troubleshooting 89
- List of Messages 99
- Appendix 103
- Index. 130
- ★ Functions Available in Each Shooting Mode ..... 134
- Please Read
- Test Shots
- Warning Against Copyright Infringement
- Warranty Limitations
- Camera Body Temperature
- About the LCD Monitor
- Video Format
- Language Setting
- Safety Precautions
- Warnings
- Equipment
- Cautions
- Preventing Malfunctions
- Avoid Strong Magnetic Fields
- Avoid Condensation Related Problems
- If Condensation Forms Inside the Camera
- Using the LCD Monitor
- 1
- Press
- Night Display
- Information Displayed on the LCD Monitor
- Shooting Information (Shooting Mode)
- Playback Information (Playback Mode)
- Standard
- Histogram Function
- Using the Viewfinder
- Power Saving Function
- Menus and Settings
- FUNC. Menu
- Rec., Play, Print, Set up and My Camera Menus
- Menu List
- Rec. Menu ( )
- Play Menu (▶)
- Print Menu ( )
- My Camera Menu ( )
- (Set up) Menu [Reset All].
- Select [OK] and press
- Formatting Memory Cards
- (Set up) Menu [Format].
- Changing the Recording Pixels and Compression (Still Images)
- FUNC. Menu ▶ (Compression)/ \* (Recording Pixels).
- Approximate Values for Compression Settings
- Setting the Image Stabilizer Function
- (Rec.) Menu [IS Mode] [Continuous]\*/ [Shoot Only]/[Panning]/[Off].
- Using the Digital Zoom/Digital Tele-Converter
- (Rec.) Menu [Digital Zoom] [Standard]\*/ [Off]/[1.5x]/[1.9x].
- Shooting with the Digital Zoom
- 2
- Press the zoom lever toward [and] shoot.
- Shooting with the Digital Tele-Converter
- Adjust the angle of view with the zoom lever and shoot.
- About the Digital Tele-Converter
- Continuous Shooting
- \*2 Recommended Memory Card:
- FUNC. Menu ▶ (Drive Mode)
- Shoot.
- To Cancel Continuous Shooting
- FUNC. Menu▶(Recording Pixels) (Postcard).
- Embedding the Date in the Image Data
- (Rec.) Menu [Date Stamp] [Off]\*/[Date]/[Date & Time].
- Setting the Display Overlays
- (Rec.) Menu [DISP. Overlay] [Off]\*/[Grid Lines]/[3:2 Guide]/[Both].
- Select a movie mode using the ← or button.
- Changing Recording Pixels and Frame Rates (Movies)
- FUNC. Menu ▶ (Frame Rate)/ \* (Recording Pixels).
- Recording Pixels and Frame Rates
- Shooting Panoramic Images (Stitch Assist)
- Use the or button to select a shooting direction.
- Shoot the first image in the sequence.
- Compose the second image so that it overlaps a portion of the first and shoot.
- Repeat the procedure for additional images.
- P Program AE
- Tv Setting the Shutter Speed
- Shutter Speed Display
- Av Setting the Aperture
- Aperture Value Display
- M Manually Setting the Shutter Speed and Aperture
- Selecting an AF Frame
- (Rec.) Menu [AF Frame] [AiAF]\*/ [Center]/[FlexiZone].
- Selecting an AF Frame Manually (when [FlexiZone] is selected)
- Turn on the LCD monitor.
- Press the ☐ button several times until the AF frame turns green.
- Use the ↑, ↓or←button to move the AF frame to the desired position and press the ➕button.
- Shooting Hard-to-Focus Subjects
- (Focus Lock, AF Lock, Manual Focus)
- Shooting with the Focus Lock
- Shooting with the AF Lock
- Press and hold the shutter button halfway and press the Mutton.
- Re-aim the camera to compose the shot as desired and shoot.
- To Release the AF Lock
- Shooting in Manual Focus Mode
- Press the MButton several times to display. MF
- Press the ◀or button and adjust the focus.
- To Cancel the Manual Focus
- Locking the Exposure Setting (AE Lock)
- Press and hold the shutter button halfway and press the 📄 button.
- Re-aim the camera to compose the shot as desired and press the shutter button fully.
- Locking the Flash Exposure Setting (FE Lock)
- Switching between Metering Modes
- FUNC. Menu ▶ (valuative)
- Lock the spot AE point to the center of the LCD monitor/Move the spot AE point to the same position as the selected AF frame
- (Rec.) Menu [Spot AE Point] [Center]\*/[AF Point]
- Adjusting the Exposure
- Compensation
- Turn on the LCD monitor.
- Press the ☐ button several times until the exposure compensation bar is displayed.
- To Cancel the Exposure Compensation
- Adjusting the Tone (White Balance)
- White Balance Settings
- Using the Custom White Balance
- FUNC. Menu \* (Auto) (Custom).
- Aim the camera at a piece of white paper or cloth and press 📄
- FUNC. Menu\* (My Colors Off).
- Setting the Camera to a Custom Color Mode
- (Custom Color) ▶ MENU
- Use the ↗ or button to select [Contrast], [Sharpness], [Saturation], [Red], [Green], [Blue] or [Skin Tone] and the ↕ or ↗ button to adjust it.
- 3
- Shooting in the Color Accent Mode
- 4
- Shooting in the Color Swap Mode
- Still image: sor button
- Movie: Or button
- Changing the Save Method for the Original Image
- (Rec.) Menu [Save Original] [On]/[Off]\*.
- When [Save Original] is Set to [On]
- Adjusting the ISO Speed
- FUNC. Menu (Auto).
- Switching between Flash Adjustment Settings
- (Rec.) Menu [Flash Adjust] [Auto]\*/ [Manual].
- Compensating the Flash Adjustment / Flash Output
- FUNC. Menu ▶(▶ - (Flash))/ Flash Output).
- Switching the Timing at which the Flash Fires
- (Rec.) Menu [Flash Sync] [1st-curtain]\*/[2nd-curtain].
- Setting the Auto Rotate Function
- In (Set up) Menu [Auto Rotate] [On]\*/ [Off].
- Creating an Image Destination (Folder)
- (Set up) Menu [Create Folder].
- Creating a Folder the Next Time You Shoot.
- Use the or button to check mark [Create New Folder] ▶ ○
- Setting the Day or Time for Automatic Folder Creation.
- Select a day for the [Auto Create] option and a time in the [Time] option ▶ ○
- Resetting the File Number
- (Set up) Menu [File Numbering] [Continuous]\*/ [Auto Reset].
- File and Folder Numbers
- Magnifying Images
- Press the zoom lever toward 🔒
- Use the ↑, ↓or← button to move around the image.
- To Cancel the Magnified Display
- Viewing Images in Sets of Nine
- (Index Playback)
- Press the zoom lever toward
- Switching between Sets of Nine Images
- Jumping to Images
- In single image playback mode, press the 📄 button.
- Use the ↕ or button to select a search key and press the ↕ or button.
- Viewing Movies
- Display a movie and press
- Select Play) and press .
- Operating the Movie Control Panel
- Editing Movies
- Select Edit) in the movie control panel and press
- Use the ↑or button to select (Ct Beginning) or Cut End) and the o\* → button to specify the cut point ( ).
- Select Save) and press . FUNC. SET
- Select [New File] or [Overwrite] and press
- Rotating Images in the Display
- (Play) Menu
- Use the ◀or button to select an image to rotate and press Ⓜto rotate it.
- Adding My Colors Effects
- Use the ◀or button to select the My Colors type, and press ⒽUNC.SET
- Select [OK], and press
- Press and select [Yes] or [No], then press
- Attaching Sound Memos to Images
- Use the or button to select an image to which to attach a sound memo and press
- Select (Record) and press .
- Sound Memo Panel
- Automated Playback (Auto Play)
- Press FUNC SET
- Protecting Images
- Use the or button to select an image to protect and press FUNC.SET
- Erasing All Images
- Select [OK] and press
- Setting the DPOF Print Settings
- Single Images
- (Print) Menu [Select Image & Qty.] .
- Use the ← or button to select images for printing.
- All the Images on a Memory Card
- (Print) Menu [Select All Images].
- Select [OK] and press FUNC. SET
- Setting the Print Style
- (Print) Menu [Print Settings]
- Setting the DPOF Transfer Settings
- Select [Order] and press
- Use the or button to select an image to transfer and press FUNC.SET
- Select [Mark all] and press
- Select [OK] and press
- Viewing Images on a TV set
- Turn off the camera and the TV.
- Connect the AV cable to the camera's A/V OUT terminal.
- Plug the other ends of the AV cable to the VIDEO IN and AUDIO IN jacks on the TV.
- Turn on the TV and switch it to video mode.
- Turn on the camera.
- Camera
- When the power is turned on
- "Card locked!" message appears.
- The Date/Time menu appears.
- LCD monitor
- The display darkens.
- Display flickers.
- A bar of light (red, purple) appears on the LCD monitor.
- appears.
- Noise displays./Subject's movements are irregular.
- Image Seen in viewfinder vs. recorded image
- Image is blurred or out of focus.
- Image contains noise.
- White dots appear on the image.
- Eyes appear red.
- Continuous shooting slows down.
- Recording images to memory card takes a long time.
- Lens will not retract.
- Shooting movies
- The recording time may not display properly or shooting may stop unexpectedly.
- “!” displayed on the LCD monitor in red and shooting automatically stopped.
- Zoom does not operate.
- Cannot play back.
- Movies cannot be edited.
- Movies do not play back correctly.
- Reading images from memory card is slow.
- Battery
- List of Messages
- Busy...
- No memory card
- Card locked!
- Cannot record!
- Memory card error
- Memory card full
- Naming error!
- Change the batteries
- No image
- Image too large
- Incompatible JPEG format
- RAW
- Unidentified Image
- Cannot magnify!
- Cannot rotate
- Incompatible WAVE format.
- Cannot modify image
- Cannot transfer!
- Protected!
- Too many marks
- Cannot complete!
- Unselectable image
- Communication error
- Lens error, restart camera
- Exx
- Battery Handling
- Battery Charge
- Battery Handling Precautions
- WARNING
- Never use batteries that look like this.
- Handling the Memory Card
- SD memory card or SDHC memory card Write Protect Tab
- Cautions When Handling
- Formatting
- Using the Power Kits (Sold Separately)
- Using Rechargeable Batteries (Battery and Charger Kit CBK4-300)
- Using the AC Adapter Kit ACK800
- Using the Lenses (Sold Separately)
- ■Wide Converter WC-DC58N
- ■Tele-converter TC-DC58N
- ■Close-up lens 250D (58mm)
- ■Conversion Lens Adapter LA-DC58G
- Attaching a Lens
- 6
- Set the lens on the adapter, and turn it in the indicated direction to attach it securely.
- Converter Settings
- (Rec.) Menu [Converter] [Off]\*/ [WC-DC58N]/[TC-DC58N]/[250D].
- Using an Externally Mounted Flash (Sold Separately)
- High-Power Flash HF-DC1
- ■Batteries
- ● Charge becomes Severely Limited
- ● Usage in Cold Temperatures
- ● Non-Use over Extended Periods
- Replacing the Date Battery
- Camera Care and Maintenance
- Camera Body
- Lens
- Viewfinder and LCD Monitor
- Specifications
- Battery Capacity
- Test Conditions
- Memory Cards and Estimated Capacities
- Movie
- NiMH Battery NB-3AH
- Battery Charger CB-5AH/CB-5AHE
- Compact Power Adapter CA-PS800
- Wide Converter WC-DC58N (Sold Separately)
- Numerics
- A
- B
- C
- D
- E
- F
- G
- H
- I
- J
- L
- M
- N
- 0
- P
- R
- s
- T
- V
- W
- Z
- Disclaimer
- Trademark Acknowledgments
- Functions Available in Each Shooting Mode
- Canon
Brand : Allview
Model : X3 Soul Mini
Category : Smartphone