
Micromat ML 7.60 - Microwave oven AEG - Free user manual and instructions
Find the device manual for free Micromat ML 7.60 AEG in PDF.


| Product Type | Microwave Oven |
| Brand | AEG |
| Model | Micromat ML 7.60 |
| Dimensions (H x W x D) | 280 x 450 x 350 mm |
| Weight | 14.5 kg |
| Rated Power Input | 1250 W |
| Microwave Power Output | 800 W |
| Frequency | 2.45 GHz |
| Capacity | 20 L |
| Display Type | LED Digital |
| Main Functions | Microwave cooking, Defrost, Auto Cook Programs, Timer, Child Lock |
| Door Opening | Side hinged, push-button |
| Interior Light | Yes |
| Turntable | Glass turntable, 270 mm diameter |
| Cleaning Instructions | Wipe interior with damp cloth and mild detergent; clean door seals regularly |
| Safety Features | Door interlock, overheating protection, automatic shut-off |
| Spare Parts Availability | Available through AEG customer service |
| Reparability | Not user-repairable; contact qualified service center |
| Voltage | 230 V / 50 Hz |
| Cord Length | 1.2 m |
Frequently Asked Questions - Micromat ML 7.60 AEG
User questions about Micromat ML 7.60 AEG
0 question about this device. Answer the ones you know or ask your own.
Ask a new question about this device
Download the instructions for your Microwave oven in PDF format for free! Find your manual Micromat ML 7.60 - AEG and take your electronic device back in hand. On this page are published all the documents necessary for the use of your device. Micromat ML 7.60 by AEG.
USER MANUAL Micromat ML 7.60 AEG
Operating Instructions & Cooking Advice
AEG
To become acquainted with this modern household appliance, it is essential that you read through this booklet carefully
Section I Operating Instructions Section II Use of Micro-Browner Section III Defrosting & Cooking Charts Section IV Questions and Answers
MICRO-BROWNER
Please note that this accessory, although supplied with the Micromat ML7.60 Microwave Oven, is chargeable as a separate item.
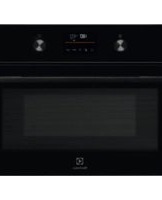
AEG-Microwave Oven Micromat ML 7.60


Specification of Microwave Oven Micromat ML 7.60 E.-No. 611 878 200
(1) Control Panel
(2) 99-Minute Digital Timer
(3) Setting Control for Digital Timer Scale (Minutes)
(4) Setting Knob for Digital Timer Scale (Seconds)
(5) Variable Cooking Selector
(6) Temperature Cooking with Indicator Light
(7) Setting Control for Temperature Cooking
(8) Appliance "On" Lamp
(9) Door Opening Bar
(10) Safety Locking System
(11) Oven Interior (Easily Cleaned Internal Acrylic Surfaces)
(12) Interior Light
(13) Permanently Fixed Ceramic Glass Plate
(14) See-through Door
(15) Socket for Food Sensor
(16) Plug for Food Sensor
(17) Sensitive Point of Food Sensor
In Addition
An audible signal at the end of the cooking cycle
Completion of Temperature Cooking by Indicator Light
( )
Setting Up the Oven
The following points must be noted:
-
Remove all material from the oven cavity.
-
Place the oven in the location of your choice but ensure there are at least 5 cm. (2") of clearance at the right hand side and 8 cm. (31") on the left and at least 3 cm. (11") on top, to ensure proper ventilation.

Electrical connection
Voltage 240 AC: Plug 13 amp fused or 15 amp.
WARNING: THIS APPLIANCE MUST BE EARTHED.
IMPORTANT: THE WIRES IN THE MAINS LEAD ARE COLOURED IN ACCORDANCE WITH THE FOLLOWING CODE:-
FIT THE MAINS LEAD WITH A 3-PIN PLUG
If these colours do not correspond with the above code then proceed as follows:
- The GREEN and YELLOW wire must be connected to the EARTH terminal in your plug, marked with the letter E or by the earth symbol or coloured GREEN, or GREEN and YELLOW.
- The BROWN wire must be connected to the LIVE terminal marked with the letter L or coloured RED.
- The BLUE wire must be connected to the NEUTRAL terminal marked with the letter N or colour BLACK.
When wiring the plug, ensure that all strands of wire are securely retained in each terminal. Do not forget to tighten the mains lead clamp on the plug. If your installation is fitted with 2-pin socket outlets, or if you are in doubt, consult a qualified electrician.
No other large appliance must be connected to the same socket in addition to the Microwave Oven.
IMPORTANT
If the appliance has been stored in a cold environment, wait for a few hours before connecting up.
Technical Data
- Safety Switch: The appliance door is protected by 3 safety devices: two locking switches and one monitoring switch. The electrical interconnections switch the microwave appliance off when the door is opened. A monitoring switch controls the start interlock. Should this fail the oven is isolated from the mains by the monitoring switch.
- Door with Safety Seal: 2 capacitive barrier zones, one induction system and one ferrite rubber insert prevent the leakage of microwave radiation.
- Economical operation means low power consumption. A highly efficient Magnetron ensures efficient energy utilisation.
| Total connected load | 1400W |
| Mains supply | 240V AC |
| Output power | 650W |
| Frequency | 2450 MHz |
| Cooling | Forced-air cooling |
| Timer with audible signal 99 minutes | |
| Dimensions | Oven | ||
| 38 cm high x 61.6 cm wide x 43 cm deep (15") | (24 _4 ") | (17") | |
| Cooking Chamber | |||
| 22 cm high x 35.6 cm wide x 41.3 cm deep (8 _4 ") | (14") | (16 _4 ") | |
Weight 32 kg
Accessories Micro-browner, Food Sensor, operating instructions, list of service departments with guarantee conditions.
Optional Extra Browning Skillet E.-No. 611 899 645 with cover, for frying, browning and roasting, casseroles, etc. Available from the dealer who supplied this appliance.


Golden Rules for Trouble-Free and Safe Operation of your Microwave Appliance
Never switch on the oven with the door open (as there could be a danger from exposure to microwaves.
Do not tamper with the safety interlock, or try to defeat it.
Always make sure that the safety interlock is functioning correctly and the oven door closes properly.
Do not place anything between the door and the front face of the oven surround or allow dirt or cleaner residue to accumulate on sealing surfaces.
Do not operate a damaged oven.
If the following faults occur:
- warped door
- broken or loose hinges or locks
- damaged door seals or sealing surfaces
these should only be repaired or adjusted by an AEG Service Engineer or Service Agent.

How Microwaves Cook
Traditionally, food heats and cooks because of molecular activity caused by a gas flame, burning wood and charcoal, or electricity converted to heat energy. This intense heat must be applied to the bottom of a pan of food or used to surround food in an oven with hot air. If food comes in direct contact with these traditional heat sources, it burns before it cooks through.
Now electrical energy can be converted to microwave energy by means of an electron tube called a magnetron. This tube is inside your Microwave Oven and sends microwaves directly into food.
Microwaves are classified as electromagnetic waves of a non-ionizing frequency and travel directly to food without heating the air or the recommended cooking dishes. The cooking process speeds up because it starts as soon as the oven is turned on.
Microwaves move directly to food because they are attracted to the fat, sugar and liquid or moisture molecules causing them to vibrate at a fantastically fast rate. This vibration is heat energy. The vibrating molecules bump and rub others, start these molecules vibrating and set up a chain reaction that moves from the outside edges, where microwaves first come in contact with food, toward the centre—cooking as it goes. This chain reaction is called conduction. The molecule vibration, or cooking, continues for several minutes after food comes from a microwave oven and is taken into consideration in microwave recipes.
Microwaves' specific attraction for moisture, fat and sugar in molecules, plus the fast molecule vibration rate this causes, results in the amazing speed of microwave cooking.


User Instructions

Please follow this general procedure:
- Set the cooking selector in accordance with the cooking charts in section III.
- Press down the door-opening bar. The oven interior light comes on automatically when the door is opened.
- Set the required time (see "Setting of Digital Timer").
- Place food in the oven and close door.
- A pinging sound or a flashing light indicate the end of the operating time, then the oven switches off automatically.
Note: If during the operating time the oven door is opened, the microwave cooking process stops immediately until the door is closed again. The same applies to the timer.
Cooking Selector
Variable power brings astounding flexibility to microwave cooking, for it allows you to choose the speed at which food cooks. It is as simple to use as a conventional cooker. Teamed up with microwave speed, it lets you enjoy outstanding cooking quality and convenience. A variable power microwave appliance cooks most food in about half the time or less, required for conventional cooking. Cool microwave cooking in hot weather is an additional advantage.
Attention: The cooking selector operates either with the digital timer or with the temperature control, using the food sensor.

Setting 6 radiates the most power and should be used to cook foods with high moisture content or foods that require fast, quick cooking to retain natural goodness, flavour and texture. Do not use this setting for “delicate” cooking.
● Cook fish and seafood dishes without butter, egg or sauce made with rich cream or sour cream.
● Quickly heat tender beef roasts; finish cooking on 4.
● Cook vegetables, unless recipe calls for butter, cream or egg sauces.
● Cook poultry such as tender young cut-up chicken or small whole birds weighing 3 pounds or under.
● Quickly heat less tender beef cuts before final cooking on a lower setting.
● Heat beverage liquids until bubbling to dissolve instant mixes or to reheat previously cooked beverages.
● Boil water before cooking rice or pasta.
● Finish cooking cakes and quick breads on this setting to set batter or dough after it rises.
● Cook fresh fruit and fresh fruit desserts that have no eggs or cream.
● Cook savoury or dessert sauces made with flour or cornflour—no cream or eggs.
● Cook fillings made with flour or cornflour—no cream or eggs.
● Preheat Micro-Browner.
Setting 5 provides a little less energy which makes it the most-used choice for heating previously cooked foods.
- Heat main dish mixtures made primarily from pre-cooked or canned foods. However, use a lower setting if recipe calls for "critical" ingredients such as eggs, cheese, cream, sour cream, kidney beans or mushrooms.
● Heat pre-cooked rice or pasta mixed with other "non-critical" ingredients.
● Heat cooked fruit and cook or heat pre-cooked fruit desserts with no cream, sour cream or eggs.
● Heat baked goods such as doughnuts, dinner rolls, coffee cake and sweet rolls.

● Heat all canned vegetables and entrées such as stews and spaghetti.
● Heat frozen foods that do not contain eggs, cheese, cream, sour cream, kidney beans or mushrooms.
● Heat fish fillets or fish fingers—pre-cooked and frozen.
Setting 4 has many functions because it uses medium energy. It cooks many meats and mixtures with critical ingredients especially well.
● Cook critical ingredient recipes—those containing mushrooms, cheese, sour cream, cream, mayonnaise, eggs, kidney beans or scallops.
● Finish cooking tender beef roasts.
- Start cooking less tender beef on this setting; finish on setting 3.
● Cook all minced meat.
● Cook most pork and lamb.
● Thaw whole poultry over 4 pounds.
● Cook large, whole chicken or turkey, geese, ducks and pheasants.
● Cook sandwiches, especially those with cheese.
● Melt and blend fat-sugar mixtures.
● Melt butter.

● Sauté finely-cut vegetables in butter.
● Cook frostings with lots of butter.
● Cook egg and cheese dishes.
● Bake pastry cases.
● Thaw meat over 4lb. (approx. 2kg.)

Setting 3 is slow and gentle—but still faster than conventional cooking.
● Bake yeast doughs.
- Let cakes and quick bread mixes rise and cook (finish on setting 6).
● Cook soft custards and custard based desserts containing eggs.
● Cook less tender beef—during major part of cooking time.
● Total cooking of small veal cuts and final cooking period of large veal cuts.
(Defrost) Setting 2 is used to defrost frozen foods that require a low energy setting and to cook some delicate foods.
● Cook rice or pasta—after water boils on 6.
● Cook baked custards and desserts with baked custard bases which cannot be stirred.
● Bake fruitcakes with a dense mixture full of fruit.
● Thaw meat and poultry under 4lb. (approx. 2kg.)
● Thaw fish.
Setting 1 is the gentlest in the variable power spectrum.
● Let yeast doughs rise.
- Keep food warm for about an hour.
● Soften cream cheese and butter.
The Setting 6 is the fastest cooking, 5 and 4 cook slightly slower, allowing more time for the heat to penetrate the centre of foods. 3 cooks like a mid-heat setting. 2 is slower, especially good for defrosting frozen foods. Finally, 1 offers the slowest cooking. You can also use any settings in between.
How You Will Cook With Microwaves
There are two questions to ask yourself in order to become a variable power microwave expert.
First: What's to be done with the food? Defrost it, heat it or cook it?
Second: What is this food like—(e.g. quantity, weight, density, compactness, temperature), before it goes in the microwave, and are any of the ingredients "critical" or sensitive to microwaves?
Answers to these two questions determine cooking time and technique (including things like oven settings, covering, stirring or turning) and utensils used.
The following paragraphs help answer these questions, define necessary microwave cooking techniques and list cooking utensils suitable for microwave cooking.
Oven Settings
The charts are designed to show you how to cook with variable power. Settings vary from 1 to 6. Cooking time is expressed in minutes and seconds. Check all controls on your oven before beginning to cook. Make certain that all controls are in the correct position.
Defrosting
Defrosting gradually heats frozen foods to change ice molecules into water without beginning the cooking process. This process must be slow. The setting 2 automatically reduces the power for even thawing.
Heating
Heating occurs when microwaves start food molecules vibrating. Porous food like bread quickly heats. Dense food, like meat, should be sliced to heat through without overcooking edges.
Cooking
Cooking is prolonged heating that changes food texture from a raw to a cooked state. Since microwaves are attracted to liquid, fat and sugar, variable power provides energy levels that assure even, quality cooking.
Browning
Seal steaks and chops on the Micro-Browner. Large meat items will brown in a microwave oven because the fat attracts microwaves and reaches a high temperature during cooking. Cakes and breads, however, will not brown in the oven.
Volume
When you increase the food volume, the concentration of microwaves in a given food item decreases—so cooking time goes up slightly. For example, one sandwich will heat faster than two.
Starting Temperature
Cold food takes longer to cook than room temperature or warm food. Lukewarm tap water heats faster than cold.
Density
Denser, more compact foods take longer to heat than porous foods. This is because microwaves penetrate deeper into porous items creating instant heat throughout. Microwaves first penetrate the outer portion of dense food and the centre must be heated by conduction from the hot, outer edges. A slice of meat, for example, heats in 2 to 3 minutes while a slice of bread the same size takes 30 seconds.
Arrangement
Minimise differences in density, volume or starting temperature of similar-size foods by arranging items in a ring, when possible, so there is no centre that must be heated. When the food varies in shape or size, place slow-to-heat dense food near the outside of the dish where heating takes place first.
Wave-Stirring
Variable power with its lower energy settings keeps stirring at a minimum. Handstirring reduces cooking time for "critical" foods that must be cooked more slowly. Heated portions are moved from the edges to the centre—cool portions to the edges
where they cook faster. Stirring also keeps "critical" foods from overcooking at edges.
Turning Food
Turn meat and other dense food over to ensure even cooking.
Covering
Glass lids, plastic wrap, wax paper, glass plates and saucers trap steam and hasten cooking. Remove covers carefully to avoid steam burns. Small pieces of aluminium foil may be used to prevent overcooked spots on large pieces of meat.
"Critical" Ingredients
This term refers to food items that microwave very quickly and can overcook, curdle or "pop". These foods are cheese, eggs, cream, sour cream, condensed milk, mayonnaise, snails, scallops, oysters, kidney beans and mushrooms.
Standing Time
Cooking continues after microwave cooking has finished. It is often advisable to undercook or underthaw food slightly and let the process finish during the standing time as suggested in recipes.
Glass Utensils
Ovenproof glass or glass ceramic oven-baking dishes are the most popular microwave cooking utensils. These dishes allow microwaves to pass through directly to food. Dishes will remain cool unless cooking is prolonged causing hot food to heat the dish.
Glass, sturdy china and pottery serving dishes can also be used. These should not have silver, gold, platinum or other metal trim which will be damaged by the microwaves.
Fine china should not be used at all if it has a metal signature on the bottom or any other metal trim. Without metal trim it may be used to heat pre-cooked foods for short periods of time.

Some paints or glazes used on glass dishes contain metallic substances and should not be used in a microwave oven.
If in doubt about any glass, pottery or china utensil, place it in the oven on 6 for 15 to 20 seconds. If the container feels warm when taken from the oven, do not cook or heat in it.
Plastics
Dishwasher-safe plastics, usually quite rigid material, can be used for cooking or heating.
Hard plastic trays, picnic ware, thermal cups, mugs and bowls (including sturdy dairy product containers) may be used in the oven. Melamine ware has a tendency to absorb energy, so you should give it a 15 to 20 second test on 6 to be certain your particular brand is safe. (See Glass Utensils).
Polystyrene dishes can be used for heating. Cover loosely (paper/plastic) to avoid dish distortion.
Plastic baby bottles are safe for heating milk or formulas.
Spatulas and spoons designed for non-stick pans can be left in the oven for a short-time.
Plastic wrap can be used as a tight covering, but it should be pierced before being removed to prevent steam burns on hands or arms.
Plastic "boil in the bag" cooking or heating is possible but slit bag before cooking so excess steam can escape.
Paper
Paper cups, plates, towels, wax paper and paper cartons can be used for heating. Prolonged time in the oven can cause paper to burn. Wax paper can be used as a covering during cooking.
Straw
Baskets can be used in the oven for the very short time it takes to heat rolls.
Metal
Metal dishes and foil reflect microwaves and inhibit cooking. Gaps in the metal particles of an object can also cause arcing. The walls of a microwave oven are made of smooth, continuous metal with no particle gaps.
Metal objects can be used in the oven under certain conditions although care must be taken that metal does not touch oven surfaces and arc.
Small pieces of aluminium foil can be used to cover spots on large pieces of meat which appear to be overcooking.
Foil TV-type trays can be used if no more than 34 " deep because microwaves reflect off the foil and must heat from the top food surface.
Metal skewers and clamps are usable when the proportion of food is much greater than the metal. Chunks of food filling shish kebab skewer microwave well without arcing. Metal clamps and clips on turkeys may be left on during cooking.
Do not use metal twister as they will arc. Sparks may ignite paper and plastic.
Wood
Moisture in wooden utensils evaporates during microwave cooking and will cause wood to crack. Small items such as a wooden spoon or wood-handled rubber spatula can be left in the oven for short periods of time.

Food Thermometers
Only the food sensors may be used during microwave cooking. Conventional meat thermometers may be inserted to test temperature after food is taken out of the oven. The reason? Mercury in conventional thermometers reflects microwaves and makes them inaccurate.
Micro-Browner
The unit is preheated in the microwave oven; then food is added to seal and/or brown. It is supplied with the ML 7.60.
Setting the Digital Timer

The AEG Microwave Oven is fitted with a 99-minute digital timer. There are two controls. A knob to the right of the indicator for setting seconds and individual minutes and a control to the left of the indicator for the quick setting of the ten digit scale on the minute indicator.
- Press the knob and turn it clockwise in order to set the seconds and minutes. In order to reduce the set time, the knob should be turned in an anti-clockwise direction. The minute indicator advances always after 60 seconds. For setting 15 seconds or less, set the indicator first to one minute and then go back to the required operating time.
- For longer cooking times, turn the control on the left of the timer upwards in 10 minute steps or for reducing turn it downwards.
To use this control, at least 15 seconds or more must be set first.
Examples:
Setting 3 minutes, 30 seconds: Press in the knob and turn it clockwise to 3 minutes, 30 seconds. Every time 60 seconds are reached an additional minute is indicated.
Setting 11 minutes: Press in the knob and turn it until 1 minute is indicated. Then turn the left-hand control upwards until 11 minutes are indicated.
Amendments to Operating Instructions on Microwave Oven MICROMAT 700
Model Number ML 7.60
The MICROMAT 700 has been technically improved. The "hold-warm" times have been limited to 15-30 minutes on the new MICROMAT 700, in order to avoid vitamin losses.
Would you please therefore, remove page 19 from your operating instructions and insert this alteration sheet.
Special Notes:
Microwave Energy
Persons must not be exposed to the microwave energy which could be emitted by the oven if this is used or connected incorrectly. All input and output connections, linings, waveguides and flanges must be well sealed.
During operation you must not look into the open waveguide or into the microwave transmitter.
Do not use the oven if faulty. It is particularly important that the oven door closes properly and that there is no damage to 1—the door, 2—the door hinges (broken or loose) and 3—the door seals and their surface.
The appliance must only be adjusted or repaired by an AEG Service Engineer.
When telephoning or writing to the Customer Service Department please state the Model and the E-Number. You will find these on the rating-plate which is fixed to the back of your oven.
YOU MUST always insert the Food Sensor into the thickest part of the meat and place it at the centre of the food to be heated.
YOU MUST check that the point of the Sensor is pushed about 12 mm ( 12 in) into the more solid part of the food to be heated.
NEVER operate the oven when it is empty and the Sensor is plugged in.
NEVER allow the Sensor to touch the sides, top or bottom of the oven cavity during operation.
NEVER use the Food Sensor in a conventional oven. It was specially developed for cooking with your Microwave Oven.
NEVER try inserting the Sensor into frozen foods.
NEVER plug any other device into the socket in the oven cavity than the Food Sensor.
NEVER clean the Sensor in a dishwasher.
Cleaning and Care
The door seal should be free from deposits of fat, dirt and splashes.
After use wipe the oven cavity to remove moisture and food deposits.
For cleaning the oven front and the inside walls use a liquid window cleaner or a mild detergent, water and a soft, clean cloth.
Any smell remaining in the oven interior can be removed by boiling a cup full of water with a few spoonfuls of lemon juice in the oven for five to seven minutes.
Cleaning the Food Sensor
Remove the Sensor from the socket.
Wipe all food remains or liquid off it with a damp cloth.
The Sensor must not be washed in a dishwasher.
Replacing the Oven Light Bulb
Remove screws and cover at the back of the oven. Replace the defective bulb by an ordinary 40W electric bulb. Then carefully replace cover and tighten the screws.
Section II
Use of Micro-Browner
Introduction to use of Micro-Browner
Your Micro-Browner works in a similar fashion to a conventional frying pan or grill. The surface of the grill is heated. When the food is then placed on it, it cooks and browns in the same way as it would in a frying pan.
The food prepared in a Microwave Oven is tender, juicy and full of flavour because it is quickly cooked without the inside of the oven getting hot. Large joints, turkeys and chickens are browned in the Microwave Oven by their natural fat and juices. However, as no heat is present in the Microwave Oven smaller pieces such as steaks and hamburgers do not brown and grill and fried eggs are not fried by themselves in the oven. With the Micro-Browner it is possible to brown, roast, grill and bake whilst cooking with microwaves. Your microwave appliance and kitchen remain cold, but nevertheless you will be pleased by the appetising appearance of your dishes in the way you are used to from conventional roasting. And all the time you are preparing the food with the speed of a Microwave Oven at a fraction of the operating costs using conventional roasting or grilling appliances.
How Does the Micro-Browner Brown?
It is made from a special ceramic material and is provided with a special base. Unlike most glass crockery which allows the microwaves to pass through freely, the special base of the Micro-Browner absorbs microwave energy. When you place it in the oven for preheating it becomes very hot. When you then place food on it the hot surface starts the browning process. When the Micro-Browner is put back into the oven the food absorbs most of the microwave energy and the browning process continues.
What Happens During Browning?
The food to be roasted is browned very quickly on the first side by the heat stored in the Micro-Browner. At the same time the microwave energy browns and cooks the part of the roast which is not in direct contact with the hot surface. Meat juices collect in the drip well surrounding the Micro-Browner. Generally speaking the roast browns best on the first side due to the stored heat in the Micro-Browner.
Do You Use the Same Pre-Heat Time for all Types of Food?
No, the pre-heat times must be adapted to the type of food. The more browning required (eg for meat) the longer the pre-heat time becomes. In the same way for larger quantities of food and for colder food a correspondingly longer pre-heat time must be chosen.
Does the Food Stick to the Micro-Browner Surface?
Some food with very little natural fat does stick to it. For these simply spread some butter on the roast or a little vegetable margarine on the Micro-Browner surface to prevent sticking. We think that butter both assists browning and improves the taste of lean meat, bread, cake or vegetables.
How Do I Clean the Micro-Browner?
The most suitable cleaning agents are detergents and hot water. You can immerse it in water and also wash it in a dishwasher like any other glass ceramic crockery. For any stubborn stains we recommend the use of a plastic brush and a domestic cleaner such as "Jif". These cleaning agents should not be used on the underside of the plate as this might damage the special base.
Observe the Following Notes when using the Micro-Browner
Keep to the pre and re-heating times given in the timetable.
Make sure that the food is fully defrosted before cooking. Any ice crystals still remaining in the food prevent browning.
The food is always cooked on the Micro-Browner without any cover.
Do not use plastic or metal spatulas.
When cooking meat, fat and juice may splash but these can easily be wiped off after the cooking process.
The well holds drippings from most foods. If there is an excess of juice and fat it may be necessary to empty the well during cooking.
Before reheating the Micro-Browner any fat or meat juice which has dripped on to it should be scraped from the grill surface into the well.
The hot Micro-Browner can be placed direct onto most working surfaces of modern kitchen furniture. On table surfaces you must however be careful as the heat is enclosed on the underside and could cause damage.
The Micro-Browner becomes very hot during reheating. Therefore never touch the surface or the underside when it is in use.
When the food has been cooked sufficiently remove it immediately to prevent overcooking.
Do not use a sharp knife for cutting as this may scratch the surface. The scratches will not, however, affect its use.
The handles normally stay sufficiently cool to be touched. For safe working, however, when cooking for a longer time and when the well is full of hot juices it may be necessary to use oven cloths.
It can be immersed in water even when hot, but is easier to handle if you allow it to cool first.
Only use the Micro-Browner for microwave cooking.
As during conventional roasting, a certain amount of smoke may develop.
Like any ceramic object it can break.
How to Proceed for Browning on the Micro-Browner
-
Place the empty Micro-Browner into the Microwave Oven for preheating. Set the cooking selector to 6, set the timer and operate the oven as for cooking.
-
If butter or oil have to be used brush this on the Micro-Browner.
-
Place the food on Browner, when preheated. Set the time and cook the first side for the time given in the table or the recipe.
-
Turn the roast in order to brown the other side if required. Set the time and cook the second side as indicated.
-
Before browning, again scrape the fat and any food particles from the surface into the well and re-heat the Micro-Browner for the indicated time (generally one half to two thirds of the original preheat time).
Cooking Chart for use with Micro-Browner
| Food | Approx Quantity | Preheat Time (min) | Notes | Cooking Time First Side | Cooking Time Second Side (min) | |
| Meat | ||||||
| Sausage | 450g | (1 lb) | 8 | — | 3 | 4—5 |
| Smoked Bacon Rashers | 6 slices | 8 | cut to 1 in | 112 | 112-2 | |
| Steak | 900g | (2 lb) | 9 | use tenderiser | 3 | 3 |
| Filet Mignon 4 | 170g | (6 oz each) | 9 | butter grill | 3 | 3 |
| Ham slices | 675g | (1 lb 8 oz) | 7 | cut 1 in thick | 112 | 1—2 |
| Hamburgers | 675g | (1 lb 8 oz) | 8 | 4 to 6 pieces | 3 | 2—3 |
| Lamb cutlet | 6 pieces | 8 | cut 1 in thick | 6 | 5—6 | |
| Lamb rissoles | 750g | (1 lb 10 oz) | 8 | 6 pieces | 3 | 2—3 |
| Meat balls 12 | 450g | (1 lb) | 8 | 2 in diameter | 2 | 312-412 |
| Minute steak (rare) | 450g | (1 lb) | 8 | butter grill | 2 | 2 |
| Pork chops | 4 pieces | 8 | cut 1 in thick | 6 | 5 | |
| Gammon | 4 pieces | 8 | cut 1 in thick | 6 | 5 | |
| Sirloin steak (rare) | 900g | (2 lb) | 9 | butter grill | 3 | 1—2 |
| T-Bone steak (rare) | 2 (3 in thick) | 9 | butter grill | 3 | 2 | |
| Veal steak | 675g | (1 lb 8 oz) | 8 | coated with egg and breadcrumbs | 2 | 2—3 |
| Roast chicken | 1250g | (23 lb) | 8 | 4 pieces | 10 | 15—17 |
| Fish fillet, fresh | 675g | (1 lb 8 oz) | 8 | butter grill | 2 | 112-2 |
| Fishfingers, frozen | 225g | (8 oz) | 7 | butter grill | 2 | 112-2 |
| Fish, frozen | 450g | (1 lb) | 7 | butter grill | 3 | 2—3 |
| Salmon | 4 slices | 8 | butter grill | 212 | 3-312 | |
| Starters | |||||
| Meat balls 25 | 450g (1 lb) | 5 | 1 in diameter | 112 | 1-112 |
| Pizza | 170g (6 oz) | 5 | frozen | 1 | 112-2 |
| Eggs, fried | 1—2 | 5 | butter grill | 34-112 | — |
| 3—5 | 5 | in foil forms | 2—4 | ||
| Sandwiches | |||||
| Toasted | 4 | 5 | spread with butter | 1 | 1-112 |
| Open sandwiches | 4 | 5 | spread with butter | 112-2 | — |
| Pizza, frozen | 10 in diameter | 5 | — | 5—6 | — |
| Fritters | 4—6 slices | 5 | butter grill | 12 | 1-112 |
| Garlic Bread | 8 slices | 5 | spread with butter | 112 | 112-2 |
| Pancakes | 2—3 pieces | 5 | butter grill | 34 | 1-112 |
| Vegetables | |||||
| Whole cabbage | in 6 wedges | 5 | brush with butter | 2 | 212-3 |
| Fresh mushrooms | 225g ( 12 lb) | 5 | butter grill | 1 | 1—2 |
| Potatoes sliced | 4 med. | 5 | butter grill | 5 | 5—6 |
| Potato pancakes | 4 pieces | 5 | butter grill | 4 | 2—3 |
| Grilled tomatoes | 9 slices | 5 | coat with breadcrumbs | 1 | 1-112 |
| Dessert | |||||
| Grilled bananas | 3 | 5 | cut lengthwise | 1-114 | — |
| Grilled pineapple | 1 (fresh) | 5 | spread butter on slices | 4 | 1-112 |
Section III
Defrosting & Cooking Charts
Quick Defrosting Process
The single step method of defrosting is covered by the defrosting charts. You may want to speed up the defrosting of solid food weighing over 450g. Microwaves penetrate frozen food with difficulty during the first few minutes but when it is partly defrosted it is much easier. The defrosting time can be reduced by starting with power setting 6 and then reducing it to setting 2 (defrosting).
How to Speed Up Defrosting
- Set the cooking selector to 6 and the time to 2 minutes for each 450g (1 lb) of solid food.
- Then set the cooking selector to 2 and the timer to 3 minutes for each 450g (1 lb) or until the food has been defrosted.
In this way the defrosting time is reduced considerably.
Example:
With the quick defrosting process the following would occur:
- With the cooking selector on setting 6 and on 2 minutes per 450g (1 lb) (2 minutes x 4 = 8 minutes)
- With cooking selector on setting 2 and on 3 minutes per 450g (1 lb) (3 minutes x 4 = 12 minutes)
This gives a total time of 20 minutes. Compared with 35 minutes at the defrost setting 2 you save 15 minutes.
How to Defrost Fish and Seafood
● Thaw fish and seafood in original closed package in a suitable baking dish.
- DEFROST on setting 2. This thawing technique allows enough heat to penetrate the centre to warm and defrost it without starting the cooking process at outer edges.
● Let fish or seafood rest 5 minutes in package after removing from oven.
● Rinse whole fish or seafood under cold running water to finish thawing centre before cooking.
● Carefully separate fish fillets under cold running water.
| Fish/Seafood | Weight | Minutes |
| Frozen Fillets | ||
| Sole, Perch, Pike, Halibut, Whitefish | 450g (1 lb) pkg. | 10 to 12 |
| Whole Fish | 675 to 800g(1 12 to 1 34 lb) | 13 to 14 |
| Salmon Steaks | 450g(1 lb) | 5 to 6 |
| Scallops | 340g (12 oz) pkg.450g (1 lb) pkg. | 4 to 55 to 6 |
| Shrimp | 225g (8 oz) pkg.450g (1 lb) pkg. | 3 to 45 to 6 |
| Lobster Tails | 225g (8 oz) pkg. | 6 to 7 |
How to Defrost Meat
● Thaw meat in its original wrapping. Place wrapped meat in a suitable baking dish to catch drippings.
● Meat weighing 4 lb (approx. 2Kg) and over is thawed on 4; under 4 lb (approx. 2Kg) thawed on 2.
● Turn large cuts during defrosting as specified in chart.
● Meat should be icy in centre when removed from oven. Edges will begin cooking if microwaves thaw meat completely.
● Standing time in package is necessary to complete thawing before cooking.
| Cut | Weight | Cooking Selector Setting | Defrosting Time | Approximate Standing Time (at room temp) | |
| Beef | |||||
| Rib roast, rolled | 3.2 to 3.6Kg(7 to 8 lb) | 4 | 8 min; turn.Repeat 3 times. | 2 hrs. | |
| 1.4 to 1.8Kg(3 to 4 lb) | 2 | 30 to 35 min. | 1 hr. | ||
| Rib Roast, (Bone in) | 2.25 to 2.7Kg(5 to 6 lb) | 4 | 8 min; turn.Repeat 3 times. | 2 hrs. | |
| Sirloin Roast | 1.8 to 2.25Kg(4 to 5 lb) | 4 | 8 min; turn.Repeat twice. | 2 hrs. | |
| Rump Roast, boneless | 2.7 to 3.2Kg(6 to 7 lb) | 4 | 10 min; turn.8 to 10 min. | 2 hrs. | |
| 1.4 to 1.8Kg(3 to 4 lb) | 2 | 20 to 22 min. | 1 hr. | ||
| Stewing Meat | 0.8 to 1Kg(1 34 to 2 lb) | 2 | 8 to 10 min. | 5 min. | |
| Minced Beef | 450g | (1 lb) | 2 | 8 to 10 min. | 5 min. |
| 900g | (2 lb) | 2 | 18 to 20 min. | 5 min. | |
Lamb
| Leg Roast | 1.8 to 2Kg(4 to 412 lb) | 4 | 10 min; turn.10 min. | 1 hr. |
| Shoulder Roast | 1.5 to 1.6Kg( 314 to 312 lb) | 4 | 10 min; turn.5 to 6 min. | 1 hr. |
| Steaks | 0.9 to 1.1Kg(2 to 212 lb) | 2 | 8 to 10 min. | 5 min. |
| Spareribs | 1 to 1.1Kg( 214 to 212 lb) | 2 | 8 to 10 min. | 5 min. |
Offal
| Liver | 225g (8 oz) | 2 | 5 to 6 min. | 5 min. |
| 450g (1 lb) | 2 | 6 to 7 min. | 5 min. | |
| Kidney | 900g (2 lb) | 2 | 6 to 8 min. | 5 min. |
Pork
| Loin Roast, boneless | 1.8 to 2.25Kg(4 to 5 lb) | 4 | 10 min; turn.5 to 6 min. | 1 hr. |
| Loin Roast, centre rib | 1.8 to 2.8Kg(4 to 5 lb) | 4 | 10 min; turn.5 to 6 min. | 1 hr. |
| Tenderloin | 0.8 to 1Kg( 134 to 2 lb) | 2 | 12 to 15 min. | 5 min. |
| 1.4 to 1.6Kg | ||||
| Loin Chops, 1 in thick | (3 to 312 lb) | 2 | 10 to 15 min. | 10 min. |
| Chops, 12 in thick675g | ( 112 lb) | 2 | 10 to 15 min. | 5 min. |
Veal
| 1.1 to 1.4Kg | |||||
| Rump Roast, (Bone in) (2 12 to 3 lb) 2 | 10 to 15 min. | 30 min. | |||
| 2.25 to 2.7Kg | |||||
| (5 to 6 lb) | 4 | 10 min; turn. | |||
| 8 to 10 min. | 1 hr. | ||||
| Chops | 450 to 900g | (1 to 2 lb) | 2 | 12 to 15 min. | 5 min. |
| Steak | 450g | (1 lb) | 2 | 7 to 8 min. | 5 min. |
Rabbit
| Cut up | 0.9 to 1.1Kg(2 to 212 lb) | 2 | 20 to 22 min. | 5 min. |
How to Defrost Poultry
● Thaw poultry in its original wrapping including metal clip. Place in a suitable baking dish to catch drippings.
● Whole poultry and parts weighing 4 lb (approx. 2Kg) and over are thawed on setting 4.
● Whole poultry and parts weighing under 4 lb (approx. 2Kg) are thawed on setting 2. This defrosting technique allows enough heat to penetrate meat to warm and defrost centre without starting cooking process at outer edges.
- Start whole birds thawing with breast side up. See chart for specific oven settings and times.
● Poultry should be icy in centre when taken from the Microwave Oven.
● Finish thawing by immersing poultry in cold water to ensure that it is always completely thawed before cooking.
- Remove loosened giblets from whole birds and set aside for gravy or stock.
| Poultry | Weight | Cooking Selector Setting | Time |
| Chicken | |||
| Whole | 0.9 to 1.4Kg(2 to 3 lb) | 2 | 20 to 25 min. |
| Whole | 1.4 to 1.8Kg(3 to 4 lb) | 2 | 25 to 30 min. |
| Cut up | 1.1 to 1.4Kg( 212 to 3 lb) | 2 | 14 to 16 min. |
| Breasts | 225g | 4 to 6 ( 12 lb ea.) | 15 to 17 min. |
| Legs | 450g | (1 lb) | 7 to 8 min. |
| Wings | 675g | ( 112 lb) | 6 to 8 min. |

| Turkey | |||
| Whole | 3.6 to 5.4Kg(8 to 12 lb) | 4 | 15 min., rest 10 min.;turn over;15 min. Stand in cold waterabout 1 hr. |
| 5.4 to 7.2Kg(12 to 16 lb) | 4 | 20 min., rest 10 min.;turn over;20 min. Stand in cold waterabout 112 hrs. | |
| 7.2 to 9Kg(16 to 20 lb) | 4 | 15 min., rest 10 min.;turn over;15 min., rest 10 min.; repeatonce. Stand in cold waterabout 2 hrs. | |
| Capon | |||
| Whole | 2.7 to 3.6Kg(6 to 8 lb) | 4 | 15 min., rest 10 min.;turn over;15 min. Stand in cold waterabout 1 hr. |
| Duckling | |||
| Whole | 1.8 to 2.25Kg(4 to 5 lb) | 4 | 10 min., rest 10 min.;turn over;10 min. Stand in cold waterfor about 30 min. |
| Goose | |||
| Whole | 4 to 5Kg(9 to 11 lb) | 4 | 20 min.; rest 10 min.;turn over;20 min. Stand in cold waterabout 1 hr. |
How to Cook Fresh Fish and Seafood
● Cook flaky-tender fresh or frozen fish and seafood (thawed) in a microwave oven.
● Thaw fish or seafood before cooking. Use defrosting chart. Complete thawing under cold, running water.
● Cook fish or seafood in a suitable baking dish or casserole. Glass or pottery serving platters may be used if they do not have gold, silver, platinum or other metal trim.
- Place steaks and fillets in baking dish with thicker edges and larger pieces toward outside of baking dish. Arrange small whole fish with tail ends toward centre of baking dish.
● Cover cooking dish with a fitted glass lid or plastic wrap tucked tightly across the top. Pierce plastic wrap to allow steam to escape.
● Cook on setting 6.
- Let fish stand, covered, for 5 minutes to complete cooking.
● Fish is done if it flakes when lifted gently with a fork near centre.
| Fish/Seafood | Weight | Container | Minutes |
| Fillets: | |||
| Sole, Halibut, 450g | (1 lb) | suitable baking dish | 6 to 7 |
| Perch, Pike, Whitefish 900g | (2 lb) | 8 to 9 | |
| Whole Fish | |||
| 675 to 800g | (1 12 to 1 34 lb) suitable baking dish | 10 to 12 | |
| Shrimp or Scallops 225g | (8 oz) pkg. | casserole | 6 to 7 |
How to Roast Meats
● Microwave fresh or completely thawed frozen meat.
● Season meat to taste. Place meat, fat side down on baking dish.
- Microwave on "first setting" for half of the total cooking time.
● Turn meat, fat side up. Meat weighing 7 pounds or over should be turned 3 times during cooking.
- Microwave on "second setting" for second half of cooking time. Check for desired doneness as specified in chart.
- Use a microwave meat thermometer in a microwave oven during cooking. DO NOT use a conventional meat thermometer in a microwave oven.
- Let meat stand, covered with foil, about 10 minutes before serving. Temperature will rise about 8^ during standing time as meat continues to cook to final desired doneness.
| Roasting Meat | First Setting | Second Setting | Condition of Meat from Oven | Approximate Cooking Time per 450g |
| Roasting joints of Beef | 6 | 4 | Rare 50 to 55°C | 8 to 9 mins |
| Medium 55 to 60°C | 10 to 11 mins | |||
| Well done 65 to 70°C | 12 to 13 mins | |||
| Roasting joints of Pork | 6 | 4 | 90°C | 10 to 11 mins |
| Roasting joints of Lamb | 4 | 4 | 80 to 85°C | 10 to 11 mins |
| Roasting joints of Veal | 4 | 3 | 80°C | 10 to 11 mins |

How to Cook Poultry
● Poultry should be completely thawed before cooking. See defrosting chart.
● Season meat to taste before cooking.
- Choose suitable baking dish to fit the size of the whole poultry or pieces to be cooked.
- Arrange pieces of poultry with skin side up and thick edges toward outside of dish.
● Metal clip holding drumsticks may be left in place on large whole birds during cooking.
● Most whole poultry is cooked uncovered.
- When two different settings are mentioned, use setting 6 during first cooking period; setting 4 during the second.
● Stuffing does not increase cooking time.
● Foil may be used to cover portions of the meat that appear to be drying during cooking. Do not allow foil to touch oven interior or the microwaves will arc and pit oven surfaces.
- Chicken and turkey pieces cooked without sauce or crumb coating should be covered during cooking and standing time. Use tightly-tucked plastic wrap or wax paper. Pierce wrap before removing it so steam escapes slowly and does not burn hands.
● Poultry weighing 10 lb (4.5Kg) or less should be turned over once during cooking; when over 10 lb (4.5Kg), turn over three times.
● The Food Sensor, registering 75^ C when bird comes from the oven, is an accurate test for doneness with whole birds. When a bird must be turned insert Sensor into thick part of the thigh after bird is turned the last time. DO NOT use a meat thermometer in a Microwave Oven.
● Other doneness tests: Meat and juices are no longer pink when bird is sliced between leg and body. Leg and thigh meat of small birds is tender when pinched. A conventional meat thermometer, inserted in thickest part of thigh meat after bird comes from oven, registers 75°C. At the end of cooking time it is a good idea to check doneness in both thighs in birds weighing 10 lb (4.5Kg) or more.

● Poultry skin may be crisped by placing it under a conventional oven grill for a few minutes before standing time.
● Standing time is ESSENTIAL to complete cooking. Allow whole birds or pieces totalling 10 lb (4.5Kg) or less to stand 5 to 10 minutes after being taken from oven. Birds and pieces over 10 lb (4.5Kg) should stand 10 to 15 minutes.
● Cover whole birds tightly with foil during standing time. Cover cut-up poultry with glass lid, plastic wrap or wax paper.
- Duck and goose are fatty meats. Drain excess fat from dish during cooking to prevent spatters and possible smoking.
| Poultry | Weight | Cooking Selector | Approximate Cooking Time | |
| First Setting | Second Setting | |||
| Chicken | ||||
| Whole, fryer | 0.9 to 1.4Kg(2 to 3 lb) | 6 | 6 | 8 min. per lb |
| Whole, roasting | 1.4 to 1.8Kg(3 to 4 lb) | 6 | 4 | 9 min. per lb |
| Cut Up | 0.9 to 1.4Kg(2 to 3 lb) | 6 | 6 | 8 min. per lb |
| Pieces | 450 to 900g(1 to 2 lb) | 6 | 6 | 8 min. per lb |
| Turkey | ||||
| Whole | 3.6 to 4.5Kg(8 to 10 lb) | 6 | 4 | 8 min. per lb |
| 4.5 to 6.3Kg(10 to 14 lb) | 6 | 4 | 9 min. per lb | |
| Breast, (Bone in) | 1.8 to 2.25Kg(4 to 5 lb) | 4 | 4 | 11 min. per lb |
| Pieces | 0.9 to 1.4Kg(2 to 3 lb) | 4 | 4 | 15 min. per lb |

| Capon | ||||
| Whole | 2.7 to 3.6Kg(6 to 8 lb) | 6 | 4 | 8 min. per lb |
| Duckling | ||||
| Whole | 1.8 to 2.25Kg(4 to 5 lb) | 4 | 4 | 10 min. per lb |
| Goose | ||||
| Whole | 4 to 5Kg(9 to 11 lb) | 4 | 4 | 10 min. per lb |
How to Cook a Few Chicken Pieces
● Cook 1 tablespoon butter on 4 setting until melted.
● Roll chicken piece in melted butter, then in seasoned dry bread crumbs.
● Place chicken, skin side down, in a suitable flat baking dish.
● Turn chicken piece(s) over halfway through cooking time.
● Cook on 6 until fork tender.
| Chicken Piece | Weight | Cooking Selector Setting | Time |
| 1 Wing or Drumstick | 112g(4 oz) | 6 | 4 to 412 min. |
| 1 Thigh or Breast | 140 to 170g(5 to 6 oz) | 6 | 5 to 6 min. |
| 3 Individual Pieces Assorted | 395g(14 oz) | 6 | 10 to 11 min. |
| 1 Thigh-Leg(2 pieces attached) | 250g(9 oz) | 6 | 7 to 8 min. |
| 1 Quarter | 280g(10 oz) | 6 | 8 to 9 min. |

Whole Chicken and Capon Key
Small tender whole chicken 3 lb (1.4Kg) and under, may be cooked quickly on 6. Whole chicken and capon over 3 lb (1.4Kg) begin cooking on 6 to heat meat through. Then continue on 4 to tenderise meat and keep it juicy.
Thaw poultry completely before cooking. See defrosting chart in this chapter.
Stuffing will not increase cooking time.
Arrange birds, breast side down in a suitable oven dish.
Turn poultry over once halfway through cooking when weight is under 10 lb (4.5Kg). See cooking chart for larger birds.
Drain fat from dish in which goose or duck are cooking halfway through cooking period. Draining prevents spatters and possible smoking.
Foil may be used to cover portions of meat which appear to be drying during cooking. Do not let foil touch oven interior or arcing and pitting may result.
Skin may be crisped under a conventional grill for just a few minutes then let bird stand covered for 5 to 10 minutes.
Standing time is essential to assure a well cooked bird. Follow directions carefully.
The Food Sensor inserted in the thickest part of the thigh registers doneness at 75°C at the end of cooking time. Insert Sensor after bird is turned in the oven. DO NOT use conventional meat thermometer in a microwave oven.
Other doneness tests: Meat and juices are no longer pink when bird is sliced between leg and body. A conventional meat thermometer, inserted in thickest part of the thigh AFTER bird comes from oven, registers 75°C.
How to Cook Fresh and Frozen Vegetables
● Cook all fresh and frozen vegetables on setting 6.
● Average cooking time for a 2 lb (900g) package of frozen vegetables is 10 to 12 minutes.
● Cook all frozen vegetables icy side up.
- Slit all frozen "boil in the bag" containers before cooking so steam can escape.
- Add 4 tablespoons of water when cooking fresh vegetables except for Baked Potatoes.
● For softer cooked vegetables, add more water and increase total cooking time.
- Arrange spear vegetables with the stalk end which takes longest to cook toward the outside of the cooking dish.
- IMPORTANT! Pierce or prick whole fresh vegetables, such as white or sweet potatoes, before placing in the microwave.
● Cook vegetables in a covered baking dish or casserole.
● Rearrange or stir vegetables halfway through cooking.
- Microwave cooking continues after food is taken from the oven—especially with vegetables like potatoes. This additional standing time varies from 2 to 5 minutes, depending on the amount and density of food being cooked.

Fresh and Frozen Vegetable Cooking Chart
| Vegetables | Amount | Minutes | Vegetables | Amount | Minutes |
| Artichokes | Broccoli | ||||
| Fresh 9cm | 1 | 5 to 6 | Fresh | 675g | |
| (3 12 inches) | 2 | 7 to 8 | (1 12 lb) | 10 to 12 | |
| in diameter | 3 | 9 to 10 | |||
| 4 | 11 to 12 | ||||
| 280g | Frozen | 280g(10 oz) pkg. | 8 to 9 | ||
| Frozen Hearts (10 oz) pkg. | 5 to 6 | Brussel Sprouts | |||
| Asparagus: Spears, Cut | Fresh | 225g(1 12 lb) | 5 to 7 | ||
| Fresh 340g | (3 12 lb) | 5 to 6 | 450g(1 lb) | 7 to 8 | |
| 675g | (1 12 lb) | 9 to 10 | |||
| 250g | Frozen | 225g(8 oz) pkg. | 8 to 9 | ||
| Frozen | (9 oz) pouch | 6 to 7 | |||
| Beans: Green | Cabbage | ||||
| Fresh | 450g(1 lb) | 12 to 14 | Fresh | 12 medium | 5 to 6 |
| 900g(2 lb) | 16 to 18 | Shredded | 1 medium | 8 to 9 | |
| Carrots | |||||
| Frozen | 280g(10 oz) pkg. | 8 to 9 | Fresh | 2 medium | 5 to 6 |
| Sliced, Diced, | 4 medium | 8 to 10 | |||
| Silvered | 6 medium | 10 to 12 | |||
| Frozen French Style or Cut | 280g(10 oz) pkg. | 8 to 10 | |||
| Beets | Frozen | Diced orWhole | |||
| Fresh Whole | 4 medium | 16 to 18 | |||
| Vegetables | Amount | Minutes |
| Cauliflower | ||
| Fresh | 1 medium | 7 to 8 |
| Broken into Florets | ||
| Whole | 1 medium | 8 to 9 |
| Whole | 1 large | 12 to 14 |
| Frozen | 280g(10 oz) pkg. | 8 to 9 |
| Celery | ||
| Fresh | 6 stalks | 10 to 12 |
| Corn on the Cob | ||
| Fresh | 2 | 4 to 5 |
| 4 | 7 to 8 | |
| 6 | 9 to 10 | |
| Frozen | 2 | 6 to 8 |
| 4 | 10 to 12 | |
| Onions | ||
| Fresh | 8 small or | 6 to 7 |
| Quartered | 2 large | |
| 4 large | 8 to 9 | |
| Frozen in Cream Sauce | 280g(10 oz) pkg. | 6 to 7 |
| Vegetables | Amount | Minutes |
| Parsnips | ||
| Fresh Quartered | 4 | 8 to 9 |
| Peas, Green | ||
| Fresh | 280g(2 lb)1.4Kg(3 lb) | 8 to 910 to 11 |
| Frozen | 280g(10 oz) pkg. | 6 to 7 |
| Peas and Carrots | ||
| Frozen | 10 oz pkg. | 7 to 8 |
| Potatoes | ||
| Fresh baked (Do not over-cook potatoes as extreme dehydration might cause smoke or fire). | 1 medium2 medium4 medium6 medium8 medium | 4 to 412 7 to 810 to 1216 to 1822 to 24 |
| Fresh boiling Quartered | 24 | 10 to 1118 to 20 |
| Spinach | ||
| Fresh | 450g(1 lb) | 6 to 7 |
| Frozen Leaf or Chopped | 280g(10 oz) pkg. | 7 to 8 |
Courgettes
| Fresh | 2 medium | 7 to 8 |
| Sliced | 3 cups |
| Vegetables | Amount | Minutes |
| Turnips | ||
| Fresh | 4 medium | 12 to 14 |
| Cut in Eighths | ||
| Vegetables, Mixed | ||
| 280g | ||
| Frozen | (10 oz) pkg. | 6 to 7 |
Rice Key
Bring water, butter and seasonings to the boil, covered, on setting 6 before stirring in rice. Hot tap water comes to a boil the fastest.
Cook raw rice on 4. Slow cooking gives light fluffy texture.
Rice expands two to three times its dry volume so use a container that's big enough to hold both rice and water.
Cover rice with a fitted glass lid or plastic wrap when cooking.
Let rice stand 5 minutes, covered, before serving so it absorbs all moisture and fluffs.
Flake rice as little as possible so it does not mush.
Rehydrate quick-cooking rice in a glass serving casserole. Bring water to boil on setting 6. Stir in quick-cooking rice, cover and let stand as directed on package.
Reheat rice, covered, on 4 until steaming hot. If rice has been refrigerated, stir once during heating.
Cook rice ahead and use in casserole dishes calling for rice.
Rice Yields
1 cup raw white rice = 3 cups cooked rice.
1 cup raw brown rice = 4 cups cooked rice.
1 cup quick-cooking rice = 2 cups cooked rice.

How to Cook Rice
- Choose a glass cooking dish two to three times as large as the amount of dry rice to be cooked—rice expands during cooking.
- Add 1 teaspoon salt and 1 tablespoon butter to water.
● Bring water and seasonings to the boil on setting 6.
● Stir in raw rice and cook on setting 4.
● Always cook rice covered. Use a fitted glass lid or tautly-stretched plastic wrap. - Let cooked rice stand, covered, 5 minutes after being removed from the oven.
● Cook quick-cooking rice in a glass or pottery serving casserole without silver, gold or other metal trim. Boil water on setting 6. Stir in quick-cooking rice; cover, and let stand as directed on package.
| Rice | Covered Casserole | Water | Cooking Selector first setting and time | Add Rice | Cooking Selector second setting and time |
| Short Grain White | 2 qt. | 2 cups | 64 to 5 min. | 1 cup | 215 to 16 min. |
| Long Grain White | 2 qt. | 2 cups | 64 to 5 min. | 1 cup | 215 to 18 min. |
| Brown | 3 qt. | 3 cups | 66 to 7 min. | 1 cup | 225 to 30 min. |
| Quick-Cooking | 1 qt. | 1 cup | 63 to 4 min. | 1 cup | Rest, covered,5 min. or until all water absorbs |
How to Cook Pastas
● Bring water, 1 tablespoon cooking oil and 1 teaspoon salt to the boil in a large covered casserole on setting 6. Hot tap water boils fastest.
● Stir in pasta and cover with fitted glass lid or plastic wrap.
● Cook on setting 2.
● Taste for tenderness.
● Drain, rinse with hot water and serve.
| Pasta | Covered container | Water | Cooking Selector first setting and time | Add Pasta | Cooking Selector second setting and time |
| Spaghetti | casserole | 4 cups | 68 to 10 min. | 200g(7 oz) pkg. | 210 to 12 min. |
| Macaroni | casserole | 3 cups | 66 to 8 min. | 2 cups | 210 to 12 min. |
| Egg Noodles | casserole | 6 cups | 610 to 12 min. | 4 cups | 212 to 14 min. |
| LasagnaNoodles | baking dish | 6 cups | 610 to 12 min. | 225g(8 oz) pkg. | 212 to 14 min. |
Make sure pastas are cooked covered with water.
How to Prepare Pasta or Rice Mixes
- When preparing pasta or rice mixes, pour water in casserole; cover, and cook on 6 until water boils.
● Stir in pasta or rice and seasonings.
● Cover with lid or plastic wrap.
● Cook on 2. - Serve foods directly from the oven.
| Dehydrated Pasta mixes | Covered Casserole | Water | Cooking Selector first setting and time | Add Pasta and seasoning mix | Cooking Selector second setting and time |
| Macaroni and Cheese | casserole | 2 cups | 64 to 5 min. | 200g (7 14 oz) pkg. | 216 to 18 min. |
| Spaghetti Spaghetti Sauce | casserole | 4 cups | 67 to 8 min. | 225g (8 oz) pkg. | 212 to 14 min.23 to 4 min. |
| Seasoned Rice Mix | casserole | 2 cups | 64 to 5 min. | 225g (8 oz) pkg. | 220 to 22 min. |
How to Prepare Canned Pasta
- Remove all processed food from cans and place in casserole.
● Cover with lid or plastic wrap.
● Cook on 5. Stir once during cooking.
| Canned Pasta | Size | Covered Casserole | Cooking Selector setting and time |
| Spaghetti | 420g(15 oz) | casserole | 54 to 5 min. |
| Macaroni and Cheese | 415g(14 34 oz) | casserole | 54 to 5 min. |
| Meat and Noodles in Sauce | 420 to 450g(15 to 16 oz.) | casserole | 54 to 6 min. |
(
How to Microwave Quick-Cooking Cereals
● Measure water, salt and cereal into individual serving bowls; mix well.
● Cook on 6 as directed in chart.
● Stir after cooking.
- Let stand 1 to 2 minutes before serving.
| Servings | Water | Salt | Cereal | Cooking Selector setting and time |
| 1 | 12 litre(9 fl. oz.) | 12 tsp. | 4 tbs. | 6approx. 3 mins |
| 2 | 12 litre(9 fl. oz.) | 12 tsp. ea. | 4 tbs. each | 66 mins |
| 4 | 12 litre(9 fl. oz.) | 12 tsp. ea. | 4 tbs. each | 612 mins |
How to Cook Basic Sauces
● Mix ingredients for basic savoury and sweet sauces in a Pyrex bowl. Sauce should not fill bowl more than half full.
● Cook at setting directed in chart.
● Stir once during cooking.
● Stir well to assure a smooth sauce.
| Sauce | Amount | Cooking Selector Setting | Minutes |
| Basic Brown or Basic White | 12 litre (9 fl. oz.) | 6 | 3 to 312 |
| 12 litre (18 fl. oz.) | 6 | 5 to 512 | |
| Sweet Cornflour | 12 litre (9 fl. oz.) | 6 | 3 to 312 |
| 12 litre (18 fl. oz.) | 6 | 5 to 612 |

Egg Key
Beaten egg mixtures, hard cooked eggs and whole raw eggs all cook on 4—but for different reasons.

Omelets, scrambled eggs and other dishes with egg white and yolk mixed are the easiest. Setting 4 cooks the mixture's centre without overcooking outside edges.
Most dishes calling for well done eggs cook on 4 to preserve tender texture throughout.
Whole raw eggs need No. 4 to keep yolks from setting before the whites.
Carefully follow recipe directions for covering and standing times because egg yolk contains fat which cooks first and can toughen or even "pop". The cover keeps yolks tender while steam cooks the white. Use a lid, saucer without metal trim or plastic wrap.
These recipes have been tested with large eggs taken directly from the refrigerator.
However, egg size and age varies—even within a single carton—so cooking time varies. Cook eggs in individual glass or pottery dishes (without silver or other metal trim) so eggs may be taken from the oven as they reach desired doneness.
DO NOT cook eggs in the shell. Rapid microwave cooking causes eggs in the shell to explode because yolks cook faster than the whites and tend to cause pressure.
How to Scramble Eggs
● Break eggs into soup bowl or large casserole. Do not use dishes with silver, gold or other metal trim.
- Add milk and beat together with a fork.
- Add butter and other seasonings to taste.
● Cover with glass lid or plastic wrap.
● Cook on 4. Stir 6 or more eggs once during cooking period.
● Stir gently with a fork before serving.
- If cooking scrambled eggs a while before serving, undercook slightly and warm on 4 when served.
● Soak cooking dish immediately after emptying for easy cleaning.
| No. of eggs | Butter or margarine | Milk | Cooking Selector Setting | Minutes |
| 1 | 1 tsp. | 1 tbsp. | 4 | 1 to 112 |
| 2 | 2 tsps. | 3 tbsps. | 4 | 2 to 212 |
| 4 | 4 tsps. | 4 tbsps. | 4 | 412 to 5 |
| 6 | 2 tbsps. | 6 tbsps. | 4 | 4 stir 212 to 312 |

How to Poach Eggs
- When poaching 1 to 3 eggs, use individual 6 ounce cups. Poach 4 eggs in a casserole.
● Bring water and 14 teaspoon vinegar to boil on 6.
● Break eggs carefully into hot water.
● Cover tightly with glass lid or plastic wrap.
● Cook eggs in boiling water on 4.
● Let stand, covered, 1 minute before serving.
● To poach eggs in bouillon, omit vinegar; use 12 cup water per egg plus 1 cube or teaspoonful of chicken bouillon. Stir after first heating to dissolve bouillon.
| Water | Glass Container | Cooking Selector Setting and time (water) | Eggs | Cooking Selector Setting and time (eggs) |
| 1 cup | 150g(6 oz) | 6 112 to 2 min. | 1 | 430 to 45 sec. |
| 1 cup ea. | 150g(6 oz) | 62 to 212 min. | 2 | 41 to 112 min. |
| 1 cup | casserole | 6 212 to 3 min. | 4 | 4 212 to 3 min. |
How to Bake Eggs
● Break each egg into a buttered 250g (10 ounce) cup.
● Cover with plastic wrap.
- Cook on 4.
● Let stand, covered, 1 minute before serving.
| No. of eggs | Cooking Selector Setting | Minutes |
| 1 | 4 | 35 to 40 sec. |
| 2 | 4 | 1 to 1 14 |
| 4 | 4 | 2 to 2 14 |
0
Reheating Food
Note:
You can reheat liquids or pre-cooked foods of uniform consistency with microwave energy.
- Place the Food Sensor into the food so that the point is at the centre.
- Cover the food with a glass lid if necessary.
- Insert the Sensor plug into the socket in the side wall of the oven cavity.
- Set the temperature pre-selector for the required doneness.
- Choose the setting of the cooking selector according to the table below.
- Close the door. The microwave oven starts operating and the orange light goes on.
- When the temperature approaches 3^ C below that pre-selected the red warning light starts to blink.
- When the pre-selected temperature is reached the "Hold Warm" lamp shines steadily and the power is automatically reduced to stage 1 (15% of full power).
- Remove the food and the Sensor from the oven.
Note:
Please remember that the oven operates on "Hold Warm" until the food and the Sensor have been removed from the oven.
Keeping Food Hot
The warning stage enables the food to be kept at the serving temperature. Please remember that the warning process continues until the food and the Sensor are removed from the oven. As in conventional cooking keeping the food hot for too long can lead to overcooking. As a rule food should not be kept hot for more than one hour. Remember that food which has cooled too much can be reheated very quickly at microwave speed.
Approximate Values of Temperatures for Reheating
| Food | Setting for Cooking Selector | Setting for Food Sensor | |
| Beverages | 6 | 70°C | Place the Sensor in the container. As a general rule: 50-55°C is warm 55-65°C is medium 65-70°C is hot |
| Soups | 5 | 70°C | Place the Sensor in the centre. |
| Casseroles | 5 | 65°C | Heat the pre-cooked casseroles of uniform consistency. Place the Sensor in the centre of food. |
| Meat Sandwiches (thick) | 5 | 50°C | Insert the Sensor in the thickest part of the sandwich which is to be heated. The tip must be in the filling of the sandwich. |
| Left-overs | 5 | 65°C | Insert the Sensor in the most dense or the largest part of the food. |
| Canned Vegetables | 5 | 65°C | Place the Sensor in centre of food, which should be emptied into a casserole first. |


| Food | Setting for Cooking Selector | Setting for Food Sensor | |
| Baked Goods Rolls, doughnuts, muffins, etc. | 5 | 50°C | Arrange on paper plate or napkins. Insert Sensor in centre of item. |
| Fruit Juice | 5 | 65°C | Place the Sensor in centre of container. |
Leftovers and Tinned Food
Insert the Sensor in the food to be reheated. In stewed and similar foods the Sensor must not touch the bottom of the casserole.
All foods should be removed from cans or packaging and transferred to casseroles before being placed in the Microwave Oven.
How to Warm Bread and Rolls
● Place rolls or muffins on paper plate, paper towel, cloth or paper napkin.
● Warm on setting 5 since all breads are precooked.
- Do not over heat or breads will toughen—surface should be "warm" rather than "hot".
| Bread | Amount | Cooking Selector setting | Time from room temperature | Time from freezer |
| Buns and Rolls | 1 | 5 | 10 to 15 sec. | 15 to 20 sec. |
| Hamburger, Hot Dog, Dinner, Bagel | 2 | 15 to 20 sec. | 20 to 25 sec. | |
| 4 | 20 to 25 sec. | 25 to 30 sec. | ||
| 6 | 25 to 30 sec. | 35 to 40 sec. | ||
| 8 | 35 to 40 sec. | 50 to 55 sec. | ||
| English Muffins | 1 | 5 | 20 to 25 sec. | 35 to 40 sec. |
| 2 | 30 to 35 sec. | 50 to 60 sec. | ||
| 4 | 55 to 60 sec. | 2 to 212 min. | ||
| 6 | 1 to 114 min. | 234 to 3 min. | ||
| French Bread | 112 lb | 5 | 30 to 45 sec. | 112 to 2 min. |
| Doughnuts | 1 | 5 | 15 to 20 sec. | 25 to 30 sec. |
| Regular, Raised, Sweet Rolls | 2 | 25 to 30 sec. | 35 to 40 sec. | |
| 4 | 40 to 45 sec. | 50 to 60 sec. | ||
| Muffins | 1 | 5 | 10 to 15 sec. | 20 to 25 sec. |
| Raisin, Fruit, Date | 2 | 20 to 30 sec. | 35 to 40 sec. | |
| 4 | 30 to 35 sec. | 55 to 60 sec. | ||
| 6 | 40 to 45 sec. | 114 to 2 min. | ||
| Pancakes, French | 1 | 5 | 20 to 30 sec. | 35 to 45 sec. |
| Toast, Waffles | 2 | 35 to 45 sec. | 1 to 112 min. | |
| 4 | 1 to 112 min. | 112 to 2 min. |


Section IV
Questions and Answers
Questions and Answers
Question: Is the operation of my Microwave Oven expensive?
Answer: No. Cooking with the AEG Microwave Oven is very economic. It uses up to 60–70% less energy than a conventional oven.
Question: What happens if I operate the Microwave Oven without food by mistake?
Answer: This should be avoided. However, the AEG Microwave Oven can operate for a short time in an empty condition without damaging the Magnetron. If the Food Sensor is left in the oven the oven operates automatically for an indeterminate period and sparks may occur and the Sensor could be damaged.
Question: Can the eating of food which is cooked in a Microwave Oven be harmful?
Answer: Microwaves are simply a heat energy source just like gas and electricity. All three cause the food to be cooked by itself. Food cooked in a Microwave Oven is therefore not harmful.
Question: Why does some moisture remain in the Microwave Oven after the cooking process?
Answer: The moisture on the inside of the cooking chamber is normal and need not cause any concern. It is caused by the steam of the boiling food which condenses on the cool surface.
Question: Can I cook prepared foods in metal dishes in my Microwave Oven.
Answer: The cooking process in this type of dish takes place only on the upper surface because microwaves do not penetrate metal. Metal dishes with a depth exceeding 20 mm should not be used. The upper part of the food would be overcooked before the lower part is ready.
Question: It seems as if food which has been cooked in a Microwave Oven cools down more quickly than food which has been cooked in the more conventional way. How do you explain that?
Answer: Often the crockery which has been used for keeping the food in the refrigerator is also used for heating the food in the Microwave Oven. In this case the cold crockery absorbs heat from the food. It may therefore be necessary to heat the food one minute longer.

Question: The inside of the door of my Microwave Oven seems to become wavy during cooking. Is this safe?
Answer: Yes this is a normal process which is caused by a certain expansion caused by hot air or steam. When the oven cools the normal state is regained.
Question: When my Microwave Oven is working the cooking chamber lighting becomes darker.
Answer: That is quite normal and shows that the oven is working correctly.
Question: Why does my Microwave Oven switch off before time on occasions when I use the temperature pre-selector?
Answer: This shows that either the Food Sensor has not been inserted properly or that it should not be used in this particular food. Try to insert the Sensor in a different part of the food.
Question: Is it normal that my food continues cooking during the warming process?
Answer: Yes, the oven continues at 15% of the full power. As in conventional cooking keeping food warm for too long a period can cause overcooking.
Amendments to Operating Instructions on Microwave Oven MICROMAT 700
Model Number ML 7.60

The MICROMAT 700 has been technically improved. The "hold-warm" times have been limited to 15-30 minutes on the new MICROMAT 700, in order to avoid vitamin losses.
Would you please therefore, remove page 19 from your operating instructions and insert this alteration sheet.
Food Sensor Temperature Selection
The Food Sensor has two functions:-
-
It controls the inside temperature of the food. That means, with the aid of the sensor you can determine how the meat should be served: rare, medium or well done.
-
"Hold-warm" of food: When the selected temperature has been reached, the thermometer automatically switches over to "hold-warm".
How to use the Food Sensor
- Place food in oven dish then push the Sensor into the food making sure that the sensitive point is in the centre. At least 12 " (approx. 1 cm) of the Sensor length must be inserted in the case of small portions of food. Make sure that the Sensor does not touch any fat or bone as this would give a false reading.
- Place the food in the oven and plug the Food Sensor into the special socket in the side wall.
- Select the temperature for the required doneness (as per chart following this amendment). Turn the setting control upwards to increase the temperature setting and downwards to reduce it.
- Select the cooking time on the timer (3) and (4). The cooking times are given in this amendment. Add 15-30 minutes to the cooking time so that the total "hold-warm" period does not exceed 30 minutes in order to retain the maximum nutritional value. If you require food to be held warm longer, it is better to reheat.
- Select the setting of the cooking selector according to the chart following this amendment.
- Close the door. The Microwave Oven starts cooking and the orange operating light comes on.
- When the temperature approaches 3°C below that pre-selected for the required doneness the red "hold-warm" light starts to blink.
- When the set temperature is reached the "hold-warm" light stays on and the power will automatically reduce to warm (15% of full power). The oven continues operating until the door is opened, or the time on the digital timer has elapsed.
During the "hold-warm" period you can open the door at any time to inspect your food. When you close the door the oven continues to operate at the "hold-warm" stage until the time has elapsed on the digital timer. If you wish to switch off the
microwave oven during the "hold-warm" period, open the door, unplug the Food Sensor and remove the food and turn the timer to "O".
ATTENTION:
If the Food Sensor is left plugged in, the oven continues working. Sparking may then occur damaging the oven or Sensor.
NOTE:
Sometimes the oven switches off prematurely. This indicates either that the Food Sensor was not inserted properly or that for the food in question temperature cooking should not be used. The following cooking chart for meat supersedes the one on Page 40 of the instruction book, ML 7.60.
| Roasting Meat | First Setting | Second Setting | Condition of Meat from Oven | Approximate Cooking Time per 450g |
| Roasting joints of Beef | 6 | 6 | Rare 50 to 55°C | 8 to 9 minutes |
| 6 | 6 | Medium 55 to 60°C | 10 to 11 minutes | |
| 6 | 4 | Well done 65 to 70°C | 12 to 13 minutes | |
| Roasting joints of Pork | 6 | 4 | 80 to 85°C | 10 to 15 minutes |
| Roasting joints of Lamb | 4 | 4 | 80 to 85°C | 10 to 15 minutes |
| Roasting joints of Veal | 4 | 3 | 80°C | 15 to 18 minutes |
AEG-TELEFUNKEN (UK) LTD, Bath Road, SLOUGH SL1 4 AW Berks.

- MICRO-BROWNER
- Specification of Microwave Oven Micromat ML 7.60 E.-No. 611 878 200
- Setting Up the Oven
- Electrical connection
- IMPORTANT
- Technical Data
- Golden Rules for Trouble-Free and Safe Operation of your Microwave Appliance
- How Microwaves Cook
- User Instructions
- Cooking Selector
- How You Will Cook With Microwaves
- Oven Settings
- Defrosting
- Heating
- Cooking
- Browning
- Volume
- Starting Temperature
- Density
- Arrangement
- Wave-Stirring
- Turning Food
- Covering
- "Critical" Ingredients
- Standing Time
- Glass Utensils
- Plastics
- Paper
- Straw
- Metal
- Wood
- Food Thermometers
- Setting the Digital Timer
- Examples:
- Amendments to Operating Instructions on Microwave Oven MICROMAT 700
- Special Notes:
- Microwave Energy
- Cleaning and Care
- Cleaning the Food Sensor
- Replacing the Oven Light Bulb
- Section II
- Use of Micro-Browner
- Introduction to use of Micro-Browner
- How Does the Micro-Browner Brown?
- What Happens During Browning?
- Do You Use the Same Pre-Heat Time for all Types of Food?
- Does the Food Stick to the Micro-Browner Surface?
- How Do I Clean the Micro-Browner?
- Observe the Following Notes when using the Micro-Browner
- How to Proceed for Browning on the Micro-Browner
- Section III
- Defrosting & Cooking Charts
- Quick Defrosting Process
- How to Speed Up Defrosting
- Example:
- How to Defrost Fish and Seafood
- How to Defrost Meat
- How to Defrost Poultry
- How to Cook Fresh Fish and Seafood
- How to Roast Meats
- How to Cook Poultry
- How to Cook a Few Chicken Pieces
- Whole Chicken and Capon Key
- How to Cook Fresh and Frozen Vegetables
- Rice Key
- Rice Yields
- How to Cook Rice
- How to Cook Pastas
- How to Prepare Pasta or Rice Mixes
- How to Prepare Canned Pasta
- How to Microwave Quick-Cooking Cereals
- How to Cook Basic Sauces
- Egg Key
- How to Scramble Eggs
- How to Poach Eggs
- How to Bake Eggs
- Reheating Food
- Note:
- Keeping Food Hot
- Leftovers and Tinned Food
- How to Warm Bread and Rolls
- Section IV
- Questions and Answers
- Food Sensor Temperature Selection
- How to use the Food Sensor
- ATTENTION:
Brand : AEG
Model : Micromat ML 7.60
Category : Microwave oven