
GZ-MC500EK - Camera JVC - Free user manual and instructions
Find the device manual for free GZ-MC500EK JVC in PDF.


| Product Type | Digital Media Camera |
| Model | GZ-MC500EK |
| Brand | JVC |
| Recording Media | Removable Hard Disk (4 GB provided), CompactFlash Card (CF+ Type II), SD Memory Card |
| Video Format | MPEG2 (SD-VIDEO compliant) |
| Still Image Format | JPEG |
| Audio Format | MPEG2 Audio (Dolby Digital) |
| Optical Zoom | 10x (video), 8x (still image) |
| Digital Zoom | Up to 200x (video) |
| Lens | F1.8 - F2.8, focal length not specified |
| LCD Monitor | Built-in LCD (size not specified) |
| Power Supply | Battery pack BN-VM200U (Li-ion, 7.2V) or AC adapter AP-V14E/AP-V17E (100-240V) |
| Battery Charging Time | Approx. 1 hour 35 minutes |
| Maximum Continuous Recording Time | Approx. 1 hour (with BN-VM200U) |
| Dimensions (W x H x D) | Approx. 74 mm x 73 mm x 115 mm |
| Weight | Approx. 460 g (with battery and hard disk) |
| Key Features | Removable hard disk, MPEG2 video recording, voice recording, program AE modes, manual exposure, white balance, effects, PictBridge direct printing, USB 2.0 connectivity |
| Playback Features | Playlist, wipe/fader effects, playback effects, search, slow motion, frame-by-frame, zoom |
| Safety Precautions | Do not expose to rain/moisture, do not open cabinet, use only JVC batteries, avoid strong magnetic fields, do not block ventilation |
| Spare Parts / Repair | Use genuine JVC battery pack (BN-VM200U), AC adapter (AP-V14E/AP-V17E); contact dealer or JVC service center for repairs |
Frequently Asked Questions - GZ-MC500EK JVC
User questions about GZ-MC500EK JVC
0 question about this device. Answer the ones you know or ask your own.
Ask a new question about this device
Download the instructions for your Camera in PDF format for free! Find your manual GZ-MC500EK - JVC and take your electronic device back in hand. On this page are published all the documents necessary for the use of your device. GZ-MC500EK by JVC.
USER MANUAL GZ-MC500EK JVC
DIGITAL MEDIA CAMERA
GZ-MC500E/EK
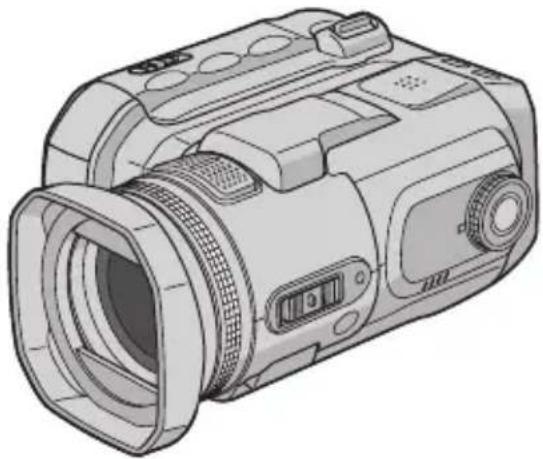
natural_image
Line drawing of a digital camera with lens and control buttons (no text or symbols)
MASCOT CAPSULE


To deactivate the demonstration, set "DEMO MODE" to "OFF". (17) pg. 48)
Major Features of this Camera
Removable Hard Disk
In contrast to conventional digital video cameras that record to DV tapes, the removable hard disk is a new type of card media that enables extended hours of high-resolution, MPEG2 video recording. (Lpg. 6)
Various Recording Media and Modes
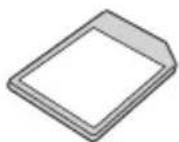
Video and still images can be recorded to CompactFlash card (CF card) and SD memory card. The removable hard disk (provided) or Microdrive® is a type of CF card compliant with CF+ Type II.
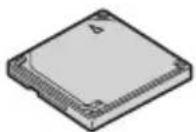
You can select the most suitable recording medium and mode for picture quality, image size, recording time, and computer environment. (17pg. 62)
Voice Recording Features
The camera can be used as a voice recorder for audio recordings. (pg. 29)
![VOICE RECORDING [5h56m] 12:55:01 L R 20.11.2005 11:30](/content/2026/06/1168946/images/04c33aa123b8b3f2a83305e647b3153d24e70854614c569408781b769c556e76.jpg)
Various Recording Features
The camera supports aperture-priority, shutter-priority, portrait, bracket shooting, and a wide range of other functions that you can select according to the scene you are shooting.
(pg. 31 - 36)
Enjoying Various Playback Features
Unlike tape operation, playback is simple and easy in this camera since no time is needed for rewinding or fast forward operations.
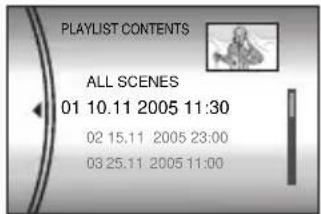
Playlist, playback effects, and other functions are also available for enjoying many different types of playback.
Editing Files on your PC
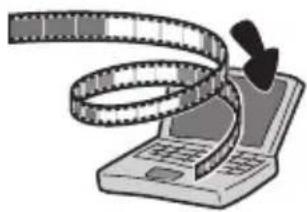
USB 2.0 enables the smooth transfer of video and still images to a computer. With the bundled Cyberlink software, you can easily edit video and create your own DVDs. (Refer to the software installation and USB connection guide.)
natural_image
Illustration of a laptop with a film strip and a black arrow pointing to it (no text or symbols)Direct Printing
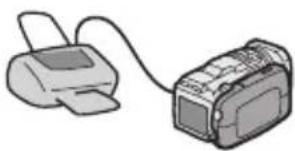
If your printer is compatible with PictBridge, still images can be printed easily by connecting the camera v to the printer. (pg. 47)
natural_image
Illustration of a printer connected to a digital device (no text or symbols visible)Contents
GETTING STARTED 7
Provided Accessories 7
Index 10
Power 14
Operation Mode 16
Language Setting 16
Date/Time Settings 17
Inserting/Removing a CF Card 17
Inserting/Removing an SD Card 18
Formatting a Recording Medium 19
Selecting Recording Medium 19
How to Use the Scroll Bar 22
Various Playback Operations 23
Playback Zoom 23
Connecting to a TV or VCR 24
Playback on a TV 24
Dubbing to a VCR 24
STILL IMAGE RECORDING & PLAYBACK 25
Still Image Recording 25
Zooming 25
Continuous Shooting 26
Flash 26
Still Image Playback 27
Slide Show 27
Index Screen of Still Image Files 27
How to Use the Scroll Bar 28
Image Rotation 28
Playback Zoom 28
Various Playback Operations 30
Backlight Compensation 31
Spot Exposure Control 31
Program AE 31
Bracket Shooting 33
Manual Focus 33
Manual Settings in MSET Menu 34
How to Select a Menu Item 34
Manual Exposure 35
White Balance 35
Effect 36
PLAYBACKFEATURES......37
Wipe or Fader Effects 37
Playback Effects 37
MANAGING FILES 38
Viewing File Information 38
Protecting Files 39
Deleting Files 40
Cleaning Up a Recording Medium 41
Copying/Moving Still Image Files 41
Resetting the File Number 42
Creating Play List 43
Playing Back Play List 44
DPOF Print Setting 46
Direct Printing with a PictBridge Printer ..... 47
MENU SETTINGS 48
Changing the Menu Settings 48
Common Menus for All Modes 48
Video Recording Menus 50
Video Playback Menus 50
Still Image Recording Menus 51
Still Image Playback Menus 51
Voice Recording Menus 51
Voice Playback Menus 51
REFERENCES 52
Troubleshooting 52
Warning Indications 55
Cleaning the Camera 57
Cautions 57
Specifications 60
TERMS ...... Back cover
Dear Customer,
Thank you for purchasing this digital media camera. Before use, please read the safety information and precautions contained in the pages 4 – 5 to ensure safe use of this product.
SAFETY PRECAUTIONS
IMPORTANT (for owners in the U.K.)
Connection to the mains supply in the United Kingdom.
DO NOT cut off the mains plug from this equipment.
If the plug fitted is not suitable for the power points in your home or the cable is too short to reach a power point, then obtain an appropriate safety approved extension lead or consult your dealer.
BE SURE to replace the fuse only with an identical approved type, as originally fitted, and to replace the fuse cover.
If nonetheless the mains plug is cut off be sure to remove the fuse and dispose of the plug immediately, to avoid possible shock hazard by inadvertent connection to the mains supply. If this product is not supplied fitted with a mains plug then follow the instructions given below:
DO NOT make any connection to the Larger Terminal coded E or Green.
The wires in the mains lead are coloured in accordance with the following code:
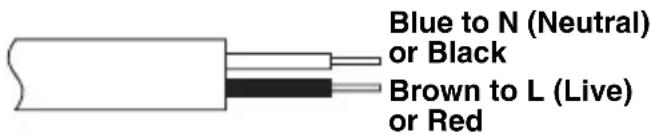
If these colours do not correspond with the terminal identifications of your plug, connect as follows:
Blue wire to terminal coded N (Neutral) or coloured black.
Brown wire to terminal coded L (Live) or coloured Red.
If in doubt — consult a competent electrician.
WARNING: TO PREVENT FIRE OR SHOCK HAZARD, DO NOT EXPOSE THIS UNIT TO RAIN OR MOISTURE.
CAUTIONS:
- To prevent shock, do not open the cabinet. No user serviceable parts inside. Refer servicing to qualified personnel.
- When you are not using the AC adapter for a long period of time, it is recommended that you disconnect the power cord from AC outlet.
CAUTION:
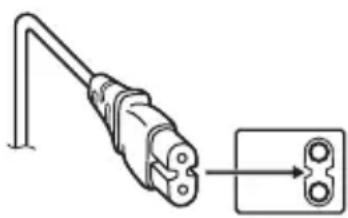
To avoid electric shock or damage to the unit, first firmly insert the small end of the power cord into the AC Adapter until it is no longer wobbly, and then plug the into an AC outlet.
natural_image
Diagram of an electrical plug with a close-up view showing internal components (no text or labels)CAUTIONS:
- This camera is designed to be used with PAL-type colour television signals. It cannot be used for playback with a television of a different standard. However, live recording and LCD monitor playback are possible anywhere.
- Use the JVC BN-VM200U battery pack and, to recharge it or to supply power to the camera from an AC outlet, use the provided multivoltage AC adapter. (An appropriate conversion adapter may be necessary to accommodate different designs of AC outlets in different countries.)
NOTES:
●The rating plate (serial number plate) and safety caution are on the bottom and/or the back of the main unit.
●The rating information and safety caution of the AC adapter are on its upper and lower sides.
Do not point the lens directly into the sun. This can cause eye injuries, as well as lead to the malfunctioning of internal circuitry. There is also a risk of fire or electric shock.
CAUTION!
The following notes concern possible physical damage to the camera and to the user.
Do not use a tripod on unsteady or unlevel surfaces. It could tip over, causing serious damage to the camera.
CAUTION!
Connecting cables (Audio/Video, S-Video, etc.) to the camera and leaving it on top of the TV is not recommended, as tripping on the cables will cause the camera to fall, resulting in damage.
When the equipment is installed in a cabinet or on a shelf, make sure that it has sufficient space on all sides to allow for ventilation (10 cm or more on both sides, on top and at the rear).
Do not block the ventilation holes.
(If the ventilation holes are blocked by a newspaper, or cloth etc. the heat may not be able to get out.)
No naked flame sources, such as lighted candles, should be placed on the apparatus.
When discarding batteries, environmental problems must be considered and the local rules or laws governing the disposal of these batteries must be followed strictly.
The apparatus shall not be exposed to dripping or splashing.
Do not use this equipment in a bathroom or places with water.
Also do not place any containers filled with water or liquids (such as cosmetics or medicines, flower vases, potted plants, cups etc.) on top of this unit. (If water or liquid is allowed to enter this equipment, fire or electric shock may be caused.)
SOME DO'S AND DON'TS ON THE SAFE USE OF EQUIPMENT
This equipment has been designed and manufactured to meet international safety standards but, like any electrical equipment, care must be taken if you are to obtain the best results and safety is to be assured.
DO read the operating instructions before you attempt to use the equipment.
DO ensure that all electrical connections (including the mains plug, extension leads and interconnections between pieces of equipment) are properly made and in accordance with the manufacturer's instructions. Switch off and withdraw the mains plug when making or changing connections.
DO consult your dealer if you are ever in doubt about the installation, operation or safety of your equipment.
DO be careful with glass panels or doors on equipment.
DON'T continue to operate the equipment if you are in any doubt about it working normally, or if it is damaged in any way — switch off, withdraw the mains plug and consult your dealer.
DON'T remove any fixed cover as this may expose dangerous voltages.
DON'T leave equipment switched on when it is unattended unless it is specifically stated that it is designed for unattended operation or has a standby mode. Switch off using the switch on the equipment and make sure that your family knows how to do this. Special arrangements may need to be made for infirm or handicapped people.
DON'T use equipment such as personal stereos or radios so that you are distracted from the requirements of road safety. It is illegal to watch television whilst driving.
DON'T listen to headphones at high volume, as such use can permanently damage your hearing.
DON'T obstruct the ventilation of the equipment, for example with curtains or soft furnishings. Overheating will cause damage and shorten the life of the equipment.
DON'T use makeshift stands and NEVER fix legs with wood screws — to ensure complete safety always fit the manufacturer's approved stand or legs with the fixings provided according to the instructions.
DON'T allow electrical equipment to be exposed to rain or moisture.
ABOVE ALL
- NEVER let anyone especially children push anything into holes, slots or any other opening in the case — this could result in a fatal electrical shock;
- NEVER guess or take chances with electrical equipment of any kind — it is better to be safe than sorry!
Before Using this Camera
This camera is designed exclusively for CompactFlash Card (CF card) and SD Memory Card.
The removable hard disk (provided) or Microdrive ^® is a type of CF card compliant with CF+ Type II.
This camera records video in MPEG2 format compliant with SD-VIDEO format.
Remember that this camera is not compatible with other digital video formats.
Remember that this camera is intended for private consumer use only.
Any commercial use without proper permission is prohibited. (Even if you record an event such as a show, performance or exhibition for personal enjoyment, it is strongly recommended that you obtain permission beforehand.)
Before recording important video, be sure to make a trial recording.
Play back your trial recording to make sure the video and audio have been recorded properly.
Make a backup of important recorded data
Protect your important recorded data by copying the files to PC. It is recommended to copy it from your PC to a DVD or other recording media for storage. Refer to the software installation and USB connection guide.
Bring your camera together with the removable hard disk
When requesting repairs for breakdowns by your dealer or JVC service centre, be sure to bring your camera together with the removable hard disk. If one of them is not included, the cause cannot be diagnosed, and the repair cannot be made properly.
Also read "Cautions" on pages 57 to 59.
●Manufactured under license from Dolby Laboratories. "Dolby" and double-D symbol are trademarks of Dolby Laboratories.
- Microdrive ^® is a registered trademark of Hitachi Global Storage Technologies, Inc. in the United States and/or other countries.

MascotCapsule is registered trademark of HI CORPORATION in Japan. Copyright © 2001 HI CORPORATION. All rights reserved.
●Other product and company names included in this instruction manual are trademarks and/or registered trademarks of their respective holders.
Removable Hard Disk
The removable hard disk is a precision electronic device. Be careful when handling it.
Cautions for external jolt or stress
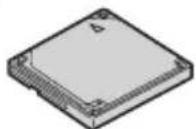
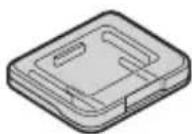
●After removing the disk from the camera, store it by inserting into the supplied protective case.
- Do not press on the cover.
- Do not subject the disk to vibrations or sudden jolts. Be especially careful to avoid sudden during playback.
- Do not affix stickers or write on the label.
- Do not apply strong pressure to the outside of the disk. Also, do not put it in your pants pocket or other location where it can be pressed on.
Cautions for temperature
- The camera's protection circuit may work for the proper recording or playback when the camera's internal temperature rises or during usage in a cold location. (17 pg. 56)
●The camera and removable hard disk can heat up when used for an extended period. However, this is not a malfunction.
●The disk can heat up when used for an extended period. Therefore, do not remove it immediately from the camera.
Other cautions
- Condensation can cause the drive to break down. If water is splashed on the drive, make sure that it is completely dried before usage.
- Do not use, replace, or store the disk in locations that are exposed to strong static electricity or electrical noise.
- Do not turn off the camera power or remove the battery or AC adapter during shooting, playback, or when otherwise accessing the recording medium.
- Do not bring the recording medium near objects that have a strong magnetic field or that emit strong electromagnetic waves.
- Since data must be read and written by the drive correctly, the camera may be unable to shoot when the camera heats up, such as during continuous shooting, or when the camera is cooled down during usage in a cold location. To fix this problem, follow the messages displayed on the screen. (17pg. 56)
- Clean up the disk regularly to maintain high performance. (I3pg. 41, 49)
Also read "Recording Medium" on page 58.
Be careful to completely delete data when discarding or giving away the removable hard disk.
When recording data is formatted or deleted on the camera, this only modifies the file management information, and the data is not completely erased. When discarding or giving away the removable hard disk, to prevent problems caused by the release of sensitive information, it is extremely important that the customer take responsibility to erase all recorded data. Some recommended methods of erasing data include using a commercial data removal program or using a hammer or strong magnet to physically or magnetically destroy the data on the hard disk so that it cannot be read. JVC shall not be responsible for any personal data that is released.
Provided Accessories
①
natural_image
Line drawing of a rectangular electronic device with a coiled cable and power plug (no text or symbols)OR
②
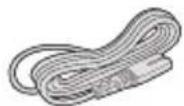
③
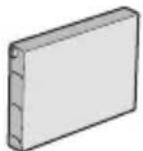
④
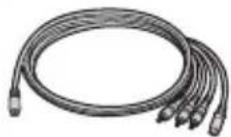
⑤
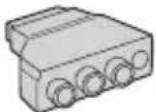
⑥

⑦
⑧
⑨
natural_image
Simple line drawing of a string with a loop and handle (no text or symbols)⑩
⑪

⑫

⑬
⑭
natural_image
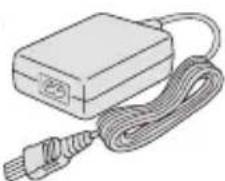
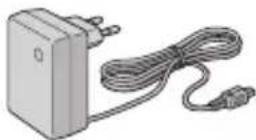
Two cylindrical electronic components with side labels 'x 1' and 'x 2' (no text or symbols on the objects themselves)①AC Adapter AP-V14E or AP-V17E
②Power cord (AP-V14E only)
③Battery Pack BN-VM200U
④S-Video/Audio/Video Cable
⑤Cable Adapter
⑥USB Cable (Refer to the software installation and USB connection guide.)
⑦Removable Hard Disk (4 GB)
⑧Protective Case for Removable Hard Disk
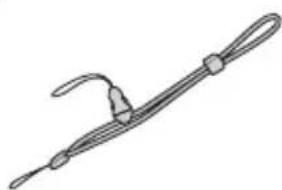
⑨Strap (See page 8 for attachment)
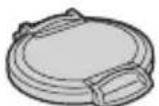
⑩ Lens Cap (See page 8 for attachment)
⑪CD-ROM
⑫Audio Extension Cable (for optional headphones, see page 9 for attachment)
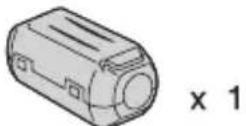
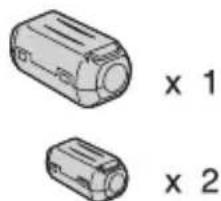
⑬Core Filter for Cables (See page 9 for attachment)
Large (x 1): S-Video/Audio/Video Cable
Medium (x 1): USB Cable
Small (x 2): Audio Extension Cable and AC
Adapter's Cord
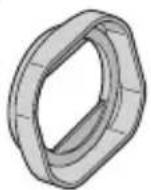
⑭ Lens Hood (Already attached to the camera, 17 pg. 8)
NOTES:
- In order to maintain optimum performance of the camera, provided cables may be equipped with one or more core filter. If a cable has only one core filter, the end that is closest to the filter should be connected to the camera.
●Make sure to use the provided cables for connections. Do not use any other cables.
The removable hard disk and its protective case are packaged in a silver bag.
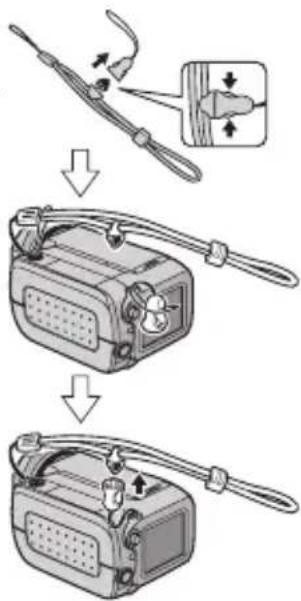
Attaching the Strap
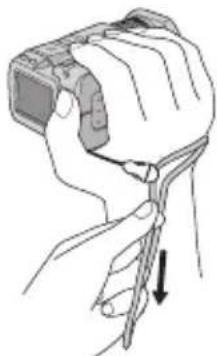
1 Press and hold both sides as shown, then detach the fastener (large).
2Pass the strap ring through the eyelet on the lens side.
3Pass through the strap ring.
4Pass the fastener's ring through the eyelet on the LCD side.
5Pass through the fastener's ring.
6Connect the fastener.
When shooting
Hold the camera as shown in the illustration, grip it gently so that it feels secure, then adjust the strap.
natural_image
Illustration of a hand holding a camera module with a tool, showing a downward arrow (no text or symbols)Pull the strap.
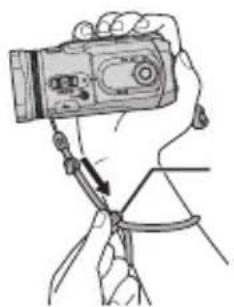
To secure the camera so it cannot be dropped during shooting
Detach the fastener from the strap as shown in step 1.
Put your hand through the strap, then secure the strap to your wrist so that the camera cannot be dropped.
natural_image
Illustration of a hand holding a camera with a cable inserted, no text or symbols presentSlide the fastener.
Attaching/Detaching the Lens Hood
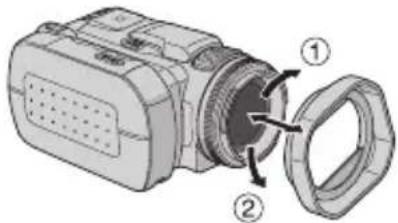
The provided lens hood helps block out glare when shooting under bright sunlight, the same way professional photographers do.
To attach
Align the lens hood with the camera's lens, and then turn the hood clockwise ①.
To detach
Turn the hood counterclockwise ②.
- Detach the hood only when using the optional conversion lens or lens filter.
Attaching the Lens Cap
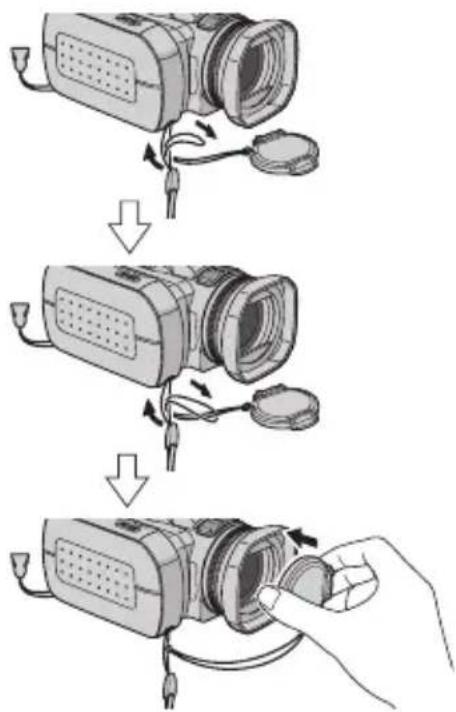
To protect the lens, attach the provided lens cap to the camera as shown in the illustration.
flowchart
graph TD
    A["Camera with cable"] --> B["Switch: Cable to cable"]
    B --> C["Switch: Cable to cable with cable attachment"]
    C --> D["Switch: Cable to cable attachment with cable attachment"]
NOTE:
To confirm the lens cap is on correctly, make sure the cap is flush to the camera.
Attaching the Core Filter
Attach the core filters to the cables. The core filter reduces interference.
1 Release the stoppers on both ends of the core filter.
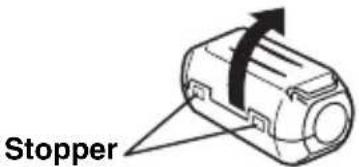
2Run the cable through the core filter, leaving approx. 3 cm of cable between the cable plug and the core filter.
Wind the cable once around the outside of the core filter as shown in the illustration.
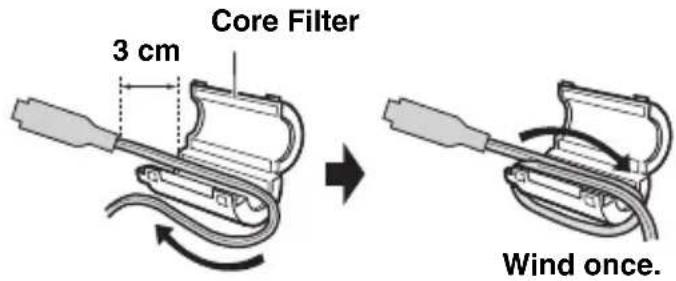
●Wind the cable so that it is not slack.
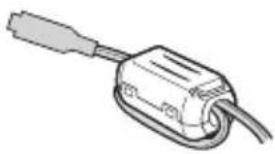
3Close the core filter until it clicks shut.
natural_image
Illustration of a handheld electronic device with a cable and connector (no text or symbols)NOTES:
●Take care not to damage the cable.
- When connecting a cable, attach the end with the core filter to the camera.
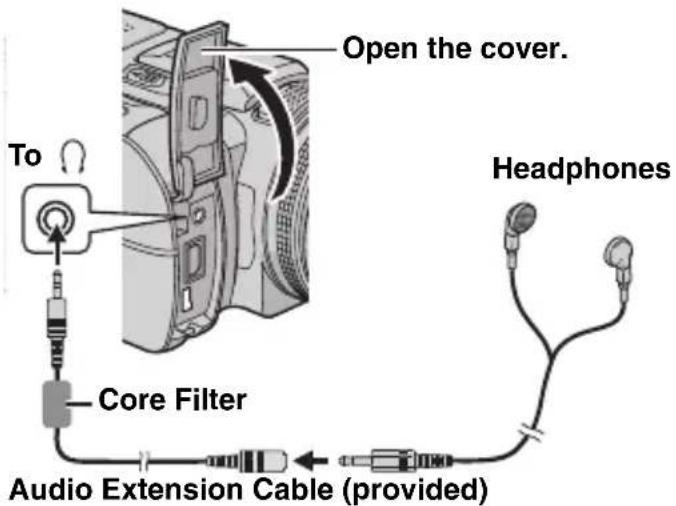
How to Use the Audio Extension Cable
When using optional headphones, connect to the provided audio extension cable (with a core filter attached), then connect the audio extension cable to the camera. The core filter reduces interference.
Index
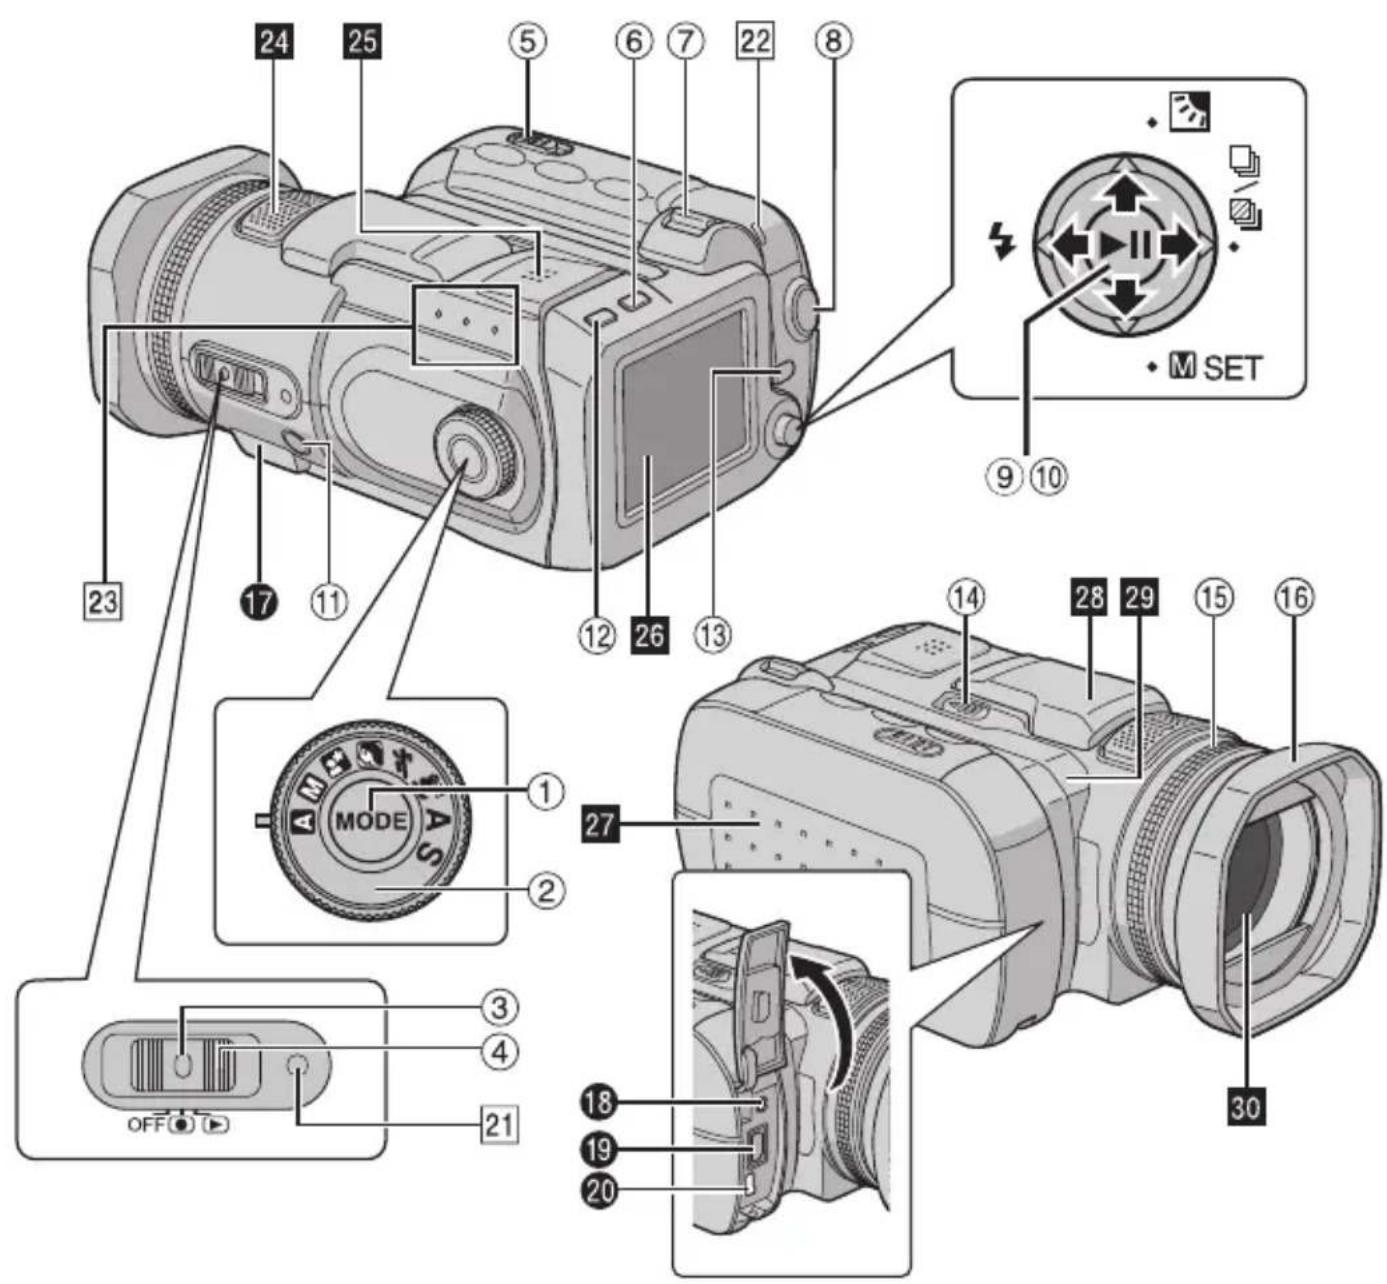
natural_image
Technical illustration of a mechanical component with a numbered annotation (35) pointing to a section detail (no text or symbols on the object itself)ATTENTION:
- Be careful not to cover 24, 29 and 30 during shooting.
- Be careful not to cover 25 during playback.
Controls
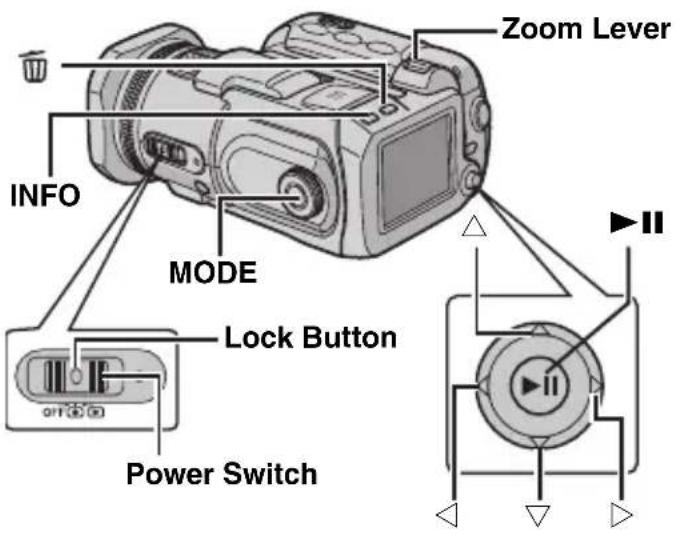
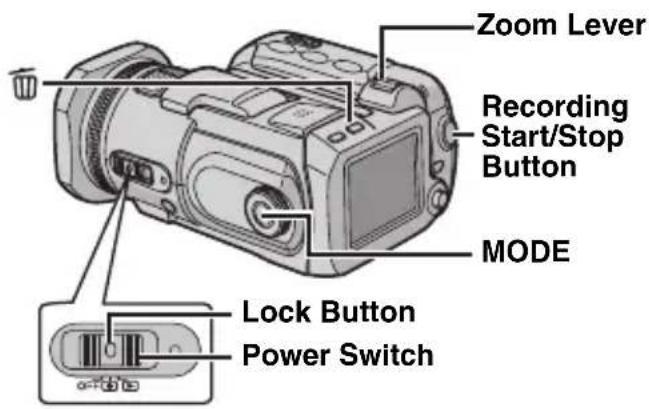
① Mode Button [MODE] (LFP pg. 16)
② Recording Mode Dial (pg. 16, 31 – 32)
③ Lock Button (pg. 16)
④ Power Switch [OFF, ●, ▶] (pg. 16)
⑤Battery/CF Card Cover Open Switch [OPEN] (17) pg. 14, 17
⑥ Delete Button [ ] (pg. 40)
⑦ Zoom Lever [T/W] (pg. 21, 25)
Speaker Volume Control (pg. 22, 30)
⑧Recording Start/Stop Button (pg. 20, 25, 29)
⑨ Play/Pause Button [▶III] (pg. 22, 27, 30)
⑩Multi-Controller
◀: Reverse Search [◀ (◀◀)] (▶ pg. 23)/Left
[◀]/Flash [◀] (▶ pg. 26)
△: Reverse Skip [△ (◀◀)] (▶ pg. 23)/Up [△]/Backlight Compensation [▶] (▶ pg. 31)/Spot Exposure Control (▶pg. 31)
▷: Forward Search [▷ (▶▶)] (pg. 23)/Right [▷]/Continuous Shooting/Bracket Shooting [☐] (pg. 26, 33)
▽: Forward Skip [▽ (▶▶l)] (Lpg. 23)/Down [▽]/Manual Set [M SET] (Lpg. 34)
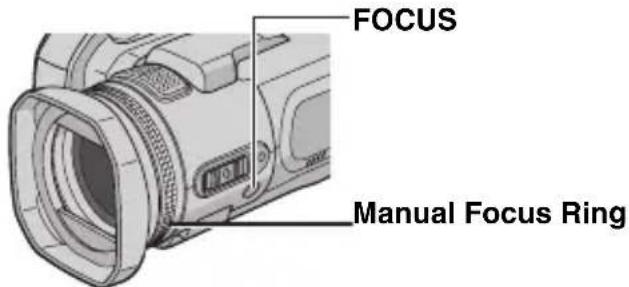
⑪ Focus Button [FOCUS] (LFP pg. 33)
⑫ Information Button [INFO] (pg. 38)
⑬ Menu Button [MENU] (pg. 48)
⑭Flash Open Switch [FLASH OPEN] (I-3 pg. 26)
⑮ Manual Focus Ring (pg. 33)
⑯ Lens Hood (pg. 8)
Connectors
The connectors are located beneath the covers.
⑰USB (Universal Serial Bus) Connector (Refer to the software installation and USB connection guide.)
18 Headphone Connector [ ] (pg. 9)
19 S-Video/Audio/Video Output Connector [AV] (Lpg. 24)
20 DC Input Connector [DC] (pg. 14)
Indicators
21 Power/Charge Lamp (pg. 14, 16)
22 Access Lamp (Lights up or blinks when you access to any files. Do not turn off the power or remove the battery pack/AC adapter while accessing to files during recording or playback.)
23 Mode Lamp [video), (still image), (voice)] (Lpg. 16)

Other Parts
24 Stereo Microphone
25 Speaker (pg. 22)
26LCD Monitor
27 Battery/CF Card Cover (pg. 14, 17)
28Flash
29 Camera Sensor
30 Lens
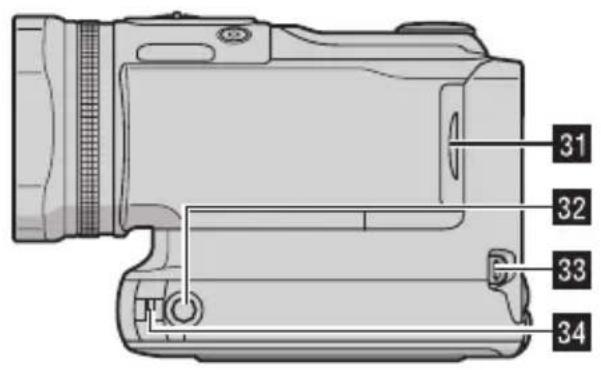
31 SD Card Cover (pg. 18)
32 Tripod Mounting Socket
33 Strap Fastener Eyelet (pg. 8)
34 Strap Eyelet (pg. 8)
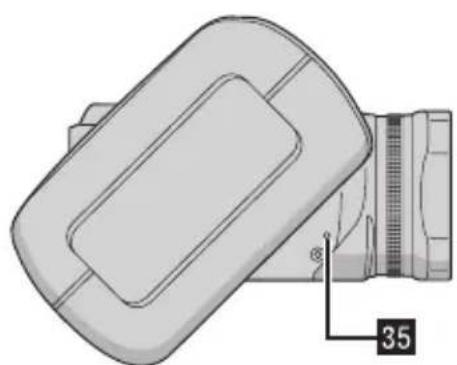
35 Reset Hole (pg. 52)
Indications on LCD Monitor
During both Video and Still Image Recording
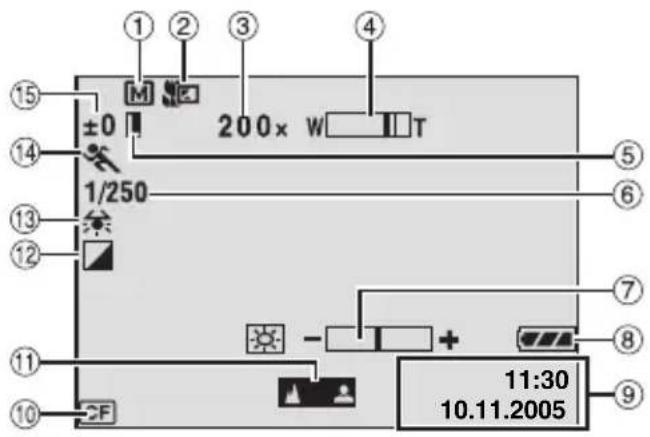
① Recording Mode Indicator (pg. 16)
A: Auto Mode
M: Manual Mode
② Tele Macro Mode Indicator (pg. 50)
③ Approximate Zoom Ratio (pg. 21, 50)
④ Zoom Indicator (pg. 21, 50)
⑤ Iris Lock Indicator (pg. 31, 35)
⑥ Shutter Speed (pg. 32)
⑦ Brightness Control Indicator (pg. 49)
⑧ Battery Indicator (pg. 55)
⑨ Date/Time (pg. 49)
⑩ Selected Medium Indicator (pg. 19, 49)
⑪ Manual Focus Adjustment Indicator (17pg. 33)
⑫ Effect Mode Indicator (pg. 36)
⑬ White Balance Indicator (pg. 35)
⑭ Program AE Mode Indicator (pg. 31)
⑮ ±: Exposure Adjustment Indicator (pg. 35)
: Backlight Compensation Indicator (17pg. 31)
: Spot Exposure Control Indicator (17pg. 31)
During Video Recording only
![① ② ③ W ≈ ④ [U] [0h56m] 0:04:01 ● REC ⑥ ⑦ ⑧](/content/2026/06/1168946/images/0597efef0afad212c3eb3821a9ff4a695cfbac837790bee73ae10f109511ec4a.jpg)
① Mode Indicator (pg. 16)
② Wide Mode Indicator (pg. 50)
③ Wind Cut Indicator (pg. 50)
④Picture Quality: [U] (ultra fine), [F] (fine), [N] (normal), [E] (economy) (I-7pg. 50)
⑤ Remaining Time (pg. 20, 62)
⑥ Counter (pg. 49)
⑦●REC: (Appears during recording.) (37pg. 20)
●II: (Appears during record-standby mode.) (pg. 20)
⑧Digital Image Stabiliser (DIS) Indicator (pg. 50)
During Still Image Recording only
![① ② ③ ④ ⑤ ⑥ ⑦ 100 1600 FINE [ 10 ] A PHOTO ⑧ ⑨ ⑩](/content/2026/06/1168946/images/5e867d4544b83e6c1fb3860f92a29cdd9d0f6306b603e877689c36db9c4bc4fc.jpg)
① Mode Indicator (17 pg. 16)
② ISO sensitivity (GAIN) (pg. 51) (When set to [AUTO], there is no indication.)
③ Focus Icon (pg. 25)
④Image Size: 2560 (2560 x 1920), 2048 (2048 x1536), 1600 (1600 x 1200), 1280 (1280 x 960), 640 (640 x 480) (pg. 51)
⑤Picture Quality: FINE (fine) or STANDARD (standard) (pg. 51)
⑥ Flash Mode Indicator (pg. 26)
⑦ Remaining Number of Shots (pg. 63)
⑧: Continuous Shooting Mode Indicator (pg. 26) ☐: Bracket Shooting Mode Indicator (pg. 33)
⑨ Shooting Icon (pg. 25)
⑩ Self-Timer Recording Indicator (pg. 51)
NOTE:
For the indications on LCD monitor during voice recording, see page 29.
During Video Playback
![① ② P ③ ④ [U] x=60 1:55:23 ⑤ ⑥ ⑦ ⑧ ⑨ CF 10.11.2005](/content/2026/06/1168946/images/eeb35e6b44e269daedc717dbb2719210d38f44536270d2eb57f67100e23f2a25.jpg)
① Mode Indicator (pg. 16)
②Play List Playback Indicator (Appears when play list is played back. page. 44)
③Picture Quality: [U] (ultra fine), [F] (fine), [N] (normal), [E] (economy) (pg. 50)
④ Playback Mode (pg. 22)
▶ : Playback
II: Pause
▶▶ : Forward High-Speed Search
◀◀: Reverse High-Speed Search
▶ : Forward Slow-Motion
◀II : Reverse Slow-Motion
(The number on the left shows speed.)
⑤ Counter (pg. 49)
⑥Volume Level Indicator
⑦ Battery Indicator (pg. 55)
⑧Date (pg. 49)
⑨ Selected Medium Indicator (pg. 19, 49)
⑩ Effect Mode Indicator (17 pg. 36)
⑪ Wipe/Fader Effect Indicator (pg. 37, 50)
During Still Image Playback
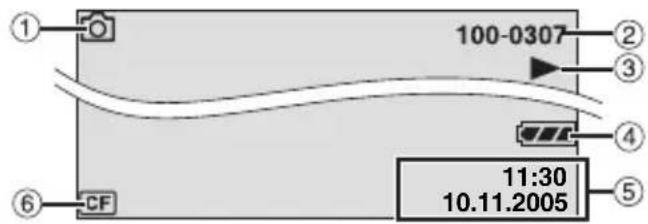
① Mode Indicator (pg. 16)
②Folder/File Number
③ Slide Show Playback Indicator (pg. 27)
④ Battery Indicator (pg. 55)
⑤ Date/Time (pg. 49)
⑥ Selected Medium Indicator (pg. 19, 49)
NOTE:
For the indications on LCD monitor during voice playback, see page 30.
Power
This camera's 2-way power supply system lets you choose the most appropriate source of power. Do not use provided power supply units with other equipment.
Charging the Battery Pack
Power Switch
AC Adapter (ex. AP-V17E)
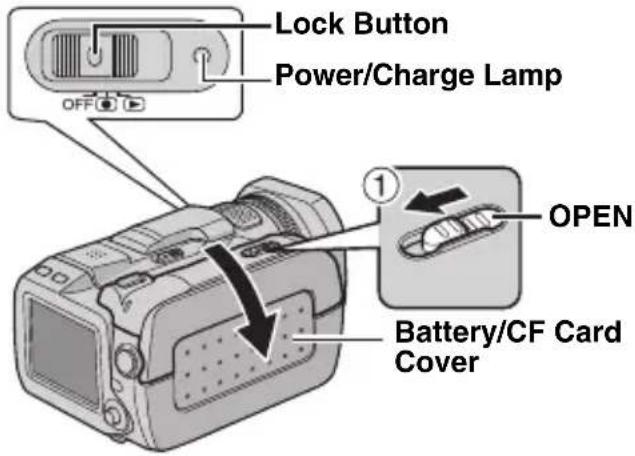
1 Set the power switch to OFF while pressing down the lock button located on the switch.
2 Slide and hold OPEN in the direction of the arrow ①, then open the battery/CF card cover.
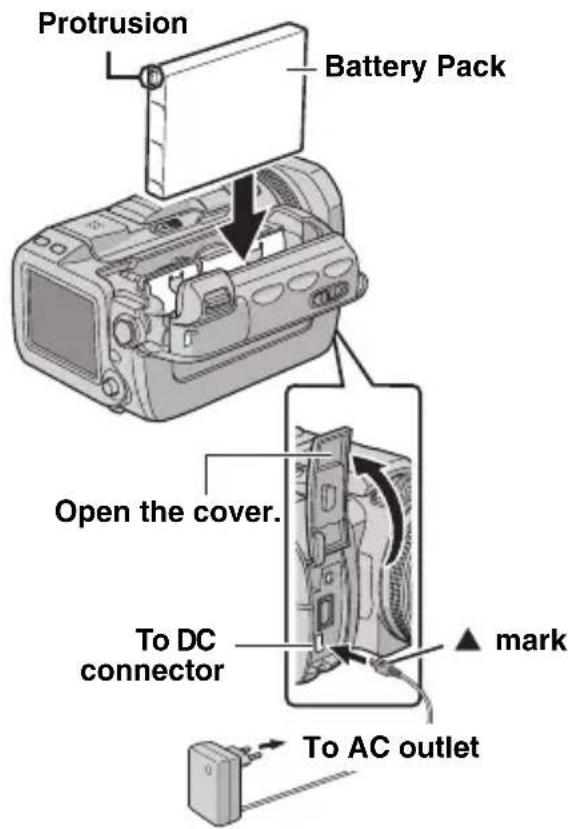
3 Insert the battery pack firmly into the battery pack mount until it locks into space as shown in the illustration.
4Close the battery/CF card cover firmly until it locks.
5Connect the AC adapter to the camera.
6Connect the power cord to the AC adapter. (AP-V14E only)
7 Plug the power cord into an AC outlet. The power/charge lamp on the camera blinks to indicate charging has started.
8 When the power/charge lamp goes out, charging is finished. Unplug the power cord from the AC outlet. Disconnect the AC adapter from the camera.
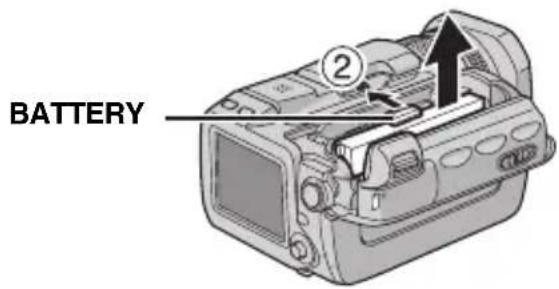
To detach the battery pack
Open the battery/CF card cover, and remove the battery pack while sliding BATTERY in the direction of the arrow ②.
Required charging time
| Battery pack Charging time | |
| BN-VM200U (provided) | Approx. 1 hr. 35 min. |
NOTES:
●Charging times are for a fully discharged battery pack.
- When the battery/CF card cover is opened or the SD card is removed while the power is on, the power is automatically turned off to protect the data in the recording medium. To turn on the power again after opening the battery/CF card cover, close the cover. To turn on the power again after removing the SD card, close the cover and set the power switch to OFF, then to 📄 or . ▶
- It is recommended that only genuine JVC batteries are used in this camera. Using generic non-JVC batteries can cause damage to the internal charging circuitry.
- If the protective cap is attached to the battery pack, remove it first.
- When charging the battery pack for the first time or after a long storage period, the power/charge lamp may not light. In this case, remove the battery pack from the camera, then try charging again.
- If the battery operation time remains extremely short even after having been fully charged, the battery is worn out and needs to be replaced. Please purchase a new one.
- Using the optional AA-V200 battery charger, you can charge the BN-VM200U battery pack without the camera.
- Since the AC adapter processes electricity internally, it becomes warm during use. Be sure to use it only in well-ventilated areas.
Using the Battery Pack
Perform steps 2 - 4 in "Charging the Battery Pack".
Maximum continuous recording time
| Battery pack Recording time | |
| BN-VM200U (provided) 1 | hr. |
NOTES:
●Recording time is reduced significantly under the following conditions:
- Zoom or record-standby mode is engaged repeatedly.
- Playback mode is engaged repeatedly.
●Before extended use, it is recommended that you prepare enough battery packs to cover 3 times the planned recording time.
Using AC Power
Connect the AC adapter to the camera.
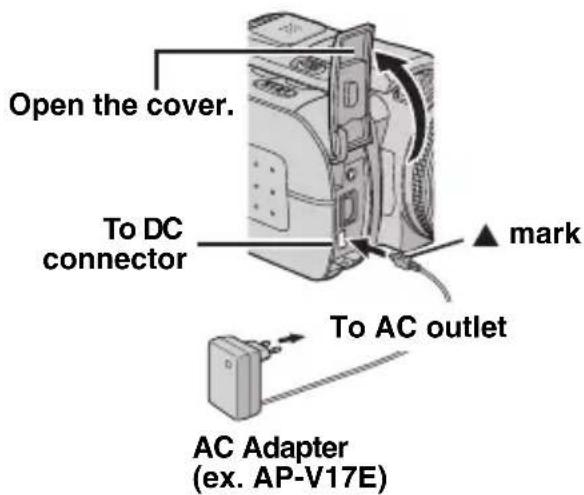
NOTE:
The provided AC adapter features automatic voltage selection in the AC range from 110 V to 240 V.
ATTENTION:
- Before detaching the power source, make sure that the camera's power is turned off. Failure to do so can result in a camera malfunction.
- If the camera is a subject to electrostatic discharge, turn the power off before using it again.
About Batteries
DANGER! Do not attempt to take the batteries apart, or expose them to flame or excessive heat, as it may cause a fire or explosion.
WARNING! Do not allow the battery or its terminals to come in contact with metals, as this can result in a short circuit and possibly start a fire.
The Benefits of Lithium-Ion Batteries
Lithium-ion battery packs are small but have a large power capacity. However, when one is exposed to cold temperatures (below 10^ C), its usage time becomes shorter and it may cease to function. If this happens, place the battery pack in your pocket or other warm, protected place for a short time, then re-attach it to the camera.
Operation Mode
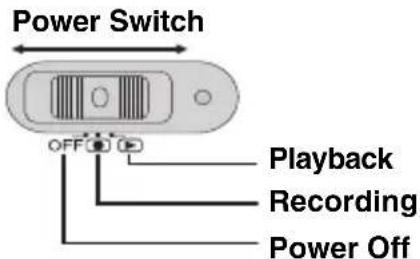
To turn on the camera, set the power switch to ☐ or ▶ while pressing down the lock button located on the switch.
●The power/charge lamp turns on. To turn off the camera, set the power switch to OFF.
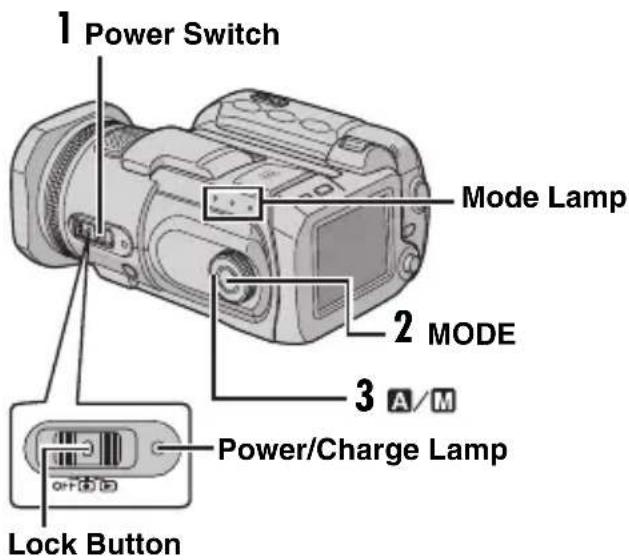
Set the appropriate operation mode according to your preference using the power switch, MODE button and the recording mode dial.
1 Power Switch Position
Set the power switch for recording ( ) or playback ( ) while pressing down the lock button.
2 Recording/Playback Mode
Press MODE to select the recording/playback mode.
The selected mode lamp lights up.
: Video mode (pg. 20, 22)
: Still image mode (pg. 25, 27)
: Voice mode (pg. 29, 30)
●To select the voice mode, press and hold MODE.
3 Auto/Manual Mode
Set the recording mode dial to the desired position to switch the auto/manual recording mode. The indicator or appears on the LCD monitor. (17 pg. 12)

Auto mode (A)
You can record using no special effects or manual adjustments.
Manual mode (other than
Manual recording is possible by setting various functions.
(pg. 31 - 36)
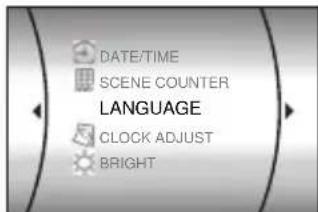
Language Setting (except GZ-MC500EK for U.K. model)
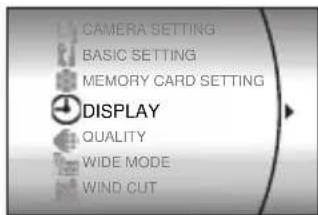
The language on the display can be changed. ( page 48, 49)
1 Set the power switch to or .
2 Press MENU. The menu screen appears.
3Select [DISPLAY] with the multi-controller (△/▽), then press ▶II.
4Select [LANGUAGE] with the multi-controller (△/▽), then press ▶II.
5 Select the desired language with the multi-controller ( / ), then press ▶II.
6 Press MENU to return to the normal screen.
Date/Time Settings
The recording start date/time is recorded on the video/still image/voice file and it can be checked by pressing INFO during playback.
(pg. 22, 27, 30)
1 Set the power switch to or .
2 Press MENU. The menu screen appears.
3Select [DISPLAY] with the multi-controller (△/▽), then press ▶II.
4Select [CLOCK ADJUST] with the multi-controller ( / ), then press ▶II. The day is highlighted.
5 Input the day with the multi-controller (△/▽), then press ▶II. Repeat to input the month, year, hour and minute.
6Press MENU to return to the normal screen.
Built-in Clock's Rechargeable Lithium Battery
If the camera is not used for approx. 3 months, the clock's lithium battery will become discharged and the date/time stored in memory will be lost. When this occurs, first connect the camera to an AC outlet using the AC adapter for over 24 hours to charge the clock's rechargeable lithium battery. Then perform the date/time setting before using the camera.
Note that the camera can be used without setting the date/time.
Inserting/Removing a CF Card
You can use a CF card (CompactFlash card) as a recording medium in the CF slot.
The removable hard disk (provided) or Microdrive ^® is a type of CF cards. See page 62 for the guaranteed media to work with this camera.
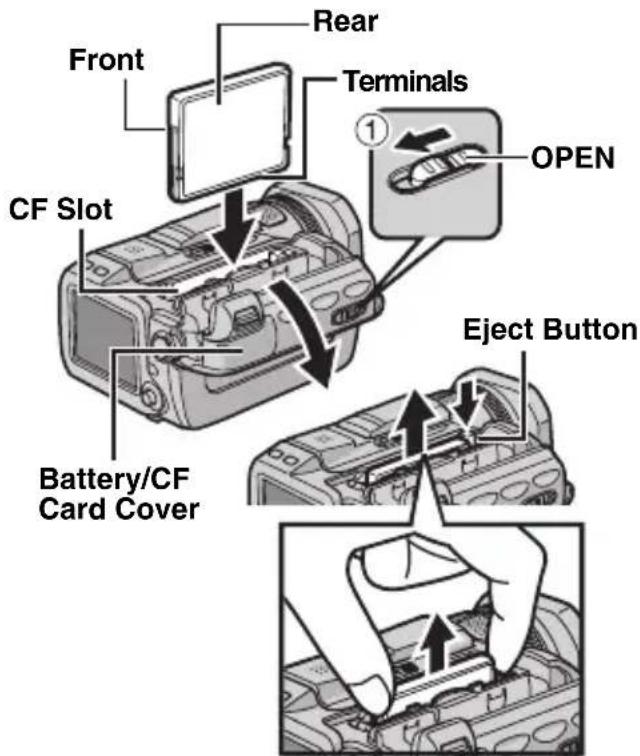
1 Make sure the camera's power is off.
2 Slide and hold OPEN in the direction of the arrow ①, then open the battery/CF card cover.
3 When the eject button is pulled out as shown in the illustration, push it once.
●The button is pushed in.
4 To insert a CF card, firmly insert it as shown in the illustration.
To remove a CF card, push the eject button twice.
●The eject button comes out by pushing it once. By pushing the eject button once again ejects the CF card.
5 Close the battery/CF card cover firmly until it locks.
NOTES:
- Read the cautions on CF card. (pg. 58, "Recording Medium")
- Before using the provided removable hard disk or a new CF card, it is necessary to format it. (17 pg. 19)
- When the battery/CF card cover is opened or the SD card is removed while the power is on, the power is automatically turned off to protect the data in the recording medium. To turn on the power again after opening the battery/CF card cover, close the cover. To turn on the power again after removing the SD card, close the cover and set the power switch to OFF, then to 📄 or .
ATTENTION:
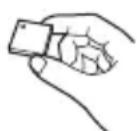
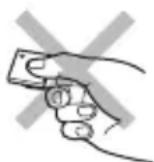
- Do not insert or remove the CF card while the camera is turned on, as this may cause the CF card to be corrupted or cause the camera to become unable to recognise whether or not the CF card is installed.
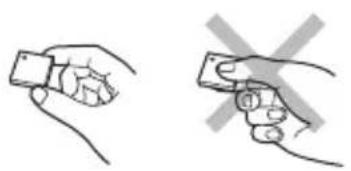
- Do not squeeze the external covers of the CF card.
natural_image
Two hand gestures: one with a rectangular object, the other with a cross mark (no text or symbols)Inserting/Removing an SD Card
You can use an SD card as a recording medium in the SD slot. See page 62 for the guaranteed media to work with this camera.
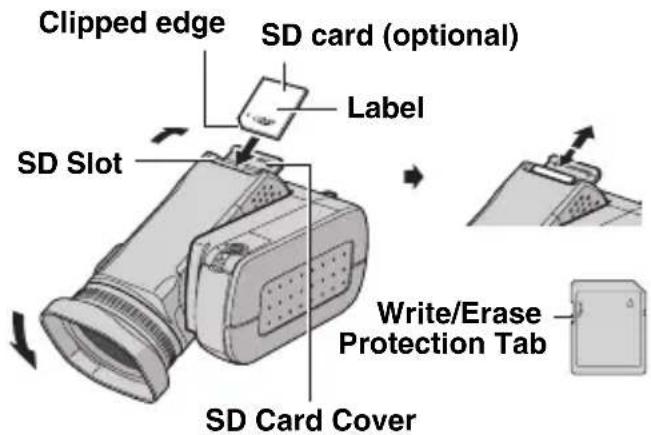
1 Make sure the camera's power is off.
2Open the SD card cover.
3 To insert an SD card, firmly insert it with its clipped edge first.
To remove an SD card, push it once. After the SD card comes out of the camera, pull it out.
- Do not touch the terminal on the reverse side of the label.
4Close the SD card cover.
To protect valuable files
Slide the write/erase protection tab on the side of the SD card in the direction of "LOCK". This prevents the SD card from being recorded over. To record on this SD card, slide the tab back to the position opposite to "LOCK" before inserting it.
NOTE:
Before using a new SD card, it is necessary to format the card. (Lpg. 19)
ATTENTION:
Do not insert or remove the SD card while the camera is turned on, as this may cause the SD card to be corrupted or cause the camera to become unable to recognise whether or not the SD card is installed.
Formatting a Recording Medium
You can format (initialise) a recording medium in the CF or SD slot. You have to format the provided removable hard disk or newly-purchased CF cards and SD cards with this camera before using them. This enables stable speeds and operation when accessing the recording medium. Be aware that all files and data including protected files will be erased. (I-7pg. 39)
1 Set the power switch to


2 Press MENU. The menu screen appears.
3Select [MEMORY CARD SETTING] with the multi-controller (△/▽), then press ▶II.
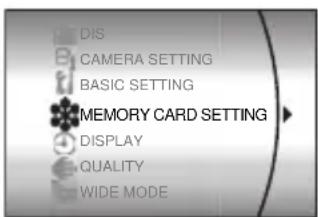
4Select [FORMAT] with the multi-controller (△/▽), then press ▶II.
5Select [CF SLOT] or [SD SLOT] with the multi-controller ( / ), then press ▶II.
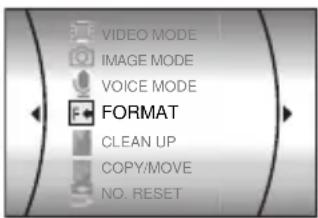
6Select [EXECUTE] with the multi-controller ( / ), then press ▶II.
- To cancel the formatting, select [CANCEL], then press ▶II.
CAUTION:
Do not remove the recording medium or perform any other operation (such as turning off the power) during format. Also, be sure to use the provided AC adapter, as the recording medium may be corrupted if the battery becomes exhausted during format. If the recording medium becomes corrupted, format it again.
NOTE:
Do not format the recording medium on the PC. Make sure to format the recording medium on the camera.
Selecting Recording Medium
Select the recording medium before starting recording or playback. (pg. 48, 49)
Example: When recording still images to an SD card
1 Set the power switch to .
2 Press MENU. The menu screen appears.
3Select [MEMORY CARD SETTING] with the multi-controller ( / ), then press ▶II.
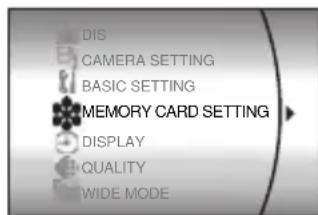
4Select [IMAGE MODE] with the multi-controller ( / ), then press ▶II.
5 Select [SD SLOT] with the multi-controller ( / ), then press ▶II.
6 Press MENU to return to the normal screen.
Video Recording
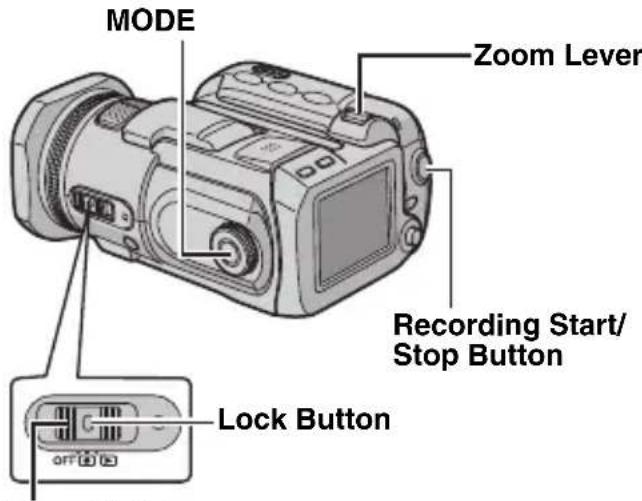
Power Switch
1 Set the power switch to
2Press MODE to select
●The camera is programmed to record videos on the medium in the CF slot by the factory-preset. To switch the recording medium, see pages 19, 48 and 49.
●To change the picture quality, see pages 48 and 50.
3 Press the recording start/stop button to start recording.
●Approximate remaining time for recording appears on the display.
4To stop recording, press the recording start/stop button again.
[U] [0h56m]
●REC
NOTES:
- If the camera is left without any operation during recording or playback (video, still image or voice) for 5 minutes when using the battery pack, the camera is turned off automatically to conserve power. To turn the camera on again, set the power switch to OFF, then to . When using the AC adapter, the camera enters the sleep mode (the access lamp lights and the LCD monitor turns off). To cancel the sleep mode, perform any operation such as zooming.
- When the camera heats up, the ●REC indicator flashes. If the camera continues to heat up, shooting may be stopped to protect the recording medium. In this case, turn off the camera power, and then wait until the camera cools down. (17pg. 56)
- When shooting continuously, shooting is automatically stopped when a file size of 4 GB is reached.
- If data cannot be recorded or saved properly, the video files are not saved to the [SD_VIDEO] folder for regular video. Instead, the files are saved to the [EXTMOV] folder. To play back these files, see "To play back files in the [EXTMOV] folder" (17pg. 22).
●There may be differences in the brightness between the recorded video and still image, even if the same subject is shot.
●Video file names are assigned as sequential hexadecimal numbers.
●To turn the operation sounds off, see page 48.
●For approximate recording time, see page 62.
Zooming
Use the zoom function for close-up or wide-angle shooting. You can zoom in up to 10x by using the optical zoom.
To zoom in
Slide the zoom lever towards T (telephoto).
To zoom out
Slide the zoom lever towards W (wide-angle).
W: Wide angle
T: Telephoto
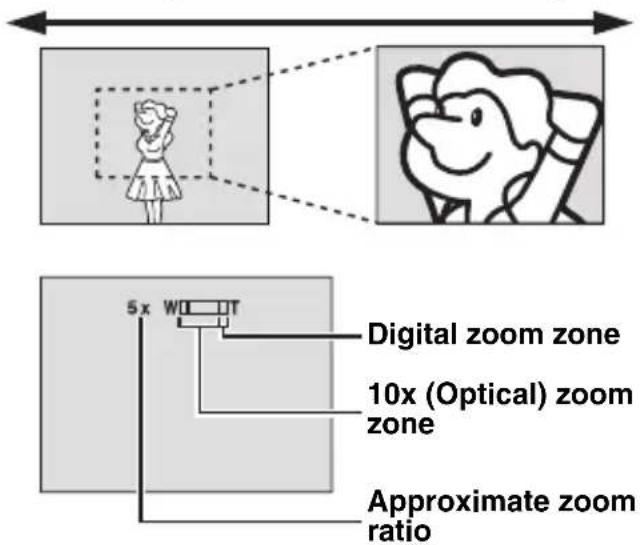
●The further you slide the zoom lever, the quicker the zoom action.
- Zoom magnification over 10x is done through digital image processing, and is therefore called digital zoom. Digital zooming is possible up to 200x. Set [ZOOM] to [40X] or [200X]. (C) pg. 50)
NOTES:
- Focusing may become unstable during zooming. In this case, set the zoom before recording and lock the focus by using the manual focus (pg. 33), then zoom in or out during recording.
●During digital zoom, the quality of image may suffer. - Macro shooting is possible as close as approx. 5 cm to the subject when the zoom lever is set all the way to W.
- When you zoom into a subject close to the lens, the camera may automatically zoom out depending on the distance to the subject. In this case, set [TELE MACRO] to [ON]. (C) pg. 50)
Angle Adjustment
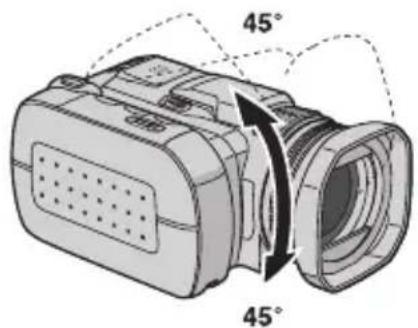
Tilt the lens part at the most convenient angle. The lens part can rotate 45^ upward and downward.
Deleting Files
If you press ☑ during recording mode, the file recorded most recently will be deleted. (☐ pg. 40)
●However, if the recording mode (video, still image or voice) is switched or the power is turned off and on again after recording, you cannot delete the file.
Video Playback
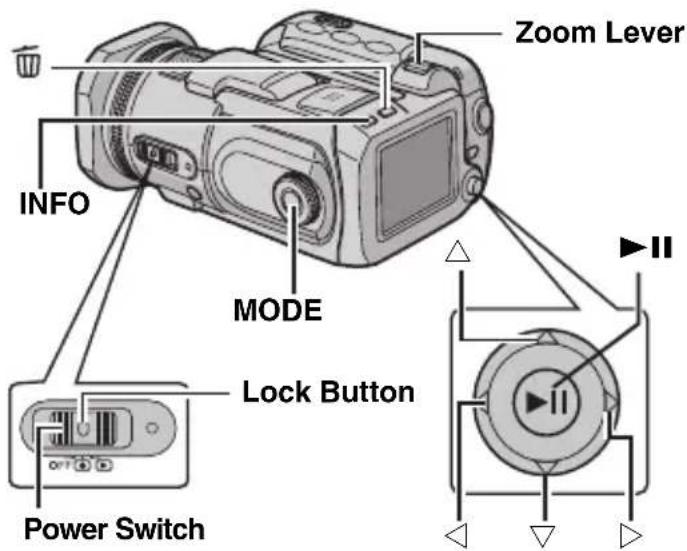
1 Set the power switch to ▶
2Press MODE to select
●The index screen for videos appears. The image on the index screen shows the first part of the shooting.
- To switch the medium to be played back, see pages 19, 48 and 49.
3Select the video file you want to play back with the multi-controller (△/▽/◀/▷).
4 Press ▶II to start playback.
5 To pause playback, press ▶II again.
To return to the index screen
Slide the zoom lever to W when playback is paused.
To adjust the speaker volume
During playback slide the zoom lever towards T to turn up the volume, or towards W to turn down the volume.
To turn on/off the date display
Set [DATE/TIME] to [ON], [AUTO] or [OFF]. (pg. 48, 49)
To turn on/off the on-screen display
Press INFO repeatedly.
To check the file information
Press INFO when playback is paused.
To play back files in the [EXTMOV] folder If the data cannot be recorded properly, the video files are saved to the [EXTMOV] folder. ( page 20)
To play back the files in the [EXTMOV] folder, press the recording start/stop button while the index screen is displayed in step 2, and then proceed to step 3 after [MPG] is displayed.
●The fast forward, rewind, slow, frame-by-frame playback, and playlist creation functions are not available for files in the [EXTMOV] folder.
NOTES:
●The playback picture can be viewed in the LCD monitor or on a connected TV. (pg. 24)
- At the junctions between scenes, the image may stop momentarily or the sound may be interrupted. However, this is not a malfunction.
- To join scenes without distortion, load the video files into the PC and use the provided software to combine the files. When the combined file is used to record a DVD, it will have the same joints without distortion between scenes as a commercial DVD. Refer to "How To Create DVDs simply" of software installation and USB connection guide for more about DVD creation.
●The date and counter can be displayed during playback. (L37pg. 49)
- When the camera heats up, the ▶ indicator flashes. If the camera continues to heat up, playback may be stopped to protect the recording medium. In this case, turn off the camera power, and then wait until the camera cools down. (I7pg. 56)
- When a cable is connected to the AV connector, the sound is not heard from the speaker or headphones.
How to Use the Scroll Bar
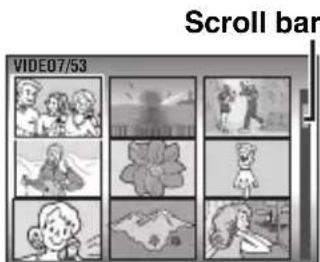
You can use the vertical scroll bar on the index screen to find the desired files quickly. The scroll bar is useful when deleting files (pg. 40), creating play list (pg. 43), etc.
1 Slide the zoom lever towards W to select the scroll bar on the index screen.
2Display the next or previous page with the multi-controller ( / ).
- If you move and hold the multi-controller to / , the high speed search starts.
- If you find the desired file, slide the zoom lever towards T, then select the file.
Various Playback Operations
Still playback (Pause)
Press ▶II during normal playback.
- To resume normal playback, press ▶II again.
Search playback
During normal playback, move the multi-controller to ▷ for forward search, or ◀ for reverse search.
- Moving the multi-controller to ◀ or ▷ repeatedly increases the search speed for each direction. (-60x to +60x)
- To resume normal playback, press ▶II.
Locating the start point of the file or skip the file
Move the multi-controller to ▽ to locate the start point of the next file. Moving the multi-controller to ▽ repeatedly skips files in forward direction. Move the multi-controller to △ to locate the start point of the current file. Moving the multi-controller to △ repeatedly skips files in reverse direction.
- If the multi-controller is moved to or during normal playback or search, playback resumes after locating the start point of a file.
Frame-by-frame playback
While playback is paused, move the multi-controller to ▷ or ◀.
- Moving the multi-controller to ◁ or ▷ repeatedly advances or reverses the still picture frame by frame.
- To resume normal playback, press ▶II.
Slow motion playback
While playback is paused, move and hold the multi-controller to ▷ or ◀ for over 2 seconds.
- To stop slow motion playback, press ▶II.
Playback Zoom
You can magnify the playback image up to 5x.
1 During normal playback, at the point you want to zoom in, press ▶II to pause playback.
2 Slide the zoom lever towards T to zoom in.
- The full view of the image is displayed in the small screen on the lower right side. The * mark indicates the centre point of the magnified area.
3Move to the magnified area you want to view with the multi-controller ( /// ).
4 To zoom out, slide the zoom lever towards W.
- When the zoom is set all the way to W (wide-angle) side, sliding the zoom lever to W switches the display to the index screen. (pg. 22)
Deleting Video Files
Press 📋 then select [EXECUTE] with the multi-controller (△/▽) and press ▶II.
- You can select the desired file to be deleted with the multi-controller (◀/▶).
●To delete multiple files at once, see page 40.
Connecting to a TV or VCR
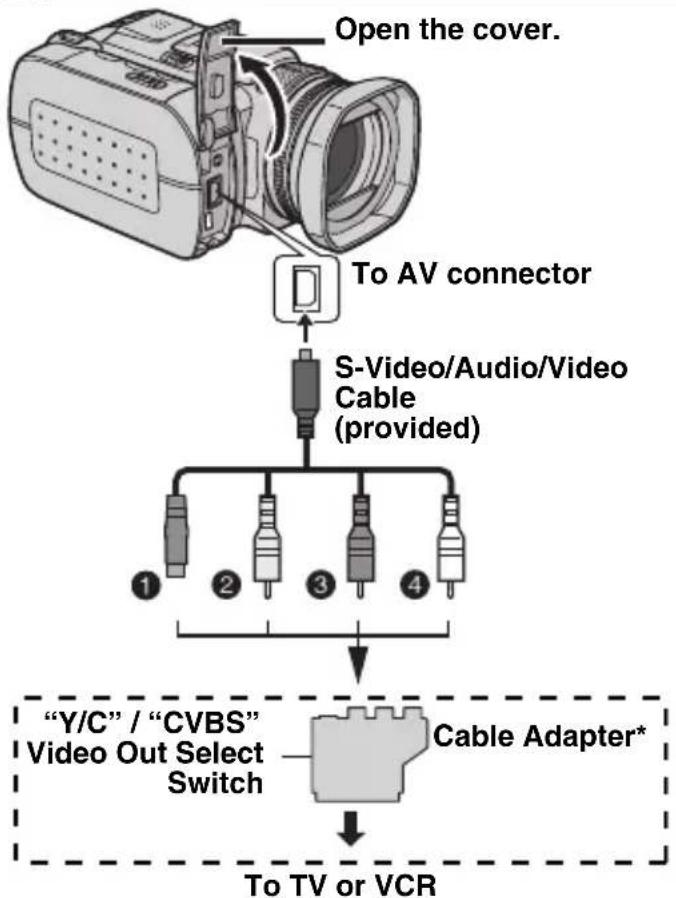
flowchart
graph TD
    A["Open the cover."] --> B["To AV connector"]
    B --> C["S-Video/Audio/Video Cable (provided)"]
    C --> D[""Y/C" / "CVBS" Video Out Select Switch"]
    D --> E["Cable Adapter*"]
    E --> F["To TV or VCR"]
① Black to S-VIDEO IN (Connect when your TV/VCR has S-VIDEO IN and A/V input connectors. In this case, it is not necessary to connect the yellow video cable.)
②Yellow to VIDEO IN (Connect when your TV/VCR has only A/V input connectors.)
③Red to AUDIO R IN**
④ White to AUDIO L IN**
* If your TV/VCR has a SCART connector, use the provided cable adapter.
** Not required for watching still images only.
NOTES:
- It is recommended to use the AC adapter as the power supply instead of the battery pack. (17 pg. 15)
- Set the video out select switch of the cable adapter as required:
Y/C: When connecting to a TV or VCR which accepts Y/C signals and uses an S-Video cable.
CVBS: When connecting to a TV or VCR which does not accept Y/C signals and uses a video cable.
●Make sure you adjust the TV sound volume to its minimum level to avoid a sudden burst of sound when the camera is turned on.
●To connect the camera to a PC, refer to the software installation and USB connection guide.
Playback on a TV
1 Make sure all units are turned off.
2Connect the camera to a TV or VCR as shown in the illustration.
If using a VCR, go to step 3.
If not, go to step 4.
3Connect the VCR output to the TV input, referring to your VCR's instruction manual.
4Turn on the camera, the VCR and the TV.
5 Set the VCR to its AUX input mode, and set the TV to its VIDEO mode.
6 Start playback on the camera. (pg. 22)
To choose whether or not the following displays appear on the connected TV
- Date/Time Set [DATE/TIME] to [AUTO], [ON] or [OFF]. (17pg. 48, 49)
- Counter Set [SCENE COUNTER] to [ON] or [OFF]. (17pg. 48, 49)
(Pressing INFO button also turns on/off the displays.)
Dubbing to a VCR
1 Perform steps 1 to 6 above.
2At the point you want to start dubbing, start recording on the VCR. (Refer to the VCR's instruction manual.)
3To stop dubbing, stop recording on the VCR, then stop playback on the camera.
Still Image Recording
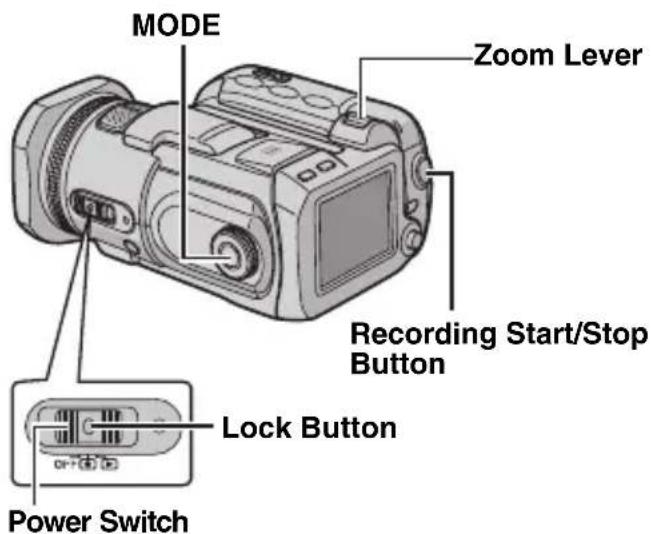
1 Set the power switch to .
2Press MODE to select
●The camera is programmed to record still images on the medium in the CF slot by the factory-preset. To switch the recording medium, see pages 19, 48 and 49.
- To change the image size and picture quality, see pages 48 and 51.
●To use the flash, see page 26.
3 Press the recording start/stop button. PHOTO indicator appers during shooting. The still image is recorded.
- To check how the image looks before recording, press the recording start/stop button halfway and hold. The indicator appears and stops blinking when the captured image is focused. To cancel the recording, release the recording start/stop button. To record it on the recording medium, press the recording start/stop button fully.
NOTES:
- There may be differences in the brightness between the recorded video and still image, even if the same subject is shot.
●To turn the shutter sound off, see page 48. - For approximate number of storable images, see page 63.
Zooming
Use the zoom function for close-up or wide-angle shooting. You can zoom in up to 8x by using the optical zoom.
To zoom in
Slide the zoom lever towards T (telephoto).
To zoom out
Slide the zoom lever towards W (wide-angle).
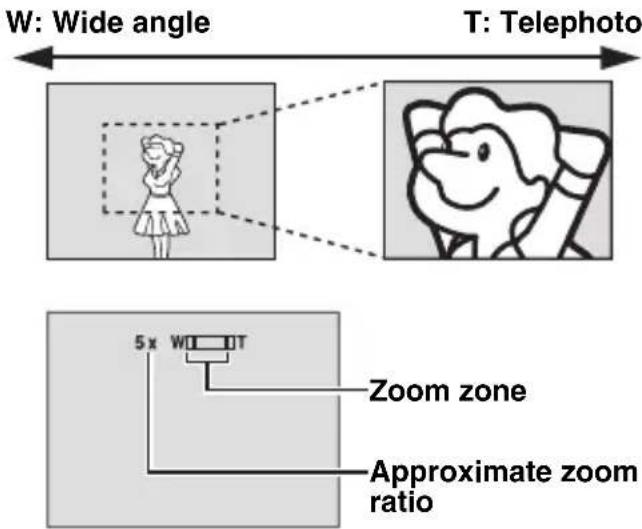
●The further you slide the zoom lever, the quicker the zoom action.
NOTES:
- Zooming is possible up to 8X regardless of the ZOOM setting in the still image recording mode.
- Focusing may become unstable during zooming. In this case, set the zoom before recording and lock the focus by using the manual focus (17 pg. 33), then zoom in or out during recording.
- Macro shooting is possible as close as approx. 5 cm to the subject when the zoom lever is set all the way to W.
- When you zoom into a subject close to the lens, the camera may automatically zoom out depending on the distance to the subject. In this case, set [TELE MACRO] to [ON]. (77 pg. 50)
Continuous Shooting
If the continuous shooting mode is set to on, keeping the recording start/stop button pressed in step 3 in "Still Image Recording" (pg. 25) provides an effect similar to serial photography. (Interval between still images: approx. 0.5 seconds)
To use this function, set the recording mode dial to other than A then move the multi-controller to ▷ so that the indicator appears on the display.
- To turn off this function, move the multi-controller to so that (or ) indicator disappears.
●Continuous shooting may not work well depending on the recording medium.
●The continuous shooting speed will drop when repeatedly making continuous shots.
Flash
You can use the flash for still image recording. The flash mode can be changed as required.
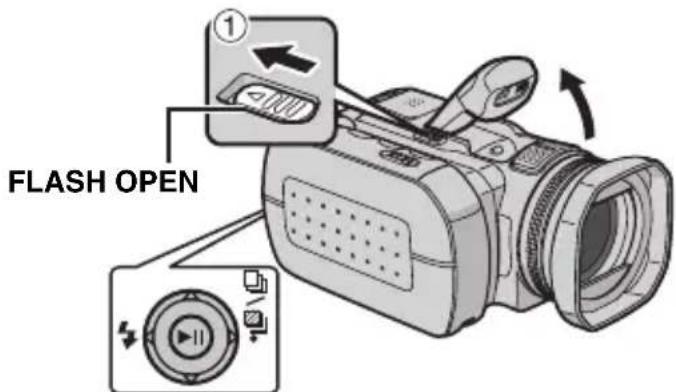
1 Set the power switch to .
2Press MODE to select
3 Slide FLASH OPEN in the direction of the arrow① so that the built-in flash pops up.
●The flash icon appears.
4Select the desired flash mode with the multi-controller ◀(⚡) .
A [AUTO]: The flash fires automatically when the surroundings are dark.
A AUTO RED-EYE: The flash fires automatically but reduces the red-eye phenomenon of the subject's eyes.
ON: The flash fires regardless of the shooting condition.
S SLOW SYNCHRO: The flash fires regardless of the shooting condition. The shutter speed becomes slower in this mode, so the background can be also brightened.
[ ] = Factory-preset
When not using the flash
Push the flash down slightly.
NOTES:
●The flash, continuous shooting or bracket shooting etc. cannot be used at the same time. An unusable mode indicator blinks or goes out.
●The flash icon also blinks while charging the flash.
- If the flash is not bright enough, set [GAIN] to [200] or [400]. (Cpg. 51)
Deleting Files
If you press 📋 during recording mode, the file recorded most recently will be deleted. ( page 40)
●However, if the recording mode (video, still image or voice) is switched or the power is turned off and on again after recording, you cannot delete the file.
Still Image Playback
1 Set the power switch to ▶
2 Press MODE to select
●A still image is displayed.
●To switch the medium to be played back, see pages 19, 48 and 49.
3 Move the multi-controller to ◀ to display the previous file. Move the multi-controller to ▷ to display the next file.
To turn on/off the date/time display Set [DATE/TIME] to [ON], [AUTO] or [OFF]. (17pg. 48, 49)
To turn on/off the on-screen display / To check the file information (pg. 38) / To display the histogram (pg. 38)
Press INFO repeatedly.
NOTES:
●Images shot and stored on the recording media with another device may not be played back correctly.
- You can zoom in/out or rotate still images. (C7pg. 28)
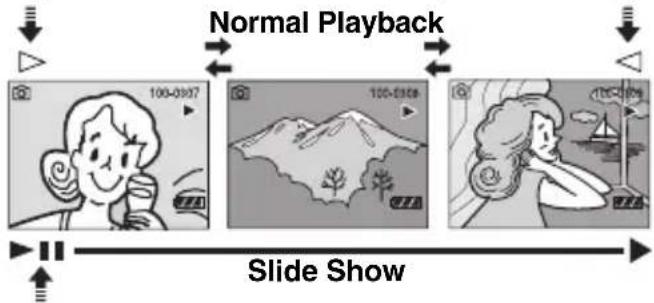
Slide Show
You can playback all the images stored in recording media automatically.
1 Set the power switch to ▶
2 Press MODE to select
●A still image is displayed.
●To switch the medium to be played back, see pages 19, 48 and 49.
3 Press ▶II to start the slide show.
- If you move the multi-controller to ▽ during the slide show, files are displayed in descending order.
- If you move the multi-controller to during the slide show, files are displayed in ascending order.
- To end the slide show, press ▶II again.
To display the next image
To display the previous image
flowchart
graph LR
    A["Normal Playback"] --> B["Slide Show"]
    B --> C["Person viewing screen"]
    C --> D["100-0307"]
    D --> E["100-0308"]
    E --> F["100-0309"]
Index Screen of Still Image Files
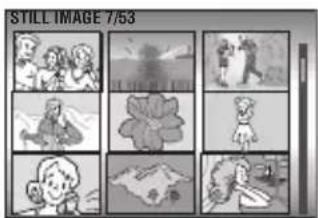
You can view multiple files stored in a recording medium at a time. This browsing capability makes it easy to locate a particular file you want.
1 Slide the zoom lever to W when a recorded image is displayed.
●The display switches to the index screen.
2 Move the frame to the desired file with the multi-controller ( /// ).
3 Press ▶II. The selected file is displayed.
natural_image
Grid of nine grayscale images showing children and animals in various settings (no text or symbols)How to Use the Scroll Bar
You can use the vertical scroll bar on the index screen to find the desired files quickly. The scroll bar is useful when deleting files (pg. 40), setting DPOF (pg. 46), etc.
1 Slide the zoom lever towards W to select the scroll bar on the index screen.
2Display the next or previous page with the multi-controller ( / ).
- If you move and hold the
multi-controller to / , the high speed search starts. - If you find the desired file, slide the zoom lever towards T, then select the file.
Scroll bar
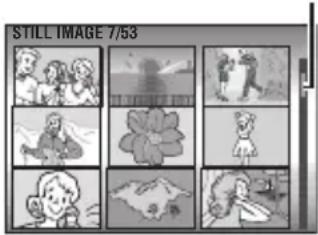
Image Rotation
You can rotate a still image clockwise or counterclockwise.
1 Set the power switch to ▶
2Press MODE to select
●A still image is displayed.
- To switch the medium to be played back, see pages 19, 48 and 49.
3 Move the multi-controller to ▽ to rotate 90° clockwise.
- Each time you move the multi-controller to , the image rotates clockwise. ( 90^ 180^ 270^ 0^ )
4 Move the multi-controller to to rotate 90^ counterclockwise.
- Each time you move the multi-controller to , the image rotates counterclockwise. ( 270^ 180^ 90^ 0^ )
Playback Zoom
You can magnify the playback image up to 5x.
1 Set the power switch to ▶
2Press MODE to select
●A still image is displayed.
- To switch the medium to be played back, see pages 19, 48 and 49.
3 Slide the zoom lever towards T to zoom in.
- The full view of the image is displayed in the small screen on the lower right side. The * mark indicates the centre point of the magnified area.
4Move to the magnified area you want to view with the multi-controller (△/▽/◀/▷).
5 To zoom out, slide the zoom lever towards W.
- When the zoom is set all the way to W (wide-angle) side, sliding the zoom lever to W switches the display to the index screen. (CP pg. 27)
Deleting Still Image Files
Press 📄 then select [EXECUTE] with the multi-controller (△/▽) and press ▶II.
- You can select the desired file to be deleted with the multi-controller (◀/▶).
●To delete multiple files at once, see page 40.
Voice Recording
1 Set the power switch to
2 Press and hold MODE to select 🖼️.
●The camera is programmed to record voice on the medium in the CF slot by the factory preset. To switch the recording medium, see pages 19, 48 and 49.
●To change the sound quality and recording level, see pages 48 and 51.
3Press the recording start/stop button to start recording.
4To stop recording, press the recording start/stop button again. The camera re-enters the record-standby mode.
NOTE:
For approximate recording time, see page 63.
Indication on LCD Monitor
![VOICE RECORDING [0h56m] 12:55:01 L R 20.11.2005 11:30](/content/2026/06/1168946/images/fffdba395bcf836c7e5bc79dfde6d5a63ebfb4b69d3487d5086a1b5d20897f10.jpg)
① Remaining Time (pg. 63)
② Selected Medium Indicator (pg. 19, 49)
③Sound Quality: 48 (fine), 16 (standard), 8 (economy) (pg. 51)
④Recording Level: (high), (middle), (low) (pg. 51)
⑤ Wind Cut Indicator (pg. 50)
⑥Counter
⑦ Battery Indicator (pg. 55)
⑧Date/Time
⑨Microphone Input Level Indicator
⑩Recording Mode
●: Record
: Record-standby
Deleting Files
If you press 📋 during recording mode, the file recorded most recently will be deleted. ( page 40)
●However, if the recording mode (video, still image or voice) is switched or the power is turned off and on again after recording, you cannot delete the file.
Voice Playback
1 Set the power switch to ▶
2 Press and hold MODE to select 🖼️.
●To switch the medium to be played back, see pages 19, 48 and 49.
3Press ▶II to start playback.
4 To pause playback, press ▶II again.
To adjust the speaker volume
During playback slide the zoom lever towards T to turn up the volume, or towards W to turn down the volume.
To check the file information
Press INFO when playback is paused.
To select the file on the playback list
Slide the zoom lever to W when playback is paused so that the playback list appears. Then select the file with the multi-controller (△/▽) and press ▶II.
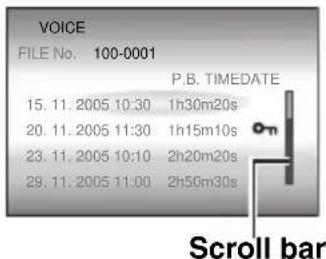
- Scroll bar is available to be used as on the index screen of video and still image.
Various Playback Operations
Search playback
During normal playback, move the multi-controller to ▷ for forward search, or ◀ for reverse search. To resume normal playback, press ▶II.
Locating the start point of the file or skip the file
Move the multi-controller to ▽ to locate the start point of the next file. Moving the multi-controller to ▽ repeatedly skips files in forward direction. Move the multi-controller to △ to locate the start point of the current file. Moving the multi-controller to △ repeatedly skips files in reverse direction.
- If the multi-controller is moved to or during normal playback or search, playback resumes after locating the start point of a file.
Indication on LCD Monitor
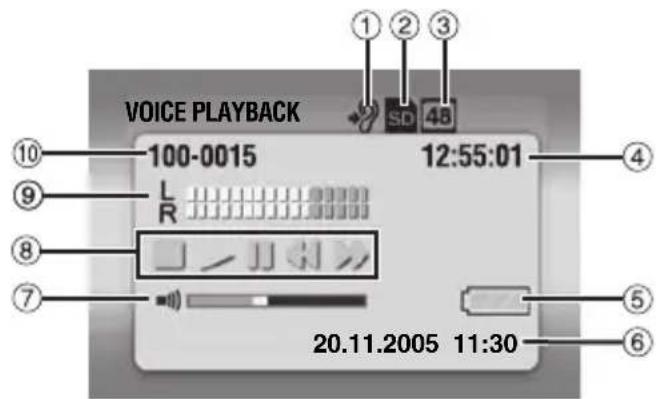

①Playback Speed: (normal), (fast), (slow) (pg. 51)
② Selected Medium Indicator (pg. 19, 49)
③Sound Quality: 48 (fine), 16 (standard), 8 (economy) (Lpg. 51)
④ Counter
⑤ Battery Indicator (pg. 55)
⑥ Date/Time (pg. 49)
⑦Volume Level Indicator
⑧Playback Mode
■ : Stop
▶ : Playback
II: Pause
◀◀ : Reverse High-Speed Search
▶▶ : Forward High-Speed Search
⑨Recording Level Indicator
⑩Folder/File Number
Deleting Voice Files
Press 📋 then select [EXECUTE] with the multi-controller (△/▽) and press ▶II.
- You can select the desired file to be deleted with the multi-controller (◀/▶).
●To delete multiple files at once, see page 40.
Backlight Compensation
Backlight compensation brightens the subject quickly. With simple operation, dark portions of the subject are brightened by increasing the exposure.
1 Set the power switch to
2 Set the recording mode dial to other than so that is displayed.
3 Move the multi-controller to △ (☐) once so that the indicator appears.
To cancel backlight compensation
Move the multi-controller to (D) twice so that the indicator disappears.
Spot Exposure Control

Selection of a spot metering area enables more precise exposure compensation. You can select one of the three metering areas.
1 Set the power switch to
2 Set the recording mode dial to other than so that is displayed.
3 Move the multi-controller to △ (☐) twice so that the indicator appears.
- The spot metering area frame ( ) appears at the centre.
4Select the desired spot metering area frame with the multi-controller (◀/▶).
5 Press ▶II. The setting is completed.
To lock the exposure
After step 4, press and hold ▶II for over 2 seconds. The Indicator appears.
To cancel spot exposure control
Move the multi-controller to △ (once so that the indicator disappears.
NOTES:
- Spot exposure control may not be possible when some other functions are activated.
- Depending on the shooting location and condition, optimum result may not be attained.
Program AE

You can use the program AE settings for specific shooting situations.
1 Set the power switch to .
2 Set the recording mode dial to the desired position.
Twilight: Makes evening scenes look more natural.
Portrait: The subject in the front is accentuated by blurring the background.
Sports: Fast shutter speed allows fast-moving subject to be captured one frame at a time vividly. The shutter speed is set at 1/250 to 1/4000 second automatically.
Snow: Compensates for subjects that may appear too dark when shooting in extremely bright surroundings such as in the snow.
To turn off the program AE function
Set the recording mode dial to ☑r . ☒
NOTE:
While recording is in progress, the program AE cannot be set even if the recording mode dial is set.
Aperture-Priority
Setting the aperture value manually (A)
You can set the aperture value (F-number) manually. The larger the aperture value (lower F-number), the more blurred the background will become. The smaller the aperture value (higher F-number), the clearer the focus will be both near and far object.
1 Set the power switch to .
2 Set the recording mode dial to A The F-number is displayed.
3Select the desired F-number with the multi-controller (◄/►).
You can select F-number from the followings. F1.8* / F1.9** / F2.0 / F2.8 / F4.0 / F5.6 / F8.0*
* Not available for still image recording.
** Not available for video recording.
- If you cannot change the value, press ▶II.
4 Press ▶II. The setting is completed.
To change the F-number
Press ▶II, then select the F-number with the multi-controller (◀/▷) and press ▶II.
To turn off the aperture-priority
Set the recording mode dial to other than A
NOTE:
If it is too bright, set to the larger F-number. If it is too dark, set to the smaller.
Shutter-Priority
Setting the shutter speed manually ( )
You can set the shutter speed manually. A fast shutter speed can freeze the motion of a fast-moving subject and a slow shutter speed can blur the subject to give the impression of motion.
1 Set the power switch to
2 Set the recording mode dial to .She shutter speed is displayed.
3Select the desired shutter speed with the multi-controller (◀/▶).
You can select the shutter speed from the followings.
- If you cannot change the value, press ▶II.
| 1/21/41/81/151/25* | Slow shutter speed can blur the subject to give the impression of flowing motion. |
| 1/50* | The shutter speed is fixed at 1/50 second. Black bands that usually appear when shooting a TV screen become narrower. |
| 1/120* | The shutter speed is fixed at 1/120 second. The flickering that occurs when shooting under a fluorescent light or mercury-vapor lamp is reduced. |
| 1/2501/5001/1000**1/2000**1/4000** | Fast shutter speed allows fast-moving subject to be captured one frame at a time vividly. Use these settings when an automatic adjustment does not work well by Sports) mode in Program AE. (pg. 31) |
* The shutter speed is set to 1/30, 1/60, 1/125 during the still image recording.
** Not available for still image recording. If the flash is used, 1/500 is also not available.
4 Press ▶II. The setting is completed.
To change the shutter speed
Press ▶II, then select the shutter speed with the multi-controller (◀/▶) and press ▶II.
To turn off the shutter-priority
Set the recording mode dial to other than S
NOTES:
- It is recommended to use a tripod when recording with a slow shutter speed.
●The shutter speed can be set separately in video and still image.
Bracket Shooting

In addition to an image with the exposure set by the camera, two other images are recorded with exposure values shifted to the +0.3 EV and -0.3 EV sides. You can select the image that has a suitable exposure after shooting.
Decreased exposure

Standard exposure
Increased exposure
1 Set the power switch to .
2Press MODE to select
3 Set the recording mode dial to other than so that is displayed.
4 Move the multi-controller to ▷ (☐) twice so that the indicator appears on the display.
5 Press the recording start/stop button for bracket shooting. Three still images are recorded.
To cancel the bracket shooting
Move the multi-controller to ▷ (Also that the indicator disappears.
Manual Focus
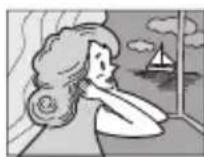
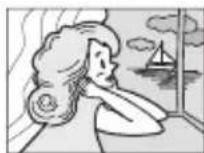
The camera's Full Range AF system offers continuous focusing ability from close-up to infinity. However, the correct focus may not be obtained depending on the shooting condition. In this case, use the manual focus mode.
1 Set the power switch to
2 Set the recording mode dial to other than so that is displayed.
3 Press FOCUS. The manual focus adjustment indicator appears.
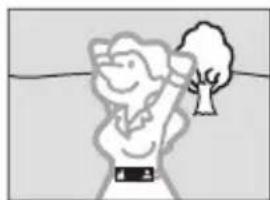
4To focus on a further subject, rotate the manual focus ring counterclockwise.
Focusing on a further subject
natural_image
Simple line drawing of a person holding a tree with a smiling face (no text or symbols)To focus on a nearer subject, rotate the manual focus ring clockwise.
Focusing on a nearer subject

natural_image
Cartoon illustration of a smiling person holding a microphone, with a smokestack in the background (no text or symbols)To return to automatic focus
Press FOCUS again or set the recording mode dial to A
Manual focus is recommended in situations listed below;
- When two subjects overlap in the same scene.
- When illumination is low.*
- When the subject has no contrast (difference in brightness and darkness), such as a flat, one-colour wall, or a clear, blue sky.*
- When a dark object is barely visible in the display.*
- When the scene contains minute patterns or identical patterns that are regularly repeated.
- When the scene is affected by sunbeams or light reflecting off the surface of a body of water.
- When shooting a scene with a high-contrast background.
* The following low-contrast warnings appear blinking: ▲, ◀, ▶, and .
Manual Settings in MSET Menu

You can use manual recording functions easily by selecting items in the MSET menus.
How to Select a Menu Item
1 Set the power switch to
2 Set the recording mode dial to other than so that ms displayed.
3 Move the multi-controller to ▽ (MSET). The menu screen appears.
4Select a desired item from the MSET menu with the multi-controller (◀/▶), then press ▶II.
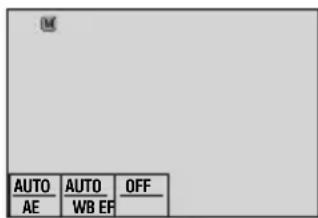
There are 3 items in the MSET menu.
AE: Manual Exposure (pg. 35)
WB: White Balance (pg. 35)
EF: Effect (pg. 36)
Step 5 and 6 below are example of the manual exposure setting.
5 Select a setting with the multi-controller (◀/▶), then press ▶II. The setting is completed.
6 Close the MSET menu by moving the multi-controller to ▽ (MSET).
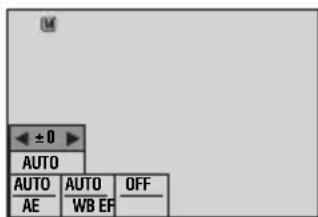
NOTE:
While recording is in progress, [EF] cannot be set even if the multi-controller is moved to (MSET)
Manual Exposure
Manual exposure is recommended in the following situations:
- When shooting using reverse lighting or when the background is too bright.
- When shooting on a reflective natural background such as at the beach or when skiing.
- When the background is overly dark or the subject is bright.
1 Select [AE] in the MSET menu. (pg. 34)
2If [AUTO] is selected, move the multi-controller to △. (video mode only)
3To brighten the image, move the multi-controller to ▷. To darken the image, move the multi-controller to ◀.
- Adjustment range
For video recording: -6 to +6 or AUTO (automatic exposure)
For still image recording: -2.0 to +2.0 (EV)
4 Press ▶II. The setting is completed.
5 Close the MSET menu by moving the multi-controller to (MSET).
To lock the exposure
After step 5, press and hold ▶II for over 2 seconds. The Indicator appears.
NOTES:
- You cannot use the manual exposure at the same time when the program AE function is set to (Snow) (I7 pg. 31), or with backlight compensation (I7 pg. 31).
- If the adjustment does not cause any visible change in brightness, set [GAIN UP] to [ON]. (Lpg. 50)
White Balance
The white balance is usually adjusted automatically for correctness of the colour reproduction under various lighting. However, you can also select the following modes according to the shooting situations.
1 Select [WB] in the MSET menu. (pg. 34)
2Select the desired mode with the multi-controller ( / ).
MWB: For adjusting the white balance manually depending on the light source.
“Manual White Balance Adjustment”
(pg. 36)
FINE: When shooting outdoors on a sunny day.
CLOUD: When shooting outdoors on a cloudy day.
HALOGEN: When a video light or similar type of lighting is used.
3 Press ▶II. The setting is completed.
4Close the MSET menu by moving the multi-controller to (MSET).
To return to automatic white balance Select [AUTO] in step 2.
Manual White Balance Adjustment
1 Select [MWB] in WB menu.
2Hold a sheet of plain white paper in front of the subject. Adjust zoom or position yourself so that the white paper fills the screen.
3Press and hold
▶II until N begins blinking then stops blinking.
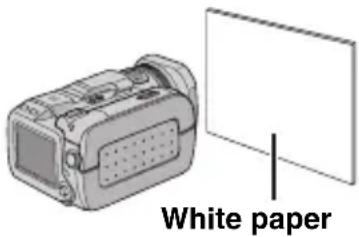
NOTES:
- In step 2, it may be difficult to focus on the white paper. In such a case, adjust with manual focusing. (pg. 33)
- A subject can be shot under various types of lighting conditions indoors (natural, fluorescent, candlelight, etc.). Because the colour temperature is different depending on the light source, the subject tint will differ depending on the white balance settings. Use this function for a more natural result.
- Once you adjust white balance manually, the setting is retained even if the power is turned off or the battery is removed.
Effect
You can add special effects to your recording images.
1 Select [EF] in the MSET menu. (pg. 34)
2Select the desired mode with the multi-controller ( / ).
SEPIA: The image has a brownish tint like old photos.
B/W MONOTONE: The image becomes black and white like old movies.
CLASSIC FILM*: The image has an old movie atmosphere by the effect of skipping frames.
STROBE*: The image looks like a series of consecutive snapshots.
* Not available for still image recording.
3 Press ▶II. The setting is completed.
4Close the MSET menu by moving the multi-controller to ▽ (MSET)
To turn off the effect
Select [OFF] in step 2.
Wipe or Fader Effects Playback Effect

You can view videos with various effects of scene transition.
1 Set the power switch to ▶
2Press MODE to select
3 Press MENU. The menu screen appears.
4Select [WIPE/FADER] with the multi-controller ( / ), then press ▶II.
5 Select a desired effect with the multi-controller ( / ).
Wh FADER-WHITE: Fade in or out with a white screen.
Bk FADER-BLACK: Fade in or out with a black screen.
B.W FADER-B.W: Fade in to a colour screen from a black and white screen, or fade out from colour to black and white.
☐ WIPE-CORNER: Wipe in on a black screen from the upper right to the lower left corner, or wipe out from lower left to upper right, leaving a black screen.
☐ WIPE-WINDOW: The scene starts in the centre of a black screen and wipes in toward the corners, or comes in from the corners, gradually wiping out to the centre.
WIPE-SLIDE: Wipe in from right to left, or wipe out from left to right.
WIPE-DOOR: Wipe in as the two halves of a black screen open to the left and right, revealing the scene, or wipe out and the black screen reappears from left and right to cover the scene.
WIPE-SCROLL: The scene wipes in from the bottom to the top of a black screen, or wipes out from top to bottom, leaving a black screen.
WIPE-SHUTTER: Wipe in from the centre of a black screen toward the top and bottom, or wipe out from the top and bottom toward the centre leaving a black screen.
6 Press ▶II. The setting is completed.
7 Press MENU to close the menu screen.
●The selected wipe or fader effect works when playback starts and ends.
To turn off the effect
Select [OFF] in step 5.
You can view videos or still images with special image effects.
1 Set the power switch to ▶
2 Press MODE to select 🎨 or 📷.
3 Press MENU. The menu screen appears.
4 Select [EFFECT] with the multi-controller ( / ), then press ▶II.
5 Select a desired effect with the multi-controller ( / ).
SEPIÀ: The image has a brownish tint like old photos.
B/W MONOTONE: The image becomes black and white like old movies.
CLASSIC FILM*: The image has an old movie atmosphere by the effect of skipping frames.
STROBE*: The image looks like a series of consecutive snapshots.
* Not available for still image recording.
6 Press ▶II. The setting is completed.
7 Press MENU to close the menu screen.
To turn off the effect
Select [OFF] in step 5.
Viewing File Information

You can view the file information in playback mode.
Information on Video Files
Press INFO while video playback is paused. File information appears.
FILE: File name
FOLDER: Folder name
DATE/TIME: Date and time of the recording
PB TIME: Playback time (length of the file)
QUALITY: Image quality (pg. 50)
PROTECT: File protection status (pg. 39)
- If you press INFO on the index screen (pg. 22), information on the selected file is displayed.
To turn off the file information display
Press INFO repeatedly.
Information on Still Image Files
Press INFO while a still image is displayed. File information appears.
FILE: File name
FOLDER: Folder name
DATE/TIME: Date and time of the recording
SIZE: Image size (17 pg. 51)
QUALITY: Image quality (pg. 51)
PROTECT: File protection status (pg. 39)
- If you press INFO on the index screen (pg. 27), information on the selected file is displayed.
To turn off the file information display
Press INFO repeatedly.
Information on Voice Files
Press INFO while voice playback is paused. File information appears.
FILE: File name
FOLDER: Folder name
DATE/TIME: Date and time of the recording
PB TIME: Playback time (length of the file)
QUALITY: Sound quality (17 pg. 51)
PROTECT: File protection status (pg. 39)
- If you press INFO in the playback list (pg. 30), information on the selected file is displayed.
To turn off the file information display
Press INFO repeatedly.
Histogram (for Still Image Files)
A histogram is a graph indicating the image's brightness. The horizontal axis indicates the brightness level (darker on the left and brighter on the right), while the vertical axis indicates how many p brightness level.
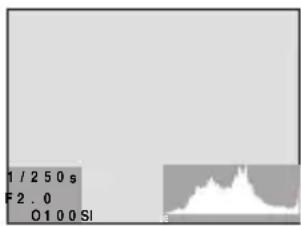
- The more pixels there are in centre position, the exposure is proper and the brightness is well-balanced.
- The more pixels there are toward the left, the darker the image.
- The more pixels there are toward the right, the brighter the image.
By checking the image and its histogram, you can see the exposure level pattern and the overall tone reproduction condition.
To display the histogram of still image files
Press INFO repeatedly while a still image is displayed.
To turn off the histogram display
Press INFO repeatedly.
NOTE:
The shutter speed, F-number and ISO sensitivity (GAIN) are also displayed as recording information with histogram. The shutter speed displayed during shooting in auto mode is an approximation. It may not match the one displayed with histogram.
Protecting Files

You can protect files from the accidental erasure.
1 Set the power switch to ▶
2 Press (and hold) MODE to select the file type (video, still image or voice).
3 Press MENU. The menu screen appears.
4Select [PROTECT] with the multi-controller ( / ), then press ▶II.
To protect the currently displayed file
5Select [CURRENT] with the multi-controller ( / ), then press ▶II.
6Select [EXECUTE] with the multi-controller ( / ), then press ▶II.
- You can select the previous or next file with the multi-controller (◀/▶).
- To release protection, select the protected file, then perform step 5 and 6.
To protect by selecting multiple files
5Select [FILE SELECT] with the multi-controller (△/▽), then press ▶II.
●The index screen appears.
6Select the file you want to protect with the multi-controller (△/▽/◀/▷), then press ▶II.
- The On mark appears on the file.
●To protect other files, repeat step 6. - The scroll bar can also be used with the zoom lever and the multi-controller ( / ). (pg. 22, 27, 30)
- If you slide the zoom lever towards T, the preview screen is displayed. Sliding the zoom lever towards W returns to the index screen.
7 Press MENU.
8 Select [QUIT] with the multi-controller ( / ), then press ▶II.
●The selected files are protected.
- To release protection, select the protected file in step 6.
To protect all files
5Select [PROTECT ALL] with the multi-controller (△/▽), then press ▶II.
6Select [EXECUTE] with the multi-controller ( / ), then press ▶II.
●All files are protected.
To release protection of all files
5 Select [CANCEL ALL], then press ▶II.
6Select [EXECUTE] with the multi-controller ( / ), then press ▶II.
CAUTION:
Do not remove the recording medium or perform any other operation (such as turning off the power) during protection. Also, be sure to use the provided AC adapter, as the recording medium may be corrupted if the battery becomes exhausted during protection. If the recording medium becomes corrupted, format it. (17 pg. 19)
Deleting Files

You can delete unnecessary files.
Deleting by the Button
1 Set the power switch to ▶
2 Press (and hold) MODE to select the file type (video, still image or voice).
3Display the desired file with the multi-controller ( /// ), then press ☑.
- You can also select the file on the index screen (video or still image) or playback list (voice). (LFP pg. 22, 27, 30)
4Select [EXECUTE] with the multi-controller ( / ), then press ▶II.
NOTE:
If you press 📋 during recording mode, the file recorded most recently will be deleted. However, if the recording mode (video, still image or voice) is switched or the power is turned off and on again after recording, you cannot delete the file.
Deleting on the Menu Screen
1 Set the power switch to ▶
2 Press (and hold) MODE to select the file type (video, still image or voice).
3 Press MENU. The menu screen appears.
4 Select [DELETE] with the multi-controller (△/▽), then press ▶II.
To delete the currently displayed file
5Select [CURRENT] with the multi-controller ( / ), then press II.
6Select [EXECUTE] with the multi-controller ( / ), then press ▶II.
- You can select the previous or next file with the multi-controller (◀/▶).
To delete by selecting multiple files
5Select [FILE SELECT] with the multi-controller ( / ), then press ▶II.
- The index screen (video or still image) or playback list (voice) appears.
6Select the file you want to delete with the multi-controller (△/▽/◇/◇), then press ▶II. - To select other files, repeat step 6.
- The scroll bar can also be used with the zoom lever and the multi-controller ( / ). (17 pg. 22, 27, 30)
- If you slide the zoom lever towards T, the preview screen is displayed. Sliding the zoom lever towards W returns to the index screen.
7 Press MENU.
8Select [EXECUTE AND QUIT] with the multi-controller ( / ), then press ▶II.
●The selected files are deleted.
To delete all files
5Select [DELETE ALL] with the multi-controller (△/▽), then press ▶II.
6Select [EXECUTE] with the multi-controller ( / ), then press ▶II.
- To cancel deletion, select [CANCEL], then press ▶II.
NOTES:
- Protected files cannot be deleted. To delete them, release protection first. (17) pg. 39)
- Once files are deleted, they cannot be restored. Check files before deleting.
CAUTION:
Do not remove the recording medium or perform any other operation (such as turning off the power) during deletion. Also, be sure to use the provided AC adapter, as the recording medium may be corrupted if the battery becomes exhausted during deletion. If the recording medium becomes corrupted, format it. (17 pg. 19)
Cleaning Up a Recording Medium

Writing speed of recording media tends to become slow after long period of repeated use. To regain the speed, execute cleanup periodically. The cleanup function is equivalent to “Defragmentation” of PC’s function.
NOTE:
Make sure to use the provided AC adapter for the power supply when cleaning up a recording medium. (17 pg. 15)
1 Set the power switch to or .
2 Press MENU. The menu screen appears.
3Select [MEMORY CARD SETTING] with the multi-controller ( / ), then press ▶II.
4Select [CLEAN UP] with the multi-controller ( / ), then press ▶II.
5Select [CF SLOT] or [SD SLOT] with the multi-controller ( / ), then press ▶II.
- If the AC adapter is not connected to the camera, a warning message appears. In this case, connect the AC adapter.
6Select [EXECUTE] with the multi-controller (△/▽), then press ▶II.
- To cancel cleanup, select [CANCEL], then press ▶II.
7 When cleanup is finished, [CLEANING UP COMPLETED] appears. Press ▶II to complete the operation.
- It may take for a while until cleanup is completed.
CAUTION:
Do not remove the recording medium or perform any other operation (such as turning off the power) during cleanup.
Copying/Moving Still Image Files

You can copy or move still image files between recording media in CF and SD slots using the on-screen display.
Before proceeding to following steps,
●Make sure that recording media are inserted in both CF and SD slots.
- Make sure that enough free space is left in the copy/move destination medium.
1 Set the power switch to ●r . ▶
2 Press MENU. The menu screen appears.
3Select [MEMORY CARD SETTING] with the multi-controller ( / ), then press ▶II.
4Select [COPY/MOVE] with the multi-controller ( / ), then press ▶II.
5Select [COPY] or [MOVE] with the multi-controller (△/▽), then press ▶II.
COPY: Files are copied to the destination medium while leaving original files in the source medium.
MOVE: Files are moved to the destination medium while deleting original files (except read-only files) in the source medium.
6Select the direction of copy/move with the multi-controller ( ◀/▷ ), then move the multi-controller to ▽ . (SD → CF or CF → SD)
To copy or move by selecting files
7 Select [FILE] with the multi-controller (◀/▶), then press ▶II.
●The index screen appears.
8Select a desired file with the multi-controller (△/▽/◀/▷), then press ▶II.
●The check mark () appears on the selected file.
●To select other files, repeat this step.
- The scroll bar can also be used with the zoom lever and . (I7 pg. 28)
9 Press MENU to return to the previous screen.
10 Select [EXECUTE] with the multi-controller ( / ), then press ▶II.
11 File transfer starts.
- To stop the file transfer, press ▶II, then select [EXECUTE] and press ▶II.
12 When [COPYING (MOVING)
COMPLETED] appears, press ▶II to finish the operation.
To copy or move all still image files in the recording medium
7 Select [ALL] with the multi-controller (◀/▶).
8Select [EXECUTE] with the multi-controller ( / ), then press ▶II.
- If you want to cancel, select [CANCEL], then press ▶II.
9File transfer starts.
- To stop the file transfer, press ▶II, then select [EXECUTE] and press ▶II.
10 When [COPYING (MOVING)
COMPLETED] appears, press ▶II to finish the operation.
Resetting the File Number

By resetting the file number (name), a new folder will be made. The new files you are going to make will be stored in the new folder. It is convenient to separate the new files from previously recorded files.
1 Set the power switch to or .
2 Press MENU. The menu screen appears.
3Select [MEMORY CARD SETTING] with the multi-controller ( / ), then press ▶II.
4Select [NO. RESET] with the multi-controller ( / ), then press ▶II.
5 Select the file type (video, still image or voice) with the multi-controller ( / ), then press ▶II.
6Select [EXECUTE] with the multi-controller ( / ), then press ▶II.
7 Press ▶II.
- The new folder (such as [101JVCSO]) will be made and the file number will start again from the new number (such as "PIC_0001.JPG").
Creating Play List

You can create a play list by collecting the desired scenes from the previously recorded video files.
1 Set the power switch to ▶
2Press MODE to select
3 Press MENU. The menu screen appears.
4Select [PLAY LIST] with the multi-controller (△/▽), then press ▶II.
5 Select [EDIT] with the multi-controller ( / ), then press ▶II.
6Select [NEW LIST] with the multi-controller ( / ), then press ▶II.
7 Scroll upward or downward the thumbnail images of recorded files with the multi-controller ( / ), and select a file to be added to a play list.
●The scroll bar can also be used with the zoom lever and the multi-controller ( / ). (pg. 22)
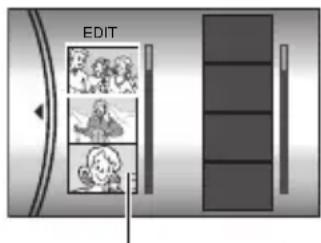
Thumbnail images of recorded files
8 Press ▶II. The frame for selecting an inserting point appears.
9 Scroll upward or downward the thumbnail of images in a play list with the multi-controller (△/▽), and select a position where you want to insert the selected file.
●The scroll bar can also
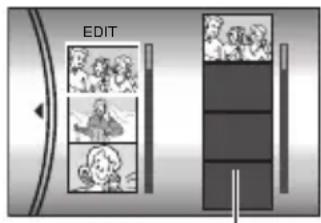
Play list
be used with the zoom lever and the multi-controller ( / ). (17 pg. 22)
10 Press ▶II. The selected file is added to a play list.
- To add other files, repeat steps 7 to 10.
11 Press MENU. The confirmation screen appears.
12Select [SAVE AND QUIT] with the multi-controller ( / ), then press ▶II.
●To return to the edit screen, select [CANCEL].
- If you do not want to save the play list, select [DELETE AND QUIT].
To check the play list by playing back the video
You can check the play list before saving it.
1 After step 10, select a thumbnail image of the play list with the multi-controller (▷).
2Select a scene you want to check with the multi-controller ( / ).
3 Press ▶II. The playback of the play list starts from the selected scene.
●The playback stops at the end of the play list automatically.
- To stop playback midway, press ▶II, then slide the zoom lever towards W.
To check only the scene transition
1 After step 10, select a scene transition with the multi-controller (▷).
- If a scene is selected, move the multi-controller to ▷ once more to select the scene transition bar.
2Select a scene transition you want to check with the multi-controller ( / ).
3 Press ▶II to start playback of the selected scene transition.
To delete the added file from the play list
1 After step 10, select a thumbnail image of the play list with the multi-controller (▷).
2Select the file you want to delete with the multi-controller (△/▽), then press 🔒.
NOTES:
●The play list can be created up to 99.
- If you delete the original files, the files also have been deleted from the play list.
Playing Back Play List

By playing back the play list, you can view your original video clips. (To create play list, 43)
1 Set the power switch to ▶
2Press MODE to select
3 Press MENU. The menu screen appears.
4Select [PLAY LIST] with the multi-controller ( / ), then press ▶II.
5Select [PLAY LIST CONTENTS] with the multi-controller (△/▽), then press ▶II. The table of play lists appears.
6Select a list you want to play back with the multi-controller (△/▽). (The display format of date and time differs depending on the country where this camera is sold.)
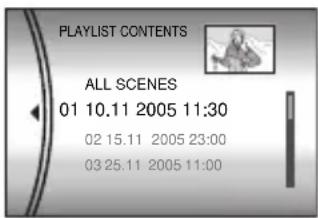
- The scroll bar can also be used with the zoom lever and the multi-controller (/) . (C37 pg. 22)
7 Press ▶II to start playback.
- During playback of play list, "P" mark appears on the top left corner of the screen.
- If you slide the zoom lever towards W while playback is paused, the index screen for play list appears. You can see the contents of the play list and select the desired scene. To return to playback screen, slide the zoom lever to T.
- You can use various playback functions during playback. (17 pg. 23)
8 To stop playback, press ▶II.
- To return to the normal playback mode, select [ALL SCENES] in step 6.
NOTE:
The on-screen display cannot be turned off during playback of play list.
Add/Delete Files in Play List
You can edit existing play lists by adding or deleting files.
1 Set the power switch to ▶
2Press MODE to select
3 Press MENU. The menu screen appears.
4Select [PLAY LIST] with the multi-controller ( / ), then press II.
5 Select [EDIT] with the multi-controller ( / ), then press ▶II.
6Select the play list you want to edit with the multi-controller (△/▽), then press ▶II.
- To add or delete files, follow the steps 7 to 12 in "Creating Play List" (17pg. 43) or 1 to 2 in "To delete the added file from the play list" (17 pg. 43).
Changing Play List Name
The default name of play list is its creation date and time. You can change the name on the keyboard screen as you like.
1 Set the power switch to ▶
2Press MODE to select
3 Press MENU. The menu screen appears.
4Select [PLAY LIST] with the multi-controller ( / ), then press ▶II.
5Select [RENAME] with the multi-controller ( / ), then press ▶II. The table of play lists appears.
6Select a play list whose name you want to change with the multi-controller ( / ).
- The scroll bar can also be used with the zoom lever and the multi-controller (/) . (17 pg. 22)
●The thumbnail appears on the upper right side.
7 Press ▶II. The keyboard screen appears.
8Select the desired letter with the multi-controller (△/▽/◀/▷), then press ▶II.
- Repeat this process to complete the name.
- You can change the character types (capital letters, small letters or marks) by selecting [A/a/@].
- To correct a letter, select [←] or [→] and press ▶II to move the cursor to the letter, then select [CLEAR] and press ▶II.
9 Select ← with the multi-controller (△/▽/◇/◇), then press ▶II.
- To cancel the setting, select [CANCEL], then press ▶II.
Deleting Play List
You can delete unnecessary play lists.
1 Set the power switch to ▶
2Press MODE to select
3 Press MENU. The menu screen appears.
4Select [PLAY LIST] with the multi-controller (△/▽), then press ▶II.
5 Select [DELETE] with the multi-controller (△/▽), then press ▶II. The table of play lists appears.
6Select a play list you want to delete with the multi-controller (△/▽).
●The thumbnail appears on the upper right side.
- To delete all play lists at once, select [DELETE ALL].
7 Press ▶II.
8Select [EXECUTE] with the multi-controller ( / ), then press ▶II. The selected play list is deleted.
- To cancel the setting, select [CANCEL], then press ▶II.
- Original files are not deleted even if you delete the play list.
Dubbing Using Play List
Dubbing to an external device using a play list is possible.
1 Connect the camera and your VCR with the S-Video/Audio/Video cable. (pg. 24)
2 Set the VCR to VIDEO/AUXILIARY input and engage the recording standby mode.
- For details how to set VIDEO/AUXILARY input refer to VCR instructions.
3 Set the power switch to ▶
4Press MODE to select
5 Press MENU. The menu screen appears.
6Select [PLAY LIST] with the multi-controller ( / ), then press ▶II.
7 Select [PLAY LIST CONTENTS] with the multi-controller ( / ), then press ▶II. The table of play lists appears.
8Select a list you want to dub with the multi-controller ( / ).
- The scroll bar can also be used with the zoom lever and the multi-controller (/) . (pg. 22)
9 Move the multi-controller to ▷. Screen for dubbing appears.
10 Select [START PLAYBACK] with the multi-controller ( / ), then press ▶II. Playback on the camera starts.
●The black screen is displayed for 5 seconds at the beginning and the end of the play list playback.
- To cancel the setting, select [CANCEL] with the multi-controller ( / ), then press II.
11 While the black screen is displayed for 5 seconds, start recording on the VCR. (Refer to your VCR's instruction manual.)
12To stop dubbing, stop recording on the VCR while the black screen is displayed for 5 seconds.
DPOF Print Setting

This camera is compatible with DPOF (Digital Print Order Format). You can set which images to be printed and the number of prints with this camera. This feature is useful to print with a DPOF-compatible printer or bring a recording medium to photo lab for print.
To print by selecting a still image
1 Set the power switch to ▶
2Press MODE to select
3 Press MENU. The menu screen appears.
4 Select [DPOF] with the multi-controller ( / ), then press II. The DPOF menu screen appears.
5Select [SELECT IMAGES] with the multi-controller (△/▽), then press ▶II.
6Select the desired file with the multi-controller (△/▽/◇/▷), then press ▶II.
●The scroll bar can also be used with the zoom lever and the multi-controller (△/▽). (17 pg. 28)
- If you slide and hold the zoom lever towards T, the preview screen of the still image is displayed.
7 Select the number of prints (max. 15 prints) with the multi-controller (</>) then press ▶II.
- To set print information for other images, repeat steps 6 and 7.
8Press MENU to finish the setting.
- To cancel the selection, select the same image in step 6.
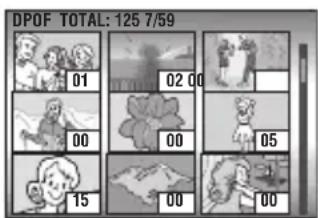
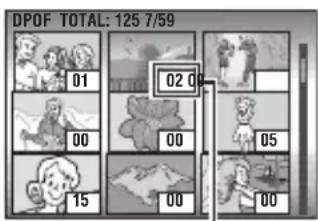
Number of prints
NOTE:
The DPOF setting is available up to 999 images.
To print all still images (One print for each)
1 Display the DPOF menu screen. (“To print by selecting a still image”)
2 Select [ALL 1] with the multi-controller ( / ), then press ▶II.
3Select [EXECUTE] with the multi-controller ( / ), then press ▶II.
4 Press MENU to finish the setting.
To confirm the DPOF setting
1 Display the DPOF menu screen. (☐ “To print by selecting a still image”)
2Select [CHECK SETTINGS] with the multi-controller ( / ), then press ▶II.
3 If necessary, change the number of prints for the desired file by following the steps 6 to 7 in "To print by selecting a still image".
4 Press MENU to return to the previous menu.
To reset the DPOF setting
1 Display the DPOF menu screen. (“To print by selecting a still image”)
2 Select [RESET] with the multi-controller ( / ), then press II.
3Select [EXECUTE] with the multi-controller ( / ), then press ▶II.
4 Press ▶II to finish the reset.
Direct Printing with a PictBridge Printer

If your printer is compatible with PictBridge, still images can be printed easily by connecting the camera with the USB cable directly to the printer. DPOF setting can also be used. (17) pg. 46)
NOTE:
After selecting [DIRECT PRINT] in the menu, connect the USB cable.
To print by selecting a still image
1 Set the power switch to ▶
2Press MODE to select
3 Press MENU. The menu screen appears.
4Select [DIRECT PRINT] with the multi-controller (△/▽), then press ▶II. A message [PLEASE CONNECT PRINTER] appears.
5Connect the camera to the printer with the USB cable.
●After a while, the print menu appears.
6Select [SELECTED PRINT] with the multi-controller (△/▽), then press ▶II.
7 Select the desired file with the multi-controller (◀/▶), then press ▶II.
8 Set the number of prints with the multi-controller (◀/▶).
●The number of prints can be set from 1 to 99.
9Select [DATE] with the multi-controller (△/▽),
then select [ON] or [OFF] with the multi-controller (◀/▶).
- Select [ON] to print the date or [OFF] not to print.
10 Select [PRINT] with the multi-controller (△/▽), then press ▶II. The image is printed.
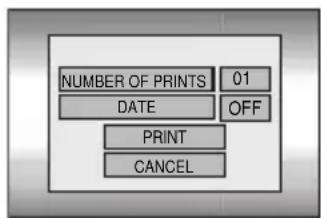
To cancel print setting
Select [CANCEL] with the multi-controller ( / ), then press ▶II.
To stop printing after printing starts
1 Press ▶II. The confirmation screen appears.
2Select [EXECUTE] with the multi-controller ( / ), then press ▶II.
To print using the DPOF setting
If the printer is compatible with DPOF, you can use the DPOF setting. ( page 46)
1 Set the power switch to ▶
2Press MODE to select
3 Press MENU. The menu screen appears.
4Select [DIRECT PRINT] with the multi-controller (△/▽), then press ▶II. A message [PLEASE CONNECT PRINTER] appears.
5Connect the camera to the printer with the USB cable.
●After a while, the print menu appears.
6Select [DPOF PRINT] with the multi-controller ( / ), then press ▶II.
7 Select [PRINT] with the multi-controller ( / ), then press ▶II. The images are printed.
- To confirm the DPOF setting, select [CHECK SETTINGS] with the multi-controller ( / ), then press II. After that, press MENU to return to the previous menu.
NOTE:
If the printer is not recognised, or to print again after direct printing with a PictBridge printer, remove the USB cable, select [DIRECT PRINT] in the menu again, and then reconnect the cable.
Changing the Menu Settings
You can change the menu settings to customize your camera. Access the desired menu screen by following the steps below, then change the various settings.
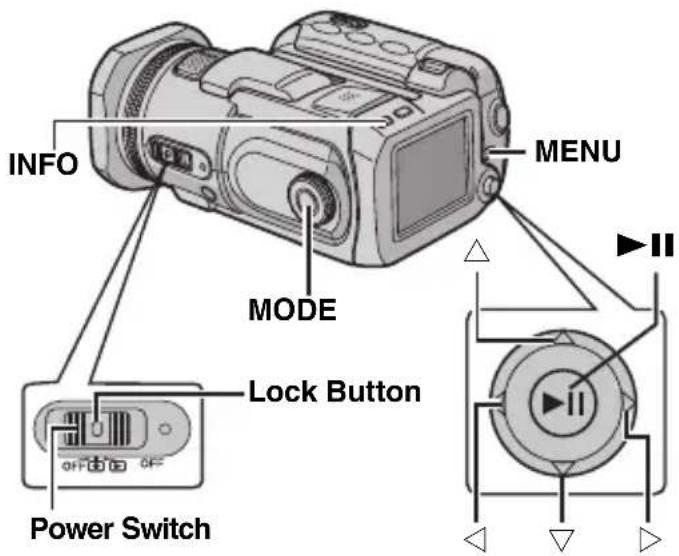
1 Select the operation mode.
For Recording Menus:
Set the power switch to
For Playback Menus:
Set the power switch to ▶
2 Press MODE to select 📋 (video), 📋 (still image) or 🥼 (voice).
3 Press MENU. The menu screen appears.
4Select the desired sub menu and menu item with the multi-controller (△/▽) and ▶II.
- To return to the normal screen, press MENU.
- To display the operation guide, press INFO when the menu screen is displayed. (The operation guide is not displayed depending on the type of the menu.) To remove the operation guide, press INFO again.
- Even if the menu item is displayed, some item cannot be set depending on the selected mode (video/still image/voice, recording/playback). In this case, sub menu cannot be accessed or setting cannot be changed.
Common Menus for All Modes
[ ] = Factory-preset
BASIC SETTING
PRESET
EXECUTE: Resets all settings to the factory-preset.
[CANCEL]: Returns to menu screen without executing reset.
DEMO MODE
OFF: Disables the function.
[ON]: Activates demonstration mode and shows various features on the display.
Demonstration starts in the following cases:
- When the menu screen is closed after [DEMO MODE] is set to [ON].
- With [DEMO MODE] set to [ON], if there is no operation for about 3 minutes after the power switch is set to
●Performing any operation during the demonstration stops the demonstration temporarily. If no operation is performed for more than 3 minutes after that, the demonstration will resume.
NOTES:
- If a recording medium is in the camera, demonstration will not take place even if it set to [ON].
●[DEMO MODE] remains [ON] even if the camera power is turned off.
OPERATION SOUND
OFF: Turns off operation sound.
BEEP: The beep sounds when the power is turned on or off, and at the beginning and end of recording.
[MELODY]: Instead of a beep, a melody sounds when any operation is performed.

MEMORY CARD SETTING
VIDEO MODE
[CF SLOT] / SD SLOT
IMAGE MODE
[CF SLOT] / SD SLOT
VOICE MODE
[CF SLOT] / SD SLOT
selection can
be set for each recording and playback mode: video
( ) still image ( ) or voice ( )

CF SLOT: The CF card is selected as a recording medium.
SD SLOT: SD card is selected as a recording medium.
FORMAT
[CF SLOT] / SD SLOT
You can format (initialise) a recording medium in the CF or SD slot. (pg. 19)
CLEAN UP
[CF SLOT] / SD SLOT
Writing speed of recording media tends to become slow after long period of repeated use. To regain the speed, execute cleanup periodically. (Epg. 41)
COPY/MOVE
COPY / MOVE
You can copy or move still image files between recording media in CF and SD slots. (17 pg. 41)
NO. RESET
VIDEO / IMAGE / VOICE
By resetting the file number (name), a new folder will be made. The new files you are going to make will be stored in the new folder. (pp. 42)

DISPLAY
BRIGHT
When this item is selected, the brightness control indicator appears. Adjust the brightness of the display using the multi-controller (◀/▶), then press ▶II.
DATE/TIME
OFF: The date/time does not appear.
[AUTO]: Displays the date/time for approx. 5 seconds in the following cases.
- When the power switch is set from OFF to
- When playback starts
- When the date is changed during playback
ON: The date/time is always displayed.

NOTES:
- The date/time is always displayed for voice mode and the only date is displayed for the video playback.
- You can set to different setting for each mode (video recording/playback and still image recording/playback).
SCENE COUNTER
[OFF]: Disables the function.
ON: Displays the counter during video mode.
LANGUAGE
GZ-MC500EK for
U.K. model)
[ENGLISH] / FRANÇAIS / DEUTSCH / ESPAÑOL / ITALIANO / NEDERLANDS
The language setting can be changed. (17) pg. 16)
CLOCK ADJUST
“Date/Time Settings” (pg. 17)
Video Recording Menus
[ ] = Factory-preset
QUALITY
Select the desired picture quality.
| Mode(In order of the quality) | Size (pixels) | Bit rate |
| [ULTRA FINE] 720 x 576 8.5 Mbps | ||
| FINE 720 x 576 5.5 Mbps | ||
| NORMAL 720 x 576 4.2 Mbps | ||
| ECONOMY 352 x 288 1.5 Mbps | ||
WIDE MODE
[OFF]: Disables the function.
16:9 WIDE: For playback on TVs with an aspect ratio of 16:9. Naturally expands the image to fit the screen without distortion. The 📌 Indicator appears. When using this mode, refer to your wide-screen TV's instruction manual. During playback/recording on 4:3 TVs/LCD monitor, black bands are inserted at the top and bottom of the screen.
NOTES:
●The 16:9 WIDE mode cannot be used when using ECONOMY mode.
●The provided software PowerDVD can automatically play back the image with an aspect ratio of 16:9.
WIND CUT
[OFF]: Disables the function.
ON: Helps cut down on noise created by wind.
The Indicator appears.
GAIN UP
OFF: The image in the dark will be recorded with no picture brightness adjustment.
[ON]: The image in the dark will be brightened.
But the overall appearance may become grainy.
DIS
OFF: Disables the function.
[ON]: Compensates for unstable images caused by camera-shake, particularly at high magnification. The indicator appears.
NOTES:
- Accurate stabilization may not be possible if hand shake is excessive, or depending on the shooting condition. In this case, the indicator blinks or goes out.
- Switch off this mode when recording with the camera on the tripod.

CAMERA SETTING
ZOOM
10X: Only optical zoom is available up to 10X.
[40X]: Digital zoom is available up to 40X.
200X: Digital zoom is available up to 200X.
NOTE:
Zooming is possible up to 8X regardless of the ZOOM setting in the still image recording mode.
TELE MACRO
[OFF]: Disables the function.
ON: You can shoot a subject as large as possible at a distance of approx. 70 cm. The indicator appears.
Video Playback Menus
[ ] = Factory-preset
PLAY LIST
PLAY LIST CONTENTS / EDIT / RENAME / DELETE
You can create a play list and view your original video clips. (17p g . 4 3 - 4 5 )
WIPE/FADER
“Wipe or Fader Effects” (pg. 37)
EFFECT
“Playback Effects” (pg. 37)
PROTECT
[CURRENT] / FILE SELECT / PROTECT ALL / CANCEL ALL
You can protect files from accidental erasure. ( page. 39)
DELETE
[CURRENT] / FILE SELECT / DELETE ALL
You can delete unnecessary files. (Lpg. 40)
Still Image Recording Menus
[ ] = Factory-preset
QUALITY
[FINE] / STANDARD
Select the desired image quality.
IMAGE SIZE
[2560 x 1920] / 2048 x 1536 / 1600 x 1200 /
1280 x 960 / 640 x 480
Select the desired image size.
NOTE:
In 2560 x 1920 mode, the data is converted and stored in its file size.
SELF-TIMER
[OFF] / 2SEC / 10SEC
By setting the self-timer, a still image is recorded 2 or 10 seconds after pressing recording start/stop button. The or indicator appears.
GAIN
[AUTO] / 100 / 200 / 400
Select the ISO sensitivity to the desired setting. When set to [AUTO], the sensitivity automatically increases in dark conditions.
NOTE:
The amount of image noise increases as the setting level increases.

CAMERA SETTING
TELE MACRO
The menu item of TELE MACRO is the same as in the description on page 50.
Still Image Playback Menus
[ ] = Factory-preset
DPOF
“DPOF Print Setting” (pg. 46)
DIRECT PRINT
“Direct Printing with a PictBridge Printer” (pg. 47)
EFFECT
“Playback Effects” (pg. 37)
PROTECT
DELETE
The menu items of PROTECT and DELETE are the same as in the description on page 50.
Voice Recording Menus
[ ] = Factory-preset
QUALITY
Select the desired sound quality.
| Mode(In order of the quality) | Recording mode | Bit rate |
| [48]FINE] 48 kHz 1,536 kbps | ||
| 16STANDARD 1 | 6 kHz 512 kbps | |
| 8ECONOMY 8 | kHz 256 kbps | |
RECORDING LEVEL
[√ HIGH] / ↘ MIDDLE / ↘ LOW
Select the desired voice recording level.
WIND CUT
The menu item of WIND CUT is the same as in the description on page 50.
Voice Playback Menus
[ ] = Factory-preset
PLAYBACK SPEED
Select the desired voice playback speed.

NORMAL]: Normal speed
FASTPLAY: Playback speed is 20% faster than normal speed.
SLOWPLAY: Playback speed is 20% slower than normal speed.
PROTECT
DELETE
The menu items of PROTECT and DELETE are the same as in the description on page 50.
Troubleshooting
The camera is a microcomputer-controlled device. External noise and interference (from a TV, a radio, etc.) might prevent it from functioning properly.
→To solve the problem, follow the Instructions below at first.
→If the problem is not solved, reset the camera. (Refer to "To reset the camera" below.)
→If the problem still exists, please consult your nearest JVC dealer.
■To reset the camera
①Press the reset hole using a piece of wire or other such pointed instrument. The power is turned off once and turned on again automatically.
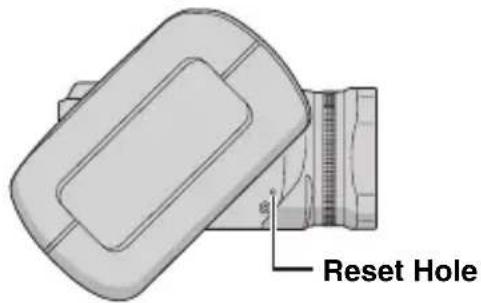
②If nothing happens, set the power switch to OFF and remove the power supply (battery pack or AC adapter) from the camera, then put it back again.
Power
No power is supplied.
●The power is not connected properly.
→Connect the AC adapter securely. (pg. 14)
●The battery pack is not attached firmly.
→Detach the battery pack once again and re-attach it firmly. (pg. 14)
●The battery is dead.
→Replace the dead battery with a fully charged one. (pg. 14)
Recording
Recording cannot be performed.
●[MEMORY CARD IS FULL] appears.
→Replace with new recording medium or delete unnecessary files. (pg. 17, 18, 40)
●Recording medium is not selected properly.
→Select the recording medium. (pg. 19, 48, 49)
●The battery/CF card cover is open.
→Close the cover.
When shooting a subject illuminated by bright light, vertical lines appear.
●This is not a malfunction.
When the screen is under direct sunlight during shooting, the screen becomes red or black for an instant.
●This is not a malfunction.
During recording, the date/time does not appear.
●[DATE/TIME] is set to [OFF].
→ Set [DATE/TIME] to [ON]. (☐ pg. 49)
The LCD monitor indications blink.
●Certain modes of program AE, effect, DIS and other functions that cannot be used together are selected at the same time.
Digital zoom does not work.
●[ZOOM] is set to [10X] (optical zoom).
→ Set [ZOOM] to [40X] or [200X]. (LFP pg. 50)
●Digital zoom is not available in the still image recording mode.
Playback
Playback cannot be performed.
●Recording medium is not selected properly.
→Select the recording medium. (pg. 19, 48, 49)
●The battery/CF card cover is open.
→Close the cover.
- Playback starts, but there is no picture on the connected TV.
→Set the TV's input mode or channel appropriate for video playback.
The same image is displayed for a long time during video playback, or motion is choppy. There are periods of silence during voice playback.
- If the surface of the removable hard disk is damaged, it makes difficult to read data and these phenomena will appear. This camera will make all possible efforts to read data, but when such a state continues for some time, and further playback is impossible, it will stop automatically.
Advanced features
The focus does not adjust automatically.
- Focus is set to the manual mode.
→ Set focus to the automatic mode. (LFP pg. 34)
●The lens is dirty or covered with condensation.
→Clean the lens and check the focus again. (Ⅰ7pg. 57)
The colour of the image looks strange.
●The light source or the subject does not include white. Or there are various different light sources behind the subject.
→ Try manual white balance adjustment. (pg. 35)
The recorded image is too dark.
●Shooting was performed under backlit conditions.
→ Try backlight compensation (17 pg. 31) or manual exposure (17 pg. 35).
The recorded image is too bright.
●The subject is too bright.
→ Try manual exposure. (pg. 35)
White balance setting cannot be activated.
●The sepia (SEPIA) or monotone (MONOTONE) mode is activated.
→Turn off the sepia (SEPIA) or monotone (MONOTONE) mode before setting white balance. (Lpg. 36)
The black & white fader does not work.
●The sepia (SEPIA) or monotone (MONOTONE) mode is activated.
→Turn off the sepia (SEPIA) or monotone (MONOTONE) mode. (137 pg. 37)
The image looks like the shutter speed is too slow.
- When shooting in the dark, the unit becomes highly sensitive to light when [GAIN UP] is set to [ON].
→If you want the lighting to look more natural, set [GAIN UP] to [OFF]. (Lpg. 50)
The continuous shooting speed of still images is slow.
- The continuous shooting speed will drop when repeatedly making continuous shots, when using certain recording medium, or under certain recording conditions. (17pg. 26)
Other problems
The power/charge lamp on the camera does not light during charging.
●Charging is difficult in places subject to extremely high/low temperatures.
→To protect the battery, it is recommended to charge it in places with a temperature of 10^ C to 35^ C. (C-7pg. 58)
●The battery/CF card cover is open.
→Close the cover. (pg. 14)
The data process is too slow after the power is switched on or the mode is changed.
●There is a large number of still images (approx. 1,000 or more) stored in the recording medium.
→Copy the stored files to a PC, and delete them from the recording medium.
[SET DATE/TIME!] appears.
●The built-in clock's rechargeable lithium battery is discharged.
●The previously set date/time is erased.
→Connect the camera to an AC outlet using the AC adapter for over 24 hours to charge the clock's lithium battery. Then set the date/time. (pg. 17)
Files cannot be deleted.
- Files are protected.
→Remove protection from the files and delete them. (17) pg. 39, 50)
When the image is printed from the printer, a black bar appears at the bottom of the screen.
●This is not a malfunction.
→By recording with DIS activated, this can be avoided. (C7pg. 50)
Images on the LCD monitor appear dark or whitish.
- In places subject to low temperature, images become dark due to the characteristics of the LCD monitor. This is not a malfunction.
→Adjust the brightness and angle of the LCD monitor. (17 pg. 21, 49) - When the LCD monitor's fluorescent light reaches the end of its service life, images on the LCD monitor become dark.
→Consult your nearest JVC dealer.
Coloured bright spots appear all over the LCD monitor.
- The LCD monitor is made with high precision technology. However, black spots or bright spots of light (red, green or blue) may appear constantly on the LCD monitor. These spots are not recorded on the picture. This is not due to any defect of the unit. (Effective dots: more than 99.99 %)
The SD card cannot be removed from the camera.
→Push in the SD card a few more times. (pg. 18)
Picture does not appear on the LCD monitor.
●The LCD monitor's brightness setting is too dark.
→Adjust the brightness of the LCD monitor. ( page 49)
Warning Indications
The following indications appear on the screen.
(Battery indicator)
Displays the battery remaining power.
Remaining power level

flowchart
graph LR
    A["Battery"] --> B["Exhausted"]
    B --> C["Exhausted"]
- As the battery power comes close to nil, the battery indicator blinks. When the battery power is exhausted, power turns off automatically.
SET DATE/TIME!
- Appears when the date/time is not set. (17 pg. 17)
- Appears when the built-in clock (lithium) battery is discharged and the previously set date/time is erased. (Lpg. 17)
LENS CAP
Appears for 5 seconds after power is turned on with the power switch set to ☐ if the lens cap is attached or when it is dark.
PLEASE INSERT MEMORY CARD
Appears when no recording medium is inserted in the selected slot. (L7 pg. 17, 18)
THIS CARD IS NOT FORMATTED
Appears when an unformatted recording medium is inserted.
MEMORY CARD IS FULL
Appears when the recording medium is full and recording is not possible.
CHECK CARD'S WRITE PROTECTION SWITCH
Appears when you attempt recording when the write protection tab on the SD card is set to the "LOCK" position. (☐pg. 18)
THIS CARD IS NOT FOR RECORDING VIDEO
Appears when a recording medium which is not capable of video recording is inserted. Use the guaranteed recording medium to work with this camera. (pg. 62)
?
Appears when playing back a file that is not compatible with this camera's file format.
NO VIDEO FILES STORED!
Appears if there are no video files when you attempt video playback.
NO IMAGE FILES STORED!
Appears if there are no still image files when you attempt still image playback.
NO VOICE FILES STORED!
Appears if there are no voice files when you attempt voice playback.
CLOSE COVER
Appears when the battery/CF card cover or the SD card cover is opened during file copy/move operation. (17) pg. 41)
NO MEMORY CARD
Appears when recording media are not inserted to both of slots for file copy/move operation. ( page 41)
NO SUPPORTED FILES
Appears when there is no JPEG (still image) files to be copied or moved in recording media. (Lpg. 41)
NUMBER OF FOLDERS OVERFLOW
Appears when the number of folders exceeds the limit for file copy/move operation.
MEMORY CARD ERROR!
REINSERT CARD OR CHANGE CARD
Appears when the camera does not recognise the loaded recording medium. Remove the medium once and insert it again or replace with another medium. (pg. 17, 18)
FILE SYSTEM MAY HAVE PROBLEM FORMAT IS RECOMMENDED AFTER COPYING WANTED DATA
The file system of the recording medium may have a problem. It is recommended to copy the data for backup, then format the medium. (17) pg. 19
VIDEO MANAGEMENT FILE IS BROKEN TO RECORD/PLAYBACK VIDEO, RECOVERY IS REQUIRED
The video management file is broken. Recovery is required to record or play back video files. Select [YES] with the multi-controller ( / ), then press ▶II to recover the video management file. If the desired video file is not displayed on the video index screen in spite of the file recovery, the file is moved to the [EXTMOV] folder. Press the recording start/stop button on the index screen to display [MPG], and then select the desired file.
NO VIDEO MANAGEMENT FILE
VIDEO FILES HAVE BEEN MOVED TO MPEG FOLDER
The data cannot be recorded properly, or the video management file is deleted or not found. Video files have been moved to MPEG (EXTMOV) folder. (L3pg. 20)
PLAY LIST'S MANAGEMENT INFORMATION IS BROKEN
The management information of play list is broken. Create the play list again. (Lpg. 43)
NO REGISTERED SCENES IN PLAY LIST SOME OF SCENES MAY NOT BE PLAYED BACK
The video files registered in the play list do not exist. Some of the scenes may not be played back.
REGISTERED SCENES IN PLAY LIST IS EMPTY
THIS PLAY LIST WILL BE DELETED
There is no scenes registered in the play list. The play list will be deleted.
CAMERA TEMPERATURE IS GOING UP TURN CAMERA OFF, PLEASE WAIT
The temperature of the camera is too high. Turn off the power, then wait for a while.
CAMERA TEMPERATURE IS TOO LOW KEEP CAMERA POWER ON, PLEASE WAIT
The temperature of the camera is too low. Keep the power on and wait for a while.
RECORDING FAILURE
- Performance of recording medium is poor. Use the Cleanup function [CLEAN UP] in the menu. (17 pg. 41, 49)
- The writing speed of recording medium is slow, or the recording medium is corrupted. Use the recording medium to which the operation is guaranteed. See page 62 for the guaranteed media to work with this camera.
●The recording medium was subjected to vibrations or jolts. Be careful not to subject the recording medium to vibrations or jolts.
RECORDING MAY NOT BE CORRECT ON THE MEMORY CARD
The data may not be recorded on the recording medium correctly. Try recording again. Otherwise, clean up the recording medium. (17pg. 41, 49)
MEMORY CARD CANNOT BE PLAYED BACK CORRECTLY
The recording medium cannot be played back correctly. Try playback again.
CANNOT USE IN VIDEO MODE
The operation is not available in the video mode.
Cleaning the Camera Cautions
Before cleaning, turn off the camera and remove the battery pack and AC adapter.
To clean the exterior
Wipe gently with a soft cloth. Put the cloth in diluted mild soap and wring it well to wipe off heavy dirt. Then wipe again with a dry cloth.
To clean the LCD monitor
Wipe gently with a soft cloth. Be careful not to damage the monitor.
To clean the lens
Wipe gently with lens cleaning paper.
NOTES:
- Avoid using strong cleaning agents such as benzine or alcohol.
- Cleaning should be done only after the battery pack has been removed or other power units have been disconnected.
●Mould may form if the lens is left dirty. - When using a cleaner or chemically treated cloth refer to the cautions of each product.
Battery Packs
The supplied battery pack is a lithium-ion battery. Before using the supplied battery pack or an optional battery pack, be sure to read the following cautions:
●To avoid hazards
... do not burn.
... do not short-circuit the terminals. When transporting, make sure the provided battery cap is attached to the battery. If the battery cap is misplaced, carry the battery in a plastic bag.
... do not modify or disassemble.
... do not expose the battery to temperatures exceeding 60°C, as this may cause the battery to overheat, explode or catch fire.
... use only specified chargers.
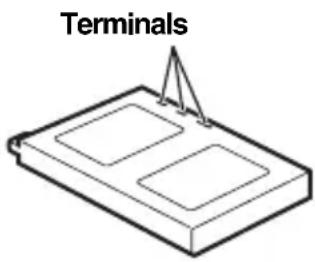
●To prevent damage and prolong service life ... do not subject to unnecessary shock.
... charge in an environment where temperatures are within the tolerances shown in the chart below. This is a chemical reaction type battery — cooler temperatures impede chemical reaction, while warmer temperatures can prevent complete charging.
... store in a cool, dry place. Extended exposure to high temperatures will increase natural discharge and shorten service life.
... fully charge and then fully discharge the battery every 6 months when storing the battery pack over a long period time.
... remove from charger or powered unit when not in use, as some machines use current even when switched off.
NOTES:
- It is recommended that only genuine JVC batteries are used in this camera. Using generic non-JVC batteries can cause damage to the internal charging circuitry.
- It is normal for the battery pack to be warm after charging, or after use.
Temperature range specifications
Charging: 10°C to 35°C
Operation: 0°C to 40°C
Storage: -20^ to 50^
●The lower the temperature, the longer recharging takes.
Recording Medium
- Be sure to follow the guidelines below to prevent corruption or damage to your recorded data.
- Do not bend or drop the recording medium, or subject it to strong pressure, jolts or vibrations.
- Do not splash the recording medium with water.
- Do not use, replace, or store the recording medium in locations that are exposed to strong static electricity or electrical noise.
- Do not turn off the camera power or remove the battery or AC adapter during shooting, playback, or when otherwise accessing the recording medium.
- Do not bring the recording medium near objects that have a strong magnetic field or that emit strong electromagnetic waves.
- Do not store the recording medium in locations with high temperature or high humidity.
- Do not touch the metal parts.
- Copy the recorded files to your PC. JVC shall not be responsible for any lost data. (It is recommended that you copy the data from your PC to DVD or other media for storage.)
●A malfunction may cause the recording medium to fail to operate properly. JVC shall not provide any compensation for any lost contents.
LCD Monitor
●To prevent damage to the LCD monitor, DO NOT
...push it strongly or apply any shocks.
...place the camera with LCD monitor on the bottom.
●To prolong service life
...avoid rubbing it with coarse cloth.
- Be aware of the following phenomena for LCD monitor use. These are not malfunctions.
... While using the camera, the surface around the LCD monitor may heat up.
... If you leave power on for a long time, the surface around the LCD monitor becomes hot.
Main Unit
●For safety, DO NOT
... open the camera's chassis.
... disassemble or modify the unit.
... short-circuit the terminals of the battery pack.
Keep it away from metallic objects when not in use.
... allow inflammables, water or metallic objects to enter the unit.
... remove the battery pack or disconnect the power supply while the power is on.
... leave the battery pack attached when the camera is not in use.
●Avoid using the unit
... in places subject to excessive humidity or dust.
... in places subject to soot or steam such as near a cooking stove.
... in places subject to excessive shock or vibration.
... near a television set.
... near appliances generating strong magnetic or electric fields (speakers, broadcasting antennas, etc.).
... in places subject to extremely high (over 40°C) or extremely low (under 0°C) temperatures.
●DO NOT leave the unit
... in places of over 50°C.
... in places where humidity is extremely low (below 35%) or extremely high (above 80%).
... in direct sunlight.
... in a closed car in summer.
... near a heater.
●To protect the unit, DO NOT
... allow it to become wet.
... drop the unit or strike it against hard objects.
... subject it to shock or excessive vibration during transportation.
... keep the lens directed at extremely bright objects for long periods.
... expose the lens to direct sunlight.
... swing it excessively when using the hand strap.
... swing the soft camera case excessively when the camera is inside it.
How to Handle a CD-ROM
●Take care not to soil or scratch the mirror surface (opposite to the printed surface). Do not write anything or put a sticker on either the front or back surface. If the CD-ROM gets dirty, gently wipe it with a soft cloth outward from the centre hole.
- Do not use conventional disc cleaners or cleaning spray.
- Do not bend the CD-ROM or touch its mirror surface.
- Do not store your CD-ROM in a dusty, hot or humid environment. Keep it away from direct sunlight.
Serious malfunctioning
If malfunctioning occurs, stop using the unit immediately and consult your local JVC dealer. When requesting repairs for malfunctioning by your dealer or JVC service centre, be sure to bring your camera together with the removable hard disk. If one of them is not included, the cause cannot be diagnosed, and the repair cannot be made properly.
The camera is a microcomputer-controlled device. External noise and interference (from a TV, a radio, etc.) might prevent it from functioning properly. In such cases, first disconnect its power supply unit (battery pack, AC adapter, etc.) and wait a few minutes and then re-connect it and proceed as usual from the beginning.
Specifications
Camera
For general
Power supply
DC 11 V (Using AC adapter)
DC 7.2 V (Using battery pack)
Power consumption
Approx. 5.5 W
Approx. 8.0 W (Maximum; when charging a battery)
Dimensions (W x H x D)
80 mm x 55 mm x 118 mm
(incl. lens hood)
Weight
Approx. 330 g
(without battery, removable hard disk, lens hood, lens cap and strap)
Approx. 400 g
(incl. battery, removable hard disk, lens hood, lens cap and strap)
Operating temperature
0^ to 40^
Operating humidity
35% to 80%
Storage temperature
-20^ to 50^
Pickup
1/4.5" (1,330,000 pixels) CCD x 3 (3 CCD)
Lens
Video: F 1.8 to 2.4, f = 3.2 mm to 32 mm, 10:1
power zoom lens
Still: F 1.9 to 2.4, f = 4.0 mm to 32 mm, 8:1
power zoom lens
Filter diameter
ø37 mm
(Detach the lens hood when using an optional conversion lens or lens filter. pg. 8)
LCD monitor
1.8" diagonally measured, LCD panel/TFT active matrix system
Speaker
Monaural
Flash
Within 2 m (recommended shooting distance)
For video/audio
Format
SD-VIDEO
Recording/Playback format
Video: MPEG-2
Audio: Dolby Digital (2 ch)
Signal format
PAL standard
Recording mode (video)
ULTRA FINE: 720 x 576 pixels, 8.5 Mbps (CBR)
FINE: 720 x 576 pixels, 5.5 Mbps (CBR)
NORMAL: 720 x 576 pixels, 4.2 Mbps (VBR)
ECONOMY: 352 x 288 pixels, 1.5 Mbps (VBR)
Recording mode (audio)
ULTRA FINE: 48 kHz, 384 kbps
FINE: 48 kHz, 384 kbps
NORMAL: 48 kHz, 256 kbps
ECONOMY: 48 kHz, 128 kbps
For still image
Format
JPEG
Image size
5 modes (2560 x 1920 / 2048 x 1536 /
Audio output: 300 mV (rms), 1 kΩ analogue, stereo
Headphone output
ø2.5 mm, stereo
USB
Mini USB-B type, USB 1.1/2.0 compliant
AC Adapter
Power requirement
AC 110 V to 240 V\~, 50 Hz/60 Hz
Output
DC 11 V _LA
Design and specifications subject to change without notice.
Recording Time and Number of Images
The tables below show the approximate recording time and number of storable images.
●The number increases or decreases depending on the conditions such as image size and/or picture quality. The first column in the table indicates the conditions.
- The provided 4 GB removable hard disk is indicated with * mark.
■Compatible recording media
The following recording media have been guaranteed to work with this camera. Others are not guaranteed to work, so buy such products with caution.
Removable hard disks: Microdrive ^® from Hitachi, JVC Microdrive ^® (CU-MD04)
CompactFlash cards: By LEXAR, SanDisk and Hagiwara Sys-Com
SD memory cards: By Panasonic, TOSHIBA, pqi (still image only) and SanDisk
- If other media are used, they may fail to record data correctly, or they may lose data that has already been recorded.
- Microdrive ^® of 1 GB or less are not supported.
●MultiMediaCards are not supported. - For video recording, use a removable hard disk, high-speed CompactFlash card (at least 40x speed) or SD memory card (at least 10 MB/s).
: Approximate recording time (for video)
(The numbers indicate "minutes".)
●Removable hard disk
| Quality 2 GB 4 GB* 6 GB | ||
| ULTRA FINE 30 60 90 | ||
| FINE 45 90 135 | ||
| NORMAL 60 120 180 | ||
| ECONOMY 150 300 450 | ||
- SD card/CompactFlash card
| Quality | 128MB | 256MB | 512MB | 1 GB |
| ULTRA FINE 2 | 4 8 16 | |||
| FINE 3 6 12 | 24 | |||
| NORMAL 4 7 1 | 5 31 | |||
| ECONOMY | 10 | 21 | 43 | 86 |
: Approximate number of storable images (for still image)
●Removable hard disk
| Image size/quality | 2 GB 4 | GB* 6 GB | |
| 640 x 480/FINE | 9999 9 | 999 9999 | |
| 640 x 480/STANDARD | 9999 9 | 999 9999 | |
| 1280 x 960/FINE | 3285 6 | 575 9865 | |
| 1280 x 960/STANDARD | 5675 9 | 999 9999 | |
| 1600 x 1200/FINE | 2230 4 | 460 6690 | |
| 1600 x 1200/STANDARD | 3670 7 | 345 9999 | |
| 2048 x 1536/FINE | 1385 2 | 775 4160 | |
| 2048 x 1536/STANDARD | 2150 4 | 305 6460 | |
| 2560 x 1920/FINE | 900 18 | 805 2715 | |
| 2560 x 1920/STANDARD | 1415 2 | 835 4255 |
-SD card
| Image size/quality | 128MB | 256MB | 512MB | 1 GB |
| 640 x 480/FINE | 780 1 | 555 314 | 0 6040 | |
| 640 x 480/STANDARD | 1115 2 | 2225 449 | 90 8635 | |
| 1280 x 960/FINE | 210 4 | 20 845 | 1630 | |
| 1280 x 960/STANDARD | 350 7 | 05 1425 | 2745 | |
| 1600 x 1200/FINE | 140 2 | 80 570 | 1095 | |
| 1600 x 1200/STANDARD | 225 4 | 55 920 | 1775 | |
| 2048 x 1536/FINE | 85 1 | 70 350 6 | 75 | |
| 2048 x 1536/STANDARD | 135 2 | 70 550 | 1055 | |
| 2560 x 1920/FINE | 55 1 | 0 225 4 | 35 | |
| 2560 x 1920/STANDARD | 85 1 | 75 355 6 | 85 |
- CompactFlash card
| Image size/quality | 128MB | 256MB | 512MB | 1 GB |
| 640 x 480/FINE | 705 1 | 420 284 | 0 5680 | |
| 640 x 480/STANDARD | 1115 2 | 235 446 | 65 8930 | |
| 1280 x 960/FINE | 210 4 | 20 840 | 1685 | |
| 1280 x 960/STANDARD | 350 7 | 10 1420 | 2840 | |
| 1600 x 1200/FINE | 135 2 | 75 555 | 1115 | |
| 1600 x 1200/STANDARD | 225 4 | 55 915 | 1835 | |
| 2048 x 1536/FINE | 85 1 | 75 350 7 | 00 | |
| 2048 x 1536/STANDARD | 135 2 | 70 545 | 1095 | |
| 2560 x 1920/FINE | 55 1 | 10 225 4 | 50 | |
| 2560 x 1920/STANDARD | 85 1 | 75 350 7 | 05 |
: Approximate recording time (for voice) (The numbers indicate “minutes”.)
●Removable hard disk
| Quality 4 GB* | |
| FINE 350 | |
| STANDARD 1060 | |
| ECONOMY 2130 | |
TERMS
A
AC Adapter 14, 15
Aperture-Priority 32
B
Backlight Compensation 31
Battery Pack 14
Bracket Shooting 33
Brightness Control 49
C
CF Card 17
Changing The Menu Settings 48 - 51
Charging The Battery Pack 14
Cleaning Up a Recording Medium 41, 49
Connection to a TV or VCR 24
Continuous Shooting 26
Copying/Moving Still Image Files 41, 49
D
Date/Time Settings 17
Deleting Files 40
Demonstration Mode 48
Digital Image Stabiliser (DIS) 50
Direct Printing 47
DPOF Print Setting (Digital Print Order Format) ..... 46
Dubbing 24, 45
E
Effect 36, 37
F
File Information 38
Flash 26
Formatting a Recording Medium 19, 49
G
Gain Up 50
H
Histogram 38
|
Image Rotation 28
Image Size 51
Index Screen 22, 27
L
Language Setting 16, 49
LCD Monitor 12, 29, 30, 58
M
Manual Exposure 35
Manual Focus 33
Mode Lamp 16
MSET Menu 34
0
Operation Sound 48
P
Picture Quality 50, 51
Play List 43 - 45, 50
Playback Speed 51
Portrait 31
Protecting Files 39, 50
R
Recording Level 51
Recording Mode Dial 16, 31 - 32
Resetting The File Number 42, 49
s
SD Memory Card 18
Self-Timer 51
Shutter-Priority 32
Slide Show 27
Slow Motion Playback 23
Sound Quality 51
Speaker Volume 22,30
Spot Exposure Control 31
T
Tally Lamp 20
Tele Macro 50, 51
Troubleshooting 52
W
Warning Indications 55
White Balance 35
Wide Mode 50
Wind Cut 50
Wipe or Fader Effects 37
Z
Zooming 21, 23, 25, 28, 50
JVC
ENGLISH
SOFTWARE INSTALLATION AND USB CONNECTION GUIDE

natural_image
Abstract geometric pattern with diagonal black and white stripes on white background (no text or symbols)Contents
System Requirements 7
Software Installation 9
Connections 11
Viewing the Contents of a Recording Medium .....12
Copying Files to the PC 14
Playing Back Files on the PC 14
Disconnecting the USB cable 15
User's Guide/Help/Readme 17
Subsidiary Information 18
Creating DVDs 18
How To Create DVDs simply 21
JVC SOFTWARE LICENSE AGREEMENT
IMPORTANT
TO CUSTOMERS: PLEASE MAKE SURE TO READ THIS CAREFULLY BEFORE INSTALLING OR USING THE SOFTWARE PROGRAM NAMED "DIGITAL PHOTO NAVIGATOR" ("Program") ON YOUR PC.
The right to use the Program is granted by Victor Company of Japan, Limited ("JVC") to You only on the condition that You agree to the following. Should You not agree to the terms hereof, You may not install or use the Program. HOWEVER, INSTALLING OR USING THE PROGRAM INDICATES YOUR ACCEPTANCE OF THESE TERMS AND CONDITIONS.
1 COPYRIGHT; OWNERSHIP
You acknowledge that all copyrights and other intellectual property rights in the Program are owned by JVC and its licensor, and remain vested in JVC and such licensor. The Program is protected under the copyright law of Japan and other countries, and related Conventions.
2GRANT OF LICENSE
(1) Subject to the conditions of this Agreement, JVC grants to You a non-exclusive right to use the Program. You may install and use the Program on a HDD or other storage devices incorporated in Your PC.
(2) You may make one (1) copy of the Program solely for your personal backup or archival purposes.
3RESTRICTION ON THE PROGRAM
(1) You may not reverse engineer, decompile, disassemble, revise or modify the Program, except to the extent that expressly permitted by applicable law.
(2) You may not copy or use the Program, in whole or in part, other than as expressly specified in this Agreement.
(3) You have no right to grant a license to use the Program, and may not distribute, rent, lease or transfer the Program to any third party or otherwise let them use the Program.
4 LIMITED WARRANTY
JVC warrants that any media in which the Program is embodied are free from any defects in materials and workmanship for a period of thirty (30) days from the date of Your purchasing any our products accompanying the Program. JVC's entire liability and your exclusive remedy in connection with the Program shall be replacement of such defective media. EXCEPT FOR THE EXPRESS WARRANTIES STATED HEREIN AND TO THE EXTENT PERMITTED BY APPLICABLE LAW, JVC AND ITS LICENSORS DISCLAIM ANY OTHER WARRANTIES, EITHER EXPRESS OR IMPLIED, INCLUDING BUT NOT LIMITED TO IMPLIED WARRANTIES OF MERCHANTABILITY AND FITNESS FOR A PARTICULAR PURPOSE IN REGARD TO THE PROGRAM AND THE ACCOMPANYING PRINTED MATERIALS. SHOULD THERE BE ANY PROBLEM ARISING FROM OR CAUSED BY THE PROGRAM, YOU SHOULD SETTLE ALL SUCH PROBLEM AT YOUR OWN COST AND EXPENSE.
5 LIMITED LIABILITY
TO THE EXTENT PERMITTED BY APPLICABLE LAW, IN NO EVENT SHALL JVC AND ITS LICENSORS BE LIABLE FOR ANY INDIRECT, SPECIAL, INCIDENTAL OR CONSEQUENTIAL DAMAGES WHATSOEVER, REGARDLESS OF THE FORM OF ACTION WHETHER IN CONTRACT, TORT OR OTHERWISE ARISING OUT OF OR IN CONNECTION WITH THE USE OF OR INABILITY TO USE THE PROGRAM, EVEN IF JVC HAS BEEN ADVISED OF THE POSSIBILITY OF SUCH DAMAGES. YOU WILL INDEMNIFY AND HOLD HARMLESS JVC FROM ANY LOSS, LIABILITY OR COST ARISING OUT OF OR IN ANY WAY CONNECTED TO CLAIMS FROM ANY THIRD PARTY RELATING TO THE USE OF THE PROGRAM.
6TERM
This Agreement will become effective on the date when You install and use the Program on Your machine, and continue to be in effect until the termination under the following provision. Should You breach any provision of this Agreement, JVC may terminate this Agreement without giving any notice to You. In this event, JVC may claim against You for any damages caused by Your breach. Should this Agreement be terminated, You must immediately destroy the Program stored in Your machine (including the erasing from any memory in Your PC), and no longer own such Program.
7 EXPORT CONTROL
You agree that You will not ship, transfer or export the Program or underlying information and technology to any countries to which Japan and other relevant countries have initiated an embargo on such goods.
8U.S. GOVERNMENT USER
If You are an agency of the United States of America (the “Government”), You acknowledge JVC’s representation that the Program is a “Commercial Item” as defined in Federal Acquisition Regulation (FAR) part 2.101 (g) consisting unpublished “Commercial Computer Software” as those items are used at FAR part 12.212 and is only licensed to You with the same use rights JVC grants all commercial end users pursuant to the terms of this Agreement.
9GENERAL
(1) No modification, change, addition, deletion or other alternation of or to this Agreement will be valid unless reduced to writing and signed by an authorized representative of JVC.
(2) If any part of this Agreement is held invalid by or in conflict with any law having jurisdiction over this Agreement, the remaining provisions will remain in full force and effect.
(3) This Agreement shall be governed by and interpreted under the laws of Japan. The Tokyo District Court has jurisdiction over all disputes which may arise with respect to the execution, interpretation and performance of this Agreement.
Victor Company of Japan, Limited
NOTE:
If You acquired the Program in Germany, the provisions of Sections 4 (Limited Warranty) and 5 (Limited Liability) provided above will be replaced with those of the German version of this Agreement.
CAUTION:
- Operate this equipment according to the operating procedures described in this manual.
- Use only the provided CD-ROM. Never use any other CD-ROM to run this software.
- Do not attempt to modify this software.
- Changes or modifications not approved by JVC could void user's authority to operate the equipment.
How to handle a CD-ROM
- Take care not to soil or scratch the mirror surface (opposite to the printed surface). Do not write anything or put a sticker on either the front or back surface. If the CD-ROM gets dirty, gently wipe it with a soft cloth outward from the center hole.
- Do not use conventional disc cleaners or cleaning spray.
- Do not bend the CD-ROM or touch its mirror surface.
- Do not store your CD-ROM in a dusty, hot or humid environment. Keep it away from direct sunlight.
You can find the latest information (in English) on the provided software program at our world wide web server at http://www.jvc-victor.co.jp/english/global-e.html
Use of this software is authorized according to the terms of the software license.
JVC
When contacting the nearest JVC office or agency in your country about this software (refer to the JVC Worldwide Service Network at http://www.jvc-victor.co.jp/english/worldmap/index-e.html), please fill out the following and have the appropriate information ready.
| Product Name | ||
| Model | ||
| Problem | ||
| Error Message | ||
| PC | Manufacturer | |
| Model | □ Desktop □ Laptop | |
| CPU | ||
| OS | ||
| Memory MB | ||
| Available Hard Disk Space MB | ||
Please note that it may take some time to respond to your questions, depending on their subject matter.
JVC cannot answer questions regarding basic operation of your PC, or questions regarding specifications or performance of the OS, other applications or drivers.
CyberLink
For details of CyberLink's technical support service, refer to the "Readme" of each software or the following list. To access "Readme", refer to "User's Guide/Help/Readme" (17 pg. 17).
| Region | Location | Phone# | Web Language | |
| Fax # | ||||
| Europe 1 | Germany (aixTeMa) | +49-700-462-92375 | support.gocyberlink.com | German / French / English |
| +49-241-70525-25 | ||||
| Europe 2 | Europe area other than Germany | —— | support.gocyberlink.com | English |
| US/Canada | US | +1-510-668-0118 | support.gocyberlink.com | English |
| —— | ||||
| Asia & Pacific 1 | South Korea | +82-31-716-8386 | www.gocyberlink.co.kr | Korean |
| +82-31-718-5173 | ||||
| Asia & Pacific 2 | Taiwan | +886-2-8667-1298 | support.cyberlink.com.tw | Mandarin / English |
| +886-2-8667-1300 | support.gocyberlink.com | |||
| Asia & Pacific 3 | Australia & New Zealand (Manacom) | +61-7-3870-4900 | support.gocyberlink.com | English |
| +61-7-3870-9440 |
■Digital Photo Navigator
The following requirements must be satisfied to connect a camera to a PC and to use Digital Photo Navigator.
OS: Windows
^® Millennium Edition [Me] (pre-installed), Windows ^® 2000 Professional [2000] (pre-installed), Windows ^® XP Home Edition [XP] (pre-installed), or Windows ^® XP Professional [XP] (pre-installed)
CPU : Intel
^® MMX ^TM Pentium ^® , at least 200 MHz
RAM : At least 64 MB
Free hard disk space : At least 40 MB for installation, at least 500 MB recommended
Connector : USB 1.1/2.0 connector
Display : Must be capable of displaying 800 x 600 dots with 16-bit color
Miscellaneous : Internet Explorer 5.5 or later
■CyberLink DVD Solution
The following requirements must be satisfied to use CyberLink DVD Solution.
OS: Windows
^® Millennium Edition [Me] (pre-installed), Windows ^® 2000 Professional [2000] (pre-installed), Windows ^® XP Home Edition [XP] (pre-installed), or Windows ^® XP Professional [XP] (pre-installed)
CPU : Intel
^® Pentium ^® III, at least 700 MHz (Intel ^® Pentium ^® 4, at least 2 GHz recommended)
RAM : At least 128 MB (at least 256 MB recommended)
Free hard disk space : At least 350 MB for installation For creating DVD Video, at least 10 GB recommended For creating VCD, at least 1 GB recommended
Connector : USB1.1/2.0 connector
Display : Must be capable of displaying 1024 x 600 dots
Miscellaneous : Internet Explorer 5.5 or later DirectX 9.0 or later
Supported media : DVD-Video: DVD-R/-RW, DVD+R/+RW DVD-VR: DVD-RW, DVD+RW, DVD-RAM VideoCD: CD-R/RW For the compatible DVD/CD burners, refer to CyberLink web site: http://www.gocyberlink.com/english/products/powerproducer/2_gold/comp_dvd_drives.jsp
- DirectX is necessary so that CyberLink DVD Solution works properly and it is automatically installed during CyberLink DVD Solution installation.
- The system requirements information above is not a guarantee that the provided software will work on all personal computers meeting those requirements.
- Windows ^ is either registered trademark or trademark of Microsoft Corporation in the United States and/or other countries.
- Other product and company names included in this instruction manual are trademarks and/or registered trademarks of their respective holders.
Software Installation
Follow the procedure described below to install the software. From the [SETUP] screen in step 2, you can install the following drivers or software. Quit any other software you are using. (Check that there are no other application icons on the status bar.)
Digital Photo Navigator 1.0
This application is used to organize still images and convert them into a variety of formats.
CyberLink DVD Solution
PowerProducer 2 Gold NE
PowerProducer 2 Gold NE is software for creating movie discs incorporating not only video but also slideshows. This software uses a simple wizard format for creating a wide range of different format discs. You can also edit imported video.
You can import video from the camera, edit it, and then create a slideshow from still images. You can create a customized menu for the video or slideshow and write the contents to DVD or other media.
PowerDirector Express NE
PowerDirector Express NE is software for easily editing MPEG, AVI, and other video files, still images, and other contents for creating a movie. This software has an interface that allows editing in either timeline or storyboard mode, maintains superior image quality, uses SVRT for high-speed rendering, and has a host of other advanced video editing features.
PowerDVD 5 NE
PowerDVD 5 NE is software for playing back DVD-Video and video files.
1 Load the provided CD-ROM into the PC. After a moment, the [SETUP] screen appears.
- From the [SETUP] screen, you can install the desired software.
- If the [SETUP] screen does not appear, double-click the CD-ROM icon in the [My Computer] window.
2Click [Install] on the right side of the desired software and follow the on screen instructions to complete the installation.
The installation of the selected software starts. The procedure differs depending on the software.
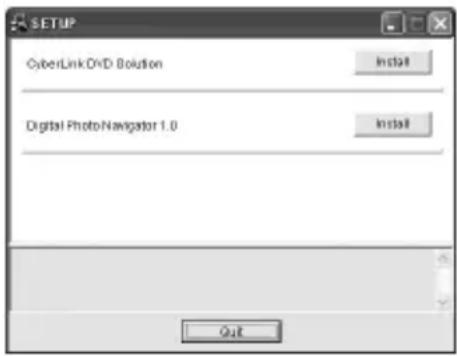
Following steps are the example of CyberLink DVD Solution.
3Click [Install] on the right side of [CyberLink DVD Solution] on the [SETUP] screen.
[Choose Setup Language] screen appears.
4Select the desired language and click [OK].
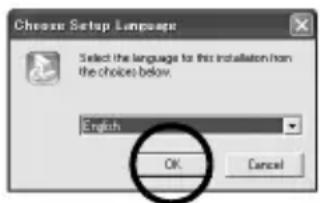
The [CyberLink DVD Solution Setup] screen in step 5 appears.
- If [Information] screen for Windows Messenger appears, see NOTES: on pg. 11.
5Click [Next].
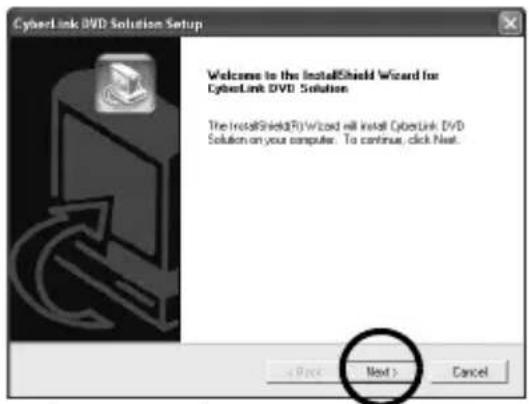
[License Agreement] screen appears.
6Click [Yes].
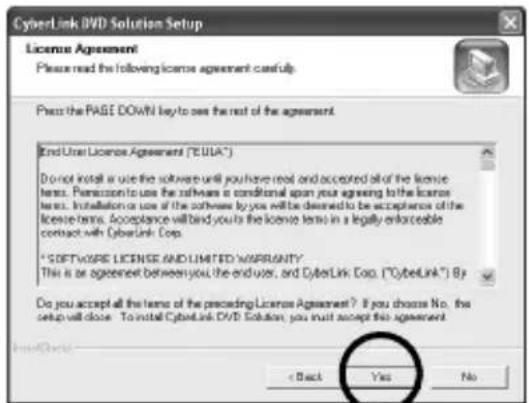
[Customer Information] screen appears.
7 Confirm your information and click [Next].
- It is possible to change the information.
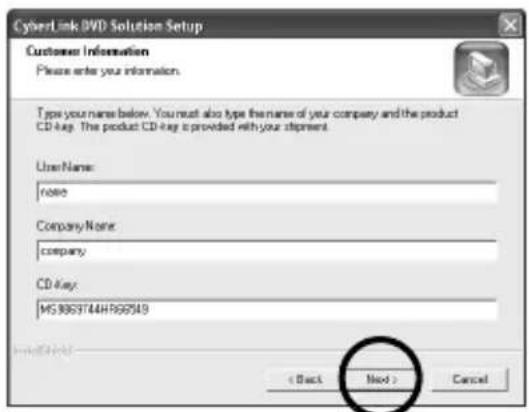
[Choose Destination Location] screen appears.
8Click [Next].
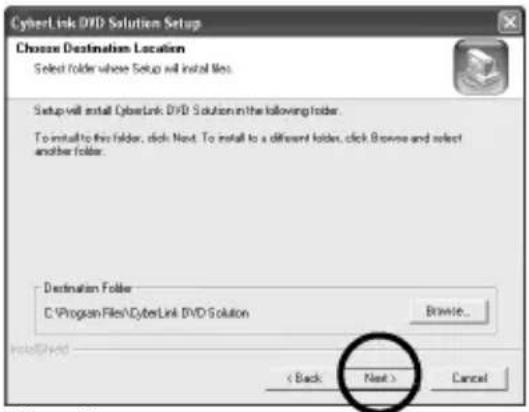
[Setup Type] screen appears.
9Select the program(s) you want to install, then click [Next].
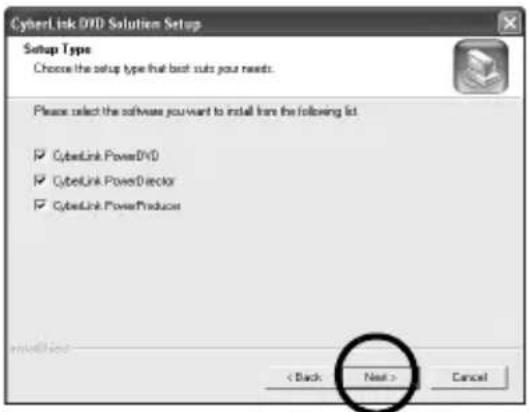
[Setup Status] screen appears. Wait for a moment until the installation is finished and [Setup Complete] screen appears.
10Click [Finish] then restart the PC.
Install all of the desired software in the same way.
To display [SETUP] screen, double-click the CD-ROM icon in the [My Computer] window.
NOTES:
- Even if PowerDirector/PowerProducer/PowerDVD have already been installed on the PC: Video files captured with this camera can only be handled on the provided software. Please install and use the provided software (PowerDirector Express NE, PowerProducer 2 Gold NE, PowerDVD 5 NE). If PowerDirector/ PowerProducer/PowerDVD have already been installed, uninstall them before installing the provided software.
- If you perform installation of a software that is already installed, uninstallation will start. In this case, perform the installation again after uninstallation is finished.
●Windows Messenger has to been closed during CyberLink DVD Solution installation. If it is running during installation, [Information] screen appears.

To close Windows Messenger:
1) While holding [Ctrl + Alt] key, click [Delete] key so that [Task Manager] appears.
2) Click [Processes] tab.
3) Select [msmsgs.exe].
4) Click [End process].
Connections
Connecting the USB cable
Connect the USB cable to copy still image, video files and voice files in a recording medium to the PC.
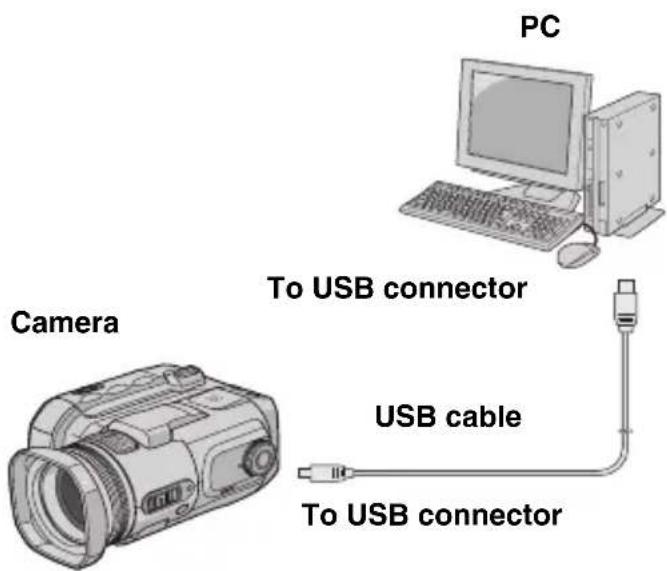
1 To assure safety, make sure all units are turned off before making any connections.
2Use the USB cable to connect the camera to the PC.
NOTES:
- It is recommended to use the AC Adapter as the power supply instead of the battery pack.
- When the USB cable is connected, turning on or off the camera causes malfunctions of the PC.
- If you connect the camera to the PC through a USB hub, compatibility issues between the hub and the PC may result in instability in the operation of the PC. If this happens, connect the camera directly to the PC, not through the hub.
- Do not use an extension USB cable.
Viewing the Contents of a Recording Medium
1 Make sure that there is a recording medium in the camera.
2Set the camera's power switch to the playback mode while pressing down the lock button located on the switch.
The camera turns on.
3Connect the camera to the PC with a USB cable. (pg. 11)
On the camera's LCD monitor [USB] appears.
4When using Windows ^® XP:
The [Removable Disk] window appears on the PC's screen after a moment. Select [Open folders to view files using Windows Explorer] and click [OK].
NOTE:
If the [Removable Disk] window does not
appear, confirm the connection (1 pg. 11) or perform the steps 1 and 2 (2 pg. 12).
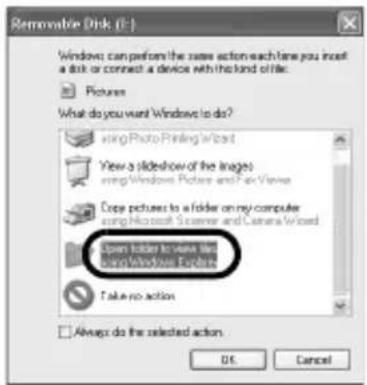
When using Windows ^® Me/2000:
1 Double-click the [My Computer] icon on the desktop. The [Removable Disk] icon which represents the recording medium in the camera appears in the [My Computer] window.
2 Double-click the [Removable Disk] icon.
5The folders in the recording medium appear.
Different file types are stored in different folders.
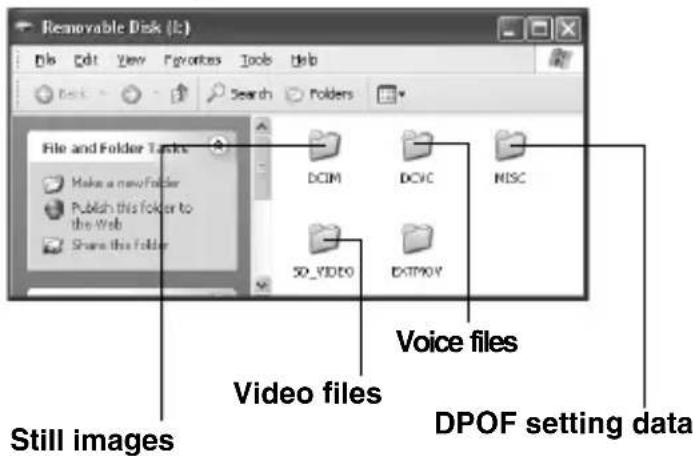
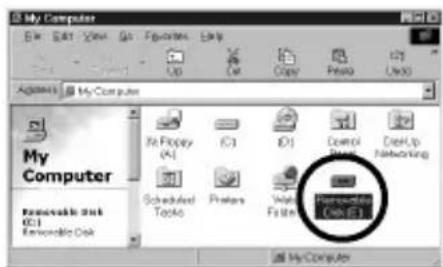
Folder structure within the recording medium Video files: Stored in the [PRGxxx] folder (where xxx is a number), within the [SD_VIDEO] folder. Still image files: Stored in the [xxxJVCSO] folder (where xxx is a number), within the [DCIM] folder. Voice files: Stored in the [xxxJVCMC] folder (where xxx is a number), within the [DCVC] folder.
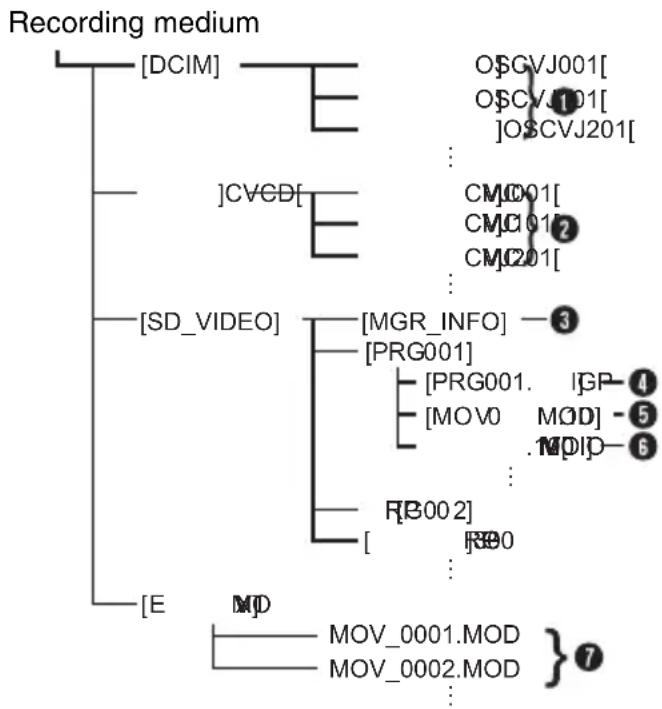
flowchart
graph TD
    A["Recording medium"] --> B["[DCIM"]]
    A --> C["[CVCD"]]
    A --> D["[SD_VIDEO"]]
    A --> E["[E"]]
    B --> F["OSCVJ001"]
    B --> G["OSCVJ101"]
    B --> H["OSCVJ201"]
    C --> I["CMC001"]
    C --> J["CMC017"]
    C --> K["CMC201"]
    D --> L["[MGR_INFO"]]
    D --> M["[PRG001"]]
    D --> N["[PRG001. IGP-4"]
    D --> O["[MOV0 MOD-5"]
    D --> P["MDI-P-6"]
    D --> Q["[R3002"]]
    D --> R["[R300"]
    D --> S["..."]
    D --> T["MVD MOV_0001.MOD"]
    D --> U["MVD MOV_0002.MOD"]
    T & U --> V[} 7
[DCIM]: Contains folders with still images (JPEG) (extension “.jpg”)
[DCVC]: Contains folders with voice (WAVE) files (extension “.wav”)
[SD_VIDEO]: Contains folders with video (MPEG2) files (extension “.mod”)
[EXTMOV]: Contains video (MPEG2) files which are not recorded or saved properly. (extension “.mod”)
[MISC]: Contains folders with DPOF setting data
① Still image file folder
②Voice file folder
③Management information for the media as a whole
④ Management information
⑤Video file
⑥ Management information for the video file
⑦Video file produced on a PC
* Management information: Information such as the date and time of recording, recorded with the video file.
NOTES:
- Any folders or files other than those described above are recorded in the recording medium.
- Saving the wrong kinds of files in a recording medium or deleting files or folders from a recording medium can cause problems with the operation of the camera. When it is necessary to delete a file from a recording medium, delete it through the camera. Also, do not move or rename folders and files within the medium on PC.
- Never disconnect the USB cable while the ACCESS lamp on the camera lights or blinks.
- If you are using a brand new recording medium, you need to format the recording medium with the camera first. You may not be able to copy files from the recording medium to the PC without doing so.
- The file extension may not appear depending on the [FOLDER] option setting of Windows®.
How to play back video files from the [EXTMOV] folder on the camera
On the index display of video files, press the recording start/stop button to display "MPG" on the screen. After that, follow the usual operation for playback. However, the forward/reverse skip search, frame-by-frame playback and playlist functions are not available.
Copying Files to the PC
Still image, video files and voice files that are stored in a recording medium can be copied to the PC and played back on the PC.
1 Perform the procedure in "Viewing the Contents of a Recording Medium" (pg. 12). The folders in the recording medium appear.
2Create a new folder, enter the folder name, and then double-click it.
For example, create a new folder in the [My Pictures] folder.
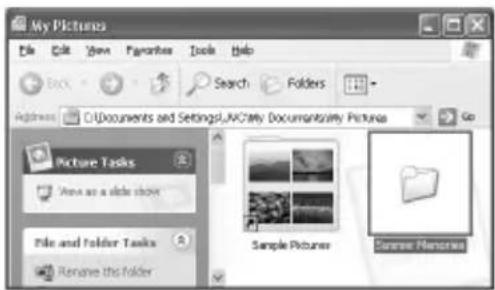
3Select the folder to be copied, and then drag and drop that folder in the destination folder.
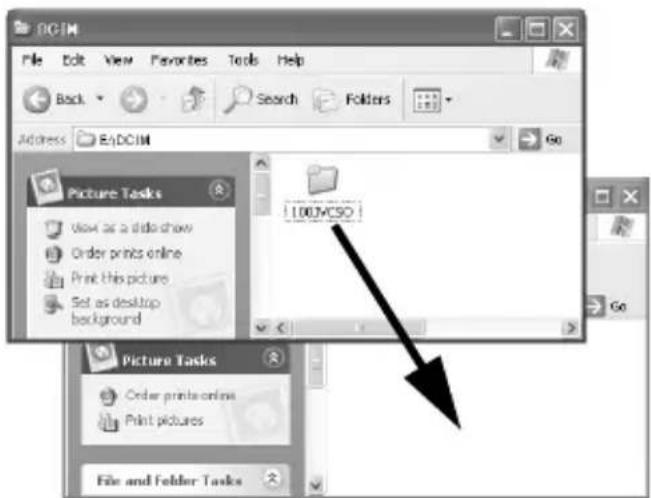
To copy still images: Copy the folder within the [DCIM] folder.
To copy video files: Copy the folder within the [SD_VIDEO] folder.
To copy voice files: Copy the folder within the [DCVC] folder.
- The ACCESS lamp on the camera lights or blinks, and the folder is copied from the recording medium to the PC.
NOTES:
- Never disconnect the USB cable while the ACCESS lamp on the camera lights or blinks.
- File transfer takes considerable time in PCs using USB 1.1. Usage of a PC that supports USB 2.0 is recommended.
Playing Back Files on the PC
Still images
Use an application that can handle the JPEG file format.
To view a still image, double-click the still image file (extension ".jpg").
Video files
Use the PowerDVD 5 NE.
You can install this software from the provided CD-ROM. For more details of PowerDVD 5 NE, refer to the User's Guide. ( page 17)
Voice files
Use the Windows Media™ Player (version 6.4 or later).
You can download the Windows Media™ Player from the Microsoft web site at:
http://www.microsoft.com/
NOTE:
When playing back a file in the recording medium on your PC, copy the file to your PC, and then play it back. If video file is played back directly from recording medium (i.e. the camera is connected through USB to your PC), it may be not played back properly due to the inadequate processing speeds or other problems.
Disconnecting the USB cable
Before loading or unloading recording mediums or turning off the PC, first disconnect the USB cable and turn off the camera.
1 Confirm that the ACCESS lamp on the camera does not light or blink.
2 Double-click the [Safely Remove Hardware] or [Unplug or Eject Hardware] icon in the status bar.
- If the ACCESS lamp lights or blinks, wait until it is turned off before proceeding.
The [Safely Remove Hardware] or [Unplug or Eject Hardware] dialog box appears.
Windows ^® XP: If not, wait a while then go to step 5.
3Select [USB Mass Storage Device] or [USB Disk], and then click [Stop].
- Windows®2000/XP
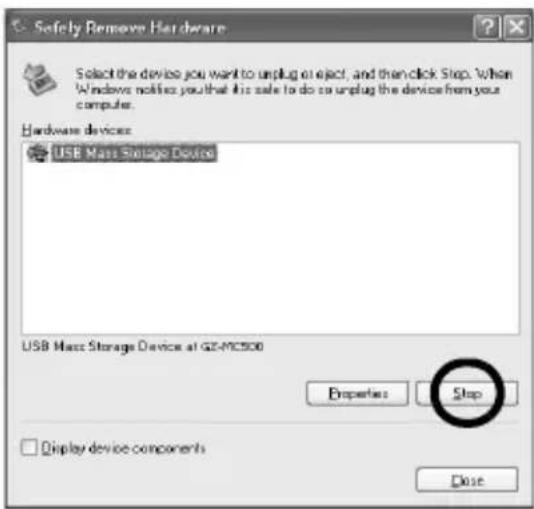
- Windows® Me
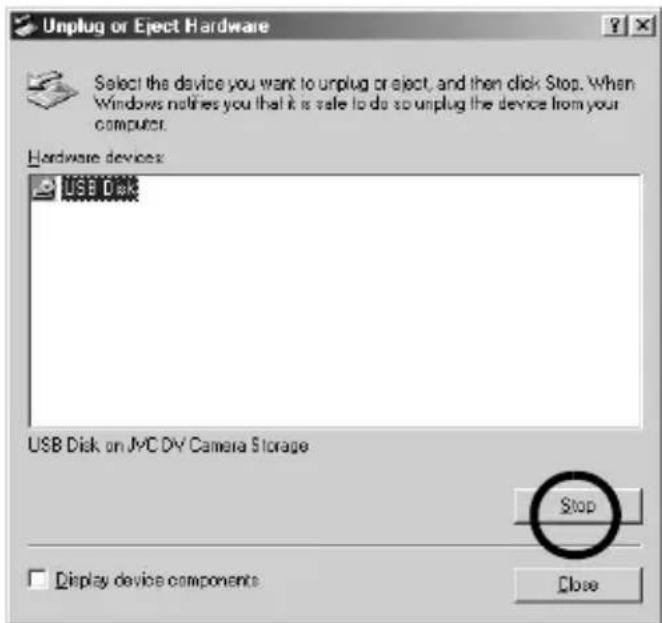
The [Stop a Hardware device] dialog box appears.
4Click [OK].
Windows® 2000/Me: If a message indicating that the device can be safely removed appears, click [OK] and then click [Close].
- Windows® 2000/XP
![Stop a Hardware device Confirm devices to be stopped. Choose OK to continue. Windows will attempt to stop the following devices. After the devices are stopped they may be removed safely. USB Mass Storage Device Generic volume - [E-] JVC GZ-MC500 USB Device OK Cancel](/content/2026/06/1168946/images/7af185bde96256e3ada16f98d2846e8df745e84a9251b675e74e6f783b18bde8.jpg)
* The model name depends on the connected camera.
- Windows® Me
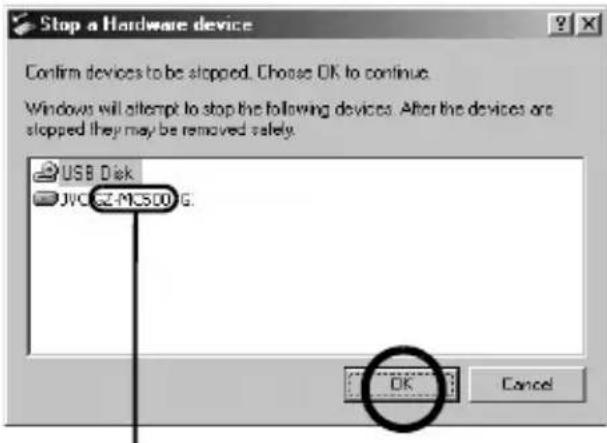
* The model name depends on the connected camera.
5 Disconnect the USB cable.
6Set the camera's power switch to off.
The camera turns off.
User's Guide/Help/Readme
This manual only refers to software installation and PC connection. For more details of each software, refer to its user's guide/help/Readme.
CyberLink DVD Solution
Following steps are the example of CyberLink PowerDirector Express NE.
1 Click [Start], go to [All Programs] or [Programs]– [CyberLink PowerDirector Express], and then click User's Guide/Help/Readme depending on your preference.
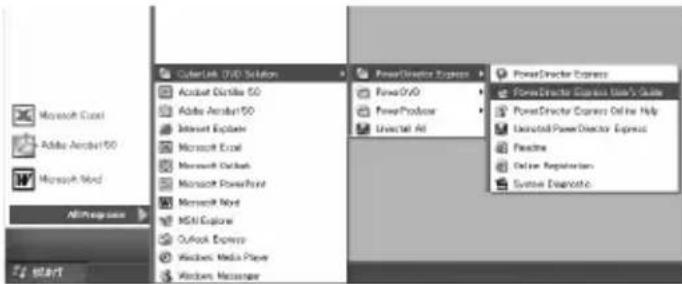
INFORMATION
The programs in CyberLink DVD Solution are versions with limited functionality. The User's Guide and Help files are written for the commercial version available in stores. For information about the differences with the commercial version, see the Readme file or the following web site: http://www2.cli.co.jp/products/ne/ for the respective program.
Digital Photo Navigator
The User's Guide is included on the CD-ROM in PDF format. Right-click the CD-ROM icon in [My Computer], then click [Open]. Double-click the [Docs] folder, then double-click the [PhotoNavi] folder. Open the "Start.pdf" file and click the button of the desired language. Note that Adobe® Acrobat® Reader™ or Adobe® Reader® must be installed to read PDF files.
- Adobe® Reader® can be loaded from Adobe's web site: http://www.adobe.com/
Creating DVDs
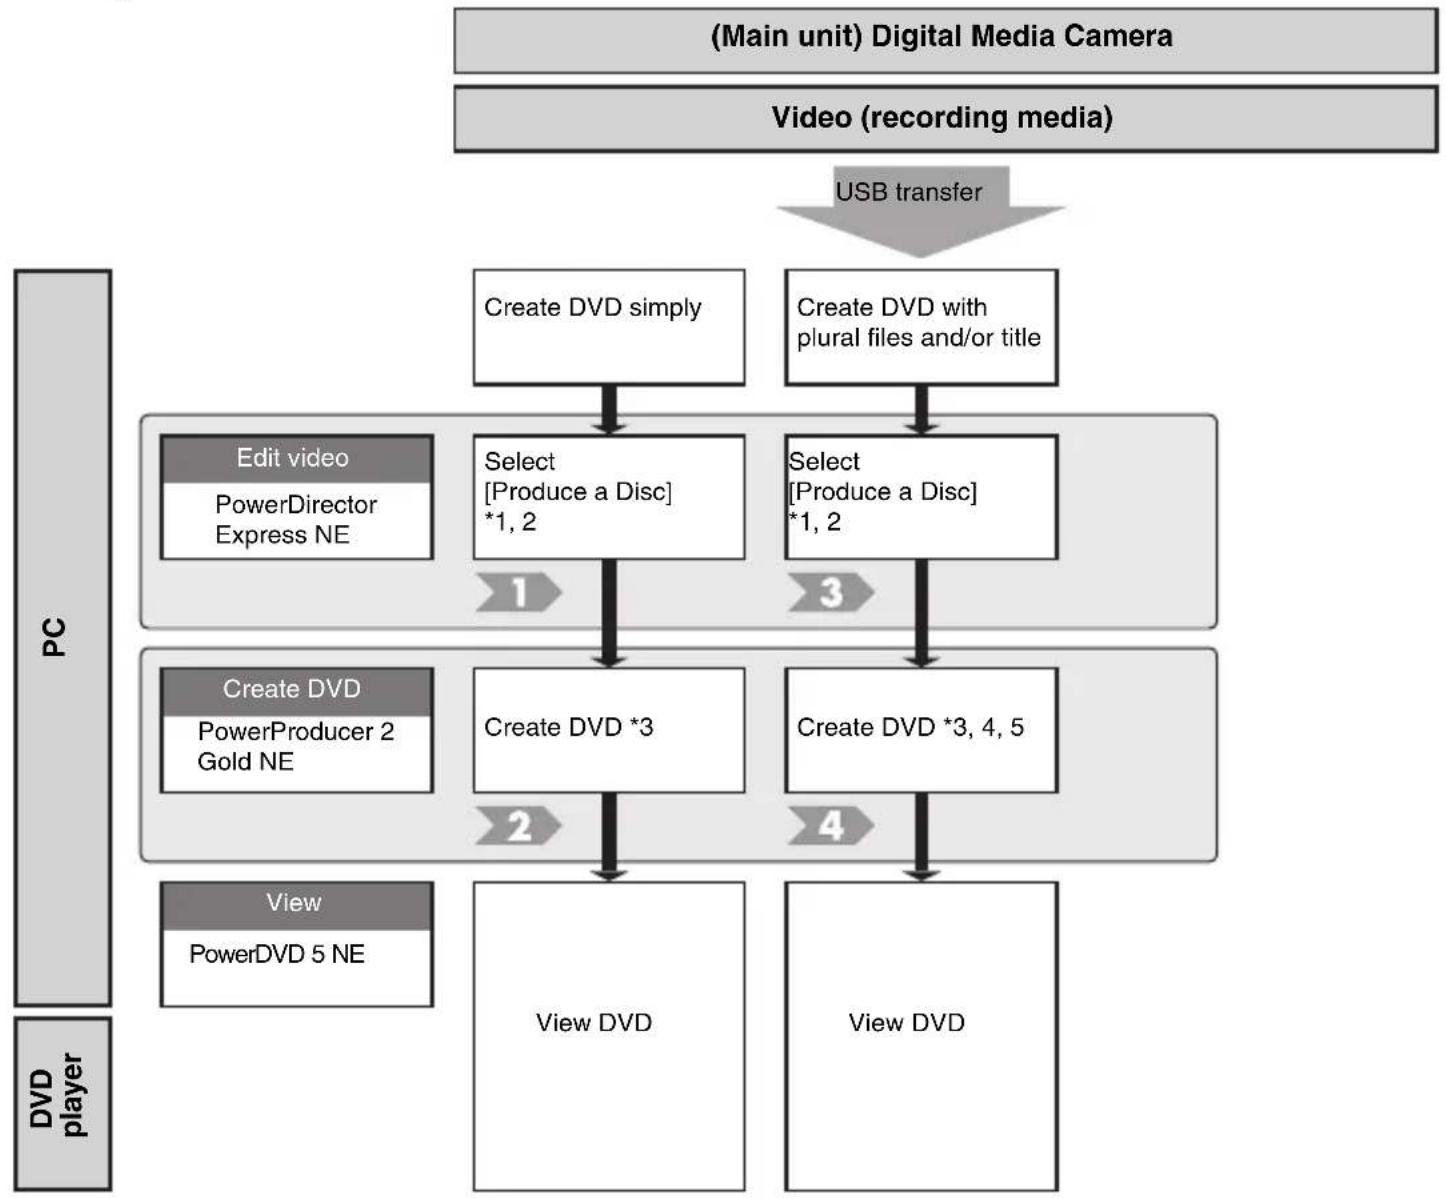
flowchart
graph TD
    A["(Main unit) Digital Media Camera"] --> B["Video (recording media)"]
    B --> C["USB transfer"]
    C --> D["Create DVD simply"]
    C --> E["Create DVD with plural files and/or title"]
    D --> F["Edit video\nPowerDirector\nExpress NE"]
    F --> G["Select [Produce a Disc"]*1, 2]
    G --> H["1"]
    H --> I["Create DVD *3"]
    E --> J["Select [Produce a Disc"]*1, 2]
    J --> K["3"]
    K --> L["Create DVD *3, 4, 5"]
    L --> M["2"]
    M --> N["View\nPowerDVD 5 NE"]
    L --> O["4"]
    N --> P["View DVD"]
    O --> Q["View DVD"]
    style A fill:#f9f,stroke:#333
    style B fill:#ccf,stroke:#333
    style D fill:#cfc,stroke:#333
    style E fill:#cfc,stroke:#333
    style F fill:#ffc,stroke:#333
    style G fill:#ffc,stroke:#333
    style H fill:#ffc,stroke:#333
    style I fill:#ffc,stroke:#333
    style J fill:#ffc,stroke:#333
    style K fill:#ffc,stroke:#333
    style L fill:#ffc,stroke:#333
    style M fill:#ffc,stroke:#333
    style N fill:#cfc,stroke:#333
    style O fill:#cfc,stroke:#333
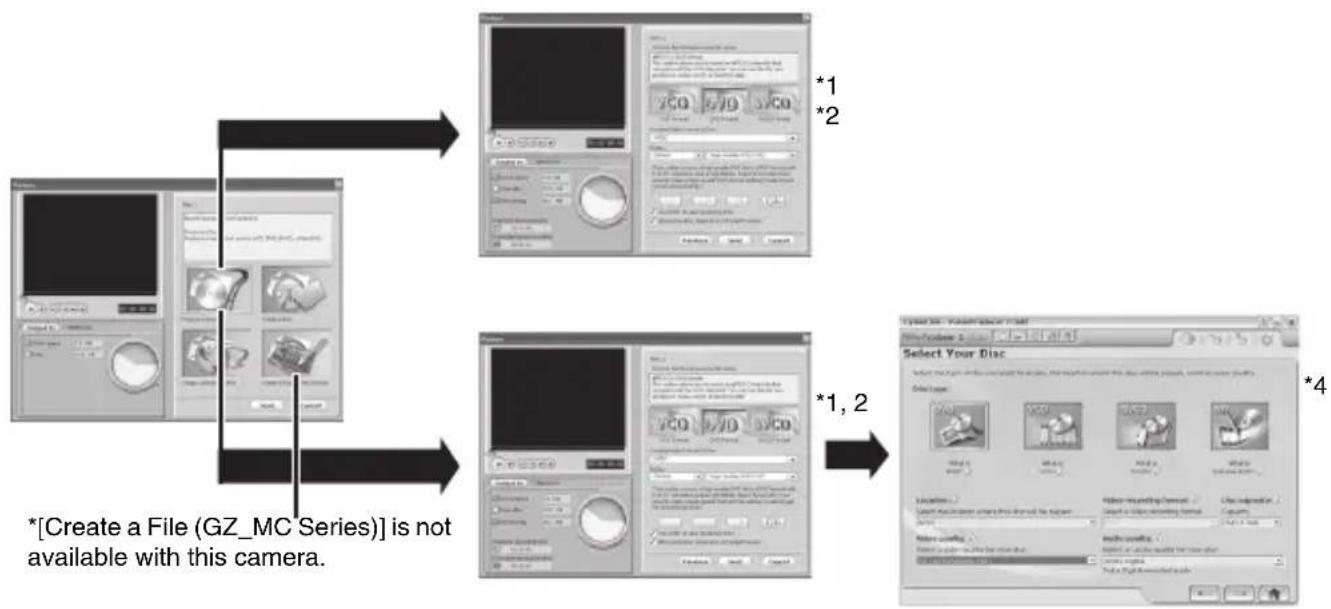
flowchart
graph TD
    A["Start"] --> B{File Creation: GZ-MC Series is not available with this camera.}
    B --> C["Step 1: Screen capture and display"]
    C --> D["Step 2: Display screen and audio output"]
    D --> E["Step 3: Display screen and audio output"]
    E --> F["Step 4: Select Your Disc with color matching format and size adjustment"]
A brief procedure is presented below for using CyberLink DVD Solution to edit video files that were shot with the camera and create a DVD-Video.
1
(1) Copy the video files on the media to the PC.
(2) Start PowerDirector Express NE.
(3) Import the copied video files in the PowerDirector Express NE library.
(4) Drag and drop the videos from the library to the timeline/storyboard in the playback order.
(5) If necessary, edit the videos on the timeline/storyboard.
(6) Click [Produce] on the main panel to open the [Produce] screen.
(7) Select [Produce a Disc], and then click [Next].
(8) Select [DVD Format] and insert a check mark for [After production, make disc in PowerProducer], then click [Next]. *1,2 (LFP pg. 20)
(9) Click [Start] to create the file.
(10) After the completeion of video file creation, PowerProducer 2 Gold NE starts automatically.
2
(1) Load a blank DVD media into the recordable DVD drive. *3 (pg. 20)
(2) Click [] in the [Import/Capture Content] screen of PowerProducer 2 Gold NE.
(3) Remove the check mark for [Include Menu] in the [Preview] screen, and then click [] .
(4) Insert a check mark for [Burn to disc] in the [Final Output] screen, and then click [+]to create the DVD-Video.
3
(1) Copy the video files on the media to the PC.
(2) Start PowerDirector Express NE.
(3) Import the copied video files in the PowerDirector Express NE library.
(4) Drag and drop the video files that you want to edit from the library to the timeline/storyboard.
(5) Edit the videos on the timeline/storyboard.
(6) Click [Produce] on the main panel to move to the [Produce] screen.
(7) Click the [Produce a Disc] and then click [Next].
(8) Select [DVD Format] and click [Next]. *1, 2 (LFP pg. 20)
(9) Clicking [Start] starts creation of the video file. After the completion of video creation, click [Home].
(10) If there are other video files to edit, repeat steps (3) to (9).
4
(1) Load a blank DVD media into the recordable DVD drive. *3 (pg. 20)
(2) Start PowerProducer 2 Gold NE.
(3) Click [Produce Movie Disc].
(4) Select [DVD] in the [Select Your Disc] screen to select the [Video quality], and then click [] . *4 (pg. 20)
(5) Click [Video files] in the [Import/Capture Content] screen.
(6) Select the video file that you want to make into a DVD from the [Open] dialog box, and then click [Open].
(7) Place the imported thumbnails into the desired playback order on the storyboard, and then click [] .
(8) In the [Preview] screen, insert a check mark for [Include Menu], and then click [] on the screen. *5 (pg. 20)
(9) Insert a check mark for [Burn to disc] in the [Final Output] screen, and then click [ ] to create the DVD-Video.
The video MOD file of the camera can be viewed using one of the methods below.
(1) Drag and drop the MOD file to the PowerDVD 5 NE icon.
(2) Start PowerDVD 5 NE, and then drag and drop the MOD file to the screen window.
(3) Start PowerDVD 5 NE, and then click [ ] on the operation panel, select [Open media files] from the pull-down menu, and then add the MOD file that you want to play to the play list for playback.
NOTES:
*1 If the video is [ULTRA FINE], [FINE], or [NORMAL], select [High Quality NTSC (or PAL) DVD].
If the video is [ECONOMY], select [Long Play NTSC (or PAL) DVD].
Encoding is not performed on unedited video, and high-speed processing is performed at the original image quality.
*2 Insert a check mark for [Use SVRT to save rendering time]. The minimum required encoding is performed, and high-speed processing is performed while keeping the original image quality.
*3 Before using PowerProducer 2 Gold NE, be sure to load a blank DVD media into the recordable DVD drive. Processing will stop if no blank DVD media is loaded.
*4 The correlation between the modes in [QUALITY] of camera setting and PowerProducer 2 Gold NE is shown below. Usage in the mode corresponding to the video is recommended if possible.
| [QUALITY] of camera setting | PowerProducer 2 Gold NE |
| ULTRA FINE HQ | |
| FINE XP | |
| NORMAL SP | |
| ECONOMY EP |
*5 To modify the menu, click [Customize Menu] of [Actions].
How To Create DVDs simply
1 Connect the camera to the PC with the USB cable, or remove the removable hard disk from the camera and connect it to the PC using the card reader. Copy the video file folder (ex. "PRG001") in the recording medium to the PC.
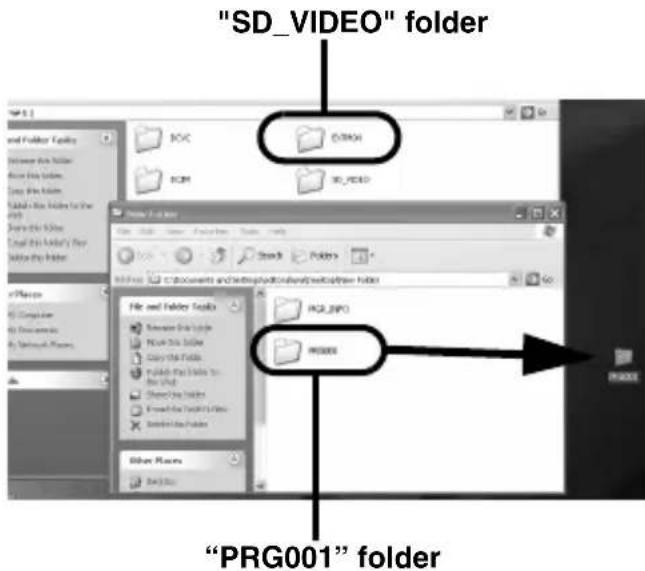
2Start PowerDirector Express NE and click [Load a media folder] of the import button, then select the folder copied to PC in step 1 to register it to the library.
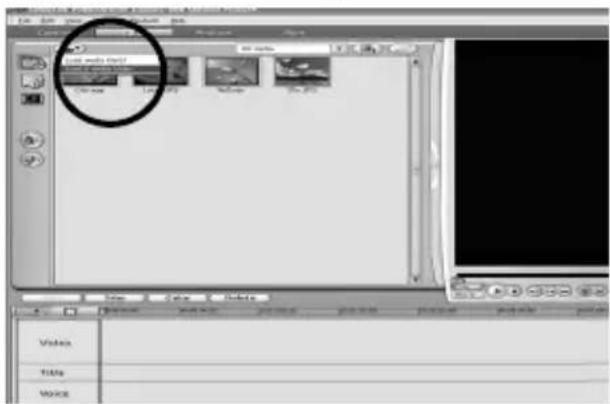
3Drag and drop the videos from the library to the timeline/storyboard in the playback order.
If necessary, edit transition or title on the timeline/storyboard. Click [Produce] button after finish editing.
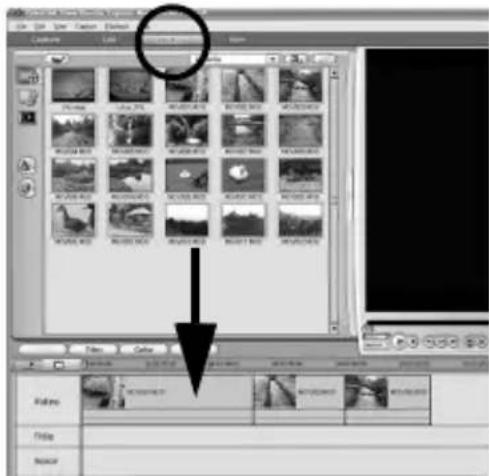
(Example of transition)
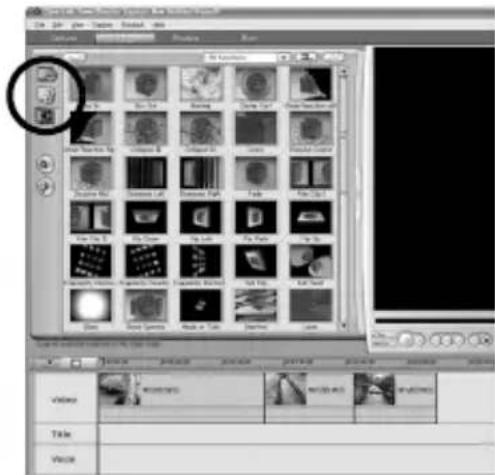
4Select [Produce a Disc], and then click [Next].
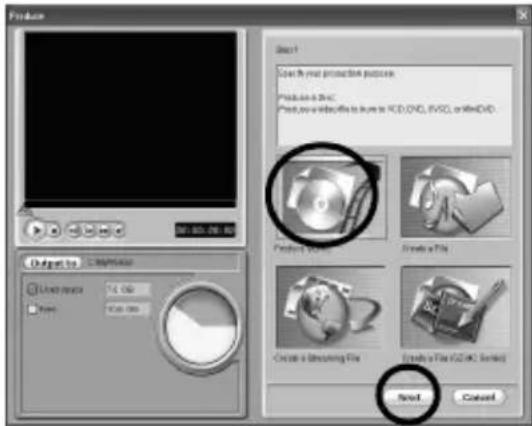
5Select [DVD Format] and click [Next].
- If the video is [ULTRA FINE], [FINE], or [NORMAL], select [High Quality NTSC (or PAL) DVD]. If the video is [ECONOMY], select [Long Play NTSC (or PAL) DVD]. Encoding is not performed on unedited video, and high-speed processing is performed at the original image quality.
- Insert a check mark for [Use SVRT to save rendering time]. The minimum required encoding is performed, and high-speed processing is performed while keeping the original image quality. Insert a check mark for [After production, make disc in PowerProducer].
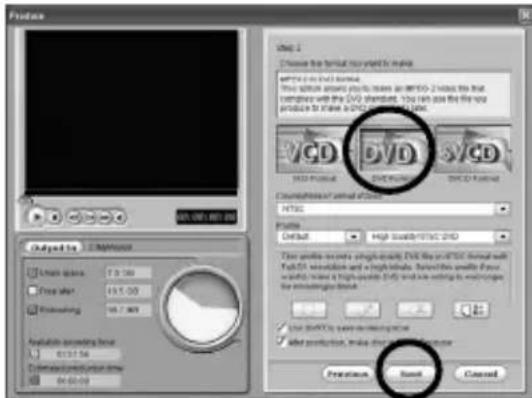
6Click [Start] to create the file. After the completion of video file creation, PowerProducer 2 Gold NE starts automatically.
7 Load a blank DVD media into the recordable DVD drive.
8 Click [→] in the [Import/Capture Content] screen of PowerProducer 2 Gold NE.
9 Remove the check mark for [Include Menu] in the [Preview] screen, and then click [→].
10 Insert a check mark for [Burn to disc] in the [Final Output] screen, and then click [Burn] to create the DVD-Video.
For "Create DVD with plural files and/or title", refer to "Creating DVDs". (17 pg. 18) For more details for creating a DVDs, refer to the user's guide of PowerDirector and PowerProducer installed on the PC. (17 pg. 17)
JVC
Read this first! - How to handle the Digital Media Camera -
ENGLISH
Please read this together with the instruction manual before using the camera.
■Make a backup of important recorded data
Protect your important recorded data by copying the files to PC. It is recommended to copy it from your PC to a DVD or other recording media for storage. Refer to the software installation and USB connection guide.
■Make a trial run before recording important data
Play back the recorded data to check that the video and sound have been recorded correctly.
■Check the compatible recording media
The following recording media have been guaranteed to work with this camera. Others are not guaranteed to work, so buy such products with caution.
Removable hard disks: Microdrive ^® from Hitachi, JVC Microdrive ^® (CU-MD04)
CompactFlash cards: By LEXAR, SanDisk and Hagiwara Sys-com SD memory cards: By Panasonic, TOSHIBA, pqi (still image only) and SanDisk
- If other media are used, they may fail to record data correctly, or they may lose data that has already been recorded.
- Microdrive ^ of 1GB or below are not supported.
- MultiMediaCards are not supported.
- For video recording, use a removable hard disk, high-speed CompactFlash card (at least 40x speed) or SD memory card (at least 10 MB/s).
■Format recording medium before using
Before using this camera, use the Format function [FORMAT] in the menu to format the provided removable hard disk. Also, be sure to format newly-purchased CF cards (removable hard disk/CompactFlash card) and SD cards with this camera before using them. This enables stable speeds and operation when accessing the recording medium.
■Take care to hold the camera correctly during recording
Do not cover the area near the lens, stereo microphone and camera sensor with your finger or any object while recording. Refer to "Index" of the instruction manual.
■When a certain length of time passes without operation
- When using the battery, the power is turned off automatically to conserve power. Use the power switch to turn on the power again.
- When using the AC adapter, the access lamp lights up, and the LCD turns off (the camera enters the sleep mode). Operation is restored once any operation is made.
■When this camera is connected to PC with the USB cable
•The recording media become read-only.
- It is not possible to delete or move files contained in the recording medium, format the recording medium and perform check disks (error checks). To perform such operations, use a commercially available CF/SD Card Reader/Writer (CF+ Type II compatible).
- To maintain high performance of a recording medium, it is recommended to perform check disks (error checks) using PC on a regular basis. Use a commercially available CF/SD Card Reader/Writer (CF+ Type II compatible) to connect to PC, and then perform the check disk on the recording medium using the same procedure as a regular local disk (C drive). Refer to the instruction manual of your PC for check disks.
- When you delete the files in the [EXTMOV] folder, perform on the PC by using commercially available CF/SD Card Reader/Writer (CF+ Type II compatible) or format a recording medium on the camera.
■Reset the camera if it does not operate correctly
This camera uses a microcomputer. Factors such as background noise and interference can prevent it from operating correctly. If the camera does not operate correctly, reset the camera. Refer to "Troubleshooting" of the instruction manual.
■Bring your camera together with the removable hard disk
When requesting repairs for breakdowns by your dealer or JVC service center, be sure to bring your camera together with the removable hard disk. If one of them is not included, the cause cannot be diagnosed, and the repair cannot be made properly.
■Subsidiary Information
- Self-Timer
To turn off the beep sound which lets you know recording start timing, set [OPERATION SOUND] to [OFF].
-Bracket Shooting
The shutter speed cannot be fixed in the bracket shooting, even if the shutter priority is set.
After reading this sheet, store it together with the instruction manual, and refer to it when necessary.
ENGLISH
Read Before Usage
—Operation of the Removable Hard Disk —
The removable hard disk is a precision electronic
device.
Do not subject the disk to sudden jolts or excessive
pressure.
•This could cause a breakdown.
●On especially careful to avoid sudden jobs when shocking ●Fair period/ienement attention is either less movements
or curing playback.
●Allie removing the disk from the camera, store it by
• decide the day to protective case.
- Do not apply strong pressure from the outside such as by
grassing it strongly on the label side or writing on the label
side.
Cautions for temperature
•The camera's protection circuit may work for the proper
recording or playback when the camera infloma
temperature is too high or too low. When
The alarm and removable hard disk can be set up when
- A lambda is to remnant the real case that has its width used for an extended period. However, this is not a
maltunlal
- Oscarelu when removing the removable hard disk in some
camera. Do not remove the disk from the camera
immediately after shooting or playback
NOTE:
Refer to the section "Removable Hard Disk" on page 6 of the
instruction manus
The remarkable hard disk and its protective case are
packaged in a silver bag.
DEUTSCH
Vor Gebrauch lesen
Participated to sell the and would be such as a short time
- E'll be a city bus
In the case of the book
“RETURN TO EQUISICALLY”
- Drive music power, audio
Za#y#e#wany W#n#mny dy#k ma# by the sucne
1980.3
The quick brown fox jumps over the lazy dog.
- 2017年1月1日
M.21.07.25
Lese a Rezeleb olaslas o. Ouzsall zilamily "Kveléis mocykrom" s. stakast
(1) 2017年1月1日
m = 311
عربية
The following table is in English:
The following table is in English:
-
-
-
-
-
-
-
-
-
-
-
-
-
-
-
-
-
-
-
-
-
-
-
-
-
-
-
-
-
-
-
-
-
-
-
-
-
-
-
-
-
-
-
-
-
-
-
-
-
-
-
-
-
-
-
-
-
-
-
-
-
-
-
-
-
-
-
-
-
-
-
-
-
-
-
-
-
-
-
-
-
-
-
-
-
-
-
-
- 90.
-
-
-
-
-
-
-
-
-
-
-
-
-
-
-
-
-
-
-
-
-
-
-
-
-
-
-
-
-
-
-
-
-
-
-
-
-
-
-
-
-
-
-
-
-
-
-
-
-
-
-
-
-
-
-
-
-
-
-
-
-
-
-
-
-
-
-
-
-
-
-
-
-
-
-
-
-
-
-
-
-
-
-
-
-
-
-
(二)
(1) 本报告书的名称、地址和联系方式
가(라의 내부 9000000000000000000000000000000000000000000000000000
Information for Users on Disposal of Old Equipment
[European Union]
![JVC GZ-MC500EK - [European Union] - 1](/content/2026/06/1168946/images/bf4f17b40ae0e8e27bc2feb40e6c91ff0bef80582984feea0c9abbd6a406a118.jpg)
Attention:
This symbol is only valid in the European Union.
This symbol indicates that the electrical and electronic equipment should not be disposed as general household waste at its end-of-life. Instead, the product should be handed over to the applicable collection point for the recycling of electrical and electronic equipment for proper treatment, recovery and recycling in accordance with your national legislation.
By disposing of this product correctly, you will help to conserve natural resources and will help prevent potential negative effects on the environment and human health which could otherwise be caused by inappropriate waste handling of this product. For more information about collection point and recycling of this product, please contact your local municipal office, your household waste disposal service or the shop where you purchased the product.
Penalties may be applicable for incorrect disposal of this waste, in accordance with national legislation.
(Business users)
If you wish to dispose of this product, please visit our web page www.jvc-europe.com to obtain information about the take-back of the product.
[Other Countries outside the European Union]
If you wish to dispose of this product, please do so in accordance with applicable national legislation or other rules in your country for the treatment of old electrical and electronic equipment.
ENGLISH
- DIGITAL MEDIA CAMERA
- GZ-MC500E/EK
- Major Features of this Camera
- Removable Hard Disk
- Various Recording Media and Modes
- Voice Recording Features
- Various Recording Features
- Enjoying Various Playback Features
- Editing Files on your PC
- Direct Printing
- Contents
- GETTING STARTED 7
- STILL IMAGE RECORDING & PLAYBACK 25
- MENU SETTINGS 48
- REFERENCES 52
- Dear Customer,
- SAFETY PRECAUTIONS
- IMPORTANT (for owners in the U.K.)
- WARNING: TO PREVENT FIRE OR SHOCK HAZARD, DO NOT EXPOSE THIS UNIT TO RAIN OR MOISTURE.
- CAUTIONS:
- CAUTION:
- NOTES:
- CAUTION!
- SOME DO'S AND DON'TS ON THE SAFE USE OF EQUIPMENT
- ABOVE ALL
- Before Using this Camera
- Before recording important video, be sure to make a trial recording.
- Make a backup of important recorded data
- Bring your camera together with the removable hard disk
- The removable hard disk is a precision electronic device. Be careful when handling it.
- Cautions for external jolt or stress
- Cautions for temperature
- Other cautions
- Be careful to completely delete data when discarding or giving away the removable hard disk.
- Provided Accessories
- Attaching the Strap
- When shooting
- To secure the camera so it cannot be dropped during shooting
- Attaching/Detaching the Lens Hood
- To attach
- To detach
- Attaching the Lens Cap
- NOTE:
- Attaching the Core Filter
- How to Use the Audio Extension Cable
- Index
- ATTENTION:
- Controls
- Connectors
- Indicators
- Other Parts
- Indications on LCD Monitor
- During both Video and Still Image Recording
- During Video Recording only
- During Still Image Recording only
- During Video Playback
- During Still Image Playback
- Power
- Charging the Battery Pack
- To detach the battery pack
- Using the Battery Pack
- Using AC Power
- About Batteries
- The Benefits of Lithium-Ion Batteries
- Operation Mode
- Power Switch Position
- Recording/Playback Mode
- Auto/Manual Mode
- Language Setting (except GZ-MC500EK for U.K. model)
- Date/Time Settings
- Built-in Clock's Rechargeable Lithium Battery
- Inserting/Removing a CF Card
- Inserting/Removing an SD Card
- To protect valuable files
- Formatting a Recording Medium
- Selecting Recording Medium
- Video Recording
- Zooming
- To zoom in
- To zoom out
- Angle Adjustment
- Deleting Files
- Video Playback
- To return to the index screen
- To adjust the speaker volume
- To turn on/off the date display
- To turn on/off the on-screen display
- To check the file information
- How to Use the Scroll Bar
- Various Playback Operations
- Still playback (Pause)
- Search playback
- Locating the start point of the file or skip the file
- Frame-by-frame playback
- Slow motion playback
- Playback Zoom
- Deleting Video Files
- Connecting to a TV or VCR
- Playback on a TV
- To choose whether or not the following displays appear on the connected TV
- Dubbing to a VCR
- Still Image Recording
- Continuous Shooting
- Flash
- When not using the flash
- Still Image Playback
- Slide Show
- Index Screen of Still Image Files
- Image Rotation
- Deleting Still Image Files
- Voice Recording
- Indication on LCD Monitor
- Voice Playback
- To select the file on the playback list
- Deleting Voice Files
- Backlight Compensation
- To cancel backlight compensation
- Spot Exposure Control
- To lock the exposure
- To cancel spot exposure control
- Program AE
- To turn off the program AE function
- Aperture-Priority
- Setting the aperture value manually (A)
- To change the F-number
- To turn off the aperture-priority
- Shutter-Priority
- Setting the shutter speed manually ( )
- To change the shutter speed
- To turn off the shutter-priority
- Bracket Shooting
- Decreased exposure
- Standard exposure
- Increased exposure
- To cancel the bracket shooting
- Manual Focus
- Focusing on a further subject
- Focusing on a nearer subject
- To return to automatic focus
- Manual focus is recommended in situations listed below;
- Manual Settings in MSET Menu
- How to Select a Menu Item
- Step 5 and 6 below are example of the manual exposure setting.
- Manual Exposure
- Manual exposure is recommended in the following situations:
- White Balance
- Manual White Balance Adjustment
- Effect
- Wipe or Fader Effects Playback Effect
- Viewing File Information
- Information on Video Files
- To turn off the file information display
- Information on Still Image Files
- Information on Voice Files
- Histogram (for Still Image Files)
- To display the histogram of still image files
- To turn off the histogram display
- Protecting Files
- To protect the currently displayed file
- To protect by selecting multiple files
- To protect all files
- To release protection of all files
- Deleting by the Button
- Deleting on the Menu Screen
- To delete the currently displayed file
- To delete by selecting multiple files
- To delete all files
- Cleaning Up a Recording Medium
- Copying/Moving Still Image Files
- Before proceeding to following steps,
- To copy or move by selecting files
- To copy or move all still image files in the recording medium
- Resetting the File Number
- Creating Play List
- To check the play list by playing back the video
- To check only the scene transition
- To delete the added file from the play list
- Playing Back Play List
- Add/Delete Files in Play List
- Changing Play List Name
- Deleting Play List
- Dubbing Using Play List
- DPOF Print Setting
- To print by selecting a still image
- To print all still images (One print for each)
- To confirm the DPOF setting
- To reset the DPOF setting
- Direct Printing with a PictBridge Printer
- To cancel print setting
- To stop printing after printing starts
- To print using the DPOF setting
- Changing the Menu Settings
- For Recording Menus:
- For Playback Menus:
- Common Menus for All Modes
- PRESET
- DEMO MODE
- OPERATION SOUND
- MEMORY CARD SETTING
- VIDEO MODE
- FORMAT
- [CF SLOT] / SD SLOT
- CLEAN UP
- COPY/MOVE
- COPY / MOVE
- RESET
- VIDEO / IMAGE / VOICE
- DISPLAY
- BRIGHT
- DATE/TIME
- SCENE COUNTER
- LANGUAGE
- [ENGLISH] / FRANÇAIS / DEUTSCH / ESPAÑOL / ITALIANO / NEDERLANDS
- CLOCK ADJUST
- Video Recording Menus
- QUALITY
- WIDE MODE
- WIND CUT
- GAIN UP
- DIS
- CAMERA SETTING
- ZOOM
- TELE MACRO
- Video Playback Menus
- PLAY LIST
- PLAY LIST CONTENTS / EDIT / RENAME / DELETE
- WIPE/FADER
- PROTECT
- [CURRENT] / FILE SELECT / PROTECT ALL / CANCEL ALL
- DELETE
- [CURRENT] / FILE SELECT / DELETE ALL
- Still Image Recording Menus
- IMAGE SIZE
- SELF-TIMER
- GAIN
- Still Image Playback Menus
- DPOF
- DIRECT PRINT
- Voice Recording Menus
- RECORDING LEVEL
- Voice Playback Menus
- PLAYBACK SPEED
- Troubleshooting
- ■To reset the camera
- No power is supplied.
- Recording
- Recording cannot be performed.
- When shooting a subject illuminated by bright light, vertical lines appear.
- When the screen is under direct sunlight during shooting, the screen becomes red or black for an instant.
- During recording, the date/time does not appear.
- The LCD monitor indications blink.
- Digital zoom does not work.
- Playback
- Playback cannot be performed.
- The same image is displayed for a long time during video playback, or motion is choppy. There are periods of silence during voice playback.
- Advanced features
- The focus does not adjust automatically.
- The colour of the image looks strange.
- The recorded image is too dark.
- The recorded image is too bright.
- White balance setting cannot be activated.
- The black & white fader does not work.
- The image looks like the shutter speed is too slow.
- The continuous shooting speed of still images is slow.
- Other problems
- The power/charge lamp on the camera does not light during charging.
- The data process is too slow after the power is switched on or the mode is changed.
- [SET DATE/TIME!] appears.
- Files cannot be deleted.
- When the image is printed from the printer, a black bar appears at the bottom of the screen.
- Images on the LCD monitor appear dark or whitish.
- Coloured bright spots appear all over the LCD monitor.
- The SD card cannot be removed from the camera.
- Picture does not appear on the LCD monitor.
- Warning Indications
- (Battery indicator)
- SET DATE/TIME!
- LENS CAP
- PLEASE INSERT MEMORY CARD
- THIS CARD IS NOT FORMATTED
- MEMORY CARD IS FULL
- CHECK CARD'S WRITE PROTECTION SWITCH
- THIS CARD IS NOT FOR RECORDING VIDEO
- NO VIDEO FILES STORED!
- NO IMAGE FILES STORED!
- NO VOICE FILES STORED!
- CLOSE COVER
- NO MEMORY CARD
- NO SUPPORTED FILES
- NUMBER OF FOLDERS OVERFLOW
- MEMORY CARD ERROR!
- REINSERT CARD OR CHANGE CARD
- FILE SYSTEM MAY HAVE PROBLEM FORMAT IS RECOMMENDED AFTER COPYING WANTED DATA
- VIDEO MANAGEMENT FILE IS BROKEN TO RECORD/PLAYBACK VIDEO, RECOVERY IS REQUIRED
- NO VIDEO MANAGEMENT FILE
- VIDEO FILES HAVE BEEN MOVED TO MPEG FOLDER
- PLAY LIST'S MANAGEMENT INFORMATION IS BROKEN
- NO REGISTERED SCENES IN PLAY LIST SOME OF SCENES MAY NOT BE PLAYED BACK
- REGISTERED SCENES IN PLAY LIST IS EMPTY
- THIS PLAY LIST WILL BE DELETED
- CAMERA TEMPERATURE IS GOING UP TURN CAMERA OFF, PLEASE WAIT
- CAMERA TEMPERATURE IS TOO LOW KEEP CAMERA POWER ON, PLEASE WAIT
- RECORDING FAILURE
- RECORDING MAY NOT BE CORRECT ON THE MEMORY CARD
- MEMORY CARD CANNOT BE PLAYED BACK CORRECTLY
- CANNOT USE IN VIDEO MODE
- Cleaning the Camera Cautions
- To clean the exterior
- To clean the LCD monitor
- To clean the lens
- Battery Packs
- ●To avoid hazards
- Temperature range specifications
- Recording Medium
- LCD Monitor
- Main Unit
- ●For safety, DO NOT
- ●Avoid using the unit
- ●DO NOT leave the unit
- ●To protect the unit, DO NOT
- How to Handle a CD-ROM
- Serious malfunctioning
- Specifications
- Camera
- For general
- Power supply
- Power consumption
- Dimensions (W x H x D)
- Weight
- Operating temperature
- Operating humidity
- Storage temperature
- Pickup
- Lens
- Filter diameter
- Speaker
- For video/audio
- Recording/Playback format
- Signal format
- Recording mode (video)
- Recording mode (audio)
- For still image
- Headphone output
- USB
- AC Adapter
- Power requirement
- Output
- Recording Time and Number of Images
- ■Compatible recording media
- : Approximate recording time (for video)
- : Approximate number of storable images (for still image)
- : Approximate recording time (for voice) (The numbers indicate “minutes”.)
- TERMS
- A
- B
- C
- D
- E
- F
- G
- H
- |
- L
- M
- 0
- P
- R
- s
- T
- W
- Z
- JVC
- SOFTWARE INSTALLATION AND USB CONNECTION GUIDE
- JVC SOFTWARE LICENSE AGREEMENT
- IMPORTANT
- TO CUSTOMERS: PLEASE MAKE SURE TO READ THIS CAREFULLY BEFORE INSTALLING OR USING THE SOFTWARE PROGRAM NAMED "DIGITAL PHOTO NAVIGATOR" ("Program") ON YOUR PC.
- COPYRIGHT; OWNERSHIP
- 2GRANT OF LICENSE
- 3RESTRICTION ON THE PROGRAM
- LIMITED WARRANTY
- LIMITED LIABILITY
- 6TERM
- EXPORT CONTROL
- 8U.S. GOVERNMENT USER
- 9GENERAL
- CyberLink
- ■Digital Photo Navigator
- ■CyberLink DVD Solution
- Software Installation
- Digital Photo Navigator 1.0
- CyberLink DVD Solution
- PowerProducer 2 Gold NE
- PowerDirector Express NE
- PowerDVD 5 NE
- 5Click [Next].
- 6Click [Yes].
- Confirm your information and click [Next].
- 8Click [Next].
- 9Select the program(s) you want to install, then click [Next].
- 10Click [Finish] then restart the PC.
- To close Windows Messenger:
- Connections
- Connecting the USB cable
- Viewing the Contents of a Recording Medium
- How to play back video files from the [EXTMOV] folder on the camera
- Copying Files to the PC
- Playing Back Files on the PC
- Still images
- Video files
- Voice files
- Disconnecting the USB cable
- Confirm that the ACCESS lamp on the camera does not light or blink.
- Double-click the [Safely Remove Hardware] or [Unplug or Eject Hardware] icon in the status bar.
- 3Select [USB Mass Storage Device] or [USB Disk], and then click [Stop].
- 4Click [OK].
- - Windows® Me
- User's Guide/Help/Readme
- INFORMATION
- Digital Photo Navigator
- 1
- 2
- 3
- 4
- The video MOD file of the camera can be viewed using one of the methods below.
- How To Create DVDs simply
- Read this first! - How to handle the Digital Media Camera -
- ■Make a backup of important recorded data
- ■Make a trial run before recording important data
- ■Check the compatible recording media
- ■Format recording medium before using
- ■Take care to hold the camera correctly during recording
- ■When a certain length of time passes without operation
- ■When this camera is connected to PC with the USB cable
- ■Reset the camera if it does not operate correctly
- ■Bring your camera together with the removable hard disk
- ■Subsidiary Information
- ENGLISH
- Read Before Usage
- DEUTSCH
- Vor Gebrauch lesen
- عربية
- Information for Users on Disposal of Old Equipment
- [European Union]
- (Business users)
- [Other Countries outside the European Union]
Brand : JVC
Model : GZ-MC500EK
Category : Camera