SC-1 - Support pour écran plat Seura - Free user manual and instructions
Find the device manual for free SC-1 Seura in PDF.

| Product Type | Flat Panel Wall Mount |
| Brand | Seura |
| Model | SC-1 |
| Compatible Screen Sizes | 32" - 65" |
| Maximum Weight Capacity | 110 lbs (50 kg) |
| VESA Compatibility | 200x200 to 600x400 mm |
| Tilt Range | -5° to +15° |
| Swivel Range | ±90° |
| Material | Heavy-Gauge Steel |
| Color | Black |
| Distance from Wall | 1.5" to 3.5" (38-89 mm) |
| Installation | Single Stud or Concrete Wall |
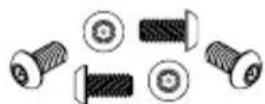
| Hardware Included | Screws, Anchors, Level, Template |
| Compatibility | Most VESA Compliant Flat Panels |
| Weight of Mount | 12 lbs (5.4 kg) |
| Warranty | 10 Years |
| Certifications | UL Listed, TUV Approved |
| Package Dimensions | 28 x 14 x 4 inches |
| Manual Languages | EN, FR, DE, ES, IT |
Frequently Asked Questions - SC-1 Seura
User questions about SC-1 Seura
0 question about this device. Answer the ones you know or ask your own.
Ask a new question about this device
Download the instructions for your Support pour écran plat in PDF format for free! Find your manual SC-1 - Seura and take your electronic device back in hand. On this page are published all the documents necessary for the use of your device. SC-1 by Seura.
USER MANUAL SC-1 Seura
natural_image
Technical line drawing of two structural frame assemblies mounted on vertical posts (no text or symbols)WARRANTY REGISTRATION
REGISTER FOR EXTRA BENEFITS
Activate within 30 days of purchase: seura.com/activate
OUTDOOR TV
CEILING MOUNT
INSTALLATION GUIDE

SÉURA
Model Numbers:
SC-1
LC-1
Compatible with Séura Outdoor TVs:
Shade Series: SHD1-55, SHD1-65, SHD1-75, SHD2-43, SHD2-55, SHD2-65, SHD2-75
Ultra Bright: STM3-55-U, STM3-65-U, STM3-86-U
Safety
Prior to the installation of this product, read all instructions. Keep this manual for future reference.
This product is designed to mount televisions and any accessories weighing up to 200 lbs. to a properly rated ceiling structure.
CAUTION DO NOT EXCEED MAXIMUM LISTED WEIGHT CAPACITY. SERIOUS INJURY OR PROPERTY DAMAGE MAY OCCUR.
Warnings:
- Safety measures must be practiced at all times during the assembly of this product. Use proper safety equipment and tools for the assembly procedure to prevent personal injury.
- At least two qualified people should perform the assembly procedure. Proper installation must be followed as outlined in these installation instructions. Personal injury and/or property damage can result from dropping or mishandling the TV.
- Ensure that there are no missing or defective parts upon receipt. Never use defective parts.
- This product contains small parts that could be a choking hazard.
- The ceiling you affix the Séura mount to must be capable of supporting five times the weight of the television and the mount combined. A professional installer or structural engineer should inspect or verify the requirements of the wall.
-
Do not use this product for any purpose other than to mount a VESA compliant TV on a vertical surface as outlined in this manual.
-
When mounting to metal structures or concrete ceilings, an alternative anchor (not included) should used.
- Always inspect mounting location for electrical wires, water, and natural gas lines prior to installation. Cutting or drilling into these utility lines may cause serious personal injury or property damage.
- Do not install near sources of high heat.
- Do not install on a structure that is prone to vibration, movement or chance of impact.
Note: The included hardware is for mounting to vertical concrete surfaces or wood trusses and ceiling structures. If you are uncertain about the nature of your wall, please consult your hardware or installation professional for proper mounting to types of walls.
WARNING: Cancer and Reproductive Harm: www.p65warnings.ca.gov.
Parts and Tools Required (not included)
The following tools may be required depending on your particular installation. They are not included.

(6mm Allen Wrench
for use with 86"
Ultra Bright TV size)
For Wood Truss Installation
Stud Sensor
(edge-to-edge stud
finder is recommended)

7/32" Drill Bit 7/16" Masonry Drill Bit
For Concrete, Brick and Stone Installation

Parts Included
Before using the device, please check the following contents of the box for completeness. Illustrations are not to scale. If any parts are missing or damaged, contact Séura.

text_image
Ceiling BracketCeiling Bracket Extension (length varies by model)
Manual

text_image
SÉURA CEILING MOUNT TEMPLATEMounting Template (located on inside bottom of box)
natural_image
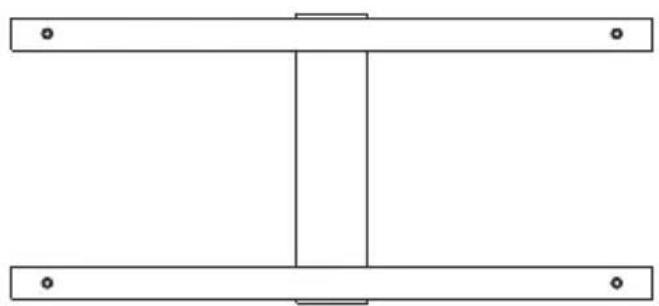
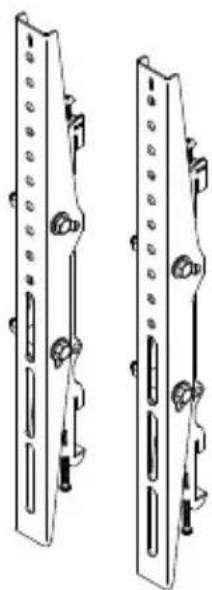
Pure structural diagram of two horizontal beams with central vertical support (no text or symbols)Mounting Plate Rails

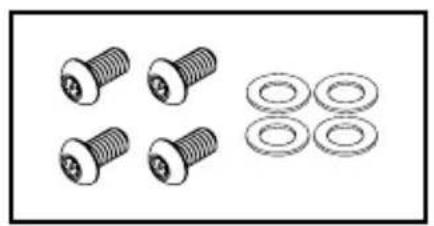
(4) 5/16" Stainless Steel Flat Washers
(6) 1/4-20x1/2 Stainless Steel Security Torx Screws
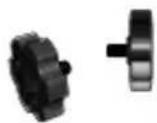
(2) 1/4-20 Knobs
Parts Included, Packaged as TW-5

natural_image
Pure technical diagram of a rectangular component with internal oval and horizontal dashed lines, no text or symbols present.Mounting Plate
natural_image
Technical line drawing of two mechanical bracket components with mounting holes and adjustment knobs (no text or symbols)2 Tilt Mount TV Brackets
Mounting Tools and Hardware

6 Plastic Anchors
3" long
(For Wall Mount Only)
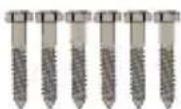
6 Stainless Steel
Lag Screws
5/16", 3" long

6 Stainless Steel
Flat Washers
5/16"
4 Security Torx
Screws
M6 1.0 x 16mm
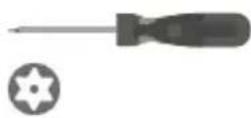
T27 Security Torx
Screwdriver
Optional security for use to mount brackets to TV
Features

text_image
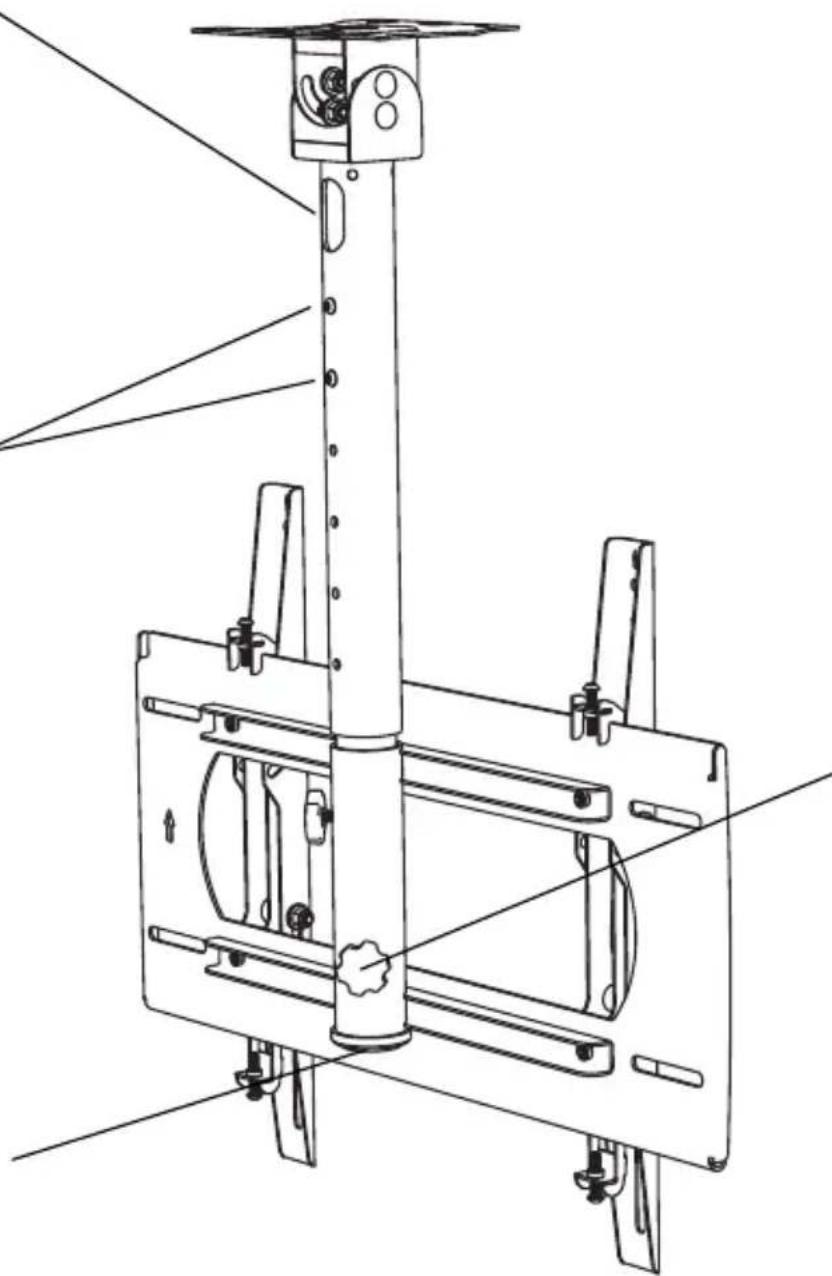
Ceiling Mounting Plate A template with the mounting hole pattern is included to aid installation. Top Leveling Screws Allows for leveling adjustments of the TV after mounting. Bottom Locking Screws Prevents the TV from being removed or dislodged from the mounting plate. Tilt Locking Bolts Allows for tilt angle of the TV adjustment. Directional Mounting Arrows The arrow lets you know which edge is up.Cable Pass Through
Run power and content cables through the back of the pole or into the ceiling.
Height Adjustment
Use both included screws to set the desired height.
Cable Pass Through
Run power and content cables through the pole and connect to the TV inputs.
natural_image
Technical line drawing of a mechanical assembly with vertical and horizontal components (no text or symbols)Swivel Adjustment
Loosening both knobs allows adjustment of the swivel. Always retighten as TV may swivel in the wind.
Step 1: Assemble and Prepare Mount
1. Assemble ceiling mount
Ensure the plastic ring is on the Ceiling Bracket Extension. Slide the Mounting Plate Rails onto the Ceiling Bracket Extension.
Note: The Mounting Plate Rails is a symmetrical part, so orientation does not matter.
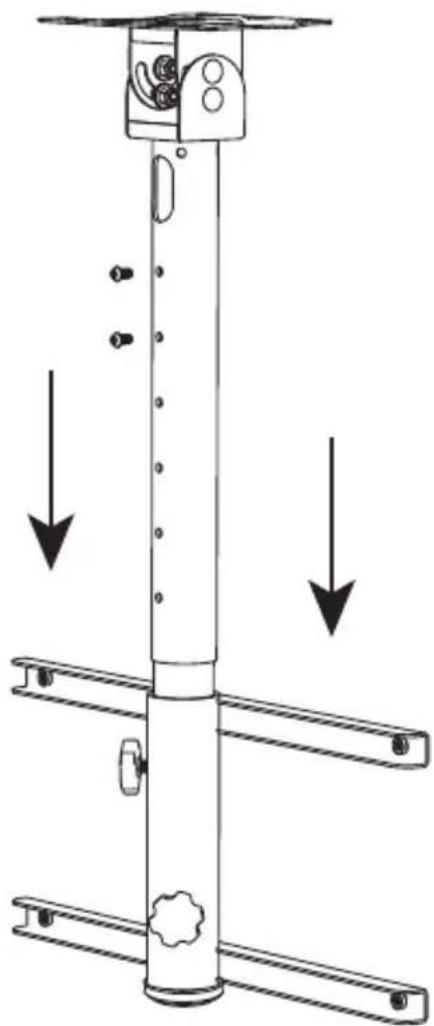
natural_image
Technical line drawing of a vertical mechanical device with mounting flanges and a central shaft, showing two downward arrows indicating force or movement (no text or symbols present)
text_image
Slide the Indentation Platic Ring2. Attach the Ceiling Bracket
Slide the Ceiling Bracket Extension into the Ceiling Bracket. Using two of the included security torx screws, tighten the extension onto the desired height.
Attach two knobs and install into the wall plate mount rails.

To adjust the swivel angle of the TV, loosen the two thumb screws on the back of the ceiling mount. Adjust to the desired angle. Tighten both screws.
3. Attach mounting plate to ceiling mount
Using the four included fasteners, attach the mounting plate to the ceiling mount rails as shown.
natural_image
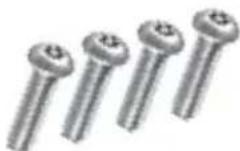
Illustration of four different types of screw and washer components (no text or symbols)
text_image
attach mounting plate to ceiling mount ing the four included fasteners, attach the mounting te to the ceiling mount rails as shown.
IMPORTANT: HANDLE THE TV IN A VERTICAL POSITION TO AVOID DAMAGE TO THE SCREEN. IF PLACING THE TV SCREEN-SIDE DOWN OR LEANING AGAINST A WALL DURING INSTALLATION, COVER THE SCREEN WITH A PROTECTIVE CLOTH OR BLANKET.
Installation
IMPORTANT: THIS PRODUCT MUST BE MOUNTED TO A PROPERLY RATED CEILING STRUCTURE. The structure must be able to support five times the weight of the television and the mount combined. A professional installer or structural engineer should inspect or verify the requirements of the wall.
Step 2: Mount Ceiling Plate to Ceiling
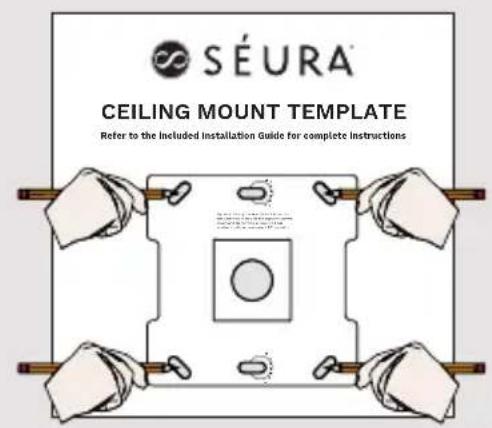
1. Choose mounting location
Place the template in the desired location on the ceiling.
Wood Joist/Truss Mounting:
At least four hole locations must be fastened to joists/trusses or an appropriately stabilized structure. Verify the center of the wood beam using an edge-to-edge stud finder. Mark all hole locations in the template slots with a pencil on the ceiling.
Concrete, Stone or Brick:
All six hole locations must be fastened. Mark all hole locations in the template slots with a pencil on the ceiling.
text_image
SÉURA® CEILING MOUNT TEMPLATE Refer to the included installation Guide for complete instructions2. Drill pilot holes
Wood Joist/Truss Mounting:
Pre-drill the four marked holes on the wall 3-inches deep with a 7/32" drill bit.
Concrete:
Pre-drill the four marked holes on the wall 3-inches deep with a 7/16" masonry drill bit. Insert a plastic anchor into each of these holes. If necessary, lightly tap each anchor into place with a hammer.

text_image
SÉURA CEILING MOUNT TEMPLATE Refer to the included Installation Guide for complete Instructional Optional: Using the keyhole locations, drill the additional holes for the support screws. Insert and fasten two screws without washers until approximately 1/2" remains.3. Attach ceiling mounting plate
Align the mounting plate with the pre-drilled holes. Ensure that the cable pass through holes on the mount are positioned appropriately.
Wood Joist/Truss Mounting:
Align the bracket with the screw keyed slots and turn to hold in place. Finish tightening all lag screws with washers until they are snug with the mounting surface. Do not over tighten the lag screws. Tighten the lag screws only until the washers are pulled firmly against the bracket.
Concrete:
Align the bracket with the pre-drilled holes. Attach bracket to the ceiling using the six lag screws and six flat washers. Tighten all lag screws using a socket wrench and 12 ” socket. Make sure the anchor is seated completely flush with the concrete surface even if there is another layer of material, such as drywall. Do not over tighten the lag screws. Tighten the lag screws only until the washers are pulled firmly against the bracket.

natural_image
Diagram of four hands holding tools around a central black component with holes, no text or symbols presentStep 3: Attach Tilt Mount TV Brackets to TV
IMPORTANT: Check your TV manual before attaching brackets to TV. Some models require attaching soundbar brackets in tandem with attaching TV brackets.
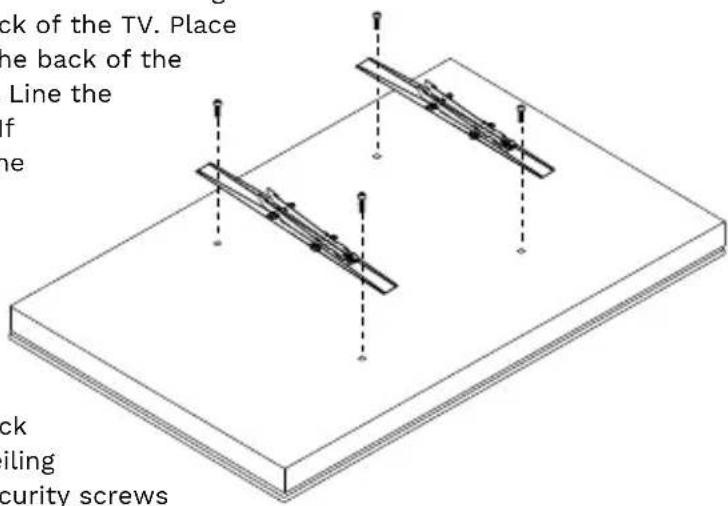
Using a Philips #2 Screwdriver (or 6 mm Allen Wrench for 86" Ultra Bright TV), remove the four VESA mount screws from the back of the TV. Place the two identical Tilt Mount TV Brackets flat against the back of the TV with the arrows pointed towards the top of the TV. Line the brackets up with the VESA mount fastener locations. If mounting a Séura Outdoor TV, reference page 14 for the bracket hole that should be used on each Tilt Mount TV Bracket. Attach the Tilt Mount TV Brackets to the TV using the same four VESA mount screws that you just removed.

Optional: If additional security is desired for installation with back access such as floor stands or ceiling mounts, use the included torx security screws to attach the brackets to the TV.
text_image
ck of the TV. Place ne back of the Line the f ne ck iling curity screwsStep 4: Hang the TV
IMPORTANT: NEVER TRY TO HANG A TV BY YOURSELF. ALWAYS USE AT LEAST TWO PEOPLE TO LIFT THE TV INTO PLACE.
-
Lift the TV and bring the back of the TV towards the mount, positioning it slightly above the mounting plate.
-
Lower the TV to hook the bottom hooks of the Tilt Mount TV Brackets on the lower rail of the mounting plate.
-
Bring the top of the TV closer to the mount to hook the top hooks of the Tilt Mount TV Brackets on the top rail of the mounting plate.
-
Make sure the bottom and top rails are fully engaged.
Do not let go of the TV until you are certain that the top and bottom hooks of both mounting brackets are securely engaged on the upper and lower mounting rails of the mounting plate.
Séura recommends checking knobs, screws, and bolts every 2-6 months. Temperature fluctuations, wind, and normal wear and tear can loosen hardware over time.
Step 5: Adjust the TV
Caution: It is possible to dislodge your TV while you level it. Use extreme caution until you tighten the leveling and locking screws.
Séura recommends checking knobs, screws, and bolts every two to six months. Temperature fluctuations, wind, and normal wear and tear can loosen hardware over time.
Top leveling screw adjustment:
If your TV is not level, the two (2) top leveling screws located on the top of the tilt mount TV brackets will allow you to compensate for this tilt by adjusting the screws with the provided T27 security torx screwdriver.
- Loosen both leveling screws (one on each bracket).
- Adjust the tilt of your TV.
- Tighten both leveling screws.
Do not overtighten the leveling screws.
Bottom locking screw adjustment:
After you have adjusted leveling the TV, tighten the two (2) bottom locking screws located on the bottom of the tilt mount TV brackets (one on each bracket) using the provided T27 security torx screwdriver.
Do not overtighten the locking screws.
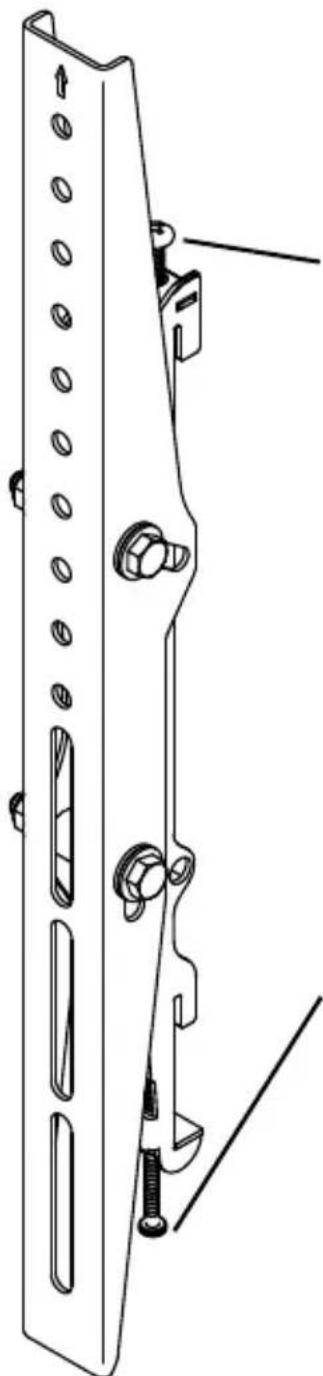
natural_image
Technical line drawing of a mechanical bracket with bolts and fasteners (no text or symbols)Top Leveling Screw
Allows for leveling adjustments of the TV after mounting.
Bottom Locking Screw
Prevents the TV from being removed or dislodged from the mounting plate.
Tilt adjustment:
Adjusting the TV Tilt Angle
- Place one hand on the center-top edge of the TV.
- Place the other hand on the center-bottom edge of the TV.
- Using the upper hand, gently pull the top of the TV towards you while the lower hand gently pushes the bottom of the TV away from you.
Adjusting the TV to the Original Position
- Place one hand on the center-top edge of the TV.
- Place the other hand on the center-bottom edge of the TV.
- Using the upper hand, gently push the top of the TV towards the wall while the lower hand gently pulls the bottom of the TV away from the wall.
After tilt is adjusted to the desired position, tighten the (2) tilt locking bolts on each bracket until the brackets are firmly secured.
Do not overtighten the tilt locking bolts.

text_image
Tilt Locking BoltsOutdoor TV Mount Warranty
The standard limited warranty policies of Séura, Inc. ("Séura") shall apply to all equipment or other goods ("Products") at the time of sale to any authorized Séura distributor and/or product reseller. These warranty policies may be modified by Séura from time to time. Copies of the standard limited warranties then in effect for a particular Product will be made available upon request and are also available on the Séura website at https://www.seura.com/warranty/. This warranty is valid only with respect to Product sales in the U.S. and Canada.
If any Product fails to work or operate properly because of a defect in materials or workmanship, Séura will, if notified of such defect within the applicable warranty period indicated below, at its option, either: (a) repair the Product with new or refurbished parts onsite or at Séura's factory, including Séura's labor if applicable; or (b) replace the Product with a new or refurbished Product; or (c) if repair or replacement is not commercially feasible, refund an amount equal to a pro rata share of the current MSRP (as determined by the remainder of the warranty period). The remedy chosen will be in good faith and at the discretion of Séura. In no event will Séura be responsible for any costs related to installation and/or removal of Product.
Séura warrants its Products as set forth below, which warranty periods shall start and run from the date of Séura's sale of the Product:
- Indoor and Outdoor Mounts for two (2) years against defects in original hardware and/or workmanship. Excludes corrosion or rust resulting from damaged, scratched or chipped paint or other surfaces.
ExceptionstoWarranty: This warranty is valid only with respect to Product sales in the U.S. and Canada. Séura does not warrant Products against defects arising out of, related to, or caused by, whether totally or partially, and whether directly or indirectly, any of the following:
A. Failing to properly clean and maintain, any Product, part or component of a Product, including, but not limited to, filters, front bezel, and other Product areas or components;
B. A Product's extended use, including particularly, commercial applications, where a Product is operating on average more than twelve (12) hours per day on a permanent or extended periodic basis;
C. Circumstances, damage (including concealed damage) or other conditions occurring during shipment of a Product or at any time after a Product leaves Séura's facility (including without limitation transport of the Product to or from Séura before or after authorized service). Products must be packed properly using original packaging or Séura replacement or pre-authorized packaging. Customer assumes all risk, and costs, including transportation costs, while Product is in transit to or from Séura;
D. Circumstances, damage or other conditions occurring
during unpacking and/or removal of a Product from its original packaging, including the removal of protective material;
E. Improper, incorrect, or insufficient AC supply voltage to a Product;
F. Alterations, modifications, including use of unauthorized mount, or changes to a Product without Séura's prior written authorization;
G. The incorporation of a Product into or within a product of a third party, without Séura's prior written authorization;
H. A Product's misuse, neglect use, abuse, or improper operation, including the failure to follow a Product's normal and ordinary operating instructions;
I. The effects of fire, flood, lightning, electrical surges, water and other liquid infiltration, smoke, insect or animal infestation, sand, mud, chemicals, improper cleaning agents and other substances not intended to come into contact with a Product, including any such substances contact with a Product as the result of acts of God;
J. The improper or faulty installation, setup, or adjustment of a Product;
K. A Product's repair, attempted repair, or total or partial disassembly by any party other than a Séura authorized service representative;
L. When the Product occurs with pixel errors within the specified and permitted area. (For more information about this, inquire directly with Séura regarding the Séura Pixel Policy.)
M. Corrosion that does not affect the performance of a Product or the reasonable cosmetic appearance of a Product (including without limitation, scratches or other paint or finish damage to a Product that lead to or are caused by, in part or in total, corrosion);
O. Normal wear and tear on the Product.
Séura does not warrant that its Products will integrate with any third party products at present or in the future. It is purchaser's responsibility to test and verify compatibility. Further, Séura does not warrant its software or programs, or any content downloaded after shipment. It is the purchaser responsibility to take precautions to protect the product from malware, viruses, data loss, and other potentially destructive programs.
Warranty Disqualifiers. This Limited Warranty only extends to, and runs for the benefit of, the original purchaser of the Product and only covers a Product purchased new. All warranty claims must be submitted together with original proof of purchase and any Product subject to a warranty claim must retain its original Séura serial number. Séura reserves the right to require any warranty claimant to produce the original purchase receipt or other original purchase date proof as may
be reasonably required by Séura to verify the Product's warranty eligibility. Séura shall have no liability with respect to Products whose serial number has been removed, defaced, replaced, or otherwise tampered with in any manner. Séura reserves the right to examine all failed product components and determine, in its sole discretion, whether any product components are defective and covered under warranty.
LIMITATION OF LIABILITY. THE EXPRESS LIMITED WARRANTIES SET FORTH HEREIN ARE IN LIEU OF ALL OTHER WARRANTIES, WRITTEN OR ORAL, EXPRESSED OR IMPLIED, INCLUDING, BUT NOT LIMITED TO, ANY IMPLIED WARRANTIES OF MERCHANTABILITY OR FITNESS FOR A PARTICULAR PURPOSE OR USE. SÉURA WILL NOT BE LIABLE FOR ANY DAMAGE TO OTHER PROPERTY CAUSED BY ANY DEFECT IN THE PRODUCT, DAMAGES BASED ON INCONVENIENCE, LOSS OF BUSINESS OPPORTUNITY, LOSS OF GOODWILL, INTERFERENCE WITH BUSINESS RELATIONSHIPS, OR OTHER COMMERCIAL LOSS, EVEN IF THE CUSTOMER HAS BEEN ADVISED OF THE POSSIBILITY OF SUCH DAMAGES. SÉURA WILL NOT BE LIABLE FOR ANY LOSS, DAMAGE OR LIABILITY OR ANY DIRECT, INCIDENTAL, INDIRECT, PUNITIVE, SPECIAL OR CONSEQUENTIAL DAMAGES RESULTING FROM THE USE OR MISUSE OF A PRODUCT, OR ARISING OUT OF ANY BREACH, BY THE PURCHASER OF A PRODUCT, OF THIS LIMITED WARRANTY. SÉURA SHALL NOT BE LIABLE FOR ANY CLAIM AGAINST THE CUSTOMER BY ANY OTHER PARTY. SÉURA SHALL NOT BE LIABLE FOR ANY VERBAL WARRANTY ASSURANCES MADE BY ANY EMPLOYEE OR AUTHORIZED DISTRIBUTOR, RESELLER OR INSTALLER THAT CONFLICTS WITH OR ENHANCES THE WRITTEN WARRANTY HEREIN. SOME STATES DO NOT ALLOW THE EXCLUSION OR LIMITATION OF INCIDENTAL OR CONSEQUENTIAL DAMAGES, OR LIMITATIONS ON HOW LONG AN IMPLIED LIMITED WARRANTY LASTS, SO THE EXCLUSIONS MAY NOT APPLY TO A PARTICULAR PURCHASER. NOTWITHSTANDING ANYTHING HEREIN TO THE CONTRARY, SÉURA'S MAXIMUM AGGREGATE LIABILITY RELATED TO ANY WARRANTY CLAIM OR WITH RESPECT TO A PRODUCT SHALL NOT EXCEED THE THEN CURRENT SÉURA WHOLESALE PRICE OF THE SPECIFIC PRODUCT FROM WHICH THE CLAIM DERIVES.
NOTICE OF ANY WARRANTY CLAIM MUST BE RECEIVED BY SÉURA, IN WRITING, PRIOR TO THE EXPIRATION OF THE APPLICABLE WARRANTY PERIOD SET FORTH ABOVE. THE PRODUCT WARRANTY APPLIES ONLY FOR THE PERIODS SET FORTH ABOVE.
Warranty Procedure. A warranty claimant must contact Séura at 920-857-9069 for a diagnostic. Please have your Product receipt available. At that time, Séura will provide technical support over the phone to attempt to fix the problem. If unsuccessful, a Séura Representative will determine if the Product will be serviced onsite, replaced, or returned to Séura's factory in Green Bay, Wisconsin for repair. If Séura determines that the Product is not covered under the warranty or damaged in shipping, Séura will notify and inform the purchaser of service alternatives that are available on a fee basis.
Toll-Free Technical Support: Please call 1-800-957-3872 to speak with a Séura Technical Support Representative. Séura Representatives are available Monday-Friday, 8:00am-4:30pm Central Time.
Onsite Service: If Technical Support determines the problem may be fixed onsite, a Séura service agent will be scheduled within 24 hours to service the unit. A Séura representative will work with the customer to schedule a convenient time for onsite service. Parts may be sent to the customer's location. Onsite service is available in the United States during normal business hours Monday – Friday, unless other special circumstances exist and special arrangements are made.
Factory Service: If Technical Support determines the Product must be sent back to Séura's factory for repair, the customer must follow return instructions below. Séura will ship the repaired Product to the authorized reseller, installer or customer's address. This warranty does not cover removal or installation costs of Products.
Advanced Replacement: If Technical Support determines the Product must be replaced, Séura will ship a new Product to the authorized reseller, installer or customer's address. The customer must follow return instructions below to send the damaged Product back to Séura's factory. Credit card information will be collected before shipment of the replacement Product. If Séura does not receive the original Product back within thirty (30) days of shipping the replacement Product, the credit card on file will be charged at full MSRP. This warranty does not cover removal or installation costs of Products.
Return Instructions: If return is necessary, Séura will issue a return goods authorization (RGA) number and, if applicable, specific return and shipping instructions. A Product will only be accepted for warranty claims if returned and shipped to Séura in the Product's original packaging materials. If original packaging is not available, please contact Séura to receive authorized replacement packaging. Packages not bearing the issued returned goods authorization (RGA) number will not be accepted by Séura and will be returned to sender. In addition to the Product, the package must include the warranty claimant's original sales receipt for the purchase of the Product. All Product returns shall be received by Séura, at 1230 Ontario Road; Green Bay, WI 54311 with freight prepaid by the warranty claimant. Séura shall not be responsible for, and the warranty claimant assumes and retains all such responsibility, any damage or loss to or of the Product during shipment to and from Séura as the result of a warranty claim.
Exclusive Remedy. This Limited Warranty sets forth the exclusive remedies of a warranty claimant, and the exclusive liabilities and obligations of Séura, with respect to allegations of a defective Product.
19163121.3
Specifications
| SHORT ARM CEILING MOUNT Model: SC-1 | LONG ARM CEILING MOUNT Model: LC-1 | ||
| GENERAL | DISPLAY COMPATIBILITY 42" - 86" Séura Outdoor TVs | ||
| CEILING MOUNT DIMENSIONS | Collapsed: 26.25" w x 6.6 d x 34" h Extended: 26.25" w x 6.6 d x 42" h | Collapsed: 26.25" w x 6.6 d x 48.5" h Extended: 26.25" w x 6.6 d x 70.5" h | |
| MOUNTING PLATE DIMENSIONS | 6.5" w x 6.5" h 6.5" w x 6.5" h | 6.5" h | |
| FINISH COLOR Black Powder Coat | |||
| DURABILITY Acrylic E-Coated Steel | |||
| INSTALLATION | MAXIMUM TV WEIGHT 200 lbs | ||
| INSTALLATION SURFACE | Wood / Concrete / Steel | ||
| HARDWARE Stainless Steel | |||
| SHIPPING | SHIPPING CONTAINER DIMS | 19" w x 27" l x 5.25" h 19" w x | 36.5" l x 5.25" h |
| SHIPPING WEIGHT | 30 lbs 36 lbs | ||
| PRODUCT WEIGHT 24 lbs 30 lbs | |||
Maximum TV Weight: 200 lbs.
The wall structure must be capable of supporting at least five times the weight of the TV. If not, the wall structure must be reinforced.
SHORT ARM
CEILING MOUNT
Model: SC-1
LONG ARM
CEILING MOUNT
Model: LC-1

text_image
14 15/16" FULLY COLLAPSED 22-15/16" FULLY EXTENDED [25mm] 1" 17 15/16"
text_image
29 7/16" FULLY COLLAPSED 51-7/16" FULLY EXTENDED [25mm] 1" 17 15/16"For technical support, please contact Séura at
1-800-957-3872 during regular business hours:
M-F 8:00 am - 4:30 pm, Central Time.

SÉURA
1230 Ontario Road Green Bay, Wisconsin 54311
1-800-957-3872 contacts@seura.com
www.seura.com
Publish date: September 15, 2020
Information is subject to change without notice.
94-060500
© 2020 Séura