Long Boards 932 - Parquet stratifié Tarkett - Free user manual and instructions
Find the device manual for free Long Boards 932 Tarkett in PDF.

User questions about Long Boards 932 Tarkett
0 question about this device. Answer the ones you know or ask your own.
Ask a new question about this device
Download the instructions for your Parquet stratifié in PDF format for free! Find your manual Long Boards 932 - Tarkett and take your electronic device back in hand. On this page are published all the documents necessary for the use of your device. Long Boards 932 by Tarkett.
USER MANUAL Long Boards 932 Tarkett
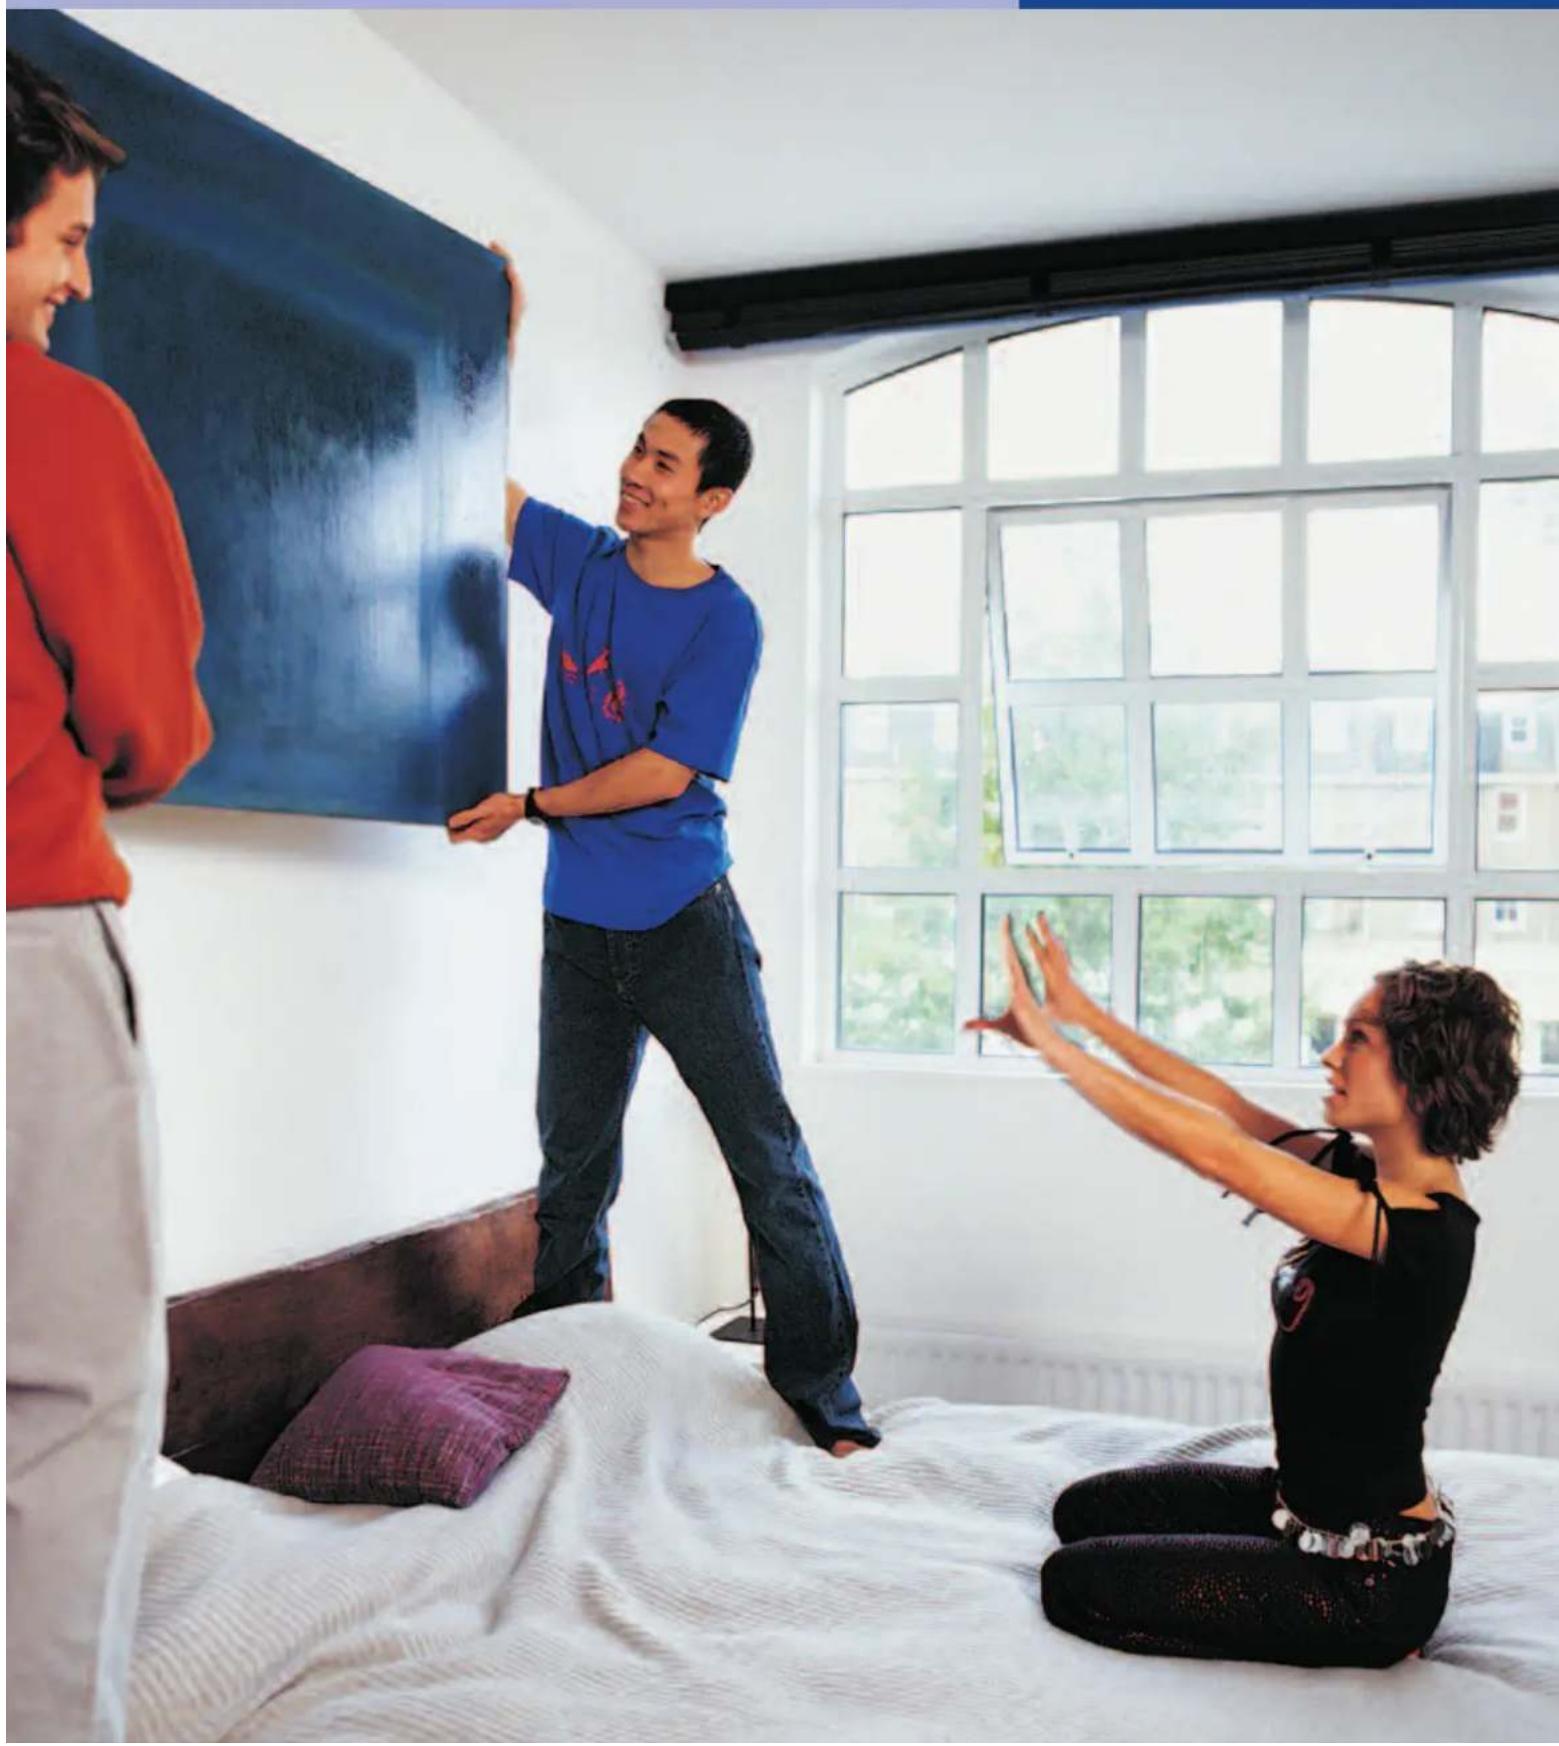
Install it, live it, care for it!

Tarkett
LAMINATE
natural_image
Three people interacting in a bedroom with a large blue chalkboard; no visible text or symbols.Installation instructions
Preparation
1 - Storage and handling
■ Pallets shall not be stacked more than five high.
- Cartons of laminate must be stored horizontally at all times.
■Storage area shall be climate-controlled with a temperature not less than 18°C. (65°F.).
■ Protect carton corners from damage.
■ Do not puncture plastic wrapping.
2 - Tools and materials and accessories
natural_image
Blue LEGO brick blocks scattered on a white surface, no text or symbols visible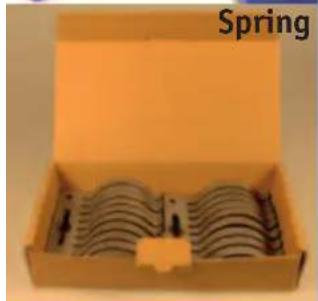
natural_image
Open cardboard box containing a rack of metallic components, labeled 'Spring' in the top-left corner (no other text or symbols visible)■Vacuum cleaner
Safety Glasses
8 mm (5/16")
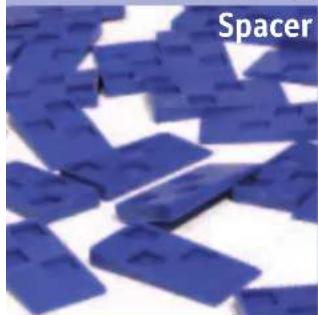
Spacers(Art. Nb.: 8022000)
Alternatively: installation springs
(Art. Nb.: 8265000)
T-square
Tape Measure
■Saws - Table Saw
(fine tooth carbide tipped blade)
Miter Saw/Jig Saw/Circular Saw.
Good to know:
Use Tarkett® 2 mm Foam over a PE-plastic foil (vapor retarder) or use Tarkett® 3 mm SoundBlock combi-foam. Tarkett® 3 mm SoundBlock foam combines PE foil and foam for damp & sound proofing. A 0.2 mm PE foil is thus not necessary.

natural_image
Stylized teddy bear figurine sitting on a white pedestal against a blue background (no text or symbols)■ Foam Underlayment
Tarkettfoam
A recyclable, freon-free 2 mm foam:
- to level slight undulations & bumps of the subfloor
- to reduce impact noise - 19 dB with 7 mm products
Dimensions: 1 m × 20 m = 20 ^2 m
art. Nb:8021000
Thickness 2 mm
Contents Recyclable
polyethylene
natural_image
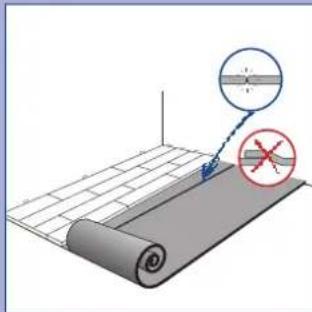
Diagram showing a rolled document with a magnified view of a horizontal bar and a red prohibition symbol (no text or labels)Properties Reduces impact noise: Levels slight undulations of the subfloor
Before laying Support must be clean and dry
Laying Butting edges (never overlap) Do not glue or fix
The 3 mm Soundblockfoam (Combi foam with vapor retarder)
All-in-one underlayer: recyclable, freon-free, insulator 3 mm PE foam (closed cell structure) with 2 extra layers offering a genuine vapour barrier.
- Gliding top-layer for a handier fitting of the planks.
- Foam to level out slight bumps, improve the shock-& pressure resistance of the flooring & noise insulation.
- Bottom layer for an optimal damp resistance with 20 cm spare length.
Dimensions: 1,2 m × 16,7 m = 20 m²
Art. nb: 8267000
Foam PE with closed cell structure
0.03 mm + 0.07 mm layers
Environment 100% recyclable Freon free
Before laying Support must be clean and dry
Laying see drawing
Storage Ventilated room
NOTE: use only Tarkett® underlayers with Tarkett® Laminate flooring. Guaranty is void if any other underlayers are used.
3 - Subfloor requirements
Tarkett® Laminate Flooring may be installed over most types of subfloors and existing floors on all grade levels.
■ All substrates must be structurally sound and free from movement.
■The substrate must be clean, dry, level and free of any defects.
Dry? The sub floor must be dry. Measure & file always with adequate test instruments.
Moisture content limits: moisture content of cement screed/concrete must be < 2% CM (CM method) and of anhydrite cement floors (Calcium sulphate screed) < 0.5% CM.
Level? The subfloor must be levelled within 3 mm in 1 m -1/4" in 8 ft.- (DIN 18202 Zeile 4) or 2 mm over 2 m. Smooth and level all irregularities with a hydraulic (portland) cement base patching and leveling compound.
Free of any defect? Cross check old wood floors, nail/screw to eliminate squeaking. Brush or vacuum clean your floor - work clean!
Tarkett® Laminate Flooring is not recommended for use in high humidity areas where the floor is usually wet. (steam rooms, saunas).
Concrete
■Concrete subfloors shall be properly cured and allowed to dry for at minimum of 90 days before installation.
Wood
■S suspended wood subfloors shall have a minimum 45 cm (18") of well-ventilated air space clearance above the ground.
A moisture vapor retarder shall not be installed over wooden floor/construction.
■ Moisture content of wood subfloor shall not exceed 12%.
Existing Sheet and Tile Flooring
■ Existing flooring must be fully adhered and in good condition.
■ Existing floor must be a single layer.
■ Repair any damaged areas.
Carpeting
- Deep pile carpeting and padding must be removed before laying laminate flooring.
Tarkett® Laminate Flooring may be installed over industrial direct glue carpeting (no padding) that is installed over wood subfloors only. - Carpeting must be removed if installed over concrete.
■Use of a foam underlayment is not recommended over carpet.
IMPORTANT ! A min. 0.2 mm ageing resistant damp-proof PE foil shall be installed over all sub floors, except over wooden floor/construction. Overlap seam edges 20 cm min and tape entire length of seam with duct tape.

Good to know:
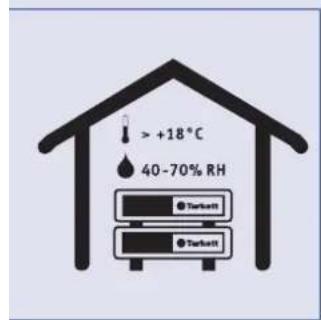
Laminate and under floor heating
Due to the hydroscopic properties of a laminated floor containing more than 90% wood the working environment should display the following values before, during and after laying: floor surface temperature min. 15°C (59°F); air temperature 18 - 24°C (64.4 - 75.2°F); relative humidity 40 - 70%. The floor will look its best under these conditions. If the values for relative humidity lie outside the above range the boards may become irreversibly warped. A damp proofing layer must always be laid! If flooring is to be laid on top of under floor heating there is a specific heating procedure (in accordance to DIN 4725) to be followed before the damp proofing layer is put in place.
Explanations and restrictions:
Laminate flooring is suitable for installation on top of underfloor heating systems provided that the heating element is embedded into concrete or any other sub floor. Laminate flooring is not suitable for installation on top of underfloor heating foil installed on top of concrete or any other sub floor unless otherwise specified by the underfloor heating manufacturer. Surface temperature should never exceed 28^ C. Standard electrical underfloor heating foil systems can usually reach a surface temperature of more than 28^ C when turned up at maximum running temperature, which makes them not suitable as sub floors for laminate flooring.
Procedure:
Installing laminate flooring on top of low temperature under-floor heating is possible provided that a specific heating procedure (in accordance to DIN 4725 & regardless of the season) is followed before the damp proofing layer is put in place: set the temperature of your heating device at 25^ C & let it run for 3 days. Increase your heating in steps of 5^ C up to its max. temperature. Let it run continuously for 72 hours.
Decrease the temperature in steps of 10^ C until reaching a floor surface temperature of 18^ C. Before, during & at least 3 days after the installation of your flooring, the floor surface temperature should be maintained at 18^ C. Do not forget to install the 0.2 mm vapour barrier! After the course of 3 days, the temperature should be slowly raised to the required operating temperature. The surface temperature of the heated sub floor should never exceed 28^ C. Please check with your dealer & the floor heating system producer.

natural_image
A small teddy bear toy sitting on a white block against a blue background (no text or symbols visible)To sum up:
Tarkett® laminate flooring can be installed on underfloor heating systems. However, some specific conditions have to be met:
■Waterborne systems included in the concrete screed are recommended
■Electrical systems not embedded in the screed are to be avoided
■T he surface temperature should never exceed 28°C (82.4°F)
■R eversible systems which are cooling and heating are NOT suitable!

natural_image
Stuffed teddy bear toy sitting on a white pedestal against a blue background (no text or symbols visible)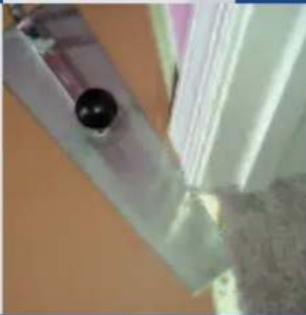
natural_image
Close-up of a white plastic panel with a black circular component and a small white object, partially visible against a plain background (no text or symbols)4 - Acclimation
Tarkett® Laminate Flooring must be allowed to acclimate to the temperature of the room in which it will be installed.
Place the unopened cartons of laminate lying horizontally in the room in which they will be installed for a minimum of 48 hours before installation.
■Do not remove the plastic wrapping.
■Room temperature shall be a minimum of 18°C (65°F).
5 - Room preparation
■ Carefully remove existing wall moldings and doorway transition moldings.
If using quarter round molding, wall base molding does not have to be removed. Existing quarter round may be reused or replaced with matching quarter round. The molding must be of sufficient size to cover the 8 mm (5/16") expansion area around the perimeter of the floor.
Leave at least 20 mm (0.79") between the surface of the flooring and the bottom of electric baseboard heaters to allow heat to circulate.
■ Undercut door jambs and door moldings to allow the flooring to fit underneath. Use a scrap piece of flooring and foam underlayment as a guide.
■Sweep and/or vacuum substrate to remove all dirt and debris.
Good to know:
First line of defence for laminate flooring board - underlayment
Underlayment padding with a moisture barrier is all you need to lay your laminate flooring board on a concrete surface. This underlayment padding will provide a barrier of moisture protection, which should always be a consideration for any flooring project.
This will help ensure that the floor remains dry underneath the laminate flooring board itself which lessens the likelihood of mould growth. This will also protect your laminate flooring board from swelling and arching.

natural_image
Illustration of a teddy bear sitting on a white block against a blue background (no text or symbols)Tarkett ^® makes it easy for you; look for:


Get started!
■Determine in which direction the planks will be installed. To make the room appear larger or if installing in very small rooms or hallways, it is preferable to lay the planks parallel to the longest room dimension.
It is recommended that cabinets be installed before installing planks. However, if planks are installed prior to installing cabinets, the cabinets must be fastened or secured to the supporting wall. Do not fasten cabinets through the laminate flooring.
Carefully measure the room to determine squareness and also to determine the width of the last row of planks. If the width of the last row of planks is less than 50 mm (2"), excluding the tongue, the width of first row of planks will have to be cut accordingly.
Good to know:
Always take into account the light source and the main direction from which the floor will be viewed. Panels should always be laid lengthwise in accordance with the main viewing direction and main source of light.

natural_image
Small teddy bear toy sitting on a white block against a blue background (no text or symbols visible)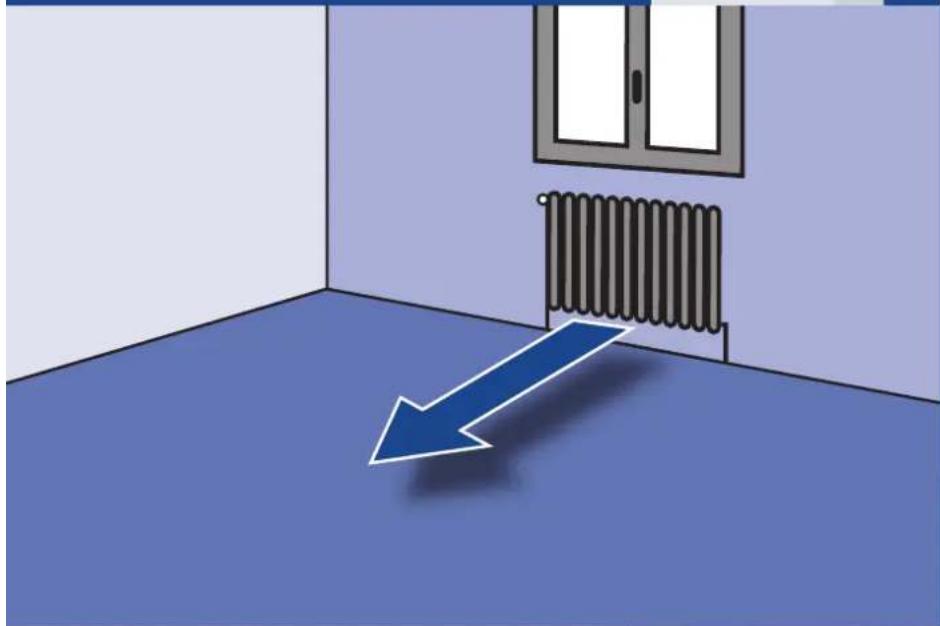
natural_image
Interior corner with a blue arrow pointing to a wall-mounted radiator, no text or symbols presentGood to know:
Inspect all planks for visible defects and damage before and during installation. Do not install damaged planks. During installation, inspect the groove area for any debris that may prevent proper assembly of planks.

natural_image
A teddy bear sitting on a white pedestal against a blue background (no text or symbols visible)Installing planks
■Begin laying planks on the left side of the starting wall and work to the right side. The tongue side of the plank shall face the starting wall.
natural_image
Close-up of wooden flooring with visible wood edges and a flat surface (no text or symbols)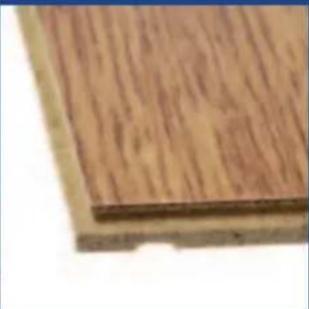
natural_image
Close-up of a wooden surface with visible grain patterns (no text or symbols)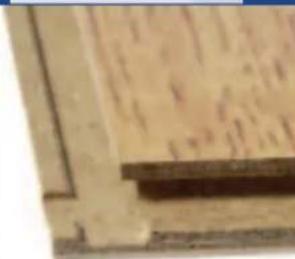
natural_image
Close-up of a wooden plank with visible grain and texture (no text or symbols)Tongue Side Groove Side
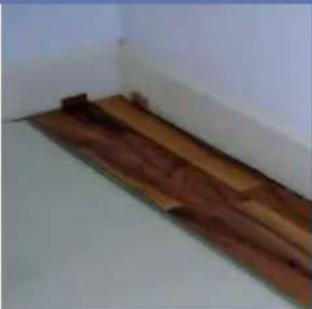
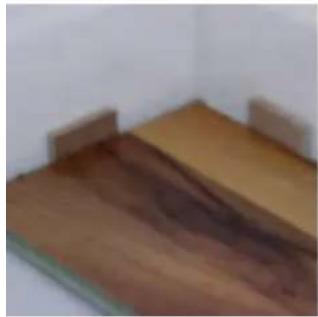
Place spacers (minimum 8 mm - 5/16") between the short and long side of the planks and the wall.
■Alternatively use installation springs.
The advantage?
You don't have to take out the springs! They will be flattened to the wall by the flooring, once installed. Even quicker, even better!
natural_image
Interior view of a room with wooden flooring and two small wooden fixtures (no text or symbols visible)■Press the short end of the next floorboard at an angle to the first one, then lay down. Complete the first row in the same matter.
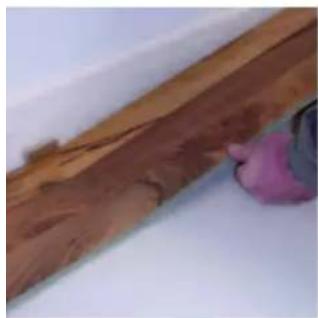
natural_image
Close-up of a hand holding a wooden plank against a plain white surface (no text or symbols visible)The last plank in the first row will need to be cut. Measure the distance between the wall and the surface of the last full plank. Subtract 8 mm (5/16") from this measurement to allow for the spacer. If this measurement is less than 30 cm (8"), the length of first plank in the row must be cut. This will allow for a longer plank at the end of the row.
The first and last plank in each row must be at least 30 cm (8") in length.
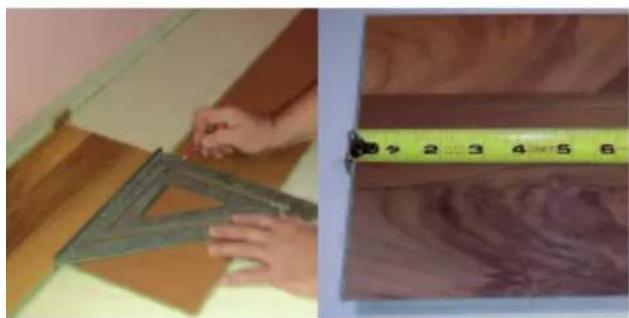
natural_image
Two-panel image showing a hand measuring a metal ruler on a wooden surface and a measuring tape placed horizontally (no text or symbols visible)■When cutting planks, make sure that the teeth of the saw blade are cutting into the decorative surface. Best results are achieved when using a carbide tipped cutting blade.
If the starting wall is irregular, scribe or trace the contour of the wall on the first row.
To remove the first row, lift the floor plank row a few centimeters and tap along the joint. Grip the right short end and angle up plank by plank Cut the floor plank as required.
■ Re-in stall the whole row from left to right. Place and press the row against the edge of the floor planks already in position - with the strip first and angle in, press down.
The remaining piece cut off from the last plank in the first row will serve as the first plank in the second row provided it is at least 30 cm (8") long. Always stagger end joints from row to row a minimum of 30 cm (8").
If you wish or need to remove the flooring, just lift the floor planks a few centimeters and tap along the joint. Then release the planks from right to left by lifting at the right short end.
Separate the whole row from the previous one and the angle up starting from the most right positioned plank.
■Altern ative releasing method: The released floor plank can then be pulled out. Never bend connected floor planks backwards; this will damage the planks.
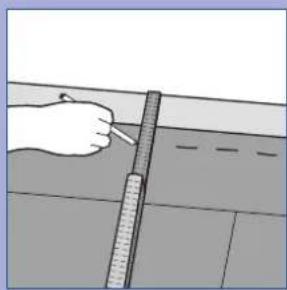
natural_image
Illustration of a hand using a ruler to draw or mark on a surface (no text or symbols)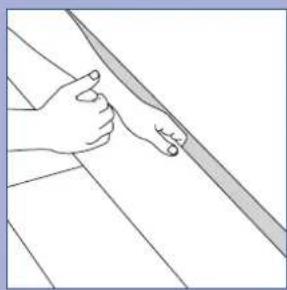
natural_image
Line drawing of a hand holding a knife, no text or symbols present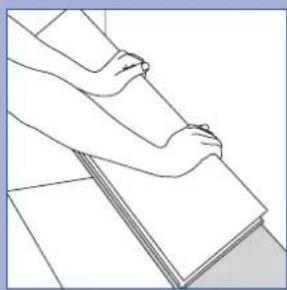
natural_image
Line drawing of a person leaning over a stack of papers or documents (no text or symbols present)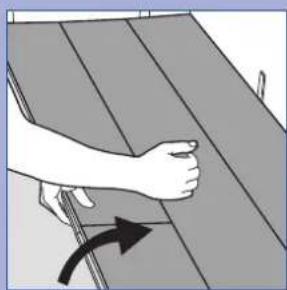
natural_image
Illustration of a hand adjusting a wooden panel with an arrow indicating rotation (no text or symbols)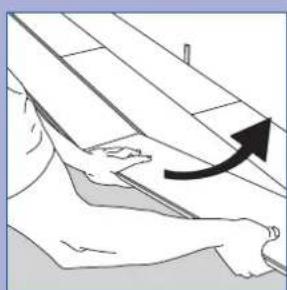
natural_image
Illustration of a person seated on a bench with an arrow indicating upward motion (no text or symbols)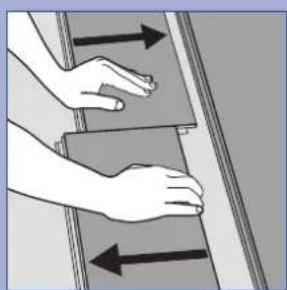
natural_image
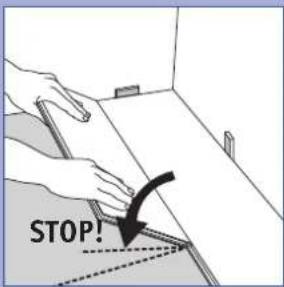
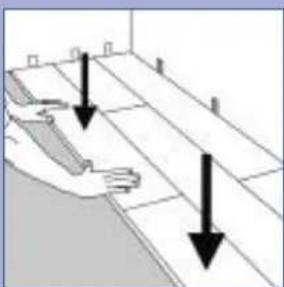
Illustration of hands pressing down on a mechanical component with bidirectional arrows indicating force or movement (no text or symbols)Place the floorboard at an angle against the floorboard in the previous row, press forward and let the panel stop/stay in this slight angled position. Do NOT press the floorboard down to the floor; see below! Remember to leave a 8 mm (5/16") space between the wall and the plank.
■Second plank second row. Place the short end of the floorboard against the previous installed floorboard. Fold down the panel to the same angled position as the previous plank.
natural_image
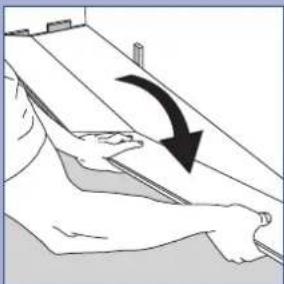
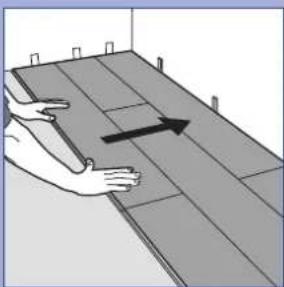
Illustration of a person lying down with a curved arrow indicating motion (no text or symbols)Slight lift and push (slide) the panel tight in the row in front. Let the panels stay in slight angled position. Complete the whole row in the same matter.
natural_image
Diagram showing a hand holding a tool with an arrow indicating direction, no text or symbols present
natural_image
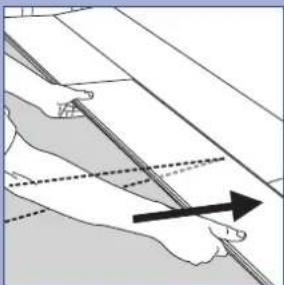
Simple line drawing of a 3D rectangular block with horizontal and vertical lines, no text or symbols present.- When the whole row is installed, fold it quite down.
natural_image
Diagram showing two arrows pointing downward on a grid-like structure with no visible text or symbols■ Continue to work from left to right, row by row. The distance to the wall can be completed when 3 rows are installed. Determine the width of the last row of planks. If it is less than 50 mm, excluding the tongue, the width of the first row of planks will have to be cut accordingly.
natural_image
Illustration of a hand pressing down on a tiled floor with an arrow indicating direction (no text or symbols)For rooms wider or longer than 10 m (33'), the use of Tarkett® T-Moldings is required to account for the normal movement of the floor. When possible, T-Moldings should be utilized in areas such as doorways, archways, etc.
The last row of planks may need to be cut lengthwise to obtain the proper width. Remember to place a spacer or an installation spring between the wall and the last row of planks.
In areas where it is difficult to angle the planks into position, such as around door moldings, it is necessary to remove the lip on the groove edge of the planks you are fitting to. This is done by lightly sanding or planing off the lip on the groove side of the plank. This will allow you to install the plank laying flat. After the lip has been trimmed on the planks you are fitting to, lay the plank flat on the floor. Apply a thin bead of PVAc-D3 laminate glue on top of the tongue and push the plank into position. Immediately wipe off any excess glue with a damp cloth.
natural_image
Close-up of a wooden plank with visible grain and a small inset detail (no text or symbols)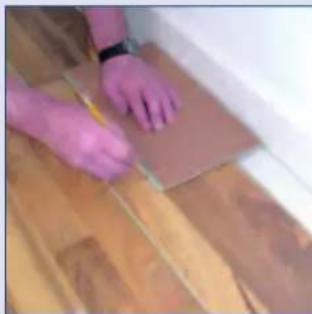
natural_image
Close-up of hands using a ruler to cut or spread wood on a wooden floor (no text or symbols visible)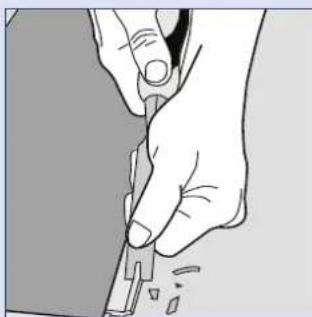
natural_image
Illustration of a hand using a power tool to cut or mark a small object (no text or symbols visible)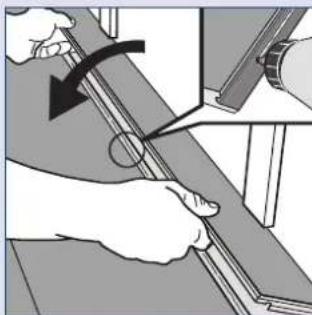
natural_image
Illustration of a person using a tool to adjust or install a mechanical component (no text or symbols visible)Finish it up!
■Remove spacers from perimeter of room. If you used installation springs, you leave them in place.
■Install transition moldings. Do not fasten moldings through the laminate flooring.
■Install quarter round or baseboard molding. Molding must be sufficient size to cover the 5/16" (8.2 mm) space. Do not fasten moldings through the laminate flooring. Fasten into the wall.
■Use plywood when moving heavy furniture or appliances into position.
■To help protect the floor, place felt pads or other type of protection under the legs of furniture.
At all times, the recommended room relative humidity (RH) of 45-60% and temperature of 18-24°C should be kept. If necessary install a humidifier/dehumidifier to ensure the best climate for yourself, furniture and your floor. If the climate is not kept or correct installed, by natural properties the floor can show fine gaps, at dry climate also concave (cupping boards) or at high RH% convex boards.
Tarkett® Laminate Flooring can be maintained by simply damp mopping with a neutral floor cleaner such as Tarkett® Antistatic Cleaner. High quality cleaner developed for the safe cleaning of laminate flooring, it protects your floor against fast re-soiling and improves its antistatic properties. (by 35% after first use). Art. Nb: 8266000
■ Do not use abrasive cleaners.

Cleaner
The profiles
Transition & reduction profiles as well as end caps provide the perfect way to give the decorative finishing touch to your flooring installation.
■Highly resistant thanks to a specific overlay (AC3).
■Made of low swelling HDF/E1 for guaranteed quality & resistance through time.
■Quick & easy installation with fixing strip.
Colours matching floor designs.
■Practical length - 2000 mm.
Installation procedure
Quick & easy, the fixing strip offers you the possibility to install & remove the profiles without any damage.
■ Clean the subfloor.
■ Position the strip.
■Screw the strip onto the subfloor or glue it down (use an EVA melting glue).
- Clip the profile onto the strip.
If using a hammer, never tap directly on the profile.
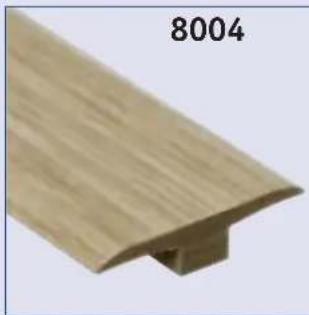
Transition profile (product code 8004)
To ensure an aesthetic continuity of your laminate flooring where expansion gaps are required.
Reduction profile (product code 8005)
To ensure a smooth transition between your laminate flooring & floorings of lesser thickness.
End cap (product code 8006)
To finish your installation in a neat & attractive way.
New: MULTI4FUNCTION! (product code 8014)
■One profile for 3 applications: Transition, Reduction, End cap
- Minimized stocking space
- No customer complaints for having taken the wrong products
- Customer can decide at home whether to use it as a motion, transition or end-profile
- Come in 0,95 m-length
- Come in 2 colours: silver or gold.
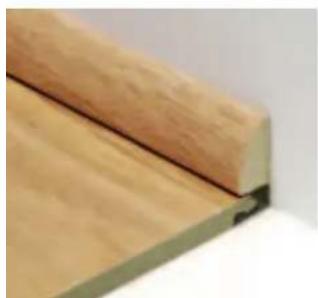
The skirtings
The easiest way to give your flooring the finishing decorative touch.
A vailable in 4 types, they answer each & everyone's desire for individuality.
■Made of MDF & coated film for guaranteed quality & resistance through time.
■Quick & easy installation with clip system.
Colours matching floor designs.
■Practical length - 2400 mm.
The beading (8001) & 8009 skirting should be glued directly to the wall with a standard EVA-melting glue
Fixing strip : Made of polystyrene fibres to be resilient enough to perfectly follow the contour of the wall & hard enough to welcome the skirting & keep them tight in place.
NEW: clipholder (8019004)
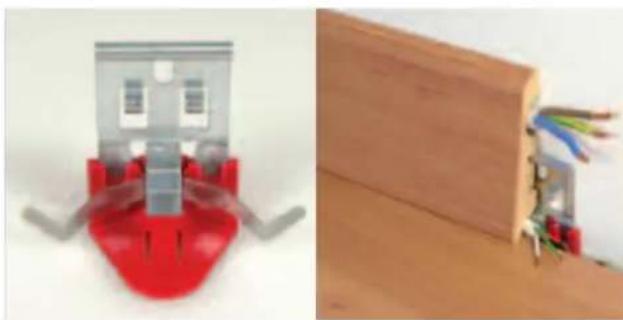
natural_image
Two views of a red and gray 3D-printed object: one with a small house-like structure, the other showing exposed wiring inside a wooden block (no text or symbols visible)The new generation of skirting fixing device for flooring from 6 to 14 mm thickness:
natural_image
Close-up of a wooden plank with visible wear and edge details (no text or symbols)As for all other skirtings, they can be nailed, screwed, glued or simply clipped to the adapted fixing strip (made of corrosion resistant spring steel):
■ No need of tools or glue
■No nail, no screw, no dirt
■ E xpansion gap ensured
Beading (product code 8001)
How to install them?
Put spring into red plastic part. Put red plastic part onto the floor pavement. Install floor. Insert metal clips into red plastic part. Clip the skirting.
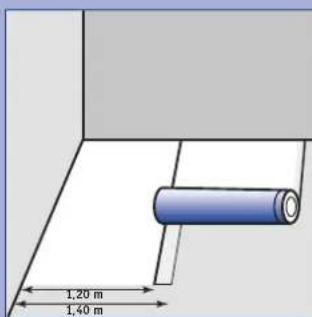
TIPS: Cutting holes for pipes
■Measure the distance from the wall to the center of the pipe. Mark the plank where the hole for the pipe will be drilled. Remember to allow 8 mm (5/16") for the spacer.
■ Measure the diameter of the pipe. Drill the hole in the plank 16-20 mm (5/8"-25/32") larger than the diameter of the pipe.
If the hole for the pipe is located in the center of the plank, make a cut perpendicular to the long side of the plank. The cut should be made going directly through the hole.
If the hole for the pipe is located near the edge of the plank, make two 45° angle cuts to the hole from the side of the plank closest to the hole.
- You can now position the two pieces around the pipe. Apply a bead of PVAc-D3 laminate glue to the cut edge of the fill piece and press into place. Immediately wipe off any excess glue from the surface with a damp cloth. Use a 5/16" (8.2 mm) spacer to wedge and hold in place until glue dries.
The 8 mm (5/16") expansion space around the perimeter of the pipe shall be completely filled with a silicone caulking.
natural_image
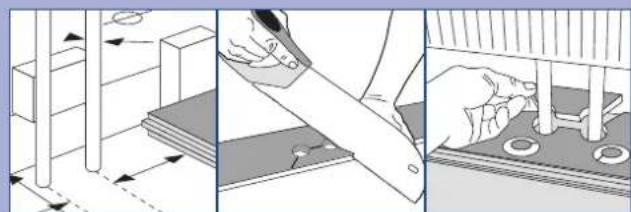
Three-panel diagram showing mechanical assembly steps: top view with blocks, middle view with tool, and bottom view with rollers (no text or symbols)TIPS: Installation on stairs
Tarkett® Laminate Flooring may be installed on stairs and risers by fully adhering the planks. Do not use a foam underlayment when installing on stairs.
Stairs and risers must be structurally sound.
The existing stair nosing must have a square edge flush with the riser. If the nosing is rounded or exceeds the riser, cut it flush with the riser.
If carpeting was installed on the steps, make sure
all staples are removed. Sweep and/or vacuum to remove all dirt and debris.
Starting at the bottom riser, measure and cut a plank to fit the riser. The plank for each riser shall be cut flush with the top of the existing stair tread. Using a good quality construction adhesive, apply a serpentine bead to the back of the plank. Press plank firmly into place.
natural_image
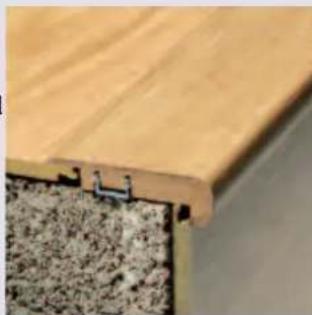
Close-up of a wooden floor panel with a textured wall and metal bracket (no text or symbols visible)■ Measure and cut a plank and stair nosing to fit the stair tread. Dry fit each piece to make sure they fit properly.
■ Apply con struction adhesive to the stair tread and spread evenly over the entire tread with a 1 mm x 1 mm x 1 mm (1/16" x 1/16" x 1/16") notched trowel. Position plank and stair nosing and press firmly into place.
If installing over a wood substrate, pre-drill holes through the stair nosing and fasten with finishing nails. Set nails so they are just below the surface of the stair nosing.
■ Repeat procedure for remaining steps. Allow adhesive to cure for 24 hours before using steps.
■ Finish up with a stair n ose 65 x 18 mm Art. Nb: 8010 + matching design.
natural_image
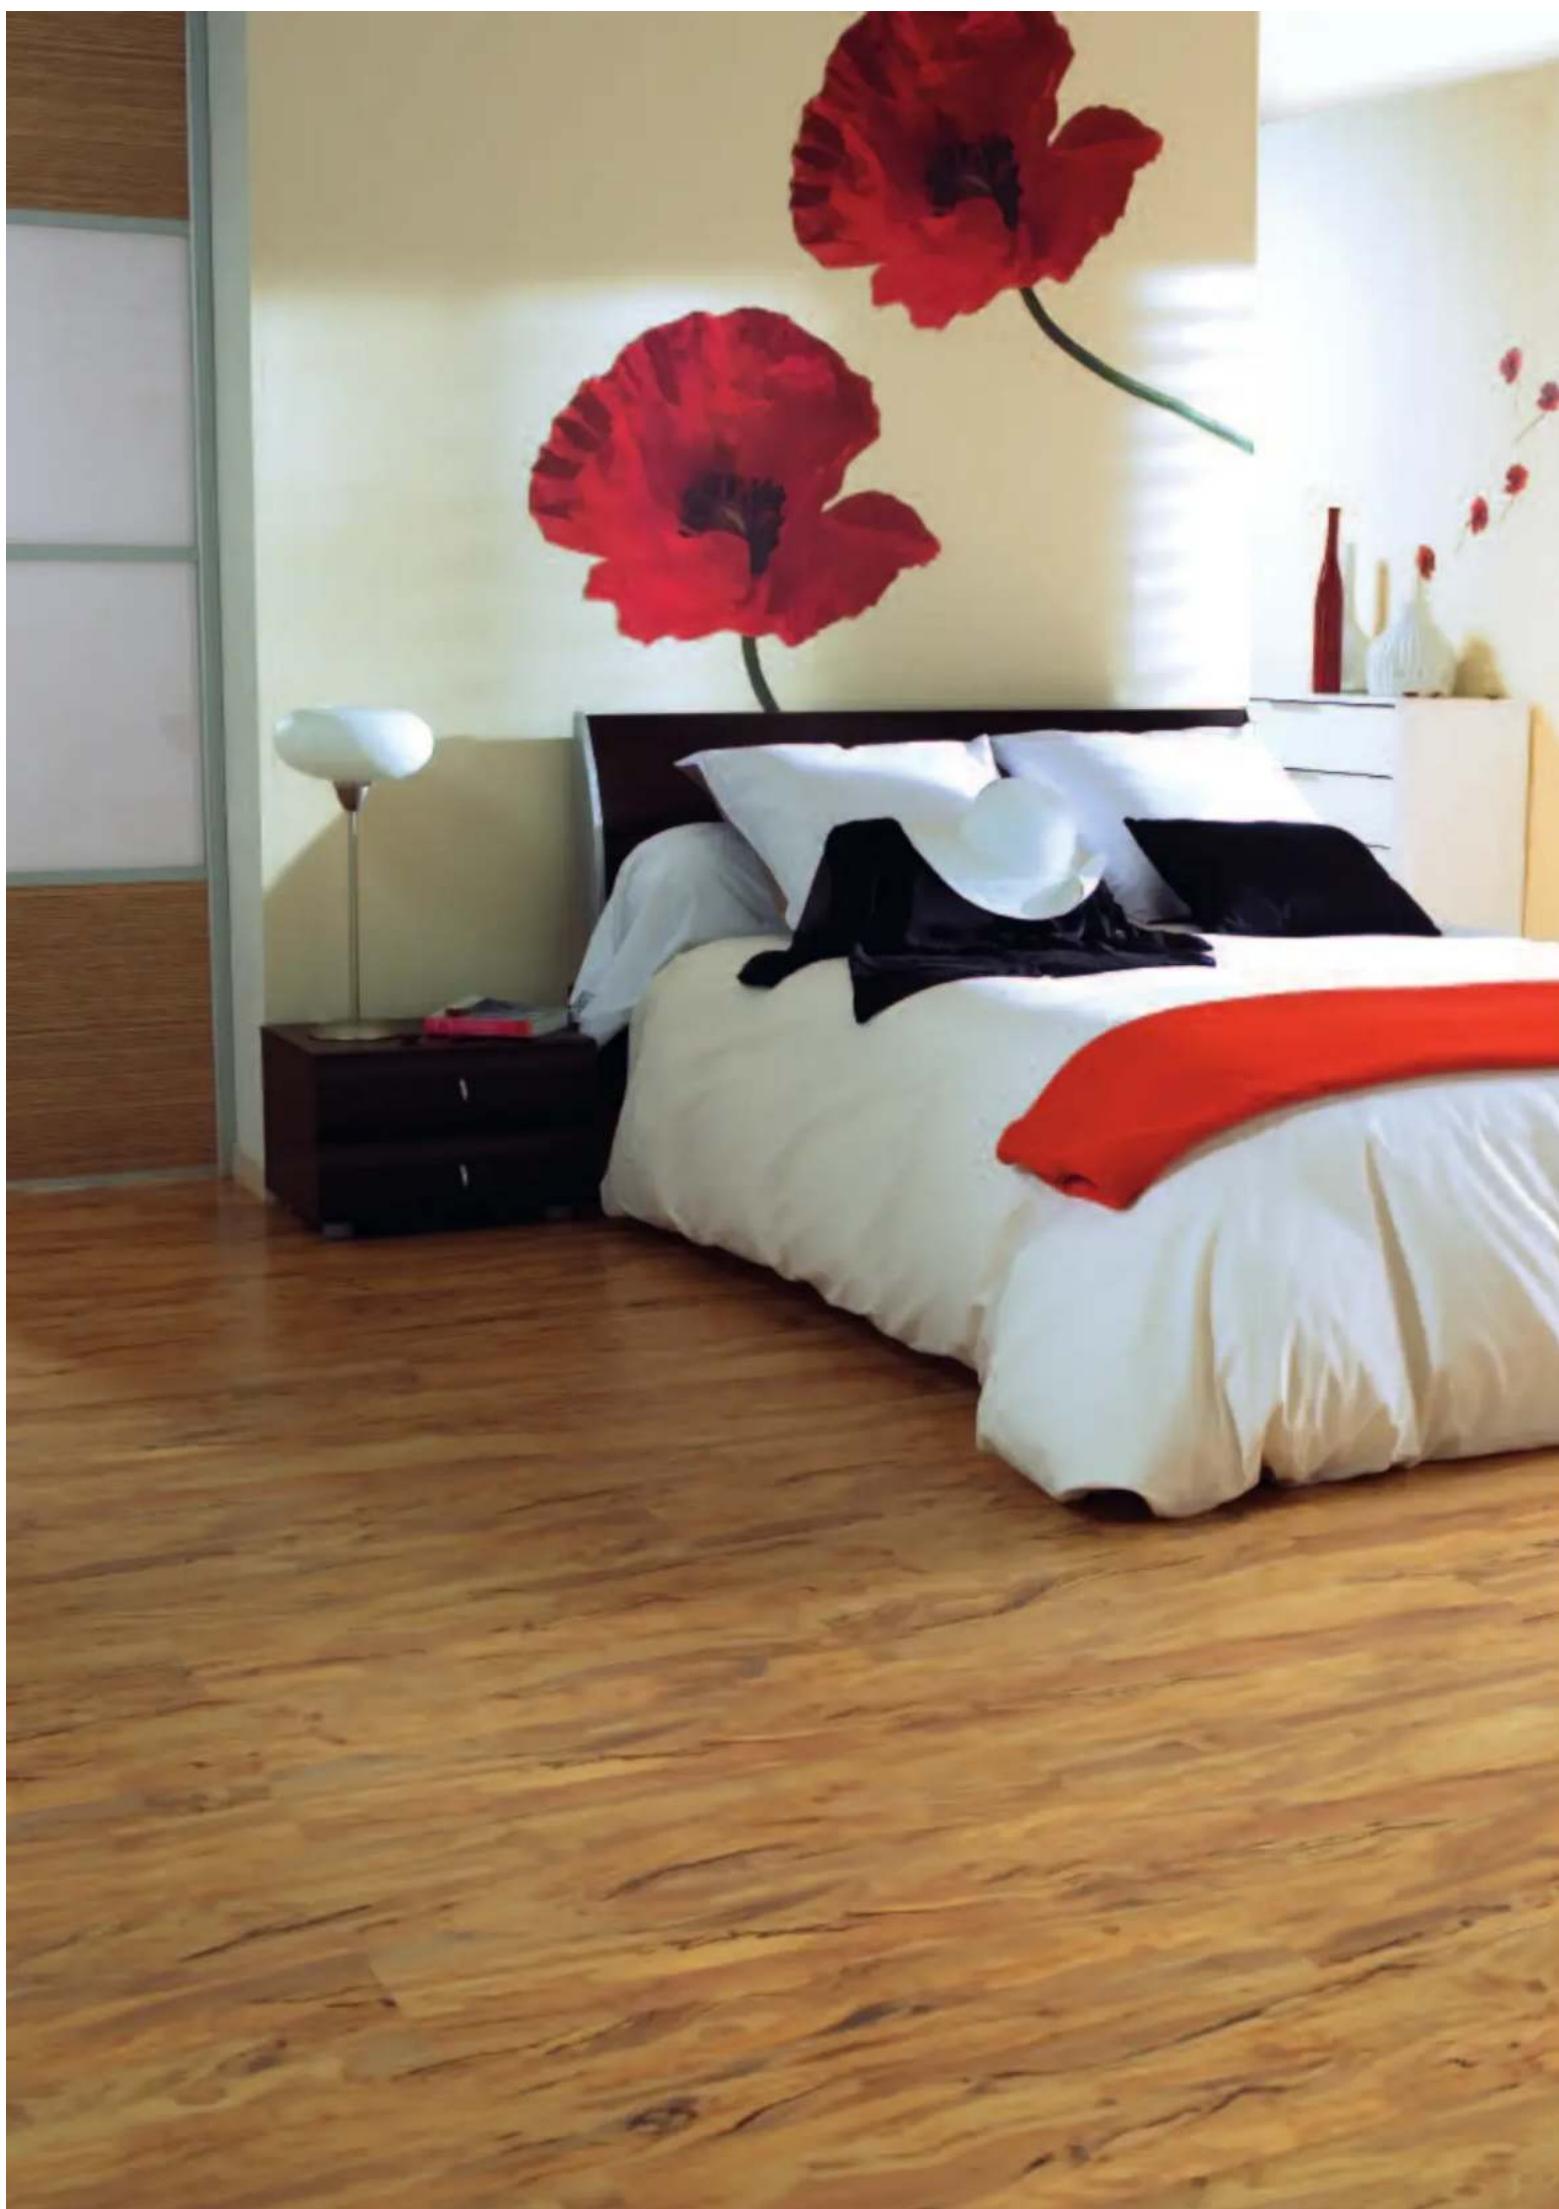
Interior bedroom with wooden flooring, a bed of white bedding, and large red floral wall decoration (no text or symbols visible)
Tarkett
LAMINATE
www.tarkett.com