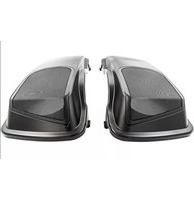
Excelon CA-LID98 - Motorcycle KENWOOD - Free user manual and instructions
Find the device manual for free Excelon CA-LID98 KENWOOD in PDF.


| Product Type | Motorcycle Saddlebag Speaker Lid Kit |
| Brand | Kenwood Excelon |
| Model | CA-LID98 |
| Compatibility | Harley-Davidson FLH (Batwing) and FLTR (Road Glide) models |
| Speaker Size Supported | 6x9 inches (recommended Kenwood XM69R) |
| Lid Material | High-impact plastic |
| Included Grommet Size | 3/4 inch (19mm) with removable plug |
| Gasket Thickness | Approximately 3/8 inch (9mm) |
| Weight per Kit | Approximately 2.5 lbs (1.1 kg) |
| Wiring Harness Length | Sufficient for routing from saddlebags to amplifier under fairing |
| Connector Types | 2-pin and 4-pin plugs |
| Installation Tools Required | Drill, screwdriver, razor knife, isopropyl alcohol |
| Maintenance | Clean with mild cleaner (99% isopropyl alcohol); avoid acetone |
| Safety Warning | Strong magnets can affect credit cards/electronics; metal objects may stick; magnets get hot at high volume |
| Spare Parts Availability | Striker plates, tethers, gaskets, and screws included; replacements may be available through Kenwood |
| Repairability | Factory metal strip re-used; adhesive parts require 8-hour curing |
| General Notes | Do not use thread lock or screw glue; zero responsibility for fitment issues with non-Kenwood speakers |
Frequently Asked Questions - Excelon CA-LID98 KENWOOD
User questions about Excelon CA-LID98 KENWOOD
0 question about this device. Answer the ones you know or ask your own.
Ask a new question about this device
Download the instructions for your Motorcycle in PDF format for free! Find your manual Excelon CA-LID98 - KENWOOD and take your electronic device back in hand. On this page are published all the documents necessary for the use of your device. Excelon CA-LID98 by KENWOOD.
USER MANUAL Excelon CA-LID98 KENWOOD
The factory saddlebag hinges limit the size of the speaker magnet that can be used and allow the lids to open and close without issue. KENWOOD assumes ZERO RESPONSIBILITY for fitment issues, or water leaks when any speaker brand other than KENWOOD is used. Be sure of all clearances and inspect the parts carefully BEFORE painting.
Do Not Use "Thread Lock" or "Screw Glue" of any kind, as it destroys plastic and will cause part failure.
Most speaker magnets are large and powerful. Credit cards and electronics can be sensitive to magnets, so please exercise caution in how you pack your saddlebags. Metal objects packed into your bags may end up stuck to the magnet, so please use caution when opening the lids. Magnets can also get hot when speakers are being played, especially at higher volumes. Please consider this when packing your saddlebags.
Contents
Section 1: Bag and Lid Prep....3
Section 2: Disassembling The Factory Lid....3
Section 3: Preparing The New Lid....4
Section 4: Mounting The Speakers....5
Section 5: Routing The Wires In The Saddlebag......6
Section 6: Routing The Speaker Wire Harness......6
Section 7: Wiring The Lids To The Amplifier......7
Installation procedure
-
Start by removing the 2 screws on the underside of the lid that secures the grille in place. Lift up slightly on the grille and slide out. Remove the saddlebag from the bike and put it on a stable working surface (placing blankets, towels, etc. on your work surface will help to protect the paint).
-
The white circle in Fig 1.1 is where a 3/4" (19mm) hole will need to be drilled. This hole is where the supplied rubber grommet will go to allow the lid's speaker wire to pass through from the saddlebag. Use masking tape over the painted area to be drilled and start with a small bit, gradually working your way up to the 3/4" (19mm) hole. Drilling the hole with the lid still on is recommended.
-
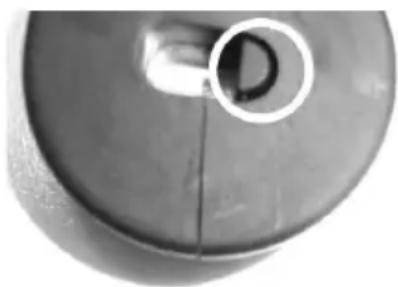
The supplied grommet in Fig 1.2 is "split" to make the installation easier once the wire is in the bag. The white circle in the picture shows a "plug" that can easily be removed. If the only wire you have going into your saddlebag is the speaker wire, leave the plug in place. If you have a second wire for such things as lighting etc., removing the plug from the grommet will allow the second wire to also pass through without having to drill additional holes in your saddlebag.

natural_image
Metallic vehicle chassis component with mounting holes and a circular arrow indicating a specific part (no text or symbols present)Figure 1.1
natural_image
Close-up of a metallic cylindrical object with a circular hole and a diagonal line, no visible text or symbols.Figure 1.2
Section 2 - Disassembling The Factory Lid
NOTE: As you disassemble your factory lid, make note of what screws came from where, as they will be re-used.
- Remove the 4 screws highlighted with white arrows in Fig 1.3 that hold the cloth tether in place. With the tether off, slide one of the metal bars out from inside the tether, as it will be used for the new lid.

natural_image
Close-up of a black plastic component with four white arrows pointing to internal features (no text or symbols visible)Figure 1.3
Section 2 - Disassembling The Factory Lid - Cont.
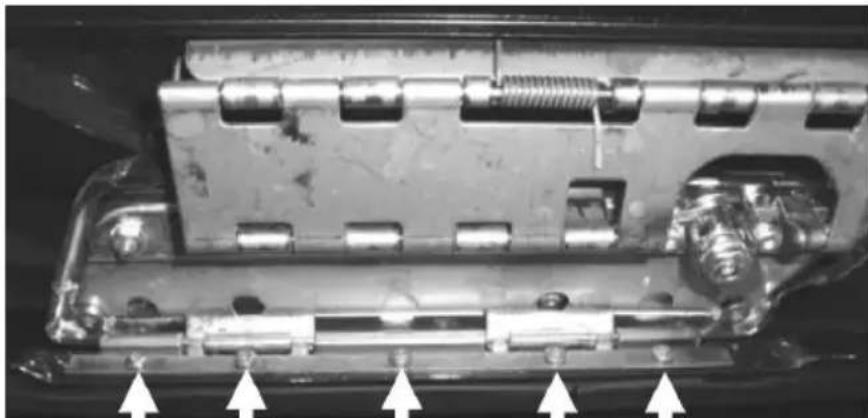
- With the tether off, fold the factory lid all the way over, exposing the 5 screws highlighted by white arrows in Fig 1.4. When these are removed, the factory lid will be free from the saddlebag.
natural_image
Close-up of a mechanical assembly with bolts and components, no visible text or symbolsFigure 1.4
NOTE: With the factory lid off the bike, you will see a metal "strip" between the rubber gasket and the lid itself that the screws just removed threaded into. This metal strip must be removed as it will be used to install the new lid.
Section 3 - Preparing The New Lid
- In the kit, you will see 2 lengths of rubber gasket material (one for each lid). Before applying the supplied rubber gasket, you will need to clean the area the gasket will stick to. Use a mild cleaner such as 99% Isopropyl alcohol, but nothing aggressive like Acetone, as Acetone will destroy the lid.
NOTE: It is strongly recommended that any adhesives in this kit be applied at room temperature or higher.
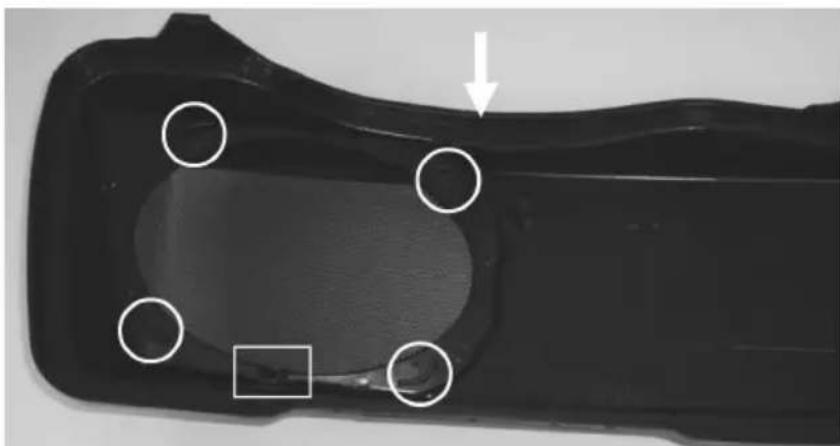
- The white arrow in Fig 1.5 shows where we suggest you start applying the gasket. Be careful not to stretch the gasket when applying. When all the way around, you can expect to have approx. 2.0" (5cm) left over to cut off (a sharp razor knife is suggested for this).
natural_image
Close-up of a black plastic component with four circular holes and a white arrow pointing to a specific area (no text or symbols)Figure 1.5
-
With the gasket installed, insert the factory metal strip (5 screws) between the gasket and the new lid, and then re-install the 5 factory machine screws the same way they came off the factory lid. The new lid will now be attached to your saddlebag.
-
Locate the tether that came with your new kit. The metal bar that was removed from the factory tether will need to be inserted into the new tether at the appropriate end. There is a shorter metal bar in your kit that will go in the shorter end of the new tether. Once done, using the 4 screws removed from the factory tether, secure the new tether to the lid/bag.
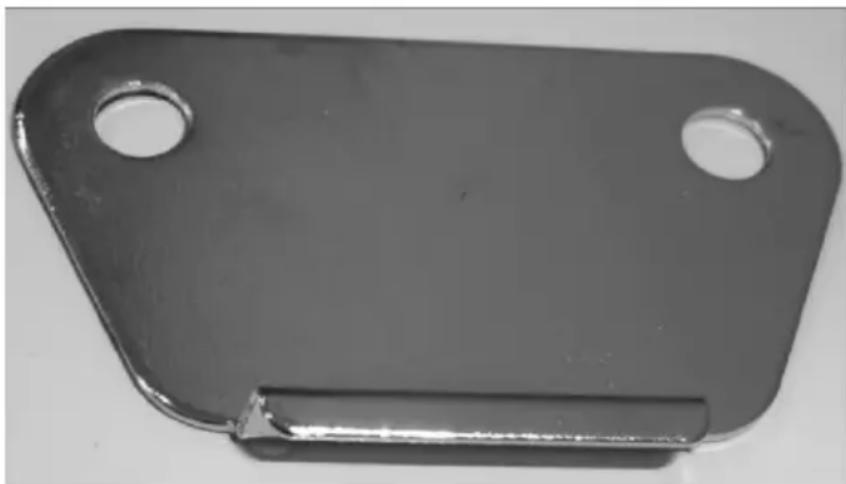
NOTE: Each kit comes with 4 new "striker plates" (Fig 1.6) that will be applied on the outside of the lid. Use your factory lids as a reference for how and where these will go.
natural_image
Metal bracket with two circular holes and a notch, shown against a plain background (no text or symbols)Figure 1.6
- Clean the area of the lid where the striker plates will be applied with isopropyl alcohol.
- Once the alcohol has fully evaporated, "stick" the plates in place.
NOTE: Let the striker plate's adhesive "set" for a minimum of 8 hours at room temperature or higher with no pressure on them. You can close the lids, but don't "latch" them closed or leave them off the bike.
Section 4 - Mounting The Speakers
Locate the black "gummy" material supplied in the kit and use it to seal the hole shown in Fig 1.5 by the white rectangle. The 4 white circles in Fig 1.5 shows "locators" built into the lid to fit the KENWOOD XM69R speakers when used. Use the supplied 6 x 9 gasket (which is approximately 3/8" (9mm) thick) as a "shim" between the speakers and the lid. Locate the bag that came with your kit that has 8 Phillips head screws and use those (4 per lid) to secure your speaker to the lid. USE HAND TOOLS FOR THIS.
Section 5 - Routing The Wires In The Saddlebag
NOTE: Included in the kit are adhesive "pads" that when attached, have a provision to secure the wires in place using the supplied zip-ties. Half of the supplied zip-ties and half the supplied pads are for one saddlebag, while the other half are for the other saddlebag.
We suggest performing a "ghost run" of placing the wires before applying any adhesives.
-
Locate the long main lid harness and unplug the two shorter extensions that come off one end. These extension wires are labeled "clutch side" and "brake side". Attach these wires to the appropriate 6 x 9 speaker, noting they will only go on one way. If the speakers you are using have different size spade terminals, you may cut off and attach your own terminals to the wires, noting that the wire with the smaller terminal is the positive wire.
-
For the ghost run, have the wire from your 6 x 9 go straight to the bag (just in front of the new tether) and "fold" the wire so it will naturally want to go straight down. Leave a little slack between the lid and bag to give a little "wiggle room" for when the lid opens and closes. Have the wire go straight down to the bottom of the bag and do another fold so the wire wants to point to the outside back of the saddlebag.
-
Next, do another fold to point the wire to the inside back of the saddle bag and then one more fold to point the wire forward along the bottom of the bag.
-
Directly below the point where you drilled the hole for the grommet, do another fold so the wire goes straight up to the hole. When done correctly, the black 2-pin plug can go through the grommet hole and hang out approximately 4" (10cm).
NOTE: Once you are satisfied that the wires are "ghost" ran as instructed, you need to plan where the adhesive pads will go so that the supplied zip ties will secure the wires inside the bag.
- Before applying the pads you need to clean the plastic well using a mild cleaner such as 99% Isopropyl alcohol, but nothing aggressive like Acetone, as Acetone will destroy the lid. With the pads in place, secure the wires in place using supplied zip ties.
Section 6 - Routing The Speaker Wire Harness
NOTE: The supplied long harness with 4 wires has two 2-pin plugs on one end, and a single 4-pin plug on the other. In all cases, the end with the 4-pin plug will go nearest the amplifier you're using which typically will be your fairing.
For FLH (Batwing) Models, the harness will pass under the inner fairing where the main wire harness passes through on the brake side of the bike.
For FLTR (Road Glide) Models, the harness will pass through the inner fairing where the factory wires pass.
- Loosen the tank console and run the wires up and over the gas tank, but under the tank console. There is a provision on the front of the tank console for wires to pass
Note: You “can” lift the tank if you want but it is not required. Once past the battery, the harness will continue towards the back of the bike along the frame, and when correctly installed, the two 2-pin plugs will be beside the back seat on the brake side of the bike.
- Secure the harness to the bike's factory harness using zip ties, plug the brake side lid in, and then run the clutch side under the seat and plug it in.
Section 7 - Wiring The Lids To The Amplifier
NOTE: The 4-pin connector will plug into the KENWOOD XM160-2-98 amplifier. If you're using another brand of amplifier, you will see that the wires near the 4-pin plug are labeled. Simply cut the plug off and wire the lids to your amp using the labels to identify each wire.
Important Notes
©2023 JVCKENWOOD Corporation. All Rights Reserved. KENWOOD® and eXcelon® are registered trademarks of JVCKENWOOD Corporation. Harley-Davidson®, Electra Glide®, Road Glide®, Street Glide®, Ultra Classic®, Tri Glide®, CVO™, Screamin Eagle® and Tour-Pak® are trademarks or registered trademarks of Harley-Davidson, Inc. and/or its affiliates and if used or implied are for reference only. There is no affiliation between Harley-Davidson, Inc. and/or its affiliates and JVCKENWOOD Corporation and/or its affiliates. All other trademarks are the property of their respective owners. Specifications subject to change without notice.
For updated information (the latest Instruction Manual, etc.), please visit the following website:
https://manual.kenwood.com/en_contents/search/


- Contents
- Installation procedure
- Section 2 - Disassembling The Factory Lid
- Section 2 - Disassembling The Factory Lid - Cont.
- Section 3 - Preparing The New Lid
- Section 4 - Mounting The Speakers
- Section 5 - Routing The Wires In The Saddlebag
- Section 6 - Routing The Speaker Wire Harness
- Section 7 - Wiring The Lids To The Amplifier
- Important Notes
Brand : KENWOOD
Model : Excelon CA-LID98
Category : Motorcycle