SDA-1671R - Mp3 player MAJESTIC - Free user manual and instructions
Find the device manual for free SDA-1671R MAJESTIC in PDF.

| Product Type | MP3 Player |
| Brand | Majestic |
| Model | SDA-1671R |
| Dimensions (approx.) | 90 x 40 x 10 mm |
| Weight | 50 g |
| Power Supply | Rechargeable lithium-ion battery (300 mAh), USB charging |
| Battery Life | Up to 20 hours of audio playback |
| Storage Capacity | Internal memory / MicroSD card slot |
| Audio Formats Supported | MP3, WMA, WAV |
| Connectivity | USB 2.0, 3.5mm headphone jack |
| Display | 1.44-inch color LCD |
| Main Functions | Music playback, FM radio, voice recording, folder navigation |
| Audio Output | 3.5 mm stereo (earphones included) |
| Charging Time | Approximately 2 hours |
| Package Contents | MP3 player, earphones, USB cable, user manual |
| Maintenance and Cleaning | Wipe with a soft dry cloth; avoid liquids and abrasive cleaners |
| Safety Precautions | Do not expose to extreme heat, moisture, or drop; use only certified charger |
| Spare Parts and Repairability | Battery and earphones replaceable; contact authorized service center for repairs |
| General Information | Portable design, supports multiple languages, firmware upgradeable via USB |
Frequently Asked Questions - SDA-1671R MAJESTIC
User questions about SDA-1671R MAJESTIC
0 question about this device. Answer the ones you know or ask your own.
Ask a new question about this device
Download the instructions for your Mp3 player in PDF format for free! Find your manual SDA-1671R - MAJESTIC and take your electronic device back in hand. On this page are published all the documents necessary for the use of your device. SDA-1671R by MAJESTIC.
USER MANUAL SDA-1671R MAJESTIC
text_image
Scanned screenshot of a legacy software interface with Chinese text, showing configuration options and buttons.text_image
Image Size Size: 2.0 mm Color: Green and Yellow Name: Exposure: Exposure: Exposure:text_image
00:00:18 1:06/00/01 00:18natural_image
Three-panel image showing a pink bird, a branch with green leaves, and a fruit on a blue background (no text or symbols)text_image
Language Power off Replay mode Firmware versio Battery chargenatural_image
Symbol of a trash bin with crossed x and y lines, no text or numbers presentDIGITAL MULTIMEDIA, VOICE RECORDING AND LCD DISPLAY
Instruction manual
CE
Description
Here below you will find a product descriptio
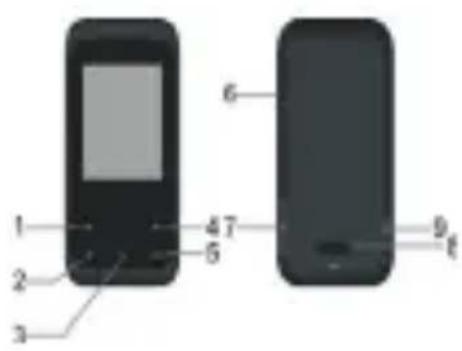
text_image
1 2 3 4 5 6 7 8 9- Previous [◀] / Backward [◀]
2.Menu
3.Play [▶] / Pause [■] - Next [ ] / Forward [ ]
5.Volume
6.MICRO SD Card Slot - USB Connector
8.Power ON/OFF
9.Earphone Connector
1. Display
Here below you will find a display descriptio
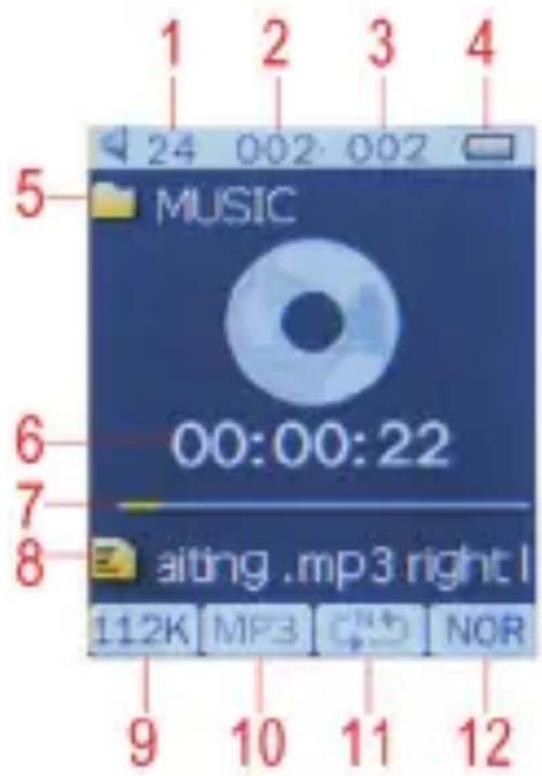
text_image
1 2 3 4 5 MUSIC 00:00:22 6 7 8 aiting .mp3 right l 112K MP3 NOR 9 10 11 121.Volume
2.Current Song Location
3.Total Number of Songs
4.Battery Life
5.Local folder name
6. Elapsed Time
7.Play Progress
8.Song Name
9.Play rate
10.File Format
11.Repeat Mode
12.EQ Mode
2.Use
2.1 Power ON/OFF
The MP3 player has built-in a rechargeable battery. At the first use we suggest to recharge the battery for a long period. To recharge the battery please connect the MP3 player to USB computer port.
Powering On:.
- Turn on On/Off button to On position
Powering Off:
-
Hold the Play [▶] / Pause [■] key until the power-off animation begins
-
Then, turn the On/Off button to Off position.
2.2 Recharge the Player
The player can be recharged by the priveded USB cable by connecting to the PC. .You should first turn on you PC, and then connect the player to the PC through the USB cable. The player should be fully charged in 3 to 4 hours.
3.Main Menu
After powering on the MP3 player, you can see the main menu with 9 submenus (optional), which allow you to select different functions and options.
By using the [ ] or [ ] buttons, you can select the desire option, and then press Menu button to confirm the selection.
To access at the main menu while you are inside any of these submenus, press and hold MENU [M] switch for a few seconds. (Short pressing the MENU [M] switch usually opens the submenu option of each submenus)
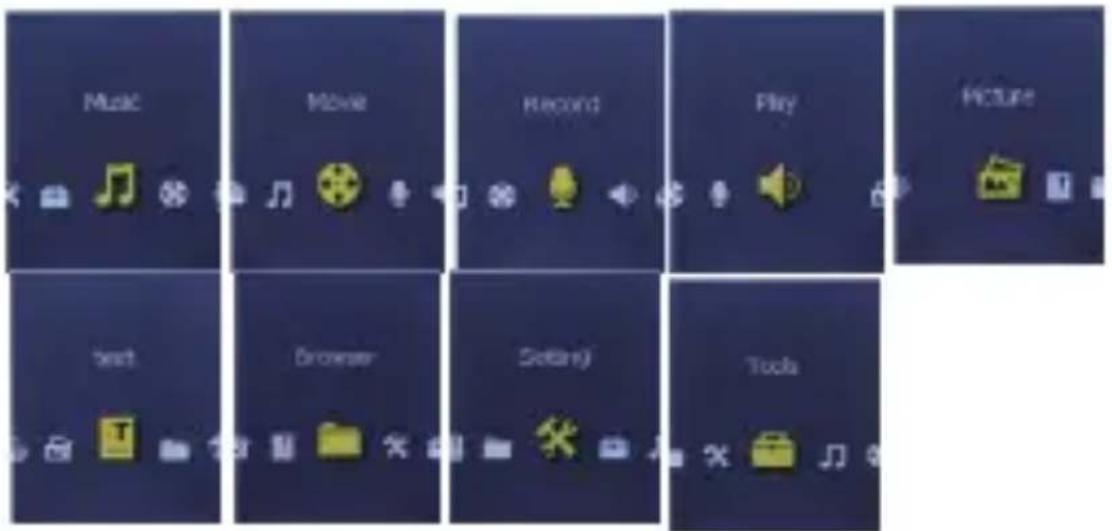
text_image
Music Movie Record Play Picture Text Browser Settings ToolsThe available options are:
| Music: Select this option to play song. | |
| Movie: Select this option to play AMV video. | |
| Record: | Select this option to record voice messages by the microphone inside. |
| Play: | Select this option to play recorded voice message. |
| E-Book: Select this option to read text. | |
| Picture: | Select this option to browse and see photos. |
| BROWSER: | Select this option to read the memory file |
| Setting: | Select this option to access at system setup. |
| Tools: | Select this option to upgrade the firmware (using the tool supplied with installation CD) or to check the memory status. |
3.1 Music Mode
The music player option allows playing songs. To activate this option please follow here below instruction:
-
Power ON the MP3 Player, the screen will display the main menu
-
By using [◀] or [▶] buttons, select MUSIC PLAY option then press [MENU] button.
-
Press PLAY [MENU] button to start to play the first song available

text_image
24 302:002 MUSIC 00:00:22 string.mp3 right 1.2K MP3 125 NOR3.1.1 Key Function at Music Mode
During the song play it is possible to activate the following controls.
| PLAY [▶II]: | Press the play [▶II] to start to play a song. Press the play button again to pause the song. To restart to play the song press play button again.Hold the play button for longer time will eventually turn off the player |
| REW & FFWD[◀◀▶▶] | Press [◀◀] or [◀◀] to select the previous or the next song.Press and Hold the [◀◀] or [◀◀] buttons to rewind or fast forward the song. |
| Volume(VOL+ and VOL-): | First Press [VOL] button,Then press[◀◀] button to increase the volume and press [◀◀]button to decrease the volume. |
3.1.2 Music Submenu
By short pressing the MENU [M] button to display the
submenus. Press [] or [] to choose an option, and then press MENU key to confirm your choice. Pressing Play button it is possible to go back to previous selection. Use the same technique to navigate inside each of the submenus.
Now playing: currently Played music
All Song: Under this directory, you can see all songs
Album: List all songs of this album
Artists: List all songs of this artist
Genre: List all songs of this genre
Card folder: List all folders of TF card
Create Playlist: analyzes the tracks and it divides them according to ID3
Setting: can set up playback mode ( Normal, Repeat one, Repeat all, Shuffle, Intro), Equalizer (Natural, Rock, POP, Classic, Soft, Jazz, DBB), Replay A-B mode.
3.1.3A-B Repeat Function
The player can loop-playing a specified music interval of a song. While Playing Music, Press M button to select replay mode ,then press the MENU button .set repeat start point A, and then press [ ]button to set repeat end point B. The player will then loop-play the content between point A and B.
3.1.4 Lyric Display
The Player supports Lyrics Display, in which the lyrics would be shown synchronizing with the actually lyrics of the song. The file format should be “.lrc”, and the fil name should be exactly the same with the song’s file name and place within the same folder with the song. To
activate this option, please follow here below instruction:
- While playing song, press and hold MENU [M] to activate lyrics display
- Short press MENU [M] button again to de-activate the lyrics display and return to music play menu.
3.2AMV Video Mode
The MOVIE allows to play movies in AMV Format. To activate this option please follow here below
instruction:
- Power ON the MP3 Player, the screen will display the main menu.
- By using [✗] or [✗] buttons, select AMV MODE option then press MENU button.
- Press PLAY [▶ II ] button to start to play the first movie available
| Note | the unit can only play video in AMV format, converted through the supplied software in the installation CD. |
natural_image
Person in a lab coat and cap, standing near a wall with a blue object (no visible text or symbols)3.2.1 Key Function at Movie Mode
During the Video play it is possible to activate the following controls.
| PLAY [▶■]: | Press the PLAY [▶■] to start to play a movie. Press the play button again to pause the movie. Hold the play button for longer time will eventually turn off the player |
| REW & FFWD[◀◀ ▶] | Press [◀◀] or [◀◀] to select the previous or the next movie. Press and Hold the [◀◀] or [◀◀] buttons to rewind or fast forward the movie. |
| Volume(VOL+ and VOL-): | First Press [VOL] button, Then press[◀◀] button to increase the volume and press [◀◀] button to decrease the volume. |
3.2.2AMV Submenu
By short pressing the MENU [M] button, you can find the following AMV submenus:
Now playing:
Now playing video
Card folder:
List all folders of TF card
Repeat:
Normal, Repeat one, Folder, Repeat folder, Repeat all, Random, Intro
Delete File:
Delete specific video you want.
Delete All:
Delete all videos using this option
How to transfer the movie file to AMV
This program allows you to convert movie files into AMV files, using the tool supplied on CD.
AVI format (.avi)
Windows Media format (.asf, .wmv & .wma)
MPEG 1 format (.mpg, mpeg &.dat)
Real player format (.rm)
Quicktime format (.mov)
MPEG 2 format (.vob)
NOTE: to convert some formats it is necessary to have installed the related codec (for example Quicktime © for “.mov” files or DivX Codec© for some “.avi” file
Installation: Put the assorted CD driver onto your computer CD disk driver, open the folder “Media Player Utilities 4.45”, select it to run the installation program.
After installation finish, you could find the program named MP3 Player Utilities 4.45 in your computer, select the "AMV&AVI Video Converter" to start your converting.
- Run “AMV&AVI Video Converter”, click 🤒 to choose the folder where to save the AMV files, then click 🤒 to select the position where the original files are
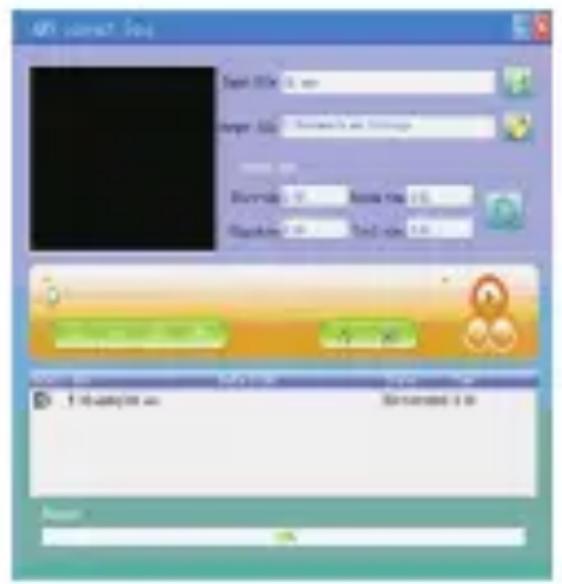
text_image
API CURRENT FOR Split Point: 0.00 Banner Size: 10000x x 5000x Dividend: 0% Dividend: 0% Dividend: 0%- Select the file to be converted, then click , the icon will be highlighted into and a dialog box will show. Choosing the setting of the AMV ◆le you want to obtain, then click OK to confirm.

text_image
Date ✓ Buy Place 2:00 Date: 19:45 Date: 19:45 ✓ Load to allow or enough time Date Use Time Use time to save time ✓ Load Time to save time to change Options ✓ Save ✓ Add Time ✓ Delete Time- Click to start converting.
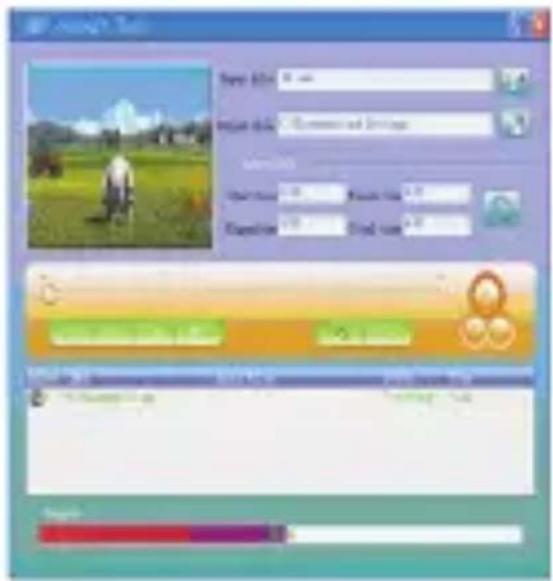
text_image
A#G#G#T Travel: 0.00 Distance: 0.00 (km) or distance Color: 0.00 Under: 100% White: 2.5 Exposure: 10% Red: 4.0- After convert, the AMV file will be played automatically.
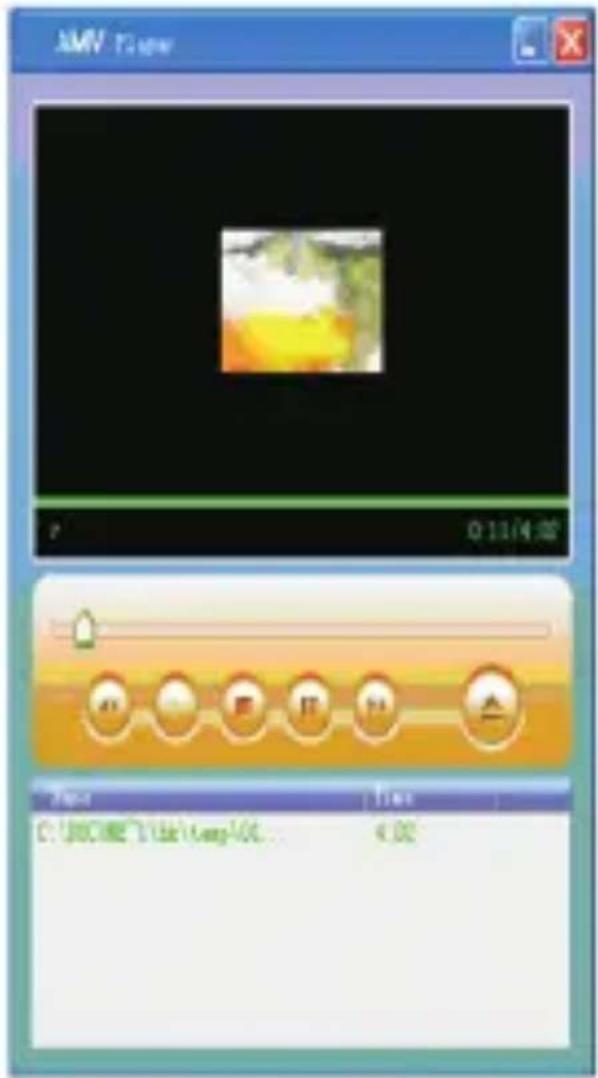
text_image
AMV 0:11/4:25 Video C:\DOC\Media\Comp\App 6:253.3Record (Voice messages recorder)
This option allows to record voice messages by using the microphone inside. To record voice message, please follow here below instruction:
-
Power ON the MP3 Player, the screen will display the main menu.
-
By using [◀] or [▶] buttons, select RECORD option then press MENU button.
-
Press PLAY [▶ II] button to start to recording.
-
You can listen to your wav file under the VOICE submenu.
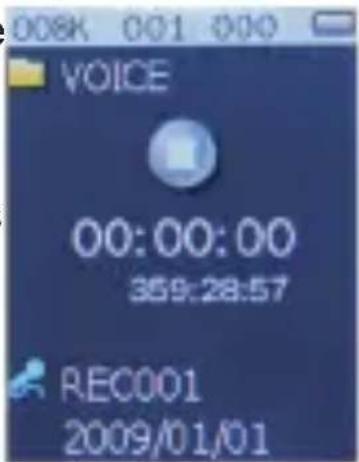
text_image
00:00:00 359:28:57 REC001 2009/01/01During recording, Press the PLAY [▶] to start recording. Press the play button again to pause recording. Hold the MENU button for longer time will eventually stop recording.
By short pressing the MENU [M] button, you can find the CARD FOLDER and Record Format settings.
-
Under the Micro SD submenu you can choose the folder you want to play
-
Under the Record Format submenu, you can choose the bitrate between 32/64/128/256Kb. Low bitrate (for ex.32Kb) will be low recording quality and occupy small memory, high bitrate (for ex.256Kb) will be high recording quality and occupy more memory.
3.4Voice (Voice Messages Player)
The voice option allows to play the voice messages
recorded by the MP3 Player. To activate this option, please follow here below instruction:
-
Power ON the MP3 Player, the screen will display the main menu.
-
By using [◀] or [◀] buttons, select VOICE option then press [MENU] button.
-
Press PLAY [▶ II] button to start to play the first recording available
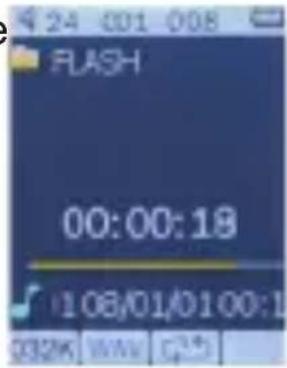
text_image
24 001 008 FLASH 00:00:18 108/01/01 00:1 032K WAV3.4.1 Key Function at VOICE Mode
During the recording play it is possible to activate the following controls.
| PLAY [▶] | Press the PLAY [▶] to start to play a recording. Press the play button again to pause the recording. |
| REW & FFWD[◀◀▶] | Press [◀◀] or [◀◀] to select the previous or the next recording.Press and Hold the [◀◀] or [◀◀] buttons to rewind or fast forward the recording. |
| Volume (VOL+ and VOL-): | First Press [VOL] button, Then press[◀◀] button to increase the volume and press [◀◀]button to decrease the volume. |
3.4.2VOICE Submenu
By short pressing the MENU [M] button, you can find the following music submenus. Press [◀] and [◀] to choose, and then press Menu key to confirm each submenus. Use the same technique to navigate inside each of the submenus.
| Status | Submenu Options |
| While Music is paused | Card Folder |
| Playback Setting | |
| Delete File | |
| Delete All |
| Status | Submenu Options |
| While music is on | Now playing |
| Card Folder | |
| Playback Setting |
3.5TEXT
The TEXT option allows reading text file in TXT format. To activate this option please follow here below instruction:
1: Power ON the MP3 Player, the screen will display the main menu.
2: By using the [ ] or [ ] buttons select TEXT, and then press [MENU] button to confirm
3: Use [ *] or [ *] buttons to choose the file
4: Press PLAY [▶ II ] button to start reading the fil
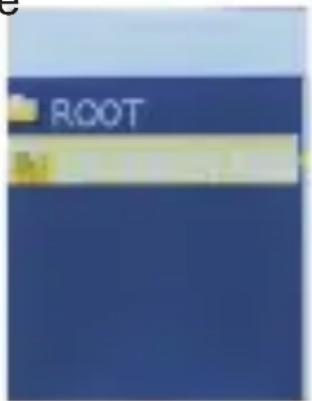
text_image
ROOT3.6.1E-Book Submenu
By short pressing the MENU [M] button, you can find the following music submenus.
| Status Submenu Options | |
| While TEXT is paused | Card Folder |
| Play Set | |
| Delete File | |
| Delete All | |
- Card Folder:
Under this directory, you can choose the folder you want to play
- Play Set:
You can choose between manual play and auto play. For auto play, you can set the playing time from 1 to 10 seconds for each page of the TEXT.
- Delete File:
Delete specific text file you want
- Delete All:
Delete all text files using this option
3.7 PICTURE
The Picture option allows browsing JPG file. To activate this option please follow here below instruction:
-
Power ON the MP3 Player, the screen will display the main menu.
-
By using the [×] or [×] buttons select Picture, and then press [MENU] button to confirm
-
Use [ *] or [ *] buttons to choose the file
-
Press PLAY [▶] button to start browsing the fil

natural_image
Four small photos of flowers and trees on a dark blue background, no text or symbols visible.3.7.1 PICTURE Submenu
- By short pressing the MENU [M] button, you can find the following picture submenus. Press [◀] or [▶] to choose, and then press [MENU] key to confirm each submenus. Press play [▶ II ] to return to the previous menu. Use the same technique to navigate inside each of the submenus.
| Status Submenu Options | |
| While Picture is paused | CARD Folder |
| Play Set | |
| Delete File | |
| Delete All | |
- Card Folder:
Under this directory, you can choose the folder you want to play
- Play Set:
You can choose between manual play and auto play. For auto play, you can set the playing time from 1 to 10 seconds for each picture.
- Delete File:
Delete specific image file you want
- Delete All:
Delete all Photos using this option.
3.8: Browser
Under the Browser menu, you can explore both the card memory, to locate all kinds of files including music, videos, recordings, photos, text files, And you can enjoy these files directly from here. To use it, please follow here below instruction:
-
Power ON the MP3 Player, the screen will display the main menu
-
By using [ ] or [ ] buttons, select BROWSER option then press [MENU] button to confirm
-
You will enter the folder menu, in which you can see all kinds of files.
-
press [MENU] button to confirm
-
Press play [▶ II] to return to the previous menu.
3.9: Setting
The SETTING option allows to access to MP3 Player setup system. To access at system setup please follow here below instruction:
- Power ON the MP3 player, button, the screen will
display the main menu. - By using the [] or [] select SYSTEM option then press [MENU] button to enter the SETTINGMENU.
- By using the [] or [] select the system setup parameter and press [MENU] button.
The parameters available in the setup system are:
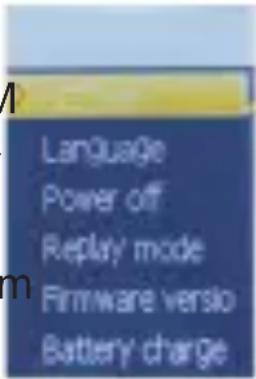
text_image
Language Power off Replay mode Firmware versio Battery charge| LCD set: | This option allows setting the inactivity time necessary before turning off automatically display. |
| Language: | This option allows setting the Language of the User Interface. |
| Power Off: | This option allows setting the off time and sleep time. |
| Firmware Ver: | This option allows checking the firmware version. |
3.10:TOOLS:
Under the TOOLS menu, you can see below setting:
| Firmware Upg: | This option allows to get ready the unit to firmware upgrade. |
| Memory Info: | This option allows checking the memory usage. |
Note: when available upgrade firmware will be available on our website www.newmajestic.com
Specification
| Size 4.3 (L) x 0.8 | (D) x 8.3 (H) cm | |
| Weight 34g | ||
| Screen | Full color display, 1.8 inch screen, 262K color | |
| Computer connection | Full-speed USB 2.0 (FS) Flash disk | |
| Memory card 2GB, 4GB, 8GB.16GB | ||
| Supply power The longest playing time is 5 hours | ||
| REC Recording format WAV | ||
| MP3, WMA | Max output power earphones | (L) 10mW+ (R) 10mW (32Ohm) |
| MP3 bit rate | 8K bps - 320K bps | |
| WMA bit rate | 5K bps - 384K bps | |
| Frequency corresponding | 20Hz-20KHz | |
| SNR 85dB | ||
| Lack fidelity <+_0.05 | ||
| Music format MP3, WMA | ||
| Temperature -5 to | 40 degree centigrade | |
| Multi languages | English, Italian | |
| Operation system | Windows XP/Vista/7/8 | |
Notice: You will not informed if the production design and the specification.