
SL-PD887 - Hi-Fi System PANASONIC - Free user manual and instructions
Find the device manual for free SL-PD887 PANASONIC in PDF.


| Product Type | Compact Disc Changer / Hi-Fi System |
| Brand | Panasonic (Technics) |
| Model | SL-PD887 (also SL-PD687) |
| Disc Capacity | 5 discs |
| Play Modes | Sequential, Program, Random (1 Disc/Full), Spiral, Delete, Repeat, ID Scan, Edit Guide |
| Frequency Response | 2 – 20,000 Hz (±1 dB) |
| Output Voltage | 2 V (at 0 dB) |
| Dynamic Range | 92 dB |
| Signal-to-Noise Ratio | 100 dB |
| Total Harmonic Distortion | 0.007% (1 kHz, 0 dB) |
| D/A Converter | MASH (1 bit) |
| Output Impedance | Approx. 1 kΩ |
| Load Impedance | More than 10 kΩ |
| Power Consumption | 12 W (UK/Europe/Australia/NZ), 14 W (others) |
| Power Supply | AC 50/60 Hz, 110–240 V (adjustable) |
| Dimensions (W×H×D) | 430 × 125 × 370 mm |
| Weight | 4.6 kg |
| Remote Control | Supplied (SL-PD887 only) |
| Laser Class | Class 1 |
| Included Accessories | AC power cord, stereo connection cable, remote control, batteries (SL-PD887 only) |
Frequently Asked Questions - SL-PD887 PANASONIC
User questions about SL-PD887 PANASONIC
0 question about this device. Answer the ones you know or ask your own.
Ask a new question about this device
Download the instructions for your Hi-Fi System in PDF format for free! Find your manual SL-PD887 - PANASONIC and take your electronic device back in hand. On this page are published all the documents necessary for the use of your device. SL-PD887 by PANASONIC.
USER MANUAL SL-PD887 PANASONIC
Compact Disc Changer
SL-PD887/SL-PD687
Operating Instructions

natural_image
Black-and-white photo of a black electronic device with a vertical control panel beside it (no visible text or symbols)The photograph shows the SL-PD887 model.

Note:
The "EB" indication shown on the packing case indicates United Kingdom.
Before connecting, operating or adjusting this product, please read these instructions completely.
These operating instructions are applicable to the SL-PD887 and SL-PD687 models.
ating Instructions, however, fundamentally explain
E EB GC GN
RQT2773-B
Dear Customer
Thank you for purchasing this Technics product. For optimum performance and safety, please read these instructions carefully.
Contents
| Caution for AC mains lead(For United Kingdom) | 3 |
| Suggestions for safety | 4 |
| Front panel controls | 5 |
| Connections | 6 |
| Basic operations | 7 |
| Program play | 9 |
| Random play | 10 |
| Delete play | 11 |
| Spiral play | 12 |
| ID scan function SL PD887 only | 13 |
| Search function | 13 |
| Skip function | 14 |
| Repeat function | 15 |
| Time mode selection | 15 |
| Edit guide function SL PD887 only | 16 |
| Concerning compact discs | 17 |
| Cautions concerning the moving of this unit | 18 |
| Technical specifications | 18 |
| Troubleshooting guide | 19 |
CAUTION!
THIS PRODUCT UTILIZES A LASER. USE OF CONTROLS OR ADJUSTMENTS OR PERFORMANCE OF PROCEDURES OTHER THAN THOSE SPECIFIED HEREIN MAY RESULT IN HAZARDOUS RADIATION EXPOSURE. DO NOT OPEN COVERS AND DO NOT REPAIR YOURSELF. REFER SERVICING TO QUALIFIED PERSONNEL.
DANSK
BEMAERK!
I DETTE APPARAT ANVENDES EN LASER. BRUG AF BETJENINGSKNAPPER ELLER REGULE- RINGER ELLER FREMGANGSMÅDER UDOVER DE I DENNE BETJENINGSVEJLEDNINGANGIVNE, KANMED- Føre FARE FOR BESTråling. ABN IKKE KABI- NETTET OG FORSøG IKKE AT UDFøre REPARA- TIONER SELV. REPARATIONER MÅ KUN FORETAGES AF KVALIFICEREDE TEKNIKERE.
SUOMI
VAROITUS!
LAITTEEN KÄYTTÄMINEN MUULLA KUIN TÄSSÄ KÄYTTÖOHJEESSA MAINITULLA TAVALLA SAATTAA ALTISTAA KÄYTTÄJÄN TURVALLISUUSLUOKAN 1 YLITTÄVALLE NÄKYMÄTTÖMÄLLE LASERSÄTEILYLLE.
NORSK
ADVARSEL!
DETTE PRODUKTET ANVENDER EN LASER. BETJENING AV KONTROLLER, JUSTERINGER ELLER ANDRE INNGREP ENN DE SOM ER BESKREVENT I DENNE BRUKSANVISNING, KAN Føre TIL FARLIG BESTRÅLING. DEKSLER MÅ IKKE ÅPNES, OG FORSOK ALDRI Å REPARERE APPARATET PÅ EGENHÅND. ALT SERVICE OG REPARASJONSARBEID MÅ UTFÖRES AV KVALIFISERT PERSONELL.
(For areas except United Kingdom, Europe, Australia and N.Z.)
CAUTION:
The AC voltage is different according to the area. Be sure to set the proper voltage in your area before use. (For details, please refer to the page 6.)
| DANGER | MAYABLE LASER RADIATION WHEN OPEN AVOID DIRECT EXPOSURE TO BE AM |
| ADVERSEL | LEVERE LASERING ARE UP BANNE WAT SODRICH/ASPERING FOR THE EQUITY OF CABBAGE, ENGLISH AS PER LATING |
| VAPD | AVANTNESS IN SOCIAL SLICE WITH NECESS LET ALTA MARYAN TINNAT ASSEMBLY O.E. ALA GATE SETTEGEN |
| VARNING | OXYLIC LASERING ARE UP BANNE WAT THE EQUITY OF SPINION AND STRONG |
| ADVERSEL | LEVERE LASERING ARE UP BANNE WAT THE EQUITY OF STRONG |
| VORSIGHT | SODRICH/ASPERING ARE UP BANNE WAT THE EQUITY OF STRONG |
(Inside of product)
(Indersden at apparatet)
(Tuoneen sisäta)
(Appenitene inside]
(Produkents ins-de)
(Im Inneren des Garitas)

flowchart
graph TD
    A["CLASS 1<br>LASER PRODUCT"] --> B["LUOKAN 1 LASERLAITE<br>KLASS 1 LASER APPARAT"]
    B --> C["(Back of product)<br>(Komponent's bagside)<br>(Produkt's bagside)"]
Caption for AC mains lead
(For United Kingdom)
("EB" area code model only)
For your safety, please read the following text carefully.
This appliance is supplied with a moulded three pin mains plug for your safety and convenience.
A 5-ampere fuse is fitted in this plug.
Should the fuse need to be replaced please ensure that the replacement fuse has a rating of 5-ampere and that it is approved by ASTA or BSI to BS1362.
Check for the ASTA mark 📋 or the BSI mark ♥ on the body of the fuse.
If the plug contains a removable fuse cover you must ensure that it is refitted when the fuse is replaced.
If you lose the fuse cover the plug must not be used until a replacement cover is obtained.
A replacement fuse cover can be purchased from your local dealer.
CAUTION!
IF THE FITTED MOULDED PLUG IS UNSUITABLE FOR THE SOCKET OUTLET IN YOUR HOME THEN THE FUSE SHOULD BE REMOVED AND THE PLUG CUT OFF AND DISPOSED OF SAFELY.
THERE IS A DANGER OF SEVERE ELECTRICAL SHOCK IF THE CUT OFF PLUG IS INSERTED INTO ANY 13-AMPERE SOCKET.
If a new plug is to be fitted please observe the wiring code as shown below.
If in any doubt please consult a qualified electrician.
IMPORTANT
The wires in this mains lead are coloured in accordance with the following code:
-Blue: Neutral, Brown: Live.
As these colours may not correspond with the coloured markings identifying the terminals in your plug, proceed as follows:
The wire which is coloured Blue must be connected to the terminal which is marked with the letter N or coloured Black or Blue.
The wire which is coloured Brown must be connected to the terminal which is marked with the letter L or coloured Brown or Red.
WARNING: DO NOT CONNECT EITHER WIRE TO THE EARTH TERMINAL WHICH IS MARKED WITH THE LETTER E, BY THE EARTH SYMBOL ⊥ OR COLOURED GREEN OR GREEN/YELLOW.
THIS PLUG IS NOT WATERPROOF—KEEP DRY.
Before use
Remove the connector cover as follows.

How to replace the fuse
- Open the fuse cover with a screwdriver.

- Replace the fuse and close or attach the fuse cover.

Suggestions for safety
Placement
Avoid placing the unit in areas of:
- direct sunlight
• high temperature
- high humidity
- excessive vibration
- uneven surfaces. (Place the unit on a flat level surface).
Such conditions might damage the cabinet and/or other component parts and thereby shorten the unit's service life.
Ventilation
Place the unit in a well ventilated position at least 10 cms away from wall surfaces etc.
Stacking
Never place heavy items on top of the unit or the power cord.
Voltage
- It is very dangerous to use an AC power source of high voltage such as for an air conditioner.
A fire might be caused by such a connection.
• A DC power source can not be used.
Be sure to check the power source carefully, especially on a ship or other place where DC is used.
Power cord protection
- Avoid cuts, scratches or poor connection of the AC mains cord, as this may result in fire or electric shock hazard.
Excessive bending, pulling or slicing of the cord should also be avoided. - Do not pull on the cord when you are disconnecting the power, as this could cause an electric shock. Grasp the plug firmly when you disconnect the power supply.
- Never touch the plug with wet hands or a serious electric shock could result.
Foreign materials
- Ensure that no foreign objects, such as needles, coins, screwdrivers etc, accidentally fall into the unit or through the ventilation holes.
Otherwise, a serious electric shock or malfunction could occur. - Be extremely careful about spilling water or liquid on/into the unit, as a fire or electric shock could occur.
(Disconnect the power plug and contact your dealer immediately if this occurs.) - Avoid spraying insecticides onto the unit as they contain flammable gases which can be ignited.
- In secticides, alcohol, paint thinner and similar chemicals should never be used to clean the unit as they can cause flaking or cloudiness to the cabinet finish.
Maintenance
Clean the cabinet, panel and controls with a soft cloth lightly moistened with mild detergent solution.
Do not use any type of abrasive pad, scouring powder or solvent such as alcohol or benzine.
Service
- Never attempt to repair, disassemble or reconstruct the unit if there seems to be a problem.
A serious electric shock could result if you ignore this precautionary measure. - If a problem occurs during operation (the sound is interrupted, indicators fail to illuminate, smoke is detected, etc) contact your dealer or Authorised Service Center immediately.
- Disconnect the power supply if the unit will not be used for a long time. Otherwise the operation life could be shortened.
Other notes
Avoid places such as the following:
- Near any equipment or device that generates strong magnetism.
- On any heat-generating equipment or device, or in any place where the temperature is high (35°C or higher).
• Extremely cold place (5°C or below). - Near a tuner or TV (it may cause noise in the broadcast, or disturbance of the TV picture).
When carrying or storing the unit, handle it with care so it is not subjected to any strong bumps.
Always remove the discs before storing the unit for any period of time.
To avoid problems due to vibration.
- Do not place a book or similar object under this unit.
- Do not route the connection cables (of this or other unit)
across the operation panel, across the top, or under the unit.
Moisture may form on the lens in the following cases...
- Immediately after a heater has been turned on
• In a steamy or very humid room - When the unit is suddenly moved from a cold environment to a warm one.
If moisture forms inside this unit, it may not work properly. In this case, turn on the power and wait about one hour for the moisture to evaporate.

| No. | Name | Ref. page |
| 1 | Power “STANDBY /ON” switch(POWER, STANDBY /ON)Press to switch the unit from on to standby mode or vice versa. In standby mode, the unit is still consuming a small amount of power. | 7 |
| 2 | ID scan button (ID SCAN)SL PD887 only | 13 |
| 3 | Edit guide button (EDIT GUIDE)SL PD887 only | 16 |
| 4 | “STANDBY” Indicator (STANDBY)When the unit is connected to the AC mains supply, this indicator lights up in standby mode and goes out when the unit is turned on. | — |
| 5 | Remote control signal sensor (SENSOR)For SL PD887The word “SENSOR” does not appear on the panel, but if you have an amplifier (or receiver) with remote control transmitter which is manufactured by Technics, it is possible to operate the main unit using this remote control transmitter.(Some remote control transmitters cannot be used.) | — |
| 6 | Display | — |
| 7 | Disc buttons (DISC 1-5) | 7 |
| 8 | Disc skip button (DISC SKIP) | 7,14 |
| 9 | Program mode button(PROGRAM MODE) | 9,11 |
| No. | Name | Ref. page |
| 10 | Time mode button (TIME MODE) | 15 |
| 11 | Spiral button (SPIRAL) | 12 |
| 12 | Random mode button (RANDOM MODE) | 10 |
| 13 | Repeat button (REPEAT) | 15 |
| 14 | Numeric buttons (1-10, 0, >10) | 8 |
| 15 | Loading drawer | 7 |
| 16 | Stop button (■) | 8 |
| 17 | Pause button (■) | 8 |
| 18 | Play button (▶) | 8 |
| 19 | Search buttons (◀◀ SEARCH ▶▶) | 13 |
| 20 | Skip buttons (I◀◀ SKIP ▶▶) | 14 |
| 21 | Loading drawer open/close button (▲ OPEN/CLOSE) | 7 |
| 22 | Disc trays (1-5) | 7 |
Connections
Please check and identify the supplied accessories

AC power supply cord
(For United Kingdom)
(For Australia and N.Z.)
(For others)

Stereo connection
cable....1

Power plug adaptor ..... 1
(Not supplied for United
Kingdom, Europe
Australia and N.Z.)
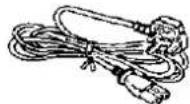
(VJA0733 or
RJA0042-P)
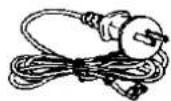
(RJA0036-K)

(RJA0019-2K)
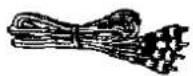
(SJP2249-3)

(SJP5213-2)

Remote control transmitter.....1
SL-PD887 only
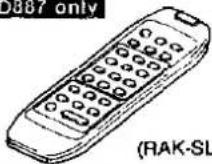

Batteries
SLPD887 only

(UM-4, "AAA", R03)
SL PD887 only
For instructions on preparation and operation of the remote control transmitter, refer to the separate booklet titled "How to use the remote control transmitter".
Before connecting the changer to your audio system, make sure that the power of the changer and all other system components is turned off.
- Although the figure below shows the AC power supply cord being connected to a household AC outlet, if the amplifier (or receiver) is equipped with an AC outlet, connect the cord to that outlet.
• The configuration of the AC outlet differs according to area.
Stereo connection cable
White (L)
Red (R)


(For United Kingdom only)
BE SURE TO READ THE CAUTION FOR AC POWER SUPPLY CORD ON PAGE 3 BEFORE THE FOLLOWING CONNECT-TIONS.
(For areas except United Kingdom, Europe, Australia and N.Z.)
Set the voltage selector to the voltage setting for the area in which the unit will be used.
[Use a minus (-) screwdriver]
Aldie
If the power supply in your area is 117 V or 120 V, set to the "127 V" position.
Note that this unit will be seriously damaged if this setting is not made correctly.
If the power plug will not fit your socket, use the power plug adaptor (included).

Amplifier or receiver
This unit
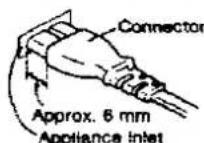
(For areas except Australia and N.Z.) insertion of Connector
Even when the connector is perfectly inserted, depending on the type of inlet used, the front part of the connector may jut out as shown in the drawing
However there is no problem using the unit.

Household AC outlet
Sequential play
All of the discs will be played, beginning from track 1 on the selected disc.

The explanation below is an example of operation in the case where all five disc trays in the changer are holding CDs.

Press POWER.
The unit will switch on.


Press OPEN/CLOSE to open the loading drawer.
Indicates that the loading drawer is open.

Numbers of the trays in which discs are loaded.

Load the disc(s) on the disc tray(s).
The discs can be loaded two at a time by pressing DISC SKIP to rotate the carousel.

Note
Do not load 8 cm and 12 cm discs on the same disc tray.
CAUTION
Do not touch the loading drawer and carousel while they are in motion, and do not attempt to rotate the carousel by hand; doing so could result in incorrect operation of the unit and/or damage to the discs.


Press OPEN/CLOSE again to close the loading drawer.
Note
Do not attempt to close the drawer by hand.
Current play position (The numeral illuminates with a red color)
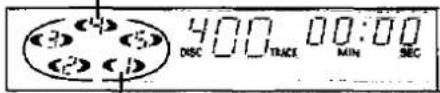
Illuminates when a disc is in the disc tray. If there is no disc in the disc tray, the indication disappears when the disc tray comes to the play position.

Press the desired disc button (1-5).
Play will begin from the selected disc. If a disc is not on the selected disc tray, the changer plays the disc at the next number.

The changer plays all the tracks on all the discs in order and stops automatically when the last track on the last disc finishes playing. The first disc will then be at the playing position.
Basic operations (continued)

To directly access a desired track

Press the numeric button(s) to select the track.
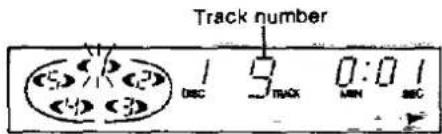
To select a track between 1 and 10:
Press the corresponding number on the numeric button.
To select a two-digit track number over 10: First press >10, and then press the numbers for the two digits.
For example; number 20:
Press >10, then 2, and then 0.
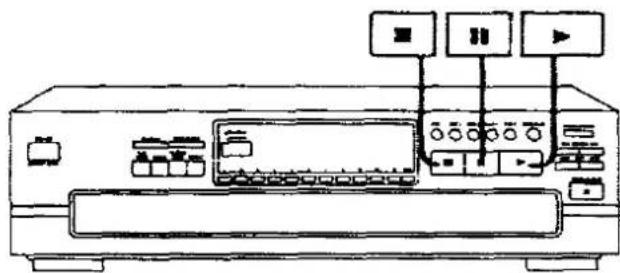
To temporarily stop play

Press II.
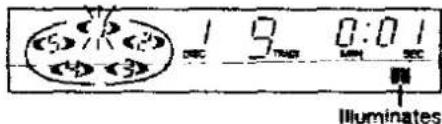
To resume play
Press ▶.
To stop play

Press ■.
The display will show the total number of tracks and the total playing time of the current disc.

To exchange discs during play
While playing a disc, it is possible to change the other discs without interrupting play.
① Press OPEN/CLOSE to open the loading drawer.
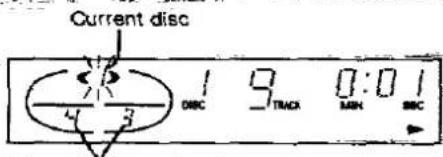
Discs which can be changed.
② Press DISC SKIP to rotate the disc trays and exchange the discs.
The carousel will move by one disc tray. Pressing again moves the carousel in the opposite direction by two disc trays.
③ Press OPEN/CLOSE to close the loading drawer.
Note
If you play a disc with the loading drawer open, discs other than the current disc cannot be played.
The total playing time displayed includes the silent sections between tracks. For this reason, it may be a few seconds longer than the playing time indicated on the disc.
To re-start play

Press ▶.
CAUTION
Do not move this changer with a compact disc inside the unit. If a disc comes off the disc tray, it might be scratched or the changer might become incapable of playing.
(Refer to "Cautions concerning the moving of this unit" on page 18.)
You can program up to 32 selections from the five discs in any order as you desire.


PROGRAM MODE

[In the stop mode]
Press PROGRAM MODE so that the "PGM" indicator illuminates.
Each time the button is pressed, the display will change in the following order:
$$ \mathrm{PGM} \rightarrow \mathrm{DEL} \rightarrow (\text { off }). $$

Illuminates

Press the desired disc button (1-5).
For example:
To select disc 3, press DISC 3.


Specified disc number
The "AL" indication shows that all the tracks on the disc are selected.
To program by means of disc numbers only, repeat the above operation. (The count will increase by one for each operation.)

Press the numeric button(s) to specify the track number. For example:
To select track number 20, press >10, then 2, and then 0.
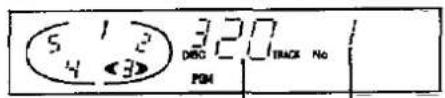
Specified track number
Programmed order

Repeat steps 2 and 3 until you have completed the desired entry.
If you enter non-existing disc(s) or track(s) soon after the loading drawer is closed or when it is open, the corresponding indicator illuminates and the entry is included in the count. In the play mode, the changer will cancel the non-existing entry.

If you attempt a 33rd selection, the “-F” (full) indication will be displayed.


Press ▶ to start play.
To enter additional selections during play, repeat steps 2 and 3.
To clear the entire programmed contents

[In the stop mode]
Press ■.
To cancel program mode
PROGRAM MODE
[In the stop mode]
Press PROGRAM MODE twice.
The changer will return to sequential play mode.
The programmed contents will remain stored in the memory until they are cleared, even after the program mode is canceled. Therefore, after using program play, it is possible to cancel the program mode and use another play mode (except delete play) and then still use the same program play again at a later time. In addition, if the disc is replaced with another one, program play will be carried out using the new disc. If non-existing entries occur at this time, they will be canceled.
For your reference:
The program mode and the programmed contents will remain stored in the memory even after the unit is switched off. However, if the power cord is unplugged or the power supply is otherwise interrupted for an extended length of time, the contents of the memory will be erased.
Program play (continued)
Using the remote control transmitter SL-PO887 only

To confirm the programmed contents

Press RECALL.
Each time you press RECALL, the display shows the programmed disc and track number in the sequence you have entered.

To clear a single item of the programmed contents

Press CLEAR.
Each time you press CLEAR, you will cancel last entry in the order you have entered.
To clear an entry in the middle of the program sequence, press RECALL repeatedly until the display shows the selection to be cleared, and then press CLEAR within three seconds after the last press.
Random play
All of the tracks will be played one time each in random order. There are two types of random play as described below
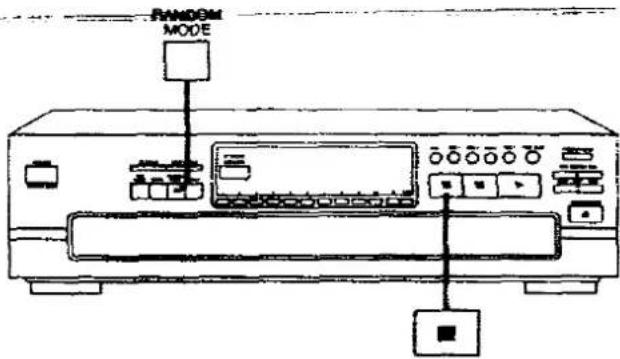
One disc random play
The changer will play all tracks on the current disc in a random order. Then it will choose a new disc randomly, excluding the discs already played, and play all tracks on that disc in a random order.

[in the stop or play mode]
Press RANDOM MODE so that the "1 DISC RND" Indicator Illuminates.
Each time the button is pressed, the display will change in the following order: 1 DISC RND → FULL RND → (off).

Full random play
Each track to be played back is selected randomly from all of the tracks on all of the discs, excluding the tracks that have already been played.

[In the stop or play mode]
Press RANDOM MODE so that the "FULL RND" indicator illuminates.
Each time the button is pressed, the display will change in the following order: 1 DISC RND → FULL RND → (off)

The changer will stop automatically when all the tracks on all discs have been played once.
To cancel random play mode

Press
The "1 DISC (or FULL) RND" indicator will go out.
You can select up to 32 selections that you do not want to hear and put them in the changer's memory. Then you can enjoy sequential, one disc random, or full random play of only your favorite tracks.


[In the stop mode]
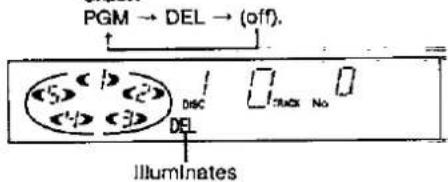
Press PROGRAM MODE twice so that the "DEL" indicator illuminates.
Each time the button is pressed, the display will change in the following order:

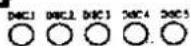
Press the disc button (1-5). For example:
To delete disc 3, press DISC 3.


Specified disc number
The "AL" indication shows that all the tracks on the disc are selected.
To delete by means of disc numbers only, repeat the above operation. (The count will increase by one for each operation.)


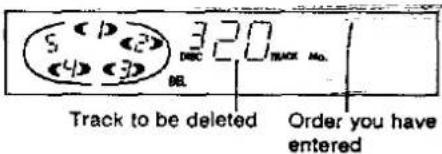
Press the numeric button(s) to specify the track number.
For example:
To delete track number 20, press >10, then 2, and then 0.

Specified track number
Order you have entered

Repeat steps 2 and 3 until you have completed the desired entry.
If you enter non-existing disc(s) or track(s) soon after the loading drawer is closed or when it is open, the corresponding indicator illuminates and the entry is included in the count. In the play mode, the changer will cancel the non-existing entry.

If you attempt a 33rd selection, the “-F” (full) indication will be displayed.


Press ▶ to start play.
To enter additional selections to be deleted during play, repeat steps 2 and 3.
For random play while deleting unwanted tracks
[Proceed through step 4 above, and then:]
To activate one disc random play, press RANDOM MODE. To activate full random play, press RANDOM MODE twice
To clear the entire contents to be deleted
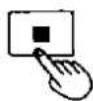
[In the stop mode]
Press ■.
To cancel delete mode
PROGRAM MODE
[In the stop mode]

Press PROGRAM MODE.
The changer will return to sequential play mode.
The contents to be deleted will remain stored in the memory until they are cleared, even after the delete mode is canceled. Therefore, after using delete play, it is possible to cancel the delete mode and use another play mode (except program play) and then still use the same delete play again at a later time. In addition, if the disc is replaced with another one, delete play will be carried out using the new disc. If non-existing entries occur at this time, they will be canceled.
For your reference:
The delete mode and the contents to be deleted will remain stored in the memory even after the unit is switched off. However, if the power cord is unplugged or the power supply is otherwise interrupted for an extended length of time, the contents of the memory will be erased.
Delete play (continued)
Using the remote control transmitter SL-PD887 only

To confirm the selections to be deleted

Press RECALL.
Each time you press RECALL, the display shows the selected disc and track number in the sequence you have entered.
Spiral play
The changer plays the first tracks on all the loaded discs in sequence, followed by the second tracks on all the discs, and so on. (Refer to the Illustration below.)
Example: When starting from disc 1

flowchart
graph TD
    Start --> Track1["Track 1"]
    Start --> Track2["Track 2"]
    Start --> Track3["Track 3"]
    Start --> Track4["Track 4"]
    Start --> Track5["Track 5"]
    Track1 --> DISC1["DISC 1"]
    Track2 --> DISC2["DISC 2"]
    Track3 --> DISC3["DISC 3"]
    Track4 --> DISC4["DISC 4"]
    Track5 --> DISC5["DISC 5"]
    DISC1 --> Track2
    DISC2 --> Track3
    DISC3 --> Track4
    DISC4 --> Track5
    Track1 --> Track2
    Track2 --> Track3
    Track3 --> Track4
    Track4 --> Track5
    Track5 --> Start

[In the stop or play mode]
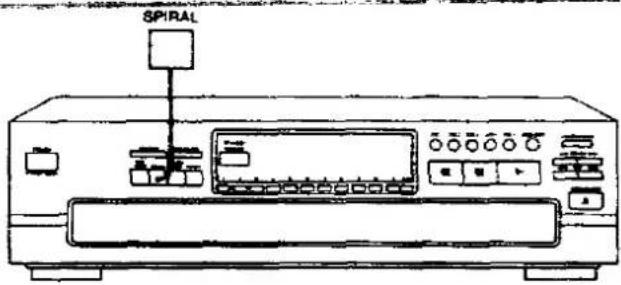
Press SPIRAL...
Spiral play will begin with the first track on the disc situated at the playing position.

To clear a selection to be deleted

Press CLEAR.
Each time you press CLEAR, you will cancel last entry in the order you have entered.
To clear a selection in the middle of the sequence, press RECALL repeatedly until the display shows the selection to be cleared, and then press CLEAR within three seconds after the last press.
The changer will stop automatically when all the tracks on all discs have been played once.
For your reference:
When a disc with fewer tracks finishes playing, that disc will be skipped and the changer will continue playing the remaining track on the other discs in spiral sequence.
To cancel spiral play mode

Press SPIRAL again.
The "SPIRAL" indicator will go out.
The changer will return to sequential play mode from the current track on the current disc which is playing

This function is convenient to use when searching for a desired track.
The function will search from the beginning of the track for a loud section, and will play 10 seconds of the track centering around that point.
The order of scanning is the same as for play mode.


Press ID SCAN.
ID scan will start.

When the desired track has been found:

Press ▶.
The changer will play the track from the beginning.
To cancel ID scan

Press ID SCAN while this function is in operation.
The "ID" indicator will go out.
The changer will continue to play from the track being played.

You can search rapidly forward or backward on the disc for specific sections.

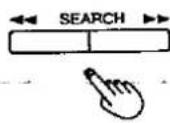
[In the play or pause mode]
Press and hold SEARCH (◀◀ or

◀◀: You can search backward.
▶▶: You can search forward.
Release the button when you reach the desired point.
The changer will return to the previous mode (play or pause).
In sequential play mode:
You can search forward over discs and backward within the current disc.
In other play modes:
You can search forward or backward only within the current track.
For your reference:
The search function will begin slowly, and then, if the button is held pressed for longer than 3 seconds, it will change to high-speed search.
In the play mode, the sound level decreases by 12 dB (1/4).
Skip function
To skip discs
Use this function to skip discs when selecting a disc to which you wish to listen, and when loading and unloading the discs.

You can use this function in stop, sequential play, one disc random play and delete play modes.

Press DISC SKIP to rotate the disc tray.
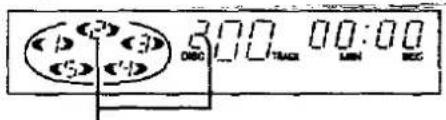
Disc number at the playing position
In stop mode:
When the loading drawer is closed, pressing DISC SKIP changes the disc tray to the next one.
When the loading drawer is open, pressing DISC SKIP moves the carousel by two disc trays.
In play mode:
When the loading drawer is closed, pressing DISC SKIP changes the disc and the changer plays the tracks on the next disc.
If a disc is not on the selected disc tray, the changer plays the disc at the next number.
When the loading drawer is open, pressing DISC SKIP moves the carousel by one disc tray. Pressing again moves the carousel in the opposite direction so that you can change all discs except the one being played.
To skip tracks
Use this function to skip tracks when selecting a track to which you wish to listen.

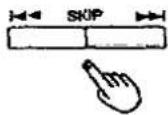
Press either SKIP (◀◀ or ▶▶) until you reach the desired track.
◀◀: You can skip backward.
▶▶: You can skip forward.

Track number at the playing position
In sequential/program/delete play mode:
In sequential play mode, you can skip only within the current disc. In program play mode, you can skip from one track to another in the programmed sequence.
In delete play mode, you can skip tracks only within the current disc excluding the tracks to be deleted.
You can skip to the beginning of the track being played. If you press this button again quickly, you can skip to the beginning of the previous track.
Remember that in a backward skip, the current track is included in the count.
▶▶▶: You can skip as many tracks as the number of times you press the button.
In random play mode:
You can skip to the beginning of the current track.
▶▶: You can skip to the beginning of a next track in random order.
In spiral play mode:
You can skip to the beginning of the current track.
▶▶1: You can skip to the beginning of the track on the next disc.
You can also skip tracks when the changer is in the stop mode or pause mode.

Play will continue endlessly in accordance with the specific play mode selected.


[Before or during play]
Press REPEAT.
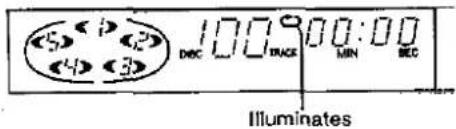
In sequential play mode:
All tracks of all discs will be played repeatedly.
In program play mode:
The changer plays only the programmed selections in the programmed sequence repeatedly.
In delete play mode:
The changer plays the discs and tracks excluding the selections to be deleted repeatedly.
In random play mode:
When the changer has played all the tracks on all the loaded discs, it will select a new random sequence and play continuously. The sequence differs each time.
In spiral play mode:
The changer plays all tracks of all discs repeatedly in the sequence of spiral play.
To cancel repeat mode

Press REPEAT again.
The " 🔒 " indicator will go out.

The various time information of the current disc can be displayed.
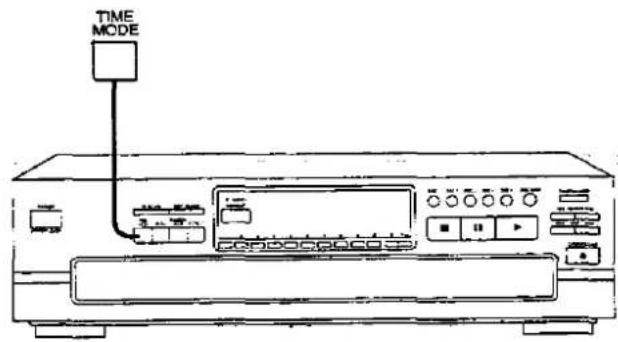

[In the play or pause mode]
Press TIME MODE.
The information will change (as described below) each time you press the button.
① Track number and elapsed play time of the current track

② Total remaining time on the disc
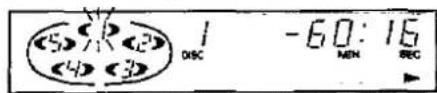
③ Track number and remaining time of the current track

④ Total elapsed play time on the disc
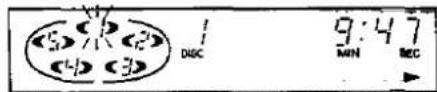
In all play modes:
When track number 21 or greater is playing, display ③ shows "----"
In program/delete/random/spiral mode:
The displayed information will alternate between displays ① and ③ each time the button is pressed.
SL-PD887 only
During operation of the edit guide function:
The remaining play time on side A or side B will be shown in display ②, and the elapsed play time for side A or side B will be shown in display ④.
When you stop playing and then start play again, the display will return to display ①.
Edit guide function SL-PD887 only
When recording, the changer will automatically program the tracks for tape sides A and B in accordance with the length of the tape so that none of the tracks will be interrupted before they are completed.
In addition, the program will also include a silent interval of approximately 4 seconds between tracks.


The display shows the data of the tracks to be recorded as follows:
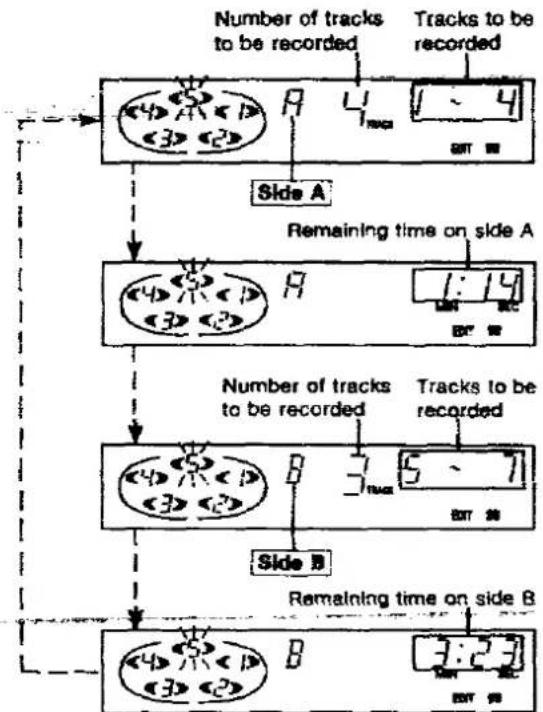
flowchart
graph TD
    A["Number of tracks to be recorded"] --> B["4"]
    B --> C["1"]
    C --> D["4"]
    D --> E["5"]
    E --> F["6"]
    F --> G["7"]
    G --> H["8"]
    H --> I["9"]
    I --> J["10"]
    J --> K["11"]
    K --> L["12"]
    L --> M["13"]
    M --> N["14"]
    N --> O["15"]
    O --> P["16"]
    P --> Q["17"]
    Q --> R["18"]
    R --> S["19"]
    S --> T["20"]
    T --> U["21"]
    U --> V["22"]
    V --> W["23"]
    W --> X["24"]
    X --> Y["25"]
    Y --> Z["26"]
    Z --> AA["27"]
    AA --> AB["28"]
    AB --> AC["29"]
    AC --> AD["30"]
    AD --> AE["31"]
    AE --> AF["32"]
    AF --> AG["33"]
    AG --> AH["34"]
    AH --> AI["35"]
    AI --> AJ["36"]
    AJ --> AK["37"]
    AK --> AL["38"]
    AL --> AM["39"]
    AM --> AN["40"]
in this example, disc 5 can be recorded with tracks 1-4 on side A and tracks 5-7 on side B of the cassette tape.


[Start recording on the tape deck and then immediately:]
Press ▶.
When the last track set for recording on side A is finished, the changer will enter the pause mode. Set the tape to the position from which recording will begin on side B, and then perform step 1 once again.
When all the programmed tracks on the specified disc finish playing, the changer will automatically stop. The edit guide mode will be canceled at the same time.
To enter a desired recording time other than 46, 60 or 90 minutes:
i. Select "C--" in step 3
- Enter the total recording time in minutes (1-99) using the numeric buttons.
For example:
To use 52-minute tape, press 5 then 2.
You can also specify the tape length pressing the SKIP button.
Press either ◀◀ or ▶▶ from each step C-46, C-80, C-90 or C…. For example:
To use 52-minute tape, select C-46 and then press and hold ▶▶▶ until the display shows "52".
-The maximum allowable playing time for editing is 99 minutes.
To stop recording

Press ■ and then press the stop button on the tape deck.
Note
Depending on the disc, a little of the beginning of the next track may be recorded onto the end of the track.

With this changer, you can only play compact discs having this mark:

Handling precautions
To open the compact disc case, gently press the sides of the top and pull up.
To remove the disc from the case, press the center holder and lift the disc, holding by the edges.

natural_image
Simple line drawing of a hand holding a small object, possibly a mechanical or electronic component (no text or symbols)
To return the disc to the case, insert the disc with the label facing up and press downward at the center.
Hold compact discs by the edges so as not to soil the surface with fingerprints. Fingerprints, dirt and scratches can cause skipping and distortion.

natural_image
Hand holding a CD with a circular button and starburst pattern (no text or symbols)
natural_image
Illustration of two hands holding a circular object with visible internal components (no text or symbols)Do not use record cleaning sprays, benzine, thinner, static electricity prevention liquids or any other solvent on a disc.
If the surface is soiled, wipe gently with a soft, damp (water only) cloth.
Always move the cloth directly outward from the center of the disc, not in a circular motion as with standard phonograph records.


If you are taking the disc from a cold to a warm environment, moisture may form on the disc. Wipe this off with a soft, dry, lint-free cloth before using the disc.
Do not write on the label side with a ball-point pen or other writing instrument.
Storage precautions
Be sure to store discs in their cases to protect them from dust, scratches, and warping.
Do not place or store discs in the following places:
1) Locations exposed to direct sunlight
2) Humid or dusty locations
3) Locations directly exposed to a heat vent or heating appliance
4) in the glove compartment or on the rear deck of an automobile
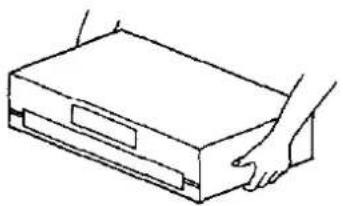
Cautions concerning the moving of this unit
natural_image
Line drawing of a hand opening a rectangular box (no text or symbols)CAUTION
Before moving the changer to another location, be sure to carry out the "Preparations for moving the unit" described below.
Failure to do so will expose the compact discs and the changer to the risk of severe damage.
Preparations for moving the unit
All of the discs must be removed so that the trays are completely empty.
Use the following procedure.
① Press POWER to switch off the unit.
② Press POWER to switch on the unit.
(If there is a disc in the play section, it will be returned to the disc tray at this time.)
③ Press OPEN/CLOSE to open the loading drawer.
④ Press DISC SKIP to rotate the disc trays and remove the discs from all disc trays.
⑤ Press OPEN/CLOSE to close the loading drawer.
⑥ Press POWER to switch off the unit.
If you have pressed a wrong button by mistake, return to step ①.

Technical specifications
AUDIO
No. of channels 2 (left and right, stereo)
Frequency response 2-20,000 Hz, ±1 dB
Output voltage 2 V (at 0 dB)
Dynamic range 92 dB
S/N 100 dB
Total harmonic distortion 0.007% (1 kHz, 0 dB)
Wow and flutter Below measurable limit
DA converter MASH (1 bit)
Output Impedance Approx.1 kΩ
Load Impedance More than 10 kΩ
PICKUP
Wavelength 780 nm
GENERAL
Power consumption
For United Kingdom, Europe, Australia and N.Z. 12 W
For others 14 W
Power supply
For United Kingdom, Europe, Australia and N.Z.
AC 50/60 Hz, 230-240 V
For others AC 50/60 Hz, 110 V/127 V/220 V/230-240 V
Dimensions (W × H × D) 430 × 125 × 370 mm
Weight 4.6 kg
Note:
Specifications are subject to change without notice.
Weight and dimensions are approximate.
MASH is a trademark of NTT.
For United Kingdom
This apparatus was produced to BS 800.
Eroptoshooting guide
Before requesting service for this unit, check the chart below for a possible cause of the problem you are experiencing. Some simple checks or a minor adjustment on your part may eliminate the problem and restore proper operation.
If you are in doubt about some of the check points, or if the remedies indicated in the chart do not solve the problem, refer to the directory of Authorized Service Centers (enclosed with this unit) to locate a convenient service center, or consult your Technics dealer for instructions.
| Problem | Probable cause(s) | Suggested remedy |
| Changer will not play. | A disc(s) or other foreign object(s) has fallen inside the changer. | • Open the loading drawer, and then remove the object. |
| Moisture has collected in the changer. | • Switch on and allow the changer to dry out for about one hour before using it. | |
| The disc in the changer does not play. | The disc is upside down. | • Make sure the label is facing upward. |
| The disc is dirty. | • Wipe the disc with a soft cloth. | |
| The disc is scratched. | • Replace the disc with a new one. | |
| The disc is warped. | ||
| The disc is not within specified standards. | ||
| Play stops before changing to the next disc. | The loading drawer is open. | • Press the OPEN/CLOSE button to close the loading drawer. |
| A certain music passage can't be played correctly. | The disc is dirty. | • Wipe the disc with a soft cloth. |
| The disc is scratched. | • Replace the disc with a new one. | |
| There is noise from the tuner or disturbance on the TV screen. | Caused by high-frequency signals from this changer. | • Use the changer further away from the tuner or TV.• If the tuner or TV's antenna is the indoor type, use an outdoor one. |
| When program play is started, an error message (-E) appears on the display. | Play was started without a track being programmed. | • Program a track. |
| An error message (-E) appears on the display, and the changer stops operating. | The mechanism of the changer has been improperly adjusted. | • Turn the unit off and then back on again.However, if the loading drawer is fully open, take out the compact disc(s) at the front position and then turn the unit off and then back on again. |
| The loading drawer stops in the middle of opening. | ||
559
Matsushita Electric Industrial Co., Ltd.
Central P.O. Box 288, Osaka 530-91, Japan
- Compact Disc Changer
- SL-PD887/SL-PD687
- Note:
- Dear Customer
- Contents
- CAUTION!
- DANSK
- BEMAERK!
- SUOMI
- VAROITUS!
- NORSK
- ADVARSEL!
- CAUTION:
- Caption for AC mains lead
- (For United Kingdom)
- IMPORTANT
- Before use
- How to replace the fuse
- Suggestions for safety
- Placement
- Ventilation
- Stacking
- Voltage
- Power cord protection
- Foreign materials
- Maintenance
- Service
- Other notes
- Avoid places such as the following:
- When carrying or storing the unit, handle it with care so it is not subjected to any strong bumps.
- To avoid problems due to vibration.
- Moisture may form on the lens in the following cases...
- Connections
- SL PD887 only
- Aldie
- Sequential play
- Press POWER.
- Press OPEN/CLOSE to open the loading drawer.
- Load the disc(s) on the disc tray(s).
- CAUTION
- Press OPEN/CLOSE again to close the loading drawer.
- Note
- Press the desired disc button (1-5).
- Basic operations (continued)
- To directly access a desired track
- To temporarily stop play
- To resume play
- To stop play
- To exchange discs during play
- To re-start play
- To clear the entire programmed contents
- To cancel program mode
- For your reference:
- Program play (continued)
- Using the remote control transmitter SL-PO887 only
- To confirm the programmed contents
- Press RECALL.
- To clear a single item of the programmed contents
- Press CLEAR.
- Random play
- One disc random play
- Full random play
- To cancel random play mode
- To clear the entire contents to be deleted
- To cancel delete mode
- Delete play (continued)
- Using the remote control transmitter SL-PD887 only
- To confirm the selections to be deleted
- Spiral play
- Press SPIRAL...
- To clear a selection to be deleted
- To cancel spiral play mode
- Press SPIRAL again.
- Press ID SCAN.
- When the desired track has been found:
- Press ▶.
- To cancel ID scan
- Press ID SCAN while this function is in operation.
- Press and hold SEARCH (◀◀ or
- In sequential play mode:
- In other play modes:
- Skip function
- To skip discs
- In stop mode:
- In play mode:
- To skip tracks
- In sequential/program/delete play mode:
- In random play mode:
- In spiral play mode:
- To cancel repeat mode
- Edit guide function SL-PD887 only
- To enter a desired recording time other than 46, 60 or 90 minutes:
- To stop recording
- Handling precautions
- Storage precautions
- Cautions concerning the moving of this unit
- Preparations for moving the unit
- Technical specifications
- AUDIO
- PICKUP
- GENERAL
- Eroptoshooting guide
Brand : PANASONIC
Model : SL-PD887
Category : Hi-Fi System