HS-761 - Mp3 player Hipstreet - Free user manual and instructions
Find the device manual for free HS-761 Hipstreet in PDF.

User questions about HS-761 Hipstreet
0 question about this device. Answer the ones you know or ask your own.
Ask a new question about this device
Download the instructions for your Mp3 player in PDF format for free! Find your manual HS-761 - Hipstreet and take your electronic device back in hand. On this page are published all the documents necessary for the use of your device. HS-761 by Hipstreet.
USER MANUAL HS-761 Hipstreet
Thank you for your purchase of this MP3 digital video player. Please read this user manual carefully before operation and retain all the operating instructions.
- The contents of this user manual are subject to change based on newer developments.
- The display screen pictures contained in this user manual are used for indication purposes and may vary.
Please read the following instructions carefully for your safety and prevention of property damage.
- Do not use the unit in places that are extremely hot, cold, dusty, or humid.
- The battery life will differ with different usage conditions and modes.
- Please charge the unit when any of the following cases occur.
○ The battery indicator informs of a low battery.
- The player turns off automatically, and turns off again after rebooting.
- The keys become inactive.
- Do not disconnect the player while it is formatting, uploading or downloading. This may lead to errors.
- The player is charging while connected with computer via USB / AC adaptor, regardless if it is powered on or not.
- Do not disassemble. Please contact our support center if you need service.
- Specifications are subject to change and improvement without notice.
- Avoid water or foreign objects falling on this player.
Content
- INTRODUCTION....4
1) Layout design 4
2) Power on & off 4
3) HOLD function 5
4) Battery Icon 5
2.BASIC OPERATION....5
A. Primary menu 5
B. Basic Function....10
-
REFERENCES TO USER 20
-
Trouble-shooting....20
1. Introduction
1) Layout design

2) Power ON & OFF
- Press and hold the ON/OFF power button to turn on the player.
- In the Stop status, press and hold the ON/OFF power button to turn off the player.
3) HOLD function
The hold function can be used in the MUSIC, VOICE, FM, and RECORD modes.
Example: In the MUSIC mode, press the power button and the player will lock all the other keys. This will prevent buttons from accidentally being pressed and a lock icon will appear. Press the power button to unlock.
4) Battery Icon
Indicates the battery is fully charged and bars will diminish with usage.
□ Indicates the battery is discharged and will require charging.
2. Basic operation
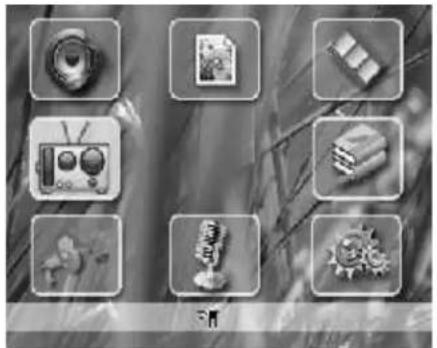
A. Primary menu
- Enter menu: Press the M button to enter all levels of the sub-menu screen.
- Exit menu: In all levels of the sub-menu, press the PLAY button to enter the pre-menu, press and hold the M button to exit.
Various function menus:
Music:
natural_image
Black-and-white collage of eight icons including a camera, books, vintage camera, trophy, gear, and music (no text or symbols)Photo:
natural_image
Grid of eight grayscale icons including camera, photo, and gear (no text or symbols)Video:
natural_image
Grid of grayscale icons including camera, photo, film, and microphone on a blurred background (no text or symbols)E-Book:
natural_image
Black-and-white collage of eight grayscale icons including a camera, photo, and food items, arranged in a 2x2 grid on a textured background (no text or symbols)Setup:
natural_image
Black-and-white photo of eight labeled mechanical and electronic components on a blurred background (no text or symbols visible)Record:
natural_image
Black-and-white photo grid showing eight small objects on a grassy background, no text or symbols visible.Voice:
natural_image
Grid of eight grayscale icons including a pen, photo, camera, eraser, musical instrument, microphone, and gear (no text or symbols)FM:
natural_image
Grid of eight grayscale icons including camera, document, and gear (no text or symbols)B. Basic Function
2.1. Music
Contains playback, pause, volume adjusting, fast forward / rewind, and you can select various options of Repeat mode, EQ, Play rate, Folder, Classified, Play List.
• Details of operation
a) Play: Enter the music interface and press play. Press the ◀ or ▶ button to select songs.
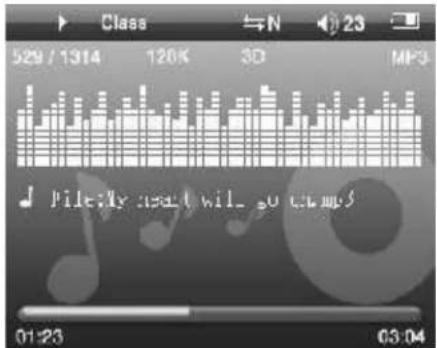
b) During playback press the ▶ button to pause.
c) Press the VOL+ / VOL- button to adjust the volume.
d) To Fast Forward and Rewind during playback, press and hold the ◀ or ▶ button. To skip to the next or previous song, press the ◀ or ▶ button.
During playback, press the M button to access the Music sub-menu.
Repeat mode: During playback, press the M button to display the submenu, press the ◀ or ▶ button to select Repeat. Press the M button to display the Repeat list. Press the ◀ or ▶ button to select the repeat option and press the M button to validate and exit.
Folder: During playback, press the M button to display the submenu, press the or button to select Folder. Press the M button to view all the audio files. Press the or button to the audio file that you want to add to the playlist. Press the VOL- button to select Add to List or Delete. Press the M button to confirm.
Play List: During playback, press the M button to display the submenu. Press the 🔊 or ➕ button to select Play List. Press the M button to view the audio files under "My List". Enter "My List" and press the VOL- button to select Delete List or Delete. Press the M button to confirm.
Note: The user can browse the Play List as they like. The player supports My List, M3U, WPL and PLA.
Lyric display: If there's a matched lyric file to the song name, the display interface will automatically display it.
EQ mode: During playback, press the M button to display the submenu, press the ◀ or ▶ button to select EQ. Press the M button to display the equalizer list: Normal, Pop, Rock, Classic, Jazz, Bass and Custom EQ. Press the ◀ or ▶ button to select the desired equalizer option and press the M button to validate and exit. Custom EQ allows the user to customize the equalizer.
Play Rate (tempo) mode: During playback, press the M button to display the submenu, press the ◀ or ▶ button to select Play Rate. Press the M button to display the Play Rate list: Press the ◀ or ▶ button to select the desired tempo speed and press the M button to validate and exit.
2.2. Photo
This player supports commonly used JPEG, BMP and GIF format images. Press the ◀ or ▶ button from the main screen to select the Photo function.
- Press the ▶ or ◀ button to select photo from the image index screen.
- Press the M button to view image.
- Press the ▶ or ◀ button to scroll through the images.
- Press the play button to exit.
- To delete an image, select a picture from the index screen and press the VOL-button. Select Yes to confirm.
2.3. Video
This player supports MTV video files.
1) Press the ▶ or ◀ button from the main screen to select the Video mode.
2) Then press M button to confirm and enter Video interface.
3) Press the ▶ or ◀ button to select the video file and press the M button to play file.
4) Fast Forward and Rewind: During video playback, press and hold the ◀ or ▶ button. To skip to the next or previous video, press the ◀ or ▶ button.
5) Adjusting the volume: Press the VOL+ or VOL- button to adjust the volume.
6) During playback, press the M button to select repeat mode and select from the various repeat functions.
7) Press and hold the M button to exit.
8) From the video index list, press VOL- button to delete video. Press the M button confirm
Converting Video Files
Notice: Before viewing video files on your player, please run the video converting software provided on the driver CD to convert the files to the player's MTV format. Even if you have MTV files, you are still required to use the conversion software to convert the video to the player's format.
Steps:
A) Insert the driver CD into the computer and click on the "Video Convert.exe" program.
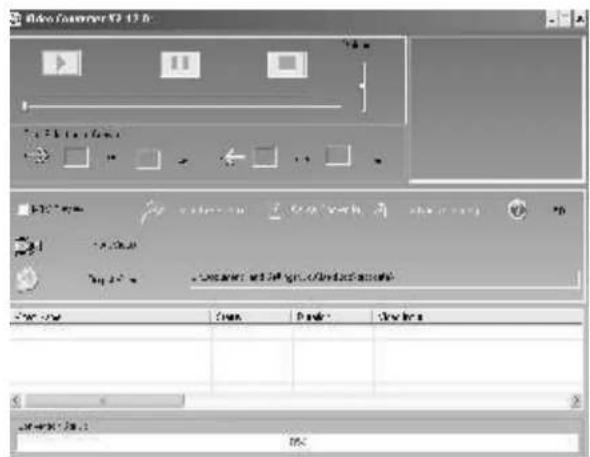
B) Select the video to convert.
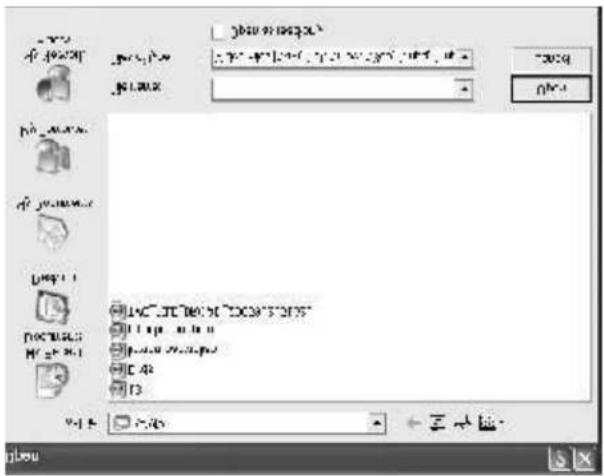
C) Click the “Start Conversion” button, and begin to convert the video to a MTV file.
D) Once converted, create an MTV folder on the removable disk (the player) and copy and paste the converted file.
2.4. E-Book
Create a TEXT folder in the removable disk (the player), then copy and paste the ".txt" file into the folder.
1) Press the ▶ or ◀ button from the main screen to select the E-Book mode.
2) Choose the file and press the M button to enter the reading interface.
3) Pressing the ▶ or ◀ button to change page.
4) Press and hold the M button to exit.
5) To delete a text file, press the VOL- from the index screen.
2.5. Setup
From the main menu, press the ▶ or ◀ button to select Setup, then press the M button to enter the setup interface.
• Power Saving (auto off feature)
Press the ▶ or ◀ button to select Power Saving and press the M button to confirm. Press the ◀ or ▶ button to select desired auto off time. Press the M button to confirm, then press and hold the M button to exit.
Example: If 2 minutes is chosen, the player will automatically turn off if no buttons are pressed for 2 minutes.
- Language
The player contains ten different languages to choose from: (English, Simple Chinese, Traditional Chinese, French, German, Italian, Polish, Portuguese, Russian, Spanish) It is displayed as followings.
1) Enter setup interface, and select Language from the sub-menu.
2) Press the ◀ or ▶ button to select desired language.
3) Press the M button to confirm.
4) Press and hold the M button to exit.
- Display
Enter the Setup interface and press the ◀ or ▶ button to select Display.
A) Brightness: Under this submenu, select the desired brightness (High, Medium, Low, Maximum), then press the M button to confirm.
B) Back Light: Under this submenu, select the amount of time you wish to have the back light on for (15 sec, 30 sec, 1 min, close), then press the M button to confirm.
- System Tools
Enter the Setup interface and press the ◀ or ▶ button to select Sys Tools.
A) Format: Press the M button to enter, then press the ◀ or ▶ button to either select Quick
or Complete. Press the M button to confirm, then select Yes or No by pressing the M button.
B) Reset: Press the M button to enter, then press the ◀ or ▶ button to either select Reset. Press the M button to confirm, then select Yes or No by pressing the M button.
C) Sys Info: Select this option to show the software version, chip and memory information.
- Storage
Enter the Setup interface and press the ◀ or ▶ button to select Storage. It contains the internal and external micro SD card memory information.
2.6. Record (voice recording)
Enter the Setup interface and press the ◀ or ▶ button to select Record.
1) Press the M button to start recording.
2) Pause: short press ▶I button to pause recording and continue recording.
3) When finished, press the M button. The player will automatically save the recorded file.
2.7. Voice (to listen to voice recordings)
1) Press the ◀ or ▶ button to select Voice and press M button to enter.
2) In Stop status, press the ▶ button to start voice recording playback.
3) To pause playback, press the ▶I button.
4) To adjust the volume, press the VOL+ or VOL- button.
5) During playback or in pause status, press the M button to enter the submenu. The repeat and folder settings will be found here.
2.8.FM
1) Press the ◀ or ▶ button from the main screen to select FM and press M button to enter.
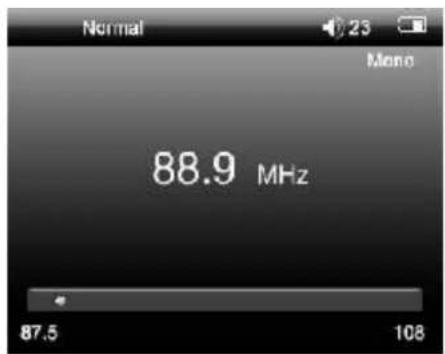
2) Press the ◀ or ▶ button to adjust the frequency. Press the ▶ button to adjust the frequency manually or by presets.
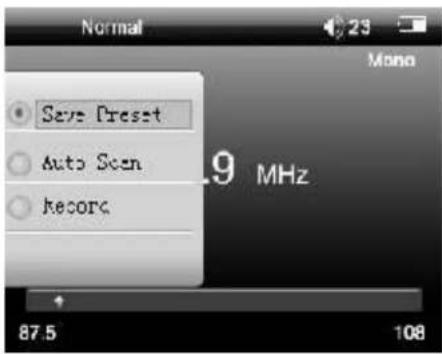
a) Save Preset: During FM playback of the frequency you wish to save, press the M button to enter the sub-menu. Press the ◀ or ▶ button to select save preset, then press the M button to confirm.
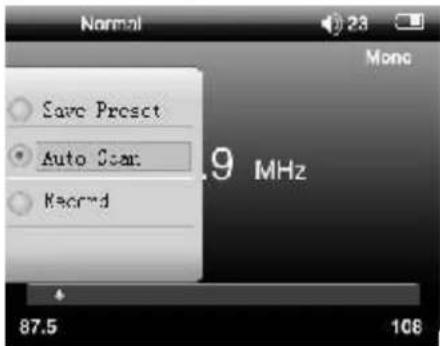
b) Auto Scan: During FM playback, press the M button to enter the sub-menu. Press the ◀ or ▶ button to select Auto scan, then press the M to confirm. This will scan all stations and save them automatically. (Approximately 30 stations.)
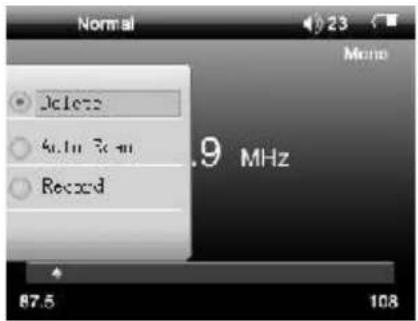
c) Delete: In the preset submenu, press the M button access additional options. Press the ◀ or ▶ button to select Delete, then press the M button to confirm.
• FM Recording
During FM playback, this player can record a FM program. Press the M button to enter the sub-menu. Press the or button to select Record, then press M button to record the FM program.
4) Press the ▶I button to pause and resume recording.
5) Press the M button to end the recording session and the player will save the file.
6) To play the recorded FM file, go to the Voice mode and select FM file.
• USB Disk function
A) Data can be uploaded / download from the computer to the player to be used as a mass data storage device.
B) After connecting the player to the computer, you will find a removable disk icon in "My Computer". This is the folder that will hold all the data for upload or download.
C) It is recommended to create a new and separate folder to hold the data.
D) Ensure the player is safely removed before unplugging it from the USB port otherwise data loss may occur.
- Connect with computer
1) When connecting the player to the computer for the first time, it will check for new hardware automatically.
2) A removable disk icon in "My Computer" will appear. This is the folder that will hold all the data for upload or download.
(If running Windows98 SE, a driver will need to be installed from the CD provided.)
3. References to User
1. Trouble-shooting
If you encounter any difficulties, our representatives are ready to help you with any questions about your new product. We can guide you through connections, first-time use, or any of the features. Just give us a call or send us an email.
Customer and technical support 1-888-4KOBIAN or 1-888-456-2426
Monday through Friday: 8:30am – 5pm EST
Email: support@hipstreetonline.com
| The player will not start. | Ensure the player is turned on and charged. |
| No sound heard from the earphone. | Ensure the volume is not at 0 and earphone connection is secure.Ensure the earphone plug is clean and free of debris.Check whether the music file is corrupted. |
| Unrecognizable codes on the display screen. | Ensure the correct language is chosen. |
| FM reception is not good. | Move the earphone cable or the player to different place as the earphone cable can be used as an antenna.Turn off the electronic devices nearby. |
| Cannot download files. | Check whether the USB cable is damaged, and secure the connection between the player and computer.Check whether the driver is installed properly.Check whether there is sufficient memory. |
| There are no files but certain memory space is occupied. | Ensure there are no hidden files. Reformat the player. |
| The player's real capacity is less than the labeled capacity. | A very small portion of the memory will be used for the player's internal operating software. |

HIP STREET®
LECTEUR MP3 VIDÉO
Guide d'utilisation
natural_image
Black-and-white image grid showing eight icons including a camera, photo, books, microphone, gear, and a gear icon, with no readable text or symbols.Photo :

natural_image
Black-and-white photo of eight small objects on a grassy background, no text or symbols visible.Vidéo :

natural_image
Grid of eight grayscale icons including camera, photo, mobile phone, camera with lens, book, trophy, gear, and 'VIDEO' label (no readable text or symbols in the image)natural_image
Black-and-white image of eight labeled icons on a textured background, including cameras, documents, and gear (no readable text or symbols)Réglages :
natural_image
Black-and-white image of eight labeled icons on a blurred background, including camera, document, gear, and mechanical components (no readable text or symbols)Enregistrement :
natural_image
Black-and-white photo of eight small objects including a camera, photo, and gear, arranged in a grid on a blurred background (no text or symbols visible)Voix:
natural_image
Black-and-white image of eight small icons arranged in a grid, no text or symbols visible.FM :