
RT09 - Heating WHIRLPOOL - Free user manual and instructions
Find the device manual for free RT09 WHIRLPOOL in PDF.


| Product Type | Oil-filled radiator |
| Brand | Whirlpool |
| Model | RT09 |
| Power Supply | 220V ~ 50Hz |
| Power Settings | 3 settings: 800W, 1200W, 2000W (plus standby 0W) |
| Current | 10A (minimum socket rating) |
| Heating Area | Up to 20 m² |
| Dimensions (approx.) | Height: 63 cm, Width: 42 cm, Depth: 25 cm |
| Weight (approx.) | 10 kg |
| Thermostat | Adjustable from 5°C to 35°C (default 23°C) |
| Timer | 24-hour timer with 0.5 hr steps (0-10 hrs), 1 hr steps (10-24 hrs) |
| Turbo Mode | Quick heating at MED + fan |
| 6th Sense Mode | Intelligent temperature regulation |
| Safety Features | Tip-over switch, thermal fuse, overheat protection (auto-resetting) |
| Noise Level | Quiet operation; tapping sound normal when starting |
| Movement | All-direction castors included |
| Cleaning | Unplug and cool; use soft cloth with water and mild detergent; do not immerse |
| Maintenance | Do not remove parts; contact service agent for repairs |
| Accessories | Castor panel, power cord hook |
Frequently Asked Questions - RT09 WHIRLPOOL
User questions about RT09 WHIRLPOOL
0 question about this device. Answer the ones you know or ask your own.
Ask a new question about this device
Download the instructions for your Heating in PDF format for free! Find your manual RT09 - WHIRLPOOL and take your electronic device back in hand. On this page are published all the documents necessary for the use of your device. RT09 by WHIRLPOOL.
USER MANUAL RT09 WHIRLPOOL
Whirlpool Oil Radiator
說明書
Owner's Instructions
充油式電暖爐使用說明書
(使用本產品前,請仔細閱讀此說明書)
目錄:
安全及注意事項
簡介及特點
使用方法
清潔和保養
本說明書適用於下列機型:
natural_image
Technical line drawing of a vehicle front view showing rear seats and side-mounted sensors (no text or symbols)圖1

natural_image
Technical line drawing of a car chassis with front and rear structural components (no text or symbols)圖2
二、開機前的檢查
Instruction Manual for the Oil Radiator
(Please read this Instruction Manual well before the oil radiator.)
Contents:
Safety Instructions and Cautions
Introduction and Features
Operation
Cleaning and Maintenance
This Instruction Manual is intended for the use of the following models:
| Model | Adjustment Scope of Power (W) | load current of power socket (A) | Operatable Room Area ( m^2 ) | Remarks | |||
| 0 | I | II | III | ||||
| RT07 | 0 | 600 | 900 | 1500 | 10 | 15 | 500W Fan Conducting Wire System |
| RT09 | 0 | 800 | 1200 | 2000 | 10 | 20 | 500W Fan Conducting Wire System |
| Remarks: The Operatable Room Area is for reference only. | |||||||
Oil radiator Operation:
- Read and understand this manual before using the oil radiator.
- The oil radiator must be operated on level floor.
- Do not use outdoors.
- Do not use oil radiator in wet areas.
- Do not use oil radiator near flammable liquids or vapor.
- Use oil radiator only as described in this manual.
- Do not insert any objects into oil radiator.
- Do not put clothes or towels directly on the oil radiator.
- When using the oil radiator, keep combustible materials, away from oil radiator.
- Do not hang anything above oil radiator.
- Do not allow use by children or invalid person.
- Do not touch hot surface when in use.
- Turn off all switches and remove plug from outlet when not in use.
- Avoid crushing the power cord with the oil radiator wheels.
- Do not put the power cord on the top of oil radiator when in use.
- Do not use the same circuit receptacle for the oil radiator and others appliances.
- Do not use extension cord.
-
Make sure the receptacle used is grounded.
-
This oil radiator is filled with a precise quantity of special conductive oil. Do not add oil to this oil radiator.
- If the supply cord is damaged, it must be replaced with the same power cord from the manufacturer or its service agent.
- Unplug oil radiator if it fails to operate properly and inform the manufacturer or its service agent for inspection and repair.
- Do not remove and replace parts.
- Do not use near animals or plants.
- The oil radiator may make a tapping sound when started. This sound is normal.
- Dispose of packaging properly.
- At the end of service life of the oil radiator, dispose of properly.
- Save this user manual for future reference.
Warning: Operating the oil radiator in a location below a fixed outlet is strictly prohibited!

Using the Oil radiator
The oil radiator must not be located immediately below a socket-outlet.
Please check that the outlet is rated for the oil radiator.
Moving the Oil radiator
Turn off all switches and remove the plug from the outlet before the oil radiator can be moved. Do not move the oil radiator by pulling by the power cord.
Introduction and Features:
This oil radiator uses electrothermal tubes as its heating elements. The heat-conducting oil sealed in the radiating fins is heated and transmits the heat via the fins to the surrounding area. The air in the room is then heated and the warming effect is achieved.
"Whirlpool" oil radiators are made of electrical elements imported from renowned manufacturers and with sophisticated craftsmanship. All function indicators meet the international requirements. Reliable and durable, they are ideal warming appliances widely used in indoors settings like homes and offices.
The structure of the electrical oil radiator is as follows:

Features of this product :
1 Quiet, and with a novel and pleasant appearance, the product is easy to use.
2 The surface areas of the radiating fins are so large that the product radiates heat effectively and the warming effect is ideal.
3 The power adjustment function enables the user to choose one of the three power settings.
4 The temperature control function (thermostat) enables the user to adjust the room temperature.
5 The temperature insurance function (heat protection device) prevents over-heating of the product.
6 The power cord hook facilitates the placement of the power cord.
7 The all-direction castors enable the user to move the product with ease.
Operation of the product:
I. Use of the components of the castor panel
1 Turn the oil radiator upside-down, with the bottom facing up, as illustrated in Figure 1;
2 Pull the castors with the stand together towards the outside flank of the oil radiator, until the inverted buckles of the hooks on the stand are firmly locked, as illustrated in Figure 2. When the buckles are in such positions, a "poop" sound will be heard;
3 To ensure that the castors are in the proper positions, push them with the stand together towards the direction opposite to that they have been pulled. The buckling positions are obstructed to prevent moving.
4 Pull all the 4 castors out, and turn the oil radiator back to its proper position, until all the castors are on the floor.

natural_image
Technical line drawing of a vehicle front view showing rear and side views (no text or symbols)Figure 1

natural_image
Technical line drawing of a car front view showing structural components (no text or symbols)Figure 2
II. Inspection before operation
1 There should not be any damage or rupture of the power cord;
2 For the RT07 and RT09 models, the rated voltage is 220V/50HZ. Before operation, please confirm that the rated current of the electrical outlet is not less than 10A, and that safe ground connection has been installed. Otherwise, the outlet should be replaced.
III. Electronic Oil Radiator Operating Instructions
1 Introduction to the control panel display
“▲”,”▼” Buttons
a) When Working Mode is on, press “▲” or “▼” to adjust temperature by 1°C each time (higher or lower) within 5°C to 35°C. Press “▲” or “▼” for more than 3 seconds, temperature increases (or decreases) continuously by 1°C every 0.3 second. After setting the temperature, machine will operate at the set temperature after 5 seconds if no other settings are made. (Default temperature is 23°C. The set temperature will be stored in the machine.)
b) When "TIMER" Mode is on, press "▲" or "▼" to set the timer. Time increases (or decreases) by 0.5 hour each time, within 0-10 hours, and by 1 hour each time, within 10-24 hours. Press "▲" or "▼" for more than 3 seconds, and the time can be quickly set. After setting the time, without other settings, machine will operate at the set time after 5 seconds.
ON/OFF Buttons
ON: Press downwards, light on OFF: Press upwards, light off

TIMER
- When Stand-by Mode is on, press "④" to enter "On" Timer mode
- When Operating Mode is on, press "④" to enter "Off" Timer mode
- When Timer Mode starts, press "💡" for 3 seconds, the remaining time is shown.
- When Timer Mode starts, press "💡" to quit Timer Mode
MODE
- When Stand-by Mode is on, press "MODE" to choose "6TH SENSE", "HI", "MED", "LO" or "Stand-by" mode.
- When "On" Timer Mode is on, press "MODE" to choose "6TH SENSE", "HI", "MED" or "LO" as the working mode after start.
2 Introduction to LCD

3 Switching on and mode choosing
i. Plug the outlet. Switch on the oil radiator, the indicator light is on. Stand-by Mode is ready.
ii. Press "Mode" to select the working modes, the oil radiator is in "6th SENSE" Mode. LCD shows "Room Temperature" + "6TH SENSE". Press "Mode" again to choose "HI", "MED" or "LO" Mode. Press "Mode" again to return to Stand-by Mode.
In "6TH SENSE" Mode, Press "▲", "▼" to set the temperature. When room temperature is higher than the set value, machine stops heating up. When room temperature is lower than the set value, machine immediately heats up the room automatically according to the temperature difference.
Room temperature maintains constant in a certain area.
Also, temperature can be set in "HI", "MED" or "LO" modes.
4 Timer Set
-
"On" Timer: In Stand-by Mode, press "💡" to set the time for switching on the machine.
-
"Off" Timer: In Operating Mode, press "①" to set the switch-off time, then the machine turns into Stand-by Mode after heating up for a period of time.
-
"On" Timer or "Off" Timer: Press "▲" or "▼" to set the time (Whenever "ⓧ" mode is on, time setting is needed.)
5 Power Off
Operating Mode: Press "Mode", machine turns into Stand-by mode. Switch the machine off, unplug the power outlet.
6 Turbo Mode
① Refer to the figure below.
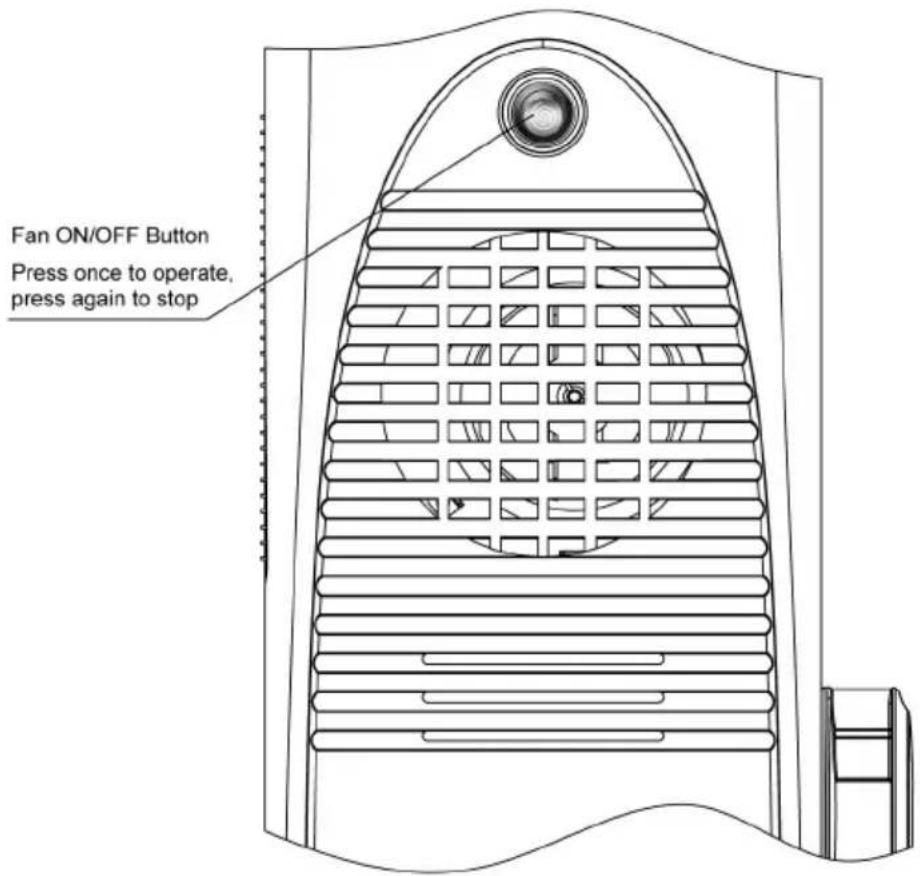
② Operating Instructions
i) Plug the outlet. Switch the oil radiator on.
ii) Press "○", machine operates in Turbo Mode and "MED" Mode, which can heat up the room quickly.
iii) When "On" Timer Mode is on: Turbo Mode cannot be used, no response of pressing
iv) Other Modes (except "On" Timer Mode): Press "○" once, machine operates in Turbo Mode and "MED" Mode.
v) When Turbo Mode is on: Press "○" once to stop, machines turns to work in "MED" Mode
vi) When Turbo Mode is on, no response of pressing "MODE" unless Turbo Mode is off.
Cleaning and Maintenance
- Unplug power cord and allow oil radiator body to cool before performing any cleaning or maintenance.
- Use a soft cloth with water and mild detergent to clean unit.
- Do not pour water on the oil radiator.
- Clean and dry the oil radiator before storing. Put the oil radiator into the original box and store in a dry area.
Circuit diagram
Circuit diagram of electrical oil-filled radiator with fan motor

flowchart
graph TD
    A["plug"] --> B["thermometer"]
    B --> C["resetting thermal limiting"]
    C --> D["tip-over switch"]
    D --> E["power switch"]
    E --> F["PCB"]
    F --> G["turbo switch"]
    G --> H["heating element 1"]
    G --> I["heating element 2"]
    H --> J["heating element 1"]
    I --> K["heating element 2"]
    L["light"] --> M["hydrogen pump"]
    N["Auto-resetting thermal limiting"] --> O["heating element"]
    P["heating element"] --> Q["thermal fuse"]
    R["Fan"] --> S["fan motor"]
    T["auto-resetting thermal limiting"] --> U["heat pump"]
$$ \frac{1}{2} = \frac{1}{3}\left(\frac{1}{4}\right) + \frac{1}{5}\left(\frac{1}{6}\right) + \frac{1}{7}\left(\frac{1}{8}\right) + \frac{1}{9}\left(\frac{1}{10}\right) + \frac{1}{11}\left(\frac{1}{12}\right) + \frac{1}{13}\left(\frac{1}{14}\right) + \frac{1}{15}\left(\frac{1}{16}\right) + \frac{1}{17}\left(\frac{1}{18}\right) + \frac{1}{19}\left(\frac{1}{20}\right) + \dots + \frac{1}{22}\left(\frac{1}{23}\right) + \dots + \frac{1}{24}\left(\frac{1}{25}\right) + \dots + \frac{1}{26}\left(\frac{1}{27}\right) + \dots + \frac{1}{28}\left(\frac{1}{29}\right) + \dots + \frac{1}{29}\left(\frac{1}{30}\right) + \dots + \frac{1}{31}\left(\frac{1}{32}\right) + \dots + \frac{1}{33}\left(\frac{1}{34}\right) + \dots + \frac{1}{34}\left(\frac{1}{35}\right) + \dots + \frac{1}{35}\left(\frac{1}{36}\right) + \dots + \frac{1}{36}\left(\frac{1}{37}\right) + \dots + \frac{1}{37}\left(\frac{1}{38}\right) + \dots + \frac{1}{38}\left(\frac{1}{39}\right) + \dots + \frac{1}{39}\left(\frac{1}{40}\right) + \dots + \frac{1}{40}\left(\frac{1}{41}\right) + \dots + \frac{1}{41}\left(\frac{1}{42}\right) + \dots + \frac{1}{42}\left(\frac{1}{43}\right) + \dots + \frac{1}{43}\left(\frac{1}{44}\right) + \dots + \frac{1}{44}\left(\frac{1}{45}\right) + \dots + \frac{1}{45}\left(\frac{1}{46}\right) + \dots + \frac{1}{46}\left(\frac{1}{47}\right) + \dots + \frac{1}{47}\left(\frac{1}{48}\right) + \dots + \frac{1}{48}\left(\frac{1}{49}\right) + \dots + \frac{1}{49}\left(\frac{1}{50}\right) + \dots + \frac{1}{50} $$
- Whirlpool Oil Radiator
- 說明書
- Owner's Instructions
- 充油式電暖爐使用說明書
- 目錄:
- 二、開機前的檢查
- Instruction Manual for the Oil Radiator
- Contents:
- Oil radiator Operation:
- Using the Oil radiator
- Moving the Oil radiator
- Introduction and Features:
- Features of this product :
- Operation of the product:
- Use of the components of the castor panel
- Inspection before operation
- Electronic Oil Radiator Operating Instructions
- “▲”,”▼” Buttons
- TIMER
- MODE
- Introduction to LCD
- Switching on and mode choosing
- Timer Set
- Power Off
- Turbo Mode
- Cleaning and Maintenance
- Circuit diagram
Brand : WHIRLPOOL
Model : RT09
Category : Heating