STEAM Education Class Pack - Toy littleBits - Free user manual and instructions
Find the device manual for free STEAM Education Class Pack littleBits in PDF.

User questions about STEAM Education Class Pack littleBits
0 question about this device. Answer the ones you know or ask your own.
Ask a new question about this device
Download the instructions for your Toy in PDF format for free! Find your manual STEAM Education Class Pack - littleBits and take your electronic device back in hand. On this page are published all the documents necessary for the use of your device. STEAM Education Class Pack by littleBits.
USER MANUAL STEAM Education Class Pack littleBits
littleBits education STEAM STUDENT SET INVENTION GUIDE
natural_image
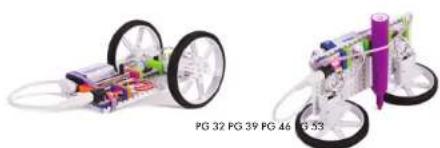
Two views of a small wheeled robot with visible wheels and components, labeled PG 32, PG 39, PG 46, and PG 53 (no text on the robot itself)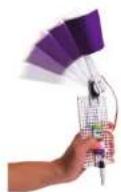
04 littleBits Basics
06-27 BIT™ INDEX
07 POWER
09 INPUT
14 WIRE
17 OUTPUT
24 ACCESSORIES
28 Inventing with littleBits
32-58 GUIDED CHALLENGES
Guided challenges start with instructions for a simple invention. Once you've created the invention, the challenge moves into the Remix phase where creativity really takes off.
32 Invent a Self-Driving Vehicle
39 Invent an Art Machine
46 Invent a Throwing Arm
53 Invent a Security Device
59-70 OPEN CHALLENGES
Open challenges get you to flex your creative muscles. These challenges start with an open-ended problem. Your mission is to explore ways you could use littleBits to create an invention that solves that problem.
59 Hack Your Classroom
62 Invent for Good
65 Invent a Chain Reaction Contraption
68 Hack Your Habits
71 Troubleshooting Tips
72 Continue Your Inventor Journey
STEAM is the evolution of STEM education, adding Art to Science, Technology, Engineering, and Math. Students gain technical skills by exploring creative, collaborative solutions to real-world problems.
The challenges in the littleBits STEAM Student Set link to NGSS (Next Generation Science Standards) Engineering Design standards.

TEACHER'S GUIDE and other classroom resources available at littleBits.cc/student-set.

SHARE & DISCOVER inventions on the littleBits Invent App or online at littleBits.cc/invention.
WEINVE WORLD WANTO


littleBits BASICS
COLOR-CODED BY FUNCTION
2 Bits ^™ are grouped into four different categories, which are color-coded.
A POWER (BLUE)
Power Bits, plus a power supply, run power through your circuit.
B INPUT (PINK)
Input Bits accept input from you or the environment and send signals that affect the Bits that follow.
G WIRE (ORANGE)
Wire Bits connect to other systems and let you build circuits in new directions.
OUTPUT (GREEN)
Output Bits do something light up, buzz, move...
Learn more about your Bits in the BIT INDEX ON PG 06
natural_image
Close-up of a black plastic component with ventilation slots, mounted on green plastic connectors (no visible text or symbols)3
MAGNET MAGICI
Bits snap together with magnets. The magnets are always right - you can't snap them together the wrong way.
ARROWS SHOULD POINT IN THE SAME DIRECTION
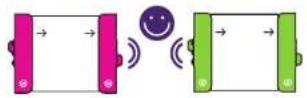
IF THE BITS WON'T SNAP TOGETHER, TRY SPINNING ONE AROUND AND MAKE SURE THE ARROWS POINT IN THE SAME DIRECTION

4
ORDER IS IMPORTANT
POWER BITS always come first and INPUT BITS only affect the OUTPUT BITS that come after them.
WITH NO OUTPUT BIT AFTER IT, THE INPUT BIT HAS NOWHERE TO SEND ITS SIGNAL
THE INPUT BIT AFFECTS THE OUTPUT BITS THAT FOLLOW
5
SOME BITS ARE ADJUSTABLE
Switches, buttons, and dials on the board allow you to change how the Bit functions.
littleBits BIT™ INDEX
POWER
07 p1 power
08 p3 USB power
INPUT
09 i3 button
10 i5 slide dimmer
11 i12 temperature sensor
12 i13 light sensor
13 i16 pulse
WIRE
14 w1 wire
15 w7 fork
16 w10 inverter
OUTPUT
17 o2 long LED
18 o3 RGB LED
19 o6 buzzer
20 o11 servo
21 o13 fan
22 o21 number
23 o25 DC motor
ACCESSORIES
24 a5 magnet shoes
a6 hook & loop shoes
a9 mounting board
25 a10 motorMate
a14 USB power adapter
26 a19 servo hub
a23 mechanical arm
27 a24 servo mount
a25 wheel

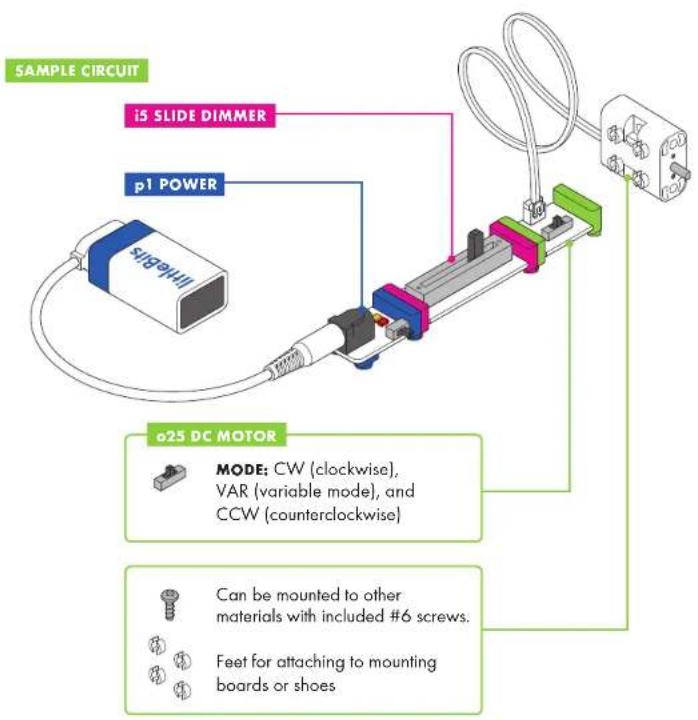
POWER
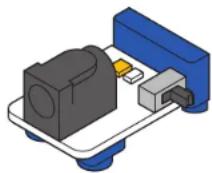
MEET THE BIT
Every circuit starts with power. It provides the electricity that makes your Bits spin, buzz, blink, and shine.
SAMPLE CIRCUIT
REAL WORLD ANALOGIES
PHONE CHARGER
HOW IT WORKS
The power Bit converts the 9 volts of electricity in the battery to the 5 volts that littleBits circuits run on.
The power Bit also sends a signal through your circuit. Controlling this signal with inputs is how you control your circuit.

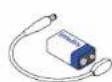
USB POWER
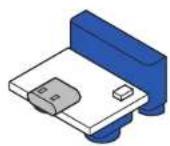
MEET THE BIT
The USB power may be the smallest in the series, but it's big enough to send electricity to all your creations. This Bit lets you power your circuit through a micro USB cable. It can be connected to a computer or wall adapter for non-stop power.
SAMPLE CIRCUIT
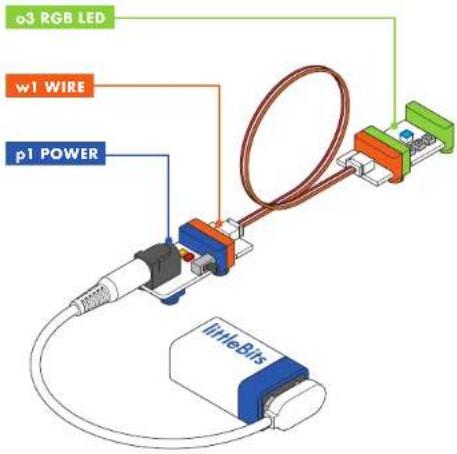
o3 RGB LED
p3 USB POWER

On light
REAL WORLD ANALOGIES
PHONE CHARGER
HOW IT WORKS
Like the power Bit, the USB power Bit sends a 5 volt signal through your circuit, which allows you to control your Bits.
Instructions for the projects in this Kit use the p1 power Bit, but you can use the USB power for all of them as well.
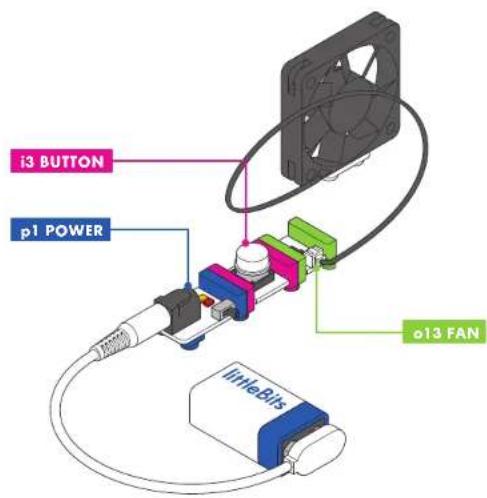
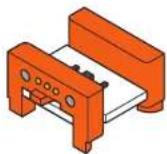
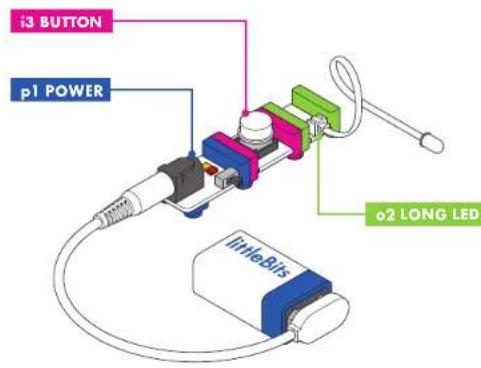
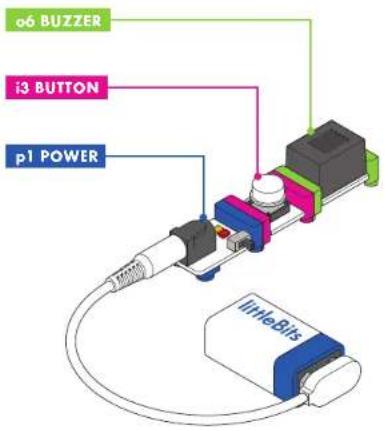
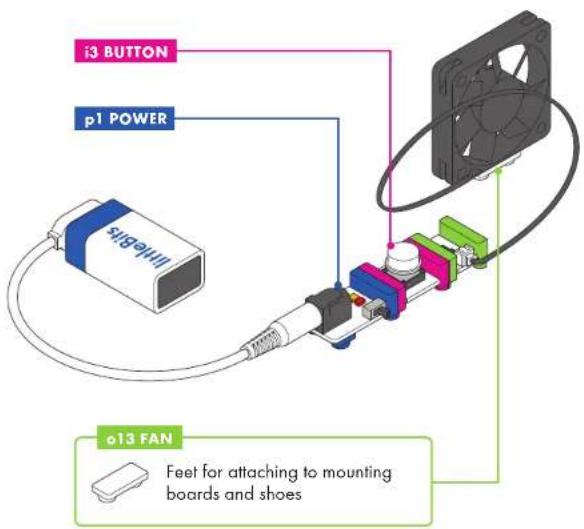
i3 BUTTON
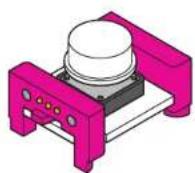
MEET THE BIT
The button Bit is a classic: big, round, and springy for comfortable pressing! Push it to turn something on and release it to turn it off.
SAMPLE CIRCUIT
HOW IT WORKS
The button is like a door. When you press it, the door opens, letting the signal pass through the Bit and on to the next Bits in the circuit. The button is a momentary switch, you must continue to press it for the signal to flow. When you release the button, the door closes, stopping the signal from passing on to other Bits.
MINI-CHALLENGE
Can you invent a chair that makes noise when you sit down?
REAL WORLD ANALOGIES
natural_image
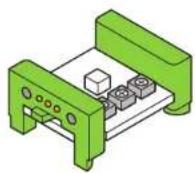
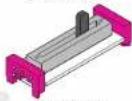
3D rendering of a mechanical component with pink and gray parts, no visible text or symbolsMEET THE BIT
Slide this dimmer back and forth to control your circuit. As you slide it up, more signal goes to the Bits that follow, brightening lights, speeding up motors, and raising the volume on your buzzer.
MINI-CHALLENGE
Can you invent something with the slide dimmer that waves a flag back and forth? How could you change the speed it waves?
SAMPLE CIRCUIT

REAL WORLD ANALOGIES
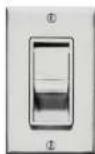
HOUSEHOLD
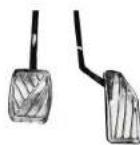
DIMMER SWITCH STEREO VOLUME CONTROL CAR PEDAL
HOW IT WORKS
When the slider is all the way to the left, it's sending an off or 0 volt signal. When the slider is all the way to the right, it's sending a 5 volt signal. The slider can be positioned to send any signal between 0 and 5 volts.
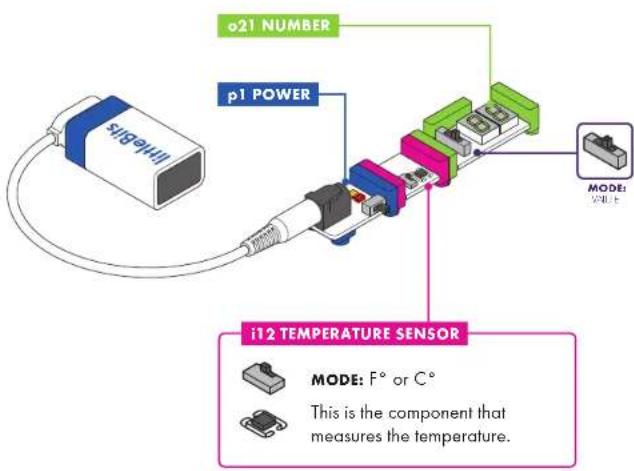
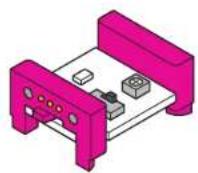
12 TEMPERATURE SENSOR
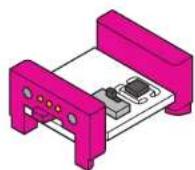
MEET THE BIT
With the temperature sensor you can use the temperature in the surrounding air to control your circuit. It's especially useful for gathering data when paired with the number Bit set to VALUE mode.
MINI-CHALLENGE
Can you invent a temperature-controlled gadget to beat the summer heat?
SAMPLE CIRCUIT
REAL WORLD ANALOGIES

THERMOSTAT MEDICAL THERMOMETER AUTOMATIC TEA KETTLE
HOW IT WORKS
The temperature sensor takes a measurement from the environment and translates it into a signal. The higher the temperature it senses, the more signal it sends out to the following Bits (making lights brighter and motors turn faster).
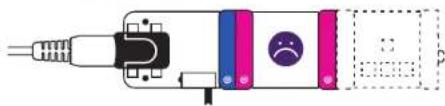
i13 LIGHT SENSOR
MEET THE BIT
Use this Bit to control your circuits with light! The amount of light shining on the sensor will change how your circuit behaves. It's a great way to activate your circuit without hands and is perfect for alarms!
SAMPLE CIRCUIT
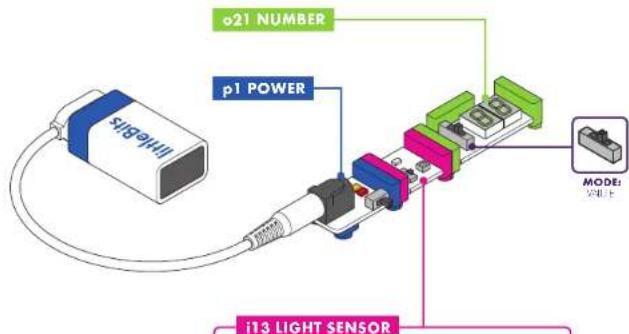

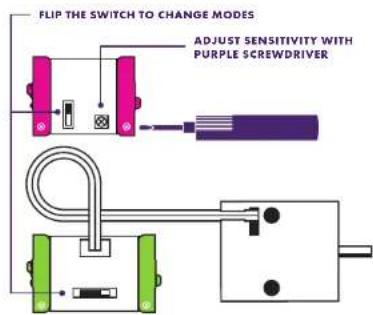
MODE: light or dark

SENSITIVITY: "-" decrease, "+" increase

This is the component that measures light.
HOW IT WORKS
The light sensor measures how much light is shining on it. It has two modes. In LIGHT mode, as the light shining on the sensor gets brighter, more signal passes through it (making lights brighter or motors turn faster). In DARK mode, the signal increases as it gets darker.
Use the purple screwdriver to turn the dial and adjust how much light it takes to change the signal. Clockwise increases sensitivity, counterclockwise decreases it.
MINI-CHALLENGE
Can you invent something that moves when the lights go out?
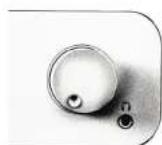
REAL WORLD ANALOGIES
NIGHT LIGHT SENSOR


PHOTOGRAPHER'S
LIGHT METER FINGER PULSE METER
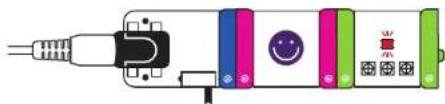
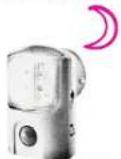
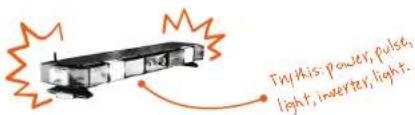
i16 PULSE

MEET THE BIT
The pulse is like a heartbeat that makes the Bits after it turn on and off in a steady rhythm.
SAMPLE CIRCUIT
HOW IT WORKS
The pulse is a switch that opens and closes over and over again. When it's open, the signal from the previous Bit passes through to the next Bit. When the switch closes, the signal is blocked.
Use the purple screwdriver to adjust the dial. You can change the speed of the rhythm by turning the small dial on the Bit with your purple screwdriver.
MINI-CHALLENGE
Can you invent a warning signal with the pulse? How can you make the signal pulse faster or slower?
REAL WORLD ANALOGIES


POLICE SIREN FIREFLY CLOCK SECONDHANDTURN SIGNAL
natural_image
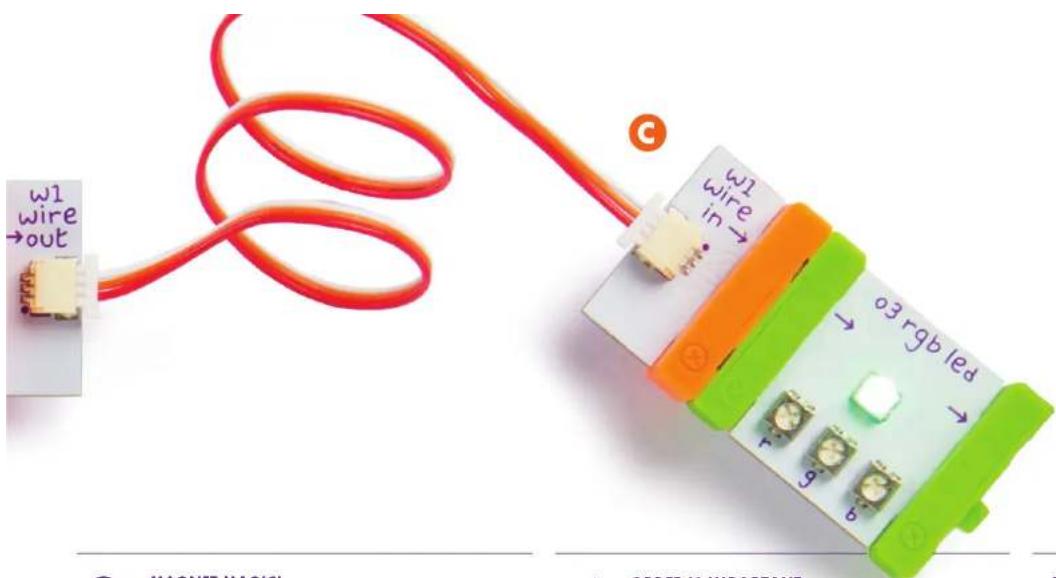
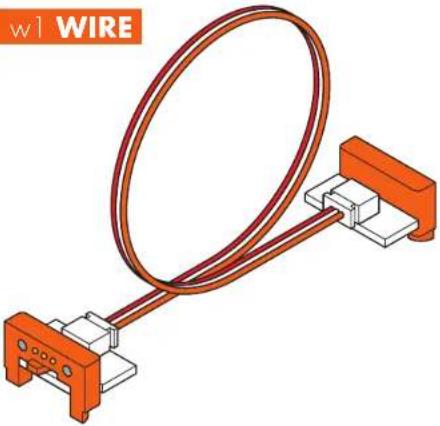
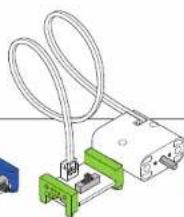
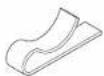
3D diagram of a wire connection device with orange components and a coiled cable (no text or symbols)MEET THE BIT
The wire Bit has a flexible wire running between its two bitSnaps. This allows you to place your Bits farther apart, turn corners, and make connections that can twist, turn, and spin.
SAMPLE CIRCUIT
HOW IT WORKS
The wire doesn't change the signal in any way - it just carries it over from one Bit to another.
MINI-CHALLENGE
Can you invent a circuit that uses the wire to shine the RGB LED on the light sensor?
REAL WORLD ANALOGIES
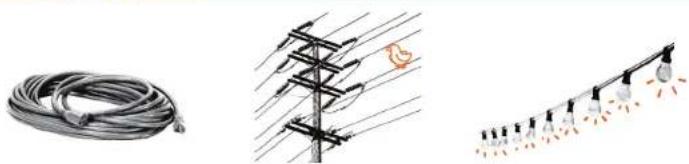
natural_image
Three separate images: a coiled cable, an electrical transmission pole with a fan, and a streetlight emitting light rays (no text or symbols)EXTENSION CORD POWER LINES STRING OF LIGHTS

FORK
natural_image
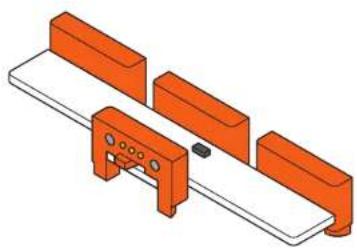
Isometric illustration of a mechanical assembly with orange components and a central rod (no text or symbols)MEET THE BIT
The fork gives you more options for connecting your Bits; it lets you connect a single Bit to as many as three others. If you place an input before the fork, it will control all three outputs at once, such as light, sound, and motion.
MINI-CHALLENGE
Can you invent a circuit where an input controls three outputs?
SAMPLE CIRCUIT
REAL WORLD ANALOGIES
natural_image
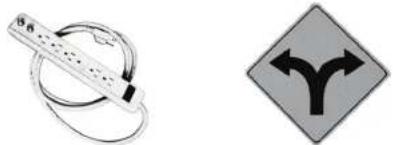
Two road signs: a medical device with a needle and a Y-shaped directional arrow (no text or symbols)POWER STRIP FORK IN THE ROAD
HOW IT WORKS
The fork takes the incoming signal and sends it to all three output bitSnap.
w10 INVERTER
MEET THE BIT
The inverter is an example of a logic Bit. It sends out the opposite of whatever it receives: send it an on signal, and the inverter changes it to an off signal, or vice versa. Would you like a button that turns things off instead of on? Try the inverter.
MINI-CHALLENGE
Can you invent something with the inverter that alerts you if someone takes a book off the table?
SAMPLE CIRCUIT

REAL WORLD ANALOGIES

OPPOSITE DAY
ALTERNATING POLICE LIGHTS
HOW IT WORKS
Anytime the inverter receives a signal lower than 50% power (2.5 volts) the inverter sends full power (5 volts) to the next Bit in the circuit. If the inverter receives a signal greater than 2.5 volts, the inverter sends 0 volts to the next Bit in the circuit.

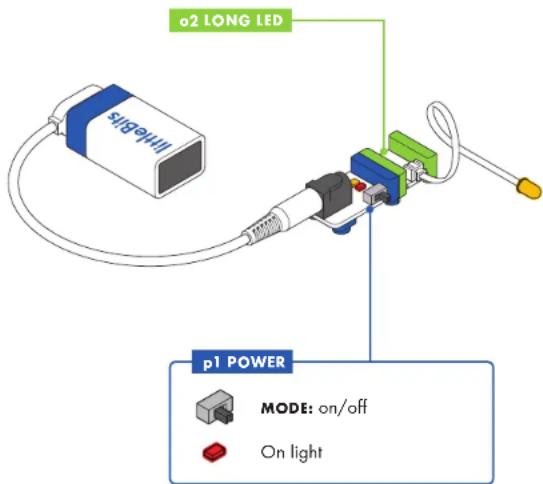
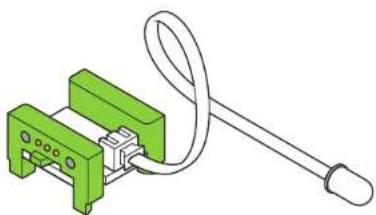
LONG LED
natural_image
Illustration of a green electrical connector with a coiled cable and handle (no text or symbols)MEET THE BIT
The long LED is a flexible lighting option. We call it the "long" LED because the light is connected to the board by a cable, which lets you put the light in some interesting places.
SAMPLE CIRCUIT
MINI-CHALLENGE
Can you invent a new wearable accessory using the long LED?
REAL WORLD ANALOGIES
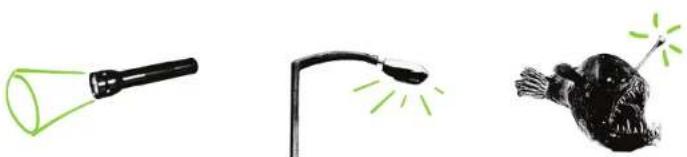
natural_image
Three black-and-white illustrations: a flashlight with green light, a lamp with green light, and a skull with a green light (no text or symbols)This Bit uses a light-emmitting diode (LED) to turn electricity into light. The more signal you send the Bit, the brighter the light shines.

RGB LED
MEET THE BIT
The RGB LED is a light with adjustable color. You can use the purple screwdriver to turn the dials and create your own custom color mix of red, green, and blue.
MINI-CHALLENGE
Can you invent a flashlight that uses your favorite color?
SAMPLE CIRCUIT
o3 RGB LED

R: Adjust the amount of red light

G: Adjust the amount of green light

B: Adjust the amount of blue light
REAL WORLD ANALOGIES

The RGB LED is actually three very small lights (a red, a blue, and a green light). Turning the dials changes the brightness of each light. The colors from these lights mix together to create every color in the rainbow.

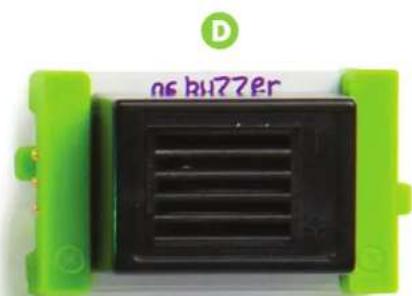
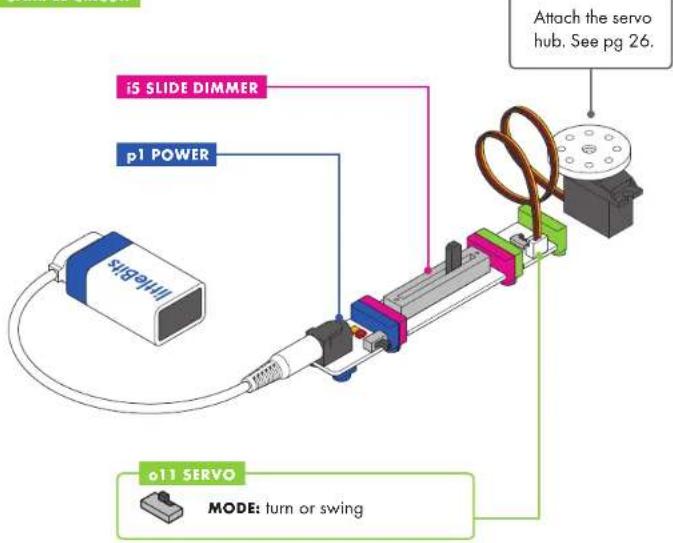
BUZZER
natural_image
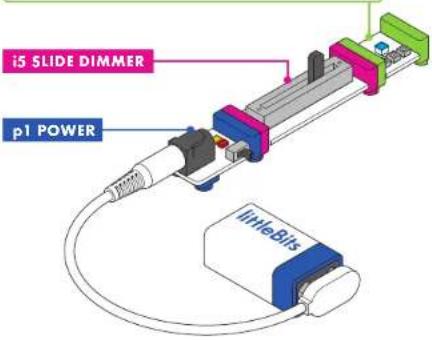
3D rendering of a black rectangular electronic component with green mounting brackets (no text or symbols)MEET THE BIT
The buzzer makes a sound no one can ignore. It's great at sounding the alarm or annoying those nearby.
MINI-CHALLENGE
Can you invent a way to communicate with your friends using the buzzer?
SAMPLE CIRCUIT
REAL WORLD ANALOGIES
DOORBELL CAR ALARM WASHING MACHINE
HOW IT WORKS
The buzzer converts the electrical signal it receives into a vibration, which creates a buzzing sound. The higher the signal it receives, the more intense the vibration, and the louder the sound is.
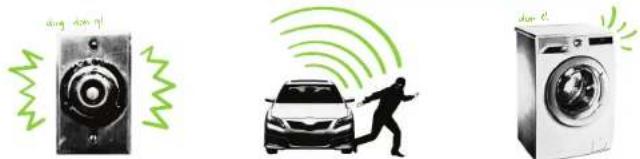
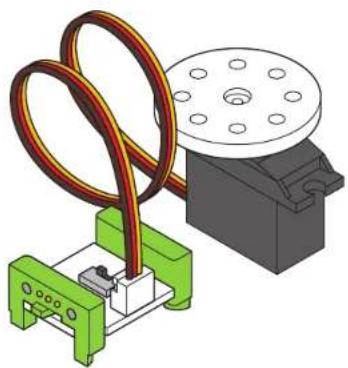
011 SERVO
natural_image
3D illustration of a robotic arm with green base, red rope, and black component (no text or symbols)MEET THE BIT
The servo is a motor that can swing back and forth or be turned to a specific position.
There are a few accessories you can use with the servo (like the mechanical arm). You can find out how to use those on pages 26 and 27.
MINI-CHALLENGE
Can you invent something that uses the servo to clean up your desk?
SAMPLE CIRCUIT
REAL WORLD ANALOGIES
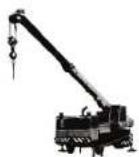
TRUCK CRANE ROBOT
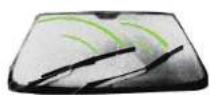
WINDSHIELD WIPERS
HOW IT WORKS
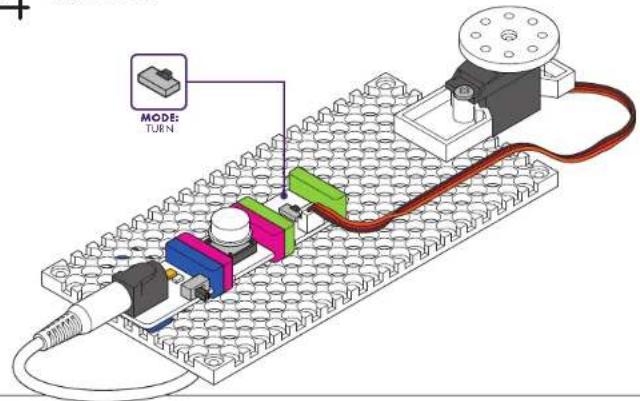
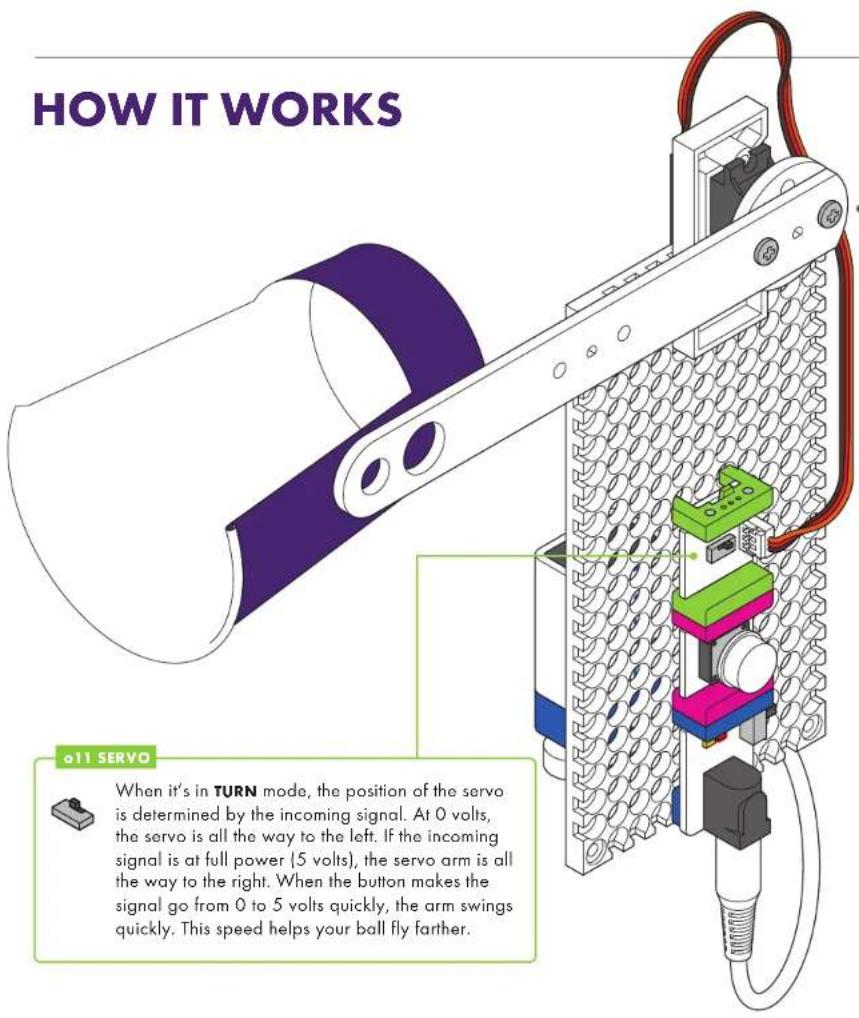
The servo has two modes. In TURN mode, the input from other Bits determines the position of the hub - try using a dimmer to set the angle you want. In SWING mode, the servo will move back and forth on its own like a pair of windshield wipers - the input signal controls the speed of the swing.
The servo's range of motion is about 110 degrees.
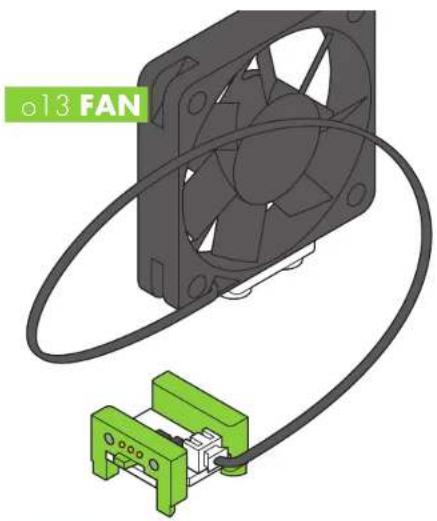
natural_image
3D diagram of a fan connected to a green connector (no text or symbols)MEET THE BIT
Use the fan to create a gentle breeze, perfect for cooling things off. You can also try taping small things (like stickers or pieces of paper) to the center of the fan for some spinning visuals.
MINI-CHALLENGE
Can you invent something that uses the fan to move an object across the table?
SAMPLE CIRCUIT
REAL WORLD ANALOGIES
LEAF BLOWER

PERSONAL FAN AIRPLANE PROPELLER
HOW IT WORKS
Inside the fan is a tiny motor. When it receives a signal, it spins. The more signal it receives, the faster it spins.
o21 NUMBER
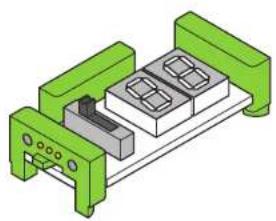
natural_image
3D diagram of a mechanical assembly with green and gray components (no text or symbols)MEET THE BIT
The number displays information that it receives from the Bits before it. It's a great way to measure the input from sensors or count things, like the score in a game.
SAMPLE CIRCUIT
o21 NUMBER

Reset bitSnap ^TM

MODE: count or read

HOW IT WORKS
The number Bit displays information about the signal it's receiving.
In COUNT mode, the Bit can count up or down when the Bit receives an input signal over 2.5 volts. It can be reset by receiving a signal through the reset bitSnap.
In READ mode, the Bit displays information about the signal it's receiving in either volts ranging from 0.0–5.0 or values ranging from 0–99.
The signal leaving the Bit will always match the number being displayed, even in COUNT mode. For example, if you count up to 38, the signal leaving the Bit will be 38% of full power.
MINI-CHALLENGE
Can you invent a game that uses an automatic score counter?
REAL WORLD ANALOGIES
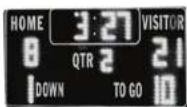
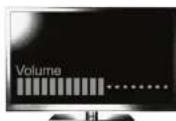
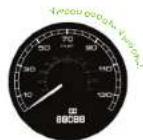
SCOREBOARD VOLUME INDICATOR ON TV SPEEDOMETER
natural_image
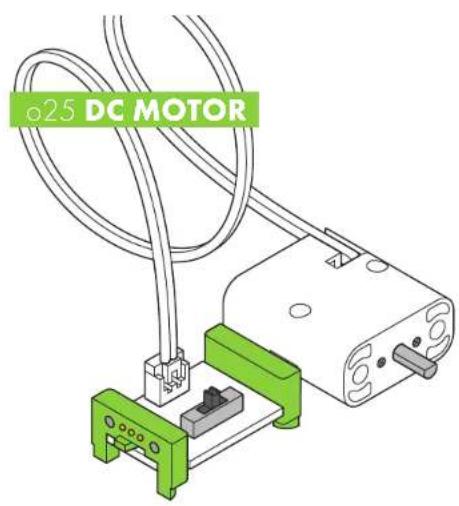
3D diagram of a DC motor assembly with green and white components and coiled wires (no text or symbols)MEET THE BIT
Use the motor to spin, turn, twist, and roll.
There are a few accessories you can use with the DC motor (like wheels). You can find out how to use those on pages 25 - 27.
MINI-CHALLENGE
Can you invent something using the DC motor that travels across the table?
REAL WORLD ANALOGIES
CAR ENGINE DRILL FERRIS WHEEL
HOW IT WORKS
The DC (or "direct current") motor rotates a shaft when it receives a signal. The more signal it receives, the faster the motor will spin.
A switch on the board lets you choose which direction the motor spins. CW spins clockwise and CCW spins counterclockwise. When the switch is in VAR (variable) mode, the amount of signal the motor receives from previous Bits allows you to control the speed and direction (clockwise or counterclockwise) of its motion. In this mode, using an input like a slide dimmer makes steering easy!
natural_image
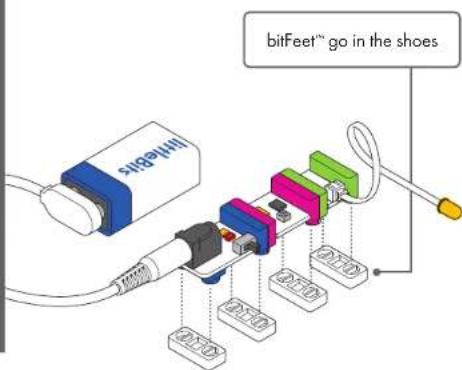
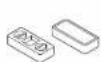
Technical line drawing of a flexible electronic component with multiple base blocks (no text or symbols)MEET THE ACCESSORY
Shoes slip onto your Bits' feet and hold your circuit together. On the bottom of your shoes you'll find magnets or hook & loops, which are great for securing your circuits to different surfaces.
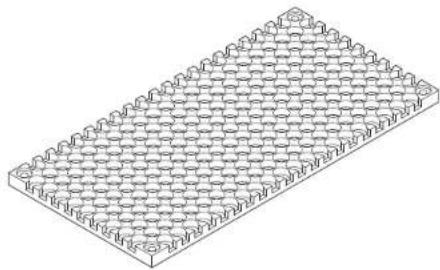
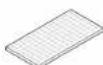
a9 MOUNTING BOARD
natural_image
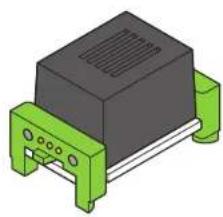
Isometric view of a rectangular grid pattern with repeating hexagonal elements (no text or symbols)MEET THE ACCESSORY
The mounting board is like the backbone of some of your inventions. It allows you to keep your circuit intact and move it around with ease! It also provides structure which is helpful for building out projects, like a vehicle.
HOW IT WORKS
First, snap together your littleBits circuit. Then press the feet of your Bits into the holes of the shoes and place it on your chosen surface.
Magnet shoes allow you to adhere your circuit to any magnetic surface. Try your refrigerator or your locker!
Hook & loop shoes come with an adhesive-backed hook & loop strip. The strip can be cut to any size you desire and affixed to clothing, fabric, or any flexible surface.
HOW IT WORKS
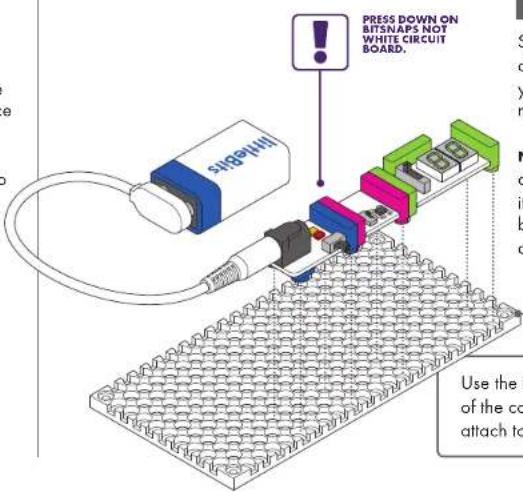
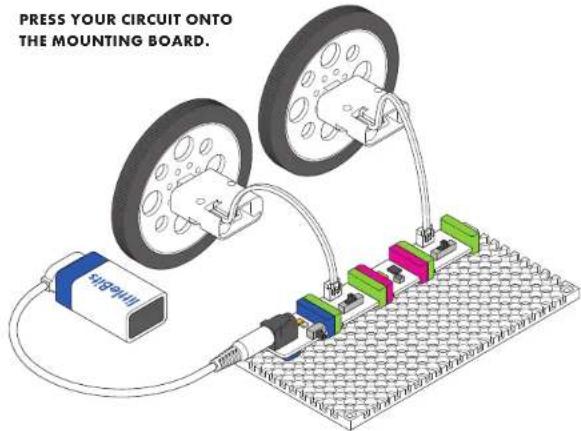
Snap together your littleBits circuit and press the feet of your Bits into the holes of the mounting board.
NOTE: Your circuit must be complete before you press it onto the board. You won't be able to add Bits one at a time.
Use the included #6 screws in each of the corner holes to permanently attach to any surface.
a10 MOTORMATE

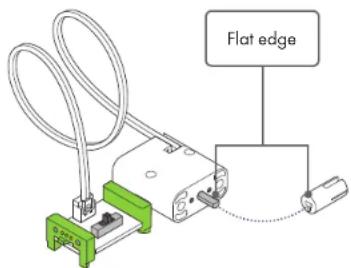
MEET THE ACCESSORY
The motorMate makes it easy to attach paper, cardboard, LEGO axles, and lots of other materials to the DC motor.
HOW IT WORKS
To mount, slide the motorMate onto the shaft of the DC motor by aligning the flat edges. The motorMate has two different sized slots: one fits most standard craft sticks and the other fits thicker papers like cardstock. LEGO axles fit right into the center.
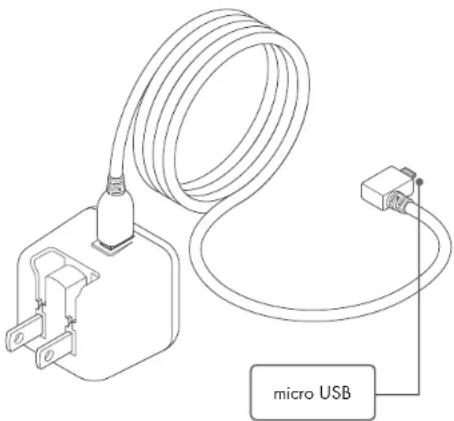
al4 USB POWER ADAPTER & CABLE
natural_image
Line drawing of a micro USB cable and plug connection (no text or symbols)MEET THE ACCESSORY
This power adapter and USB cable combo is the perfect way to provide long-term power to your littleBits creations.
HOW IT WORKS
This power adapter converts your 120 volt wall power into the 5 volt power that littleBits circuits run on. Simply connect the cable from the power adapter to your littleBits USB power Bit (this only connects to the p3 USB power Bit). You can also use the USB cable to power your circuits from a computer or rechargeable USB battery.
NOTE: Input: 100–240V AC 50/60Hz; Output: 5.0V DC 2000mA. Included adapter is for US electrical outlets only.
a19 SERVO HUB

MEET THE ACCESSORY
The servo hub lets you easily attach materials to your servo motor and add more complex movements to your littleBits inventions.
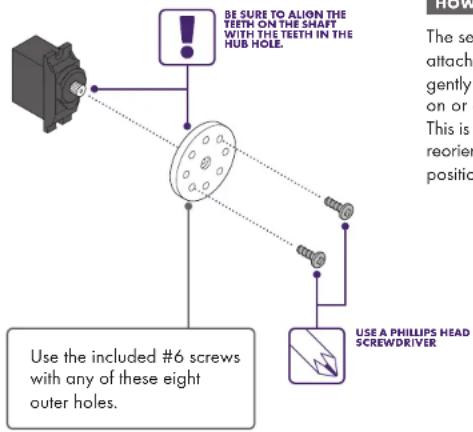
HOW IT WORKS
The servo hub can be attached and removed by gently pushing or pulling it on or off the servo motor. This is helpful if you need to reorient how the holes are positioned for a project.
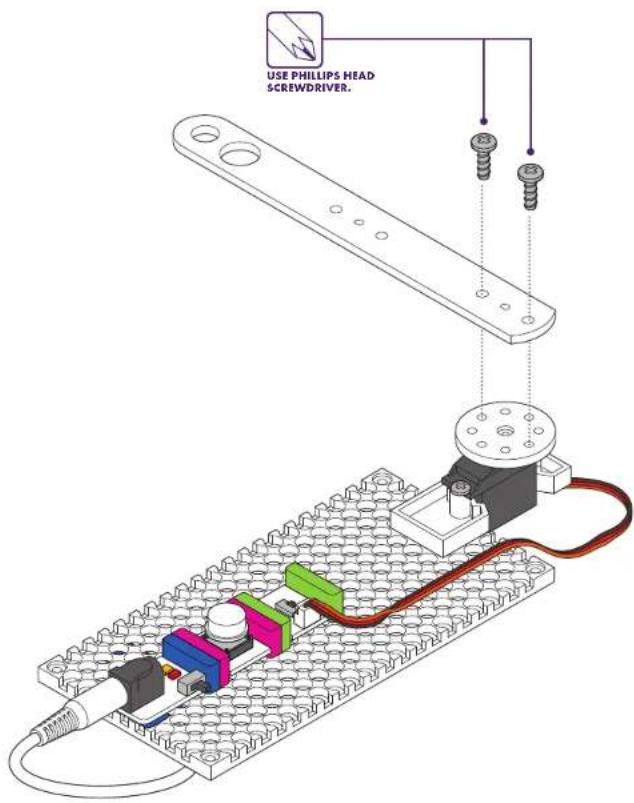
a23 MECHANICAL ARM
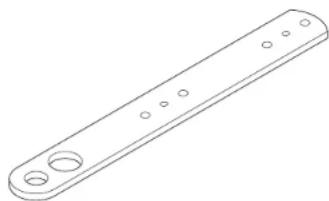
natural_image
Isometric line drawing of a long rectangular object with evenly spaced circular holes (no text or symbols)MEET THE ACCESSORY
The mechanical arm attaches to both the servo hub and the DC motor shaft, and offers lots of leverage for pushing, pulling, and throwing.
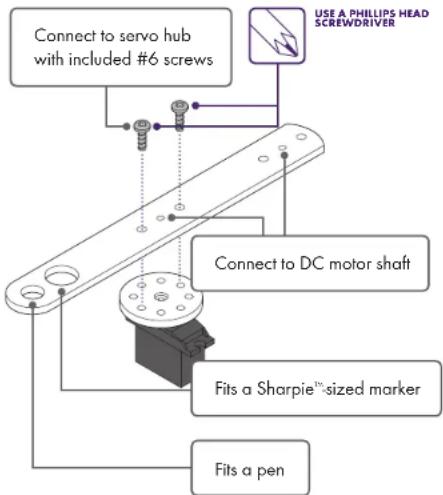
HOW IT WORKS
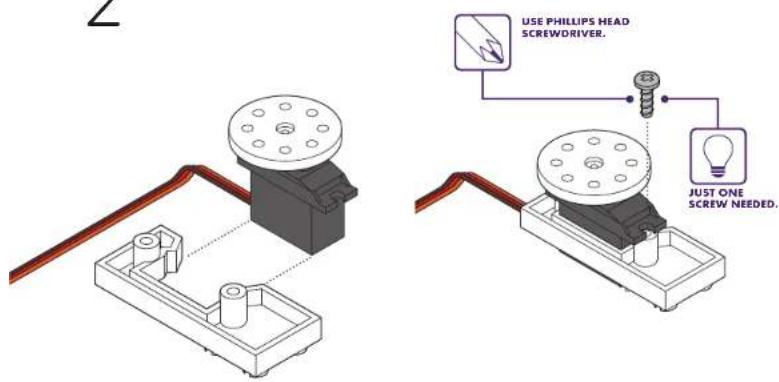
To attach the mechanical arm to the servo hub, use two of the #6 screws (included) and a Phillips head screwdriver (not the purple screwdriver). Be sure to screw through the holes on the servo hub.
To attach the mechanical arm to the DC motor, line up the flat edge of the DC motor shaft with the flat edge of either of the flat-edged holes on the mechanical arm.
The two large holes on the end are perfect for holding pens and markers in place.
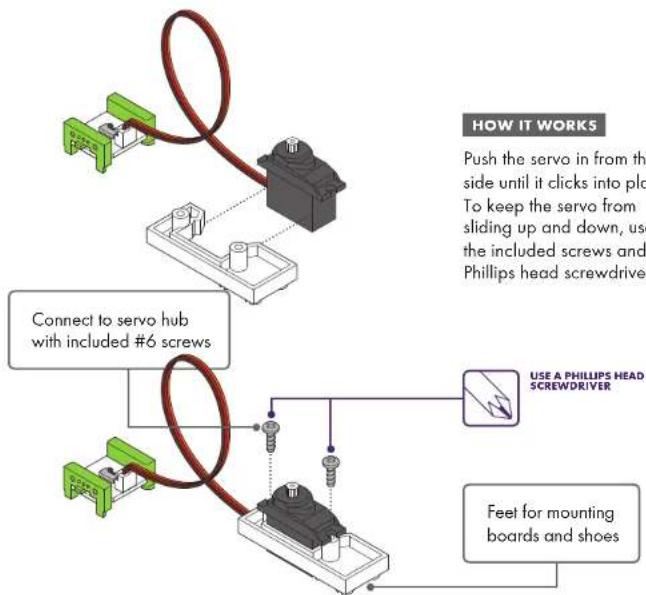
a24 SERVO MOUNT
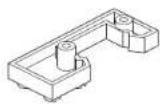
MEET THE ACCESSORY
The servo mount lets you attach your servo to a mounting board or a pair of littleBits shoes. It's a great way to keep the servo steady so the arm can go wild.
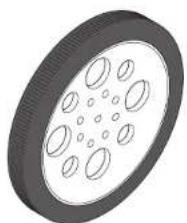
a25 WHEEL
natural_image
3D rendering of a wheel with multiple circular cutouts (no text or symbols)MEET THE ACCESSORY
When used with a DC motor, this wheel is perfect for making bots, cars, and all sorts of spinning inventions.
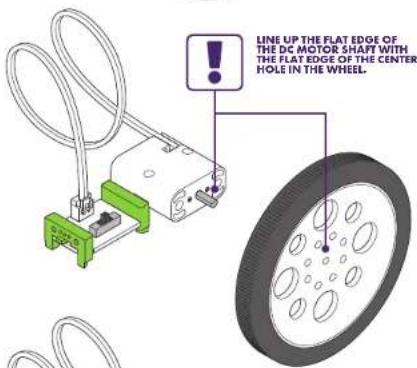
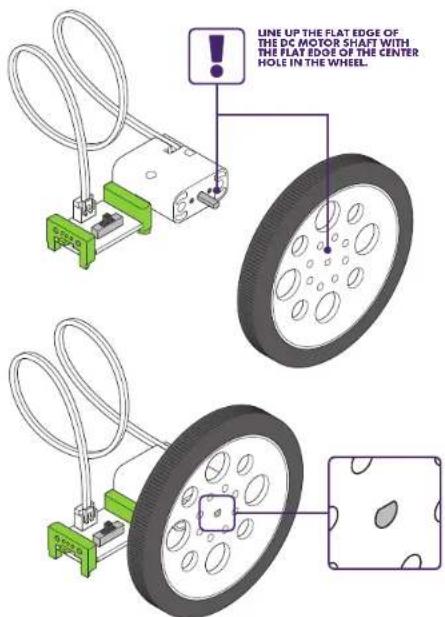
HOW IT WORKS
The metal shaft of the DC motor and the hole in the wheel are both flat edged. To attach the wheel to the DC motor shaft, align the flat edge of the hole in the wheel with the flat edge of the motor shaft. Press firmly to slide it on.
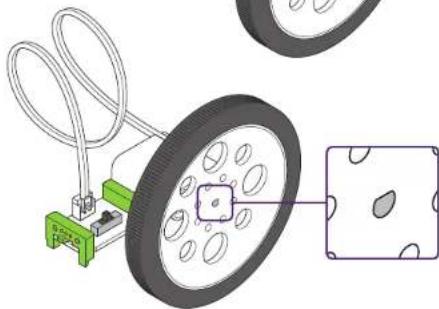
natural_image
Mechanical assembly diagram showing a wheel with attached components and a close-up view of a component (no text or symbols)The wheel also connects to the servo hub using the included #6 screws.
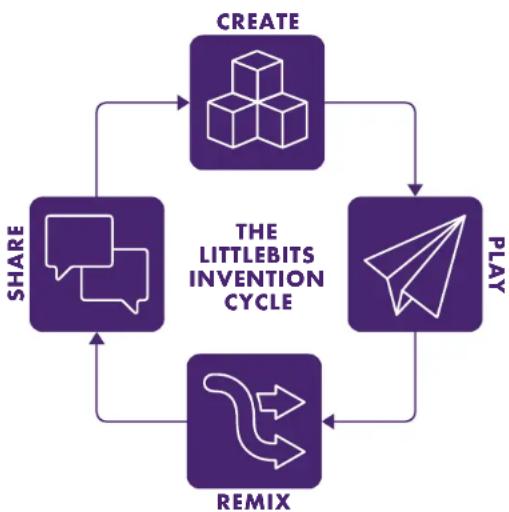
What is the Invention Cycle? The Invention Cycle is a roadmap for your invention journey. Each phase is full of activities and questions that help you explore your ideas and develop your invention.
DO I HAVE TO GO THROUGH THE INVENTION
CYCLE EXACTLY IN ORDER?
Nope! If you want, you can remix while you play or share while you create. Each phase of the invention cycle represents a different way of thinking and making. They work well in order, but a good design process is always a bit messy.
flowchart
graph TD
    A["CREATE"] --> B["PLAY"]
    B --> C["REMX"]
    C --> D["SHARE"]
    D --> A
    style A fill:#999,stroke:#333
    style B fill:#ccc,stroke:#333
    style C fill:#fff,stroke:#333
    style D fill:#fff,stroke:#333
CREATE
PUT SOMETHING TOGETHER. You can build it from the instructions or make something from your imagination. Don't worry if it doesn't work or if it isn't perfect. The important thing is to create your first model so you have something to experiment with.
REMIX
IMPROVE YOUR INVENTION. Keep experimenting! Add new Bits, swap parts with other inventions, or take all the pieces apart and put them together in a different way.
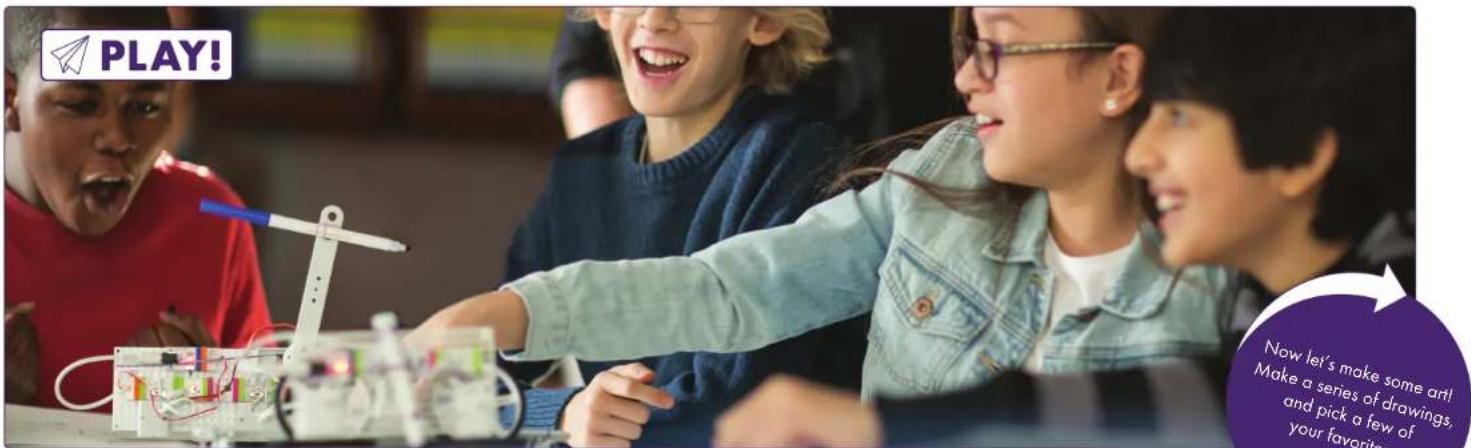
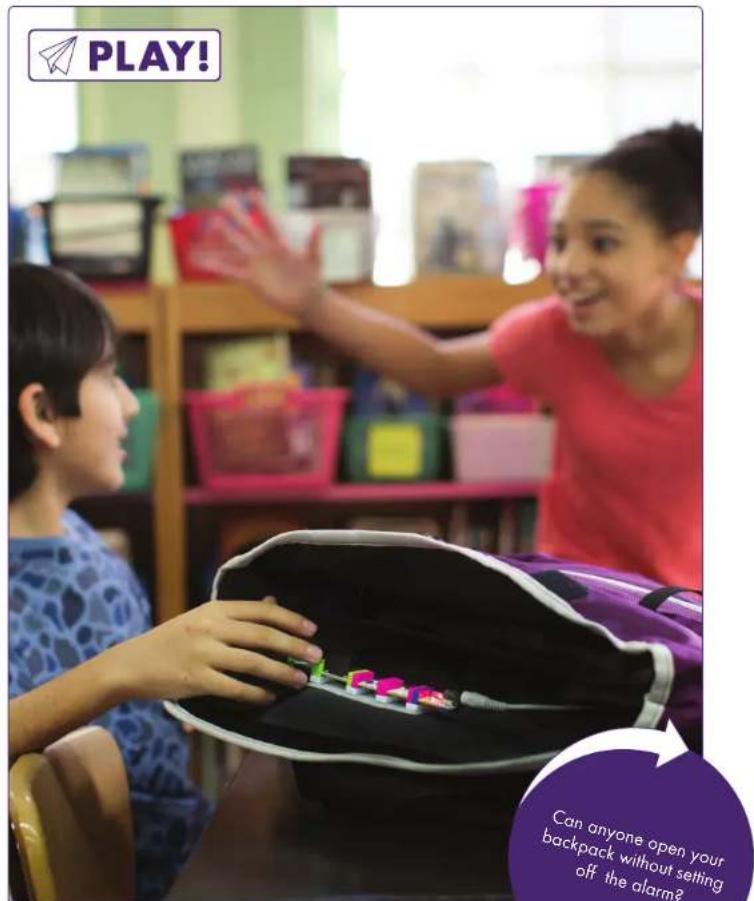
PLAY!
USE IT! Playing with what you've created is fun, but also an important part of inventing. Playing is like a test run. It's a chance to see how well your invention works and look for ways you can make it better.
SHARE
INSPIRE OTHERS. Show the world what you've created. Get inspired by exploring what others have shared. Create, play with, and remix other inventions. This is how awesome new inventions are born.
ICON INDEX

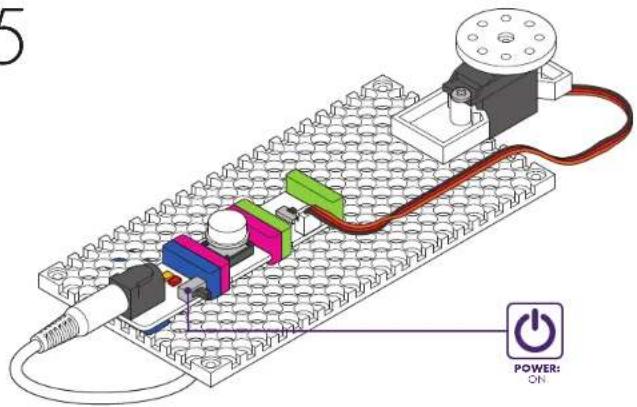
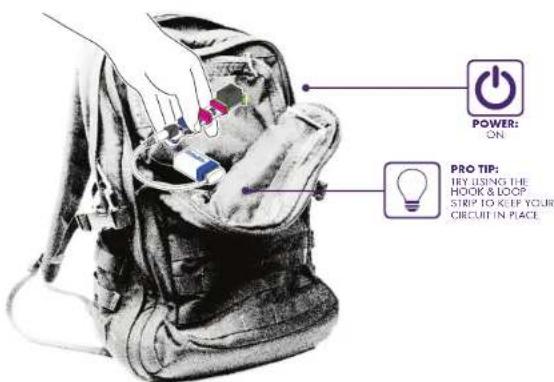
POWER ON/OFF: The p1 power bit ^TM has on or off switch. This icon will let you know when it's time to turn it on or off.

PRO TIPS Keep your eyes open for these bits of littleBits wisdom. These tips will help build your invention skills and level up your inventors.

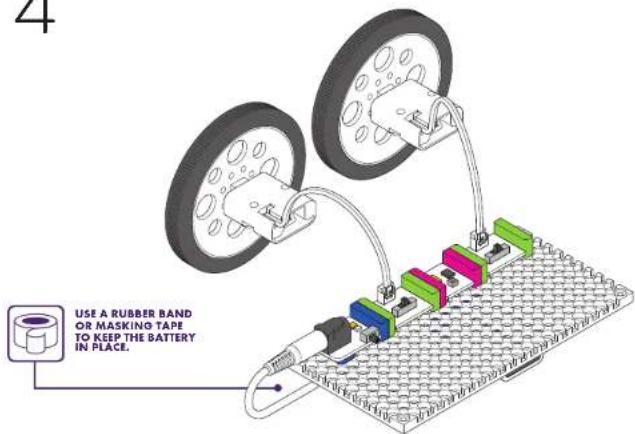
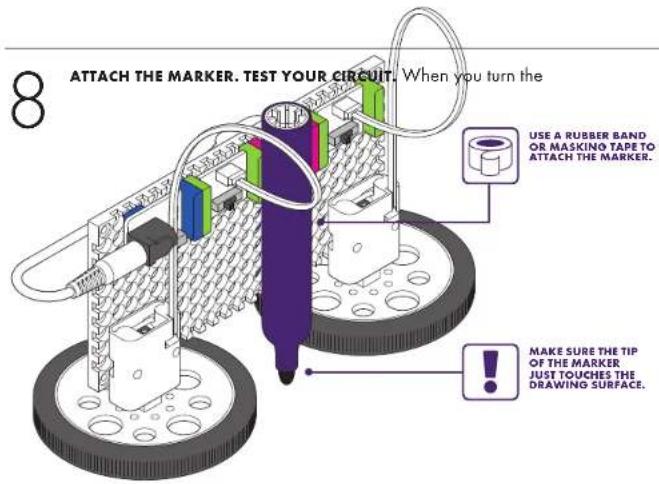
USE RUBBER BAND OR MASKING TAPE This icon will tell you when to use rubber bands or some masking tape to keep something in place.
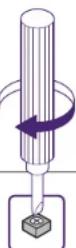
TURN DIAL CLOCKWISE (CW): Use the purple screwdriver to turn the dial on the Bit all the way clockwise.
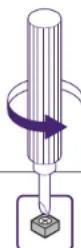
TURN DIAL COUNTER- CLOCKWISE (CCW): Use the purple screwdriver to turn the dial on the Bit all the way counterclockwise.

CHANGE MODE Some Bits have a switch that changes how the Bit works. This icon will tell you which made your switch should be in.

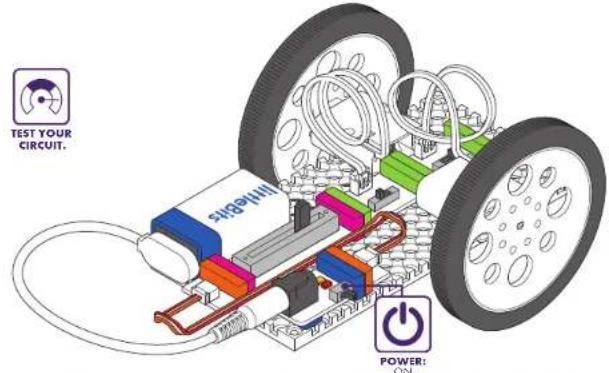
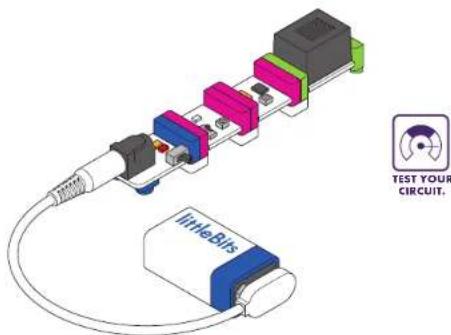
TEST YOUR CIRCUIT Before you play with your new invention, you'll turn the power on and make sure all your Bits ^™ are doing their jobs.

EXTRA IMPORTANT INFO! This icon will let you know when there is a small, but very important step we don't want you to miss. If you ignore these your invention won't work.

PHILLIPS HEAD The metal screws included with your set require a Phillips head screwdriver (not included). Do not use the plastic purple screw driver on these screws.

USE THE LITTLEBITS APP Discover inventions, connect with the littleBits community, and easily upload and share your own creations.
PROTOTYPING TIPS
WHAT'S A PROTOTYPE, YOU ASK? A prototype is a model that helps you test an idea. This is the first step in turning your ideas into actual inventions. Building a prototype helps you learn what you like, what works, and what needs more figuring out. You'll be building a lot of prototypes during the challenges in this booklet.


DON'T WORRY ABOUT PERFECTION or if your invention will work right away – just start making. Do you think the light bulb was invented on the first try? Most inventions take many tries to get right.


BUILD MANY DIFFERENT VERSIONS. The more you experiment, the more you will learn, and the better your invention will be.


TRY SOME WEIRD AND UNEXPECTED STUFF. You might be surprised at what you discover when you add random materials, flip your prototype upside down, or try using it for a totally different purpose.

DOCUMENT EACH STEP. As your prototype changes, take photos, draw sketches, and jot down notes. The journey from idea to invention is just as exciting and important as the final result. You did a lot of work to bring it to life. Show it proudly!
HELPFUL TOOLS & MATERIALS
THE WORLD AROUND YOU IS FULL OF MATERIALS FOR PROTOTYPING AND CREATING
INVENTIONS. At littleBits, we dig through our recycling bins all the time to collect stuff for our projects. In fact, the very first prototype of a Bit was made with cardboard, copper tape, and a few electronic components like LEDs. Here's some of our favorite stuff to work with:

natural_image
Line drawing of a cup with horizontal stripes on a purple background (no text or symbols)paper or plastic cups

natural_image
Line drawing of scissors on a purple background (no text or symbols)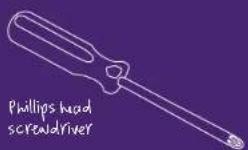


natural_image
Illustration of a knitted yarn ball on a purple background (no text or symbols)
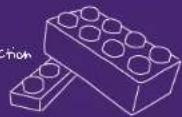
construction toys
rubber bands


cereal box


natural_image
Simple line drawing of an open cardboard box on a purple background (no text or symbols)

natural_image
Illustration of multiple overlapping paper sheets in white outline on a solid purple background (no text or symbols)CHALLENGE 01
INVENT A SELF-DRIVING VEHICLE
30
MINUTES [MINIMUM]
○○○ ●
TIME LEVEL
natural_image
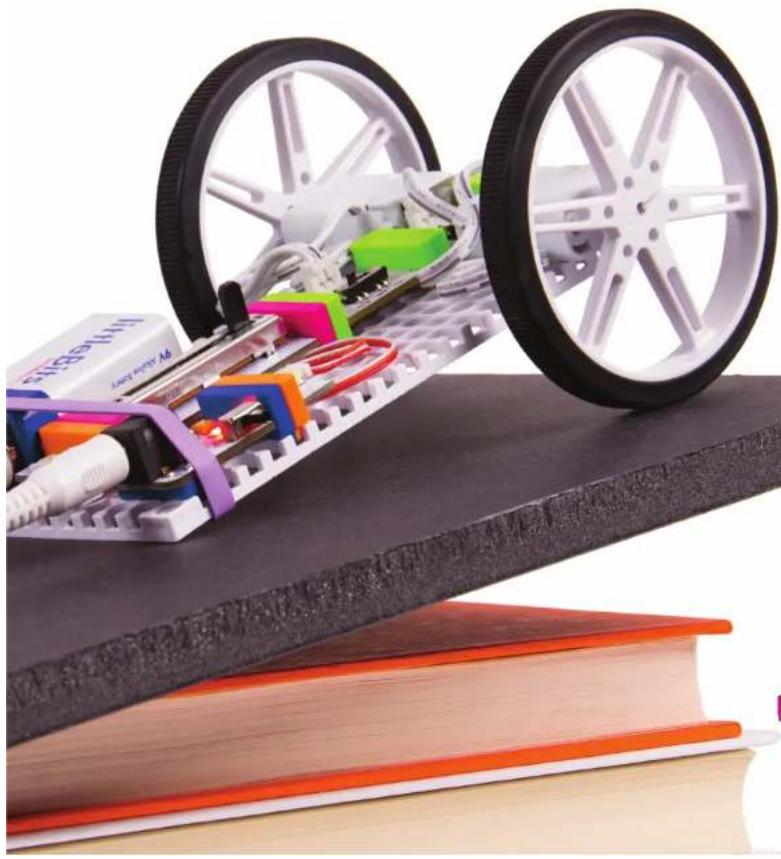
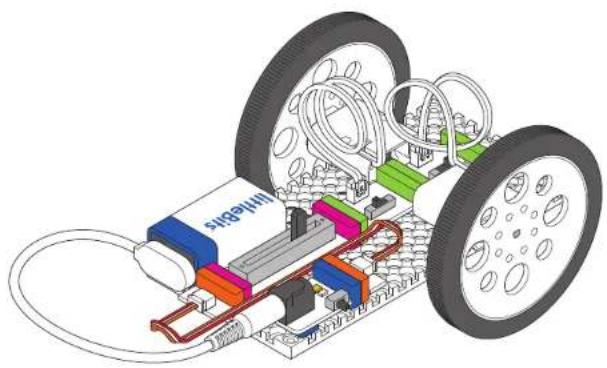
Close-up of a robotic car on a black platform with colorful components, placed above an open book (no visible text or symbols)START BY BUILDING THE CIRCUIT CRUISER, A VEHICLE THAT
GETS AROUND ON TWO DC MOTORS. Add extra features to this lean, mean, mobile machine. Use it to deliver school supplies to your friends, help your teacher pass out papers, or wake up your sleeping classmate.
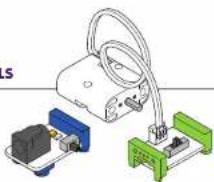
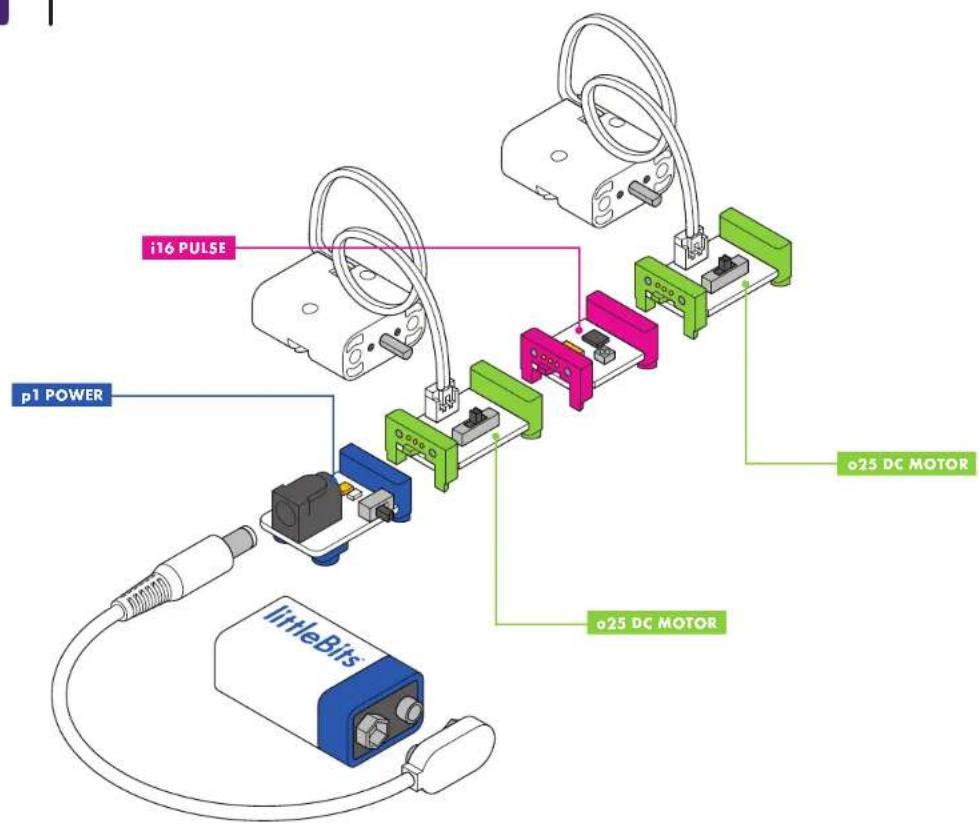
BITS ^™ + MATERIALS
a) battery & cable

p1 pzw a=025 DC motor (×2)
natural_image
Diagram of a mechanical assembly with coiled wires and connectors (no text or symbols)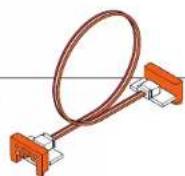
wl wire
15 slide dimmer

a25 wheel |<2|
a9 mounting board
• rubber band/tope
(not included)

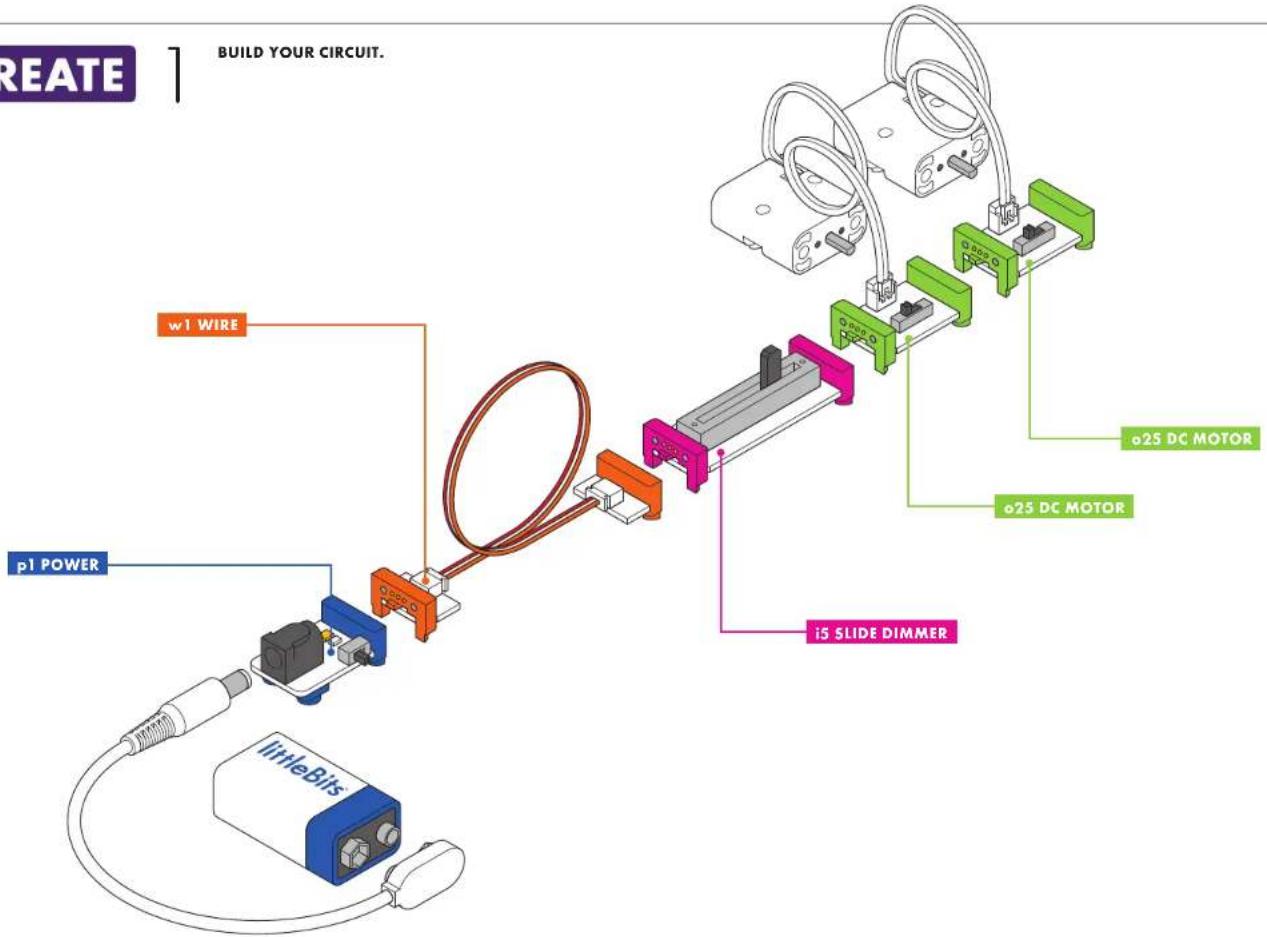
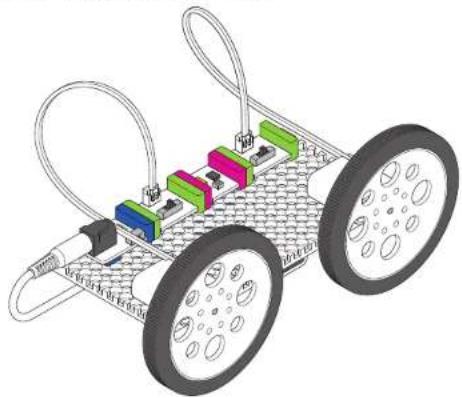
CREATE
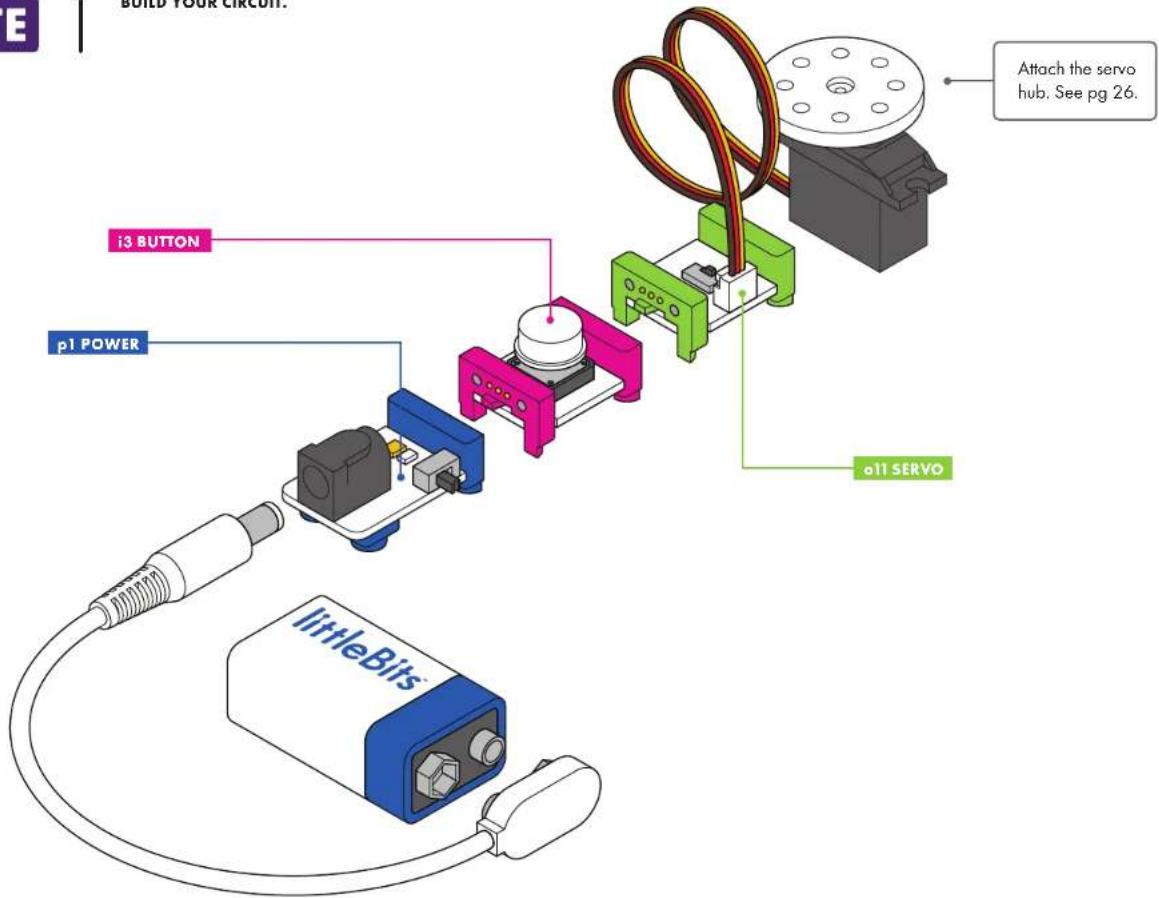
BUILD YOUR CIRCUIT.
2
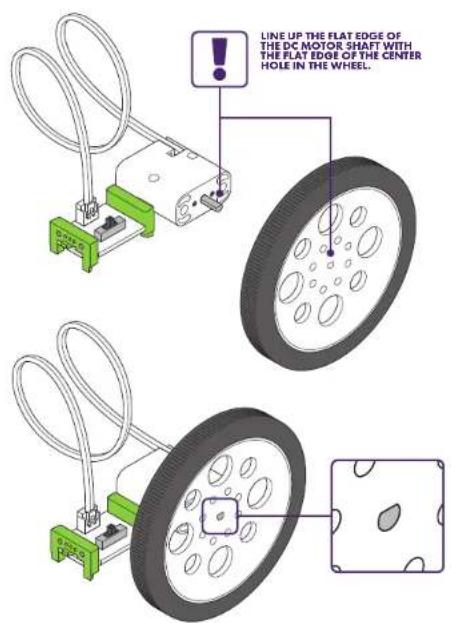
PRESS THE WHEELS ONTO THE DC MOTORS.
3
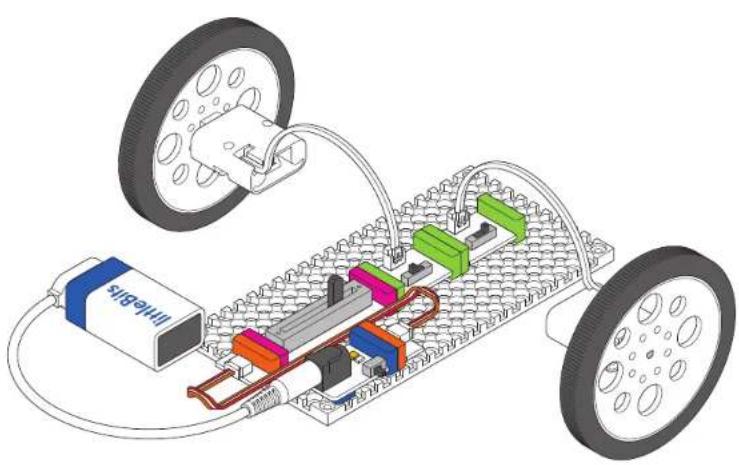
PRESS YOUR CIRCUIT ONTO THE MOUNTING BOARD.
natural_image
3D diagram of a robotic car chassis with colored components and connected wheels (no text or symbols)4
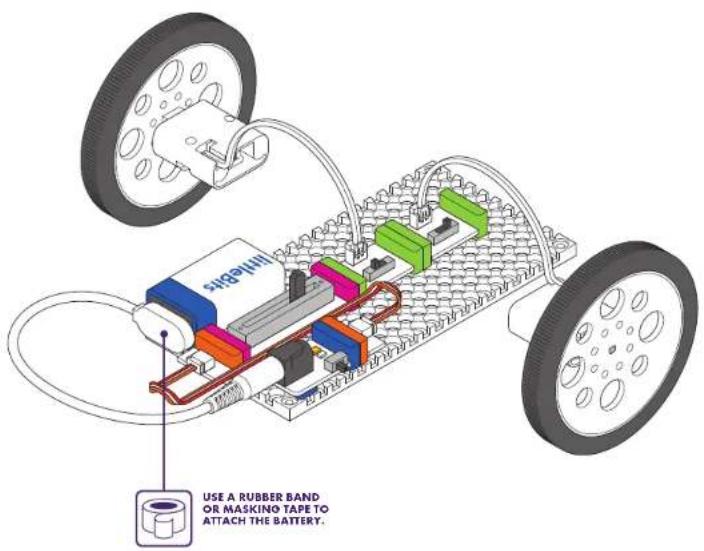
ATTACH THE BATTERY TO THE MOUNTING BOARD NEXT TO THE SLIDE DIMMER. PRESS THE MOTORS ONTO THE MOUNTING BOARD.
THEY 5
natural_image
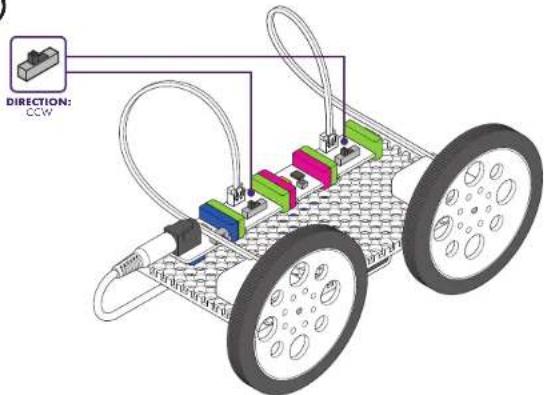
3D technical illustration of a robotic car with visible wiring and components (no text or symbols)6
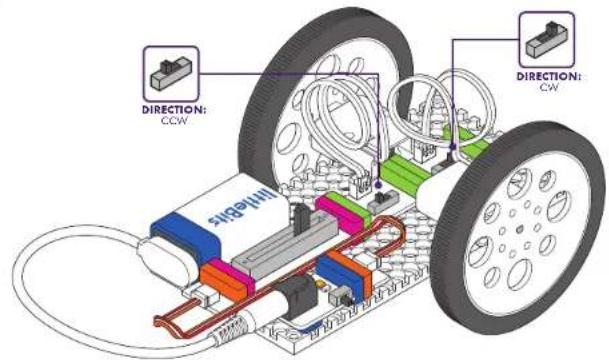
SET THE FIRST DC MOTOR TO CCW (COUNTERCLOCKWISE) AND THE SECOND DC MOTOR TO CW (CLOCKWISE).
7
TEST YOUR CIRCUIT. With the slide dimmer set all the way up, the car should move forward. Troubleshooting pg 71.

HOW IT WORKS
o25 DC MOTOR

Control the direction your car drives by flipping the mode switches. Because the motors face opposite directions, they need to be set in opposite spin modes to drive in one direction. Setting the motors to the same direction mode will create a car that spins around in circles.
i5 SLIDE DIMMER
The slide dimmer is like the gas pedal for your car. As you slide it up, more power goes to your motors.
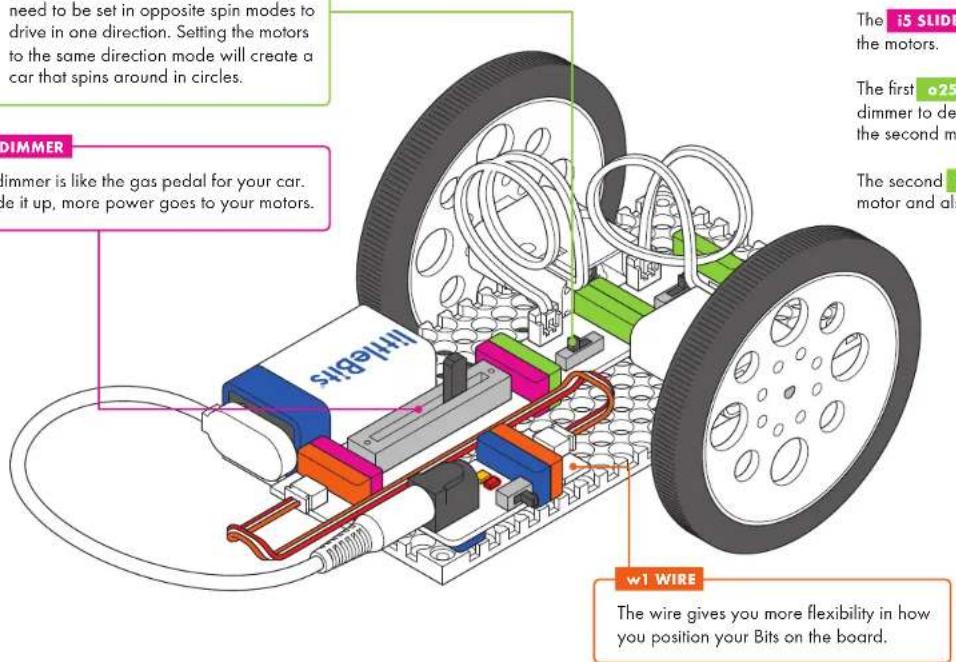
p1 POWER sends a signal through the circuit.
The w1 WIRE receives the signal from the power and sends it along to the slide dimmer.
The i5 SLIDE DIMMER controls how much power goes to the motors.
The first o25 DC MOTOR uses the signal from the slide dimmer to determine its speed. It then passes this signal onto the second motor.
The second o25 DC MOTOR reads the signal from the first motor and also uses it to determine its speed.

HOW CAN YOU LEVEL-UP YOUR CAR? LET'S EXPERIMENT!

natural_image
Three cartoon illustrations: a smiling character with a lightbulb, a factory truck with a smiling face, and a small car with a smiling face (no text or symbols)
natural_image
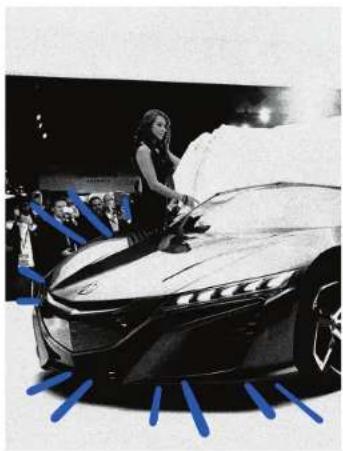
Black-and-white photo of a luxury car on display with a woman standing beside it, surrounded by blue graphic elements (no visible text or symbols)A CHANGE HOW YOU CONTROL THE CAR.
- Use inputs other than the slide dimmer. Try a light sensor you control with a flashlight, or string two wires together with a button to have a "remote" control.
B SUPE IT UPI BUILD A TRAILER FOR YOU
- Add a siren using lights or the buzzer, or a speedometer using the number Bit:
- Give your vehicle a body or form. Give it some character!
- Use LEGO ^® to build a bigger car or even a train.
C VEHICLE USING MATERIALS AROUND YOU.
• How much stuff can your vehicle haul?
HOST A CAR SHOW! Present the best features of the car you made. Let others test drive it.
ASK YOUR FRIENDS WHAT THEY WOULD USE YOUR VEHICLE FOR - sending messages, passing snacks, borrowing pencils - and show them how it could accomplish that function.

SHARE YOUR INVENTION ON THE LITTLEBITS APP OR WEBSITE
CHALLENGE 02
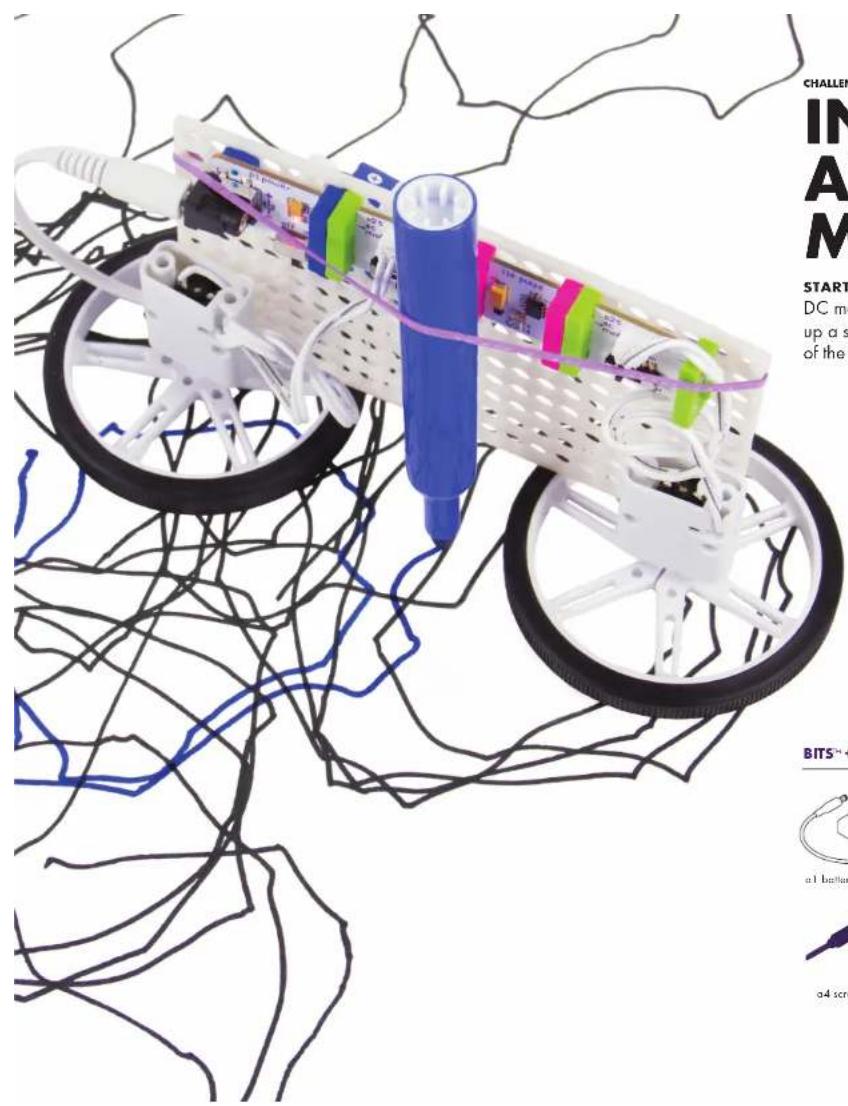
INVENT AN ART MACHINE
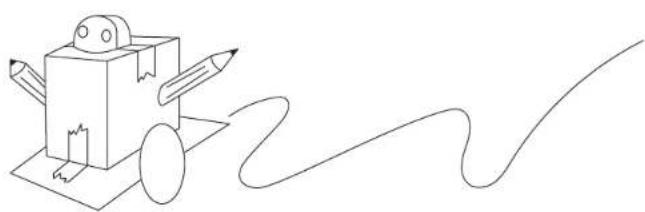
START BY CREATING A DOODLE WIZARD - a bot made with DC motors, and a pulse that dances, wiggles, and draws up a storm. Add your own artistic flair by changing up some of the Bits and materials to create unique masterpieces.
30
MINUTES [MINIMUM]
○○○ ● ●
TIME LEVEL
BITS™ + MATERIALS

e1 battery & cable
natural_image
Illustration of a mechanical device with attached tubing and two labeled components (no text or symbols visible)

a9 mounting boardpl power a25

a4 screwdriver
• markers • drawing surface • rubber band/masking tape
(not included)

CREATE
BUILD YOUR CIRCUIT.
2
ATTACH THE WHEELS TO THE DC MOTORS.
3
PRESS YOUR CIRCUIT ONTO THE MOUNTING BOARD.
4
ATTACH BATTERY TO THE MOUNTING BOARD.
5
ATTACH MOTORS TO THE MOUNTING BOARD.
natural_image
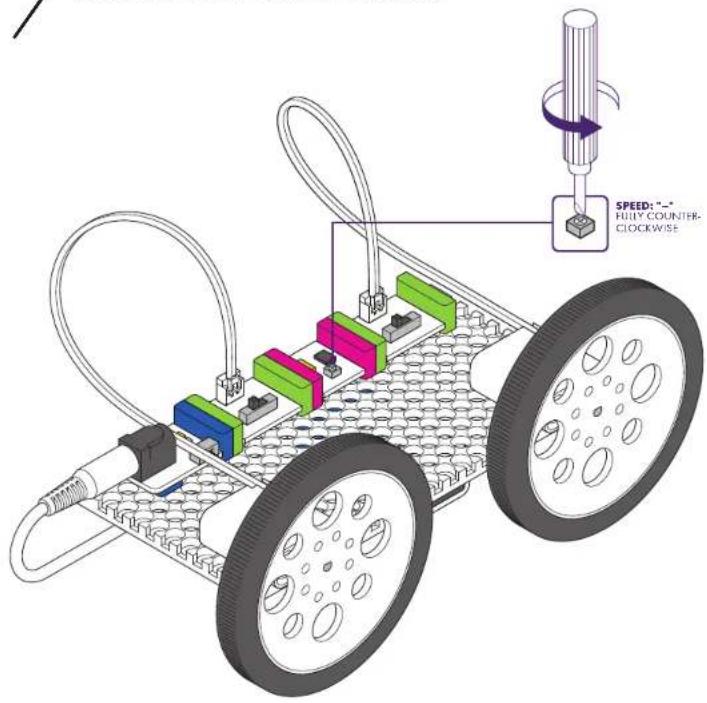
3D rendering of a small wheeled robot with colored components and wiring (no text or symbols visible)6
ADJUST MOTOR MODES.
7
SET THE PULSE SPEED TO THE SLOWEST SETTING.
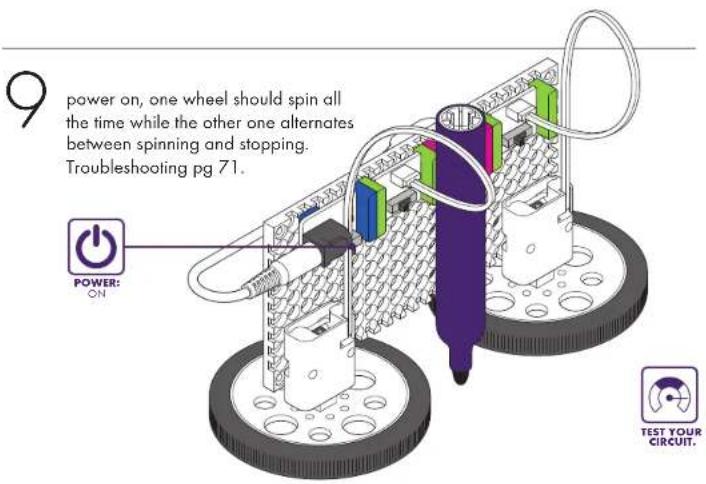
HOW IT WORKS
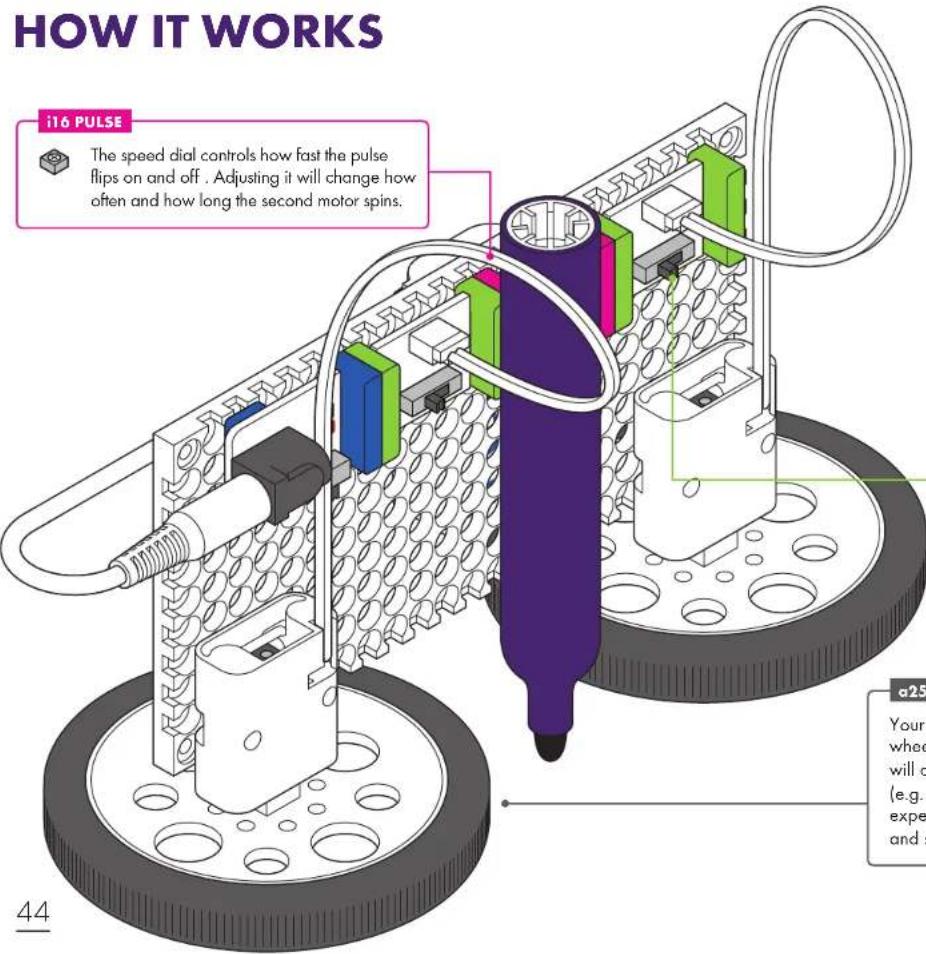
i16 PULSE

The speed dial controls how fast the pulse flips on and off. Adjusting it will change how often and how long the second motor spins.
p1 POWER sends a signal through the circuit.
The first o25 DC MOTOR receives that signal and spins at full speed in one direction.
The signal passes through the motor and on to the i16 PULSE. The pulse only lets the signal through in short bursts.
When the second o25 DC MOTOR gets a signal from the pulse, it spins, but when the pulse switches off, the motor stops.
o25 DC MOTOR

This switch controls which direction the motor spins. Changing the direction of the spin will change how the Doodle Wizard moves.
a25 WHEEL
Your Doodle Wizard's movement is caused by friction between the wheels and the drawing surface. The motion of your Doodle Wizard will change if it is placed on different types of drawing surfaces (e.g. rough paper, glossy paper, or a whiteboard). You could also experiment with adding different materials to the face of the wheels and see how changes in friction change your drawings.
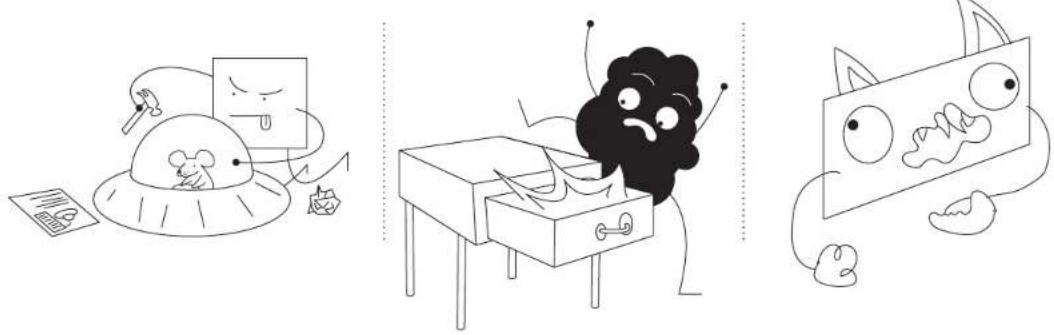
REMIX
WHAT ELSE CAN YOUR INVENTION DO? LET'S EXPERIMENT!
natural_image
Simple line drawing of a cartoon character with a frowning expression, next to a small object (no text or symbols)
natural_image
Cartoon character holding a pencil and paintbrush, no text or symbols present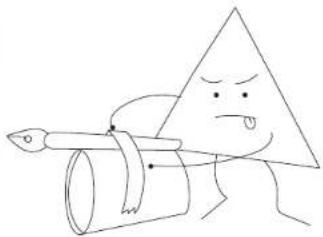
natural_image
Simple line drawing of a cartoon character holding a large pen (no text or symbols)SHARE

natural_image
Black-and-white photo of a person standing in front of a wall with a large pink exclamation mark and framed photographs (no text or symbols visible)A ADJUST THE BITS TO CREATE YOUR OWN UNIQUE DRAWING STYLE.
• How does changing the speed of the pulse or the direction that the motors spin make your drawings different?
- Which adjustments make your favorite drawings?
B WHAT OTHER MATERIALS CAN YOU USE?
- Use different drawing tools, like chalk, crayons, pens, or pencils.
- Attach multiple drawing tools to use at once.
- Try the Doodle Wizard on different drawing surfaces.
C TRY ADDING NEW BITS.
• What happens when you use a servo to draw?
• What happens when you add or swap an input?
SET UP A GALLERY SHOW. Present your art alongside your Doodle Wizard.
SEE IF YOUR AUDIENCE CAN GUESS WHICH BITS YOU USED, JUST BY LOOKING AT YOUR DRAWINGS. Challenge them to invent a machine to recreate your masterpiece.

natural_image
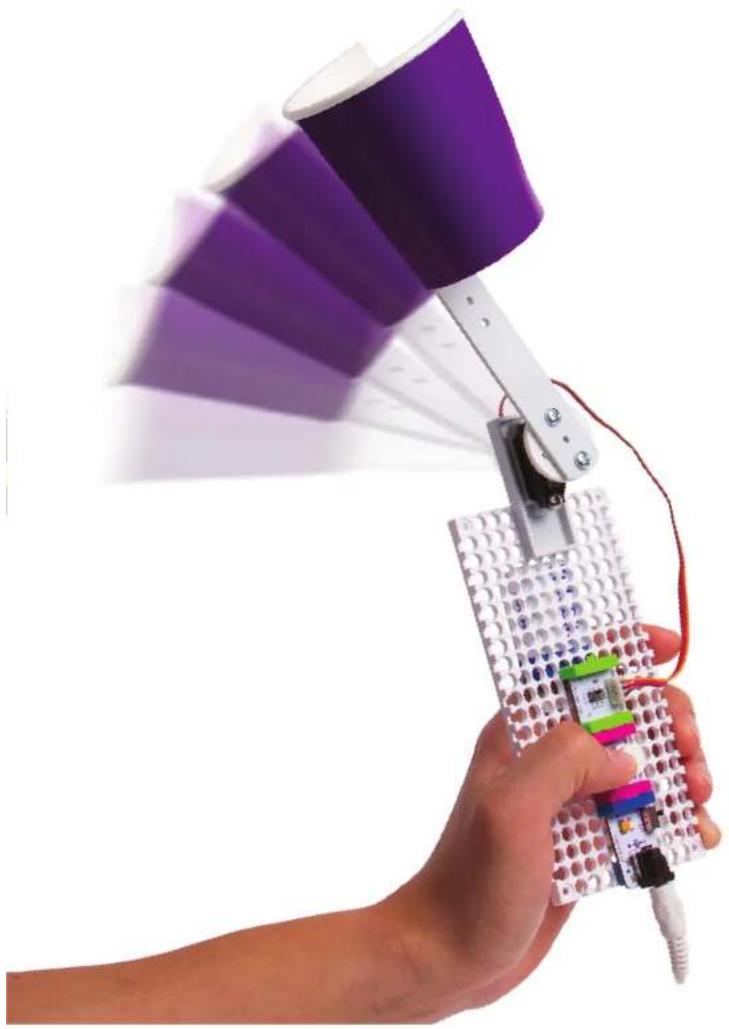
Hand holding a purple LED array device with a white lever, against a plain white background (no text or symbols visible)CHALLENGE 03
INVENT A THROWING ARM
START BY BUILDING A LAUNCHER THAT FLINGS PROJECTILES WITH A SERVO AT THE PRESS OF A BUTTON.
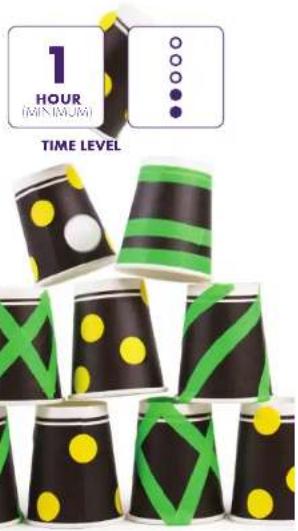
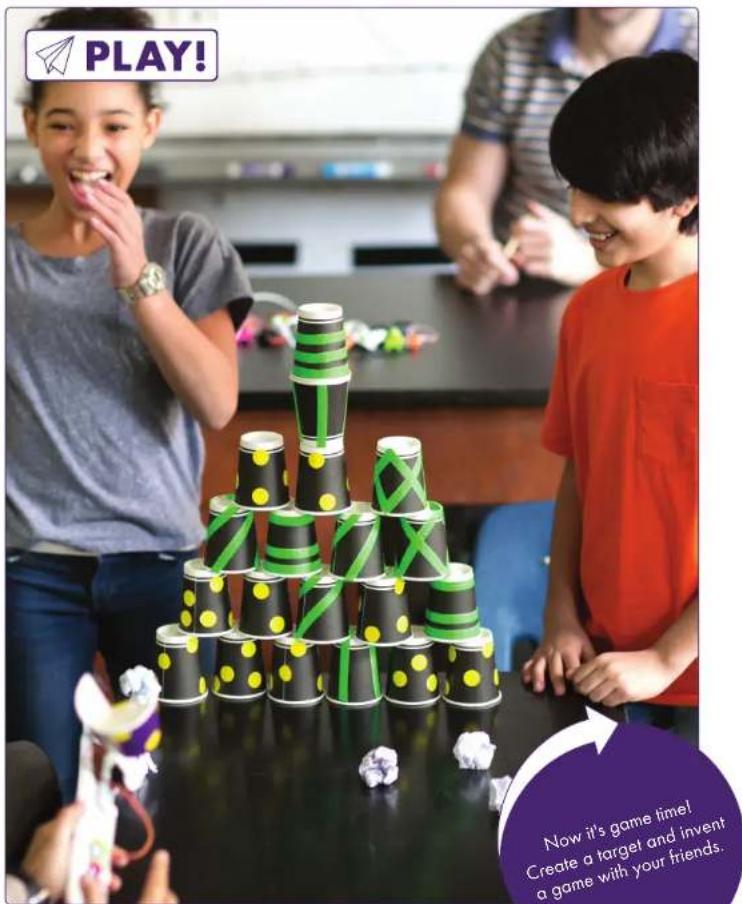
Set up a tower of cups and try to knock them over. Then modify your launcher to make it even more accurate, powerful, or speedy. Challenge your friends to see who can knock over the most cups.
BITS™ + MATERIALS

e1 battery & cable

p power

screws (×3) a9 mounting board
• Phillips head
acsedriva
• scissors
• Robber Davis
- masking tape
(not included)

CREATE
BUILD YOUR CIRCUIT.

2
PRESS SERVO INTO THE SERVO MOUNT AND SCREW IN.
4
PRESS THE SERVO MOUNT ONTO THE MOUNTING BOARD AND ADJUST SERVO MODE.
3
PRESS YOUR CIRCUIT ONTO THE MOUNTING BOARD. TURN POWER ON.

5
natural_image
3D technical diagram of a robotic control system with motor, wiring, and power button (no text labels or symbols)
WITH POWER ON, CONNECT THE MECHANICAL ARM TO THE SERVO HUB AT A 90 DEGREE ANGLE TO THE MOUNTING BOARD, AS SHOWN.

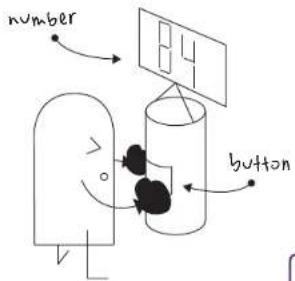
MAKE A BUCKET FOR THE LAUNCHER.

natural_image
Simple 3D illustration of a purple cylindrical cup (no text or symbols)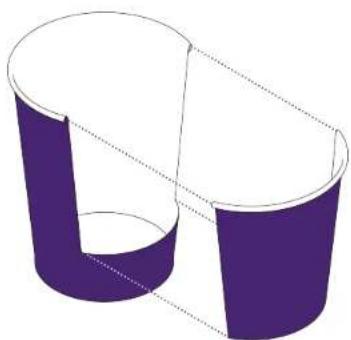
natural_image
3D illustration of two purple cylindrical containers with dashed lines indicating hidden edges (no text or symbols)
TAPE THE BUCKET TO THE FREE END OF THE MECHANICAL ARM.
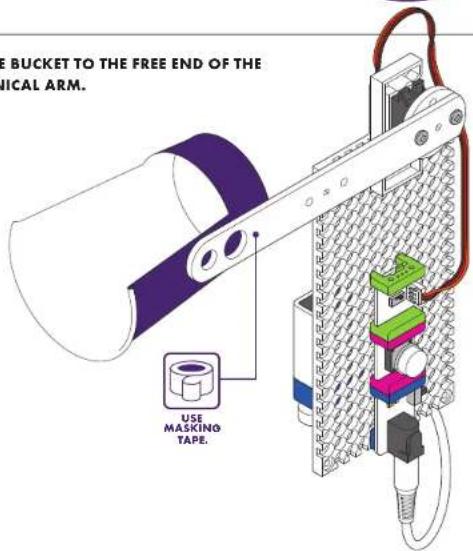

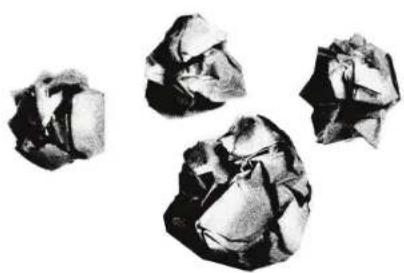
CRUMPLE UP A HALF SHEET OF NOTEBOOK PAPER TO LAUNCH.
natural_image
Five fragmented, irregularly shaped rock fragments with no visible text or symbols
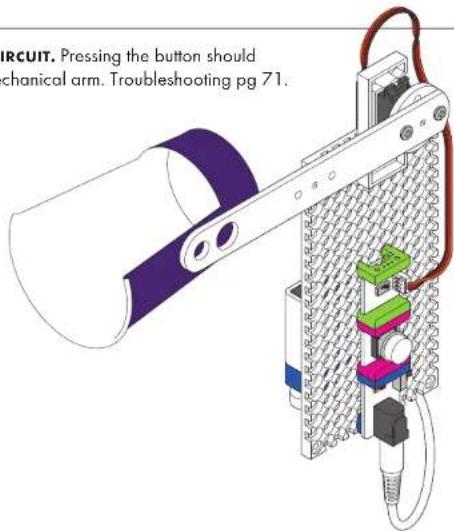
TEST YOUR CIRCUIT. Pressing the button should rotate the mechanical arm. Troubleshooting pg 71.

TEST YOUR CIRCUIT.
HOW IT WORKS
p1 POWER sends a signal to the button.
When pressed, the i3 BUTTON lets the signal through to the servo.
When the o11 SERVO gets the signal, it turns, rotating the arm and throwing the projectile.
a23 MECHANICAL ARM
The farther you place your cup from the servo hub, the faster it will swing. You can experiment with extending the mechanical arm with other materials, but you'll have to pay attention to weight.
As the cup gets farther from the hub, it also takes more force to move it. If your arm gets too long it will overpower the servo motor and will be hard to move. This relationship between distance and force is called torque.
-11 SERVO

When it's in TURN mode, the position of the servo is determined by the incoming signal. At 0 volts, the servo is all the way to the left. If the incoming signal is at full power (5 volts), the servo arm is all the way to the right. When the button makes the signal go from 0 to 5 volts quickly, the arm swings quickly. This speed helps your ball fly farther.
REMIX
WHAT DO YOU WANT TO IMPROVE OR CHANGE? LET'S EXPERIMENT!
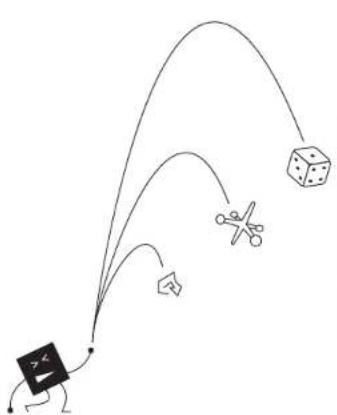
flowchart
graph TD
    A["Stick Figure"] --> B["Cartoon Box"]
    B --> C["Arrow to Cube"]
    C --> D["Scissors on Line"]
    D --> E["Arrow to Triangle"]
    E --> F["Arrow to Triangle"]
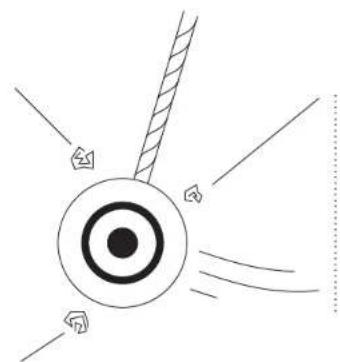
natural_image
Simple line drawing of a target with radiating lines and arrows, no text or symbols present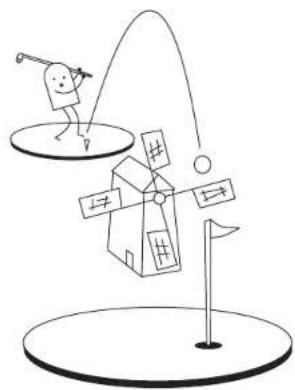
natural_image
Simple line drawing of a cartoon character playing a golf, with a windmill and flag on a platform (no text or symbols)SHARE
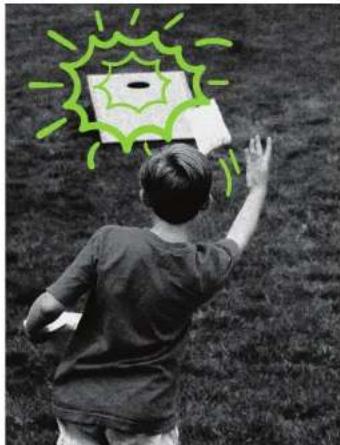
natural_image
Child looking up at a sun icon on grass, no text or symbols visibleA TRY EXPERIMENTING WITH THE MECHANICS OF YOUR CATAPULT.
• How does changing the length of the mechanical arm change the throwing distance?
- Try different objects for balls. What gets thrown the farthest? How does the size and shape affect the distance traveled?
• What happens when you change the bucket size or shape? How does it affect the throw?
B HOW COULD USING OTHER BITS MAKE IT BETTER?
- Switch the button with a pulse Bit for automatic firing.
- Add a number Bit to count the number of shots taken.
- Creating a moving target with one of the motors and the other mechanical arm.
WHAT OTHER GAMES CAN YOU PLAY? COULD YOU INVENT YOUR OWN?
• Try miniature golf, baseball, or bowling!
WHAT NEW GAME DID YOU INVENT? Make it official. Give it a name. Write the official rules and share what you created.
GATHER YOUR FRIENDS AND START A TOURNAMENT. What do they think of the game? Is it too easy? Too hard? Just right?

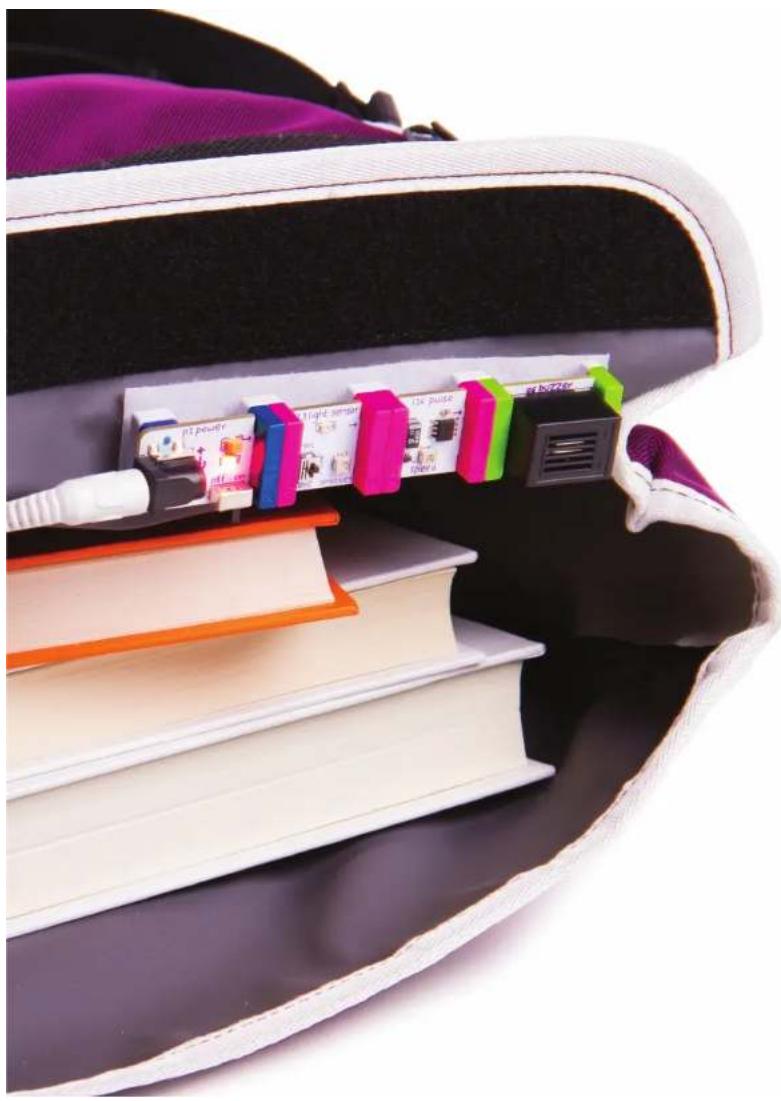
natural_image
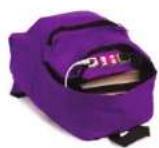
Stack of books with colorful audio jack connectors and a white cable inserted into a black cushion (no visible text or symbols)CHALLENGE 04
INVENT A SECURITY DEVICE
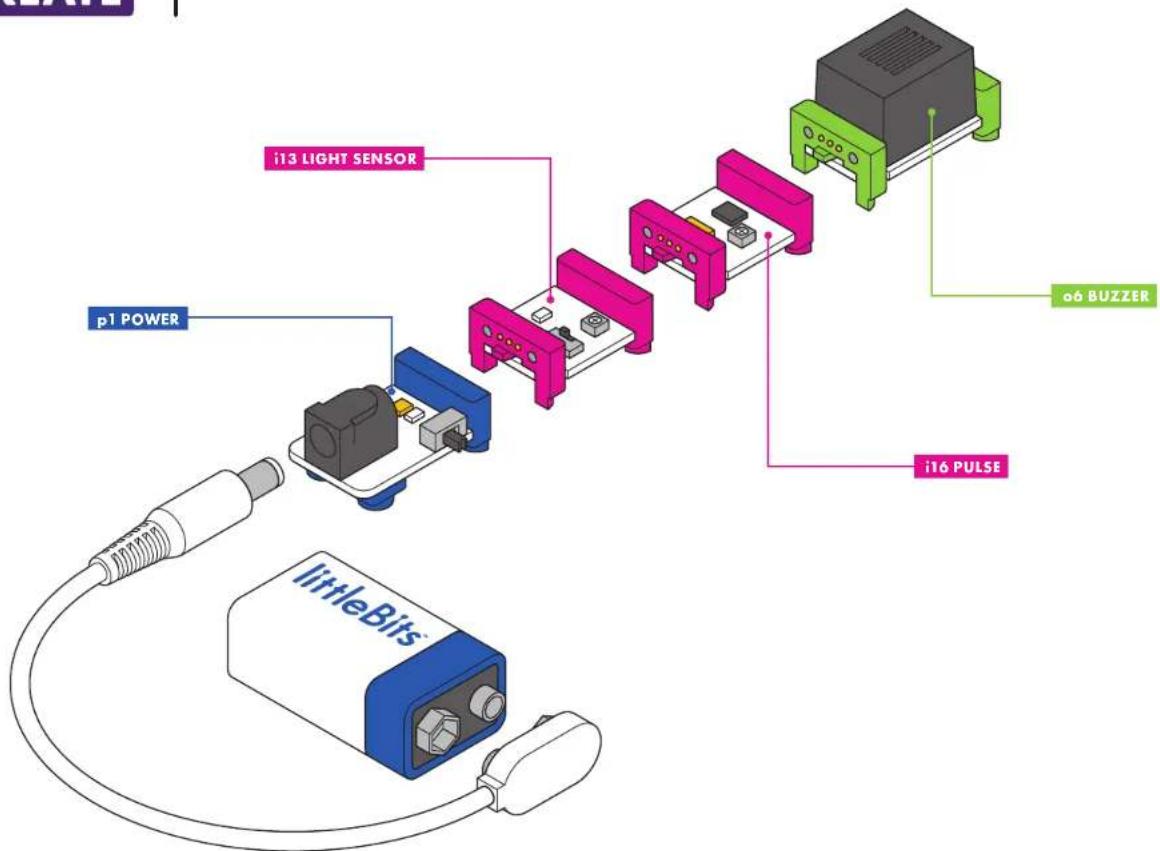
START BY MAKING THE BACKPACK ALARM WITH THE LIGHT
SENSOR, PULSE, AND BUZZER. This light-sensitive alarm
will alert you if someone is snooping around your stuff.
Customize your alarm for different places around the school.

TIME LEVEL
BITS™ + MATERIALS


a1 battery & cable out purple sphinxibiori 13 light source 116 pulse of buzzer
a6 hook & loop shoes
hook & loop
adhesive strip
- backpack
(not included)

CREATE
BUILD YOUR CIRCUIT.
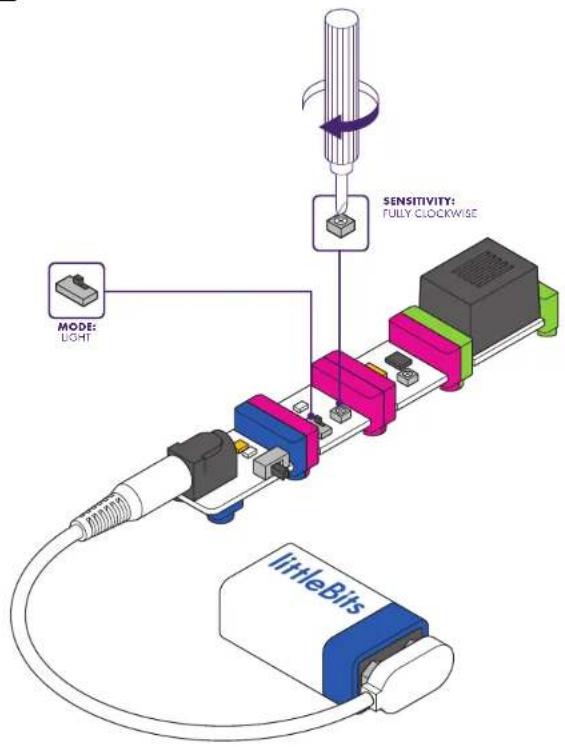
2
SET THE MODE AND SENSITIVITY OF THE LIGHT SENSOR.
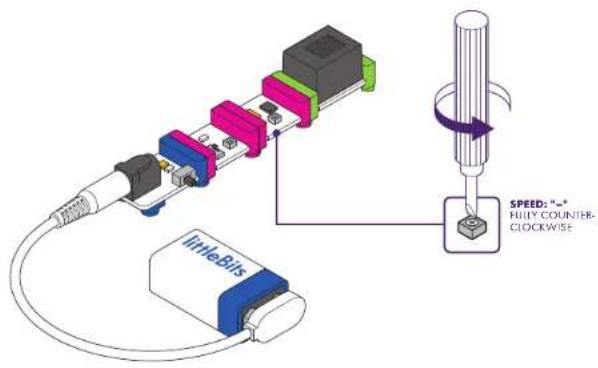
3
SET THE PULSE SPEED TO THE SLOWEST SETTING.
PRESS HOOK & LOOP SHOES ONTO YOUR CIRCUIT.
4
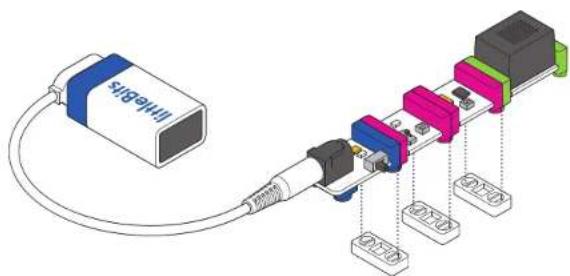
natural_image
Diagram of an electronic device connected to a multi-pin assembly with connectors (no text or symbols visible)5
PLACE THE ALARM INSIDE YOUR BACKPACK.
6
TEST YOUR CIRCUIT. The buzzer should BUZZ when your circuit is exposed to light, and stop buzzing when it is completely covered up. You may need to adjust the sensitivity of your light sensor to get it just right. Troubleshooting pg 71.
HOW IT WORKS
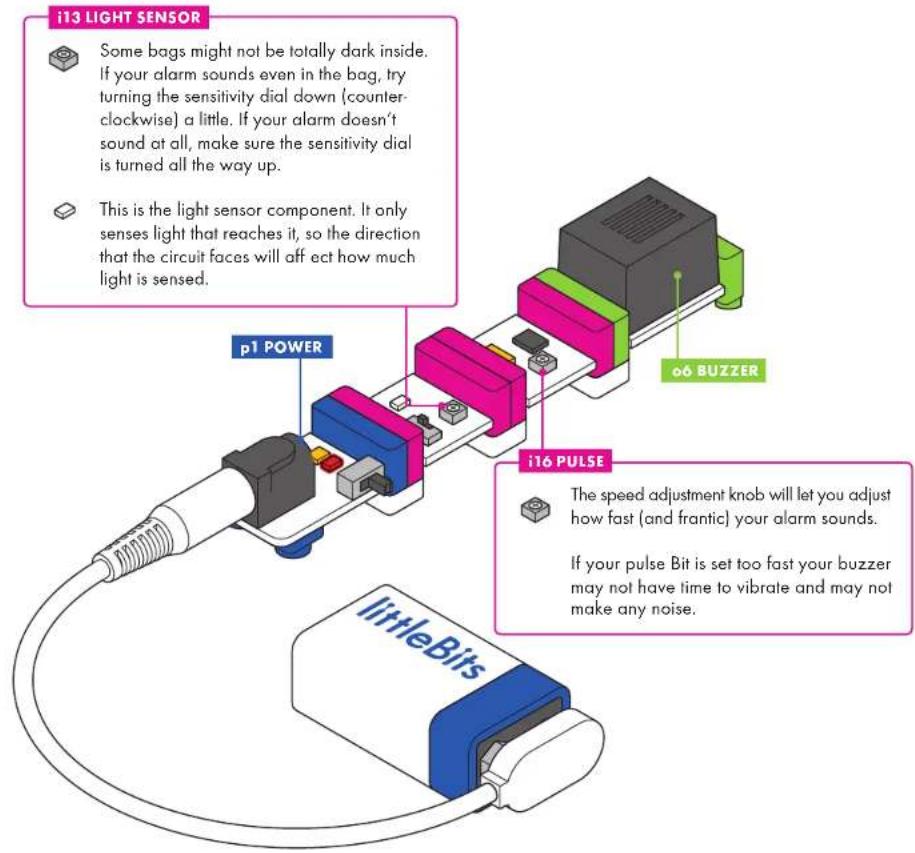
The p1 POWER sends a signal through the circuit.
The i13 LIGHT SENSOR is in light mode. When the alarm is inside your bag, no light hits the sensor, so it doesn't allow a signal to pass through. When you open the bag, light shines in on the sensor, letting the signal through to the pulse. The more light that shines on the sensor, the more signal it lets through and the louder your buzzer will sound.
The i16 PULSE Bit is continuously switching on and off. When it gets a signal from the light sensor, it only lets it through in short bursts.
The o6 BUZZER sounds when it gets the signal from the pulse, but is quiet when the pulse flips off. This changing between on and off produces the alarm noise to scare off the snooper.

HOW CAN YOU CUSTOMIZE YOUR ALARM?

natural_image
Illustration of a tablet device displaying a play button and grid layout (no text or symbols)
CHANGE THE BIT SETTINGS.
- Switch the light sensor mode to DARK to create an alarm that sounds when it is dark. Where could an alarm like this be useful?
- If your alarm didn't sound reliably, try adjusting the sensitivity of the light sensor.
- Adjust the speed of the pulse Bit to change how fast the alarm sounds. What setting do you think makes the best alarm?

WILL YOUR ALARM WORK IN DIFFERENT PLACES OR SCENARIOS?
- Try it in your desk drawer, locker, or under your backpack.
- Put it on the windowsill as a wake-up alarm.
- Use it to prank someone when they turn out the lights.

MAKE YOUR ALARM MORE EFFECTIVE.
- Snap on a DC motor and sign with a scary monster on it.
- Amplify the sound (try using a paper cup or cone).
- Add lights.
PROMOTE YOUR INVENTION! Create a 30-second commercial explaining how useful it is.
HOW DO YOUR CLASSMATES' ALARMS COMPARE WITH THE ORIGINAL DESIGN? Write a product review for your favorite tech publication.

SHARE YOUR INVENTION ON THE LITTLEBITS APP OR WEBSITE.
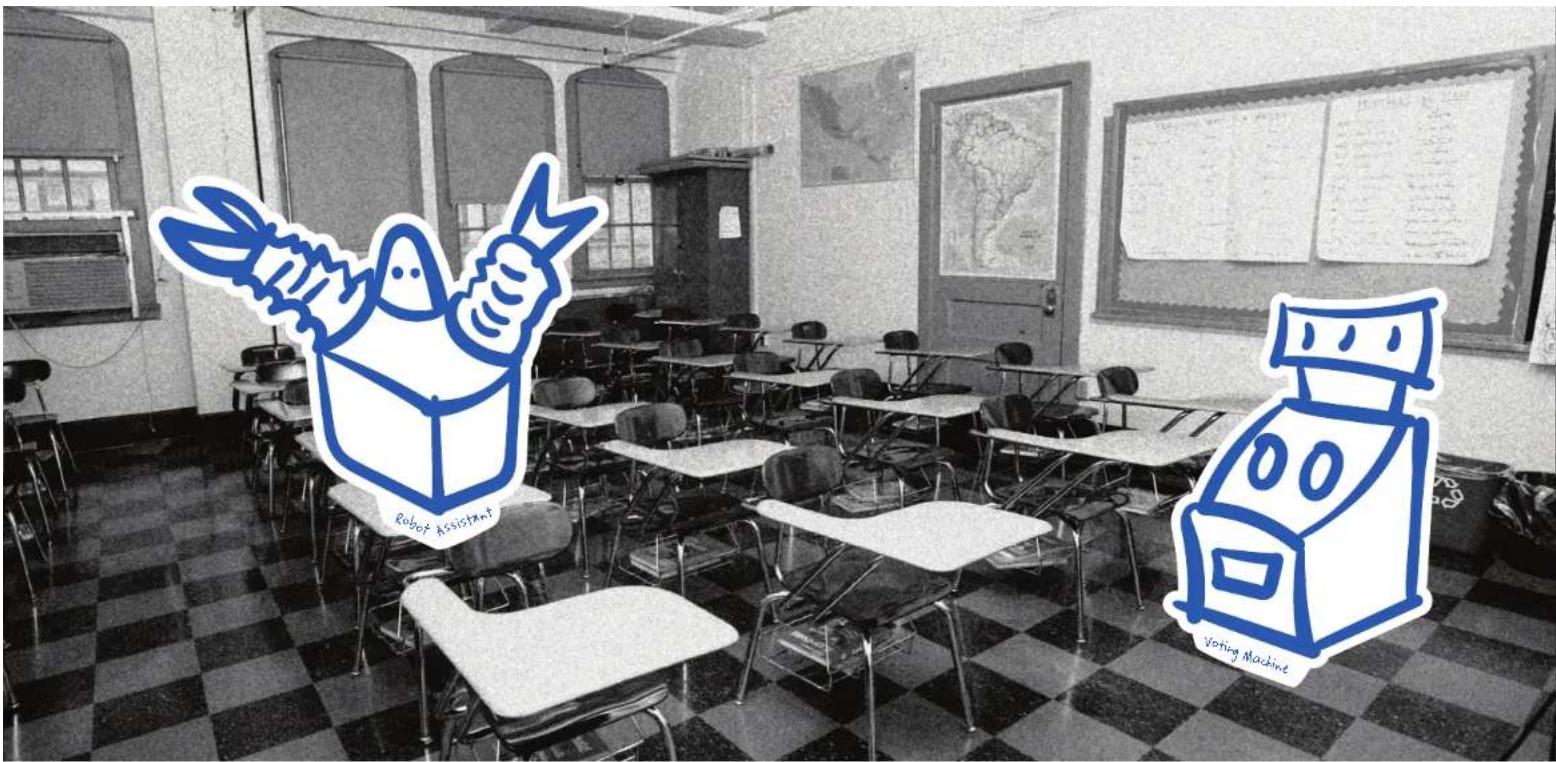
CHALLENGE 05
HACK YOUR CLASSROOM

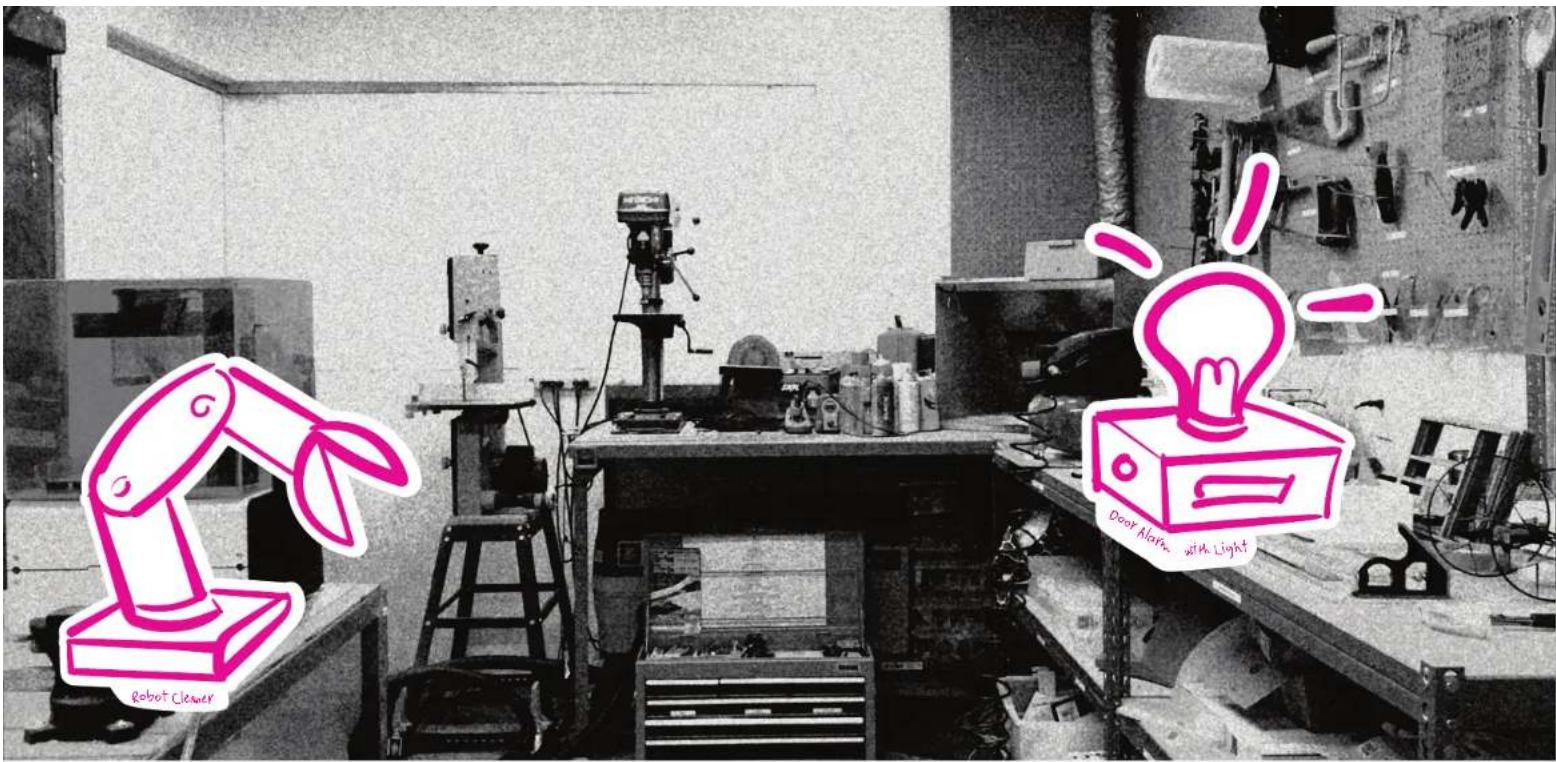
USE BITS AND YOUR WITS TO MAKE THE CLASSROOM OF THE FUTURE. You spend a lot of time in your school and classroom. How can you make it even more fun to be there? Pinpoint something that could be easier, especially exciting, or that you wish existed. Use your expertise to design an invention that makes school extra awesome. Perhaps your new invention will become an essential part of the classroom in the future!
TIME LEVEL

CREATE
]
CREATE A LIST OF WAYS YOU COULD MAKE YOUR CLASSROOM BETTER. Need ideas? Ask your friends or teachers about what bothers them or what they'd like improved. You could even level-up something you already like.

2
SELECT THE ISSUE YOU WANT TO WORK ON. Maybe it's something a lot of people feel strongly about, or that you find particularly interesting.
3
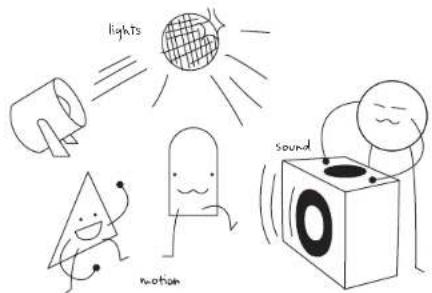
LOOK THROUGH YOUR BITS AND MATERIALS AND THINK ABOUT HOW EACH ONE COULD HELP. Could motion, light, or sound help you achieve your mission? How about buttons or dimmers? If you're not sure what a Bit does or how it could help, snap it into a circuit and start to play with it. If you're still stumped, read through the "Bit Index" section at the beginning of this booklet.
4
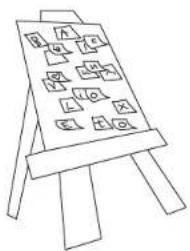
SKETCH OUT IDEAS, PICK YOUR FAVORITE, AND CREATE A PROTOTYPE. When you create a physical model of your idea, it is easier to understand how it works. Don't worry about getting everything right on the first try though. The important thing is to just get started and experiment.
PLAY!
REMIX
SHARE

PRO TIP: EVERY TIME YOU TRY SOMETHING NEW, PLAY WITH YOUR INVENTION TO TEST IT OUT.
natural_image
Simple line drawing of a cartoon character pulling a small object and a trash can (no text or symbols)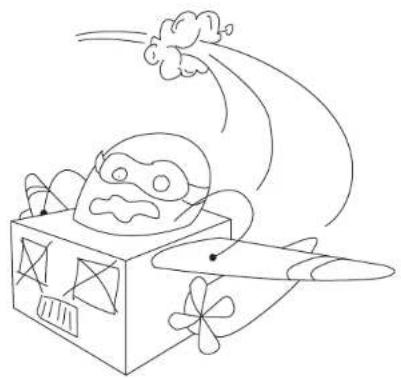
natural_image
Simple line drawing of a cartoon character flying inside an airplane with motion lines (no text or symbols)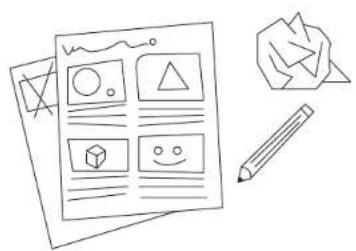
natural_image
Illustration of a document with various geometric and symbolic icons, including a pencil, a pencil case, and a geometric shape (no text or symbols present)
SHARE YOUR INVENTION ON THE LITTLEBITS APP OR WEBSITE.
TEST YOUR PROTOTYPE. Set up your invention in the classroom and see what you can learn about how it works. Your invention might not work the way you thought, but that's ok, it's part of the invention process! Take note of what works and what doesn't so you can improve it.
DID PLAYING WITH YOUR INVENTION GO THE WAY YOU
EXPECTED? Now's your chance to experiment with fixes and improvements. You might need to make things sturdier, work on the mechanics of moving parts, or try using different Bits to achieve your mission.
MAKE WACKY AND WEIRD EXPERIMENTS PART OF YOUR INVENTION PROCESS. Sometimes really great ideas come from unexpected places. Close your eyes and pick a Bit at random. How could this Bit add something cool to your invention? Is it better now or before? Try this with a few different Bits.
CREATE A SHORT COMIC. Show what classroom life was like before and after your invention, and how it has improved things. Inventors often draw comics like these called storyboards to describe how their invention works. These stories are a great way to show people what you did and why it's important.
SET UP AND SHOW OFF YOUR INVENTION TO SOME
CLASSMATES OR YOUR TEACHER. How can their feedback help your invention grow? Do they have ideas for improvements? Can they think of other ways it could be used? Their ideas can be great fuel for another round of remixing, playing, and sharing.
CHALLENGE DO
INVENT FOR GOOD


TIME LEVEL
INVENT A PRODUCT TO MAKE A DIFFERENCE IN SOMEONE ELSE'S LIFE. How does a product get invented? Here at littleBits™ we use the Invention Cycle! When it's time to create a new kit we go through the same process that you do. We brainstorm, create prototypes, play with them, let kids around the country play with them, and we remix over and over again until we get things right. When it's all done, we get to share it with the world. In this challenge you're going to think like a product designer and invent something that helps someone else. Who knows, maybe you'll start the next company like littleBits!

CREATE
]
CREATE A LIST OF IDEAS FOR A PRODUCT. Start by thinking about where there are frustrations or difficulties in someone's life. For example, a person who has trouble hearing might need a way to know if someone is knocking at their door.

2
SELECT THE ISSUE YOU WANT TO WORK ON. It could be the one that sounds the most fun to solve, or creates the biggest difference in someone else's life.

3
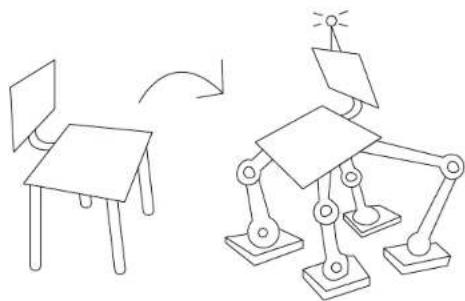
LOOK THROUGH YOUR BITS ^™ AND MATERIALS AND THINK ABOUT HOW EACH ONE COULD HELP. Also take a look at everyday objects you could make better with Bits. For example, if you wanted to design a product that makes doing chores more fun, you could start with a broom.
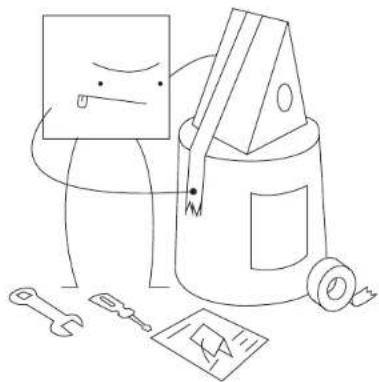
natural_image
Line drawing of a robot arm demonstrating a transformation from a simple table to a robotic arm (no text or symbols present)4
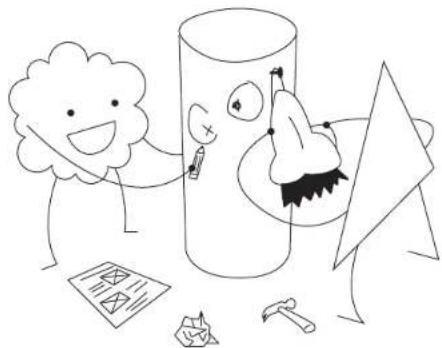
SKETCH OUT IDEAS, PICK YOUR FAVORITE, AND CREATE A PROTOTYPE. Don't worry about getting everything right on the first try. The important thing is to just get started and experiment. Building a physical model of your idea makes it easier to share with others and collect feedback on your design.
natural_image
Simple line drawing of a robot with a pencil and eraser, connected to a curved line (no text or symbols)PLAY!
REMIX
SHARE
natural_image
Simple line drawing of two cartoon characters interacting with a bottle and pipe (no text or symbols)
natural_image
Simple line drawing of a laptop with three cartoon characters interacting with a box (no text or symbols)
SHARE YOUR INVENTION ON THE LITTLEBITS APP OR WEBSITE.
TEST YOUR PROTOTYPE. The first product tester will be you. Pretend you are a customer who just purchased your invention. How well does it do its job? Take notes about what works and what doesn't. You can make changes in the next version.
DID PLAYING WITH YOUR INVENTION GO THE WAY YOU
EXPECTED? Now's your chance to experiment with fixes and improvements. Could adding a new Bit" add important features? Would craft materials make it stronger or give it a new look?
HAVE SOMEONE ELSE TEST YOUR INVENTION AFTER
YOU'VE MADE A FEW IMPROVEMENTS. If possible, try to find the type of person you're designing it for. Ask about their favorite parts, and what suggestions they have for making it better. Use their feedback to create an even better version of your invention.
CREATE A SKIT, A PRINT, OR VIDEO ADVERTISEMENT
ABOUT WHAT YOU'VE INVENTED. It should explain what your invention is and how it can help make life better for the customer. Share it with the world!
RECRUIT A TEAM. A lot of product designers work in teams because sharing different ideas and perspectives makes for a better design process. Show your invention to some friends. Could you all work together to create an even better product?
CHALLENGE 07
INVENT A CHAIN REACTION CONTRAPTION

TIME LEVEL
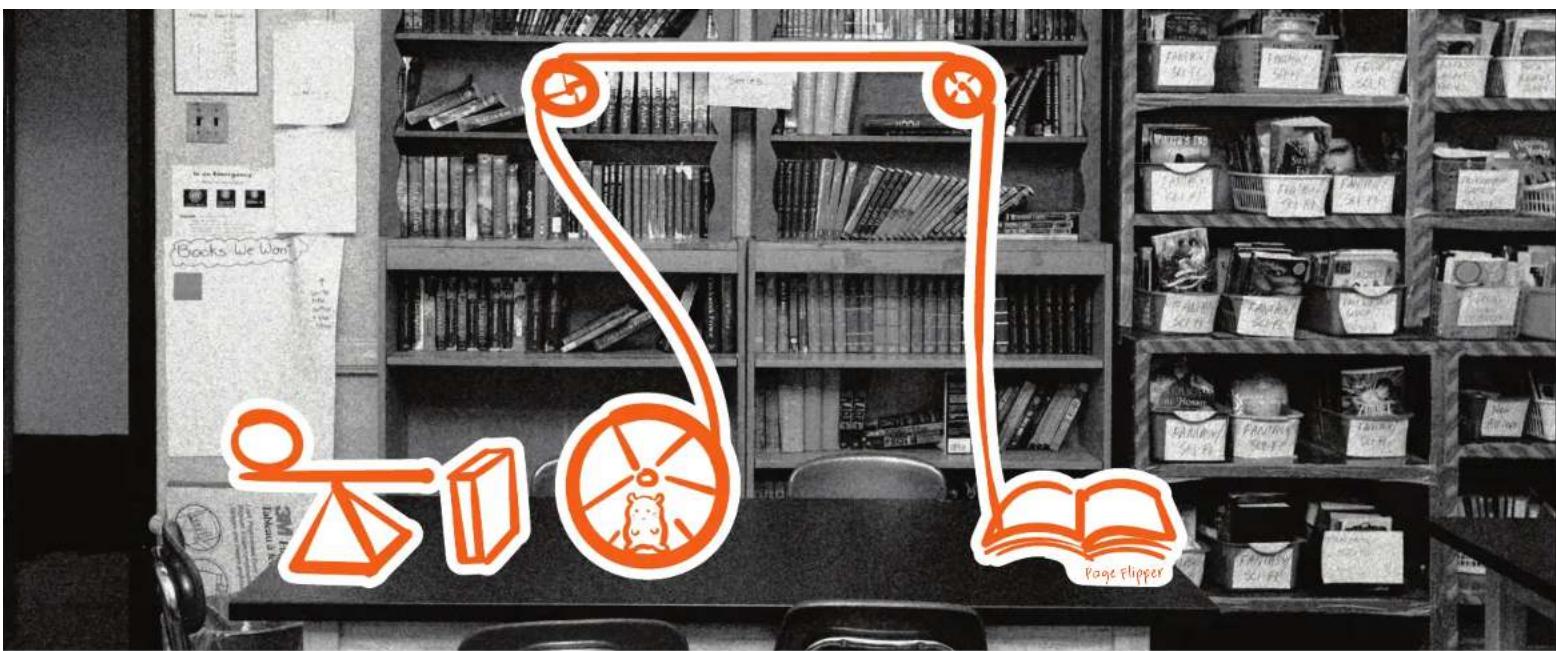
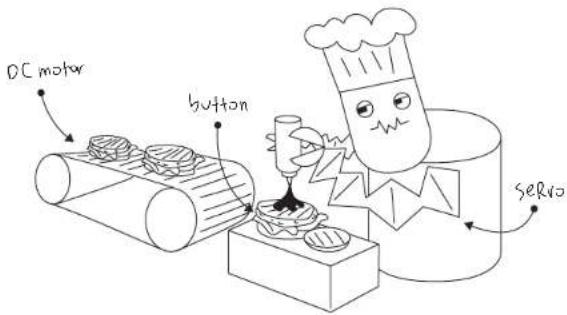
PERFORM A VERY SIMPLE TASK IN A NOT-SO-SIMPLE WAY. Rube Goldberg was a cartoonist who liked to draw really complicated solutions to very simple problems. For example, to turn the page of a book, you might roll a ball down a ramp that hits a box. Then the box falls over and scares a hamster that starts running on its wheel, that winds up a string that turns the page. In this challenge, you're going to design your own multi-step machine. Before you start inventing, there are two important rules:
1) Once you start your machine, it needs to be able to run without any help from you. Each step must be triggered automatically by the step before it.
2) Your machine should have at least two steps. (Bonus points if you can create more steps!)

CREATE
1
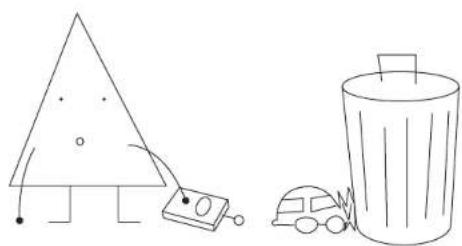
CREATE A LIST OF EVERYDAY ACTIVITIES THAT ONLY TAKE ONE STEP. For example, dropping a can in the recycling bin, flipping on a light switch, or opening a book.
2
SELECT THE EVERYDAY ACTIVITY YOU WANT TO ACCOMPLISH. Which one do you think will be the most fun for this challenge?

3
LOOK THROUGH YOUR BITS AND MATERIALS AND THINK ABOUT HOW EACH ONE COULD HELP. Could motion, light, or sound help you achieve your mission? How about buttons or dimmers? If you're not sure what a Bit does or how it could help, snap it into a circuit and start to play with it. If you're still stumped, read through the "Bit Index" section at the beginning of this booklet.
4
SKETCH OUT IDEAS, PICK YOUR FAVORITE, AND CREATE A PROTOTYPE OF YOUR CONTRAPTION. Don't worry about getting everything right on the first try. The important thing is to just get started and experiment.
natural_image
Cartoon illustration of a smiling cloud character interacting with a large cylindrical object, surrounded by tools and drawings (no text or symbols)PLAY!
REMIX
SHARE
natural_image
Simple line drawing of a cartoon character reacting with surprise and pointing at a monster (no text or symbols)
natural_image
Simple line drawing of a cartoon character climbing a rope with a pulley and balls, next to a bird (no text or symbols)
SHARE YOUR INVENTION ON THE LITTLEBITS APP OR WEBSITE.
TEST YOUR PROTOTYPE. Getting all of these moving pieces to work together is going to be a challenge. Try running your contraption a few times. Record where it works the best and where it isn't so reliable. You can use this information to refine your design.
DID PLAYING WITH YOUR INVENTION GO THE WAY YOU EXPECTED? Now's your chance to experiment with fixes and improvements. How can you make your machine more reliable? Maybe you need to strengthen some materials, change the angle of a ramp, or try using different Bits ^™ for one of your steps.
Set your invention aside and look through your remaining Bits and materials. Could you complete a step with them? Try a few options to see how they compare to what you already have.
TAKE A VIDEO OF YOUR INVENTION AND POST IT TO YOUR FAVORITE SOCIAL MEDIA CHANNEL. People love watching a crazy contraption in action! While you're online, look up some Rube Goldberg cartoons and create your own that describes what your invention is used for and how it works.
Challenge a friend. Show them your invention and see if they can accomplish the same task, but using totally different steps.
CHALLENGE 08
HACK YOUR HABITS


TIME LEVEL
CREATE AN INVENTION TO TRACK YOUR DAILY HABITS, THEN TRANSFORM YOUR
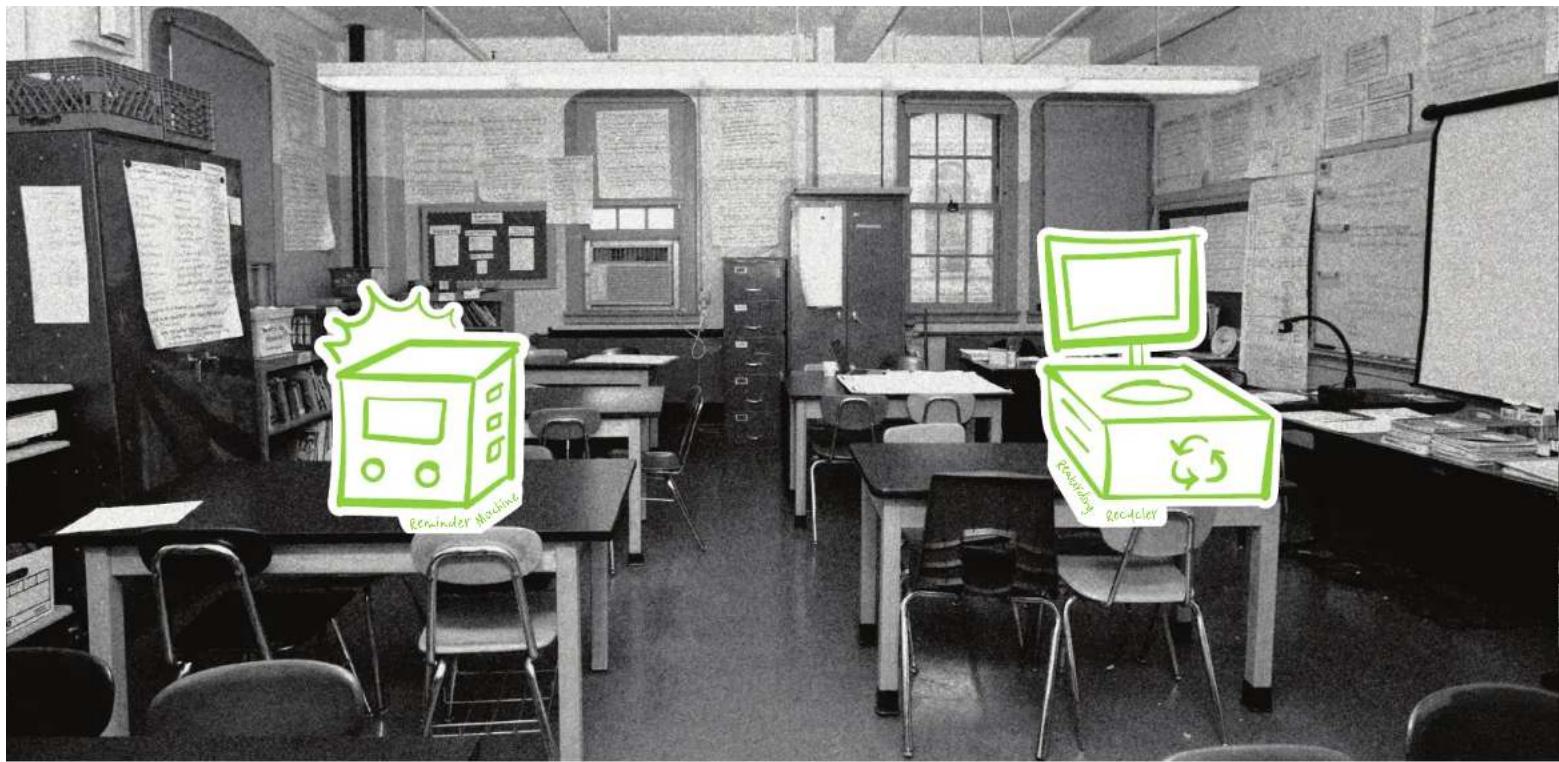
INVENTION TO MAKE LIFE BETTER. How much use does your classroom's recycling bin get? Maybe you could invent something to encourage people to use it more often! How many times a day do you have to go back to your locker because you forgot something? Maybe you could invent something that counts these trips and reminds you to grab what you need! Now's your chance to use your inventing powers to get to the bottom of these types of questions and invent a gadget to make your everyday experience better.

CREATE
]
![littleBits STEAM Education Class Pack - ] - 1](/content/2026/06/1146922/images/3a58d5eb64359026f44411be0a0eef33b07e4000b6cce6434314112e6c924977.jpg)
natural_image
Simple line drawing of a person sitting on a computer monitor with a recycling symbol on the screen (no text or symbols present)CREATE A LIST OF THINGS YOU OR YOUR CLASSMATES DO THAT YOU WANT TO KNOW MORE ABOUT. Maybe it's a habit you'd like to improve on (how can I make fewer trips to my locker?), something you're curious about (how many high fives can I get in a day?), or an issue you'd like to help other people understand (which don't your classmates recycle?). Try to list as many different habits as possible.
2
SELECT THE HABIT YOU WANT TO LEARN MORE ABOUT. Is there one that makes you the most happy, passionate, or upset? It's always good to work on something that means a lot to you.

3
LOOK THROUGH YOUR BITS ^™ AND MATERIALS AND THINK ABOUT HOW EACH ONE COULD MEASURE OR TRACK THAT HABIT. Could the button help you know when something is moved? Could the light sensor detect when something is opened?

PRO TIP: PAIRING AN INPUT BIT ^TM WITH THE NUMBER (IN COUNT MODE) CAN BE A REALLY HELPFUL COUNTER IN THIS PROJECT.
4
SKETCH OUT IDEAS, PICK YOUR FAVORITE, AND CREATE A PROTOTYPE OF A DATA-COLLECTION MACHINE. Don't worry about getting everything right on the first try. The important thing is to just get started and experiment. Building a physical model of your idea will help you figure out the best way to track habits.
natural_image
Simple line drawing of a person holding a document and a paint can, with tools and a paper nearby (no text or symbols)
PLAY!

TEST YOUR PROTOTYPE. To get it working reliably, it will probably take a bit of adjusting and redesigning. Once you have it down, you can start tracking your life.
MAKE A HYPOTHESIS ABOUT THE RESULTS YOU WILL GET. For your first trial, decide how long you want to use the invention for. For example, if you're tracking recycling bin use, how many times do you think it gets used daily? Soon you'll have data to test your theory!

REMIX

DID PLAYING WITH YOUR INVENTION GO THE WAY YOU EXPECTED? Now's your chance to experiment with fixes and improvements. Did it gather data well? Do you think it was accurate? Now that you know a little more about your circuit and the habit you're exploring, you can tinker with the invention to make it work better.
HOW CAN YOU ADD NEW FEATURES TO CHANGE PEOPLE'S HABITS? For example, could an invention that tracks use of the recycling bin also reward people for recycling? Would that make them more likely to recycle? Try it out and see if it changes your data.

SHARE
COMPARE THE TRACKING INFORMATION FROM BEFORE AND AFTER YOU MADE CHANGES. Now you know more about how people behave and what motivates them. More importantly, you have the data to prove it! Create a poster that describes the habit you were studying and how your invention affected it. Share it with the world!
HAVE SOMEONE ELSE TRY YOUR INVENTION FOR THE DAY. Do you think your invention could be useful elsewhere? Maybe another classroom wants to encourage recycling, or a friend wants to know what seats in the cafeteria are the most popular.
TROUBLESHOOTING
MY CIRCUIT ISN'T WORKING.
1) Make sure your power Bit ^™ is on. You should see a red LED illuminated on the board.
2) Try swapping in a new 9 volt battery. Low batteries can cause a circuit to misbehave.Bits ^™ have different power demands. For example: a DC motor may appear to not be working while a light still shines brightly.
3) Ensure the power cable is securely fastened to both the battery and the power Bit.
4) Make sure your Bits are arranged in the proper order. Remember that you always need a power Bit & power supply at the beginning of each circuit, and an output Bit at the end. If the last Bit in your chain is an input, then it won't do anything to affect your circuit.
5) Check your connections. Are all the Bits securely snapped to each other? You can also try gently wiping down the ends of the bitSnaps with a soft cloth (like your sleeve). Sometimes dust gets in the way of a strong connection. Try unsnapping, cleaning the bitSnaps, and snapping it all back together again.
THE SENSITIVITY OF MY LIGHT SENSOR KEEPS CHANGING.
Are you moving your circuit around between different rooms and spaces? Light conditions can vary quite a bit depending on many different factors like the type of light you're working under, or the time of day (the sun shines through the window at different angles depending on what time it is). If your light sensor is in a new environment (for example, if the sun went down), you might need to adjust the sensitivity again.
I'M HAVING TROUBLE WITH MY TEMPERATURE SENSOR.
1) If the signal coming into the temperature sensor is less than 50% power, the sensor will be turned off (i.e. it won't pass a temperature signal on to the next Bit.) To turn the temperature sensor on, make sure the Bits before it are sending a strong enough signal. For example, if you have a slide dimmer before the temperature sensor, slide the dimmer all the way up.
2) The power Bit can get warm with a lot of use. If your temperature sensor is near the warm power Bit, it may read a higher temperature than the rest of your surroundings. If this happens, try placing a wire between the power and temperature sensor to give them some space.
MY SERVO IS SHAKING.
1) Check your battery. Try swapping in a new one. Low batteries can cause the servo to misbehave.
2) Make sure the servo's wire is firmly connected to the board.
3) The servo motor can only take so much weight. If you have something attached to it, you might need to lighten the load.
4) If your servo is receiving a signal from a light sensor Bit, the light conditions may have had an effect on your servo. For example, some fluorescent and LED light fixtures flicker at a very high frequency and cause the light sensor to send jittery signals. If you suspect this problem, try moving to a different light environment.
HOW CAN I CHANGE THE POSITION OF MY MECHANICAL ARM?
Did you know that you can remove the servo hub from the servo motor? To do this, hold the black part of the servo motor and pull the hub away from it. It should pop off. Then you can rotate the position of the arm to your liking and press the hub back on. You may need to try this a few times to get it just right. Be careful to align the little teeth on the servo gear with the ridges inside the hole on the servo hub.
I'M HAVING TROUBLE ATTACHING THE WHEEL/MOTORMATE TO MY DC MOTOR.
The shaft of the DC motor and the holes in the wheel and motorMate are all shaped like a "D". Make sure that the flat edge of the shaft on the DC motor aligns with the flat edge of the hole in the wheel/motorMate.
STILL HAVING TROUBLE?
Visit littleBits.cc/faq or contact our customer service team at support@littleBits.cc.
CONTINUE YOUR INVENTOR JOURNEY
The inventing doesn't stop here! Discover new friends, new challenges, and new invention adventures online and on the littleBits™ Invent App.
EXPLORE LITTLEBITS.CC AND THE LITTLEBITS INVENT APP FOR...
MORE INVENTIONS!
See what other Inventors have made with littleBits.
MORE CHALLENGES!
Take on new challenges and submit your solutions.
MORE BITS!
Add Bits and Kits to your collection for bigger and better inventions!

COMMUNITY
Find a local littleBits Chapter or share your questions and ideas on our forum.
WARNING
- This product contains small magnets. Snollowed magnets bar sizes together across intestines passing serious infections and death. Stock is used to maintain the size of magnets are swallowed or inhaled. - Near bits are small parts. E0 KOT allow children under 3 years old to play bath or near this product. - NEFS can be used for a single circuit, so any 30 electrical outlets. - On not touch or hold any saving parts of undalen while they are spacing. - Noop conductive radicals (such as aluminium foil, staples, paper clips, etc.), the circuit and the connector terminals. - Always turn off circuits when not in use or when left unattended. - Never use Lite in or near any liquid. - Never use in any extreme environments such as extreme hot or cold
cold, high humidity, dust or sand. - Bits are subject to damage by static electricity. Handle with cars. - Some nodules may become worn to the touch when used in certain circuit designs. This is normal. Rearrange nodules or discontinues using if they before excessively hot. - Discontinue use of any bits that malfunction, because damaged or broken.
VERY IMPORTANT NOTE
- Several projects in this kit involve the use of sharp objects. These tools should be used ONLY under direct adult supervision.
BATTERIOS
- non-rechargeable batteries are not to be recharged - rechargeable batteries are to be removed from the product before being charged - rechargeable batteries are only to be charged under adult supervision
INSTRUCTIONS
We recommend using littlebits brand 9-volt batteries, but standard alkulins or standard rechargeable batteries may also be used. Properly discard and replace exhausted batteries. • In not connect the two battery terminals to any conducting material.
CARE AND CLEARING
Clean Bits ONLY by wiping with a dry cloth. If necessary, (impropyl) alcohol on a cloth may be used sparingly, and then wipe with a dry cloth.
TO EOT use any other cleaning products on nodules.
FC RADIO AND TELEVISION INTERFERENCE FOC ID: 860HDB240 This device couples with the limits for a Class II digital device,
pursuant to Part 15 of the FCC rules. Construction is subject to the following two conditions: In This device may not cause harmful interference, and In this device must accept any interference in any way, including interference that may cause undisturbed operation. These limits are designed to provide reasonable protection against harmful interference in a residential installation. This equipment generates, uses and can run into a residential installation, and it is not installed and used in accordance with the instructions, may cause harmful interference to radio communications. However, there is no guarantee that interference will not occur in a particular installation. If the equipment does cause harmful interference, it is not necessarily an elevation reception, which can be deharmified by turning the equipment off and on,
the user is encouraged to try to correct the interference by one or more of the following measures: - Reorient or relocate the receiving instructions. - Increase the separation between the equipment and the receiver. - Connect the equipment into an outlet on a circuit different from that to which the receiver is connected. - Consult the dealer or an experienced radio/TV technician for help.
Changes and modifications not eximately approved by the manufacturer or registrant of this equipment can void your authority to operate this equipment under Federal Communications Commissions rules.
GET A QUESTION?
Visit LittleBite.co/fog for troubleshooting and additional support.
LittleBite Electronics Inc. 601 X 26th Street, M274 NY, KY 10001 (917)464-4577
www.littlebis.02
Released under CTRK Open Hardware License, version 1.2 Designed By: littlebits Electronics, Inc.
©2016 LittleBite Electronics, Inc. All rights reserved. Name in China
Littlebits, Sio, Sio, circuits in Seconds, and Nace Something That Does Something are trademarks of Littlebits Electronics, Inc.
All other marks are the property of their respective owners.
