PMO-750 - Microwave Palsonic - Free user manual and instructions
Find the device manual for free PMO-750 Palsonic in PDF.


| Product Type | Microwave Oven |
| Brand | Palsonic |
| Model | PMO-750 |
| Outside Dimensions (W x D x H) | 492 mm x 359 mm x 298 mm (19.4" x 14.1" x 11.7") |
| Net Weight | 15.6 kg (34 lbs) |
| Power Supply | 230V ~ 50Hz (typical Australian supply; see rating label for exact) |
| Power Output (Microwave) | 800 W |
| Microwave Frequency | 2450 MHz |
| Capacity | 22 litres |
| Functions | Microwave cook, Defrost, Programmed cooking (up to 3 stages), Quick cook (Popcorn, Pizza, Baked Potato, Minute Plus/Quick Cook), Clock timer |
| Control Panel | Digital display with touchpad keys |
| Door Opening | Push-button release |
| Interior Light | Yes (via see-through window) |
| Turntable | Removable glass turntable with roller ring |
| Safety Features | Door safety interlock system, automatic shut-off when door opened, requires proper grounding |
| Cleaning Instructions | Exterior: mild soap and water. Interior: mild detergent, avoid abrasives. Turntable and roller ring washable in soapy water. |
| Repairability | Only qualified service personnel should repair. Contact Palsonic Customer Service for authorized service. |
| Intended Use | Household use only; not for commercial, industrial, or laboratory use |
| Warranty / Support | Palsonic Customer Service: Australia 1300 657 888; website www.palsonic.com.au |
Frequently Asked Questions - PMO-750 Palsonic
User questions about PMO-750 Palsonic
0 question about this device. Answer the ones you know or ask your own.
Ask a new question about this device
Download the instructions for your Microwave in PDF format for free! Find your manual PMO-750 - Palsonic and take your electronic device back in hand. On this page are published all the documents necessary for the use of your device. PMO-750 by Palsonic.
USER MANUAL PMO-750 Palsonic
natural_image
Abstract geometric pattern with four black star-like shapes arranged in a diamond (no text or symbols)Palsonic
MICROWAVE OVEN

natural_image
Line drawing of a microwave oven with control panel and display (no text or symbols)PMO-750
INSTRUCTIONS MANUAL
IMPORTANT
Before operating your microwave oven, please read the operating instructions completely and retain this manual for reference.
Please also record the following details:
Model number: ____
Serial number: ____
Purchase date: ____
Dealer's name: ____
Dealer's address: ____
CONTENTS
SPECIFICATIONS 1
OPERATING INSTRUCTIONS 2
Safety precautions to avoid possible exposure to excessive microwave energy 2
Important safety instructions 3
Electrical requirements 5
Grounding instructions 5
Features 6
Control panel 7
Installation 8
How to operate 8
Trouble shooting 18
| SPECIFICATIONS | |
| MODEL: | PMO-750 |
| AC line voltage:Power consumption: | See rating label |
| Output power: | 800W |
| Microwave frequency: | 2450MHz |
| Capacity: | 22 litres |
| Outside dimensions:(W x D x H) | 492mm x 359mm x 298mm(19.4" x 14.1" x 11.7") |
| Net weight (approx.): | 15.6 kg (34 lbs) |
PRECAUTIONS TO AVOID POSSIBLE EXPOSURE TO EXCESSIVE MICROWAVE ENERGY
(a) Do not attempt to operate this oven with the door open since open-door operation can result in harmful exposure to microwave energy. It is important not to defeat or tamper with the safety interlocks.
(b) Do not place any object between the oven front face and the door or allow soil or cleaner residue to accumulate on sealing surfaces.
(c) Do not operate the oven if it is damaged. It is particularly important that the oven door closes properly and that there is no damage to the:
(1) door (bent),
(2) hinges and latches (broken or loosened),
(3) door seals and sealing surfaces.
(d) The oven should not be adjusted or repaired by anyone except properly qualified service personnel.
IMPORTANT: The microwave oven is designed for household use only. It must not be used for commercial operation.
IMPORTANT SAFETY INSTRUCTIONS
When using electrical appliances, basic safety precautions should be followed, including the following:
WARNING - To reduce the risk of burns, electric shock, fire, injury to persons or exposure to excessive microwave energy.
- Read all instructions before using the appliance.
-
Read and follow the specific "PRECAUTIONS TO AVOID POSSIBLE EXPOSURE TO EXCESSIVE MICROWAVE ENERGY" found on page 2.
-
This appliance must be grounded. Connect only to properly grounded outlet. See "GROUNDING INSTRUCTIONS" found on page 5.
-
Install or locate this appliance only in accordance with the provided installation instructions.
-
Some products such as whole eggs and sealed containers - for example, closed glass jars - may explode and should not be heated in this oven.
-
Use this appliance only for its intended use as described in this manual. This oven is specifically designed to heat, or cook food. and is for domestic use only. It is not designed for commercial, industrial or laboratory use, Do not use the microwave oven for other than cooking purposes.
-
As with any appliance, close supervision is necessary when used by children.
-
Do not operate this appliance if it has a damaged cord or plug, if it is not working properly, or if it has been damaged or dropped.
-
This appliance should be serviced only by qualified service personnel. Contact nearest authorized service facility for examination, repair or adjustment
-
Do not cover or block any openings on the appliance.
-
Do not use outdoors.
-
Do not immerse cord or plug in water.
-
Keep cord away from heated surfaces.
-
Do not let cord hang over edge of table or counter.
-
When cleaning surfaces of door and oven that comes together on closing the door, use only mild, non-abrasive soaps or detergents applied with a sponge or soft cloth.
-
Do not heat substances containing or producing corrosive chemicals and vapors, such as sulfides and chlorides in oven and avoid using such cleaning agents containing such chemicals to clean the oven.
-
To reduce the risk of fire in the oven cavity:
(a) Do not overcook food. Carefully attend appliance if plastic or paper. other combustible materials are placed inside the oven to facilitate cooking.
(b) Remove wire twist-ties from paper or plastic bags before placing bag in oven.
(c) If materials inside the oven should ignite, keep oven door closed, turn oven off, and disconnect the power cord, or shut off power at the fuse or circuit breaker panel.
18. Install your oven as directed and with adequate ventilation provided all round.
19. Microwave oven should not be operated without food inside. Operation in this manner is likely to damage the oven.
20. Metal and electroplated material should not be put inside the oven when operating.
21. Do not lean on the door; this could cause mis-alignment of the door.
22. Do not remove the outer case, door or control panel at any time to ensure that you will not be exposed to excessive microwave energy.
23. Do not use the oven for storage of paper or cooking utensils.
24. Be certain the turntable inside the oven is in place when you operate the
25. Handel the glass turntable carefully. It is fragile.
26. Preheating times for microwave browning dishes vary depending on the size of the browning dish and food being cooked
DO NOT REHEAT BROWNING ON DISH THE GLASS TURNTABLE MORE THAN 5 MINUTES. A SUITABLE INSULATOR SUCH AS A MICROWAVE AND HEATPROOF DINNER PLATE SHOULD BE PLACED BETWEEN THE TURNTABLE AND THE BROWNING DISH IN ORDER TO PREVENT THE TURNTABLE FROM OVERHEATING.
SAVE THESE INSTRUCTIONS
- The microwave oven must be plugged directly to a 3-prong wall receptacle which is properly grounded.
- Use power source of 10 amps minimum capacity and as specified on the label at the back of the microwave oven.
- This unit must be fully grounded at all times. Do not under any circumstances cut or remove the third (ground) prong from the power cord.
- Because of potential safety hazards under certain conditions, we strongly advise against the use of an adaptor
GROUNDING INSTRUCTIONS
This appliance must be grounded. In the event of an electrical short circuit, grounding reduces the risk of electric shock by providing an escape wire for the electric current. This appliance is equipped with a cord having a grounding wire with a grounding plug. The plug must be plugged into an outlet that is properly installed and grounded.
WARNING - Improper use of the grounding plug can result in a risk of electric shock.
Consult a qualified electrician or serviceman if the grounding instructions are not completely understood, or if doubt exists as to whether the appliance is properly grounded.

- Safety door lock system (latches) - governed by three built-in safety devices to ensure that the oven automatically cuts out and stops functioning the moment the door is opened.
- See-through oven window with perforated metal inlaid in plastic.
- Ventilation openings with projected spacer to allow proper airflow.
- Removable roller ring.
- Removable glass turntable improves cooking uniformity.
- Control panel.
- Press to open oven door.

NOTE: This microwave oven is not designed for built-in use.
-
Make sure all packing materials have been removed from the oven. Visual check after unpacking Check the oven for any damages, such as misaligned door. damaged gaskets around door or dents inside the oven cavity or on the door. If there is any damage, do not operate the oven until it has been checked by an authorized service personnel and any repairs made, if necessary.
-
The oven should be placed on a flat and stable counter, table or cart.
-
The oven should be placed away from high temperature and steam.
-
Exhaust vents are provided on the back of the oven for proper cooling and airflow in the cavity. Never allow anything to cover the air vents and there should be at least 2" (5cm) clearance at the air vents to permit adequate air circulation.
-
Place turntable inside the oven cavity and be sure that it is seated properly on the roller ring.
-
Read through all the precautions and the operating instructions before operating the oven.
-
Diagram for installing the turntable.

- Plug your oven into a 3 prong grounded outlet. Be sure that your microwave oven is the only appliance on the circuit.
- Set clock (see page 11 for setting).
- Push button to open door
- Close door securely.
- Set function pads.
- Touch START pad.
- An audible signal will sound at the end of the cooking cycle and the oven will turn off automatically.
- Cancel any entry for cooking, when food has been removed from oven during operation.
NOTE:
Cooking may be interrupted at any time during operation for turning or stirring of food. When the door of the oven is open, oven stops producing microwave energy instantly. To continue cooking re-close the door and touch START pad again. Previously set programme will not be wiped off.
HOW TO OPERATE THE FUNCTION KEYS
SETTING THE CLOCK
This feature functions as a 12-hr clock. DO NOT input numbers exceeding 1259.
To set the clock, follow this procedure when you first plug in your oven.
After your oven is plugged in, the letters 88:88 will appear in the display window.
Touch the Ⓥ CLOCK key and then touch the appropriate number pads in sequence.
| PROCEDURE | DIGIT DISPLAY | CLOCK INDICATOR | |
| When oven is plugged in | 88:88 | ||
| 1. Touch CLOCK key | CLOCK | :0 | On |
| 2. Touch number key | 808 | 8:08 | On |
| 3. Touch Clock Pad to set. |
MICROWAVE COOK
The microwave oven has a 99 minute 99 second timer for cooking operations. Once Microwave Cook is set, the microwave oven will operate at maximum power (power level 10) automatically, but this does not appear in. the display. If another power level is desired, then touch △ POWER LEVEL key and the power level required
EXAMPLE 1: Setting 1 minute at. power level 10
COOKING EXAMPLE: Melt butter
| PROCEDURE | KEY | DIGIT | COOK |
| DISPLAY | INDICATOR |
- Place food in oven and close door
- Touch MICROWAVE COOK key
- Touch desired number keys
- Touch START key

MICRO-
WAVE
COOK
100

:0
On
1:00
On
The display will show the set cooking time counting down till the cooking cycle is finished. An audible signal will sound and the display will return to the day clock.
NOTE: If you wish to check the power level, touch △ POWER LEVEL key. The power level will be displayed for a few seconds. and then the display will change back to cooking time.
Example 2: Setting 5 minutes cooking time at power level 7
COOKING EXAMPLE: Reheating two plates of food
| PROCEDURE | KEY | DIGIT DISPLAY | MICROWAVE COOK INDICATOR |
| 1. Place food in oven and close door | |||
| 2. Touch MICROWAVE COOK key |  MICROWAVE COOK MICROWAVE COOK | :0 | On |
| 3. Touch number keys for desired cooking time | 500 | 5:00 | On |
| 4. Touch POWER LEVEL key | POWER LEVEL | P-10 | On |
| 5. Touch number key for power level | 7 | P-7 | On |
| 6. Touch START key | START | The display will show the cooking time counting down from 5 minutes to zero. Power level 7 does not show, unless power level key is touched. | |
Note: If you want to change the power level during cooking, touch the

POWER LEVEL key and then enter the power level you wish to use.
MICROWAVE COOK
Your microwave oven is ideal for defrosting frozen food quickly and evenly. and has a special defrost facility for this. Simply touch ^*** DEFROST key and power level 3 is automatically set.
Example: Defrost for 10 minutes
COOKING EXAMPLE: Defrost 450g/1 lb fish fillets
| PROCEDURE | KEY | DIGIT DISPLAY | DEFROST INDICATOR |
| 1. Place frozen food in oven and close door | |||
| 2. Touch DEFROST key |  DEFROST DEFROST | :0 | On |
| 3. Touch number keys for desired defrosting time | 1000 | 10:00 | On |
| 4. Touch START key |  START START | The display will show the defrosting time counting down from 10 minutes to zero. | |
PROGRAMMED COOKING
You can programme your microwave oven to a combined cooking sequence of a maximum of three stages.
1) TWO STAGES
a) MICROWAVE COOK - MICROWAVE COOK, at different power level
Cooking can start off with high power level and finish cooking at a lower power level, or vice versa.
Note:
If the power level of the second stage of cooking is different from the first stage,
△ POWER LEVEL key should be touched again for the desired setting otherwise power level 10 will automatically set at the second stage of cooking.,
Example: MICROWAVE COOK, 8 minutes at power level 10 - MICROWAVE COOK, 20 minutes at power level 5.
| PROCEDURE | KEY | DIGIT DISPLAY INDICATOR | MICROWAVE COOK |
| 1. Touch MICROWAVE COOK key | MICROWAVE COOK | :0 | On |
| 2. Touch number keys | 800 | 8:00 | On |
| 3. Touch MICROWAVE COOK key | MICROWAVE COOK | :0 | On |
| 4. Touch number keys | 2000 | 20:00 | On |
| 5. Touch POWER LEVEL key | POWER LEVEL | P-10 | On |
| 6. Touch number key | 5 | P-5 | On |
| 7. Touch START key | START | The display will show 8 minutes of counting down and followed by 20 minutes. | |
| COOKING EXAMPLE: Beef stew | |||
b) MICROWAVE COOK - MICROWAVE COOK
Microwave cook, using the same power level to prolong the cooking time. COOKING EXAMPLE: Turkey
2) THREE STAGES
DEFROST - MICROWAVE COOK - MICROWAVE COOK
Defrost food and cook straight away, using two different power levels
COOKING EXAMPLE: Frozen cheese fondue.
INDEPENDENT FUNCTIONS
Four quick cooking functions are provided to suit your convenience in cooking the most common foods. The cooking result will vary according to the initial temperature of the foods. Adjustment in cooking time may be necessary.
A) POPCORN
A program has been installed to heat a bag of popcorn weighing about 100g
| PROCEDURE | KEY | DIGIT DISPLAY | POPCORN PIZZA INDICATOR |
| 1) Place a bag of microwave popcorn in oven and close door | |||
| 2) Touch POPCORN/PIZZA key once | POPCORN PIZZA | PC | On |
| 3) Touch START key | START | 2:30 | On |
| B) PIZZA | |||
| Another program has been installed to cook a pizza of approximately 350g in weight. | |||
| PROCEDURE | KEY | DIGIT DISPLAY | POPCORN PIZZA INDICATOR |
| 1) Place a frozen pizza in oven and close door | |||
| 2) Touch POPCORN/PIZZA key twice | POPCORN PIZZA | PI | On |
| 3) Touch START key | START | 5:00 | On |
REMARK: The key POPCORN/PIZZA operates alternatively.
C) BAKED POTATOES
A programme has been pre-set to microwave 2 potatoes, weighing approximately 230g each.
| PROCEDURE | KEY | DIGIT | BAKED |
| DISPLAY | POTATO | ||
| INDICATOR |
1) Place 2 potatoes in oven and close door
2) Touch BAKED POTATO kev BAKED PO On - POTATO
3) Touch START key START 7:00 On -
4) MINUTE PLUS/QUICK COOK
This is a convenient key programmed to microwave food for one minute at power Level 10.
COOKING EXAMPLE: To reheat a piece of chicken.
| PROCEDURE | KEY DIGIT | DISPLAY | MICROWAVECOOKINDICATOR |
1) Place foodstuff in oven and close door
2) Touch MINUTE PLUS/ MINUTE PLUS/ 1:00 On QUICK COOK key QUICK
3) Touch START key START 1:00 On
REMARK: This key can also be used to programme microwave cook for more than one minute.
| PROCEDURE | KEY DIGIT | DISPLAY | MICROWAVECOOKINDICATOR |
1) Place foodstuff in oven and close door
2) Touch MINUTE PLUS/QUICK COOK key
once
MINUTE PLUS/ QUICK COOK
1:00
On
twice
triple
2:00 On
3:00
On
3) Touch START key
START
3:00
On
Be certain oven is unplugged before cleaning. NEVER USE A COMMERCIAL CLEANER OR ANY ABRASIVE POWDERS OR PADS OR ANY CLEANING AGENTS CONTAINING OR PRODUCING CORROSIVE CHEMICALS AND VAPORS, SUCH AS SULFIDES AND CHLORIDES ON OR IN ANY PART OF THE MICROWAVE OVEN.
Exterior
Clean the surface with soap and warm water, then rinse and dry with a soft cloth. Water should not be allowed to seep into the ventilation opening to prevent damage to the operating parts inside the oven. Clean the control panel of your microwave oven only with a damp cloth. DO NOT USE CLEANING SPRAYS OR LARGE AMOUNTS OF SOAP AND WATER. These can cause problems with the control mechanisms, Always keep the door seal and door surface clean by wiping with a damp cloth, to prevent grease, soil or spatters from building up.
Interior walls
If steam accumulates inside or around the outside of the oven door, wipe with a dry cloth. Wipe the interior walls and the ceiling with mild detergent, rinse and wipe dry with a piece of soft cloth. Odors can be eliminated from the inside of the oven. by boiling a solution of one cup of water and several tablespoons of lemon juice in the oven for 5-7 minutes. This also helps to loosen any dried soil in the oven. Be very careful not to scratch the door and interior surface,
Wipe out any spillages or splashing on the turntable after use. It is also occasionally necessary to remove the turntable and the roller ring for cleaning and to clean the floor of the oven. Wash the turntable and roller ring in mild soapy water, then rinse and dry. Be sure that the roller ring and turntable are put back in their proper places before operation.
TROUBLE SHOOTING
OVEN WILL NOT WORK IF:
- The power plug is not fully inserted..
● One of the house fuses has blown. - Door is not closed properly.
● Time has not been set. - You have not entered START'
- You have entered a new program without cancelling the old one.
- You have not entered numbers after Time Cook.
- CANCEL/OFF' pad was touched accidentally.
- The oven is overheated. A thermal sensitive safety device will automatically turn the oven off. The oven will be operable again when it has cooled sufficiently.
INCORRECT PROGRAMMING
An incorrect data will not be accepted by the built-incomputer; you will see nothing happen when an incorrect pad is touched.
If a cooking programme is entered incorrectly, you can cancel the program by touching the CANCEL/OFF pad and re-enter the correct full program.
MICROWAVE OVEN TURNED ON ACCIDENTALLY WITH NO FOOD IN THE OVEN
- Touch ‘CANCEL/OFF’ pad immediately to cease all operation. A cup of water left in the oven will absorb the microwave energy if the oven is accidentally turned on.
COOKING TIMES IN COOKBOOK DO NOT SEEM RIGHT FOR YOUR FOOD
- Foods vary in size, type and shape. These may cause cooking times to differ from those given in the cookbook. House power varies too.
● Food has not stirred as required in recipe.
NOTE: If food is not heated at all when a cooking program has been entered, call for service.
CONDENSATION
- Steam accumulating inside and outside of the oven door and air vents is a normal sign of microwave cooking. Wipe out excess moisture with a piece of soft cloth after every operation.
The advantages of a microwave oven
A microwave oven is most useful for its speed in cooking. Speedy cooking of meals can be very helpful in some busy families. Microwave cooking roughly takes about one third to one quarter of the conventional cooking time. Of course this varies according to the density, temperature and the amount of food being cooked.
Foods are cooked so quickly in a microwave oven that they can be cooked in their own juices, with less or no seasonings at all, thus retaining all their natural flavours.
A microwave oven saves energy because energy is only consumed during the actual cooking time. There is no preheating and no cooling down for a microwave oven, so no energy is consumed and wasted.
A microwave oven does not become hot during cooking; only the foods get hot. The kitchen remains coal always, and this means comfort to the cook.
Microwave cooking also means less washing-up. Foods can be cooked and served in the same container, as they do not get hot during cooking in a microwave oven. Spatters and spills do not burn on the oven walls, so it is easy to keep the oven nice and clean.
Do not worry if you forget to defrost the meat. The microwave oven can defrost frozen food in a matter of minutes. Cooking can then begin immediately.
Reheating of foods in a microwave oven is also another advantage for late comers in the family. Reheating of food will not spoil its appearance and flavour.
The theory of microwave cooking
When the microwave oven is plugged in, the ordinary electrical current is converted to microwaves by a tube called a magnetron. The microwaves are of very short wave length and high frequency. The waves are then channelled into the cavity of the oven. Distribution of microwaves is evenly done by a stirring fan installed in the oven. The oven walls will reflect the microwave energy directly to the food, causing its molecules to vibrate at an incredibly high speed. These vibrations generate the heat that cooks the food, without heating the oven or cooking container, although a container may sometimes be warmed subsequently by the conduction of heat from the food cooked in it.
Once the door of the oven is opened, during or after cooking, the magnetron producing microwaves automatically switches off. and cooking by microwave energy stops instantly. Microwaves cook in three ways:
-
Microwaves are reflected to the foods by the metal walls of the oven. Never use metal utensils or utensils with metal trims, because they reflect microwaves away from the food.
-
Microwaves are transmitted through certain substances such as paper, plastic, glass and ceramic without producing heat. Cookware made of these materials are sometimes suitable for use in a microwave oven. For further details, see "Cooking Utensil"
-
Microwaves are attracted to the liquid. sugar, fat or moisture content in foods, causing them to vibrate at an incredibly high speed. As the vibrating molecules rub against each other, this causes friction. thereby creating heat within food.

MICROWAVE COOKING UTENSILS
You can test your cooking utensils to see whether they are microproof or not. Do this simple test. Put a glass half full of water in the microwave oven. Place it on top of or next to the dish. Microwave for one minute at full power. If the water becomes hot, the dish is microwave-safe. If on the other hand, the dish is warm or hot, this means that the dish has been absorbing microwave energy, and should
not be used in the microwave oven.
For most oven cooking, a round dish is preferable to oval or rectangular dishes, because food cooked in corners allow more exposure to microwaves. Over cooking at comers may occur.
There are also a number of cooking utensils designed for microwave cooking on sale in the market. Always check manufacturers' instructions.
| RECOMMENDED | NOT RECOMMENDED |
| Metal MetalSmall pieces or strips of aluminium foil may be used to shield parts of food, such as tips of poultry, wings or legs or the thin ends of joints. Shallow TV dinner trays less than 3/4 inch (1 1/2cm) deep can be used, but foil lids should be replaced with wax paper or plastic wrap.Glass, ceramic and chinaAll ovenproof glass and ceramic cookware can be used. Ordinary glass and china can be used only for short-term heating.PlasticPlastic cookware designed specifically for microwave cooking, microwave plastic cooking bags or boilable bags are all acceptable. Always puncture bags before cooking to prevent bursting. Plastic wrap can make a good tight seal when used to cover cooking dishes during microwaving. Turn back one corner to allow steam to escape. Foam cups and dishes should be used for short-term hearing only.PaperPaper plates and cups can be used for short-term cooking or re-heating. Paper towels and wax paper are best used for covering cooking dishes, heating rolls and sandwiches, because they keep the food moist.Wood and strawSmall wooden utensils and straws can be used for very short periods. | Metal dishes or utensils and those with any form of metal trim or decoration are not recommended, because metal reflects microwaves. This will cause arcing (sparks), and damage to the dish and the oven magnetron. Foil plates more than 3/4 inch (1 1/2 cm) in depth, foil-lined paper bags or boxes, sheets of aluminium foil, conventional meat thermometers, pewter or silver dishes, pots and pans are not to be used. Use string or elastic bands to replace metal twist-ties which are often supplied with cooking bags.GlassDelicate glassware and lead crystal should be avoided.PlasticMelamine dishes plastic bags used for freezing or storage Should not be used.PaperPaper of any kind should not be used in the oven for prolonged periods. This causes the paper to igniteWood and strawLarge wooden utensils should not be used as the microwave energy may cause the wood to become dry and brittle. |
- If cling-film or plastic wrap is used to cover food, turn back one corner to vent, thus preventing burns from the steam trapped underneath. Be careful when removing cover to avoid scalding from hot steam.
- Always use oven gloves when handling browning dishes. Cooking utensils may sometimes become hot because of the heat transferred from the heated food.
- Do not turn on the oven when it is not in use, to avoid damage to the oven and the danger of fire.
- The prevent fire, do not sterilize baby bottles, melt paraffin wax, dry flowers, fruit, herbs, newspaper or clothes in the oven.
- Eggs must not be cooked in their shells; egg yolks should be pricked, as should chicken livers, tomatoes and potatoes. Other foods with a skin, such as frankfurters must be pierced before cooking.
- Popcorn is not recommended, unless packed in bags specifically designed for use in microwave ovens.
- Narrow-necked bottles, baby food and canned foods should be avoided.
- Never attempt to heat carbonated drinks, because pressure can accumulate.
- No wire twist-ties, or metal of any kind are to be used; substitute them with string or rubber bands.
- Deep fat frying must not be done in the oven as the fat could overheat. Excess fat and dripping from meat and poultry should be basted away during cooking, to prevent spattering.
- Prick or pierce pouches, boiling and roasting bags before use.
-
Do not overheat food in paper and do not line the oven with paper.
-
Do not overcook food. Overcooking may result in fire. In case of fire, disconnect and keep the door closed.
- Insert a wooden cocktail stick when testing cakes; do not use a metal skewer or stick.
- Never use a conventional thermometer when cooking in the microwave oven.
- Be careful when baking or heating sweet rolls: sugar or fruit filling can become very hot. Do not intake straight away, you may burn your tongue.
- When heating TV foil tray, place it at least 1 inch (2 1/2 cm) from oven walls. TV trays should not be more than 3/4 inch (1 1/2 cm) deep.
- Cancel cooking time when food is removed from oven.
MICROWAVE COOKING TECHNIQUES
Microwave cooking is very similar to cooking on the range top, i.e. simmering or steaming, but not too similar from oven cooking. Microwave cooking is a moist form of cooking. It does not produce food with crusts or browning.
Timing is very important in microwave cooking because of the speed with which most food is cooked. Microwave cooking generally needs approximately one third of the time that is required in a conventional oven. It is better to under cook rather than over-estimate the cooking time. Food will still be cooking by heat conduction after it is removed from the oven. Overcooking of food has no remedy. Food can be examined easily by opening the oven door as many times as, you like.
Cooking time varies according to the temperature of the food. Food that is taken straight from the refrigerator takes longer to cook than food at room temperature and room temperature can vary too. Dense food will take longer to cook than porous food, because microwaves cannot penetrate deep into dense food. so the deeper part of food is heated and cooked by the conduction of heat from the outer surface. As the cooking time is determined by various factors, such as standing temperature, density, thickness and quality of the food, as well as the size, type and shape of dish used and sometimes by your own personal taste, the recipes given in this book have indicated a range of cooking time for your guidance. When you become more familiar with the oven, you will be able to adjust the cooking time to suit these factors.
Here are some helpful techniques for microwave cooking.
Standing time
Food still continues to be cooked by conduction of heat towards the centre after it has been removed from the microwave oven, or after the microwave oven has been turned off. This is called Standing Time. The Standing Time varies according to the volume and density of the food.
To retain heat. large items of food such as poultry or roasts of meat should be wrapped in foil with shiny side in during standing time for 10-20 minutes. During this time, the internal temperature of meat or poultry will rise from 5^ - 10^ .
Stirring
Stirring is helpful. because food cooks from the outer edges inwards. Therefore stirring from the outer edges towards the centre during cooking encourages even cooking.

natural_image
Line drawing of a bowl filled with chopped vegetables and a spoon (no text or symbols)Turning and rotating
It is possible that sometimes microwave energy is not distributed evenly in the cavity of the microwave oven. Food such as joints of meat or poultry should be turned over at least once during cooking.
natural_image
Simple line drawing of a basket with a handle and legs (no text or symbols)Placing of food
Arrange the thicker parts of the food near the outside of the container, and place the easily heated thinner parts towards the centre. Try to arrange the food in a circular pattern and leave the centre space empty. The empty space in the centre will allow the microwaves to act more efficiently.

natural_image
Illustration of a flower with six petals on a circular plate (no text or symbols)Sheilding
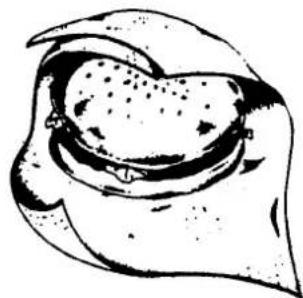
The thinner ends of joints of meat, or fish or the tips of poultry wings or legs can be shielded with small pieces of aluminium foil, to reflect microwaves away from these areas, to prevent them from cooking too quickly. The foil must never touch the walls of the oven.

natural_image
Illustration of a roasted chicken on a plate (no text or symbols)Covering
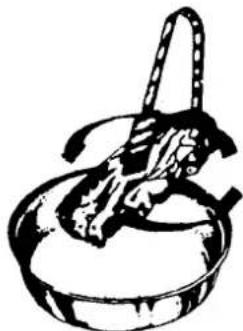
Covering of food retains moisture and prevents splashing in a microwave oven. If you wish to develop a drier surface, do not cover or use only a paper towel. Wax paper, paper towels, plastic wrap, glass lids and cooking bags can be used for covering during microwaving. If a cooking bag is used, tie the bag loosely with string, leaving a small space for steam to escape. Place the bag in baking dish. For prolonged period of cooking, paper towels must not be used. If covering is not specified in a recipe, food can be left uncovered.
natural_image
Illustration of a biological structure resembling a heart with surrounding tissue (no text or symbols)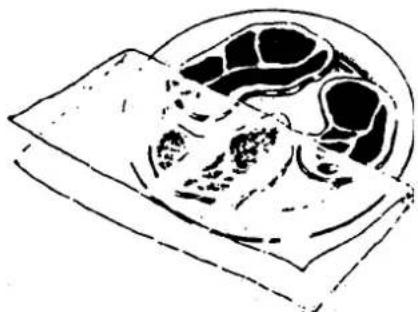
natural_image
Medical illustration of a cross-sectional view of internal organs (no text or labels)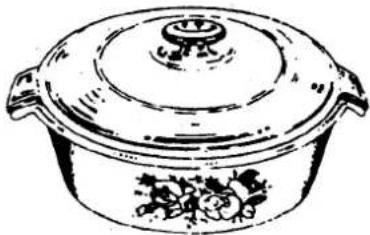
natural_image
Line drawing of a cooking pot with lid and side handles (no text or symbols)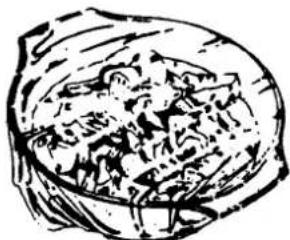
natural_image
Sketch of a bowl containing a textured, organic object (no text or symbols)
natural_image
Line drawing of a fish head and neck (no text or symbols)Browning
Food that requires more than 15 minutes cooking time will brown naturally. The fat in meat attracts microwaves. Food that cooks quickly, such as steaks, chops, hamburgers, can be browned by using a few drops of soy sauce.
Quick bread and cakes do not brown, because there is no hot air in the oven to dry out the surface; therefore icing or toppings of cinnamon. sugar, coconut, chopped nuts, and soft brown sugar are recommended to add eye appeal. These can be sprinkled on the surface after half the cooking time. Bread or bread rolls can be brushed with beaten egg or milk and sprinkled with poppy seeds or cracked wheat before cooking. Using brown flour and brown sugar also adds colour to bread.
You may use browning dishes which are on sale in the market, but read and follow the safety instructions carefully on page 4.
Cooking Time variations
Always start by trying the minimum cooking time and check for doneness. The cooking times given in this book can only be approximate. The cooking times may vary because of size, shape, temperature, thickness of the food and utensils used.
Most of the recipes are for approximately two to four servings. Use slightly less than double the amount of cooking time when doubling a quantity. When cooking quantities are halved, the cooking time should be reduced to slightly more than half the time required in the recipe.
COOKING CHART
| Food | Cover Cooking Time | ||
| BEEF1 lb (454g) ground beef1 lb (454g) meatballs1 lb (454g) hamburgers1 lb (454g) meat loafPot roastWater: 1 cup per lb (454g)Tender roastsraremediumWell doneSteaks | Lid/wax paperWax paper 9-12 min/wax paper 4-6 min/plastic wrapLidWax paperWax paper | 10minutes106 20-25 min/utes per lb (454g)810 minute per slce10 minutes per lb (454g)10-12 minutes per lb (454g)2-4 minutes per lb (454g) | |
| PORKBacon1/2 lb (225g) pork sausages,rawPork chopsPork roastspare-ribsHam roastPrecooked 6Raw 13-18 minutes per lb (454g)1 1/2-2 lb (750g-910g) Wax paper 8raw ham steaks1 1/2 (750g)ham loaf Plastic wrap | Paper towel 3/4-1 min/utes per lb (454g)Wax paper 2-4 min/Wax paper 10-12 min/mines per lb (454g)Wax paper 10-11-12 minutes per lb (454g)Wax paper 7-9 min/mines per lb (454g)Plastic wrap | 11-14 minutes per lb (454g)18-25 minutes | |
| LAMBRoast leg or shoulder | Wax paper | 8 | 8-10 minutes per lb (454g) |
| Food | Cover | Power Level | Cooking Time |
| VEALRoast shoulderLamb/veal cutlets/chops(3-4 pieces) | Wax paperPlastic wrapWax paper | 810 | 9-10 minutes per lb (454g)9-11 minutes |
| POULTRYChicken piecesWhole chickenStewing, cut upComish hensWhole ducklingDuckling piecesTurkey breasts | Wax paperCooking bag 7-8Wax paperLid 8 12-14 minWax paper 10Wax paper 8 9-11Wax paperPlastic wrap | 10minutes per lb10utes per lb (454g)minutes per lb10 4-5 minutes8 | 2 1/2-3 minutes per piece (454g)8-9 minutes per lb (454g)6-8 minutes per lb (454g)(454g)per piece8-9 minutes per lb (454g) |
| FISH AND SEAFOOD1 lb (454g) fillet/steaks1 lb (454g) whole fish1 lb (454g) clams/oysters1 lb (454g) scallops1 lb (454g) shrimps peeledUnpeeled Plastic wrap2 Crab legs (8-10 oz each)(225g-280g each)Whole lobster (1-2 lb)(454g-910g)2 lobster tails (8-10oz each)(225g-280g each) | Wax paper/ 7-9 minplastic wrapPlastic wrapPlastic wrapPlastic wrapWax paperWax paperWax paper | 101010101010101010 | 3-5 minutes5-7 minutes5-7 minutes8-11 minutes5-8 minutes10-15 minutes6-8 minutes |
| EGGS AND CHEESEScrambledPoachedOmeletteQuiche (9 in) (22.5cm)pic shellfillingCustard (8 x 8 in)(20 x 20cm)Food | -Plastic wrapWax paper 10-Cover | 10108106Power Level Cooking Time | 1-1 1/2 minute per egg1-1 1/4 minute per egg1-1 1/2 minute to melt butter1 3/4-2 3/4minute per egg6-8 minutes2-4 minutes20-25 minutes |
| VEGETABLESVegetables (1-2 lb) 10 8-16 minut(454-910g)water: 1/4 cupPotatoes(1 lb) (454g)bakedboiled. water: 1 cupCorn-on-the-cobfresh in husk 2frozen 2 Plastic wrap 10 5-8 | fed/plastic wrap-Lid 10 15-20 minutesPlastic wrap 10 minutes per lb (454g) | 10 8-12 minutes | 6-7 minutes per lb (454g) |
| RICE, PASTA AND CEREAL8 oz (225g) macaroni. Lid/ 10 15- 18 minuteswater: 3-4 cups16 oz (454g) spaghetti. Plastic wrap 10 18-25 minutestwater: 6-7 cups8 oz (225g) egg noodles, Lid/ 10 13-18 minuteswater: 3-4 cups1 cup long grain rice, 10 18-25 minutestwater: 2-3 cups1 cup regular rice, water: 1 1/2-2 cups1 cup minute rice. water:1 1/2-2cups1 cup brown rice, water: 3 cups1/2 cup quick oatmeal, water: 1 cup1/2 cup long cooking oatmeal, water: 1 cup1/2 cup cornmeal. water: 2 cups | Lid/plastic wrapLid/plastic wrapLid/plastic wrap-Lid/plastic wrap-Lid/plastic wrap-Lid/plastic wrap-Lid/plastic wrap-Lid/plastic wrap-Lid/plastic wrap-Lid/plastic wrap-Lid/plastic wrap-Lid/plastic wrap-Lid/plastic wrap-Lid/plastic wrap-Lid/plastic wrap-Lid/plastic wrap-Lid/plastic wrap-Lid/plastic wrap-Lid/plastic wrap-Lid/plastic wrap-Lid/plastic wrap-Lid/plastic wrap-Lid/plastic wrap | 10 18-20 minutes1010101010 3-5 minutes10101010101010101010101010101010101010101010101010101010101010101010101010101010101010101010101010101 | 3-6 minutes30-35 minutes2-3 minutes3-4 minutes |
| CAKESCarrot cake (10 x 6 in)(25cm x 15cm)Basic butter or chocolatecake 8-1/5in (21cm)round dishRing cakeCupcakes (6)Bar cookies 8 in (20cm)square dish | - | 1010 6-8 minutes108 3-3 1/2minutes10 5-8 minutes | 13-16 minutes6-7 minutes |
| SOUP/BEVERAGE1 cup water based1 cup milk based | - | 108 2-3 minutes | 2-3 minutes |
DEFROSTING
Rapid defrosting of food is one of the great advantages of the microwave oven.
Before starting, make sure that you have removed any of the metal twist-ties which often come with frozen food bags, and replace them with strings or elastic bands. Containers such as cartons should be opened before they are placed in the oven. Always slit or pierce plastic pouches or packaging. If food is foil wrapped, remove foil and place it in a suitable container. Slit the skins of frozen food if any. Flex plastic pouches of food to ensure even defrosting.
When large pieces of meat are defrosted, you should shield thin parts of poultry
to slow down heating, otherwise, the outer edges will dry out, or even begin to cook.
Always under-estimate defrosting time. If defrosted food is still icy in the centre, return to microwave oven for further defrosting. Allow standing time when defrosting because the defrosting process still continues during the standing time.
The length of the defrosting time varies according to how solidly the food is frozen. Turn frozen food over or separate food if possible during defrosting or standing time.
The defrosting chart is an approximate guideline to help you to thaw food in the microwave oven.
DEFROSTING CHART
| Food | Recommended Time | Suggestions |
| MEAT1 pack baconFrankfurtersSpare-ribsGround meatRoastBeefPorkLambSteaks, chops and cutletsSausages | 3-5 minutes3-5 minutes per lb (454g)7-8 minutes per lb (454g)8-11 minutes per lb (454g)6-8 minutes per lb (454g)10-13 minutes per lb (454g)10-12 minutes per lb (454g)4-9 minutes per lb (454g)4-6 minutes per lb (454g) | Leave packages unopened when defrosting. Microwave till foods can be separated.Turn over after half of defrosting time.Unwrap roast and place in cooking dish. Defrost till half of defrosting time and turn it over. Stand for ten minutes.Separate pieces after half of defrosting time.Turn over after half of defrosting time. |
| POULTRY1 whole chicken(2 1/2-3 1/2lb)(1 1/4-1 1/2kg)Duckling (4-5 lb)(1 3/4-2 1/4 kg)TurkeyChicken piecesTurkey partsComish hen | 18-22 minutes4-6 minutes per lb (454g)9-11 minutes per lb (454g)6-8 minutes per lb (454g)9-11 minutes per lb (454g)9-10 minutes per lb (454g) | Place wrapped whole bird in oven when defrosting.Unwrap after half of defrosting time. Shield warm areas with foil. Stand in cold water.Separate during half of defrosting time. Stand to complete defrosting.Place wrapped chicken in oven and turn over after half of defrosting time. |
| FISH AND SEAFOOD1lb (454g) fillets1 lb (454g) steaks8-10 oz (225-280g) whole fish1 lb (454g) small pieces of seafood, e.g. shellfish shrimps, crabmeat, oysters, etc.6-9 oz (170-225g) lobster tails1 1/2 lb (750g) whole lobster or crab | 8-10 minutes2-3 minutes4-6 minutes6-8 minutes Break-up after half of defrosting time.6-8 minutes No manipulation6-18 minutes | Leave package unopened when defrosting. Stand in cold water to separate.No mainpulationPlace fish in cooking dish.Turn over once half way through defrosting time.Rinse cavity of fish with cold water.Turn over after half of defrosting time. |
| BREAD AND CAKES7 oz-1 lb (190-454g) bread, buns, rollsDoughnuts 1/2 minute each12-17 oz (340-482g) poundcake/coffee cake, frosted, cream filled, or topped17-19oz (482-539g) cheesecake8 in (20cm) fruit or nut pie 8-14 oz (395g) cream or custard pieCup cakes | 2-4 minutes2-5 minutes5-7 minutes10 minutes2-3 minutes1/2-1 minute | |
| VEGETABLESVegetables are preferably cooked from frozen.Add 1-2 tablespoons of water. | ||
RE-HEATING
Cooked food and leftovers can be reheated quickly and efficiently without spoiling their freshness and taste.
Always place the dense food at the outer edges and the more porous food towards the centre. To retain moisture during re-heating, cover the food with a microproof lid or plastic wrap, because covering the food retains heat and speeds heating. It also prevents spatters. For sandwiches and rolls, wrap them in paper towels loosely to absorb moisture and prevent sogginess.
Spread food in a shallow dish if possible. Stirring and rotation of food is sometimes necessary even for re-heating.
With so many combinations of food and numerous variations of food to be reheated, it may not be possible to provide you with the actual timing for re-heating. Therefore recommended re-heating time can only be offered as guidance. Always under-estimate re-heating time until you are used to the oven.
RE-HEATING CHART
| Power level: High | ||||
| Food | Cover | Power Level | Cooking Time | |
| 1 serving | Plate of food | Wax paper/ plastic wrap | 10 | 2-3 minutes |
| 1-2 servings | Saucy main dish | Lid /plastic wrap | 10 | 7-10 minutes |
| 2-4 servings | Thick meat slices, such as hamburgers, meat loaf slices | Wax paper / plastic wrap | 10 | 3-5 minutes |
| 2-3 servings | Thin meat slices, such as beef, ham, pork, turkey | Wax paper / plastic wrap | 8 | 2-3 minutes |
| 2-3 | Chicken pieces | Wax paper / plastic wrap | 8 | 3-4 minutes |
| 2 servings | Casserole | Lid | 8 | 9-12 minutes |
| 2 servings | Vegetables | Plastic wrap/lid | 10 | 3-4 minutes |
| 1-2 ears | Corn-on-the-cob | Plastic wrap | 10 3-4 minutes | |
| 2-3 Rolls | paper towel 10 | 1-1 1/2minutes | ||
| 1 | Whole pie | - | 10 | 5-10 minutes |
| 1-2 slices | Pie | - | 10 | 1-2 minutes |
| 3-4 | Sausages | Wax paper | 10 | 1-2 minutes |
| 4 | Hot dogs Paper towel 10 | 1 1/2-2minutes | ||
PALSONIC CORPORATION PTY LTD
1 JOYNTON AVENUE
WATERLOO NSW 2017 AUSTRALIA
TEL:(02)9313 7111
FAX:(02)9313 7555
www.palsonic.com.au
PALSONIC CUSTOMER SERVICE
TELEPHONE
AUSTRALIA: 1300 657 888
- Palsonic
- MICROWAVE OVEN
- IMPORTANT
- CONTENTS
- SPECIFICATIONS 1
- OPERATING INSTRUCTIONS 2
- PRECAUTIONS TO AVOID POSSIBLE EXPOSURE TO EXCESSIVE MICROWAVE ENERGY
- IMPORTANT SAFETY INSTRUCTIONS
- SAVE THESE INSTRUCTIONS
- GROUNDING INSTRUCTIONS
- NOTE:
- HOW TO OPERATE THE FUNCTION KEYS
- SETTING THE CLOCK
- MICROWAVE COOK
- PROGRAMMED COOKING
- INDEPENDENT FUNCTIONS
- A) POPCORN
- C) BAKED POTATOES
- Exterior
- Interior walls
- TROUBLE SHOOTING
- OVEN WILL NOT WORK IF:
- INCORRECT PROGRAMMING
- MICROWAVE OVEN TURNED ON ACCIDENTALLY WITH NO FOOD IN THE OVEN
- COOKING TIMES IN COOKBOOK DO NOT SEEM RIGHT FOR YOUR FOOD
- CONDENSATION
- The advantages of a microwave oven
- The theory of microwave cooking
- MICROWAVE COOKING UTENSILS
- MICROWAVE COOKING TECHNIQUES
- Standing time
- Stirring
- Turning and rotating
- Placing of food
- Sheilding
- Covering
- Browning
- Cooking Time variations
- DEFROSTING
- RE-HEATING
Brand : Palsonic
Model : PMO-750
Category : Microwave