PMO-585 - Microwave Palsonic - Free user manual and instructions
Find the device manual for free PMO-585 Palsonic in PDF.


| Product Type | Microwave Oven |
| Brand | Palsonic |
| Model | PMO-585 |
| Category | Countertop Microwave |
| Capacity | 20 Liters |
| Power Consumption | 1200 W (Microwave), 800 W (Grill) |
| Power Output | 700 W (Microwave) |
| Frequency | 2450 MHz |
| Control Type | Digital Touch Panel with LED Display |
| Door Type | Side-opening with Handle |
| Interior Light | Yes |
| Turntable | Yes, Glass Turntable (Diameter 270 mm) |
| Functions | Defrost, Auto Cook, Timer, Child Lock, Grill, Express Cooking |
| Dimensions (W x D x H) | 450 x 370 x 280 mm |
| Cavity Dimensions (W x D x H) | 315 x 315 x 215 mm |
| Weight | 12.5 kg |
| Child Lock | Yes |
| Cleaning | Wipe with damp cloth; do not use abrasive cleaners |
| Warranty | 1 Year Limited Warranty |
Frequently Asked Questions - PMO-585 Palsonic
User questions about PMO-585 Palsonic
0 question about this device. Answer the ones you know or ask your own.
Ask a new question about this device
Download the instructions for your Microwave in PDF format for free! Find your manual PMO-585 - Palsonic and take your electronic device back in hand. On this page are published all the documents necessary for the use of your device. PMO-585 by Palsonic.
USER MANUAL PMO-585 Palsonic
natural_image
Line drawing of a microwave oven with control panel and display (no text or symbols)
natural_image
Abstract geometric pattern with four black star-like shapes and a gray rectangle (no text or symbols)Palsonic
For customer service or product assistance
please telephone our call centre
1300 657 888
www.palsonic.com.au
CONTENTS
INSTALLATION
• Before installing the oven
- Place
• Electrical installation
OPERATION
• Use of the microwave
• What are microwaves?
MICROWAE OVEN FEATURES
CONTROL PANEL FEATURES
SETTING THE CLOCK
USING THE MINUTE TIMER
USING ADD MINUTE
- Reheating tips
• Cooking at different cook powers
• Cooking with more than one cook cycle
• Using Baked potatoes
• Using Popcorn - Using Defrost
- Defrosting tips
- Using Reheat
- Repeating Tips
• Using Vegetables - Cooking Chart
• Defrosting Chart - Reheating Chart
MAINTENANCE
- Cleaning the microwave
USEFUL HINTS
• Use of the microwave
- When cooking food
- Manual defrosting
• The amount of food
• The humidity content
- Pressure in foods
• The standing time
- Arranging food
• The tools and containers to use
- How to check whether a container is suitable for microwave cooking
- Container shape
- Trouble shooting
TECHNICAL SPECIFICATIONS
INSTALLATION
• BEFORE INSTALLING THE OVEN
Make sure that the oven door closes correctly and that the seal is not damaged.
- PLACE
Take account of the following recommendations when installing the microwave:
-
Keep it away from heat sources (e.g. oven). Heat affects correct appliance operation.
-
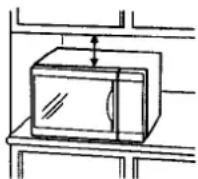
Keep a distance of about 3 cm between the wall and the back part. Allow a minimum space of 3 cm between the microwave top and the unit, if the appliance is to be installed below a unit.
Taking account of these recommendations guarantees suitable ventilation.
-
Place the microwave on a flat and stable surface that is strong enough to hold the oven and the additional weight (food-utensils). Remember that the control panel side is the heavy side.
-
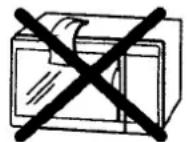
The oven ventilation openings must NOT be covered. Blocking the ventilation or the openings may affect correct oven operation and give poor cooking results.
-
Install the oven at least 2 m from radio, television or aerial to avoid interference.

• ELECTRICAL INSTALLATION
Before connecting the microwave oven
- Check that the electrical supply voltage is correct. - Have a socket with earth discharge suitable for the product's power.
- Use protective fuses for the line. Do NOT Change the plug for any reason, shortening the mains cord. Do not use multiple sockets or adapters to make the connection, either.
N. B.:
If you do not have a socket with earth, contact a specialist to make a correct earth connection. This recommendation is for SAFETY REASONS. UNDER NO CIRCUMSTANCE change the plug, shortening the mains cord, or use adapters to make the connection.
Important:
All our units are manufactured to the strictest safety standards. For total user protection THIS APPLIANCE MUST BE EARTED.
If you do not have a correct earth connection, contact a specialist for its installation. The manufacturer will accept no responsibility for injury to persons or damage to objects arising from the non-observance of this requirement, even with the additional protection of a differential circuit breaker.
OPERATION
• USE OF THE MICROWAVE
- Do not use the oven cavity for storage purposes.
- Do not leave paper, cooking utensils or food in the cavity when not in use.
- Make sure that children do not swing on the door when it is open.


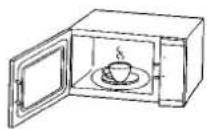
The oven should not be operated empty when using microwaves. Operation in this manner is likely to damage the appliance.
If you want to practice programming, put a glass of water inside the oven, to absorb the microwaves.
• WHAT ARE MICROWAVES?
Microwaves are like TV waves or light waves.
You cannot see them, but you can see their effect.
Just as ordinary daylight passes through glass, plastic or air, microwaves pass through materials like paper, glass, porcelain, plastic and air. These materials do not contain water or metal and will consequently not be heated up by the microwaves. Microwaves are reflected by metal in the same way as light is reflected by a mirror.

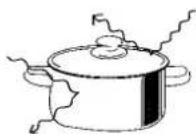
Microwaves are absorbed by water, oil and fat. The water, oil and fat molecules are excited by microwaves and rub against each other, thus producing heat, and the rubbing speed determines the temperature. This is why the food heats so quickly. Microwave energy is not hot. It simply causes the food to produce its own heat.
When we heat food with infrared waves (e.g. GRILL) in a traditional oven, the heat reaches the food surface and then reaches its centre by conduction. Food has a rather poor ability to conduct heat and thus needs a long time to heat up.
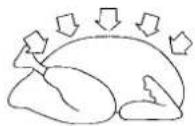
Using microwaves saves time. You save time and electricity, especially when cooking small amounts of food.

An example:
If you boil fish in a sauce-pan with water, the energy must first heat the pan and then the water which will heat the fish. In a microwave oven nearly all the energy is converted into heat inside the food which cooks more quickly, saving electricity and a lot of time.

natural_image
Simple line drawing of a cooking pot with steam rising, no text or symbols presentCooking Time: 20-25 min.

natural_image
Line drawing of a microwave oven with a circular dial indicator (no text or symbols)Cooking time: 10 min.
OPERATION
- ACCESSORIES
Turntable support
- Use the support under the glass turntable.
- Do not put any tool on the support, only the glass turntable.
- The support can be washed in the dishwasher.

Positioning:
- Put the support on the seat in the bottom of the microwave (internal cavity).
Glass turntable
- Use the turntable with all cooking methods. The turntable collects the dripping juices and food particles that otherwise would stain the inside of the oven.
- The turntable can be washed in the dishwasher.
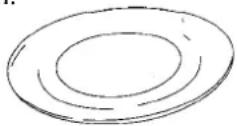
Positioning
- Put the glass turntable on the support.
Microwave oven features
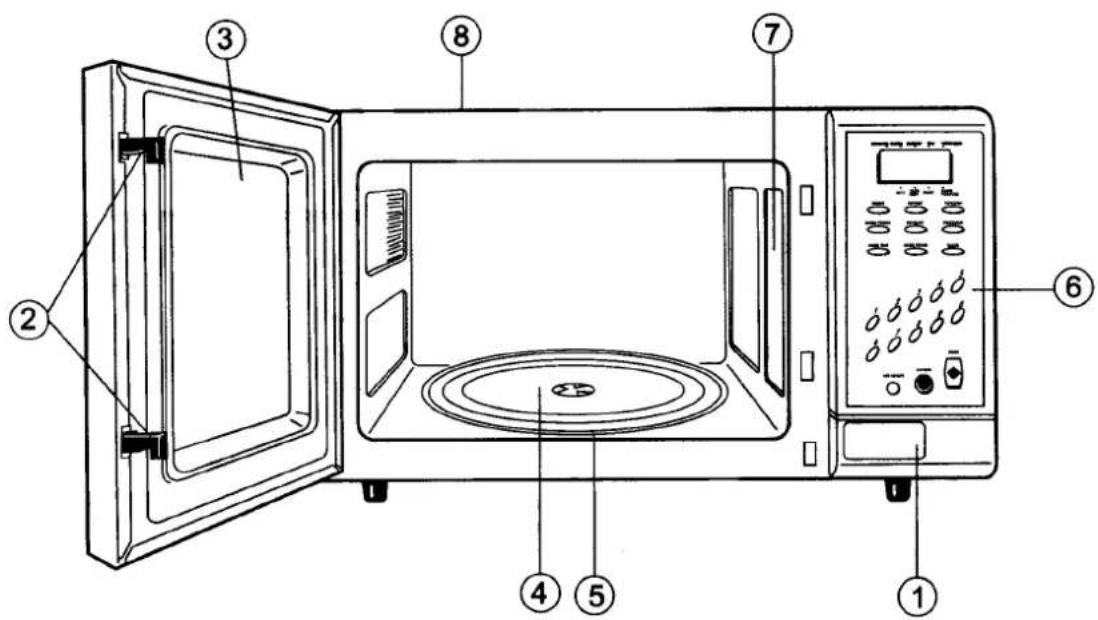
- One-Touch Door Open Button.
Push to open door.
- Door Safety Lock System.
The oven will not operate unless the door is securely closed.
- Window with Metal Shield.
Shield prevents microwaves from escaping. It is designed as a screen to allow you to view food as it cooks.
- Glass Turntable
This turntable turns food as it cooks for more even cooking. It must be in the oven during operation for best cooking results.
-
Turntable Support (under turntable).
-
Control Panel.
Touch pads on this panel to perform all functions.
- Light.
Automatically turns on when door is opened or when oven is operating.
- Model and Serial Number Plate (on back).
Control panel features
Your microwave oven control panel lets you select a desired cooking function quickly and easily. All you have to do is touch the necessary Command pad. The following is a list of all the Command and Number pads located on the control panel.
-
DISPLAY. The display includes a clock and indicators to tell you time of day, cooking time settings, and cooling functions.
-
REHEAT. Touch this pad 1-4 times to reheat food from one of four preset categories. You do not need to enter cooking time or cook power.
-
DEFROST. Touch this pad followed by Number pads to thaw frozen food.
-
POPCORN. Touch this pad to pop a snack size (1.75 oz [50g])bag of popcorn. You do not need to enter cooking time or cook power.
-
BAKED POTATOES. Touch this pad followed by Number pads to bake 1-2 potatoes. You do not need to enter cooking time or cook power.
-
BEVERAGE. Touch this pad to reheat a beverage. The oven will automatically heat for a preset time and cook power.
-
VEGETABLES. Touch this pad 1-2 times to cook vegetables from one of two preset categories. You do not need to enter cooking time or cook power.

flowchart
graph TD
    A["BEVERAGE CLOCK DEFROST TIME VEGETABLES"] --> B["QTY.? CUPS/ SIZE? START? BAKED POTATOES"]
    B --> C["REHEAT"]
    B --> D["BEVERAGE"]
    B --> E["POPCORN"]
    C --> F["BAKED POTATO"]
    D --> G["VEGETABLES"]
    E --> H["CLOCK"]
    F --> I["COOK TIME"]
    G --> J["COOK POWER"]
    H --> K["12 ADD MINUTE"]
    I --> L["13 CANCEL"]
    J --> M["START"]
    style A fill:#f9f,stroke:#333
    style B fill:#ccf,stroke:#333
    style C fill:#cfc,stroke:#333
    style D fill:#cfc,stroke:#333
    style E fill:#cfc,stroke:#333
    style F fill:#fcc,stroke:#333
    style G fill:#fcc,stroke:#333
    style H fill:#fcc,stroke:#333
    style I fill:#cff,stroke:#333
    style J fill:#cff,stroke:#333
    style K fill:#ffc,stroke:#333
    style L fill:#ffc,stroke:#333
    style M fill:#ffc,stroke:#333
- COOK TIME. Touch this pad followed by Number pads to enter cooking times.
- COOK POWER. Touch this pad, after the cook time has been set, followed by a Number pad to set the amount of microwave energy released to cook the food. The higher the number, the higher the power or faster the cooking speed.
- CLOCK SET. Touch this pad followed by Number pads to enter the correct time of day.
- Number Pads. Touch Number pads to enter cooking times, cook powers, and quantities.
- ADD MINUTE. Touch this pad to cook for one minute at 100% cook power or to add an extra minute to your cooking cycle.
- OFF/CANCEL. Touch this pad to erase an incorrect command or to cancel a program during cooking. This pad will not erase time of day.
- START/ENTER. Touch Number pads to enter cooking times, cook powers, and quantities.
NOTES:
- If you choose an auto cook function and change your mind, you must press OFF/CANCEL before you choose another auto cook function.
- If you attempt to enter unacceptable instructions, three tones will sound, and "Err" will appear on the display. Touch OFF/CANCEL and re-enter the instructions.
- Once you choose a function, an indicator light (▲) will flash as a prompt for the next action you need to perform.
-
If you choose a function but do not press another command pad within one minute, the dispaly returns to the time of day and you have to start over again.
-
If you have entered all settings for a function but do not touch the Start/Enter pad in 5 seconds, the Start? indicator light will flash.
- If you open the door while the oven is on and then shut the door, the Start? indicator light will flash.
Audible signals
Audible signals are available to guide you when setting and using your oven:
- A programming tone will sound each time when you touch a pad.
- Four tones signal the end of a cooking cycle and two tones will sound every minute until you open the door or press the command pad.
- Three tones will sound if you enter incorrect instructions.
Interrupting cooking
You can stop the oven during a cycle by opening the door. The oven stops heating and the fan stops, but the light stays on.
To restart cooking, close the door and
TOUCH
START
If you do not want to continue cooking:
- Close the door and the light goes off. OR
- TOUCH

NOTE: Before setting a function, touch CANCEL to make sure no other function is on.
Setting the clock
When your microwave oven is first plugged in, or after a power failure, the display will show ":"", If a time of day is not set, ":" will stay on the display until you set the clock or another function.
- If you enter an incorrect time, three tones will sound, "Err", then "0" will appear on the display. Reenter the correct time.
- If you touch OFF/CANCEL while setting the clock, the clock will return to the time already on the dispaly.
NOTES:
- You can only set the clock if the oven is not cooking food.
To set time:
- Choose the setting.
TOUCH

YOU SEE
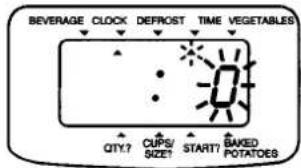
- Enter the time of day. Example for 5:30:
TOUCH

YOU SEE
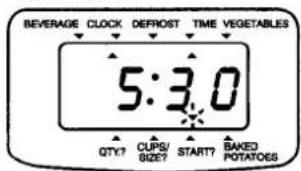
(Start? indicator light flashes after 5 seconds)

- Touch CLOCK/SET or START/ENTER.
TOUCH

YOU SEE

OR

Using the minute timer
Your microwave oven can be used as a kitchen timer. Use the minute timer for timing up to 99 minutes, 99 seconds.
NOTE: You can use the minute timer to set a delayed start time. Set the delayed start time with the minute timer by following Steps 1 and 2 below. Then set cook time as described in the "Using Your Microwave Oven" section.
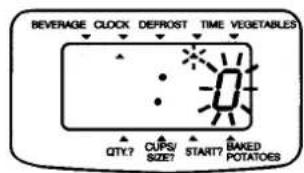
1. Touch 0.
TOUCH
YOU SEE
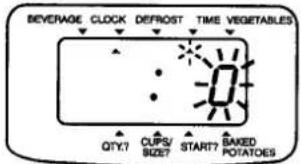
2. Enter the time to be counted down.
TOUCH

YOU SEE

3. Start the countdown.
TOUCH

YOU SEE

Using ADD MINUTE
ADD MINUTE lets you cook food for one minute at 100% cook power or add an extra minute to the current cooking cycle at the current cook power. You can also use it to extend cooking time in multiples of one minute, up to 99 minutes.
NOTES:
- To extend cooking time in multiples of one minute, touch ADD MINUTE repeatedly during cooking.
- You can use ADD MINUTE when timed cooking, defrosting, or running any function with preset time (for example, BEVERAGE).
- If you touch ADD MINUTE during cooking, the oven will cook at the currently selected cook power.
Before starting:
-
Make sure the food is in the oven and the door is closed.
-
Touch ADD MINUTE.
TOUCH

(example: one for one minute)
YOU SEE
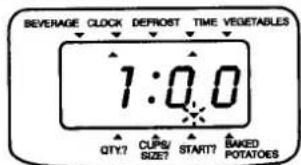
(For 5 seconds, TIME indicator flashes. After 5 seconds, Start? indicator light flashes)
- Start the oven.
TOUCH
YOU SEE
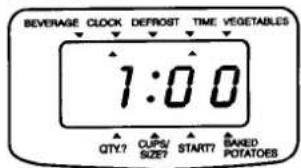
(example: for 1 minute)
During cooking: Touch ADD MINUTE.
TOUCH

(example: twice for 2 minutes)
YOU SEE

(example: for original time of 2:45)
- Cooked food and leftovers can be reheated quickly and efficiently without spoiling their freshness and taste.
- Always place the dense food at the outer edges and the more porous food towards the center.
-
To keep food moist during reheating, cover the food with a microwave-safe lid or plastic wrap. Covering the food keeps heat in the food, speeds heating, and prevents spatters.
-
Wrap sandwiches and rolls loosely in paper towels to absorb moisture and prevent sogginess.
- Spread food in a shallow dish if possible.
• Stir and turn food as needed.
• Always underestimate reheating time until you are used to the microwave oven.
Using Your Microwave Oven
This section gives you instructions for operating each microwave function. Please read these instructions carefully.
Cooking at high cook power
- Put the food in the oven and close the door.
2. Set the cooking time.
Example for 1 minute, 30 seconds:

YOU SEE


YOU SEE

(Start? indicator light flashes after 5 seconds)
3. Start the oven.
At end of cooking time:
Four tones will sound.
Two tones will sound every minute until you open the door or touch any pad. The display will then return to the time of day.

YOU SEE

(cooking time counts down)
YOU SEE

Cooking at different cook powers
For best results, some recipes call for different cook powers. The lower the cook power, the slower the cooking. Each Number pad also stands for a different percentage of cook power. Many microwave cookbook recipes tell you by number, percent, or name which cook power to use.
The following chart gives the percentage of cook power each Number pad stands for, and the cook power name usually used. It also tells you when to use each cook power. Follow recipe or food package instructions if available.
NOTE: Refer to a reliable cookbook for cooking times.
| COOK POWER NAME | WHEN TO USE IT | |
| 10=100% of full power | High | ·Quick heating many convenience foods and food with high water content, such as soups and beverages·Cooking small tender pieces of meat, ground meat, poultry pieces, fish fillets, and vegetables |
| 9=90% of full power | ·Heating cream soups | |
| 8=80% of full power | ·Heating rice, pasta, or casseroles | |
| 7=70% of full power | Medium-High | ·Cooking and heating foods that need a cook power lower than high (for example, whole fish and meat loaf) or when food is cooking too fast·Reheating a single serving of food |
| 6=60% of full power | ·Cooking requiring special care, such as cheese and egg dishes, pudding, and custards·Finishing cooking casseroles | |
| 5=50% of full power | Medium | ·Cooking ham, whole poultry, and pot roasts·Melting chocolate |
| 4=40% of full power | ·Simmering stews·Heating pastries | |
| 3=30% of full power | Medium-Low, Defrost | ·Defrosting foods, such as bread, fish, meats, poultry, and precooked foods |
| 2=20% of full power | ·Softening butter, cheese, and ice cream | |
| l=10% of full power | Low | ·Keeping food warm·Taking chill out of fruit |
-
Put the food in the oven and close the door.
-
Set the cooking time.
TOUCH

YOU SEE

Example for 7 minutes, 30 seconds:
TOUCH

YOU SEE
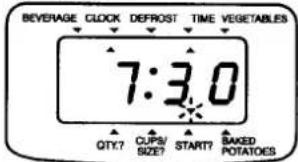

(Start? indicator light flashes after 5 seconds)

- Set the cook power.
TOUCH

YOU SEE
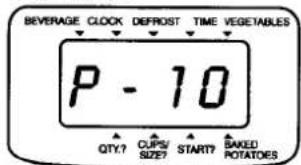
Example for 50% cook power:
TOUCH

YOU SEE

(Start? indicator light flashes after 5 seconds)
NOTES:
- You cannot enter a cook power higher than 10. If you touch a number from 2 to 9 after you touch Number pad 1, the cook power will become the second number you touched. For example, if you touch Number pads 1 and 4 the cook power would be "4".
- If you touch Number pad 0, then another number, your microwave oven will ignore Number pad 0.
continued on next page
4. Start the oven.
At end of cooking time:
Four tones will sound.
Two tones will sound every minute until you open the door or touch any pad to return the display to the time of day.
TOUCH

YOU SEE

(cooking time counts down)
YOU SEE

To see the cook power during cooking:
NOTE: If you wish to change the cook power press the desired Number pad.
TOUCH
YOU SEE

(example for 50% cook power)
Cooking with more than one cook cycle
For best results, some recipes call for one cook power for a certain length of time, and another cook power for another length of time. Your oven can be set to change from one to another automatically, for up to 4 cycles.
NOTE: Refer to a reliable cookbook for cooking times and power levels.
1. Put the food in the oven and close the door.
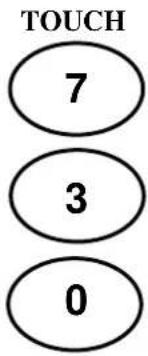
2. Set the cooking time for the first cycle.
TOUCH

YOU SEE
continued on next page
Example for 7 minutes, 30 seconds:

3. Set the cook power for the first cycle. TOUCH YOU SEE

Example for 50% cook power: NOTES:
- You cannot enter a cook power higher than 10. If you touch a number from 2 to 9 after you touch Number pad 1, the cook power will become the second number you touched. For example, if you touch Number pads 1 and 4 the cook power would be "4".
- If you touch Number pad 0, then another number, your microwave oven will ignore Number pad 0.

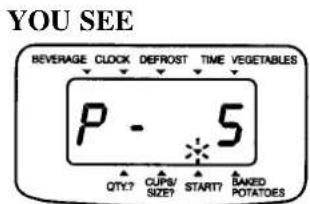
(Start? indicator light flashes after 5 seconds)
4. Repeat Steps 2 and 3 to set the cooking time and cook power for each additional cycle.
continued on next page
5. Start the oven.
TOUCH
YOU SEE

(first cycle's cooking time counts down, followed by cooking time for each additional cycle)
YOU SEE

At end of cooking time:
Four tones will sound.
Two tones will sound every minute until you open the door or touch any pad to return the display to the time of day.
Changing instructions
You can change the cook power for a cycle only before you start to set the next cycle.
To change cook power repeat Step 3. If you want to change the cooking time for a cycle touch CANCEL and start over again.
Using BAKED POTATOES
Your microwave oven cooks 1-2 baking potatoes (up to 8 oz [225g] total weight) by automatically choosing baking time and cook power. Before baking, remember to pierce potato with a fork several times. After cooking, let potato stand 5 minutes wrapped in foil.
- Put pierced potatoes on a paper towel in the oven and close the door.
NOTE: If more time is needed do not touch the BAKED POTATOES pad. Use
ADD MINUTE.(See "Using ADD MINUTE" earlier in the section.)
2. Touch BAKED POTATOES.
TOUCH

YOU SEE
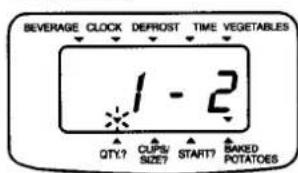
continued on next page
3. Enter the number of potatoes.
TOUCH
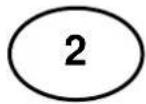
YOU SEE
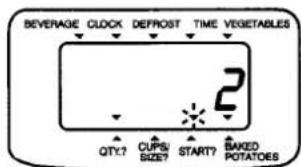
(Start? indicator light flashes after 5 seconds) (example for 2 potatoes)
4. Start the oven.
TOUCH

YOU SEE
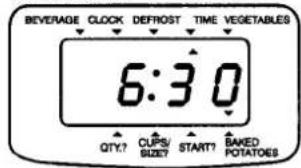
At end of cooking time:
Four tones will sound.
Two tones will sound every minute until you open the door or touch any pad to return the display to the time of day.
NOTES:
- If you do not enter a number after touching BAKED POTATOES you will see "1" with the Qty.? and Baked potatoes indicator lights on and the Start? indicator light flashing. You can touch the Start pad to bake one potato or enter "2" to bake more.
- If you do not touch any pad, the Baked Potatoes function will cancel out.
- If you touch a Number pad above 2, you will hear three tones and see "Err" on the display for one second, followed by "1-2" with the Qty.? and Baked Potatoes indicator lights on.
- If you touch the Start pad before entering the number of servings, the oven wil automatically be set to bake one potato.
YOU SEE

Using BEVERAGE
BEVERAGE lets you heat an 8 to 10 ounce (240mL to 30mL) beverage by touching just 2 pads.
-
Place a cup of a beverage in the oven and close the door.
-
Touch BEVERAGE.
TOUCH

YOU SEE

- Start the oven.
TOUCH

YOU SEE
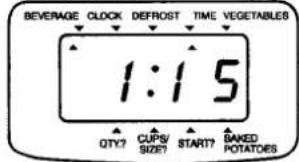
(heating time counts down)
At end of heating time:
Four tones will sound.
Two tones will sound every minute until you open the door or touch any pad to return the display to the time of day.
YOU SEE

Using POPCRON
POPCORN lets you pop a "snack size" bag (1.75 oz [50g]) of commercially packaged microwave popcorn by touching just 2 pads. Pop only one package at a time. If you are using a microwave popcorn popper, follow manufacturer's instructions. For best results, use fresh bags of popcorn. Cooking performance may vary with brand and fat content. Try several brands to decide which gives best popping results.
NOTE: Do not use popcorn bags that are larger than the "snack size" bags recommended above. As a larger bag expands, it may interfere with the rotation of the turntable, causing it to slow down or stop.
WARNING

Fire Hazard
Do not repop unpopped kernels. Do not reuse popcorn bags. Doing so can result in death, fire or burns.
-
Place the bag in the center of the turntable and close the door.
-
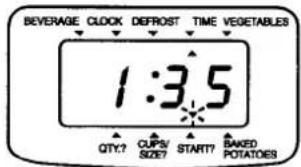
Touch POPCORN.
TOUCH

YOU SEE
- Start the oven.
TOUCH
YOU SEE

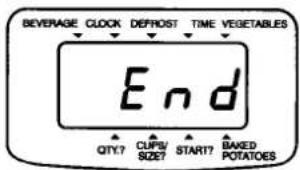
At end of heating time:
Four tones will sound.
Two tones will sound every minute until you open the door or touch any pad to return the display to the time of day.
(popping time counts down)
YOU SEE
Using DEFROST
Your microwave oven lets you defrost food by simply entering defrosting time. A 30% cook power is preset.
NOTE: Refer to a reliable cookbook for defrosting times.
1. Put the frozen food in the oven and close the door.
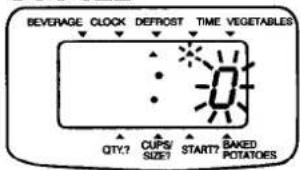
2. Touch DEFROST.
NOTE: You can use defrost instead of a cook cycle when cooking with more than one cycle.
TOUCH

YOU SEE
3. Enter the defrosting time.
TOUCH
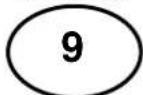
YOU SEE
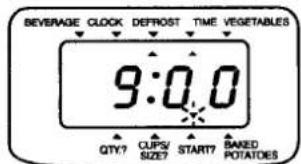
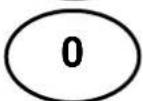
(Start? indicator light flashes after 5 seconds)

4. Start the oven.
TOUCH

YOU SEE
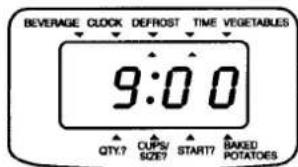
(defrosting time counts down)
At end of heating time:
Four tones will sound.
Two tones will sound every minute until you open the door or touch any pad to return the display to the time of day.
YOU SEE

Defrosting tips
- Before starting, make sure you have removed any of the metal twist-ties which often come with frozen food bags, and replace them with strings or elastic bands.
- Open containers such as cartons before they are placed in the oven.
- Always slit or pierce plastic pouches or packaging.
- If food is foil wrapped, remove foil and place it in a suitable container.
- Slit the skins, if any, of frozen food such as sausage.
- Bend plastic pouches of food to ensure even defrosting.
- Always underestimated defrosting time. If defrosted food is still icy in the center, return it to the microwave oven for more defrosting.
- The length of defrosting time varies according to how solidly the food is frozen.
-
The shape of the package alters the defrosting time. Shallow, rectangular packets defrost more quickly than a deep block.
-
Separate pieces as they begin to defrost. Separated pieces defrost more easily.
- You can use small pieces of aluminum foil to shield foods like chicken wings, leg tips, and fish tails, but the foil must not touch the side of the oven. Foil can damage the oven lining.
- Shield areas of food with small pieces of foil if the food begins to get warm. Make sure the foil does not touch the sides, top, or bottom of the oven.
- For better results, let food stand after defrosting.
- Turn over food during defrosting or standing time. Break apart and remove food when required.
Using REHEAT
REHEAT lets you reheat one of four different types of food, without needing to set heating times or cook powers. To use REHEAT, follow the steps below:
1. Touch
1-4 times, to select the food setting.
2. Touch one of these Number pads to enter the quantity.

3. Touch
NOTES:
- For casserole, soups/sauces, and pizza slice, if you do not enter a quantity within 2 seconds, REHEAT will prompt you to choose a quantity. You have 3 seconds to enter a quantity or to touch the Start/Enter pad to reheat one item. If you do not do either, the display will ask you if you want to reheat one item. You then have 1 minute to touch the Start pad or change the quantity and touch the Start pad. If you do not touch any pad within 1 minute, REHEAT will be canceled.
- If you touch a Number pad higher than the maximum allowed for your food setting, three tones will sound, and the display will show "Err" for 1 second, followed by a prompt telling you which quantities you can choose from.
- If you touch the Start pad before entering a quantity, you oven will automatically be set to reheat a quantity of "1".
- If you touch the Reheat pad 5 times, the display goes back to the Dinner Plate setting.
This chart shows you which foods you can reheat and how to program your oven to reheat them.
| FOOD | TOUCH REHEAT | DISPLAY SHOWS | QUANTITIES AVAILABLE |
| Dinner Plate | 1 time | dinr | 1 plate |
| Casserole | 2 times CASS | 1-2 cups (250mL-500mL) | |
| Soups/ Sauces | 3 times | SOUP | 1-2 cups (250mL-500mL) |
| Pizza Slice | 4 times | PIZZ | 1-2 slices |
Reheating tips
- Cooked food and leftovers can be reheated quickly and efficiently without spiling their freshness and taste.
- Always place the dense food at the outer edges and the more porous food towards the center.
-
To keep food moist during reheating, cover the food with a microwave-safe lid or plastic wrap. Covering the food keeps heat in the food, speeds heating, and prevents spatters.
-
Wrap sandwiches and rolls loosely in paper towels to absorb moisture and prevent sogginess.
- Spread food in a shallow dish if possible.
• Stir and turn food as needed. - Always underestimate reheating time until you are used to the microwave oven.
Using VEGETABLES
VEGETABLES lets you heat one of two types of vegetables, without needing to set heating times or cook powers. To use VEGETABLES, follow the steps below:
1. Touch

1-2 times, to select the vegetable setting.
2. Touch one of these Number pads to enter the quantity.

3. Touch

NOTES:
- If you do not enter a quantity within 2 seconds, VEGETABLES will prompt you to choose a quantity. You have 3 seconds to enter a quantity or to touch the Start pad to heat one item. You then have 1 minute to touch the Start pad or change the quantity and touch the Start pad. If you do not touch any pad within 1 minute, VEGETABLES will be canceled.
- If you touch a Number pad higher than the maximum allowed for your vegetable setting, three tones will sound, and the display will show "Err" for 1 second, followed by a prompt telling you which quantities you can choose from.
- If you touch the Start pad before entering a quantity, your oven will automatically be set to heat a quantity of "1".
- If you touch the Vegetables pad 3 times, the display goes back to the Frozen Vegetables setting.
This chart shows you which types of vegetables you can heat and how to program your oven to heat them.
| FOOD | TOUCH VEGETABLES | DISPLAY SHOWS | QUANTITIES AVAILABLE |
| Frozen Vegetables | 1 TIME | P1 | 1-2 cups (250mL-500mL) |
| Fresh Vegetables | 2 TIMES | P2 | 1-2 cups (250mL-500mL) |
COOKING CHART
| Food Power level | Cooking time | |
| MINCED BEEF | ||
| 500g minced beef | P10 | 4-6 minutes |
| 500g meatballs | P10 | 9-12 minutes |
| 500g hamburgers | P10 | 4-6 minutes |
| 500g meat loaf | P10 | 15-20 minutes |
| ROAST BEEF | ||
| Juicy (500g) | ||
| Medium (500g) | P9 | 6-7 minutes |
| Well cooked (500g) | P9 | 7-8 minutes |
| Thin steaks (500g) | P9 | 10-12 minutes |
| PORK | ||
| Bacon | P10 | 1/2-3/4 minutes |
| 250g raw meat sausages | P10 | 2-4 minutes |
| Pork chops | P10 | 10-12 minutes |
| Pork roast | P10 | 10-12 minutes |
| Raw pork steaks (750g) | P10 | 12-16 minutes |
| LAMB | ||
| Leg or shoulder (500g) | P9 | 8-10 minutes |
| VEAL | ||
| Roast shoulder | P9 | 9-10 minutes |
| Lamb/veal chops (3 or 4) | P10 | 6-8 minutes |
| POULTRY | ||
| Chicken pieces | P10 | 2-3 minutes |
| Whole chicken (500g) | P10 | 9-10 minutes |
| Stewing chicken (500g) | P8 | 12-14 minutes |
| Turkey breasts (500g) | P8 | 8-9 minutes |
| FISH | ||
| 500g fillets | P10 | 7-9 minutes |
| 500g pieces | P10 | 7-9 minutes |
| EGGS and CHEESE | ||
| Scrambled | P10 | 1-2 minutes |
| Poached | P10 | 1-2 minutes |
| Omelette | P10 | 1-2 minutes |
| VEGETABLES | ||
| Mixed vegetables (500-1000g) | P10 | 8-19 minutes |
| Water: 1/4 cup | ||
| Baked potatoes (500g) | P10 | 8-12 minutes |
| Fresh corn-on-the-cob (2) | P10 | 5-5 1/2 minutes |
| Frozen corn-on-the-cob (2) | P10 | 4-6 minutes |
| CEREAL | ||
| 1/2 cup quick porridge oatsWater: 1 cup | P10 | 1-2 minutes |
| 1/2 cup quick porridge oatsWater: 1 cup | P10 | 2-4 minutes |
| 1/2 cup quick porridge oatsWater: 1 cup | P10 | 2-3 minutes |
| BISCUITS/CAKES | ||
| Carrot cake (25cm x 15cm) | P10 | 9-12 minutes |
| Chocolate cake (21cm) | P10 | 5-6 minutes |
| Cupcakes (8) | P6 | 2-2 1/2 minutes |
| Biscuits | P10 | 3-6 minutes |
| SOUP/BEVERGE | ||
| 1 cup water based | P10 | 1-2 minutes |
| 1 cup milk based | P8 | 1-2 minutes |
DEFROSTING CHART
| Food | Time Suggestions | |
| MEAT | ||
| 1 pack bacon 2-3 1/2 minutes | Leave packages unopened when defrosting. Microwave until the pieces can be separated easily. Then once half way through defrosting | |
| Beef (500g) | 6-8 minutes idem | |
| Pork chops (500g) | 5-6 minutes idem | |
| Roast meat (500g) | 4-6 minutes Unwrap roast and place in cooking dish. Defrost till half of defrosting time then turn. Stand for 10 minutes inside the oven. | |
| Roast Pork (500g) | 7-9 minutes | idem |
| Roast Lamb (500g) | 7-8 minutes | idem |
| Hamburges, steaks (500g) | 3-6 minutes | Separate pieces after half of defrosting time. |
| Sausages (500g) | 3-6 minutes | Turn over after half of defrosting time. |
| POULTRY | ||
| 1 whole chicken | 13-16 minutes | Place wrapped whole bird in oven when defrosting. |
| Duck (500g) | 3-4 minutes | Take the pieces out of their covering after half defrostinf time. Protect the more sensitive parts with aluminium foil, Then keep covered with cold water. |
| Turkey (500g) | 6-8 minutes | idem |
| Chicken pieces (500g) | 4-6 minutes | Separate after half of defrosting time. Leave to stand in oven after defrosting is finished. |
| Turkey pieces (500g) | 6-8 minutes | idem |
| FISH AND SEAFOOD | ||
| 500g fish fillets | 6-7 minutes | No need to open the package to defrost. Leave to stand in cold water to separate the fillets |
| 500g fish fingers | 1-2 minutes | No handling necessary |
| 225-280g fish | 2-4 minutes | Turn over once half way through defrosting time. Rinse inside of fish with cold water. |
| 1 lb (500g) small pieces of seafood, e.g. oysters, crab meat, shrimps, crayfish | 4-6 minutes | Separate the pieces after half of defrosting time. |
| 170-255g lobster | 4-6 minutes | No handling necessary |
| 1 1/2 lb (750g) whole lobster or crab | 12-13 minutes | Turn after half defrosting time |
| BREAD AND CAKES | ||
| 500g bread, buns, rolls | 1-3 minutes | |
| Doughnuts (1) | 1/4 minutes | |
| 350-450g plum cake | 1-3 minutes | |
| 450-550g cheese cake | 3-5 minutes | |
| Fruit or nut cake (20cm) | 6-7 minutes | |
| 400g cream pie | 1-2 minute | |
| VEGETABLES | We recommend cooking from frozen. Add 1-2 tablespoons of water | |
REHEATING CHART
| Food Power level | Cooking time | |
| 1 plate of food | P10 | 2-3 minutes |
| 1-2 main dishes with sauce | P10 | 7-9-3 minutes |
| 2-4 meat hamburaers | P10 | 3-5 minutes |
| 2-3 thin slices of meat, pork, turkey | P10 | 2-3 minutes |
| 2-3 chicken pieces | P8 2-3 minutes | |
| 2 vegetables portions | P10 | 3-4 minutes |
| 1-2 corn-on-the-cob | P10 | 3-4 minutes |
| 1 portion of pie | P10 | 3-7 minutes |
| 1-2 portions of pie | P10 | 1-2 minutes |
| 3-4 sausages | P10 | 1-2 minutes |
| 4 hot dogs | P10 | 1-2 minutes |
MAINTENANCE
General recommendation
Always disconnect the microwave before any cleaning or technical check.
-
Clean at regular intervals, especially if spill-overs have occurred, or around the door if there are deposits of food.
-
Remove the turntable, for easier cleaning.
-
Do not use abrasive solvents or metal scouring pads. They will damage the microwave oven.
-
Clean inside and outside the oven using a sponge with a liquid detergent or a paper towel moistened with a window cleaning product. Sprinkle on the sponge or towel and not the oven directly.
-
For stubborn stains boil a cup of water in the microwave for 2 to 3 minutes.
-
To eliminate odours inside the oven, boil a cup of water with lemon juice in the microwave.


CHECK the door and door seals regularly. If you find any damage the appliance should not be operated until it has been repaired by a trained service engineer.
Do not use the microwave oven without the turntable, as the oven has been designed to work with the plate in its correct place.
Do not heat, store or use flammable materials in or near the oven. Fumes can create a fire hazard or explosion.
USEFUL HINTS
General recommendation:
Like other electrical appliances close supervision is necessary when the microwave oven is used by children.
• USE OF THE MICROWAVE
Use the microwave oven only for its intended use as described in this user guide. It must not be used for industrial or laboratory purposes, as it was designed to heat or cook food.
* Do not use the microwave oven to dry textiles, paper, spices, herbs, wood, flowers or other combustible materials. Fire could result.


* Remove wire twist-ties from plastic or paper bags before placing bags in the oven.
* Do not leave the oven unattended, especially when using paper, plastic or other combustible materials in the cooking process. Paper can bum and some plastics can melt when heated. Remember that melted plastic can contaminate food.
* If food or material inside the oven should ignite:
-
Keep the door closed.
-
Turn the oven off.
-
Unplug or disconnect the general house electrical supply.

- WHEN COOKING FOOD
Consult the recipe book for more details or specifications about cooking food, especially that containing alcohol.
Turning the food half way through cooking ensures even and uniform cooking, as in traditional cooking. Foods like roasts should be lifted up so that they do not absorb too much cooking liquid.
* Use oven gloves. Microwave energy does not heat containers - if they are special microwave ones - but it heats food, which transmits heat by contact to the containers, increasing their temperature.

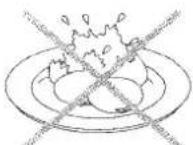
* Do not use the microwave to cook or heat whole eggs with or without shell.
* Do not heat foods or liquids in airtight sealed containers. The pressure increases and may cause damage when opening, or the container may explode.

* Do not over-cook food such as potatoes and sweet potatoes which could catch fire. Some foods which have a low water content, e.g. oil, chocolate and some pastries with filling, must be heated carefully. Do not use oil for deep frying, because you cannot control the temperature.
* When heating liquids, e.g. beverages or water, remember that the liquid can be heated beyond its boiling point without bubbles appearing. This could result in a sudden boil-over of the liquid.
To prevent this situation:
-
Avoid the use of narrow necked containers.
-
Stir the liquid before putting the container in the oven.
-
Leave the container to stand for a short time and stir again before removing the container from the oven.
• Liquids in baby bottles:
- Remove the inner cap and teat before putting the bottle in the microwave oven.
- When cooking is finished, check the liquid temperature. Do not serve without doing this.
- Shake before serving to distribute the heat evenly, avoiding risk of burning.
• MANUAL DEFROSTING

natural_image
Line drawing of a hand holding a bottle pouring liquid from a container (no text or symbols)Remember that the package shape affects the defrosting time:
* Flat and rectangular packages defrost more quickly than thick locks.
* Separate the pieces when they begin to defrost, so that they defrost more quickly.
* Shield areas of food with aluminium foil if they start to become warm.
Use tooth-picks to hold the foil in place.
* It is better to under-thaw the food slightly and allow the process to finish during the standing time.
•THE HUMIDITY CONTENT
As microwaves are attracted by humidity, the cooking time varies depending on the food's water content.
* Foods with a high water content, such as vegetables, fish and poultry, cook more quickly and evenly than drier foods such as rice and beans which require water for microwave cooking.
* Humidity in foods can produce condensation on the walls of the oven or inside the door. This is normal during cooking. It can be reduced by covering the container during cooking.
• PRESSURE IN FOODS
Many foods are covered with a tight skin or a membrane. To relieve the internal pressure:
* Pick the skin or membrane with a fork, preventing the food exploding and deforming, e.g.: potatoes, sweet potatoes, chicken livers, sausages, egg yolks and some fruits.

• THE STANDING TIME
To improve cooking or defrosting results and to enable an even temperature distribution in the food, when cooking calculate the standing time.
* Remember that in a microwave oven food continues to cook even when the microwaves are turned off. It is no longer cooked by the emission of microwaves but by the conduction of the high residual heat in the food.

* The length of the standing time depends on the volume and density of the food. With very dense foods the standing time can be as long as 10 minutes. The food will finish cooking during this time.
• ARRANGING FOOD
The best results are obtained if the food is evenly distributed on the dish. In microwave cooking this can be done in different ways.
Several items of the same food (potatoes, sweet potatoes, etc.). Arrange them in a ring pattern for uniform cooking.
When cooking foods of uneven shapes and thickness (pieces of chicken) place the thinnest or smallest towards the centre of the dish, where they will be heated last.
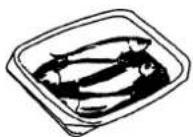
Uneven foods (fish) should be arranged with the tails to the centre of the dish.
Score the skin so that the fish do not break apart.
Protect the tail with small pieces of aluminium foil to prevent over-cooking.
Place meat steaks or slices on top of each other or interlace them. Thicker slice or sausages must be placed next to each other.

natural_image
Illustration of five food items: a bowl with dumplings, a plate of fish, a cut of bread, and a dish (no text or symbols)Gravy or sauces should be heated in a separate container. Choose a tall narrow container, rather than a low, wide one. Do not fill the container more than 2/3 full

• THE TOOLS AND CONTAINERS TO USE
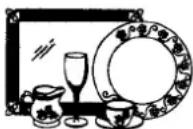
Cooking containers must be of a material which allows the microwaves to pass. Generally this means that you can use paper, plastic, glass, ceramic and porcelain container.
* Porcelain and ceramic containers are ideal for use in microwave ovens.
* Glass containers are suitable. Do not use coloured glass or glass with metallic decorations in the microwave, because e.g. gold decorations could be spoilt.
* Crystal container could break. Their use is not recommended.
* Plastic and paper containers can be used if they can withstand the temperature of the hot food. Plastic containers must withstand temperatures greater than 120°C
* Metal container, e.g. :casseroles, must not be used in microwave ovens. Microwaves cannot penetrate the metals. They are rejected by any metal object, producing sparks.
USEFUL HINTS
* Aluminium foil must only be used to protect parts of food which could cook too much; e.g. chicken wings, the ends of chicken thighs and fish tails.
To avoid sparks, aluminium foil must not touch the oven walls. Food containers and other container must not come into contact with the oven walls, either.
\* Aluminium containers:
Throw-away aluminium containers can be used in the new generation of microwave ovens, always complying with the following recommendations:
- Remove the container lid before heating it, so that the oven is not damaged.
- Only use perfect aluminium foil containers.
- We recommend using containers less than 3 cm. high.
- The container must be at least 2/3 full.
- To avoid sparks, leave 1 cm between the container and the oven walls.
- Use individual containers and place them on the microwave oven turntable.
- Follow the instructions on the food package, for even heating.
- Remember that if aluminium containers are used to heat cheese-based foods, the heating time will be longer than if other containers, e.g. glass, were used.
- Check that the food is hot (at least 720C ) before serving.
- Useful advice: put the aluminium container in a bain-marie (maximum 1 cm water) in a glass container, so that the aluminium container base heats evenly.
- How to check whether a container is suitable for microwave cooking
- Put a container, empty or with a cup of water, in the oven. The cup of water avoids the oven working empty.
- Switch the oven on at maximum power for 1 minute.
- At the end of the time take the container out of the oven.
- Check that the container is lukewarm; this means that the container is suitable for microwave cooking.
| Container material | Cooking with microwaves |
| Glass in general (1) | Yes |
| Heat-resistant glass | Yes |
| Heat-resistant glass-ceramic and ceramic (I) | Yes |
| Earthenware | Yes |
| Heat-resistant porcelain | Yes |
| Plastic in general (2) | Yes |
| Heat-resistant plastic (2) | Yes |
| Aluminium containers/foil (3) | Yes |
| Metal (casseroles, etc.) | No |
| Paper | Yes |
| (1) Without metal parts or metal edges.(2) Some types of plastic do NOT withstand high temperatures.(3) Aluminium foil can be used to protect the most delicate parts of the food,to prevent these cooking too much. | |

Suitable
Not Suitable
- Container shape
Round or oval are the recommended shapes because they give better cooking results. With square or rectangular containers the food may over-cook in the corners, because they absorb more energy.
Depth: Shallow container give better cooking results.
• TROUBLE SHOOTING
Before making a service call make the following checks:
- Check that the support and turntable are in place.
- Check that the oven is plugged in properly.
- Open and close the door again, making sure that the door was not incorrectly closed.
- Check the fuses and socket.
- Make sure that there is power available.
TECHNICAL SPECIFICATIONS
| Model | PMO-585 |
| Supply voltage | 240V / 50Hz |
| Current consumption | 1250 W |
| Fuse | 10A |
| Microwave power in agreement with IEC 705 standards, 1000 g of water | |
| Full power | 750w |
| Timer | Electronic |
| Dimensions (Height x Width x Depth) in mm | |
| Outside dimensions | 286 x 463 x 324 |
| Oven cavity dimensions | 229 x 276 x 243 |
This publication indicates basic characteristics subject to change without notification and is not binding for our organisation or our representatives.
Palsonic Corporation Pty Ltd
1 Joynton Avenue
Waterloo NSW 2017.
Australia
Tel: 02-9313 7111
Fax: 02-9313 7555
www.palsonic.com.au
4619-652-58681
- Palsonic
- CONTENTS
- INSTALLATION
- OPERATION
- MICROWAE OVEN FEATURES
- CONTROL PANEL FEATURES
- SETTING THE CLOCK
- USING THE MINUTE TIMER
- USING ADD MINUTE
- MAINTENANCE
- USEFUL HINTS
- TECHNICAL SPECIFICATIONS
- • BEFORE INSTALLING THE OVEN
- - PLACE
- • ELECTRICAL INSTALLATION
- B.:
- Important:
- • USE OF THE MICROWAVE
- • WHAT ARE MICROWAVES?
- An example:
- - ACCESSORIES
- Turntable support
- Positioning:
- Glass turntable
- Positioning
- Microwave oven features
- NOTES:
- Audible signals
- Interrupting cooking
- TOUCH
- START
- If you do not want to continue cooking:
- To set time:
- Touch 0.
- Enter the time to be counted down.
- Start the countdown.
- Before starting:
- Using Your Microwave Oven
- Cooking at high cook power
- Set the cooking time.
- Start the oven.
- Cooking at different cook powers
- Start the oven.
- To see the cook power during cooking:
- Cooking with more than one cook cycle
- Put the food in the oven and close the door.
- Set the cooking time for the first cycle.
- Set the cook power for the first cycle. TOUCH YOU SEE
- Example for 50% cook power: NOTES:
- Repeat Steps 2 and 3 to set the cooking time and cook power for each additional cycle.
- Start the oven.
- YOU SEE
- Changing instructions
- Using BAKED POTATOES
- Touch BAKED POTATOES.
- Enter the number of potatoes.
- Using BEVERAGE
- Using POPCRON
- Using DEFROST
- Put the frozen food in the oven and close the door.
- Touch DEFROST.
- Enter the defrosting time.
- Defrosting tips
- Using REHEAT
- Touch
- Touch one of these Number pads to enter the quantity.
- Touch
- Reheating tips
- Using VEGETABLES
- General recommendation:
- - WHEN COOKING FOOD
- • Liquids in baby bottles:
- • MANUAL DEFROSTING
- •THE HUMIDITY CONTENT
- • PRESSURE IN FOODS
- • THE STANDING TIME
- • ARRANGING FOOD
- • THE TOOLS AND CONTAINERS TO USE
- \* Aluminium containers:
- - How to check whether a container is suitable for microwave cooking
- - Container shape
- • TROUBLE SHOOTING
Brand : Palsonic
Model : PMO-585
Category : Microwave