
DFT-707 - Television DENVER - Free user manual and instructions
Find the device manual for free DFT-707 DENVER in PDF.


| Product Type | Portable LCD Television |
| Model | DFT-707 |
| Brand | Denver |
| Screen Size | 7 inches (diagonal) |
| Resolution | 480 x 234 pixels (approximate) |
| Display Type | LCD with LED backlight |
| Aspect Ratio | 16:9 |
| Dimensions (W x H x D) | 7.9 x 5.9 x 1.6 inches (200 x 150 x 40 mm) |
| Weight | 1.2 lbs (0.55 kg) |
| Power Supply | DC 12V via AC adapter or car adapter |
| Power Consumption | 12W (typical) |
| Input Voltage | AC 100-240V, 50/60Hz (adapter) |
| Tuner | ATSC (for North America) / DVB-T (for Europe) - region specific |
| Inputs | 1 x HDMI, 1 x USB, 1 x AV (composite), 1 x Antenna |
| Outputs | 1 x Headphone jack (3.5mm) |
| Built-in Battery | Rechargeable lithium-ion (optional, if model variant) |
| Remote Control | IR remote included |
| Additional Features | PAL/NTSC compatible, sleep timer, channel scan, brightness/contrast adjustment |
| Mounting | VESA 75x75 mm wall mount compatible (optional) |
| Accessories Included | AC adapter, car adapter, remote control, user manual |
| Warranty | 1 year manufacturer warranty |
| Maintenance | Clean screen with microfiber cloth; avoid liquids; disconnect power when cleaning |
| Safety | Do not expose to water or extreme temperatures; use only provided power adapter |
| Repairability | Contact Denver service center; do not open casing; spare parts available via support |
Frequently Asked Questions - DFT-707 DENVER
User questions about DFT-707 DENVER
0 question about this device. Answer the ones you know or ask your own.
Ask a new question about this device
Download the instructions for your Television in PDF format for free! Find your manual DFT-707 - DENVER and take your electronic device back in hand. On this page are published all the documents necessary for the use of your device. DFT-707 by DENVER.
USER MANUAL DFT-707 DENVER
natural_image
Snow-covered forest scene captured in a video player interface (no text or symbols on the scene itself)Dear Customers:
• Thanks for your purchase of the product.
- To ensure the best efficiency and safety of the product, please read carefully that manual before your connection, operation or adjustment and keep your manual well with you.
MODEL NO.: DFT-707
8. General Troubleshooting
Check the following points before assuming malfunctions of the TV set:
| Phenomenon | Reasons |
| No picture & sound | Improper connection of AC adaptor or ear adaptor.The batteries are run down or incorrect poles. |
| No picture | TV reception channel is not right and try to reset the unit.Relocate the TV set to a place where reception is better. |
| No sound | Sound volume is too low.The earphone has been plugged in or the signal is too weak or sound mate function is operated. |
| Poor reception | TV rod antenna is not correctly adjusted or TV channel is not right. |
| Dark or blurred picture | The brightness & contrast are too low.The battery voltage is too low. |
| Unclear or unstable picture | TV rod antenna is not properly adjusted or too weak reception signal area. |
| Picture moves up & down, blurs or folds over | TV rod antenna is not rightly adjusted. The signal reception is too weak or caused by signal reflection from the buildings nearby or mountains. |
| Interfered snow picture | The signal interfering from car's engine, railway, high tension wires, neon signs or radio frequency. |
| No colour | Colour is not setting properly. |
Table of Contents
-
User Safety Instructions....(2)
-
General Part....(3-8)
1) TV Unit
2) Remote Control
-
Basic Characteristics and Functions (8-9)
-
Connection (9)
1) Connection to the power source
2) Use of the Headphone
3) External AV Equipment
-
Operation Instructions …… (10)
-
Reset TV Channel (10)
-
General Specification....(11)
-
General troubleshooting …… (12)
-
Accessories List....(13)
1. User Safety Instructions
Please use specified voltage for this unit. Damage or malfunction might be caused when the range is exceeded.
Important:
-Using incorrect voltage may cause damage or malfunction of the TV.
-Please operate or connect the unit according to the manual.
-Please do not use thinner or other chemical cleaners.
-Please use a soft cloth to wipe off the dirt on the unit
-Do not expose the TV set to extreme temperature. The clone temperature of the atom is 10^ to 80^ .
-The storage temperature of the limit is -50 °C to 80 °C. The operation in the series of the unit is 20°C to 70°C.
The operation temperature of the unit is -20 °C to 70 °C. The environmental humidity of the unit is 0% to 80%.
The environmental continuity of the units 0.5 to 80%.
Warning:

-In order to prevent fire or electric shock, please do not wet or dampen the unit.
-Please use the accessories only recommended by the manufacturer
-Please do not remove the cover in order to avoid the electric shock from the high
voltage of the unit. When failure occurs, please call for maintenance technician
to repair the unit.
Caution:
-For your own safety, you should never watch TV while driving a car.
-
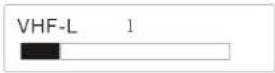
The channel searching bar is disappeared after AUTO scan is finished.
-
Press Menu to release the Auto Scan for TV channel if you need.
-
Press CH- or CH+ to select the desired program.
7. General Specification:
- Description: Portable 7" TFT LCD Color TV Set
2、TV System: NTSC(M)/PAL B/G D/K I M/N/SCAM B/G D/K System
PAL System
NTSC System
SECAM System
VHF-L: 48.25-160.25MHz
55.25-83.25MHz
48.25-62.15MHz
VHF-H: 168.25-464.25MHz
175.25-211.25MHz
175.25-211.25MHZ
UHF 471.25-863.25MHz
471.25-885.25MHz
471.25-855.25MHz
- Audio System: M, B/G, D/K, I
4、Display device: Colour TFT-LCD
5、Display Screen Size: 7 inches
- Video Input: 1Vp-p
8、Audio Output: ≥250mW (MAX)
9、Input Resistance: 75Ω
-
Power Consumption: ≤11w
-
Resolution: 1440 (H)*234 (V)
12、Dots Distance: 0.107(H) X 0.372(V)mm
- Visible Range: 154.08(H) X87.05(V)mm
14、Power Source: AC adaptor or car adaptor (normal: DC 12V)
15、Measurement: 190 (W) X 130 (H) X 34.8 (D) mm
-
Weight: Approx. 510g
-
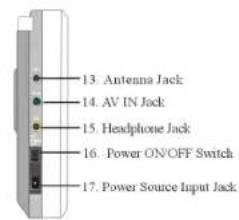
Connection terminals:
①. Headphone Jack
②. AV Input Jack
③. External Power Source Input Jack
5. Operation instructions
- Connect the power adaptor (DC12V) to the unit
- Switch on the main power switch at the side of the unit and the red light on in standby mode; then press standby "Switch" and the green light in working status
- Select AV/TV to watch AV/TV signal.
- Press CH+ or CH- to select the desired TV channel; Keep pressing V+ and V- to set the sound to a suitable level.
- Select Menu for Auto Scan and storage the TV channels; Press CH+, CH- and V+, V- in the Menu to adjust the brightness, contrast, colour and other functions.
- According to the specified system, default TV system in PAL/NTSC/SECAM and set the suitable Audio system: M, B/G, D/K, I
- To receive clearer pictures
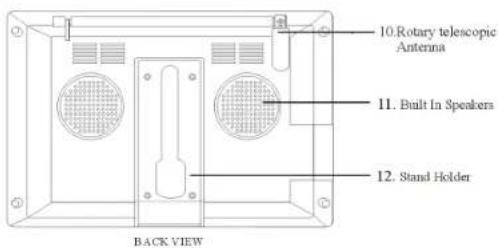
Adjust the length, angle and direction of the built in TV rod antenna (10) to get an excellent picture.
If signal is too weak, you may not get the reception and find unclear picture, sound noisy, twisted picture etc., even adjusted the rod antenna. In this case, you should use exterior or antenna adaptor plug in the antenna jack(13) or relocate the TV set to a place where reception is better.
6. Reset TV Channel:
- Full automatic channel selection and memory. Press AUTO switch (11) on the Remote Control for TV channel memorized Auto Scan VHF-L, VHF-H, UHF in order.
2. General Part
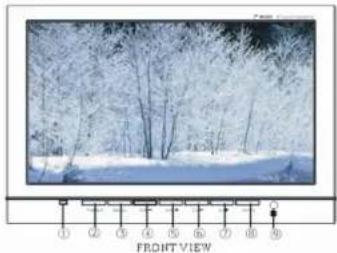
(1). TV Unit
natural_image
Snow-covered forest scene with frost-covered trees, labeled 'FRONT VIEW' at bottom (no other text or symbols)- Standby
- Remote Control Sensor
- Power Source Indicator
- Channel Down Button
- Menu Button
- Channel Up Button
- Volume-Control
- Volume+Control
- AV/TV Switch
SIDE VIEW
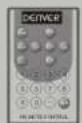
(2). Remote Control
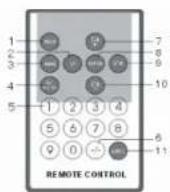
- Stand By Button
- Volume- Control
- Mute Mode
- AV/TV Switch
- TV Channel Selector
-
TV Channel+(Two Digits Selector)
-
Channel Up Control
- Menu Button
- Volume+ Control
- Channel Down Control
-
Auto Scan
-
Stand By Mode
- Screen Display with16:9&4:3 Functions
- Headphone Jack
- This Unit Supports With OSD Language in English \ German Spanish\ Italian
4. Connection
- Connection to the Power Source
(1) Connect one round end of attached AC adaptor (or car adaptor) to the power source input jack (17)
and the other end to the wall outlet at the suitable voltage (or the car cigarette lighter)
(2) Connect the detachable battery compartment stand power cord to the power source input jack (17).
- Use of Headphone
Connect the Headphone to " 🔒" at (15) for private listening.
3. Connection of the External AV Equipment
Plug the AV cable into the AV IN jack (Screen display at AV1&AV2 status) (14) to enable the connection of external audio and video equipment.
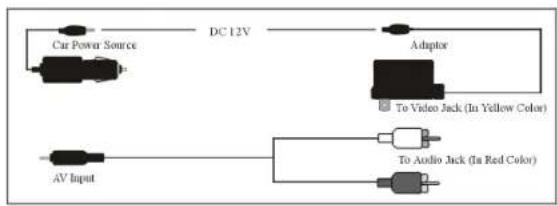
flowchart
graph LR
    A["Car Power Source"] --> B["DC 12V"]
    C["Adaptor"] --> D["To Video Jack (In Yellow Color)"]
    E["AV Input"] --> F["To Audio Jack (In Red Color)"]
    B --> F
9
Press CH knob to select the row & press V knob to select the channel number. E.g. To change the frequency signal of channel 8 to the frequency signal of channel 3 as above. Press V knob to confirm and press menu to release.

=Timer Control
- Clock e.g. 02:12(Display the operating time) Press CH knob to enter & press the number knob on the remote control to set the time. e.g. 19:20 to enter 1920.
- OFF e.g. -- (To set the time for auto-off)
Press the number knob on the remote to set the auto-off time - ON e.g. -- (To set the time for auto-on)
Press the number knob on the remote to set the auto-on time. -
ON Channel e.g ---(To set on the channel when switch on) Press the number knob on the remote to select the channel that you desired when switch on. Press MENU to quit after finished.
-
VOLUME UP CONTROL(V+)
-
CHANNEL DOWN CONTROL(CH-)
11 AUTO SCAN
-
Basic Characteristics and Functions
-
NTSC(M)/PAL B/G D/K I M/N / SCAMB/G D/K System
- Multifunction Remote Control
- Full Menu OSD on Screen Display
- Auto Scan for TV VHF/UHF Channel
- TV Channel Programming
- VCD/DVD AV Equipment Connection Port
- Brightness, Contrast & Colour Adjustment
OSD Remote Control Menu Instruction
- STAN
Press it in STAND BY mode after power on. - VOLUME DOWN CONTROL (V-)
- MUTE MODE
Press mute for silence or press again to release. - AV/TV SWITCH
- NUMBER KNOB
- TV CHANNEL UP TO TWO DIGITS SELECTOR
- CHANNEL UP CONTROL (CH+)
- MENU BUTTON
- Press it to enter the main menu
- Select the control function by V+/V-
- Press menu again to quit or it will be quit after 7 sec. w/o further operation.
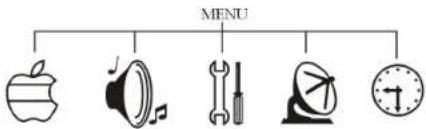
flowchart
graph TD
    A["Apple"] --> B["SoundCloud"]
    B --> C[" wrench"]
    C --> D[" megaphone "]
    D --> E[" clock "]
    F["Other items"] --> G[" Apple"]

=VIDEO CONTROL
To press CH knob to enter
To press select V+ or V- to the 0-100 unit as desired.
- Brightness
To adjust the picture if it's too bright or dark.
- Contrast
To adjust the picture if it's too bright or dark.
• Color
To adjust the color density.
- Sharpness
To adjust the picture to clear
- Tint
To adjust the best color under N system signal.

=VOLUME CONTROL
Press CH knob to enter, then to adjust volume by V+ or V-. You also can press v+(9) or v-(2) control directly on the remote control.

=SET UP CONTROL
- Language
Press CH knob to enter & Press V+ or V- to select language in English (Eng) /Italian(ITA) /Duetch (DUE)/Spanish(ESP)
- Background
Press CH knob to enter & Press V+ or V- to set ON/OFF, it will becoming blue screen when no signal.

-TUNE CONTROL
- C-SYS
To press the CH knob to set the C-SYS. Press V+ or V- to change the TV color system in your countries. E.g.: PAL for U.K., NTSC 358, SECAM…… (Under AV mode, PAL/NTSC 358 for selection)
- S-SYS
To press CH knob to enter & press V+ to set the Audio System in your countries. E.g. 1 for UK/DK/M……
- Channel
To press CH knob to enter & press V+ or V- to change the TV channel by manual.
- Auto Install
To press CH knob to enter & press V+ to auto searching the TV channel L-H-U in order
- Search
To press CH knob to enter and press V+ & V- to searching the TV channel from TV band set range UHF, VHF-H, VHF-L by manual.
- Band
To press CH knob to enter & press V+ to set the TV Band UHF, VHF-H, VHF-L
- Fine Tune
To press CH knob to enter and press V+ & V- one by one to fine tune the signal of the TV channel.
- Skip
To press CH knob to enter & to select skip ON by V knob to skip the TV channel through the CH+/CH- knob on the remote control if you want. To select skip off to release or press the number on the remote control directly to display.
- PG Exchange
To press CH knob to enter & display
Channel
3
0(e.g. Press V knob to enter number 8)
PG Exchange
- Accessories List
| Name | Quantity |
| AC Adaptor | 1 piece |
| Remote Control | 1 piece |
| AV Cable RCA Jack | 1 piece |
| Car Cord | 1 piece |
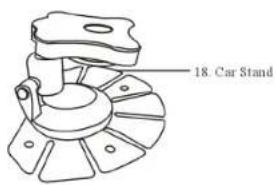
| Car Stand | 1 piece |
| Instruction Manual | 1 piece |
| Exterior Antenna Adaptor | 1 piece |
| Fixed Screws | 4 pieces |
ALL RIGHTS RESERVED
COPY RIGHT DENVER ELECTRONICS A/S
C E
www.denver-electronics.com
- General Troubleshooting
- Table of Contents
- User Safety Instructions
- Important:
- Warning:
- Caution:
- General Specification:
- PAL System
- NTSC System
- SECAM System
- Operation instructions
- Reset TV Channel:
- General Part
- Connection
- OSD Remote Control Menu Instruction
- =VOLUME CONTROL
- =SET UP CONTROL
- -TUNE CONTROL
Brand : DENVER
Model : DFT-707
Category : Television