
IPD-157B - Docking Station HAIER - Free user manual and instructions
Find the device manual for free IPD-157B HAIER in PDF.


| Product Type | Docking Station with Clock Radio |
| Brand | Haier |
| Model | IPD-157B |
| Dimensions (Main Unit) | 212 mm (L) x 135 mm (W) x 185 mm (H) |
| Weight (Main Unit) | 1.2 kg |
| Power Supply | AC Adaptor Model: GPE248-085290-1; Input: AC 100-240V ~ 50/60Hz; Output: 8.5V 2.9A |
| Max Power Consumption | 26W |
| Amplifier Power Output | 5W x 2 (THD 10%) |
| Speaker Impedance | 8 Ω (2.5" speakers x 2) |
| Dock Compatibility | iPod, iPhone, iPad (with adaptors for various models) |
| Audio Input | AUX IN (3.5 mm) |
| Video Output | HDMI (cable not included) |
| FM Tuner | Yes, with 30 presets (via app) and auto-search |
| App Integration | AppClockRadio(VIEW XL) for clock, alarms, EQ, weather |
| Equalizer Presets | 3D, Jazz, Rock, Classic, Custom |
| Alarm Functions | Multi-alarm with sleep/snooze, wake to music or radio, weekday calendar |
| Remote Control | CR2032 lithium battery, range ~20 ft |
| Cleaning Instructions | Disconnect power, wipe with soft dry cloth; no liquids or polishes |
| Safety Certifications | Designed for household use; meets safety standards |
| Warranty | 1 year parts and labor |
| Customer Service | 1-877-337-3639 (24/7 hotline) |
| Included Accessories | Main unit, remote control, AC adaptor, 6 dock adaptors, instruction manual |
| Repairability | No user-serviceable parts; refer to qualified personnel |
Frequently Asked Questions - IPD-157B HAIER
User questions about IPD-157B HAIER
0 question about this device. Answer the ones you know or ask your own.
Ask a new question about this device
Download the instructions for your Docking Station in PDF format for free! Find your manual IPD-157B - HAIER and take your electronic device back in hand. On this page are published all the documents necessary for the use of your device. IPD-157B by HAIER.
USER MANUAL IPD-157B HAIER
natural_image
Line drawing of a Haier device front panel with control buttons and indicator lights (no text or symbols on the device itself)User Manual
Model # IPD-157
TABLE OF CONTENTS
INTRODUCTION ....1
IMPORTANT SAFETY INSTRUCTIONS 2-3
PREPARATION FOR USE 4
MAINTENANCE 4
USING THE AC ADAPTOR 5
CONNECTING EXTERNAL DEVICES 6
LOCATION OF CONTROLS & INDICATORS 7
REMOTE CONTROL 8
OPERATING INSTRUCTIONS 9
FUNCTION CONTROLS 9-13
AppClockRadio(VIEW XL) OPERATION 14-19
VIDEO OPERATION 20
TROUBLESHOOTING GUIDE ....21
TECHNICAL SPECIFICATION 22
APPLE DEVICE COMPATIBILITY CHART 23-24
WARRANTY 25
INTRODUCTION
There are many exciting performance enhancements available by downloading the free AppClockRadio(VIEW XL) from the iTunes App Store.
For information on the AppClockRadio(VIEW XL) and how it works with your IPD-157, please visit the Apple's App Store or through Haier America's website.
Note: app is for iPordyTouch, iPhone, iPad
Download the FREE Apple App to use these features:
- Enlarged display clock
· FM Tuner with 30 preset stations
· EQ function(3D / Jazz / Rock / Classic / Custom)
- Clock with multi Alarm / Sleep / Snooze
- Weather
IMPORTANT SAFETY INSTRUCTIONS
1.) Read these instructions. Keep these instructions. Follow all instructions. Heed all warnings.
2.) Install this unit in accordance with the manufacturer's instructions.
3.) Only use attachments / accessories specified by the manufacturer.
4.) Use only with the cart, stand, tripod, bracket, or table specified by the manufacturer, or sold with the unit. When a cart is used, use caution when moving the cart/unit combination to avoid injury from tip-over.
5.) Use replacement parts as specified by the manufacturer.
6.) Do not install this unit near any heat sources such as radiators, heat registers, stoves, or other apparatus (including amplifiers) that produce heat.
7.) The unit shall not be exposed to dripping or splashing water and no object filled with liquids, such as vases, shall be placed on the apparatus.
8.) Do not use this apparatus near water and clean the unit with dry cloth only.
9.) Disconnect the unit from the power source when cleaning.
10.) No naked flame sources, such as lighted candles, should be placed on the unit.
11.) Keep the player clean and never store it next to a heat source or in dirty, humid or wet places. Keep it out of direct sunlight.
12.) Do not block any ventilation openings; the ventilation should not be impeded by covering the ventilation openings with items, such as newspapers, table-cloths, curtains, etc. Give minimum 100 mm distances around the apparatus for sufficient ventilation.
13.) To prevent fire or shock hazard, do not expose this unit to rain or moisture.
14.) Do not subject the product to harsh impacts. Do not drop the device. This may result in damage to the product and loss of data.
15.) Care required with the use of this apparatus in extreme climates.
16.) Do not use this apparatus in an extremely dry environment, as this can lead to static discharge which can damage the player.
17.) This unit may be subject to inoperability to a strong electromagnetic field or other interference. If this occurs, turn the unit's power off, then disconnect the power plug from the "DC IN" on back of unit. After a few minutes, reconnect the power jack into "DC IN" input to reset the unit software, and the unit should return to normal operation.
18.) To prevent fire or shock hazard, do not use this plug with an extension cord, receptacle or other outlet unless the blades can be fully inserted to prevent blade exposure.
19.) Unplug this unit during lightning storms or when unused for long periods of time.
20.) Where the MAINS plug is used as the disconnect device, the disconnect device shall remain readily operable.
IMPORTANT SAFETY INSTRUCTIONS
21.) Do not destroy the polarized or grounding-type plug. A polarized plug has two blades with one wider than the other. A grounding type plug has two blades and a third grounding prong. The wide blade or the third prong is provided for your safety. If the provided plug does not fit into your outlet, do not attempt to force the plug, consult an electrician for replacement of the obsolete outlet.
22.) Protect the power cord from being walked on or pinched particularly at plugs, receptacles, and the point where they exit from the apparatus.
23.) Do not overload wall outlet. Only use power source as indicated.
24.) Upon completion of any service or repairs to this product, ask the service technician to perform safety checks.
25.) Refer all servicing to qualified service personnel. Servicing is required when the unit has been damaged in any way, such as power-supply cord is damaged. Liquid has been spilled into the unit, the unit has been exposed to rain or moisture, or has been dropped, and does not operate normally.
26.) Batteries shall not be exposed to excessive heat such as sunshine, fire or the like.
27.) Attention should be drawn to the environmental aspects or battery disposal.
28.) This product is not intended for commercial use. Household use only.
29.) Do not install this apparatus in a confined space, such as a book case or built-in cabinet. Maintain minimum distance (about 10cm) around the apparatus for sufficient ventilation.
30.) To completely turn off the power, the main plug of the apparatus must be disconnected from the wall outlet.
Servicing:
• This unit contains no user serviceable parts. Refer to qualified personnel.
- Consult your dealer if you are ever in doubt about the installation, operation or safety of this product.
PREPARATION FOR USE
Contents:
1x Main Unit, 1x Remote control, 1x Instruction manual, 1x Main adaptor,
6x AdaptorsiPod, iPhone, iPad
Unpacking And Set Up
- Remove the contents from the box and remove all packing material from the main unit. We recommend that you save the box & packing material in the event that the unit ever needs to be returned under warranty.
- Do not remove any labels or stickers from the back panels.
MAINTENANCE
Cleaning The Unit
- To prevent fire or shock hazard, disconnect your unit from the main power source when cleaning.
- If the cabinet becomes dusty, wipe it with a soft dry cloth. Do not use any wax or polish sprays on the cabinet.
- If the cabinet becomes dirty or smudged with fingerprints, it may be cleaned with a soft cloth. Never use abrasive cloths or polishes, which will damage the finish of your unit.
Caution: Never allow any water or other liquids to get inside the unit while cleaning.
USING THE AC ADAPTOR
Connect the single plug into the "DC IN" jack on the unit's back panel. Then, connect the AC Adaptor into the 120V AC outlet.

NOTES:
• The housing of the AC adaptor may become warm during operation. This is normal.
- To reduce the risk of electric shock, never connect or disconnect the AC adaptor while your hands are wet.
- Please use original AC adaptor supplied with the unit, to avoid damage to the unit.
- Ensure the "DC IN" plug is connected to the unit BEFORE connecting to the mains socket.
CONNECTING EXTERNAL DEVICES
Complete the connections as shown below:
- VIDEO connection requires a HDMI cable(not supplied). See "Video Operation" for details.
- AUX connection requires a 3.5mm audio cable (not supplied) to connect your external audio source to the AUX input on the back of the main unit.
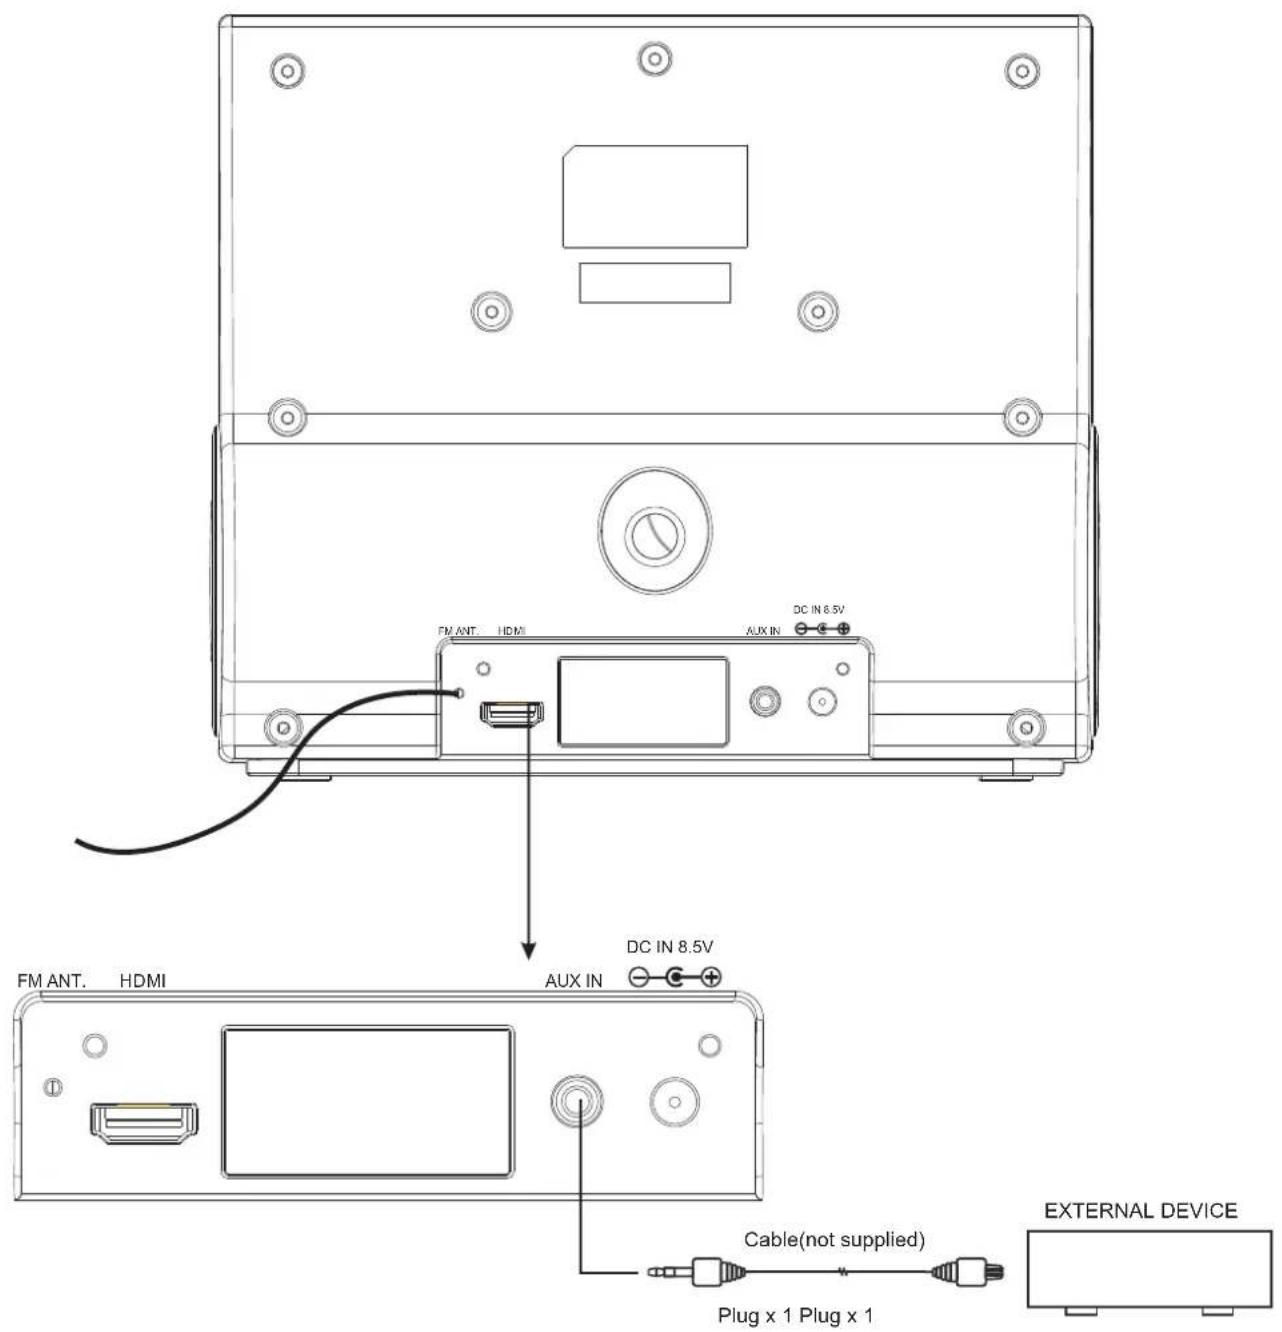
NOTE: If an iPod, iPhone, iPad is docked, it must be removed before you can listen to the AUX input.
LOCATION OF CONTROLS & INDICATORS
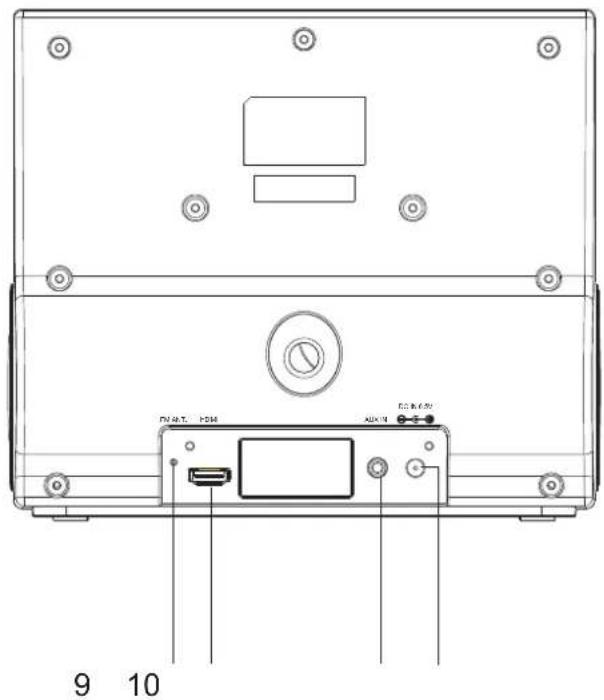
Front view Back view
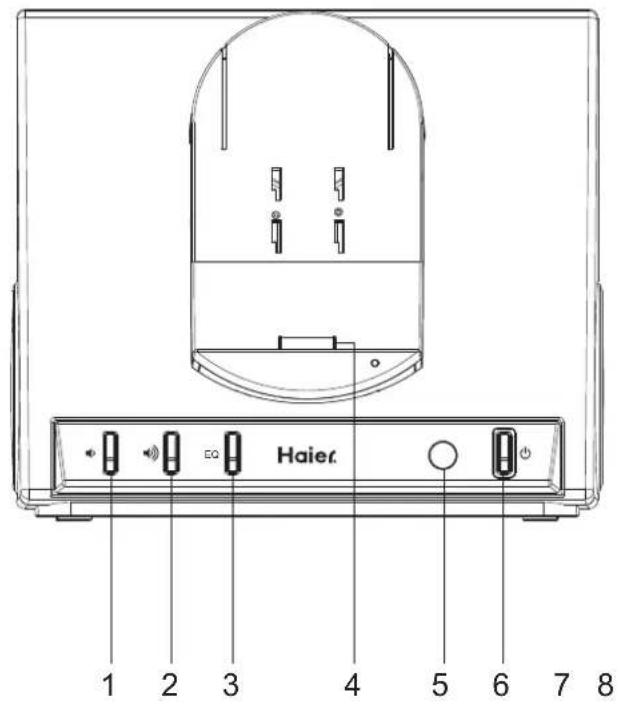
- VOLUME - Button
- VOLUME + Button
- EQ Button
- Universal Dock for iPad / iPhone / iPod
- Remote Sensor
- ⏻ POWER ON/OFF/PLAY/PAUSE Button
- FM Ant
- HDMI Connector
- AUX IN Jack
- DC IN Jack
REMOTE CONTROL

- Remote Control Transmitter
- Power ⏻ Button
- iPod MENU + Button
- SKIP ◀◀ Button
- ENTER Button
- iPod MENU - Button
- PLAY / PAUSE ▶ Button
- VIDEO OUT Button
- VOLUME ▶ Button
- SKIP ▶▶ Button
- MENU Button
- 3D SOUND Button
- VOLUME 🏠 Button
Using The Remote Control
The CR2032 lithium battery is already installed in the remote control. Pull out the small mylar insulation tab as shown in the illustration to begin using the remote control.

flowchart
graph TD
    A["Power"] --> B["+"]
    B --> C["INPUT MENU"]
    C --> D["ENTER"]
    D --> E["VIDEO OUT"]
    E --> F["VOLUME"]
    F --> G["Haier"]
    G --> H["PULL"]
    style A fill:#f9f,stroke:#333
    style H fill:#ccf,stroke:#333
To use the remote controller, point the remote control towards the remote control receiver on the front panel of the main unit and press the desired button. The effective range of the remote controller is approximately 20 feet. Please note that bright sunlight or artificial light may interfere with the proper operation of the remote control.
Battery Replacement
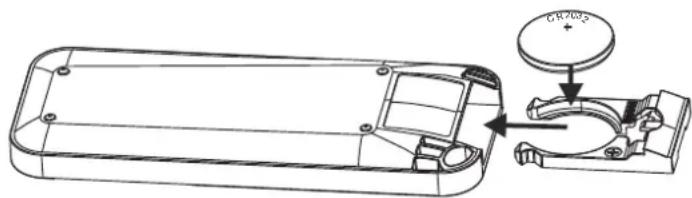
When the remote operation becomes weak or intermittent, it is time to replace the remote control battery. Pull out the battery holder, remove the old battery and install a new CR2032 battery in the holder as shown in the illustration. Slide the holder back into the remote control.
NOTE: If the battery is installed incorrectly the remote control will not work.
- Make sure that you have removed the mlar insulation tab from the remote control.
natural_image
Technical line drawing of a mechanical assembly with a circular component and a curved housing (no text or symbols)- Ensure the system is connected to an AC outlet that is always "live".
OPERATING INSTRUCTIONS
General Controls
The main functions of this system can be operated by the controls on the top panel of the main unit, or by the buttons on the remote control. If a specific function can only be operated by the remote control, this will be clearly indicated in the instructions.
When operating this system with the remote control, make sure that the IR (Infrared) transmitter on the front of the remote control is pointed at the remote sensor on the front panel of the main unit.
The effective operating range of the remote control is approximately 20 feet. Please note that bright sunlight or room lighting may interfere with the remote control operation. If the remote control is not operating properly, try reducing the brightness of the room or moving closer to the main unit. If this does not solve the problem, it may be time to change the remote control battery.
FUNCTION CONTROLS
Docking your iPod, iPhone, iPad
Gently dock your iPod, iPhone, iPad to the 30 pin connector on the front of the unit. Do not force. If you have not already downloaded the free AppClockRadio(ViewMe)
iTunes App Store, you will see the following message on your iPad / iPhone or iPod Touch display: "This accessory requires an application that you do not have installed." The purpose of this message is to advise you that you must download the AppClockRadio(VEW XL) enjoy the enhanced features of the IPD-157. However, your iPod , iPhone , iPad will work properly with the IPD-157(VEW XL) the AppClockRadio installed.
IMPORTANT NOTES:
When you dock an iPod,iPhone or iPad there may be a slight delay before the system recognizes the device and the main menu is displayed. This is because the system and the docked device must go through an 'Authentication Process' before the docked device can accept any commands. THIS IS NORMAL AND IS NOT AN INDICATION OF ANY PROBLEM WITH YOUR SYSTEM.
The iPod Classic,iPod (4th and 5th generation) are not supported charging function with this unit.(This charging operation is not allowed by Apple)
Volume Controls
To increase or decrease the system volume, press the VOLUME 🔊 or 🔒 button on the remote control or on the front panel.
FUNCTION CONTROLS
Choosing The Correct iPod, iPhone, iPad Adaptor

When connecting an iPod, iPhone, iPad to this iPod Dock, please ensure that the correct adaptor plate is used. FAILURE TO DO SO MAY RESULT IN DAMAGE TO THE iPod, iPhone, iPad.
You docking station comes with 6 removable dock adaptor. Use the correct adaptor to ensure a more proper fit for your iPod, iPhone, iPad and help to reduce the stress on the connector when operating and rotating the iPod, iPhone, iPad.
To place / remove a dock adaptor:
-
Refer to the compatibility table on the page 23 and select the correct dock adaptor for the iPod, iPhone, iPad.
-
Place the proper adaptor inserted into the docking station front panel and press it into position.
The adaptor will only go in one way.
-
Carefully align and then gently insert the iPad, iPhone, iPod into the dock connector. (Please remove your case or skin before inserting into the dock connector)
-
To remove/replace a dock adaptor, first remove the iPod, iPhone, iPad, then grip the adaptor and pull gently upwards.

natural_image
Technical line drawing of a mechanical device with multiple housing components and a close-up view of internal components (no text or symbols)FUNCTION CONTROLS
Charging your iPod, iPhone, iPad
NOTE: Please make sure you are using the correct insert and your iPod, iPhone, iPad that it is properly docked into this unit. FAILURE TO DO SO MAY DAMAGE THE iPod, iPhone, iPad.
When an iPod, iPhone, iPad is inserted into the dock, it will go to standby mode then turn off. While the iPod, iPhone, iPad is docked in the system, it will recharge (until fully charged).
Please note that older iPod classic can not be charged by this unit.
FUNCTION CONTROLS
Volume Controls
To increase or decrease the system volume, press the VOLUME 🔊 or 🔊 button on the unit front panel or on the remote control.
If the volume is less than the default level when the unit is set to standby, when the unit is powered up again the volume will return to the default level.
If the volume is higher than the default level when the unit is set to standby, when the unit is powered up again the volume will remain at that level.
SOUND Button(On Remote Control Only)
The preset allows your to adjust the sound characteristics.
Press the SOUND button on the remote control to cycle the music for surround on and off.
▶/II (Play/Pause) – Press this button on the remote control to begin playback on your iPod, iPhone, iPad. Press again to Pause playback.
▶◀ / ◀◀ Skip Forward/Back buttons(on Remote Control Only) - During playback press to skip forward or backward to the next or previous track.
MENU button(Remote control only) - Press this button to access the iPod, iPhone, iPad. This button operates exactly like the MENU button on the iPod, iPhone, iPad itself.
√ / ▲ (Plug/Minus)buttons(on Remote Control Only) - After pressing the MENU button to access the iPod, iPhone, iPad, press the √ / ▲ buttons to move up( ▲ ) or down( √ ) within the Menu display.
ENTER button(Remote Control Only) - After selecting your desired selection in the Menu, by using the + or - buttons, press the ENTER button to enable that selection.
NOTES: Menu Navigation by remote control does not work on touch screen products like the iPod nano 6th generation, iPhone, and iPad.
FUNCTION CONTROLS
1.) If necessary, press the ⏻POWER ON/OFF/PLAY/PAUSE button on the front panel or on the remote control to turn the system 'On'.
2.) Make sure that you have inserted the correct adaptor for your iPod, iPhone, iPad accessories into the dock and then insert your iPod, iPhone, iPad into the adaptor. The word "iPod" stops flashing and remains 'On'. Your iPod, iPhone, iPad display will come on. If you were playing music on your iPod, iPhone, iPad before inserting in the dock your iPod, iPhone, iPad may change to pause mode, but it may take several seconds for your iPod, iPhone, iPad to go through the authentication process. If your iPod, iPhone, iPad was in the pause mode when inserted into the dock it may remain in the pause mode. Press the ⏻ POWER ON/OFF/PLAY/PAUSE button on the front panel or Play/Pause (▶/1) button on the remote control to release the pause mode and resume playback.
3.) To skip forward or backward to different tracks, press the ▶▶ button on the remote control.
4.) The MENU button on the remote control works the same way as the MENU button on your iPod, iPhone, iPad. Press the MENU button repeatedly to access the Main Menu of your iPod, iPhone, iPad. Press the + / - buttons on the remote control to navigate Up or Down through the displayed Menu list. When the desired Genre, Artist, Album, or Song is 'highlighted' on your iPod Menu display, press the ENTER button on the remote control to 'Enter' or Select' the highlighted item. If the highlighted item is a specific song, pressing the ENTER button will begin playback of the song.
5.) To pause iPod playback press the ⏻ POWER ON/OFF/PLAY/PAUSE button on the front panel or ▶/II button on the remote control. Press again to release pause and resume iPod playback.
6.) To stop iPod playback press and hold the ⏻ POWER ON/OFF/PLAY/PAUSE button on the front panel or ▶/1button on the remote control until your iPod shuts off and enters the 'Charging' mode. However please note that the system power remains 'On'.
7.) To shut the system 'Off' completely, press the ⏻ POWER ON/OFF/PLAY/PAUSE button on the front panel for 3 seconds or press ⏻ button on the remote control, until your iPod shuts off and enters the Charging mode. The front panel power LED litging turns "off".
AppClockRadio(VIEW XL) OPERATION
"AppClockRadio(VIEW XL)": the app-enhanced experience
AppClockRadio(VIEW XL) is an interactive app with IPD-157 for iPod Touch, iPhone and iPad Users. In addition to a full screen clock - it includes weather, iPod controls, FM Radio and Clock with wakeup settings such as alarms, music selection, Favorite Radio Station.
"app-enhanced FM tuner"
Works with IPD-157 "App-Enhanced" products to control the FM Radio. 30 preset stations.
Music and Radio alarm clock
Set your alarm between set alarm tones or music playlists from your entire iPod library or your Favorite Radio Station.
Weekday alarm calendar
Program alarms to repeat for any day of the week: never, everyday, weekday, weekend & custom Sleep and snooze timers, and much more...
"app-enhanced preset equalizer"
Works with IPD-157 "App-Enhanced" products for audio performance. 3D / Jazz / Rock / Classic / Custom
Weather widget
Quickly view the current weather or forecast in your designated area.
Set up, download, and launch
- Plug IPD-157's included AC adaptor into a wall outlet
- Download and install "AppClockRadio(VIEW XL)" (it's a free app):
Option 1 - Docking your iPhone or iPod touch or iPad onto the IPD-157 will prompt you for download:
"This accessory requires an application you do not have installed. Would you like to install it from the APP store?"
Option 2 - Visit the app store via iTunes or your iPod touch, iPhone or iPad and search for "Haier AppClockRadio" and download.
- Launch "AppClockRadio(VIEW XL)", your social music alarm clock app
NOTE: "AppClockRadio(VIEW XL)" is only available for the iPod touch, iPhone, and iPad.
AppClockRadio(VIEW XL) OPERATION
Home Screen
Launching "AppClockRadio(VIEW XL)" will bring you to the clock home screen from which you can control and access all other settings

App Settings
Manage your setting.

AppClockRadio(VIEW XL) OPERATION
Alarm Settings

Select which day of the week you want the alarm to sound: (Never, Everyday, Weekday, Weekend or Custom)
Select what alarm tone, music or favorite Radio station you want to wake-to
Select "SNOOZE" time Set the Alarm Name
Set the Alarm time


Press Sleep icon ' when you're ready to go to sleep...
- Sleep Stats - starts a log of the time you went to bed and starts calculating sleep duration

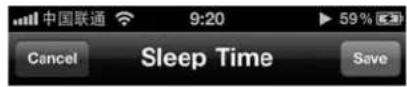
2 Minutes

AppClockRadio(VIEW XL) OPERATION
iPod Music Play Settings

Preset Equalizer Settings

AppClockRadio(VIEW XL) OPERATION
FM Radio Settings

Click one time to skip. Click and hold to Start Auto Search
Click to preset your favorite stations
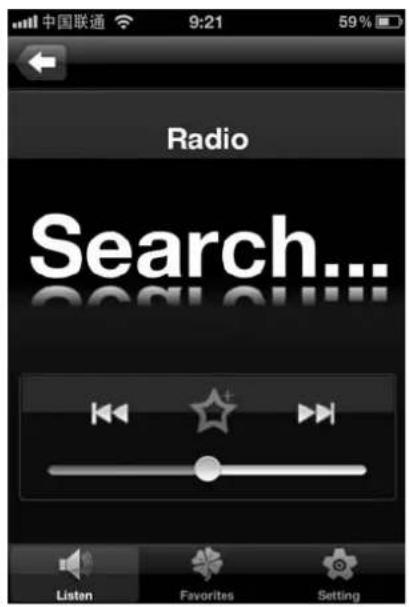
Select your Favorite station in this list.


Select your Area Region.
Select Stereo / MONO
Learn More
For more questions or to learn more, visit our community forum at http://www.haieramerica.com/support
AppClockRadio(VIEW) XL OPERATION
FAQ
1.iPod Integration - Can I sleep or wake to my iPod library?
Yes. "AppClockRadio(VIEW XL)" is specially designed with iPod support and built-in iPod controls for navigating your music and wakeup via Playlists, Artists, Songs.
- My "AppClockRadio(VIEW XL)" app software alarm did not sound at the specified time
A. Make sure that the volume of the iPod touch, iPhone, or iPad is not set at 0 and verify your wake-to volume settings.
B. The iPhone OS does not currently support 3rd party applications running if the app is closed, which means that alarms won't work if you exit the app. This is why we suggest customers use our App-enhanced Speaker Systems to make sure you always have a back-up alarm. If the app exits, simply relaunch the app and your alarms will automatically pick up where they left off
C. If you dock your iPod, iPhone, or iPad into a speaker dock overnight, the speaker dock must be powered ON to hear your alarms in the morning.
- What happens if I exit the app?
The iPhone OS does not currently support 3rd party applications running if the app is closed, which means that alarms won't work if you exit the app. We recommend customers use our App-enhanced Speaker Systems to make sure you always have a back-up alarm. If the app exits, simply relaunch the app and your alarms will automatically pick up where they left off.
- My app crashed:
Crashes can happen for reasons in and out of our control. Please reload the app.
Don't hesitate to email us if there is something you are doing over and over and you keep crashing. Sometimes crashes are hard to reproduce and depend on your setup, so we never hate hearing about it so that we can make sure App is working properly for all of our users.
- My iPhone screen auto-locks while it is running.
If you manually lock your iPhone screen while our app is running, it will disable the auto-lock-prevention system for the remaining time you run the app session. If you wish to enable auto-lock-prevention, please exit and relaunch AppClockRadio(VIEW XL).
Please note that the alarms will still work even if the screen is locked.
VIDEO OPERATION
Connecting the Video Cord to View a Video/Picture from iPod, iPhone, iPad
Use the HDMI cable (rootsupplied)jack to the HDMI jack on your television for the best picture. If an HDMI cable is connected to an HDMI-compatible TV, HDMI will be output automatically a maximum of 10 seconds later.
Refer to the TV's instruction manual for detailed information regarding the HDMI terminal.
The below diagram show the connection options available.
NOTE: Consult your iPod documentation for details on how to enable video output on you model of iPod, iPhone, iPad.
Connecting to a TV with HDMI Jack
- Using the HDMI cable connect the HDMI OUT terminal
to the rear of the unit and to the HDMI IN terminal of your TV. - Press the input selector on your TV remote control to switch to the
HDMI signal from the unit appears on your TV screen.
** If there is noise or lines on the screen, please check the HDMI cable.

Remarks:
- When you have your iPod outputting video and the unit connected to your TV, you may need to change the output setting to TV output.
- Press the VIDEO OUT button on the remote control to escape the current video playback, then press ENTER or Play(iPad) to resume on TV screen.
Video play on iP d, iPhone, iP d
←→a TV out with outHDMI
NOTES:
- Due to the software used in iPod Classic and iPod Nano 3G, to change the video to video output mode you will need to press the MENU button to escape the current video playback, then press ENTER to resume.
- HDMI video output to television is supported by iPod nano (3rd, 4th and 5th generation), iPod touch (2nd generation), and iPod classic at 480p or 576p resolution; and by iPod touch (1st generation), iPhone, iPhone 3G, iPhone 3GS, iPhone 4, and iPad at 480p or 576p resolution.
TROUBLESHOOTING GUIDE
| Symptom | Possible Cause | Solution |
| IPod,iPhone, iPad Player(Example “iPod”) | ||
| Unit does not respond (no power) | AC adaptor is not plugged into a wall outlet or the connector is not plugged into the DC IN jack on the back of the unit. | Plug the AC adaptor into a wall outlet and plug the connector into the DC IN jack on the unit. |
| Using no or wrong iPod insert | Make sure the dock insert is the proper fit for the iPod. | |
| iPod does not dock properly | iPod did not install properly | Remove the iPod from the dock and check for obstruction on the connections in the dock and on the iPod. Then reseat it in the dock. |
| iPod does not respond to the unit | iPod is not installed properly | Remove the iPod from the dock and check for obstruction on the connections in the dock and on the iPod. Then reseat it in the dock. |
| iPod is locked up | Please make sure your iPod is working properly before docking into the unit. Please refer to the iPod manual for details. | |
| Using first or second generation iPod, iPod shuffle or other devices. | This unit cannot control those iPod or other devices. | |
| iPod did not charge up | iPod is not installed properly | Remove the iPod from the dock and check for obstruction on the connections in the dock and on the iPod. Then reseat it in the dock. |
| iPod is locked up/frozen | Please make sure your iPod is working properly before docking into the unit. Please refer to the iPod manual for details. | |
| iPod battery has problem | ||
Remarks:
If trouble shooting does not eliminate the problem, disconnect the DC IN plug from the back of unit and reconnect after a few seconds. This resets the unit to it's factory default settings and results in the deletion of all previous settings.
TECHNICAL SPECIFICATION
1. General
Power requirements
AC Adapter Model: GPE248-085290-1
Input: AC 100-240V \~ 50/60Hz
Output: 8.5V 2.9A
Max power consumption
26W
Dimensions of main unit
212mm(L) × 135mm(W) × 185mm(H)
Weight of main unit
1.2 Kg
2. Amplifier
Power Output
5W x 2 THD 10%
3. Speaker system
Impedance
8 Ω 2.5" Speaker x2
4. AUX IN
Input
Φ 3.5mm
Max voltage
1 V
Impedance
47 KΩ
5. Remote Control
Battery size
CR2032 3V
Specifications subject to change without notice.
DOCK ADAPTOR / APPLE DEVICE COMPATIBILITY CHART
Adaptor A: iPhone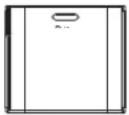 | iPhone,iPhone 3G,iPhone 3GSiPod classic(1st and 2nd generation)iPod nano(6th generation) |
Adaptor B: iPhone 4 | iPhone 4 |
Adaptor C: iPod Touch | iPod Touch(1st, 2nd, 3rd, and 4th generation)iPod nano(1st, 2nd, and 3rd generation) |
Adaptor D: 4G / 5G nano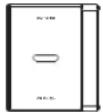 | iPod nano(4th and 5th generation) |
iPad • iPad | |
iPad2 | iPad2 |
APPLE DEVICE COMPATIBILITY CHART
| [iPod nano1st generation1GB 2GB 4GB] | 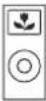 | iPod nano2nd generation(aluminum)2GB 4GB 8GB |  | iPod nano3rd generation(video)4GB 8GB |
| [iPod nano4th generation(video)5th generation(video camera)8GB 16GB] |  | iPod nano6th generation8GB 16GB | 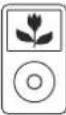 | iPod classic80GB 160GB |
| [iPod classic2nd generation120GB] |  | iPod touch1st/2nd generation8GB 16GB 32GB |  | iPod touch3rd generation32GB 64GB |
| [iPod touch4th generation8GB 32GB 64GB] | 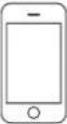 | iPhone4GB 8GB 16GB |  | iPhone 3G8GB 16GB |
| [iPhone 3GS8GB 16GB 32GB] |  | iPhone 416GB 32GB | 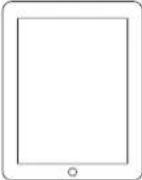 | iPad16GB 32GB 64GB |
 | iPad 216GB 32GB 64GB |
"Made for iPod," "Made for iPhone," and "Made for iPad" mean that an electronic accessory has been designed to connect specifically to iPod, iPhone, or iPad, respectively, and has been certified by the developer to meet Apple performance standards. Apple is not responsible for the operation of this device or its compliance with safety and regulatory standards. Please note that the use of this accessory with iPod, iPhone or iPad may affect wireless performance.
LIMITED WARRANTY
This Haier brand product, when shipped in its original container will be free from defective workmanship and materials, and agrees that it will, at its option, either repair the defect or replace the defective product with a new or remanufactured equivalent at to the purchaser, for parts or labor for the periods set forth below:
This warranty does not apply to the appearance of the product or the exterior of the product, which has been damaged or defaced, altered or modified in design or construction. It does not apply to the additional excluded items set forth below:
The warranty commences on the date the item was purchased and the original purchase receipt must be presented and the original purchase receipt must be presented to the authorized service center before warranty repairs are rendered.
The limited warranty described herein is in addition to whatever implied warranties may be granted to the purchasers by law. ALL IMPLIED WARRANTIES INCLUDING THE WARRANTIES OF MERCHANTABILITY AND FITNESS FOR USE ARE LIMITED TO THE PERIOD(s) FROM THE DATE OF PURCHASE SET FORTH BELOW. Some states do not allow limitation on how long an implied warranty lasts, so the above limitation may not apply to you.
Neither the sales personnel of the seller nor any other person is authorized to make any warranties other than those described herein, or to extend the duration of any warranties beyond the time period described herein on behalf of Haier.
The warranties described herein shall be the sole and exclusive remedy available to the purchaser. Corrections of defects in the manner and for the period of time described herein, shall constitute complete fulfillment of all abilities and Responsibility of Haier to the purchaser with respect to the product, and shall constitute full satisfaction of all claims, whether based on contract, negligence, strict duality or otherwise. In no event shall Haier be liable, or in any way responsible for any damages or defects in the product which were caused by repairs or attempted repairs performed by anyone other than an authorized service center or dealer; nor shall Haier be liable, or in any way responsible for incidental or consequential economic or property damage. Some states do not allow the exclusion of incidental or consequential damages, so that above exclusion may not apply to you.
THIS WARRANTY GIVES YOU SPECIFIC LEGAL RIGHTS. YOU MAY ALSO HAVE OTHER RIGHTS WHICH VARY FROM STATE TO STATE.
Warranty period for this product: 1 year parts and labor.
Additional items excluded from warranty coverage: non-rechargeable batteries. Where to obtain service: For the location of the nearest Haier authorized service center or to obtain product literature, accessories, supplies or customer assistance, please call 1-877-337-3639.
What to do to obtain service: ship or carry in your product to an authorized service dealer or center. Be sure to have proof of purchase. If you ship the product, be sure it is packaged carefully.
Haier America
New York, NY 10018
IMPORTANT
Do Not Return This Product To The Store
If you have a problem with this product, please contact the
"Haier Customer Satisfaction Center" at 1-877-337-3639.
DATED PROOF OF PURCHASE, MODEL # AND SERIAL # REQUIRED FOR
WARRANTY SERVICE
IMPORTANT
No. DE MODELO Y No. DE SERIE

CUSTOMER
SERVICE
Hotline 24/7
1-877-337-3639
115 V, 60 Hz
Made in China
Fabriqué en Chine
Hecho en China
Haier®
Haier America
New York, NY 10018
Printed in China

- TABLE OF CONTENTS
- INTRODUCTION
- IMPORTANT SAFETY INSTRUCTIONS
- Servicing:
- PREPARATION FOR USE
- Contents:
- Unpacking And Set Up
- MAINTENANCE
- Cleaning The Unit
- USING THE AC ADAPTOR
- NOTES:
- CONNECTING EXTERNAL DEVICES
- LOCATION OF CONTROLS & INDICATORS
- REMOTE CONTROL
- Using The Remote Control
- Battery Replacement
- OPERATING INSTRUCTIONS
- General Controls
- FUNCTION CONTROLS
- Docking your iPod, iPhone, iPad
- IMPORTANT NOTES:
- Volume Controls
- To place / remove a dock adaptor:
- Charging your iPod, iPhone, iPad
- SOUND Button(On Remote Control Only)
- AppClockRadio(VIEW XL) OPERATION
- "AppClockRadio(VIEW XL)": the app-enhanced experience
- "app-enhanced FM tuner"
- Music and Radio alarm clock
- Weekday alarm calendar
- "app-enhanced preset equalizer"
- Weather widget
- Set up, download, and launch
- Home Screen
- App Settings
- Alarm Settings
- Minutes
- Learn More
- AppClockRadio(VIEW) XL OPERATION
- FAQ
- VIDEO OPERATION
- Connecting the Video Cord to View a Video/Picture from iPod, iPhone, iPad
- The below diagram show the connection options available.
- Remarks:
- TECHNICAL SPECIFICATION
- General
- Amplifier
- Speaker system
- AUX IN
- Remote Control
- DOCK ADAPTOR / APPLE DEVICE COMPATIBILITY CHART
- APPLE DEVICE COMPATIBILITY CHART
- LIMITED WARRANTY
- IMPORTANT
Brand : HAIER
Model : IPD-157B
Category : Docking Station