Science of Special effects - Educational game Learning Resources - Free user manual and instructions
Find the device manual for free Science of Special effects Learning Resources in PDF.

User questions about Science of Special effects Learning Resources
0 question about this device. Answer the ones you know or ask your own.
Ask a new question about this device
Download the instructions for your Educational game in PDF format for free! Find your manual Science of Special effects - Learning Resources and take your electronic device back in hand. On this page are published all the documents necessary for the use of your device. Science of Special effects by Learning Resources.
USER MANUAL Science of Special effects Learning Resources
CHOKING HAZARD—Small parts
Not for children under three (3) years. Toy contains balloons. Uninflated or broken balloons could be a choking or suffocation hazard, especially for infants and children. Adults should inflate balloons and supervise their use with children under eight (8) years. Discard broken balloons immediately.
Educational Insights®
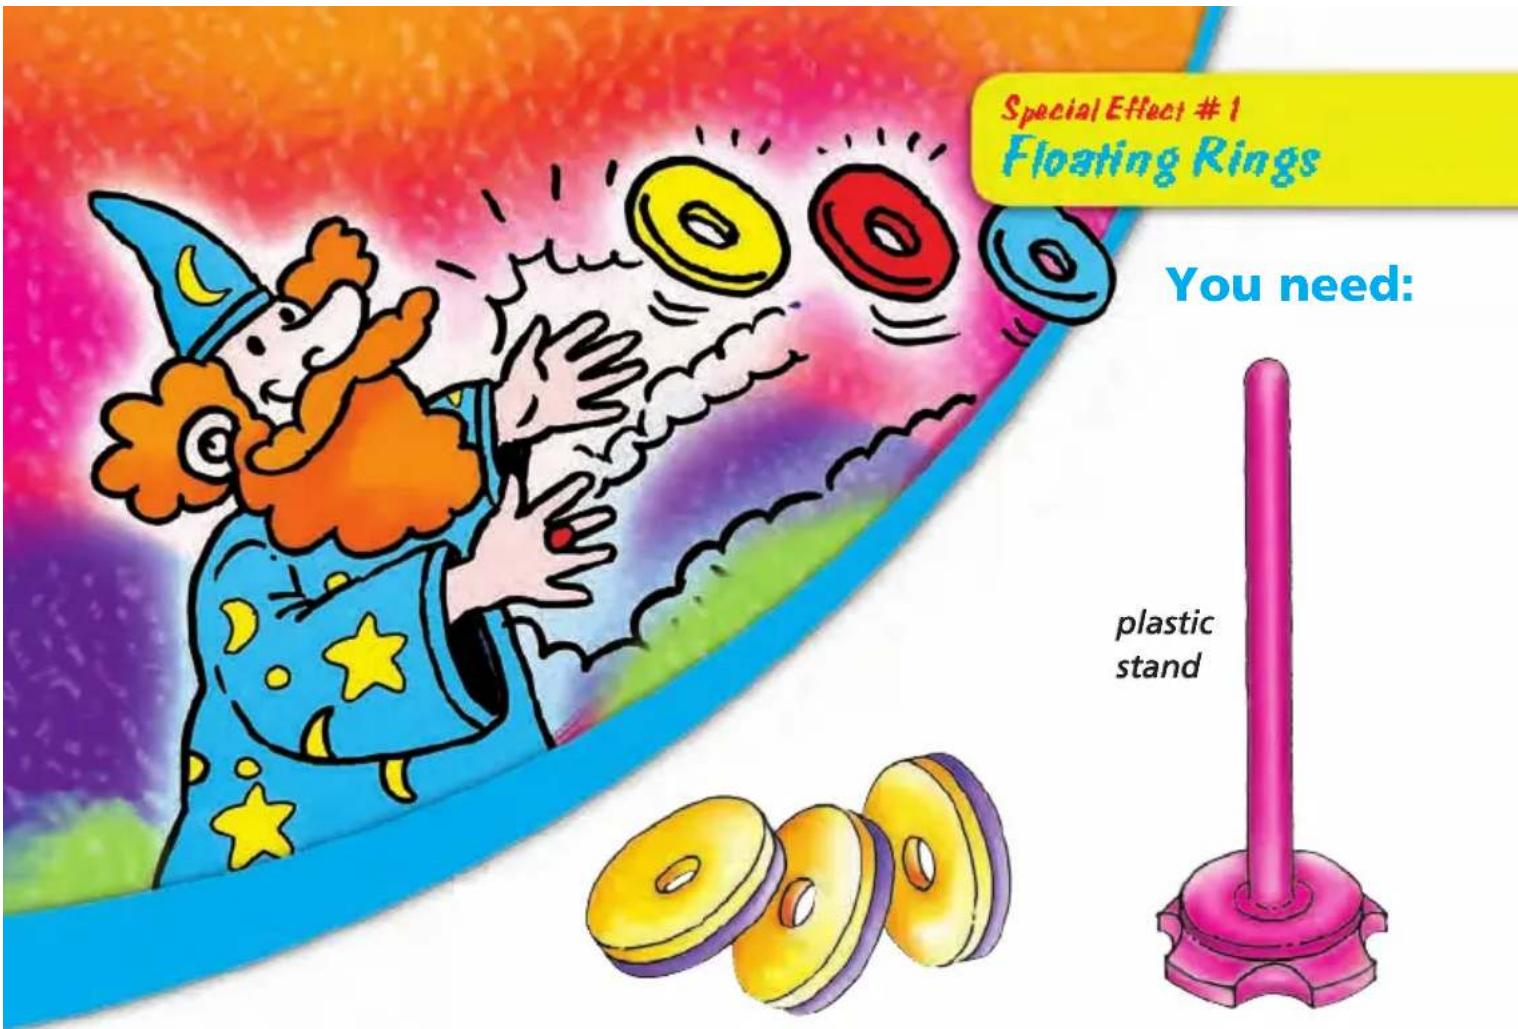
Welcome to the exciting world of special effects! This kit will show you more than thirty mysterious phenomena – and then explain the science behind these mysteries. When people don’t understand something, they sometimes call it ‘magic.’ Yet frequently there are interesting scientific explanations. With the special effects included here, you will be able to amaze your family and friends – while learning science in the process.
The activities in this box are grouped according to the area of science in which they belong. These categories are designated with symbols on the bottom corner of each page and are as follows:

This kit contains most of the materials required to perform the activities described. In addition, you will need the following common household items: dollar bill, water, index card (or thick sheet of paper), toothpick, two metal forks, cork, eraser (or raisins), scissors, baking soda, vinegar, coins, paper clips, paper towel, thread, plastic bottle, glass bottle, a bit of woolen cloth, a bowl, and belt. At the beginning of each experiment, there is a list of the materials you need in order to do the activity. If you don't have something, it's OK to go on to the next experiment. Have fun and see you in pictures!
List of Special Effects and Experiments
Floating Rings ....5
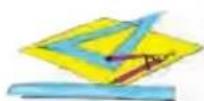
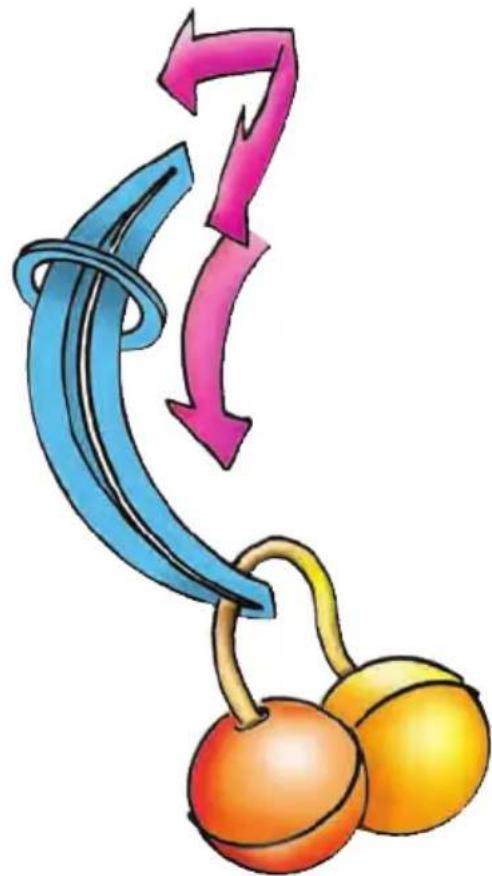
Mysterious Energy ....7
Pathfinder Ring......9
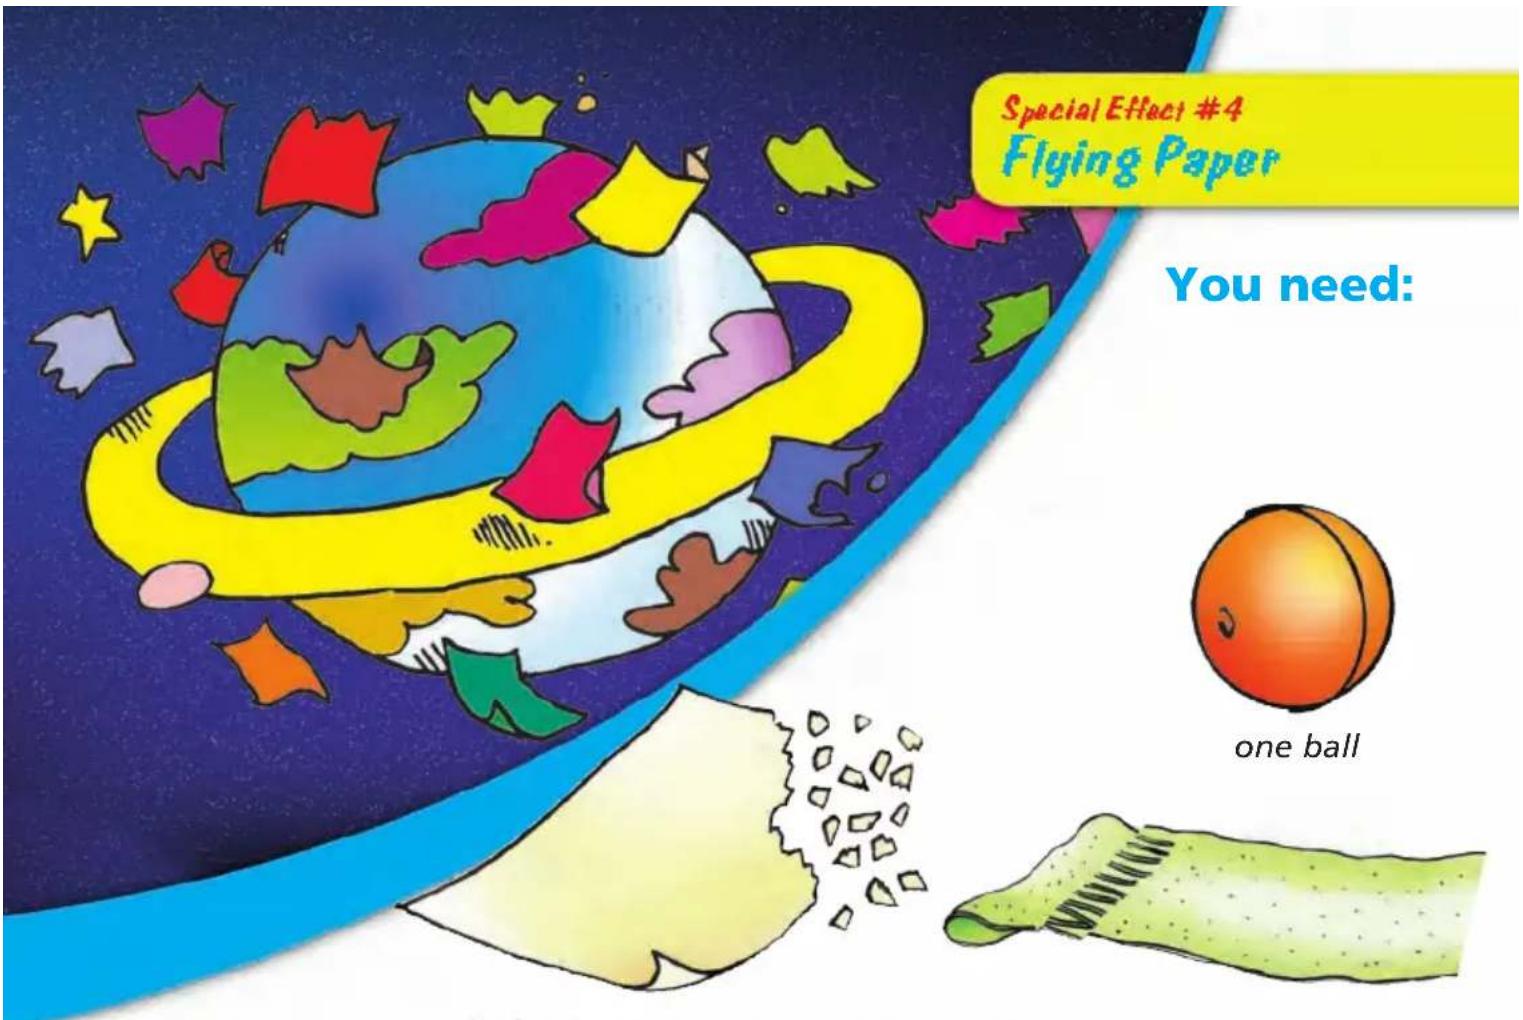
Flying Paper 11
Rolling Uphill 13
Defying Gravity....15
Balancing Champion .....17
Blowing a Kiss....19
Under Pressure....21
Arrested Water 23
Sticky Water 25
Bubble Up 27
Hot Air Balloon....29
Make a Rainbow....31
A Vanishing Rainbow ....33
Floating Money......35
Changing Direction ....37
Disappearing Image ......39
Things on the Move ....41
Red Alert 43
A Pit Stop 45
The Hole in Your Hand......47
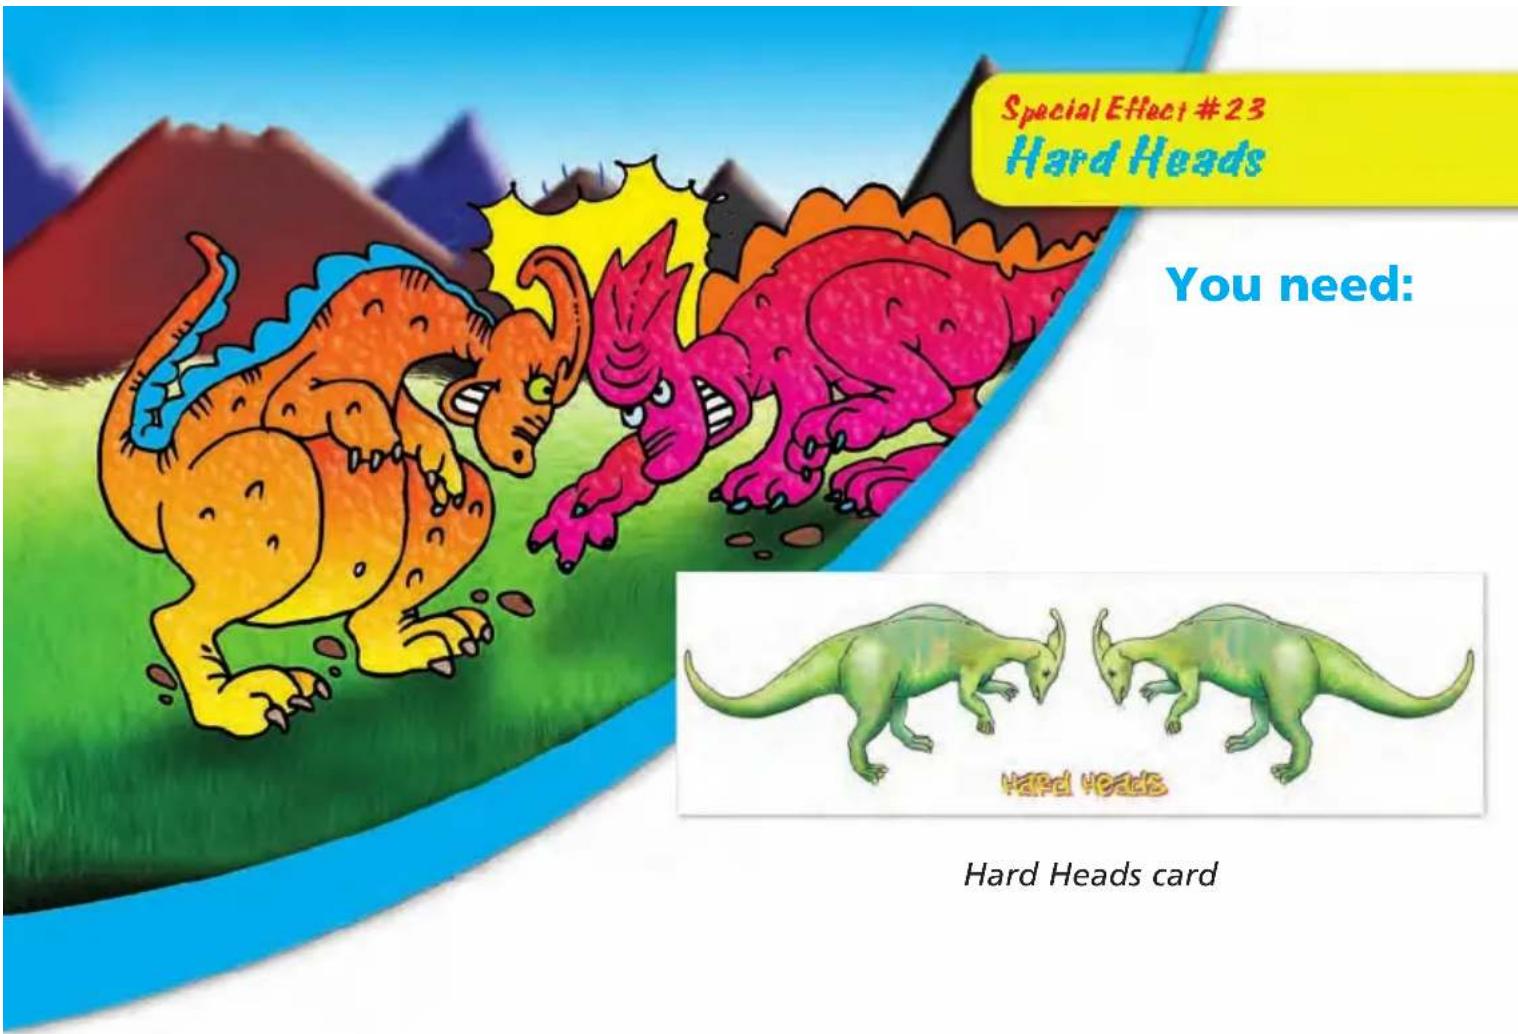
Hard Heads....49
Colors Change......51
Double Vision....53
Dark Clouds....55
The Ghost Submarine ....57
A Tall Tale....59
Narrow Escape ....61
Going in Circles....63
Materials in This Kit
(Colors may vary.)
plastic bow
plastic stand
toy car
plastic cup
Changing Direction card
Things on the Move card
Colors Change card

Hard Heads card
inch/centimeter ruler
clear prism
3 two-color rings
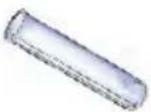
cylinder

cord
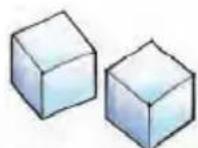
2 cubes

cardboard arms
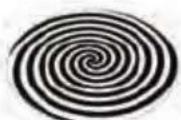
spiral disk
ghost submarine
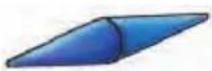
plastic double cone
test tube

red dome clip
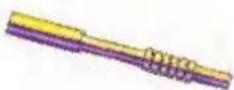
magnetic wand
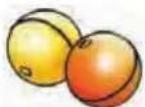
2 balls
balloon

yellow pin
large and small soft
foam circles
colored disk (Newton's disk)
Assembly Instructions
How to thread the cord through the plastic balls:
natural_image
Two curved, translucent blue sheets of paper or material, no text or symbols visible
natural_image
Illustration of a hand holding a blue ribbon above an orange fruit, with a red arrow pointing downward (no text or symbols)
natural_image
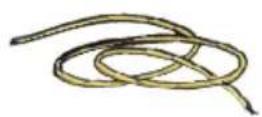
Illustration of a single orange fruit with a thin stem and motion lines (no text or symbols)1) Fold a sheet of paper over multiple times.
2) Tie the strip of paper to one end of the cord.
3) Push the end with the tied-up paper into the hole in the ball.
Assembling disks with the yellow pin
natural_image
Colorful circular fan with a black center and dashed arrow pointing outward (no text or symbols)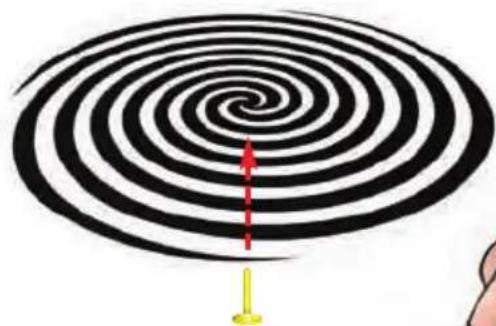
natural_image
Black and white spiral vortex pattern with a red arrow indicating direction, no text or symbols present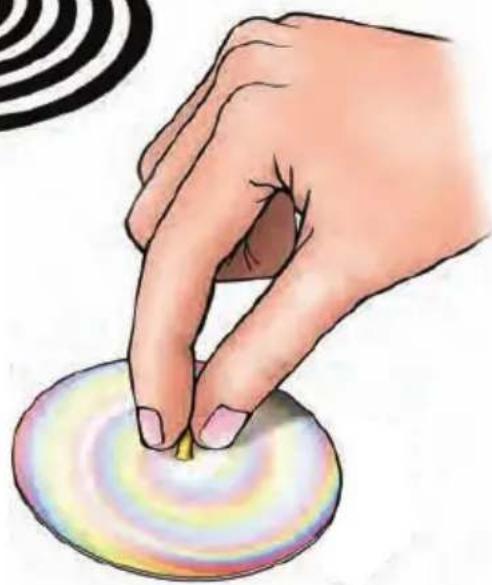
natural_image
Illustration of a hand touching a circular object with concentric rings (no text or symbols)1) Insert the pin into the middle of the disk.
2) Use the head of the pin as a base so you can spin the disk like a top.
Assembling the ghost submarine disk:
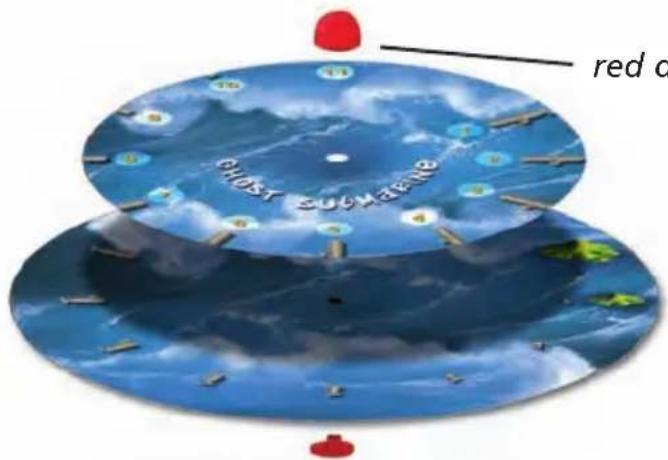
red dome clip
3 two-color rings
How to do it:
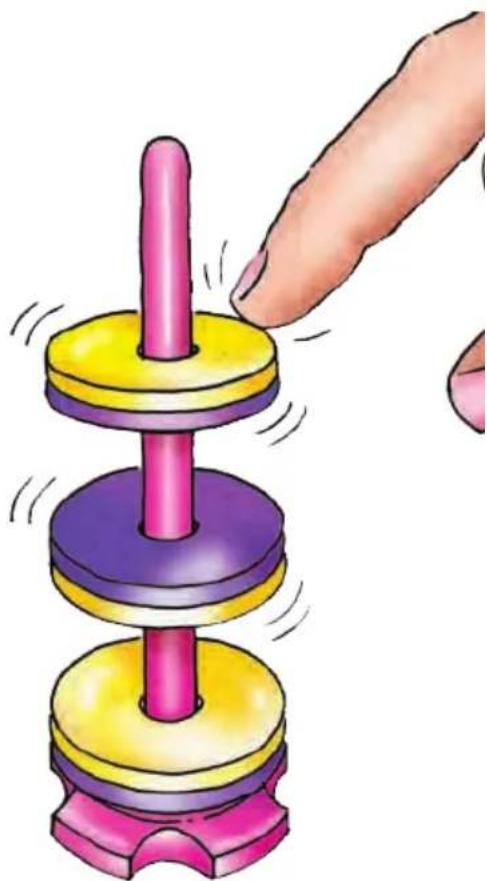
1) Place one of the rings onto the stand so that it rests on the base.
2) Add a second ring so that the same color side is facing the top side of the first ring (i.e. so that two identical colors are next to each other). The second ring will stay suspended in midair; even if you press down on it with your finger, it still bounces back up.
3) Add the third ring so that the matching color is opposite the one under it, and this one will stay a distance away as well. Now there are two rings floating in midair.
Try turning the rings over and see what happens.
natural_image
Illustration of a hand reaching toward a multi-tiered spinning wheel with pink and purple segments (no text or symbols)
Why?
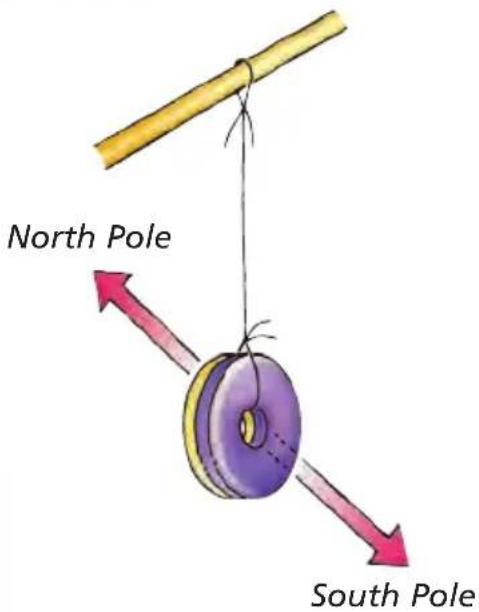
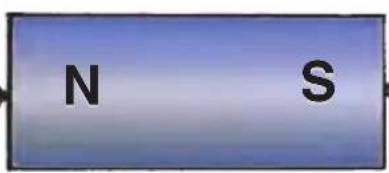
In a magnet, identical magnetic poles repel each other and opposite magnetic poles attract each other.
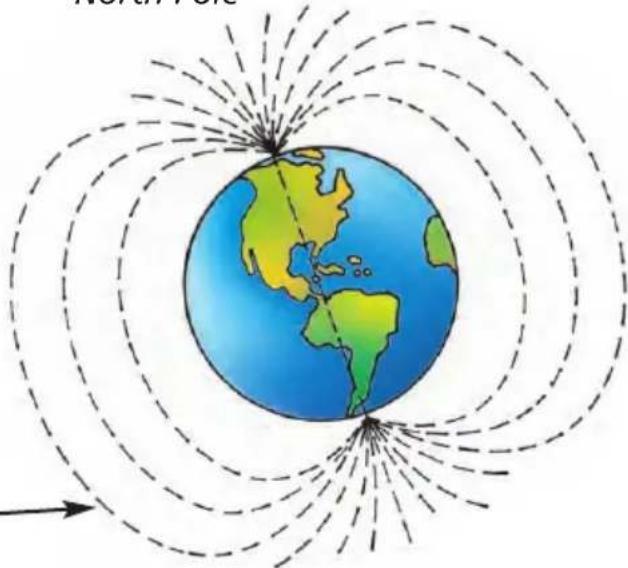
The two-color rings (yellow and purple) are actually magnets and so they have magnetic poles. The yellow side with the letter N corresponds to the north pole of the magnet because if the magnet is suspended by a very fine thread and is free to rotate, the yellow part will always turn toward Earth's North Pole.

natural_image
Illustration of Earth with concentric dashed lines indicating magnetic field lines (no text or symbols)The purple side with the letter S corresponds to the south pole of the magnet because it will always turn to face the Earth's South Pole.
Earth's magnetic field
The region where attraction or repulsion takes place is called the magnetic field.
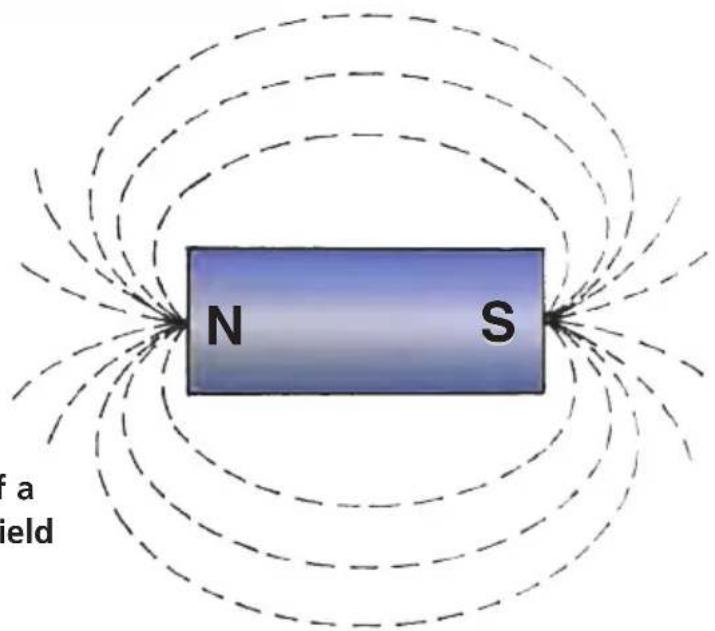
Diagram of a magnetic field
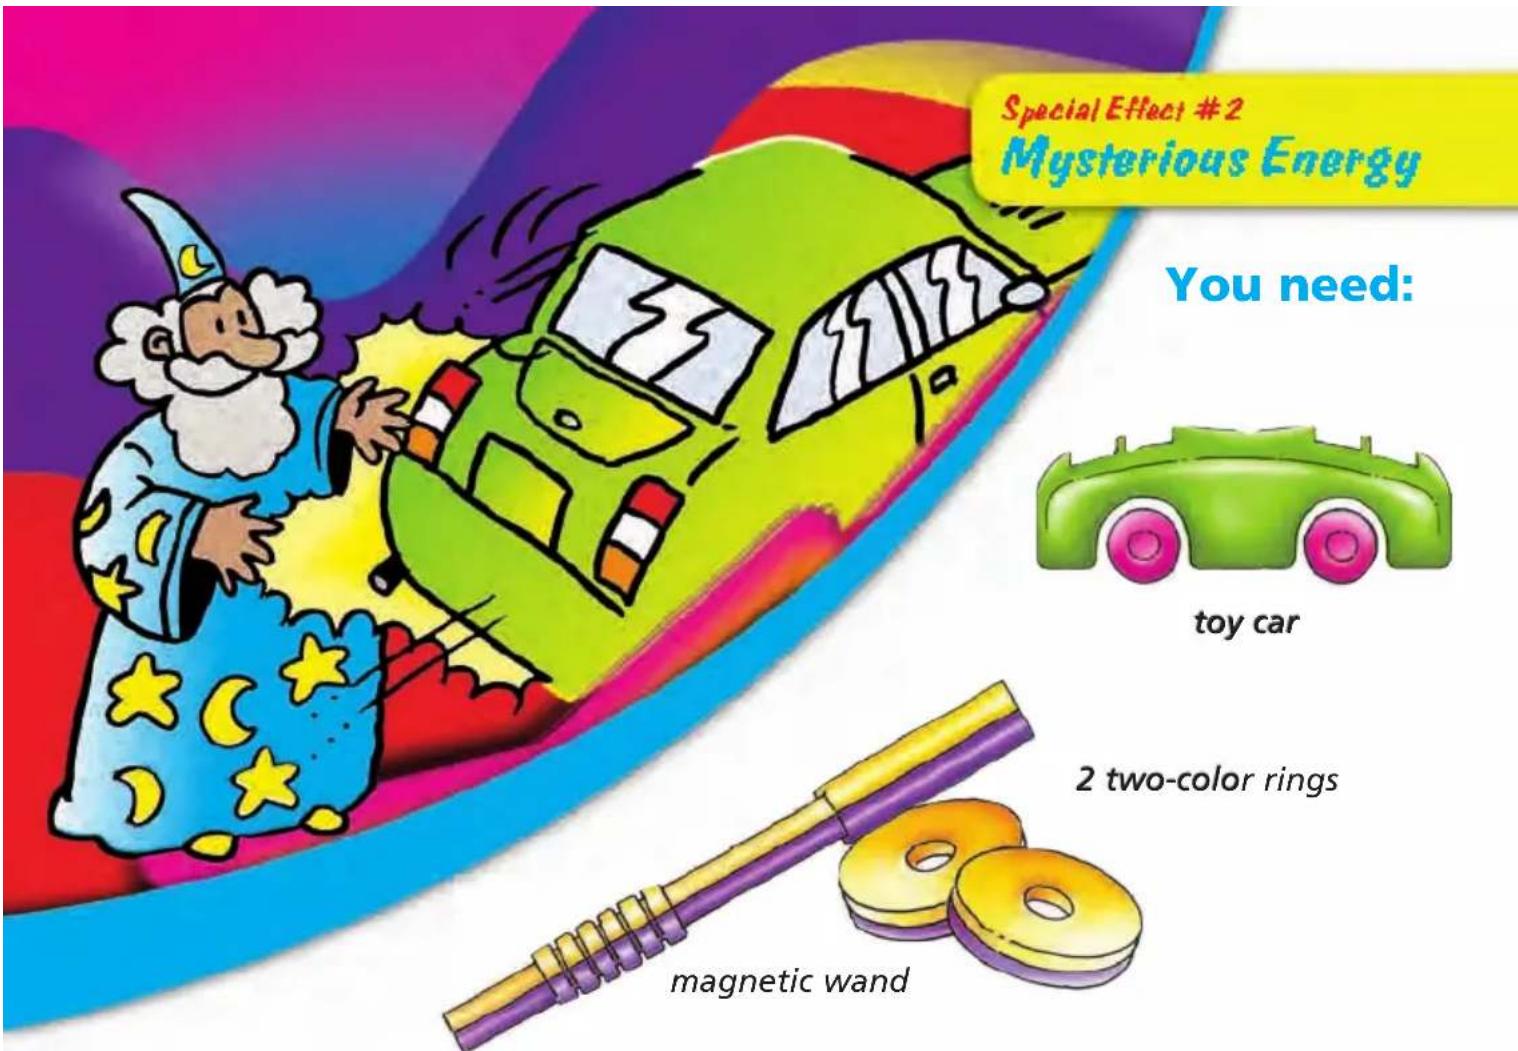
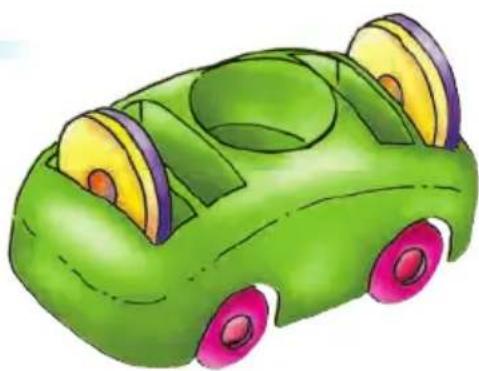
How to do it:
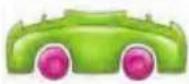
1) Place the toy car on a smooth surface. Put two magnets upright in the spaces at the front and back of the car: one ring with the yellow side facing outward and another with the purple side facing outward.
2) Take the magnetic wand and move it carefully toward the front and back of the car where the rings are, as in the picture.
If the colors facing each other are the same, the car will race away from the wand.
If the colors facing each other are different, the car will zoom toward the wand.
natural_image
Illustration of a green toy car with yellow and purple wheels (no text or symbols)
natural_image
Illustration of a green toy car with purple wheels and yellow accents (no text or symbols)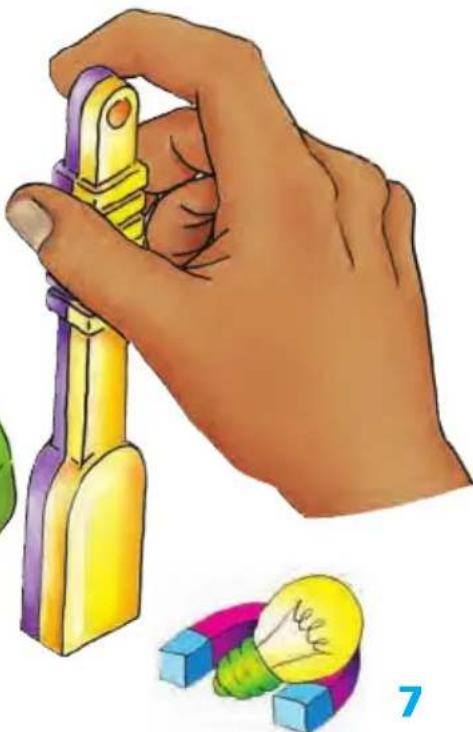
natural_image
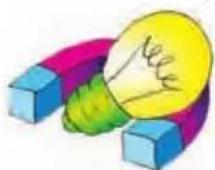
Illustration of a hand holding a yellow tool with purple handle, next to colorful blocks and a light bulb (no text or symbols)Why?
Magnets pull and push on each other even when they are not touching.
The two-color rings and the magnetic wand are all magnets. Magnetism is an invisible force that creates a push or a pull. Magnets do not need to be touching for this force to occur. They can attract each other through the air. The magnetic disk and wand even attract each other through the plastic of the toy car's front bumper.
A doctor can use a magnet to remove a steel splinter from a machinist's eye. The magnet does not even need to touch the eye to remove the dangerous splinter.
The force of attraction or repulsion between magnetic poles acts at a distance. The region where attraction or repulsion takes place is called the magnetic field. That's why you don't need to touch the car to make it move.
Diagram of a magnetic field
natural_image
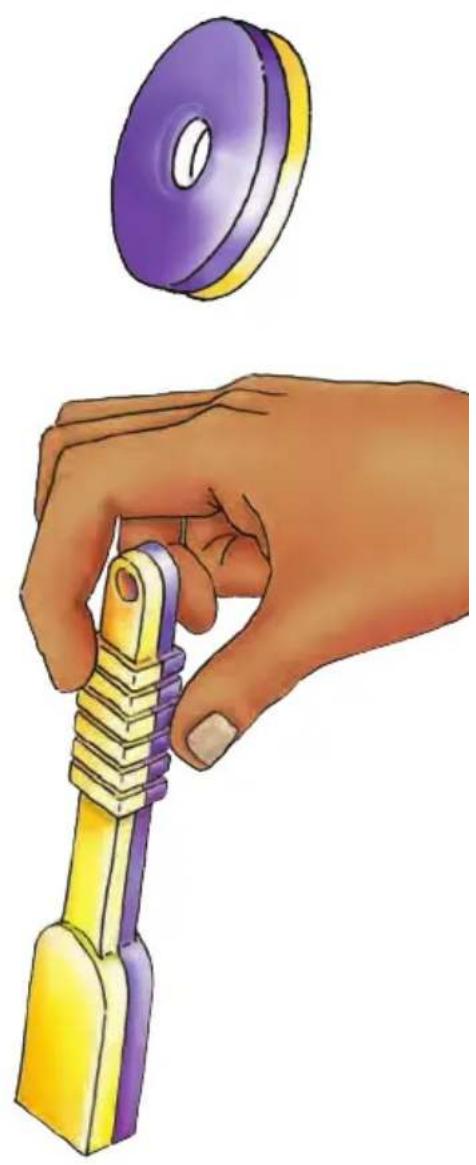
Illustration of a hand holding a yellow and purple tool, with a purple circular object above (no text or symbols)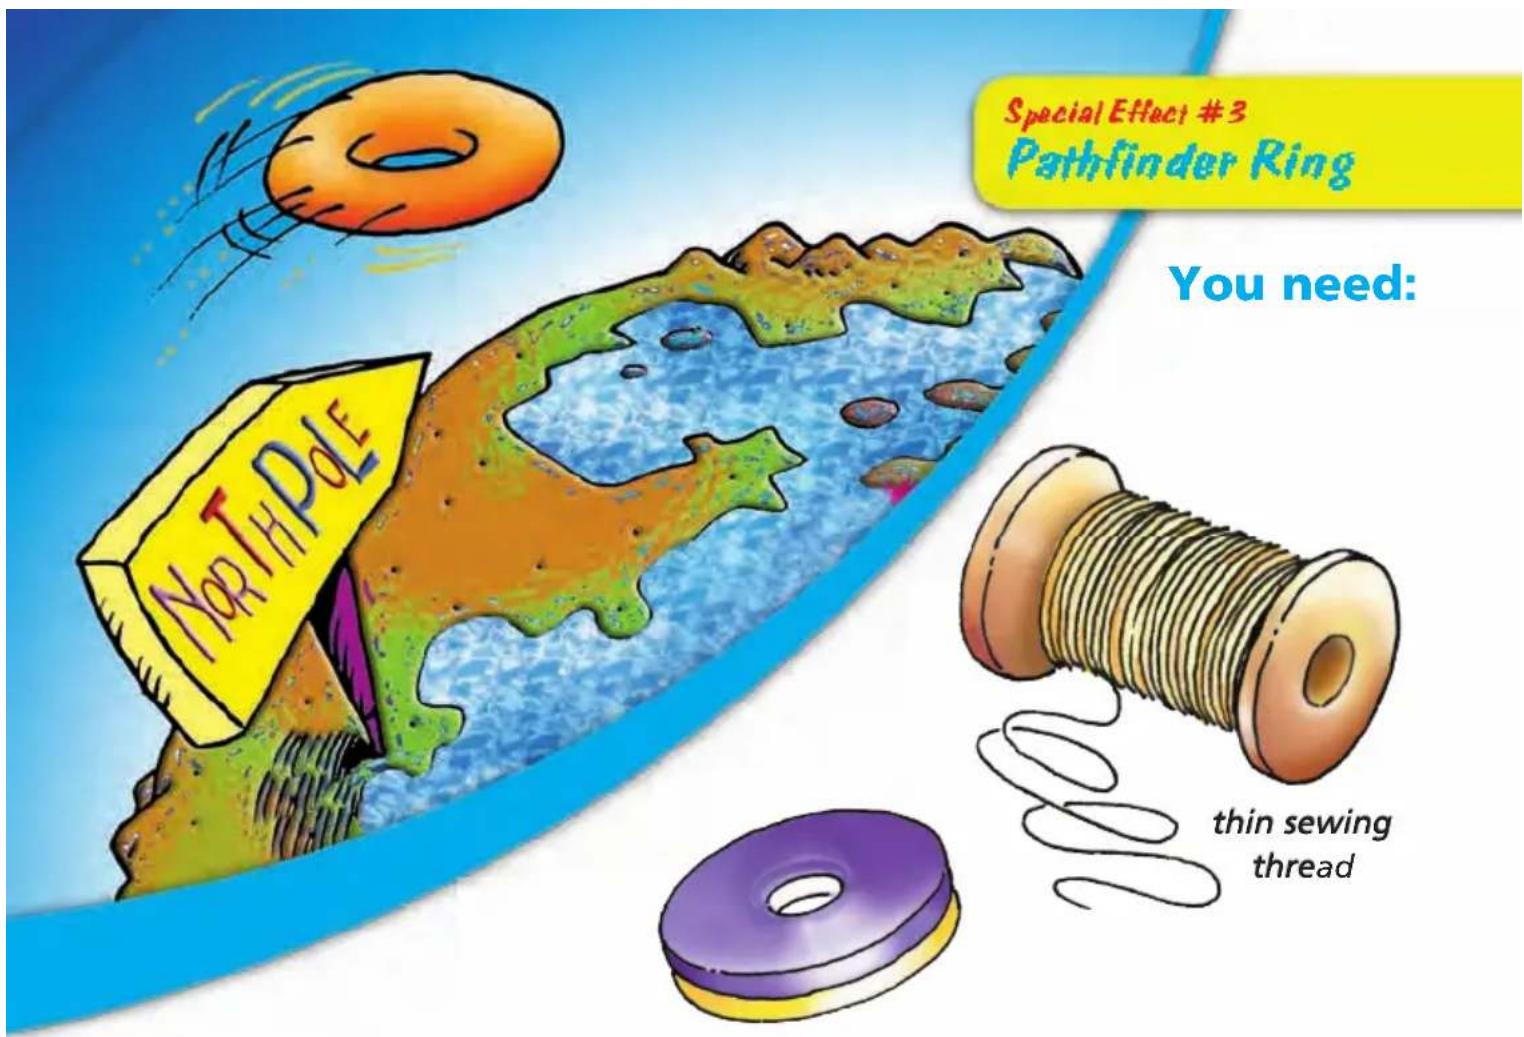
two-color ring
How to do it:
1) Hang a two-color ring from a piece of sewing thread as long as your arm.
2) After a few swings, you will notice that the yellow part of the ring always ends up facing north.
3) To test this, keep jiggling the ring about and you'll find that it still always ends up facing the same direction.
South Pole
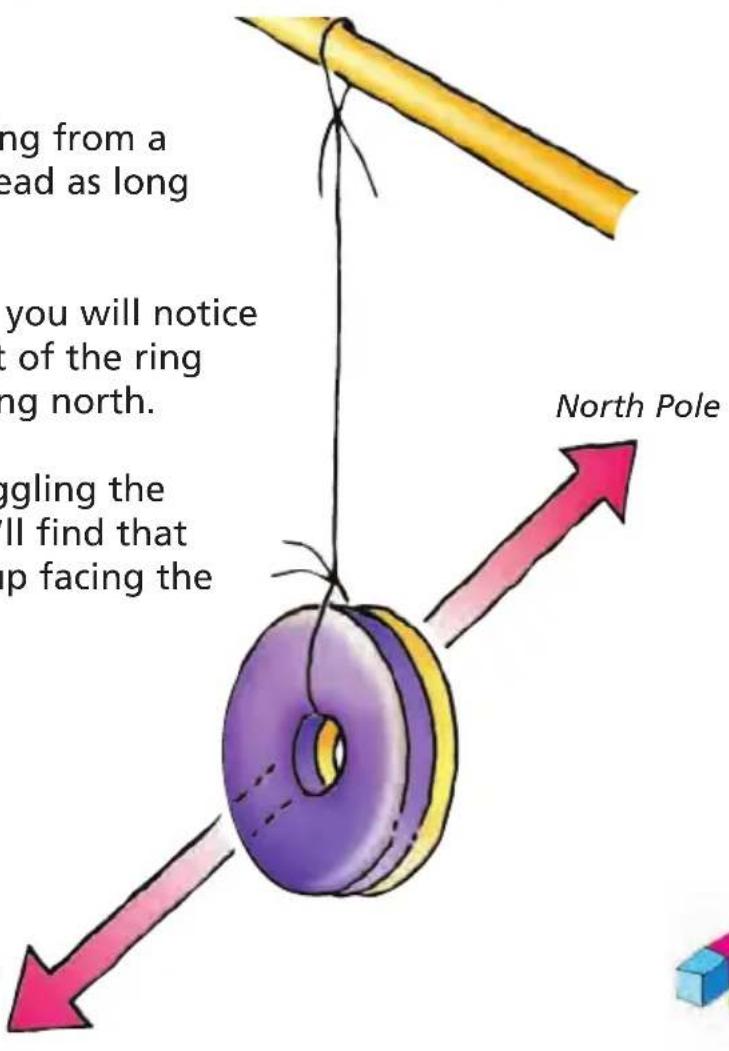
The two-color ring is acting like the needle of a compass.
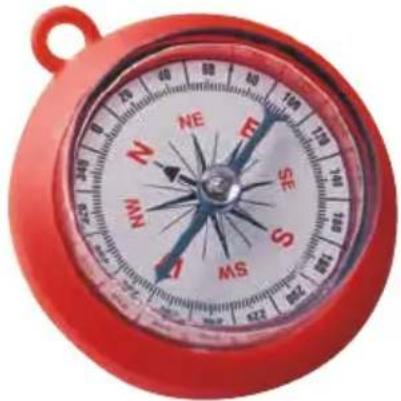
The magnetic ring uses the yellow part (where N is stamped) to point itself toward Earth's magnetic North Pole. Check with a compass to find which way is north.
Caution: Don't get the compass too near the magnetic ring or it will cause the compass to point to the magnetic ring, rather than the North Pole. The magnet may also eventually demagnetize the compass if held too close.
natural_image
Red compass with cardinal direction markings (NE, E, SE, S, MS) on white dial, no additional text or symbols visible.Earth's Magnetic Field
Special Effect #1 showed how the planet Earth behaves like a great big magnet, as English doctor William Gilbert (1544-1603) first stated. The compass needle lines up with the lines of force of Earth's magnetic field.
The causes of Earth's magnetism are still unknown; it is thought that there are electric currents inside the planet that have created a magnetic field.

North Pole
natural_image
Illustration of Earth with magnetic field lines around it, showing concentric dashed circles and an arrow indicating direction (no text or labels)South Pole
little pieces of paper woolen clothing
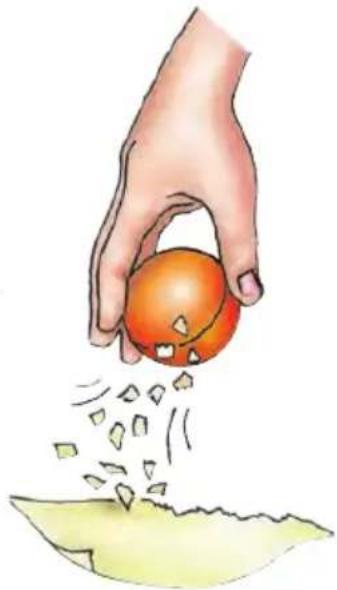
How to do it:
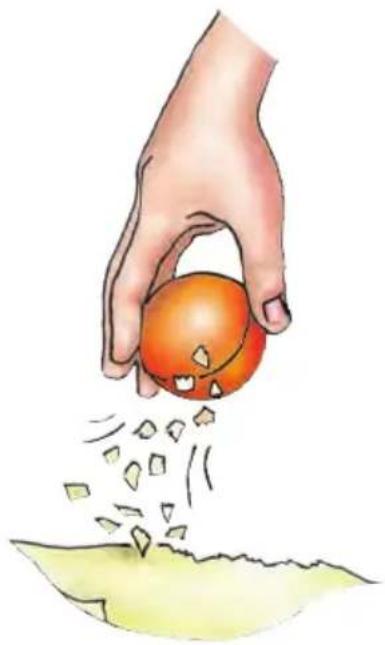
1) Tear lightweight paper into lots of little bits. Then rub the plastic ball on a piece of woolen clothing. (You can also try rubbing the ball on your hair.)
natural_image
Illustration of a hand holding an orange fruit with scattered green leaves, pouring from a surface (no text or symbols)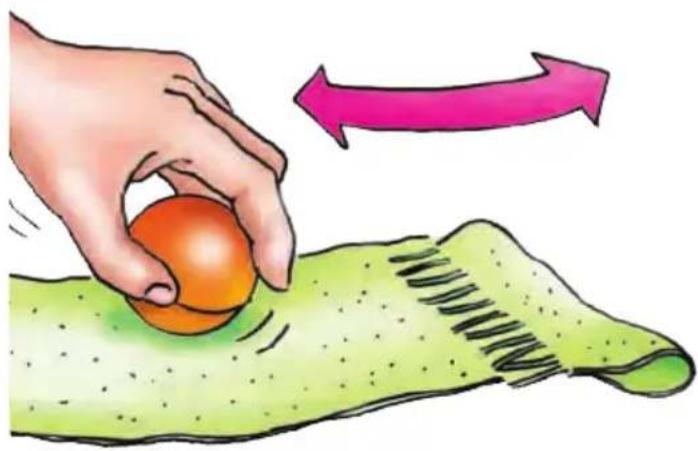
natural_image
Illustration of a hand rolling an orange ball on a green textured surface with a pink arrow indicating rotation (no text or symbols)2) Move the ball toward the bits of paper, without touching them, and they'll jump up to the ball and then fall back down. They go up and down.
Why?
Opposites attract! The negative ball attracts the positive paper. Here's how:
Everything in the universe is made up of atoms.
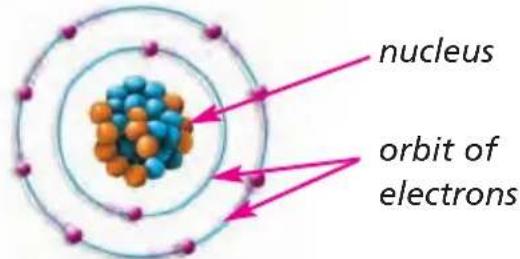
Model of the atom
proton (positive electric charge)
neutron (neutral electric charge)
electrons (negative electric charge)
When you rub the ball with wool, electrons pass from the wool to the ball; that charges the ball with negative static electricity because it has more electrons than protons.
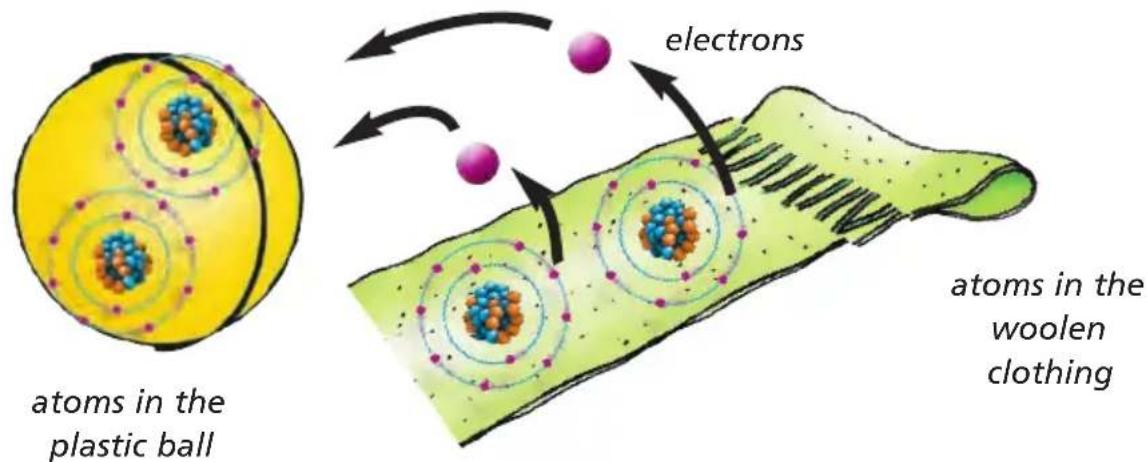
When the negatively charged ball is held close to the paper, the negative charge naturally in the neutral paper is repelled to the bottom of the paper and the positive charges go to the top. As a result, the positive top of the paper and the negative ball are attracted to each other.
The bits of paper detached themselves from the ball after a while because some electrons (negative charge) passed from the ball to the paper. So, the negatively charged ball and paper repelled each other. As soon as they were down again, the excess electrons on the paper passed to the tabletop or the air. At that point, the paper was neutral and again attracted to the ball.
natural_image
Illustration of a hand holding an orange apple with seeds spilling out from a green leaf (no text or symbols)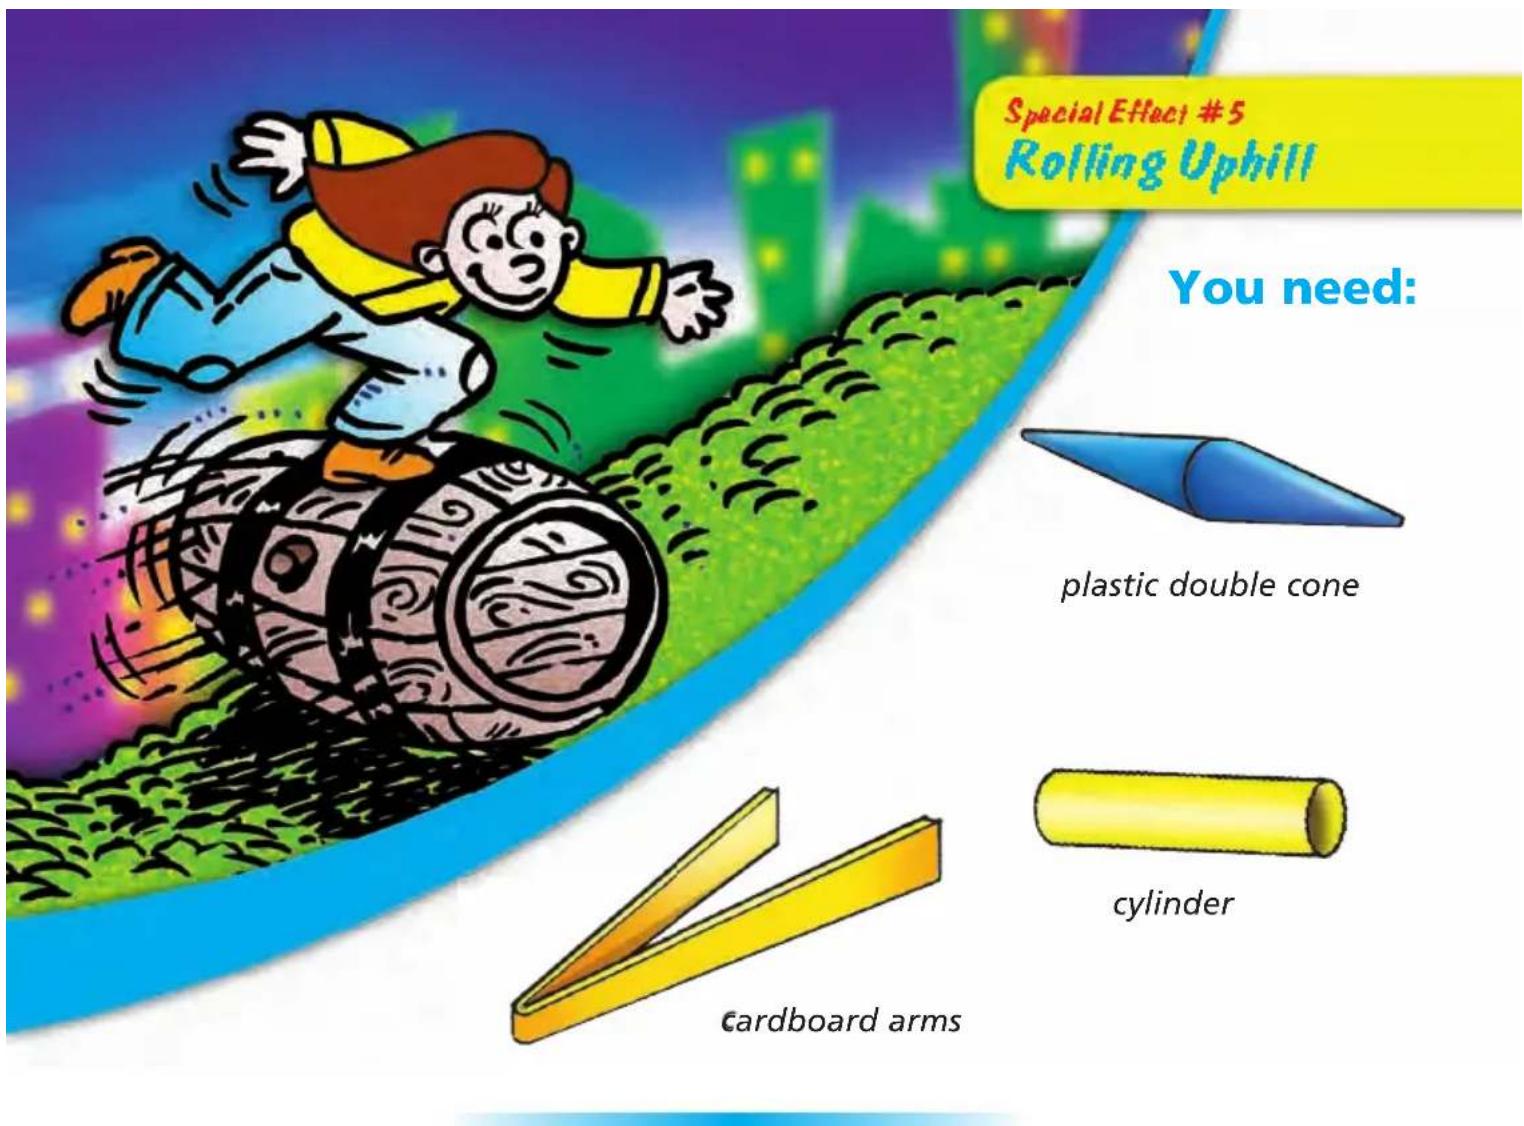
How to do it:
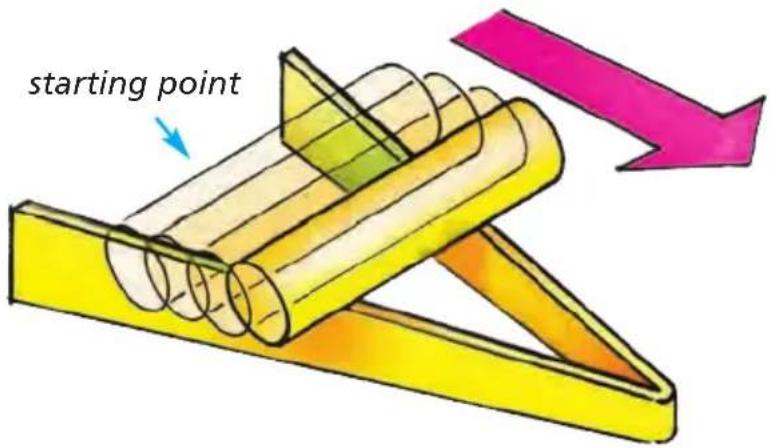
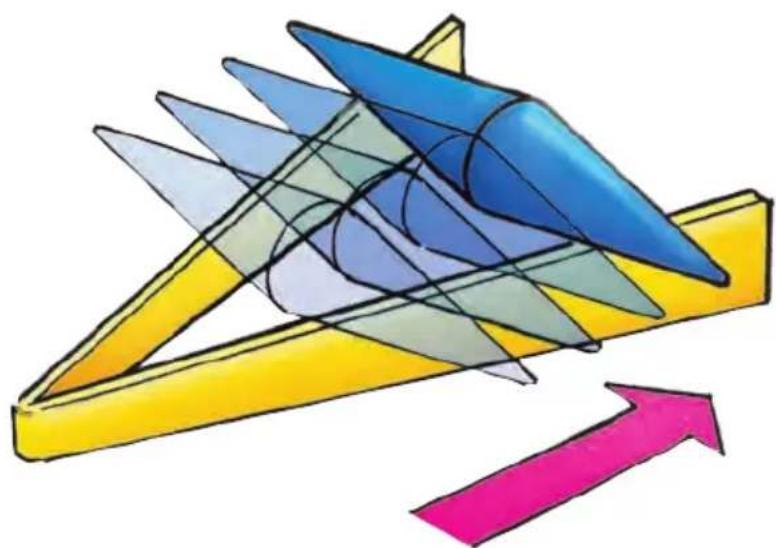
1) Lay the cardboard arms apart on a completely flat surface, as in the diagram.
2) Rest the cylinder on the midpoint of the arms and it will roll down toward the lower part of the arms, as you'd expect!
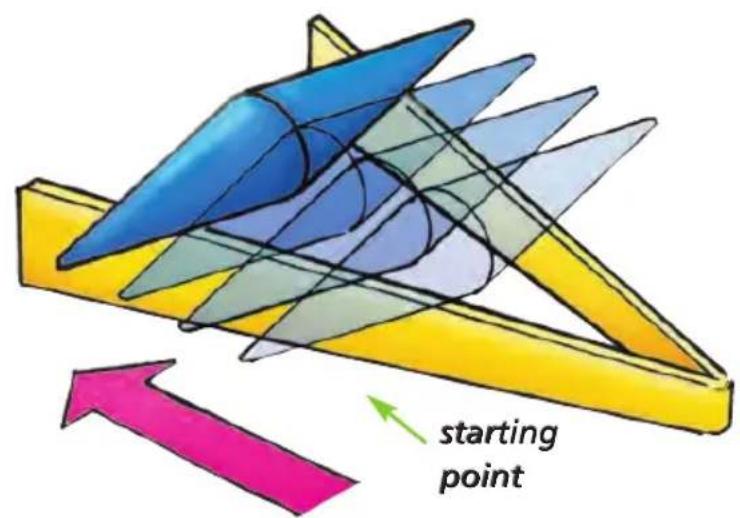
3) Rest the double cone on the midpoint of the arms and it will roll toward the upper part of the arms. Surprise! It goes uphill, but how?

Why?
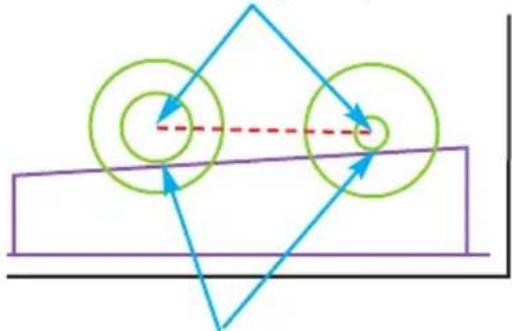
The center of gravity of an object always tends downward.
Every object has a point, called its center of gravity, which is the point where you can imagine that its weight is concentrated.
red line: where the center of gravity moves
The body appears to go up, but actually its center of gravity is going down, falling between the arms as the cone rolls.
center of gravity
natural_image
Pure geometric diagram with circles and arrows, no text or symbols presentresting point of the cone on the arms
natural_image
Illustration of a stylized aircraft viewed from above, with colored triangular panels and an upward arrow (no text or symbols)10 in. (25 cm)
A body starts moving when its center of gravity lowers because of the force of gravity. The edges of the double cone roll upward on the arms, but most of the double cone's mass (center of gravity) is really rolling down in the space between the arms.
natural_image
3D illustration of a yellow triangular object with a red curved arrow indicating rotation (no text or symbols)The wider apart they are, the greater the effect.
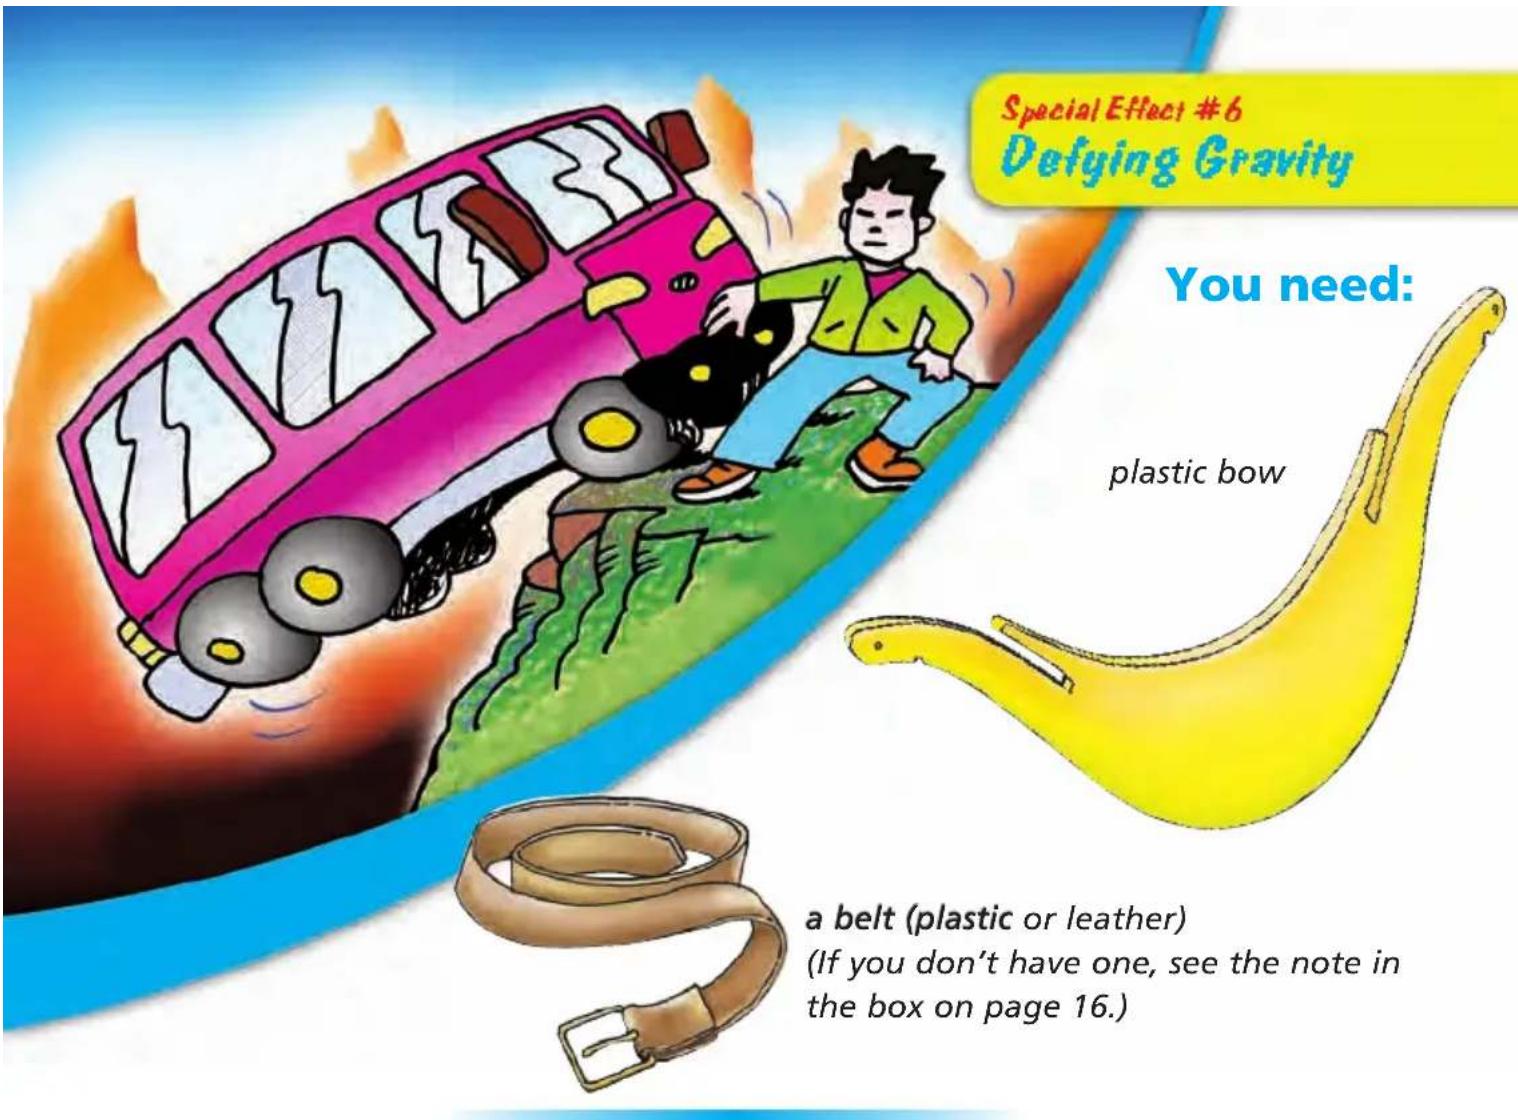
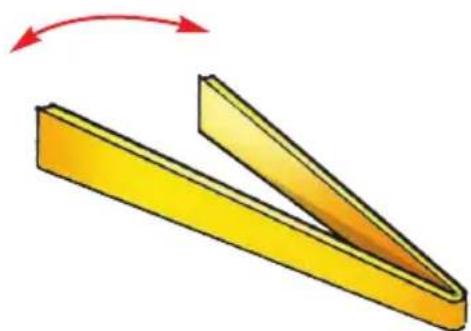
How to do it:
Try to hold up the bow on one finger from the end. It's impossible. But now...
1) Insert a belt into one of the slots in the bow so that its weight is equally spread on the right and the left of the bow. Take note of the position of the buckle because this will have an effect on the weight distribution.
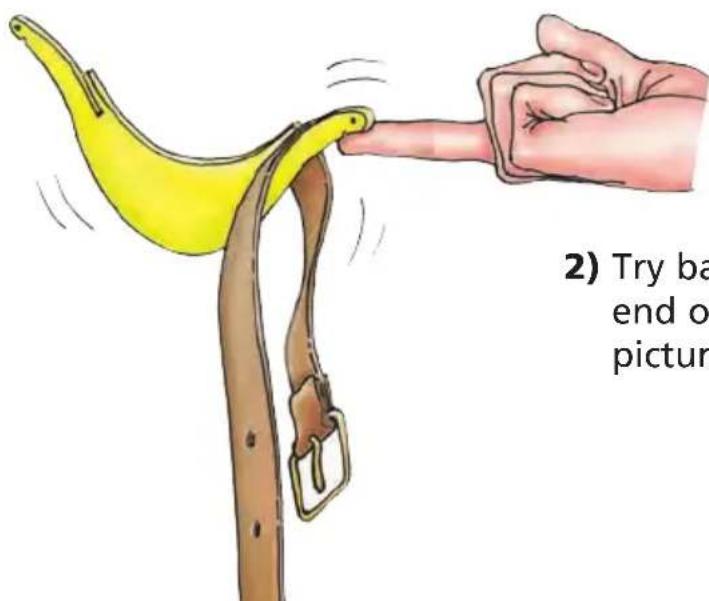

2) Try balancing the belt and bow on the end of your finger, as shown in the picture. See, it's perfectly balanced!
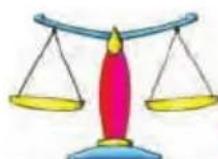
Why?
A body is balanced when the sum of all the forces that act on it is zero.
For example, a pencil laid across your fingers won't fall off because the fingers support it by opposing the forces of gravity that attract all things toward the center of the Earth. Keep in mind that if your fingers weren't exerting an upward force, the object would fall down.
Every object has its center of gravity, which is the point at which you can imagine its weight being concentrated.
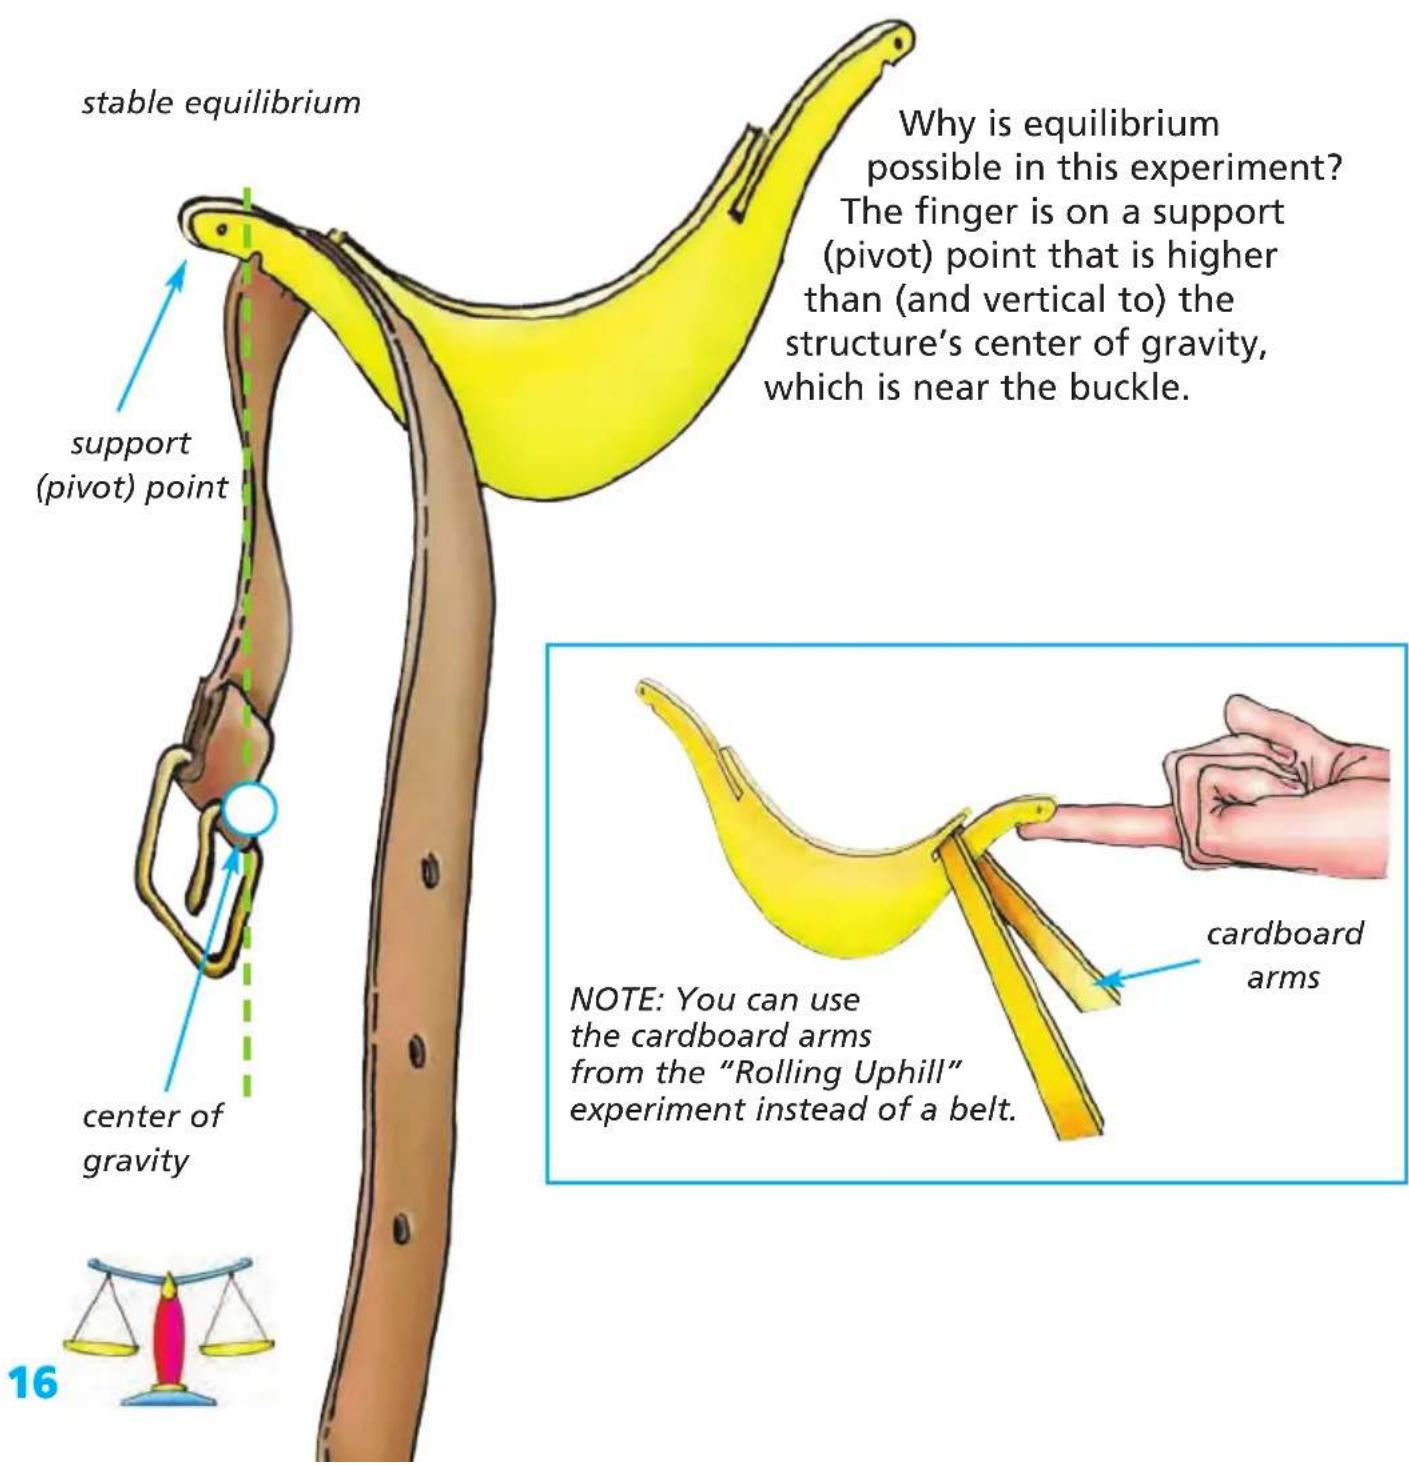
How to do it:
Ask an adult to help you.
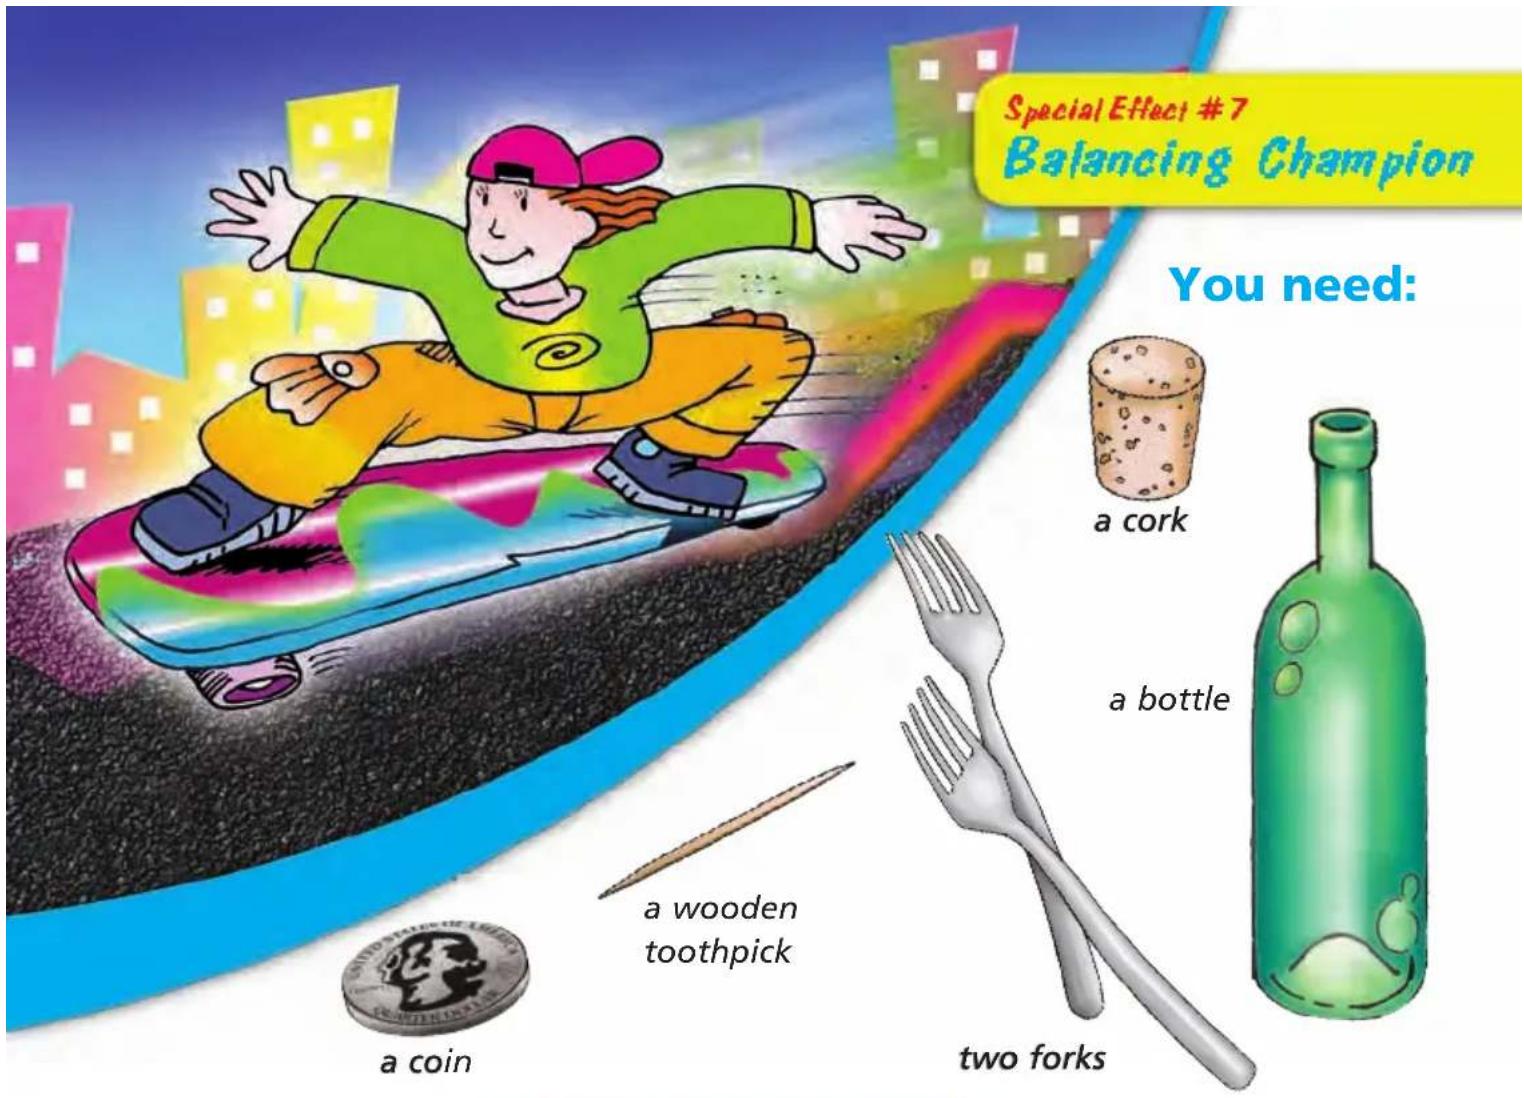
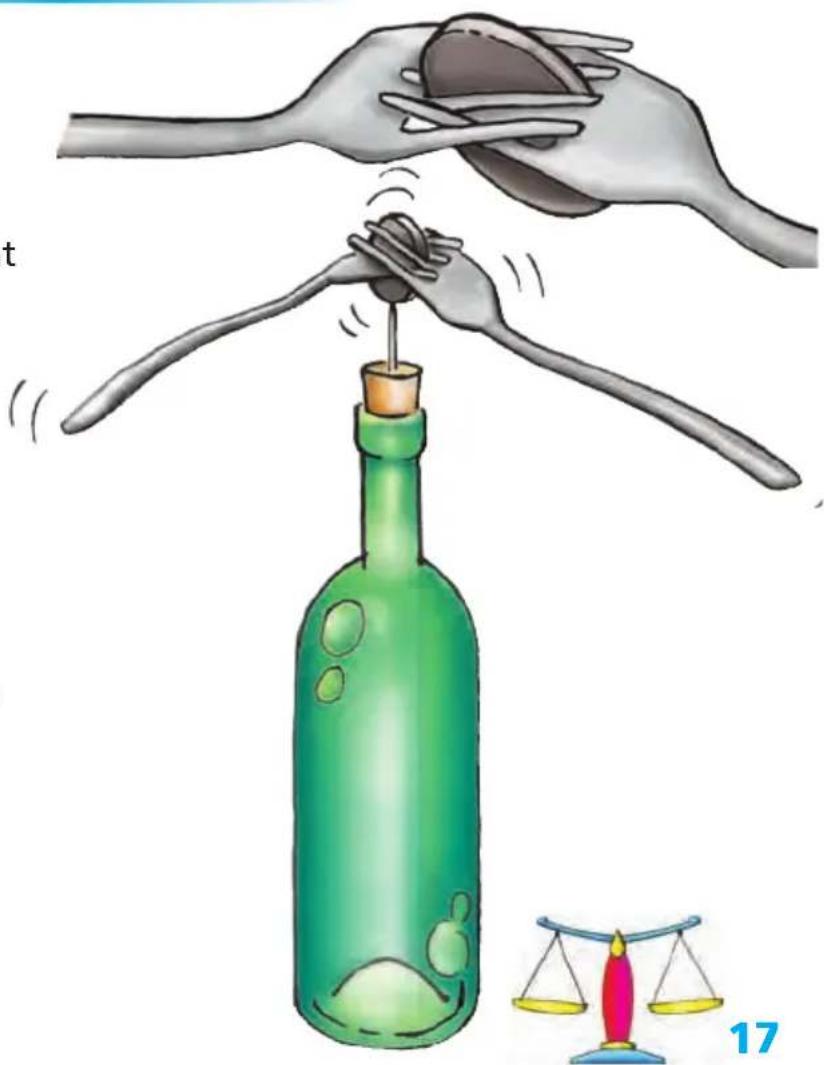
1) Insert a coin in between the teeth of the two forks so that they are firmly in place.
2) Insert a toothpick into the cork of a bottle. Rest the whole fork structure on the toothpick making sure it's resting on the coin.
Give the forks a slight push and they will spin around on the coin.
natural_image
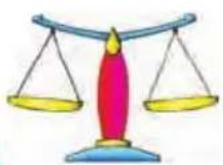
Illustration of a wine bottle being dispensed with a fork, accompanied by a balance scale and a red flame (no text or symbols)Why?
A body is in stable equilibrium (easily balanced) when its center of gravity is below the pivot point.
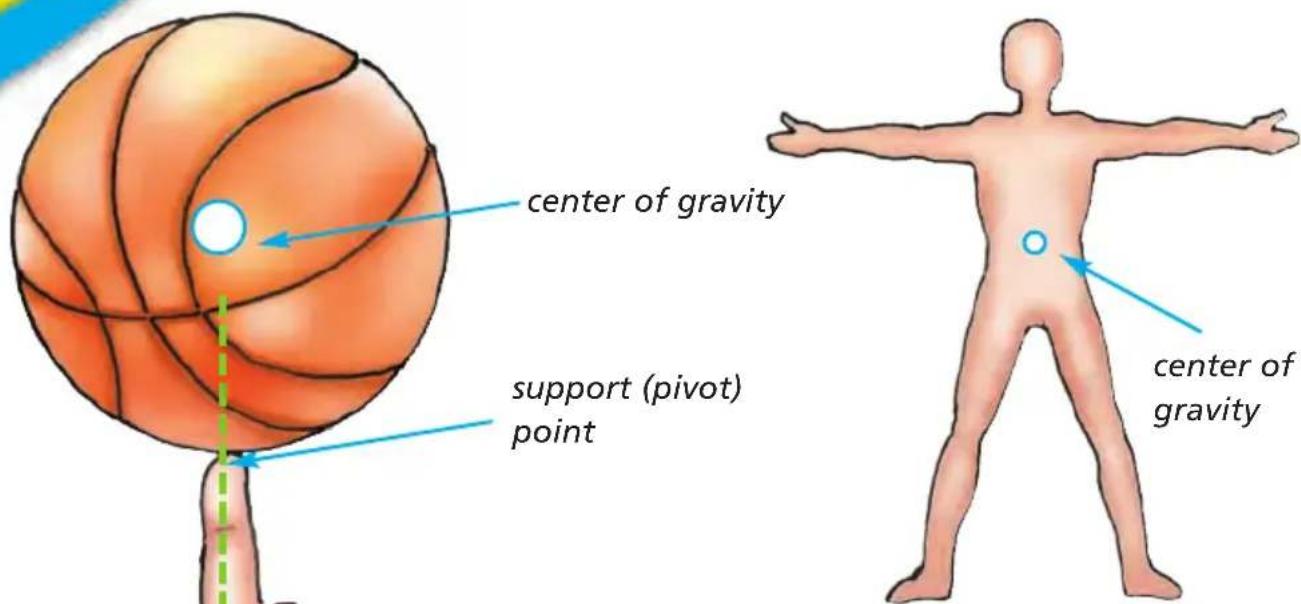
Every object has a center of gravity, which is the point at which you can imagine its weight being concentrated.
A suspended body is balanced when the point of support is in line with its center of gravity.
Unstable equilibrium: when the center of gravity is higher than the point of support

Tight rope walkers (funambulists) make use of this concept in designing their balancing pole. Funambulists carry drooping (not rigid) poles, sometimes with heavy weights at the end. This puts their center of gravity below the wire and makes it much easier to balance.
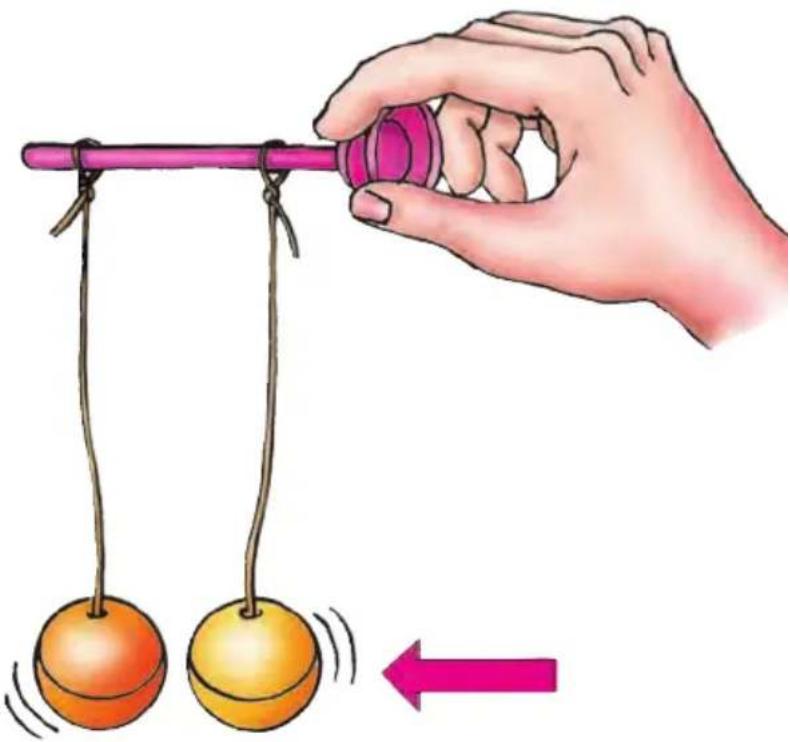
How to do it:
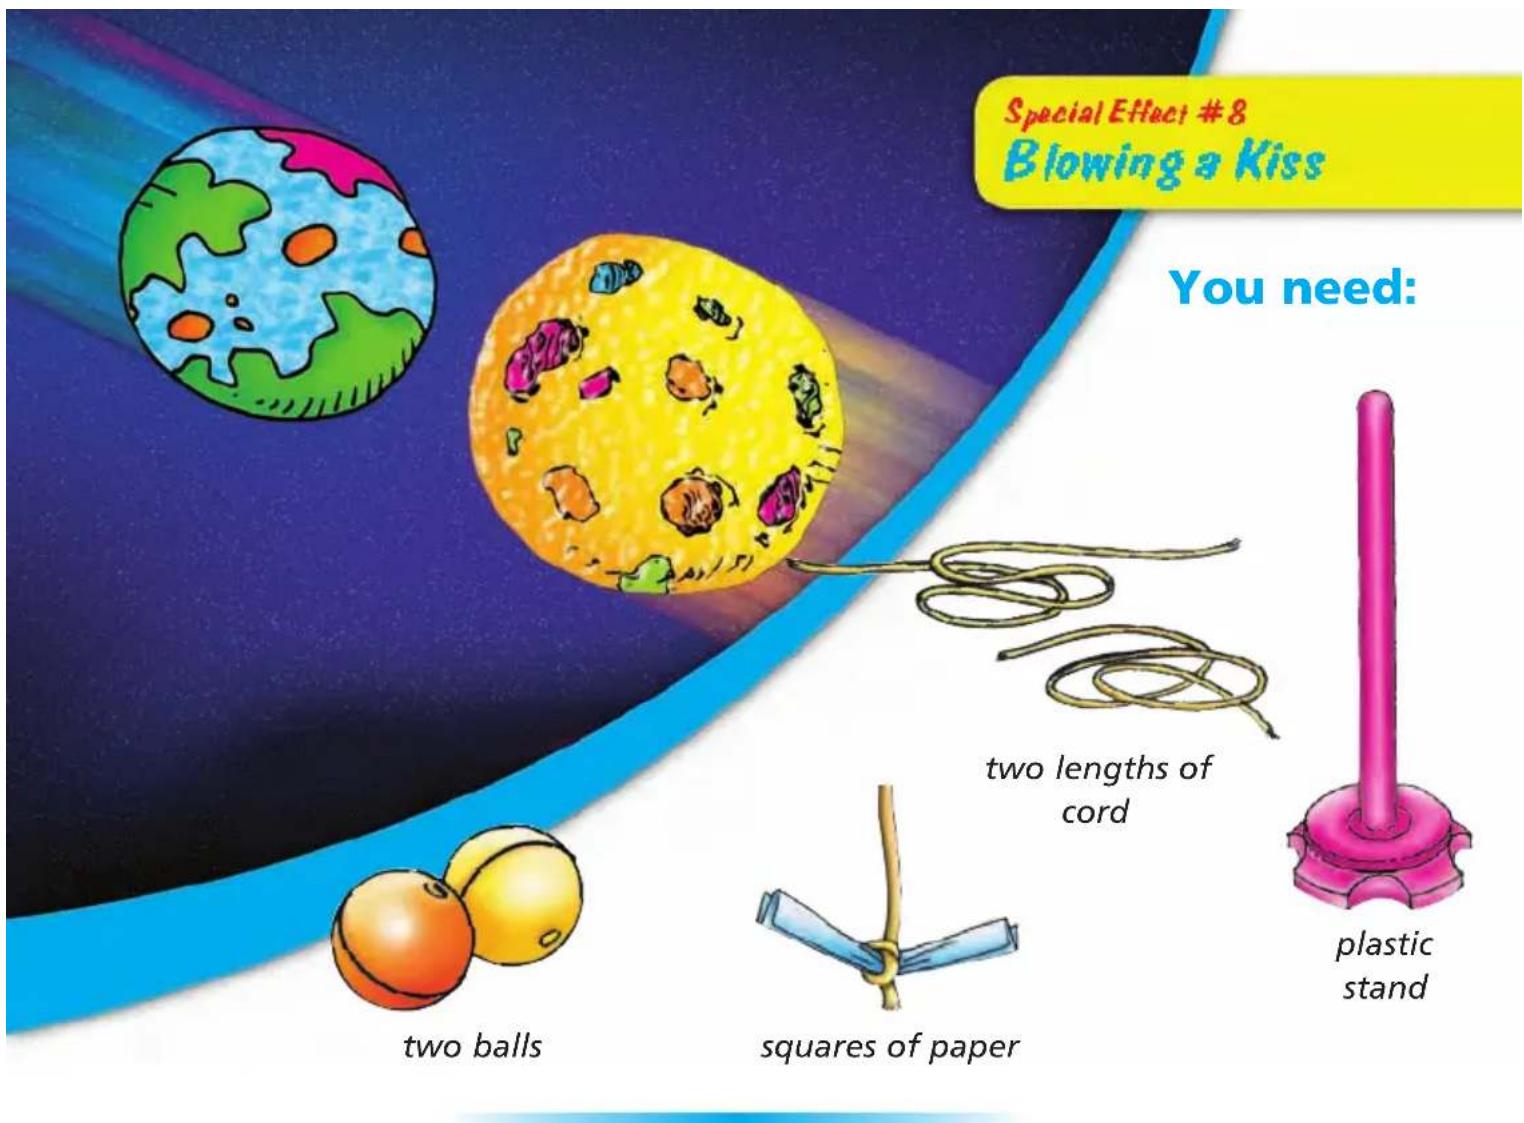
1) Attach two 12 inch (10 cm) lengths of cord to the two balls by tying the ends of the cords to two pieces of paper as shown above.

natural_image
Illustration of a person using a string to lift a ball with two balls, no text or symbols present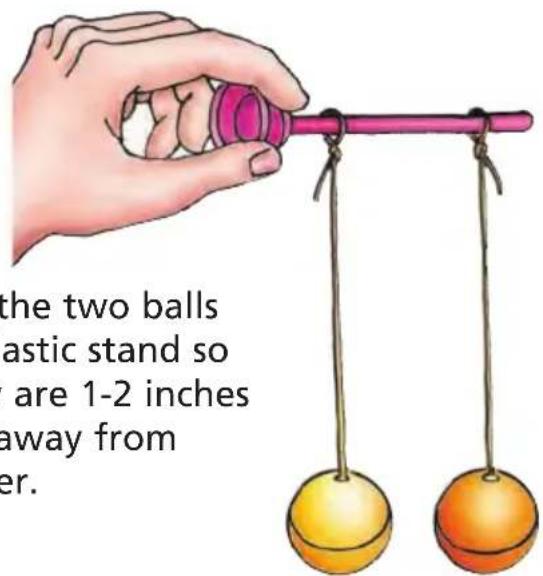
2) Suspend the two balls on the plastic stand so that they are 1-2 inches (3-4 cm) away from each other.
3) Blow between the two balls from a distance of about 4 inches (10 cm) away. The two balls will move toward each other and appear to "kiss."

Why?
Air pressure pushes in all directions but slow-moving air pushes harder than fast-moving air.
This experiment is a demonstration of Bernoulli's Principle. Swiss mathematician Daniel Bernoulli (1700-1782) showed that faster-moving air exerts less pressure than slower-moving air. When you blow between the two balls, you lower the air pressure between the balls. So the higher air pressure surrounding the rest of the balls pushes them together.
natural_image
Illustration of a hand holding a pink string attached to two orange balls, with a pink arrow indicating motion (no text or symbols)Air Pressure and Flight
Put a sheet of paper just below your mouth and blow hard over the top of it as in the illustration. If you do this, the air pressure under the paper is greater than that above it, so the paper rises up. That's how planes fly.
Airplane Wing Shape
faster-moving air—low pressure

natural_image
Abstract diagram with curved arrows and a shaded region, no text or symbols presentslower-moving air—high pressure
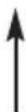
lift due to pressure difference
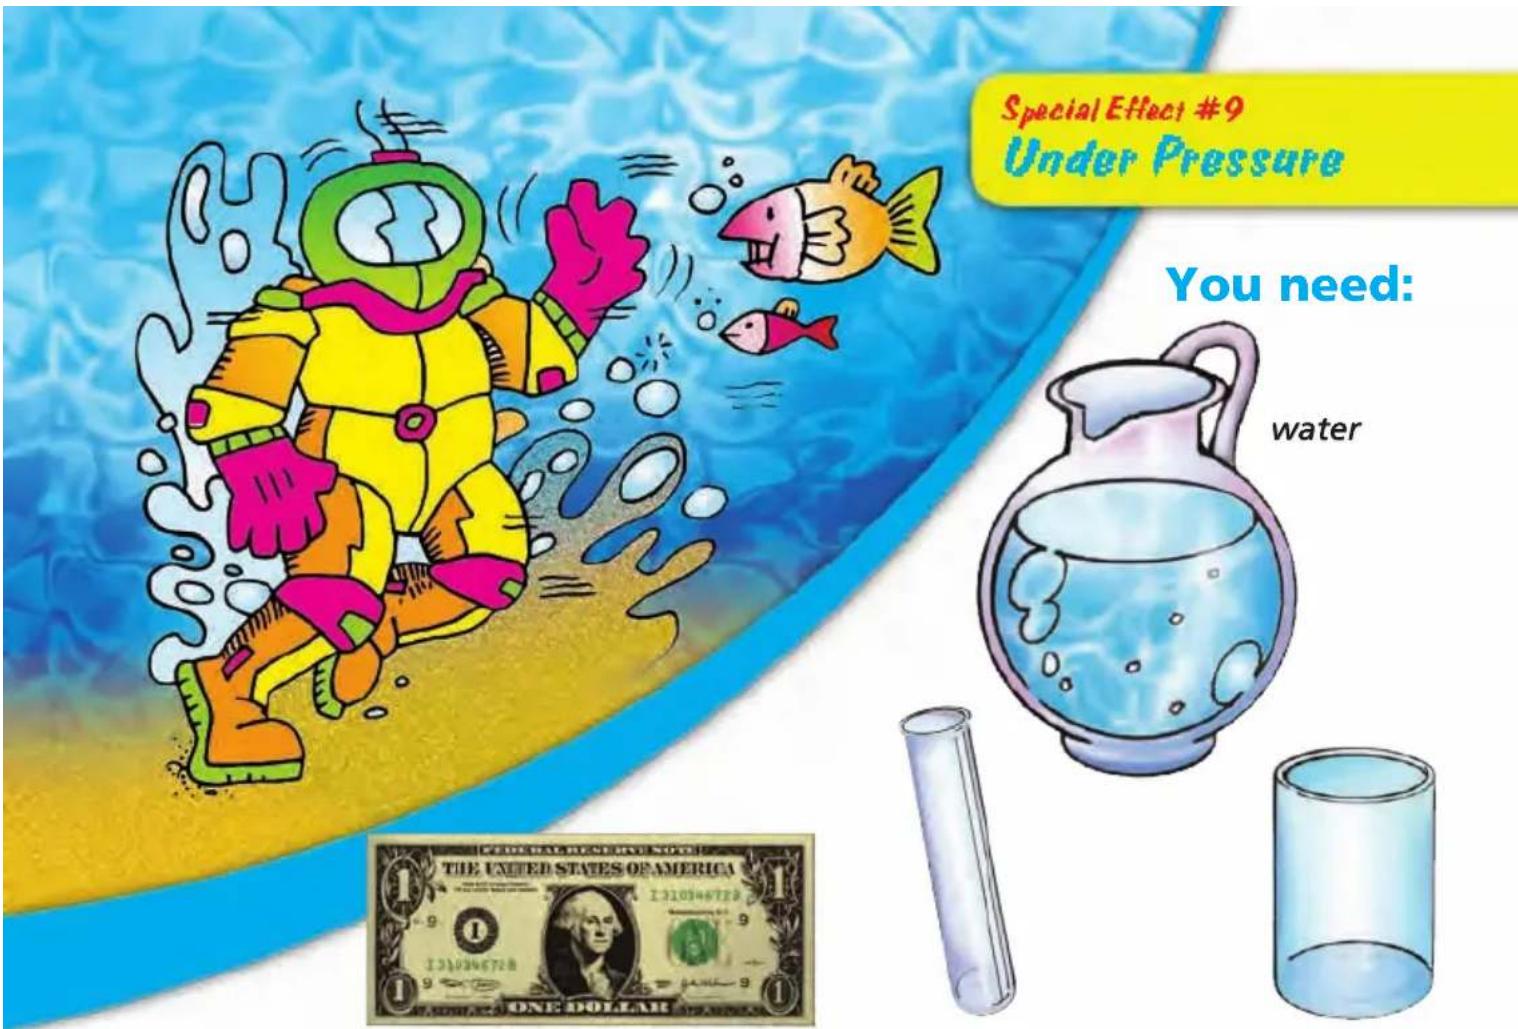
test tube plastic cupdollar bill
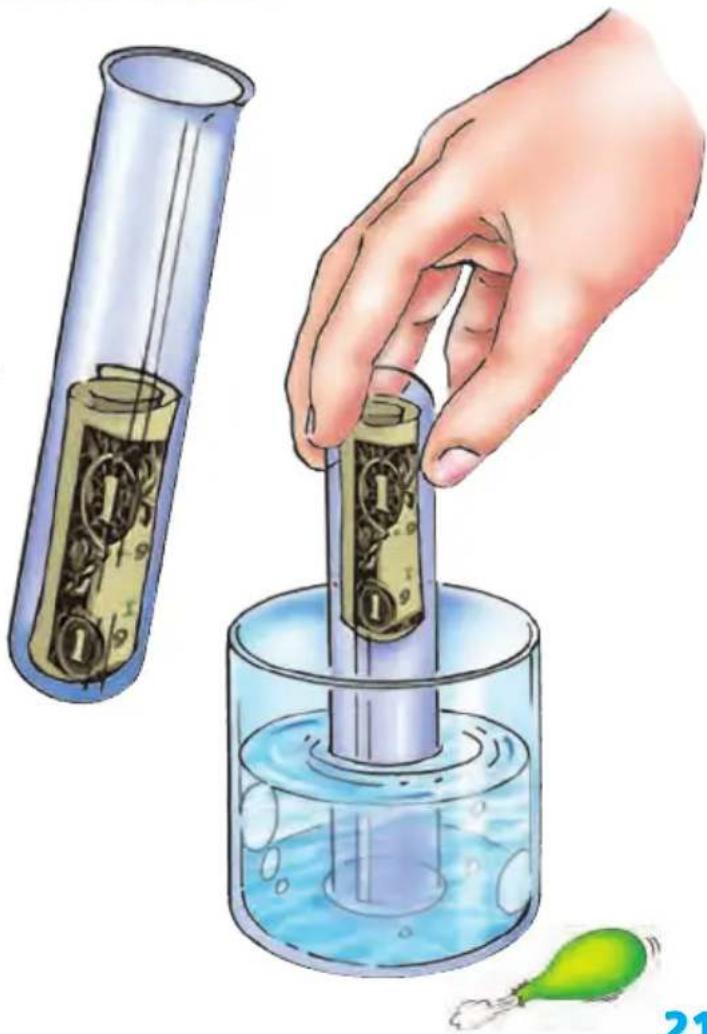
How to do it:
1) Ask an adult for a dollar bill. Roll it up and put it into a test tube, as in the diagram.
2) Dip the test tube vertically upside down in the cup of water.
3) After a while, raise the test tube and retrieve the bill. The bill is dry.
natural_image
Illustration of a hand pouring liquid into a beaker with a dollar bill, next to a test tube and a green balloon (no text or symbols)The air inside the test tube stops the water from rising.
Air is a mixture of gases: nitrogen, oxygen, carbon dioxide, and small quantities of other gases.
In 100 parts of air:
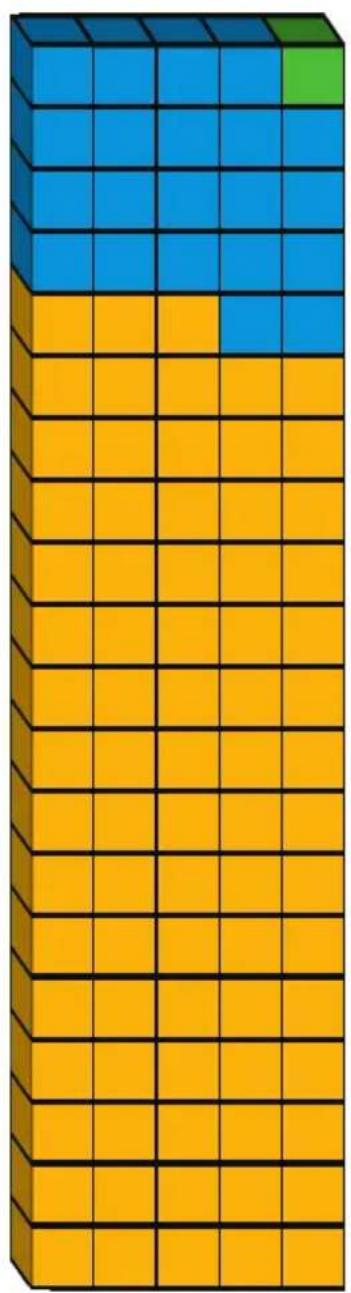
natural_image
3D stacked pyramid structure with blue, orange, and yellow blocks (no text or symbols)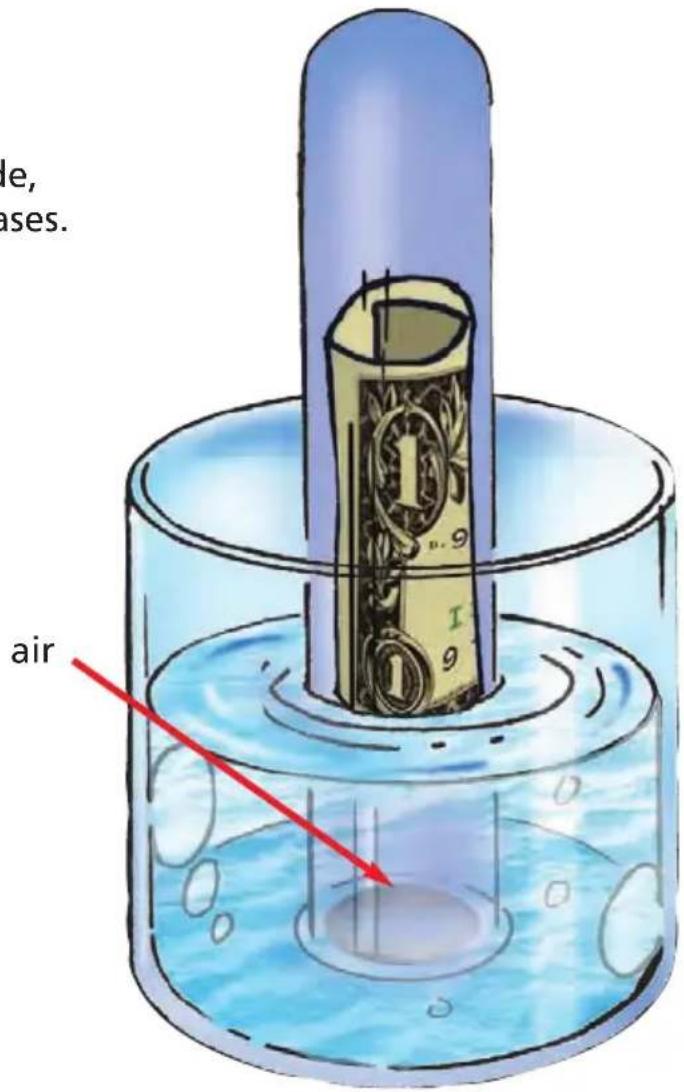
78 parts are nitrogen
21 parts are oxygen
1 part is other gases
The air particles take up space inside the test tube and exert pressure so the water can't get up high enough to wet the dollar bill.
The water level stops at the entrance to the upside down test tube.
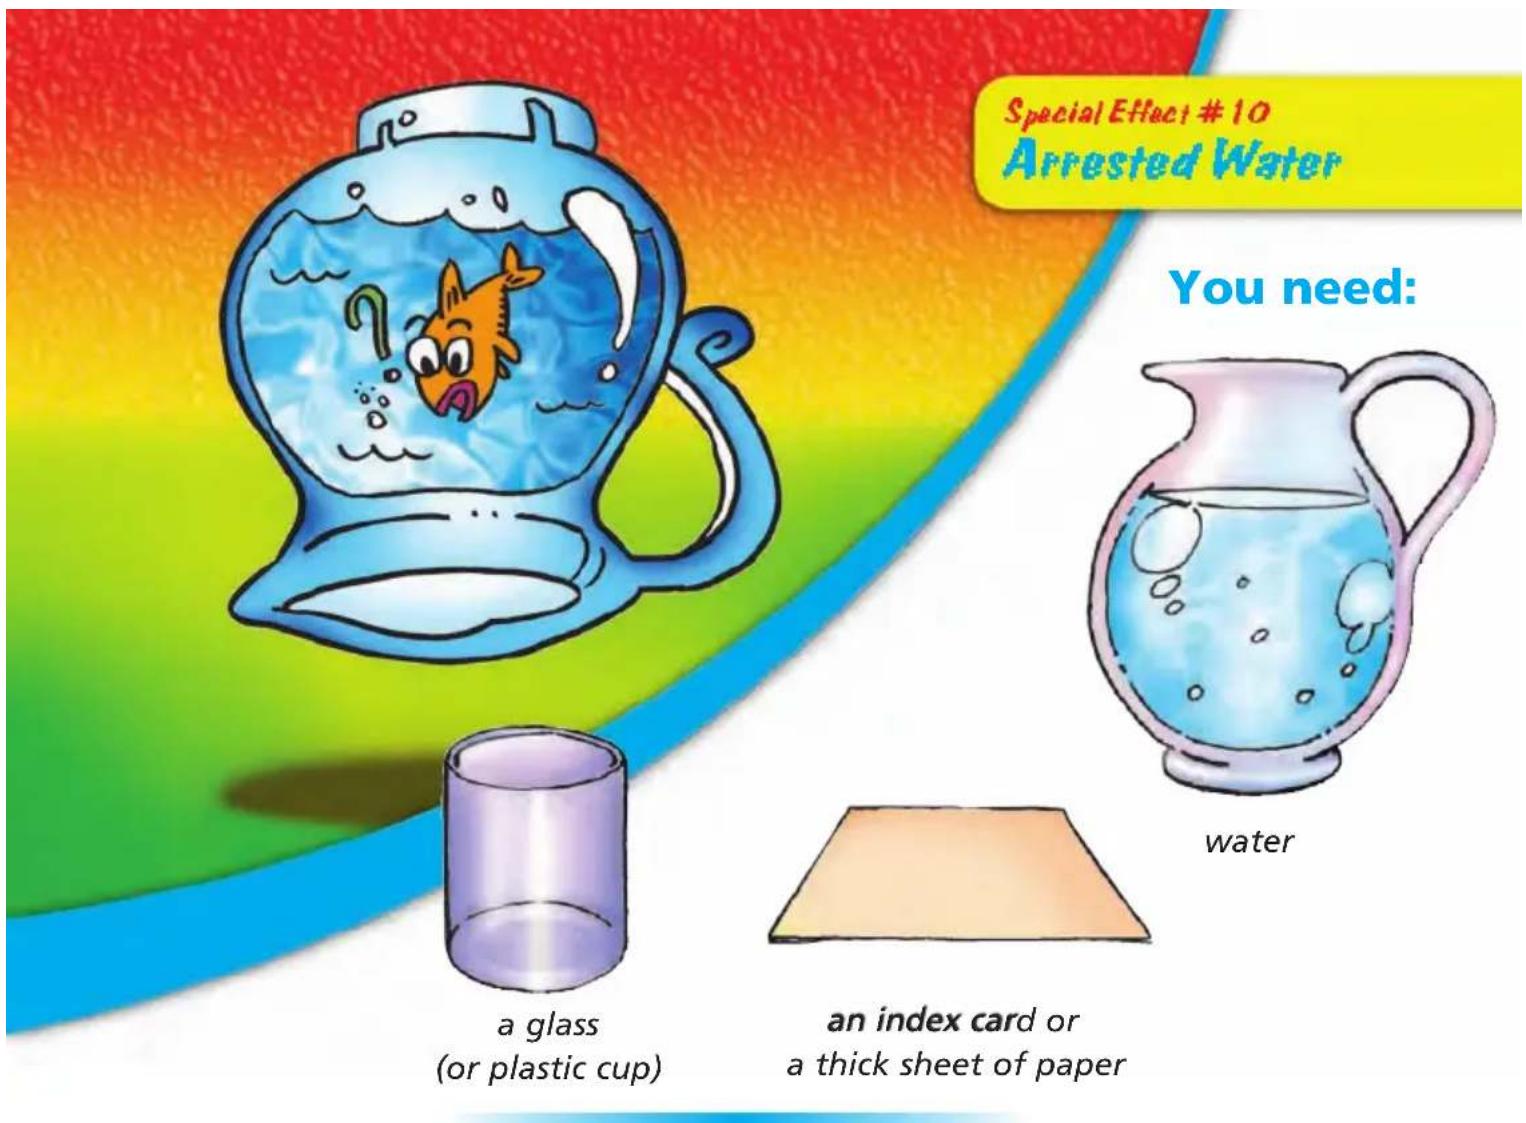
How to do it:
1) Fill the glass about half full with water.
2) Wet the rim of the glass and lay the index card on top of it.
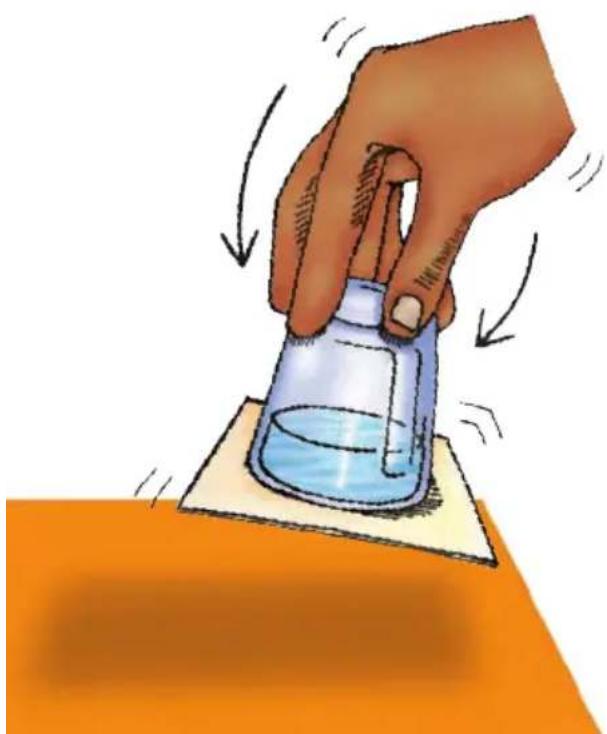
natural_image
Illustration of a hand holding a glass jar with liquid, moving arrows on a surface (no text or symbols)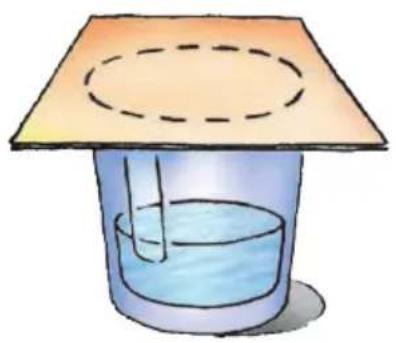
natural_image
Illustration of a beaker with liquid inside and a lid above it, containing a wire rod (no text or symbols)3) With a rapid movement, turn the glass upside down, holding the card in place with your hand for a second or two. Take away your hand and the water won't pour out.
Why?
Air is made up of lots of gaseous particles that exert pressure in all directions.
The index card creates a large surface area where air can push up. Now the atmospheric pressure pushing up on the card is greater than the force of the water pushing down.
The gas particles exert pressure in all directions, even from the bottom, keeping the card pressed onto the edges of the glass.
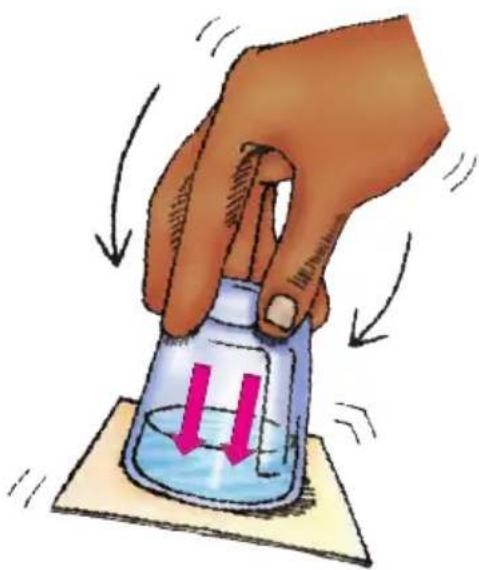
natural_image
Hand holding a glass jar with liquid and arrows indicating downward motion (no text or symbols)
natural_image
Three magenta upward-pointing arrows arranged horizontally (no text or symbols)There is more pressure pushing up than down.
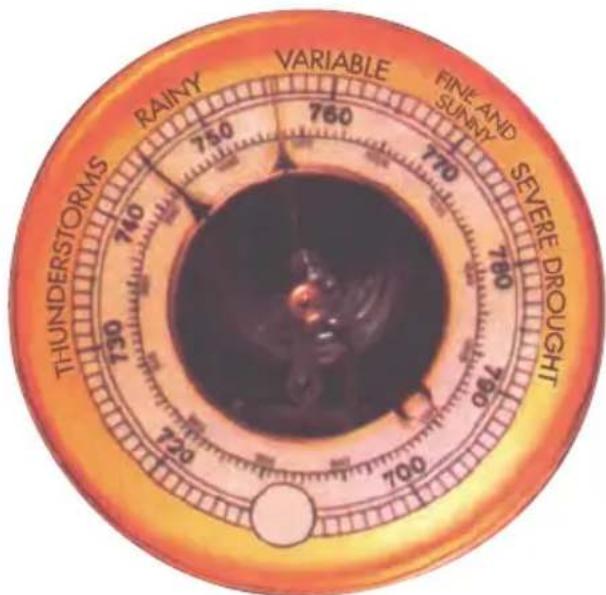
A barometer is an instrument we use to measure air pressure.
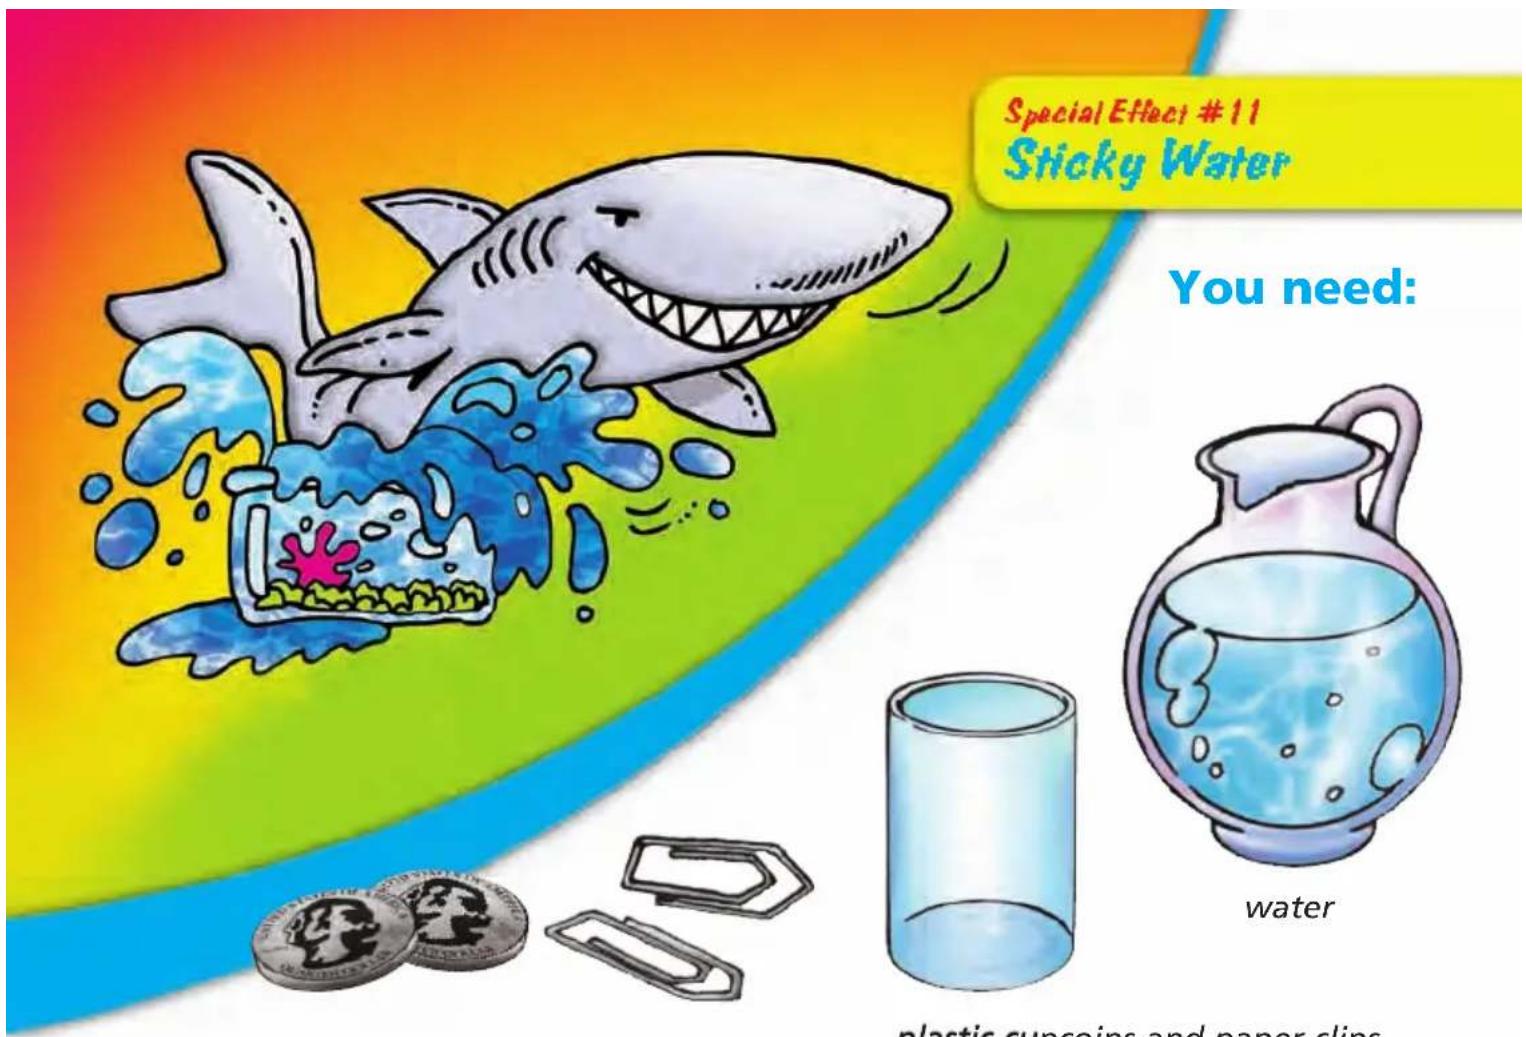
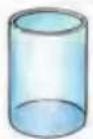
plastic cupcoins and paper clips
How to do it:
1) Fill the cup to the brim with water.
2) Add several coins and paper clips to the cup of water.
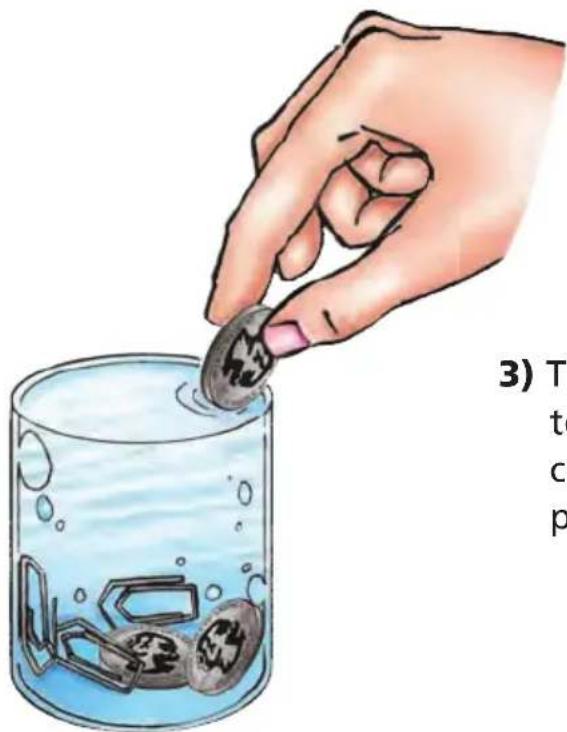
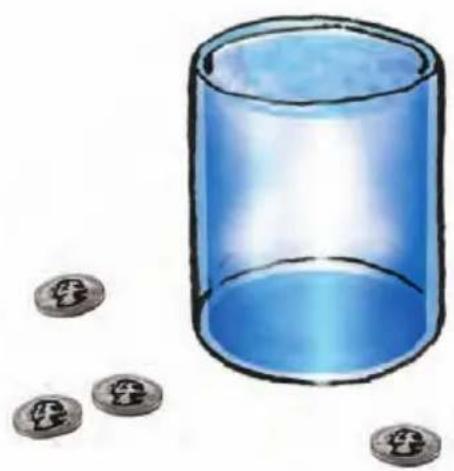
natural_image
Illustration of a blue glass cylinder with scattered coins (no text or symbols)3) The already full cup appears to have more space for the coins and paper clips. Turn the page to find out why.
Why?
As the coins are added, the water level rises above the rim of the cup but it does not spill over because water molecules are attracted to one another.
Look carefully at the edge of the curved surface of the water. The liquid has a “skin” that has formed because of the surface tension of the water particles (molecules). This “sticky” surface tension happens because the hydrogen atoms in one H_2O (water) molecule are attracted to the oxygen atom in the neighboring H_2O molecule.
The surface tension (water's "skin") allows the water's surface to "stretch" upward before breaking.
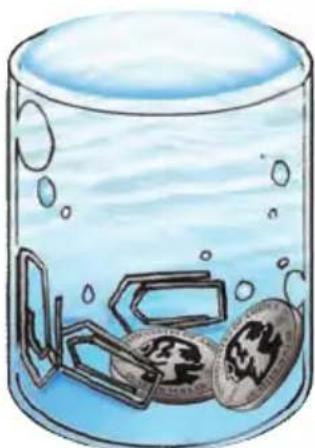
natural_image
Illustration of a glass beaker containing submerged coins and bubbles, no text or symbols present
natural_image
Illustration of a magnifying glass with a blue sky and handle (no text or symbols)Surface tension allows insects to land on the surface of the water and even lay their eggs on it.
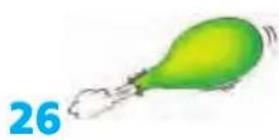
Try this:
Use surface tension to float a paper clip on the surface of the water. (It may help to cut a piece of paper towel slightly larger than the paper clip. Lay the towel on the surface, float the paper clip on the towel, and then carefully slide the towel out from underneath.) Voilá! The paper clip is floating on the water's "skin"!
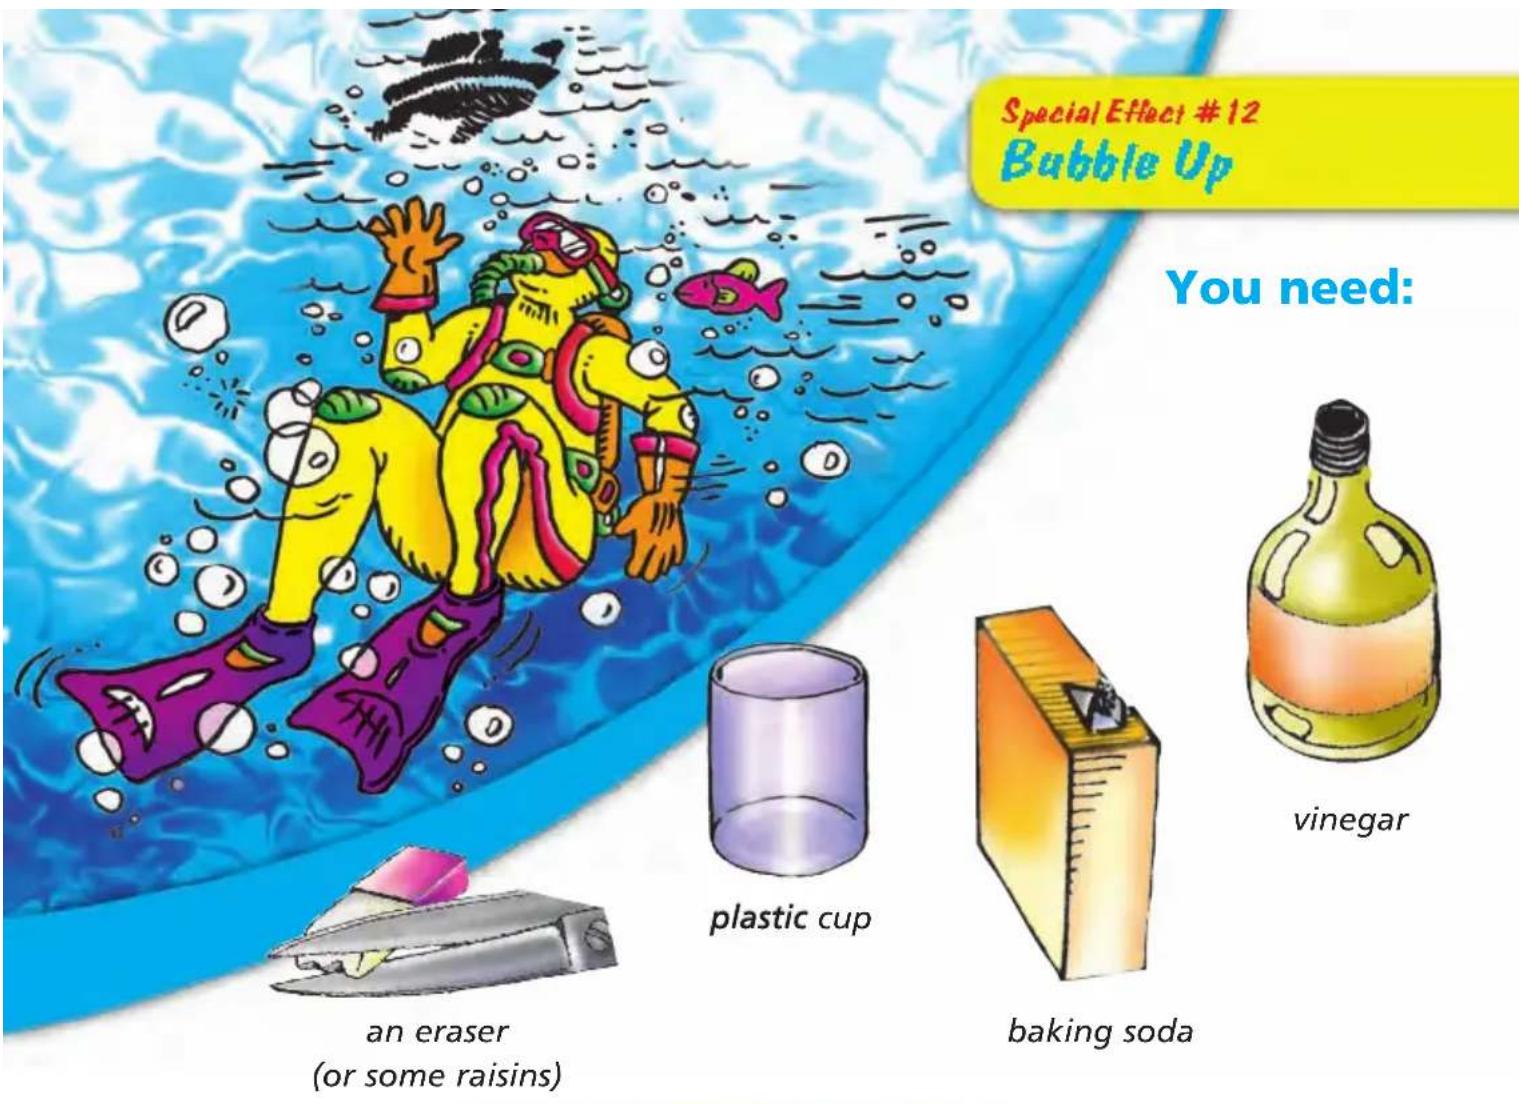
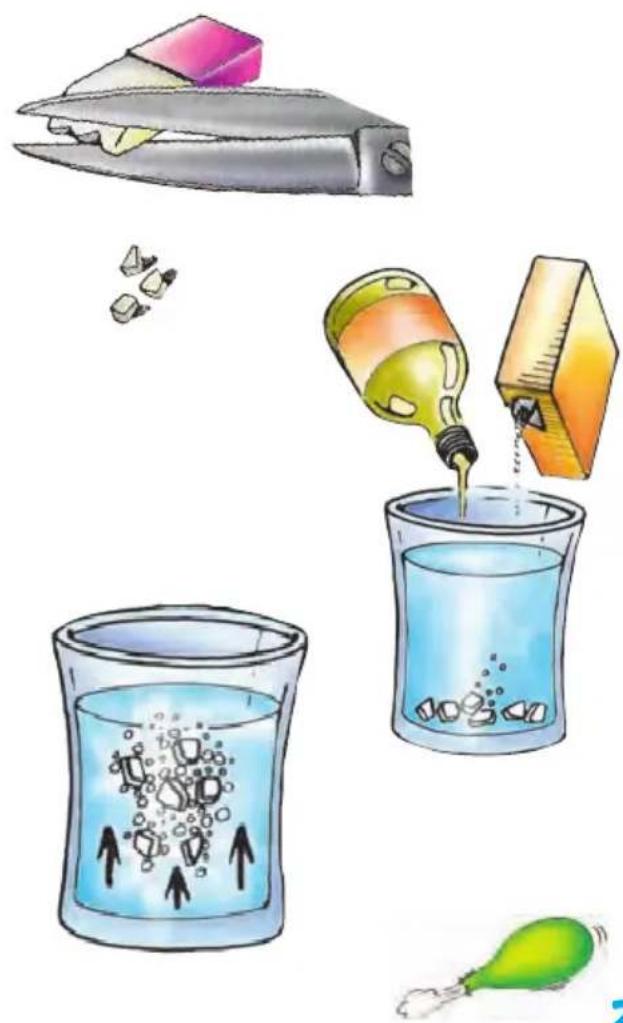
How to do it:
1) Cut the eraser (or raisins) into pieces that are about the size of grains of rice.
2) Fill the cup with half a cup of vinegar and a pinch of baking soda. Then add the eraser or raisin pieces.
3) The pieces at the bottom will come up to the surface, then sink, then come back up again.
To continue this experiment later or to make it go on longer, add a little more vinegar and baking soda.
natural_image
Illustration of a chemical experiment with dropping funnel, beaker, and liquid being poured into glass (no text or symbols)Why?
The pieces are brought up to the surface by carbon dioxide bubbles.
When you combine vinegar and baking soda you start a chemical reaction that forms carbon dioxide bubbles ( CO_2 ).
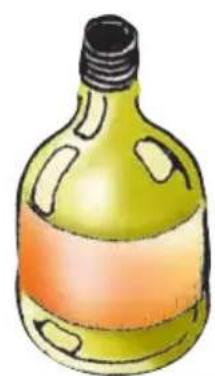
natural_image
Illustration of a light green glass bottle with a black cap and orange band (no text or symbols)vinegar (liquid)
+
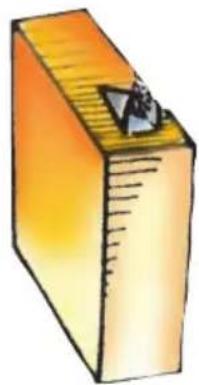
natural_image
Illustration of a rectangular block with a small triangular object on top (no text or symbols)baking soda (solid)

natural_image
Illustration of a glass beaker containing blue liquid with bubbles, no text or symbols presentcarbon dioxide (gas)
Observe how the pieces on the bottom are surrounded by bubbles and brought up to the surface. They sink again immediately after the bubbles burst.

natural_image
Illustration of a glass filled with blue liquid and ice cubes (no text or symbols)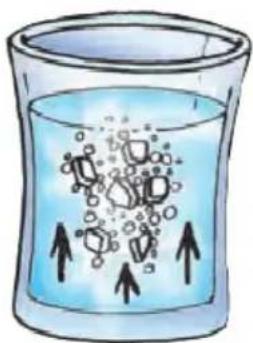
natural_image
Illustration of a glass beaker containing a liquid with bubbles and arrows indicating flow or movement (no text or symbols)
How to do it:
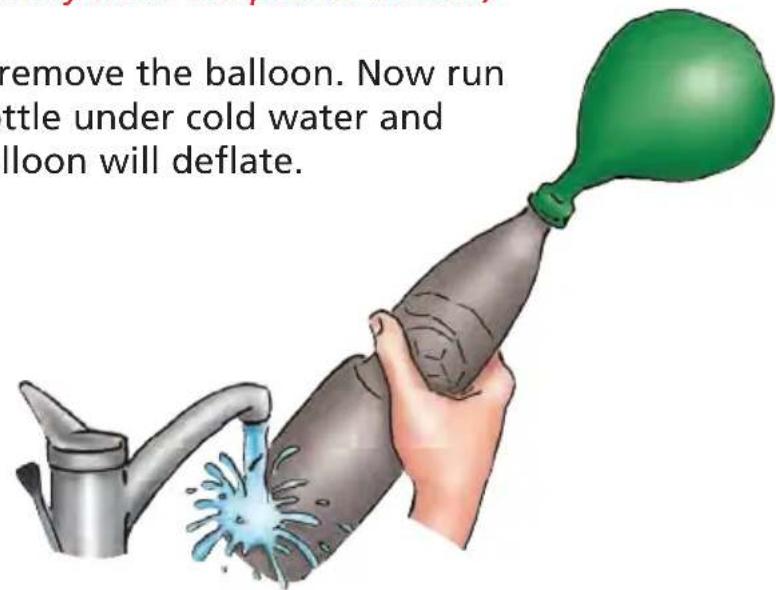
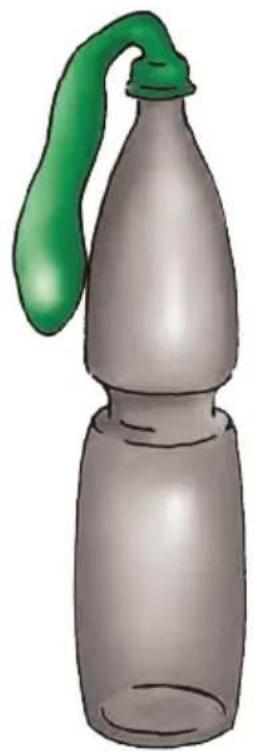
1) Put a rubber balloon over the top of an empty bottle.
2) Heat the plastic bottle by running warm water over it. The balloon will begin to blow up. (Note: Don't use hot water or you may melt the plastic bottle.)
3) Don't remove the balloon. Now run the bottle under cold water and the balloon will deflate.
natural_image
Illustration of a green balloon attached to a gray plastic bottle (no text or symbols)
Why?
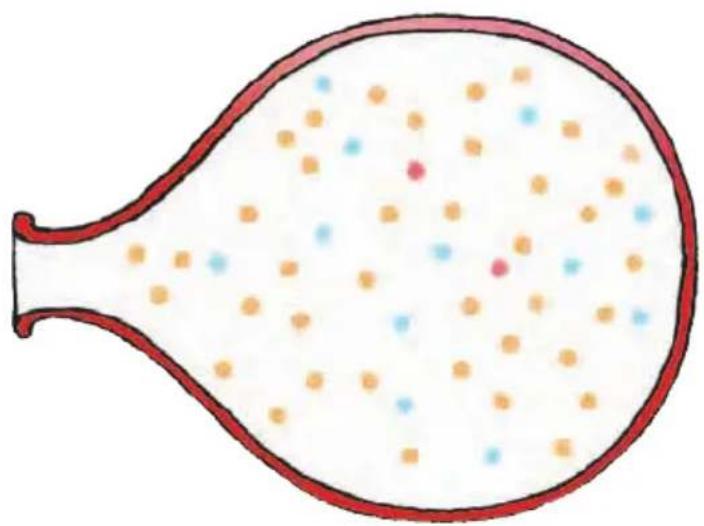
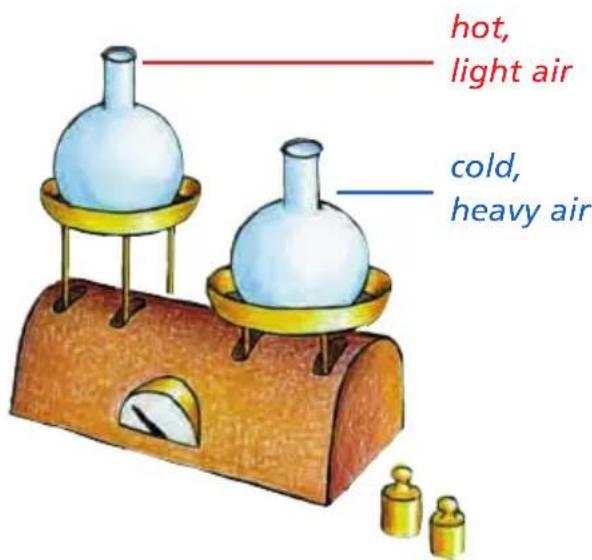
Air expands with heat and contracts when cooled.
The air particles move around a lot when it's hot and occupy a lot of space (the volume of air, or any gas, is greater when heated).
natural_image
Illustration of a teardrop-shaped container filled with scattered colored dots (no text or symbols)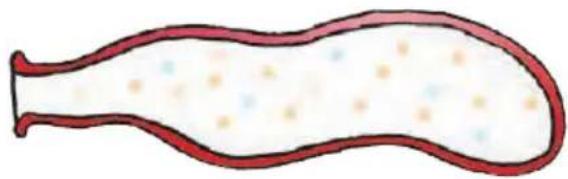
natural_image
Illustration of a stylized, elongated biological structure with internal speckles (no text or symbols)The air particles move more slowly when it's cold and take up less space (the volume of gas is less when cooler).
natural_image
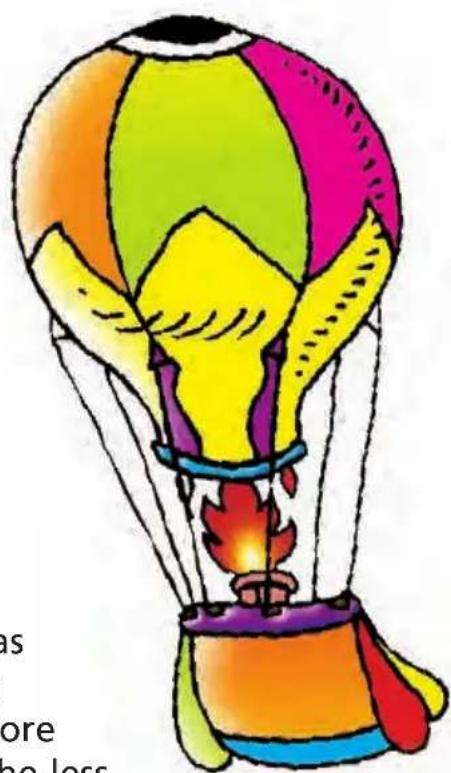
Colorful hot air balloon illustration with flame inside, no text or symbols presentA hot air balloon rises when the molecules of gas inside the balloon are heated. This increases the volume of the gas inside the balloon and therefore lowers the overall density of the air inside. So, the less dense air inside "floats" on the more dense air outside and the balloon rises.
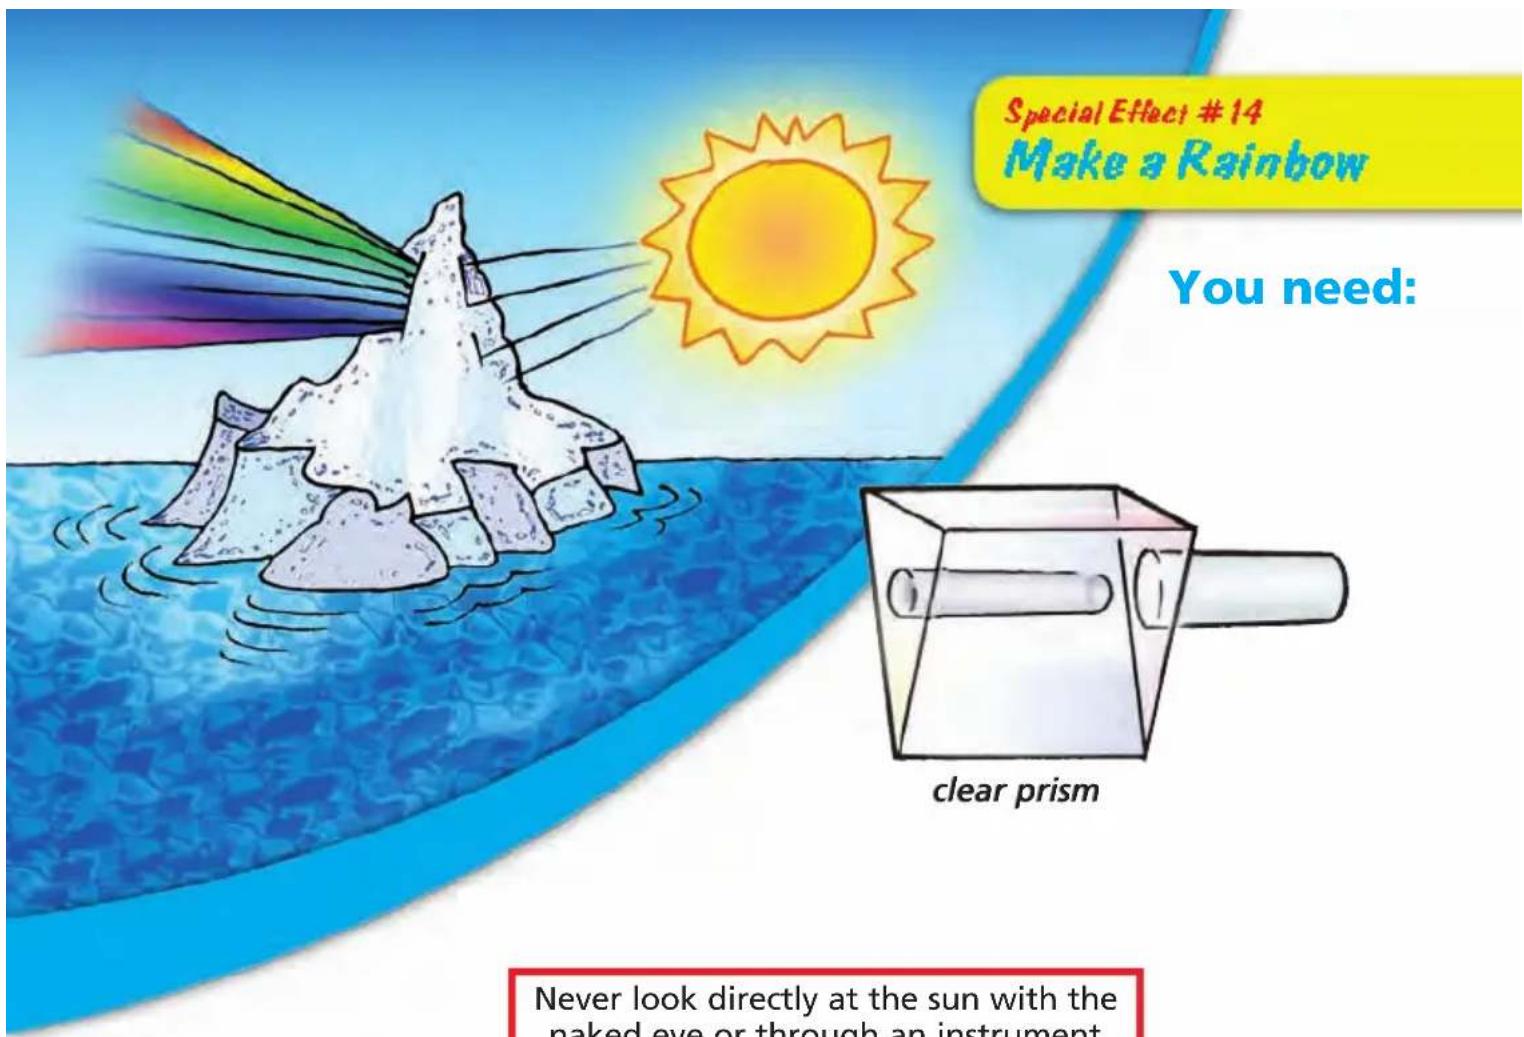
How to do it:
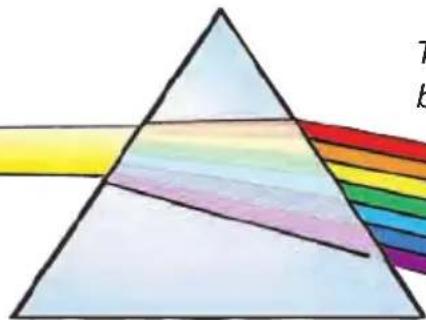
1) Hold the clear prism so that the rays of the sun catch one of the faces at an angle (see the diagram).
2) Look on the floor or a wall exposed to the sun, about half a yard away. You should be able to see the seven colors of the rainbow. (You may need to tilt the prism a bit to get the sun's rays to hit it properly.)
natural_image
Illustration of a hand holding a transparent cube with a pointed tip, emitting light from a rainbow-colored surface (no text or symbols)This experiment was first carried out by English physicist and mathematician Isaac Newton (1642-1727) more than 300 years ago.
Do the experiment so the colors are formed in a shady area.
Why?
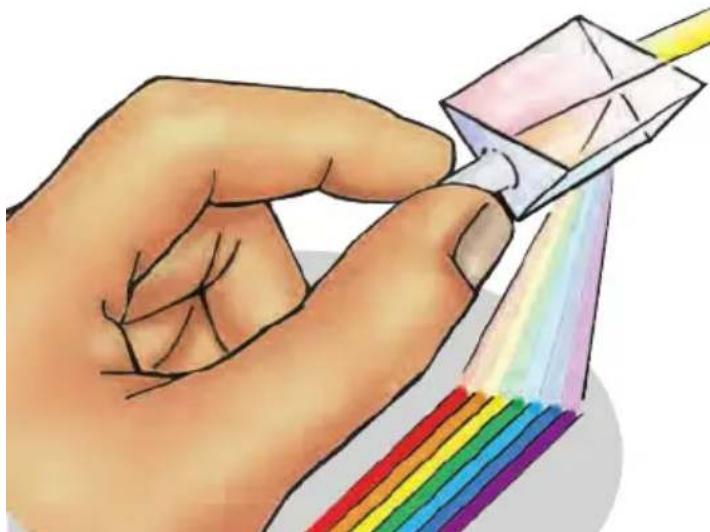
The seven colors of the rainbow make up white light.
White light is really a collection of all colors. Light, and therefore colors, are made up of a flow of tiny particles (photons) that move in waves. When they meet the face of the prism they are all at the same inclination, but as they pass through the prism, the colors are bent (refracted) at different angles because each has a different wavelength.
white light
These colors are bent less.
natural_image
Diagram of a triangular prism with a rainbow-colored horizontal band, no text or symbols presentThese colors are bent more.
Red, which has less energy, bends the least. Violet, which has more energy, bends at the greatest angle compared to the beam of original white light. All the others undergo angle deviations somewhere between red and violet.

Breaking down white light into the colors of the rainbow means making the spectrum of white light. The colors which humans can see are called the visible spectrum. There are seven colors in the visible spectrum: red, orange, yellow, green, blue, indigo, and violet.
natural_image
Illustration of a cartoon jellyfish with rainbow-colored tentacles (no text or symbols)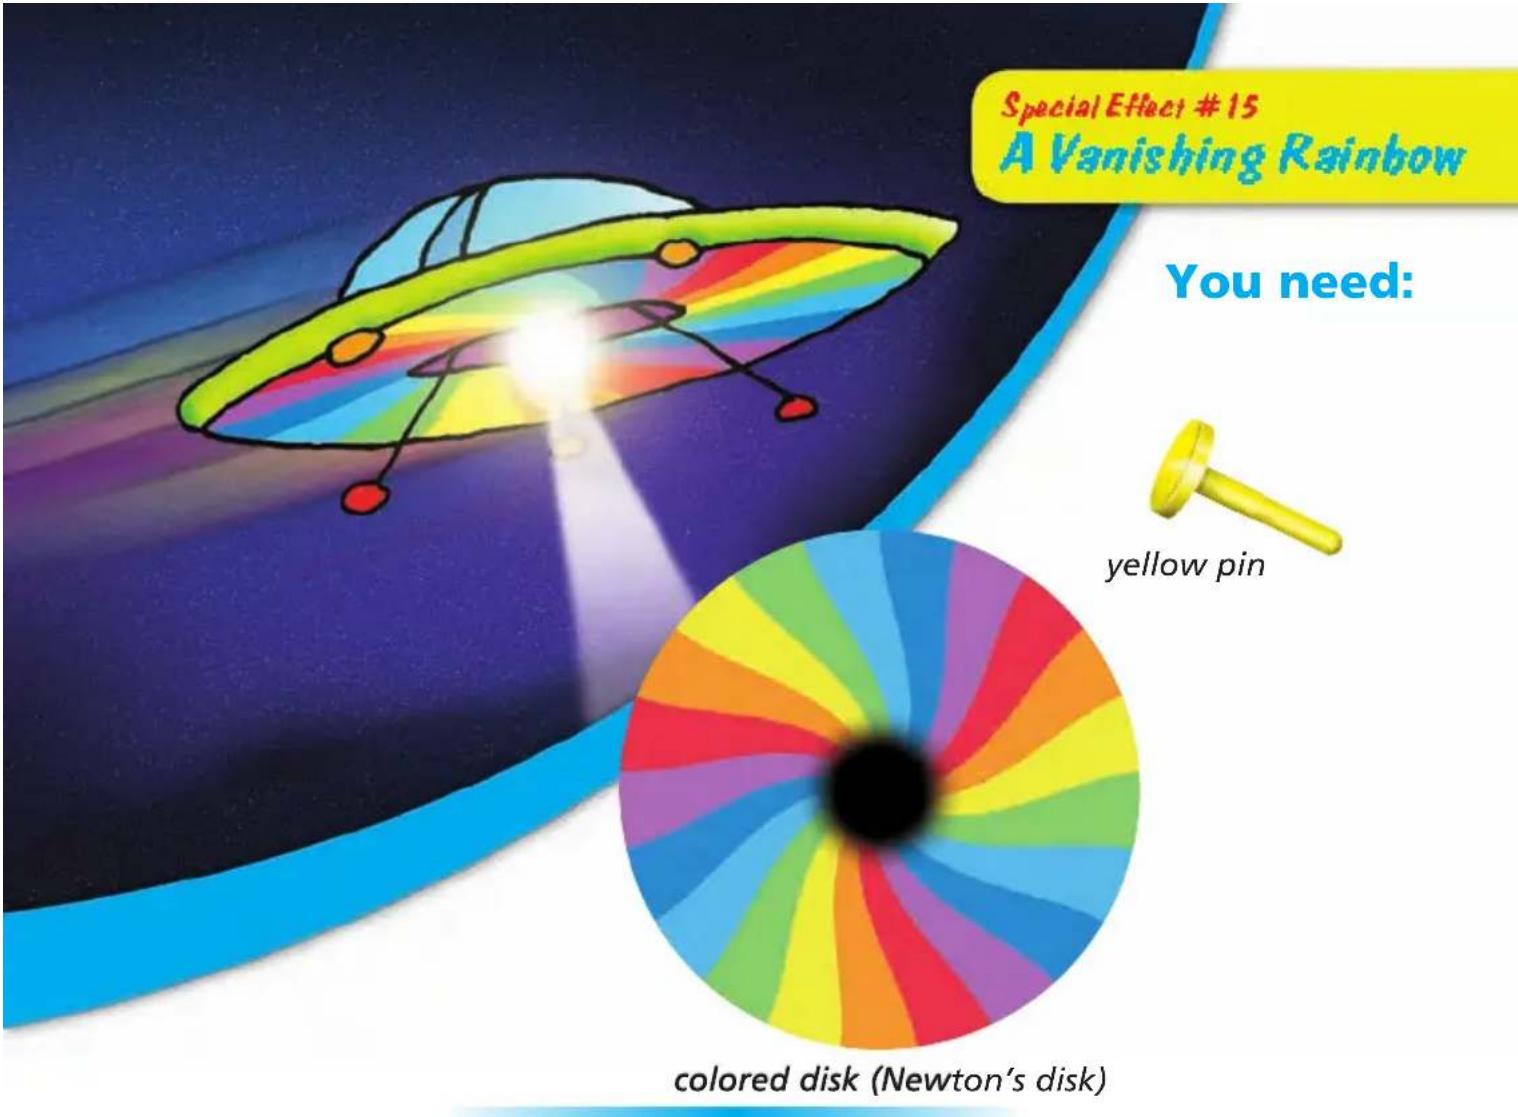
How to do it:
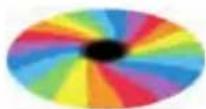
1) Put the yellow pin into the disk with all the colors of the rainbow and try spinning it quickly.
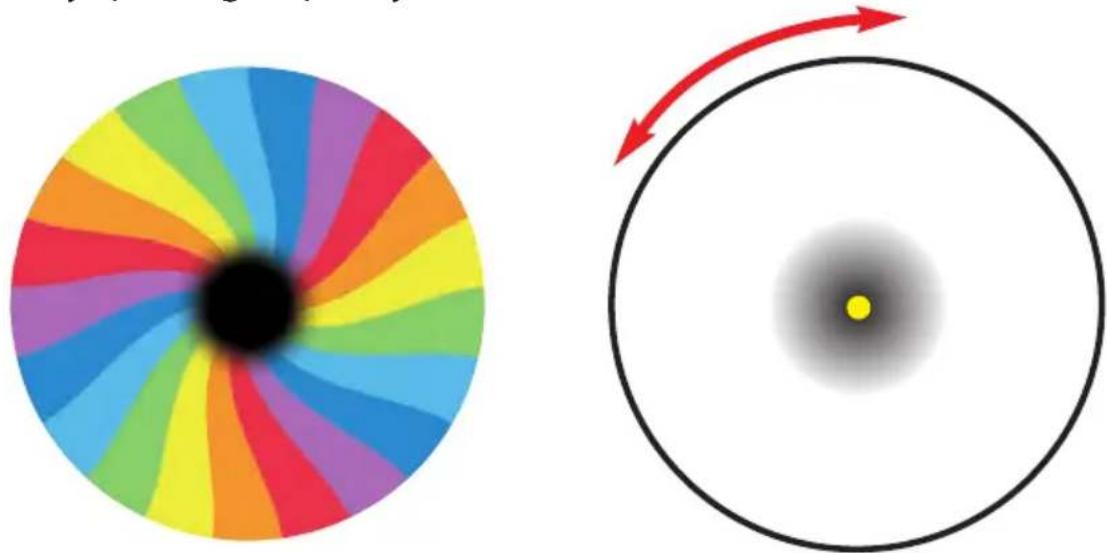
natural_image
Two circular diagrams: one showing a colorful spiral pattern on the left, and another showing a black circle with a yellow center and red arrows pointing outward (no text or symbols)As the disk rotates quickly, the colors disappear and seem to go white.
Note: If the speed of rotation is not fast enough, the disk could appear to be silvery gray.
Why?
White is made up of all seven colors of the rainbow.
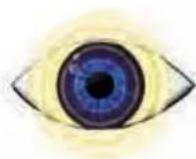
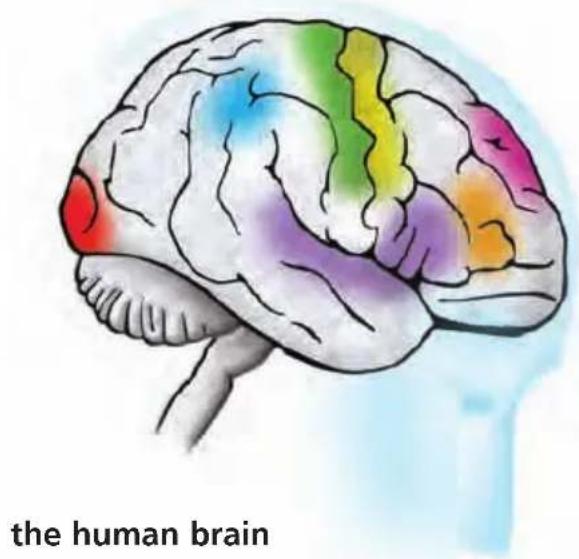
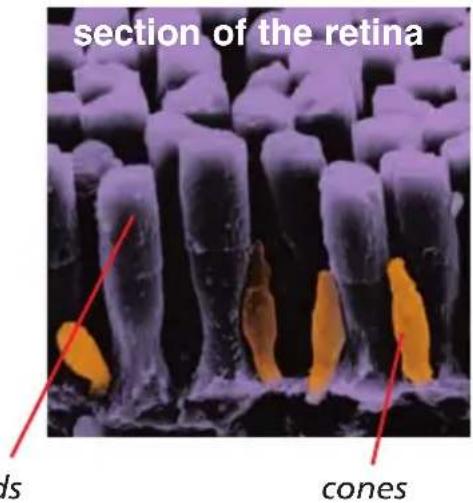
When the disk is still, the seven colors of the rainbow arrive at the eye and they are transmitted by cells (cones) from the retina to the brain.
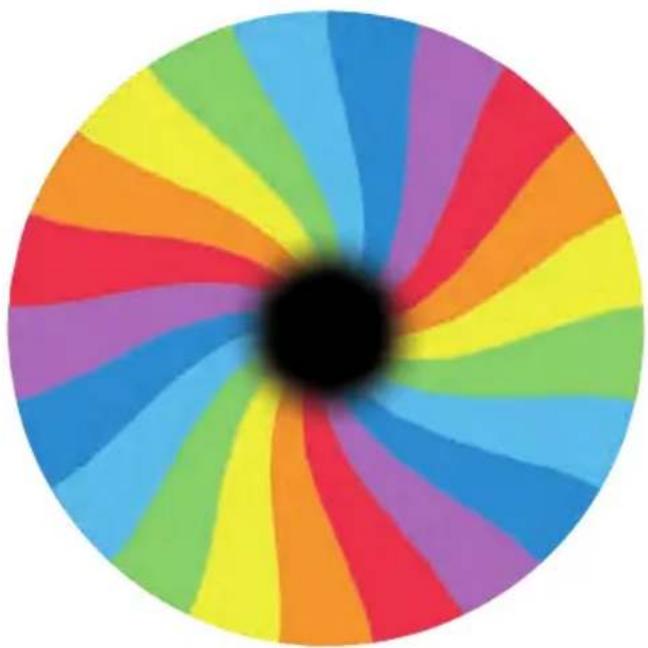
natural_image
Colorful circular abstract pattern with radial gradient from blue to red, no text or symbols present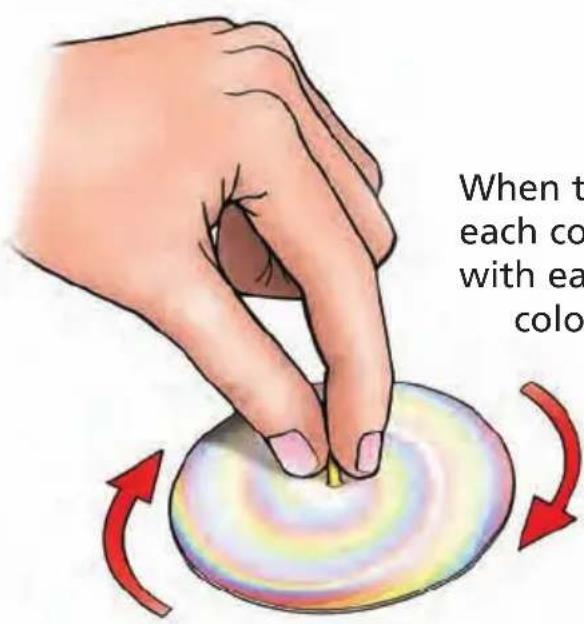
When the disk is spinning, as the image of each color arrives at the eye, they overlap with each other. The brain then blends all the colors together. As you saw in the last experiment, all the colors blended together creates white light. So, you perceive the spinning disk to be white.
Cones recognize colors and transmit them to the brain. Rods detect black and white.
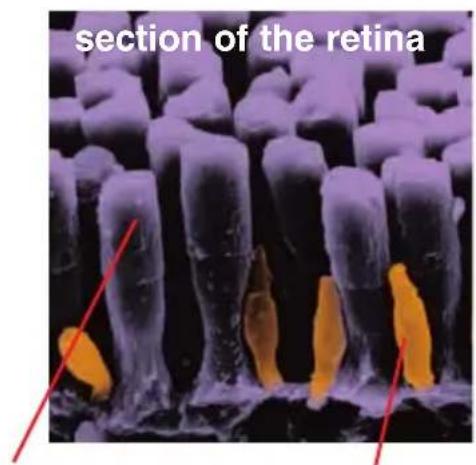
rods
cones
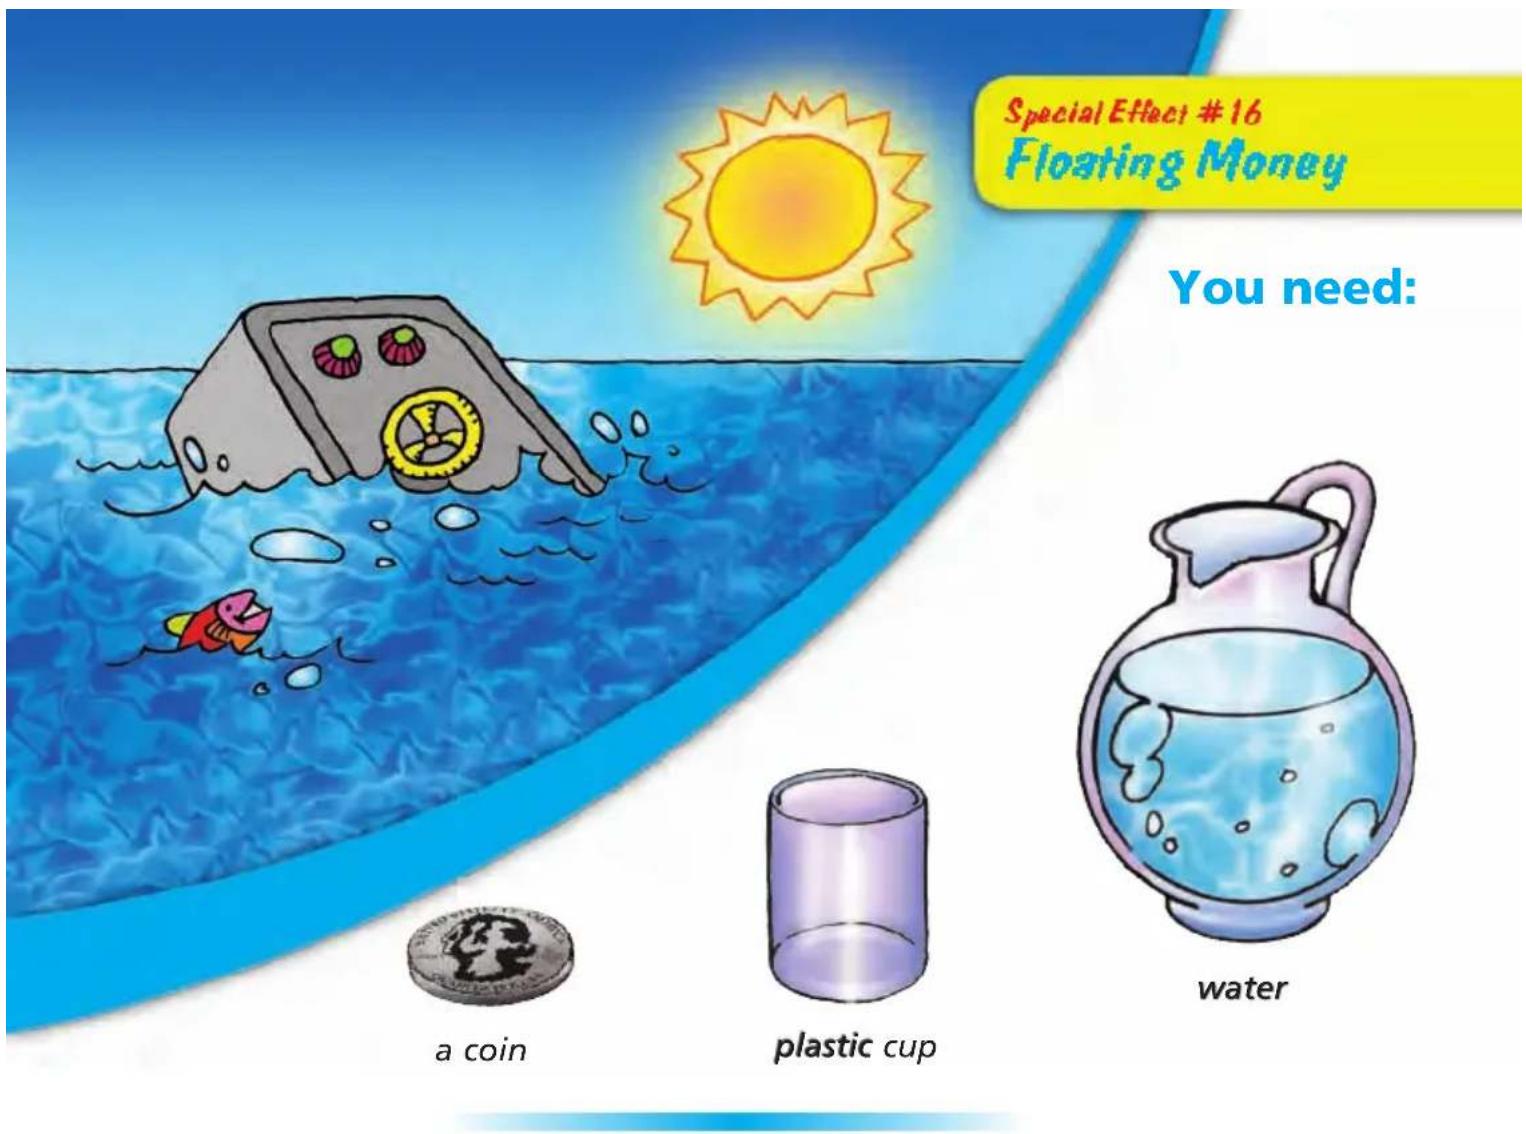
How to do it:
Show friends and family your amazing ability to make coins float.
1) Put a coin on the bottom of the cup and pour water over it. The water level should be about a half inch high.
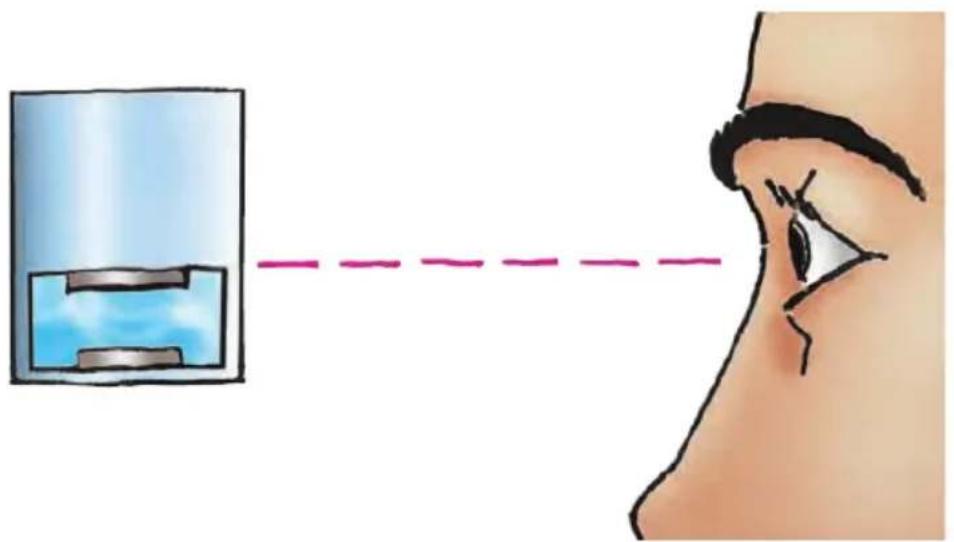
2) Observe: If you line up your eyes directly with (or slightly above) the surface of the water, you'll see the coin floating.
natural_image
Illustration of a hand pointing to the eye and a small container with liquid, showing no text or symbols.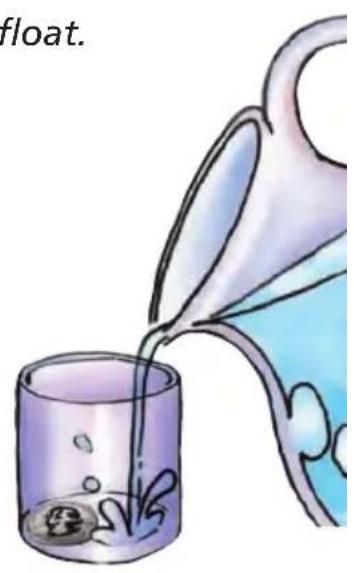
natural_image
Illustration of a person pouring liquid from a glass with coins into a container (no text or symbols)
Why?
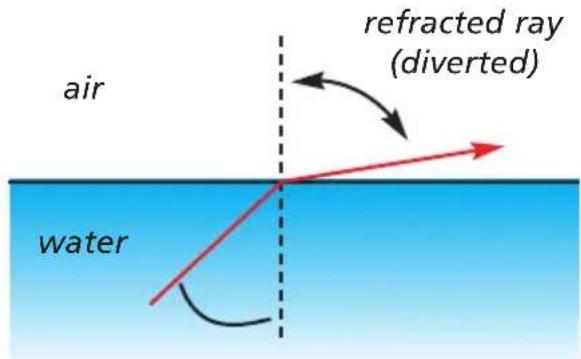
The image of the object on the surface of the water is due to the phenomena of light refraction.
REFRACTION is the change in direction of a light ray when it passes from one medium (e.g. water) to another (e.g. air).
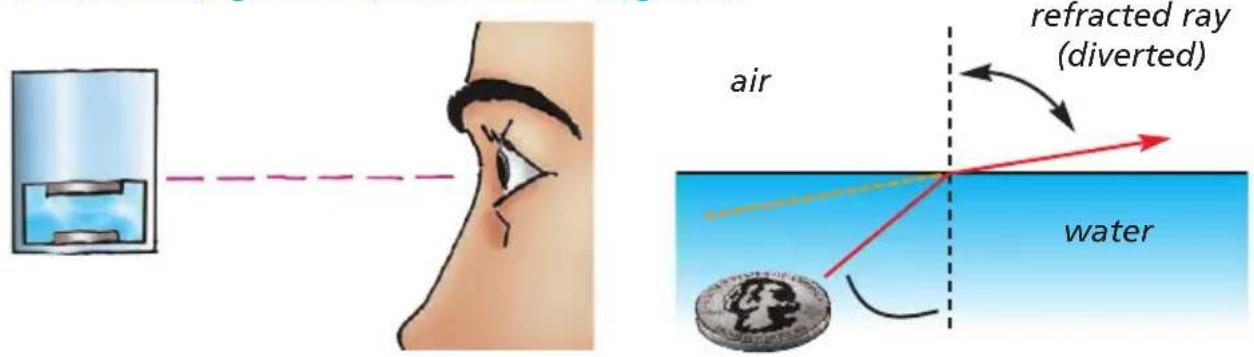
In this experiment, light rays go from the object, which is on the bottom to the surface of the water, and then bend (are refracted) as they leave the water and come toward your eye. This bending of the light makes it look like the money is floating.
Light travels more slowly through water than it does through air. As the light changes speed, it gets refracted (changes direction a little).
Try this:
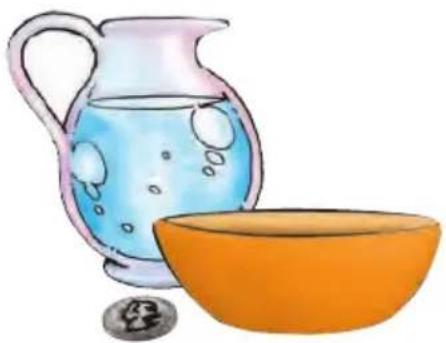
Get a bowl, a coin, and some water. Put the bowl on a table and then place the coin inside the bowl. Back up until the coin disappears from view (it's hidden by the bowl's rim). Stay standing in the same place and ask a friend to pour water into the bowl. Suddenly, you'll be able to see the coin again! The light from the coin is bent (refracted) by the water.
natural_image
Illustration of a glass pitcher with blue liquid and an orange bowl beside it (no text or symbols)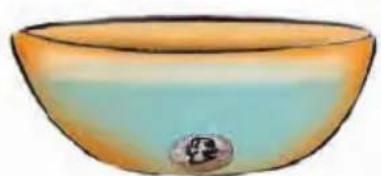
natural_image
Illustration of a bowl with a small circular object on the side (no text or symbols)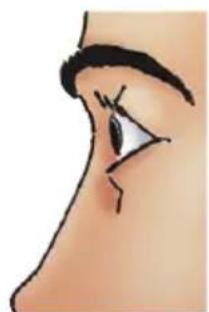
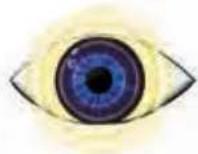
natural_image
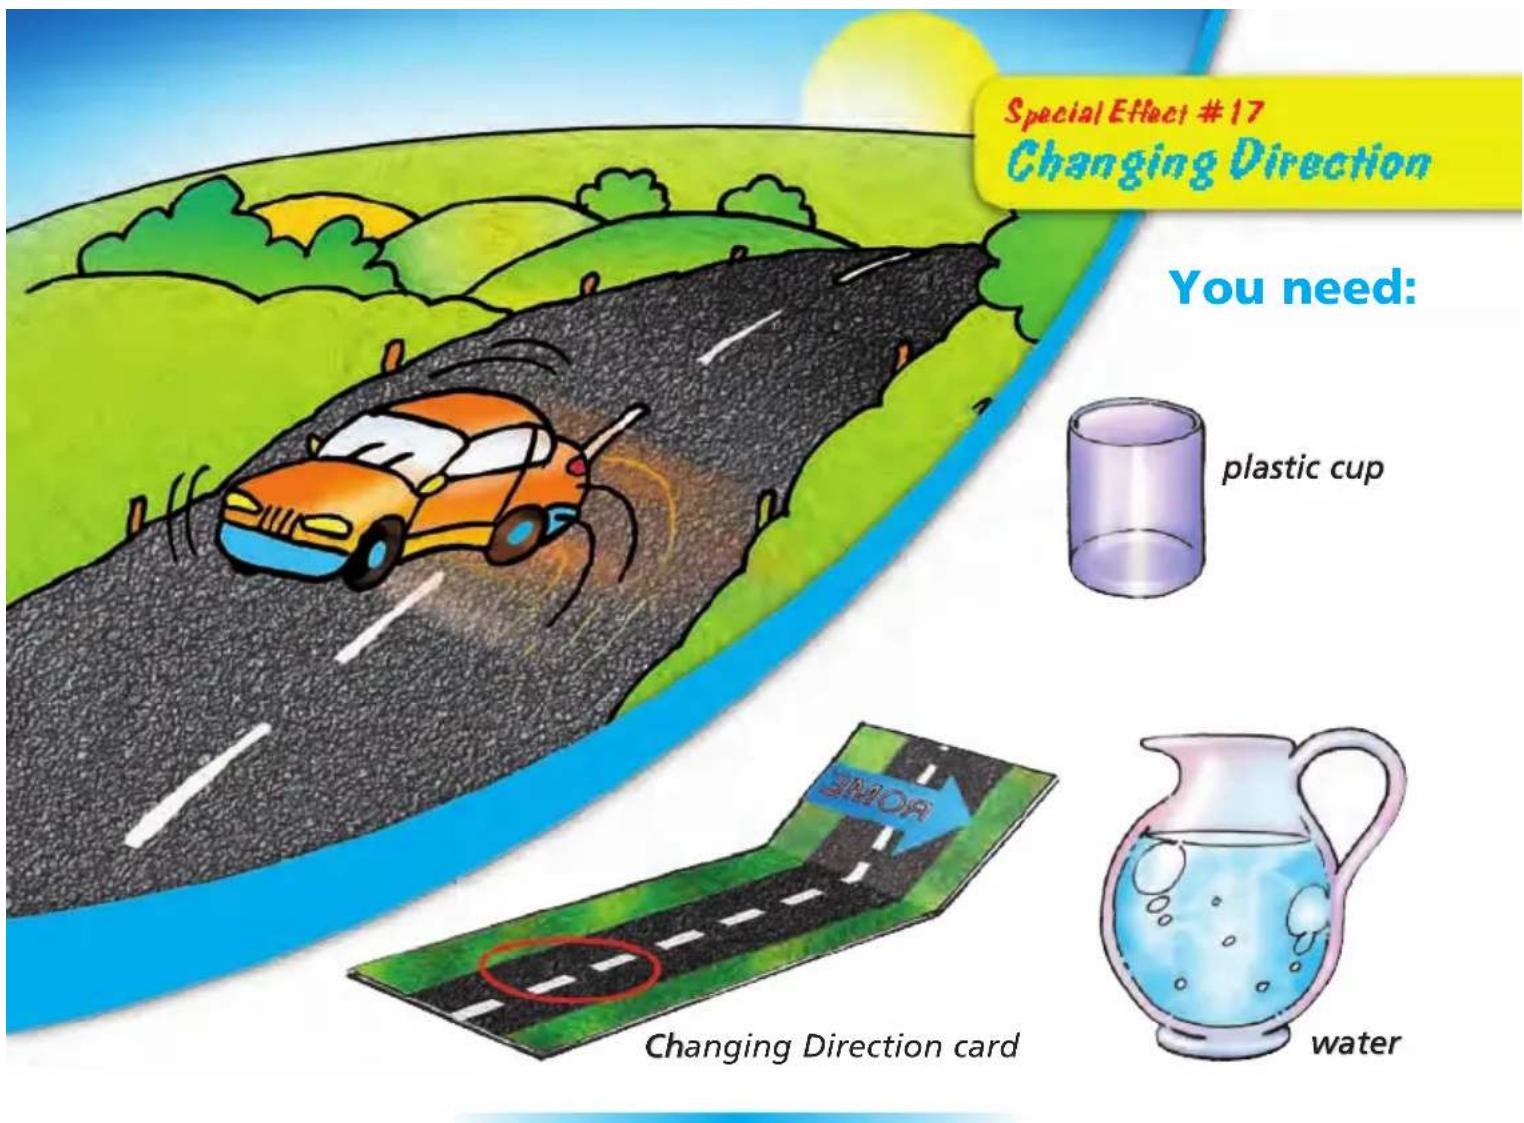
Close-up illustration of a human eye with eyeliner and eyebrow (no text or symbols)On a very hot day, it sometimes appears that there is water ahead on the road even though the road is completely dry. Light from the sky is refracted by the hot air near the road. The 'water' you see is actually refracted sunlight.
How to do it:
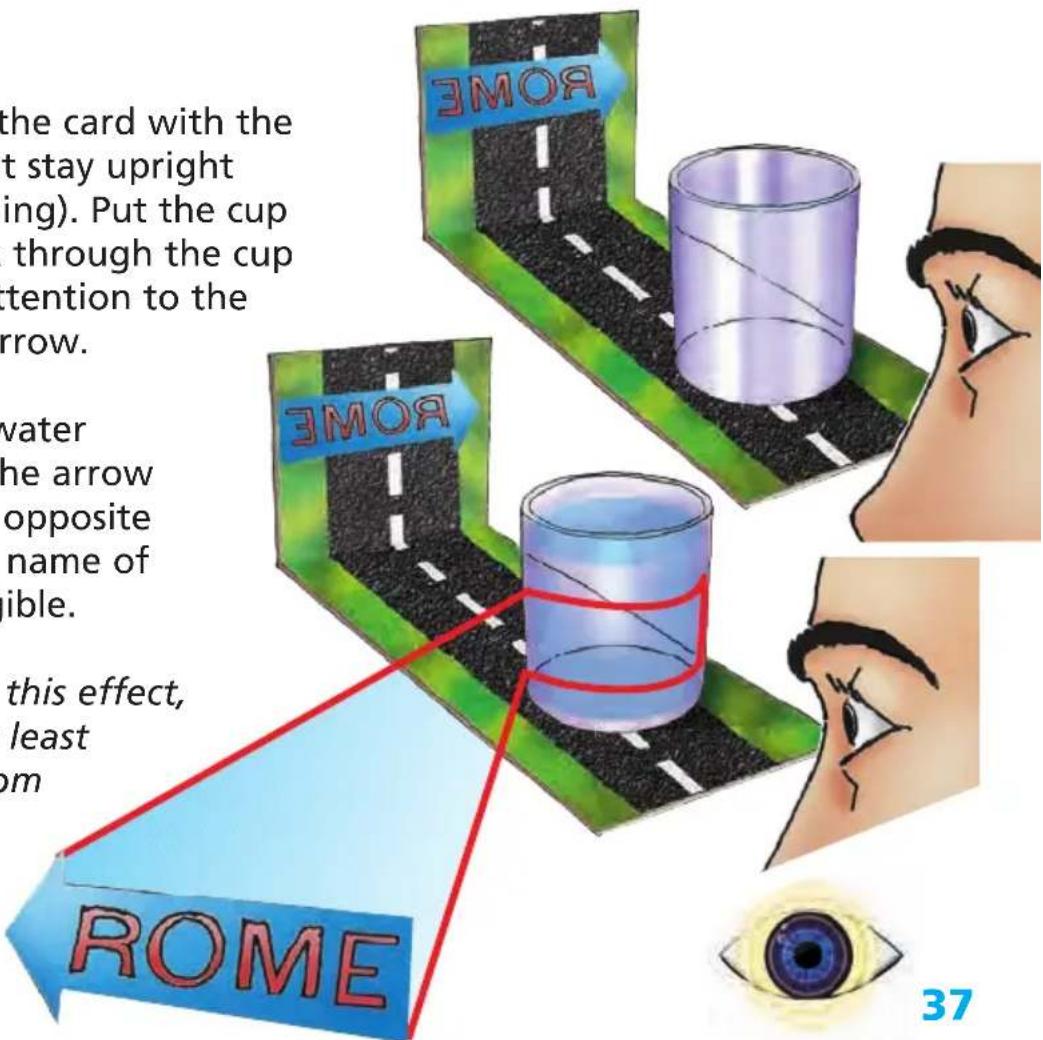
1) Bend the part of the card with the arrow and make it stay upright (rest it on something). Put the cup in the circle. Look through the cup and pay special attention to the direction of the arrow.
2) Fill the cup with water and look again. The arrow is pointing in the opposite direction and the name of the city is now legible.
Note: To best see this effect, keep your face at least one foot away from the glass.
Why?
The glass of water is behaving just like a lens because it is bending light. The water lens inverts the image.
The empty cup gives you a realistic picture, like looking through glass.
When you add water, the light rays coming from the word "ROME" get refracted as they travel through the water to your eyes.
REFRACTION is the change in direction of a light ray when it passes from one medium (e.g. water) to another (e.g. air). In this situation the image is reversed because the glass with water works like a lens.
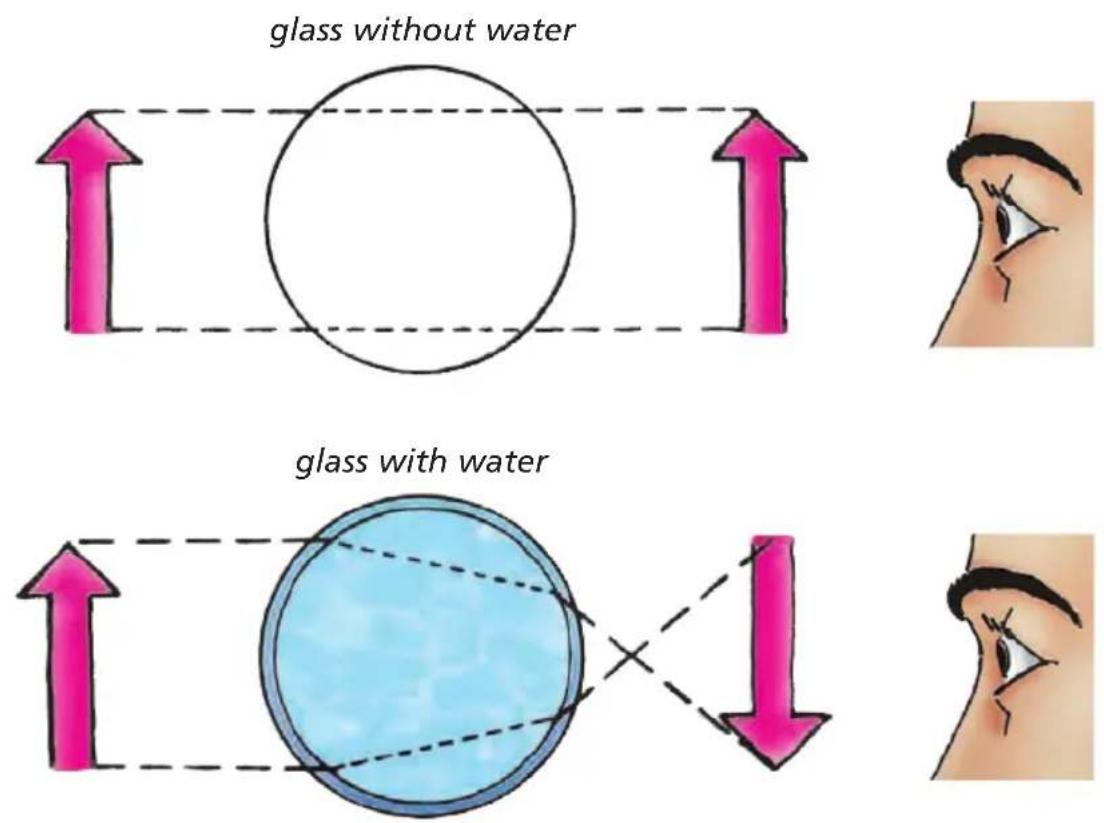
The light rays bend as they enter the water cup and bend again when they leave the water. The light ray at the top ends up on the bottom and the light ray that started at the bottom ends up on top; so, the whole image is inverted!

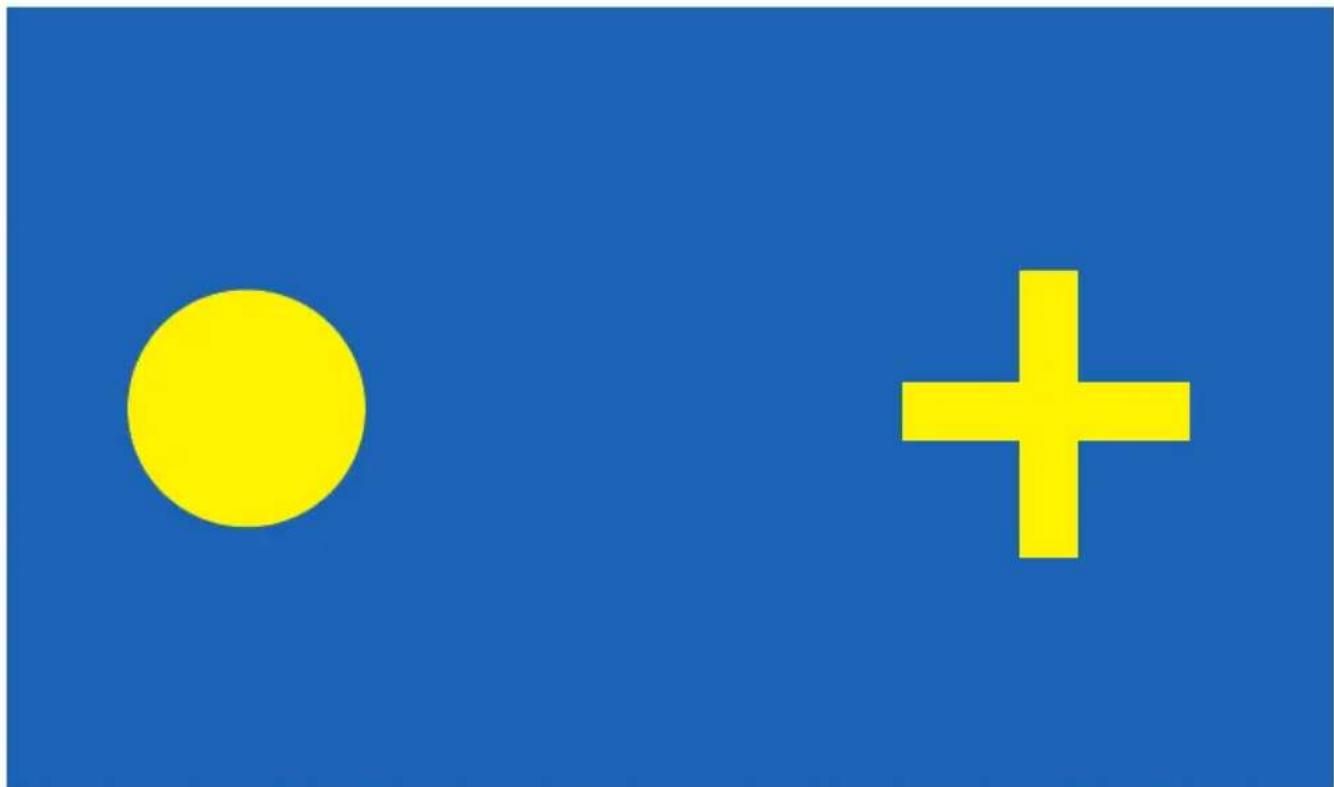
3) Bring the picture very slowly up to your left eye, making sure you are still focusing on the plus sign, and you'll find that the yellow dot disappears completely from sight at a certain point.
natural_image
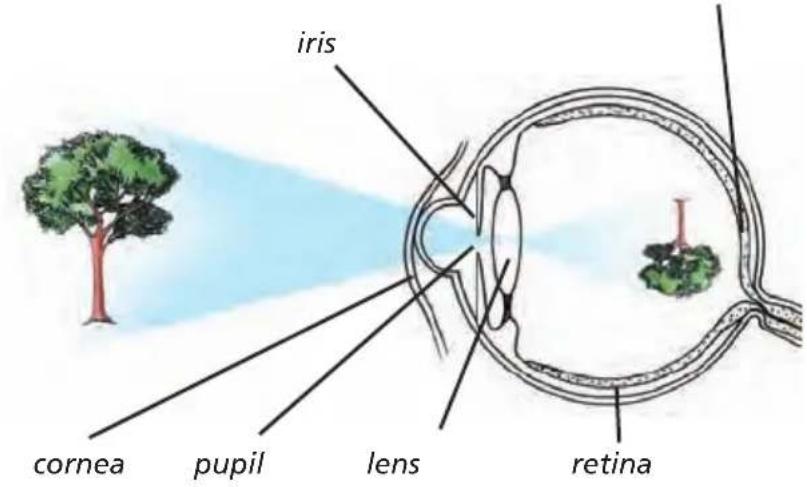
Two geometric shapes: a yellow circle and a yellow plus sign, set against a solid blue background (no text or symbols)An image that falls in the blind spot of the eye is not transmitted to the brain.
Diagram of the eye
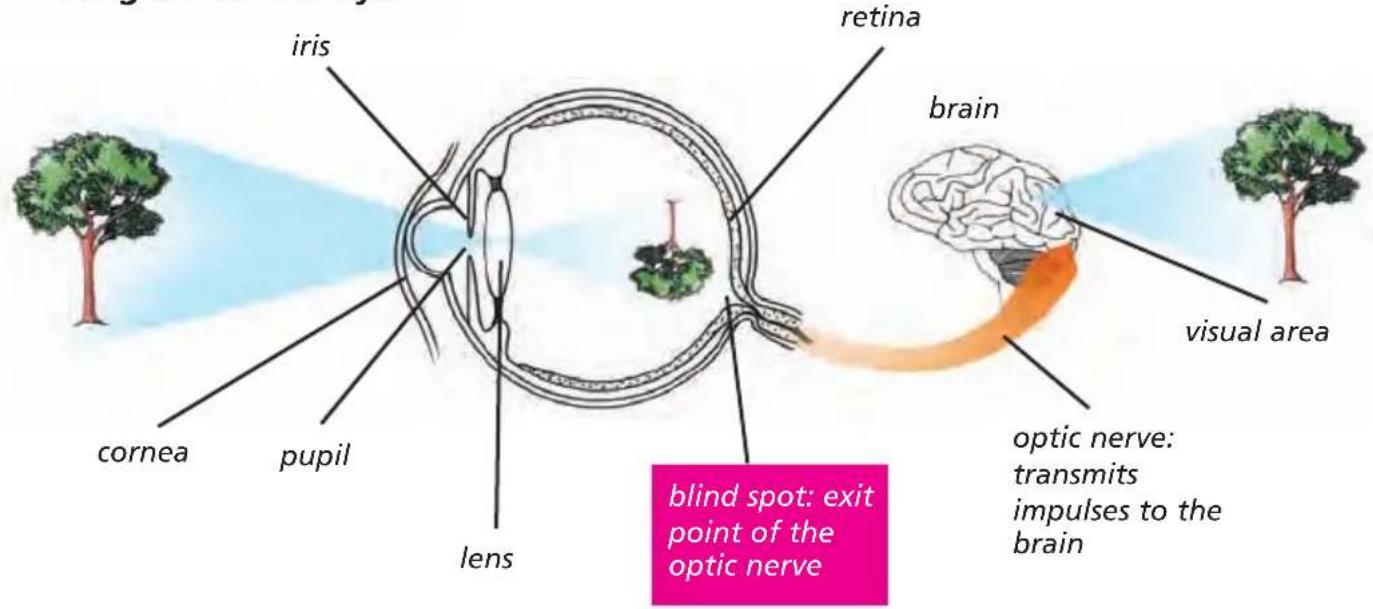
The blind spot of the retina is where the optic nerve exits the eye and there are no visual cells, so the brain cannot see an image that falls in this area. In this experiment, at the moment when the yellow dot disappears, the light reflected from the yellow dot is falling on the blind spot on the retina.
natural_image
Blue background with a yellow plus sign in the center (no text or symbols)You don't see an "empty" spot because the brain compensates by filling in the area with blue (the surrounding color) where the yellow dot should have appeared. Your brain is always "filling in" the blind spot with surrounding images so you never even notice it!
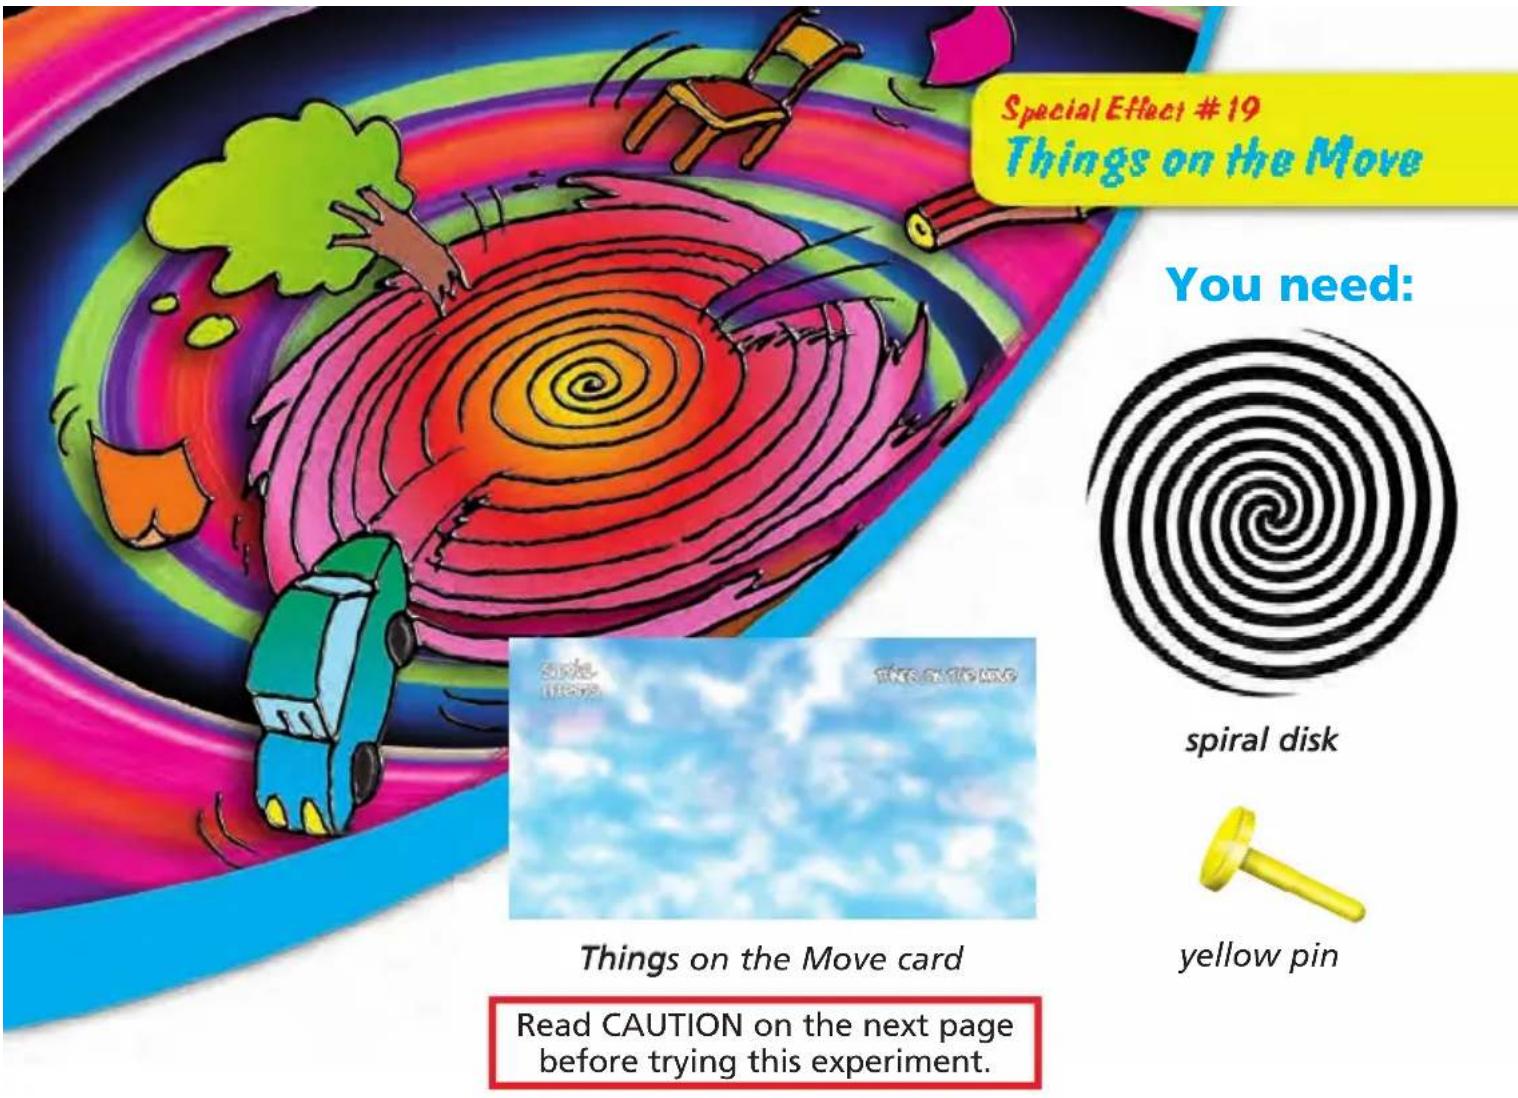
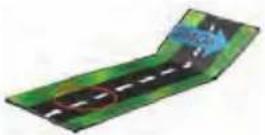
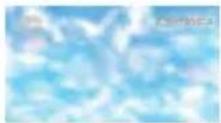
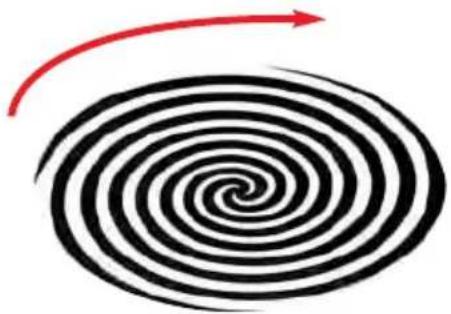
How to do it:
Insert the pin in the center of the disk.
1) On a very smooth surface, spin the disk in one direction and observe the movement for about 15 seconds.
2) Quickly move your gaze to the card with the clouds: everything is moving!
3) Now, spin the disk in the opposite direction, observe for 15 seconds, and look at the image again. Notice it's now moving in the opposite direction.
natural_image
Black and white spiral vortex with a red curved arrow indicating rotational motion (no text or symbols)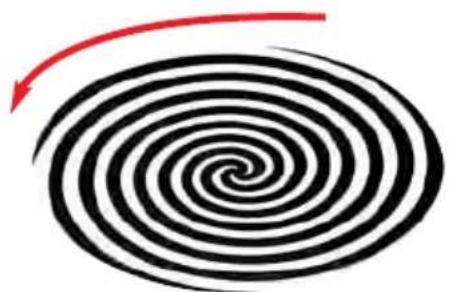
natural_image
Abstract spiral pattern with black and red curved arrows, no text or symbols presentWhy?
The image of the moving spiral stays in the brain which visualizes movement for a few moments even after the motion has stopped.
This illusion is called motion aftereffect. It is also called the waterfall effect because when you gaze into a waterfall for a while and then look at the surrounding landscape, the landscape appears to move upward.
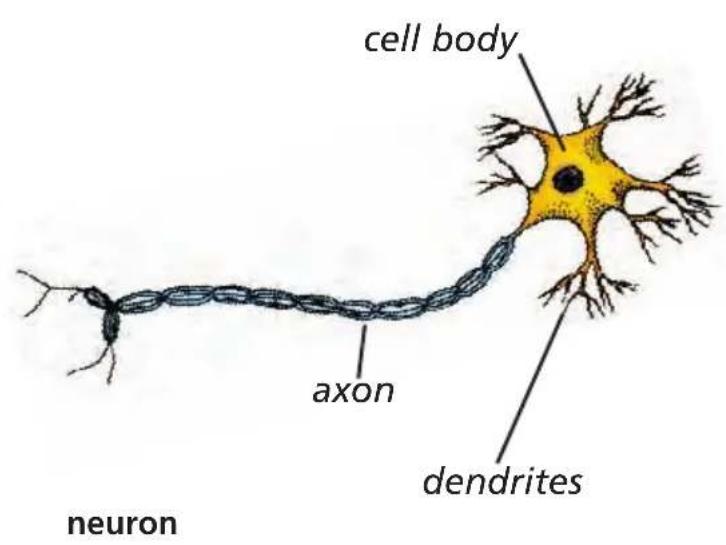
Neurons (cells in your brain) get used to seeing the spinning disk and adapt to the motion so you can concentrate on other things. For example, when you put your clothes on in the morning, you notice them touching your skin; but when you start concentrating on other things, you forget abut your clothing. Your brain's neurons adapt to the clothing and don't respond (or barely respond) to the sensation of your clothing touching your skin.
Your neurons similarly adapt to the spinning disk image by barely responding to the motion of the disk. But this puts the brain's sense of the motion of surrounding things out of balance with the way it perceives the disk motion. The brain compensates by perceiving the stationary surrounding images (like the clouds on the paper), as moving the other way.
natural_image
Illustration of a palm tree on a yellow sun with a blue water island, labeled '42' below (no text or symbols on the main image)Caution: Some people may suffer ill effects from watching this picture as it spins. If this activity makes you feel unwell or produces the illusion of color, stop immediately. If you suffer from epilepsy or migraines, please consult a doctor before doing this activity.
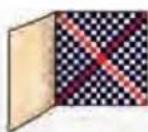
How to do it:
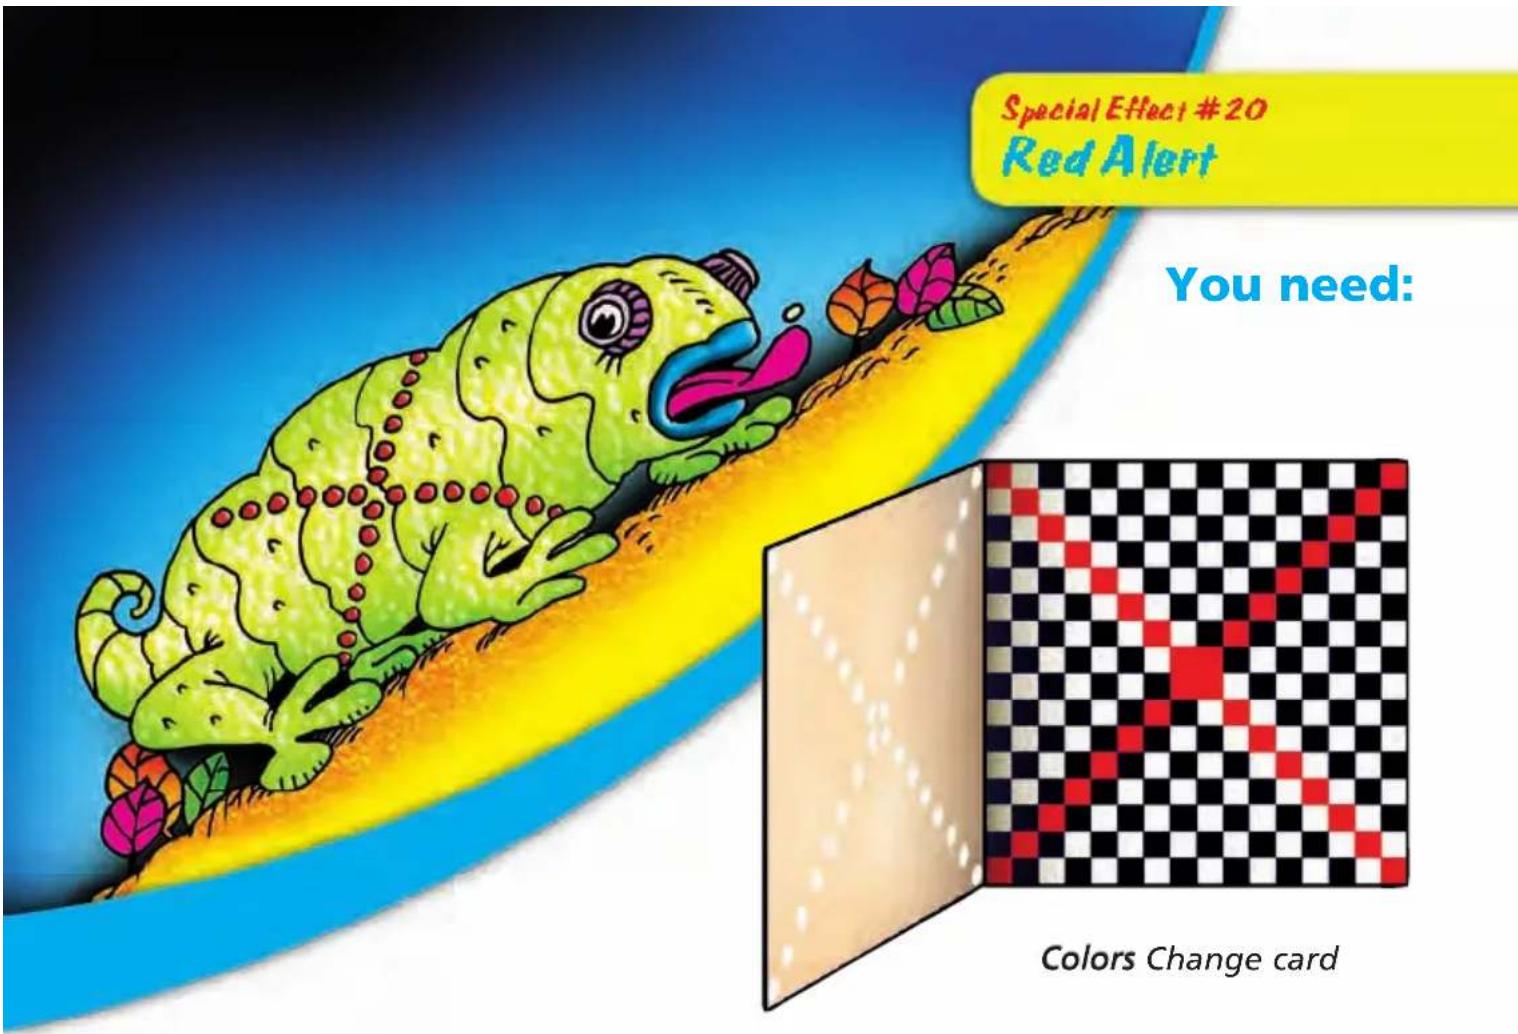
1) With the card open look at the red squares that make up the X. How many shades of red can you see...maybe two? It's an optical illusion!
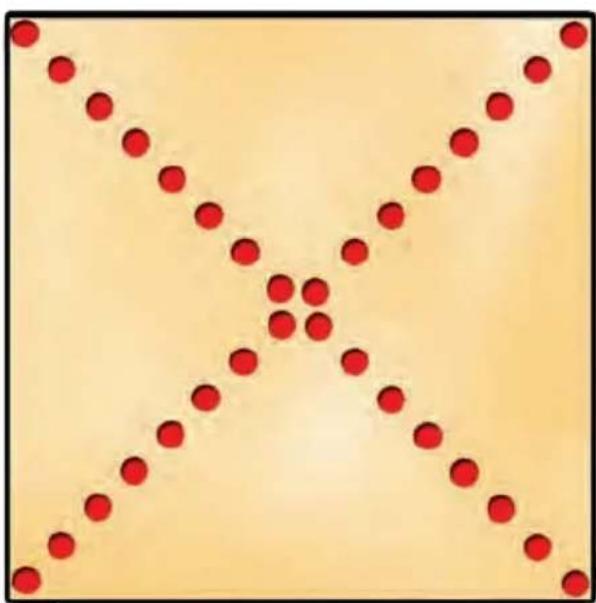
natural_image
Abstract pattern of red dots forming an X shape on a beige background (no text or symbols)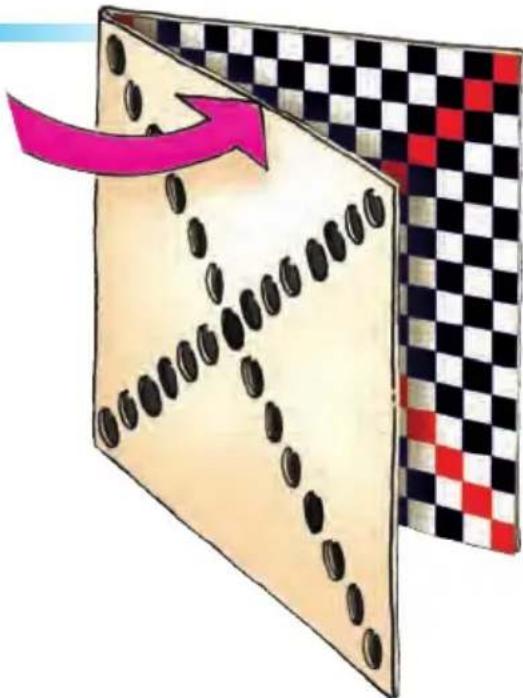
natural_image
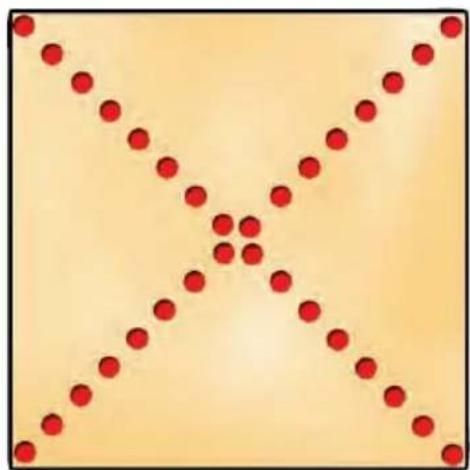
Illustration of a folded card with black and red patterned panels, showing a pink arrow pointing to the card's edge (no text or symbols)2) Close the card and look at the red color through the holes. You will see that in fact there is only a single shade of red.

Why?
It's the same red but it arrives at the brain in a different way.
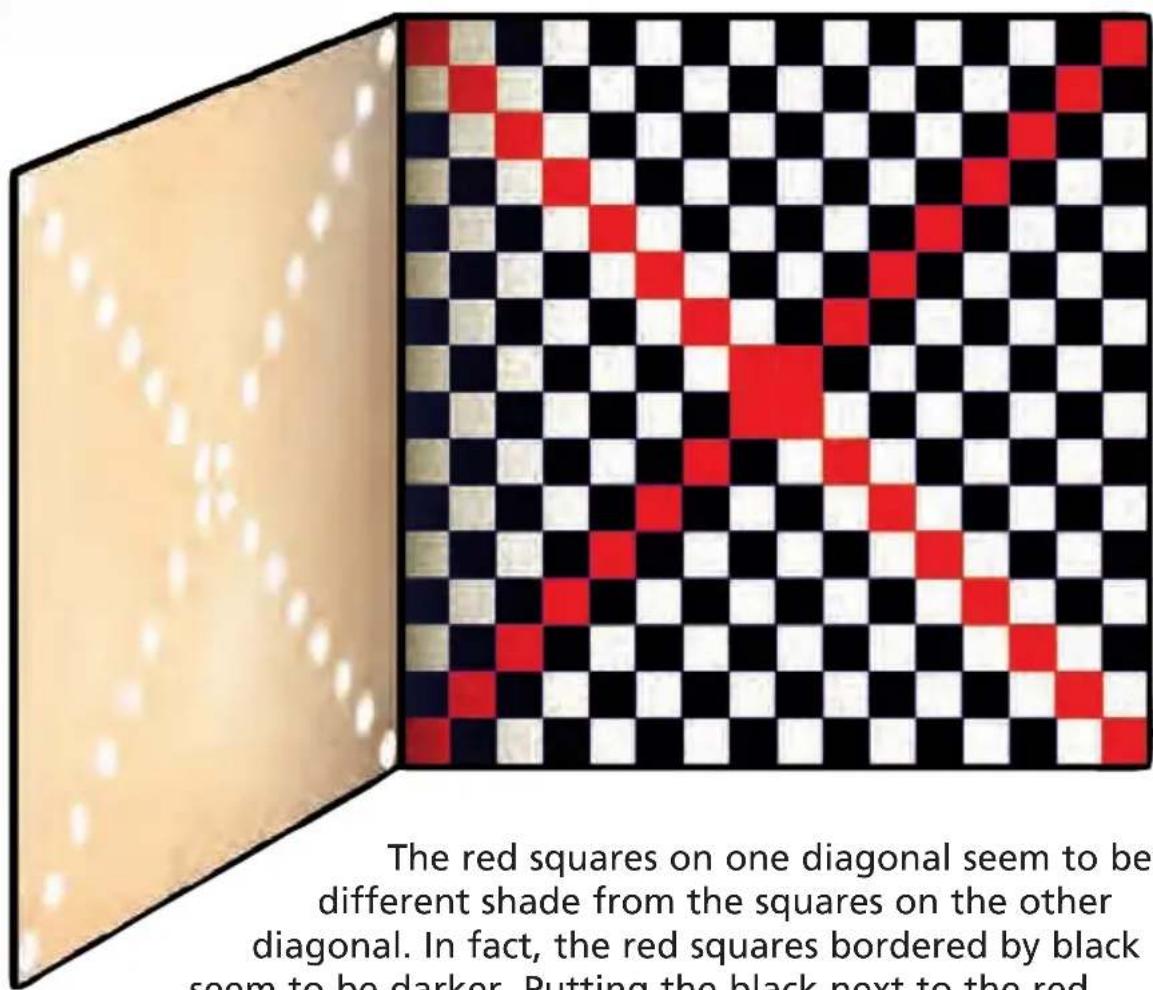
The red squares on one diagonal seem to be a different shade from the squares on the other diagonal. In fact, the red squares bordered by black seem to be darker. Putting the black next to the red confuses the brain.
natural_image
Abstract pattern of red dots forming an X shape on a beige background (no text or symbols)When you block out the surrounding color, you see that there is only one shade of red.
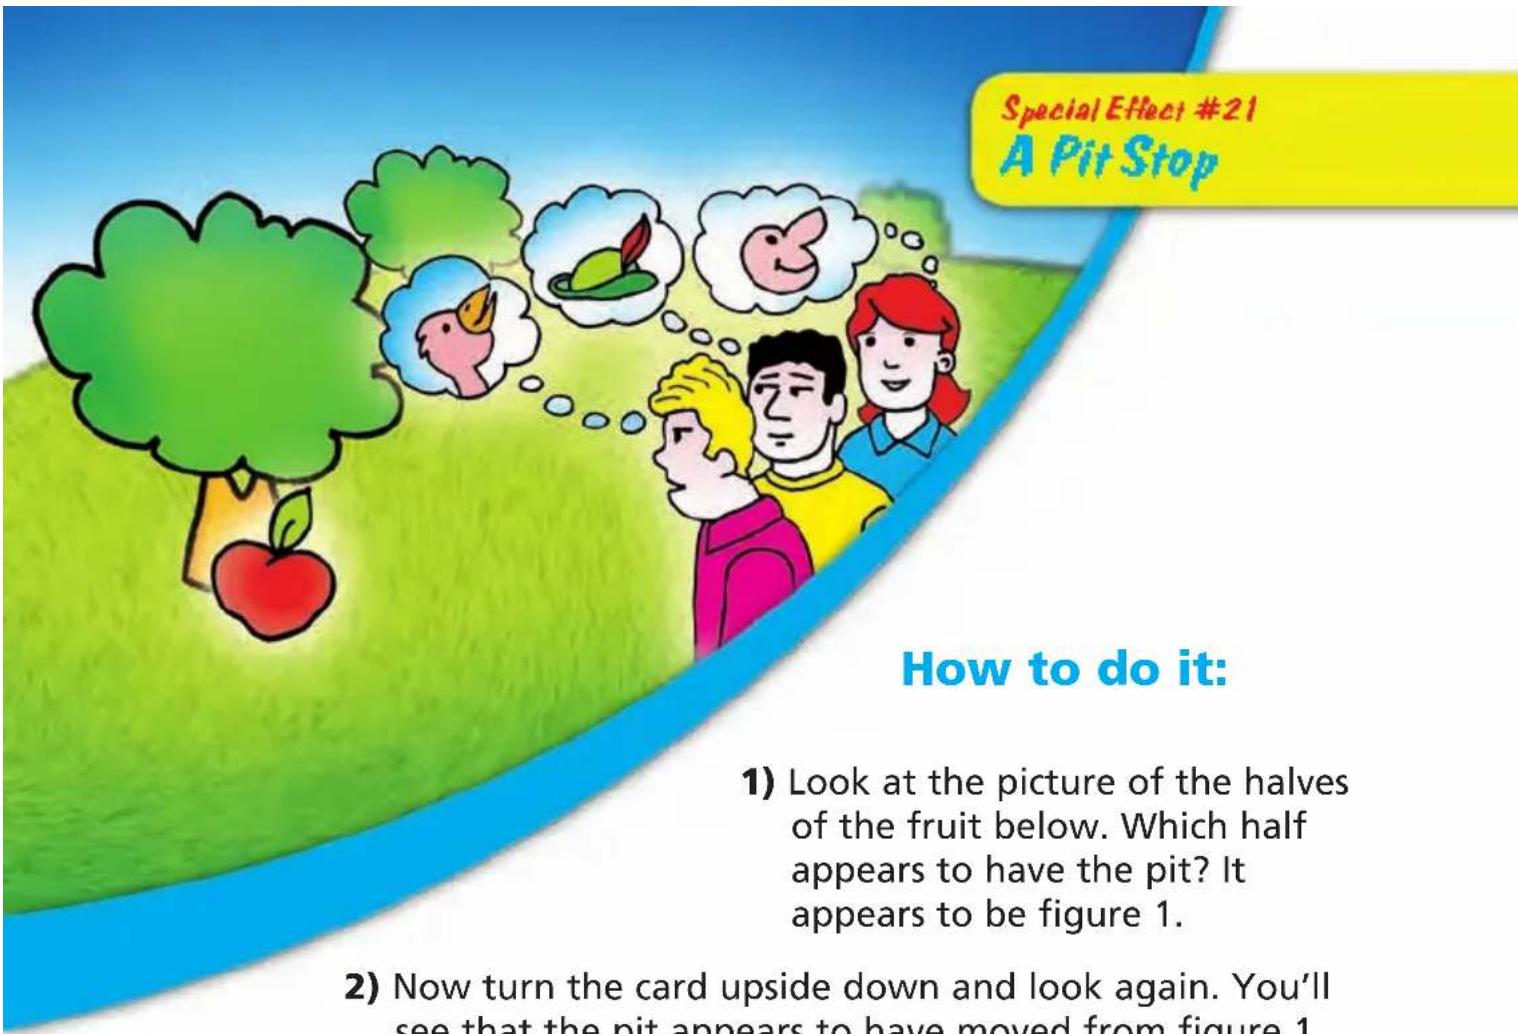
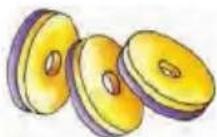
2) Now turn the card upside down and look again. You'll see that the pit appears to have moved from figure 1 to figure 2.
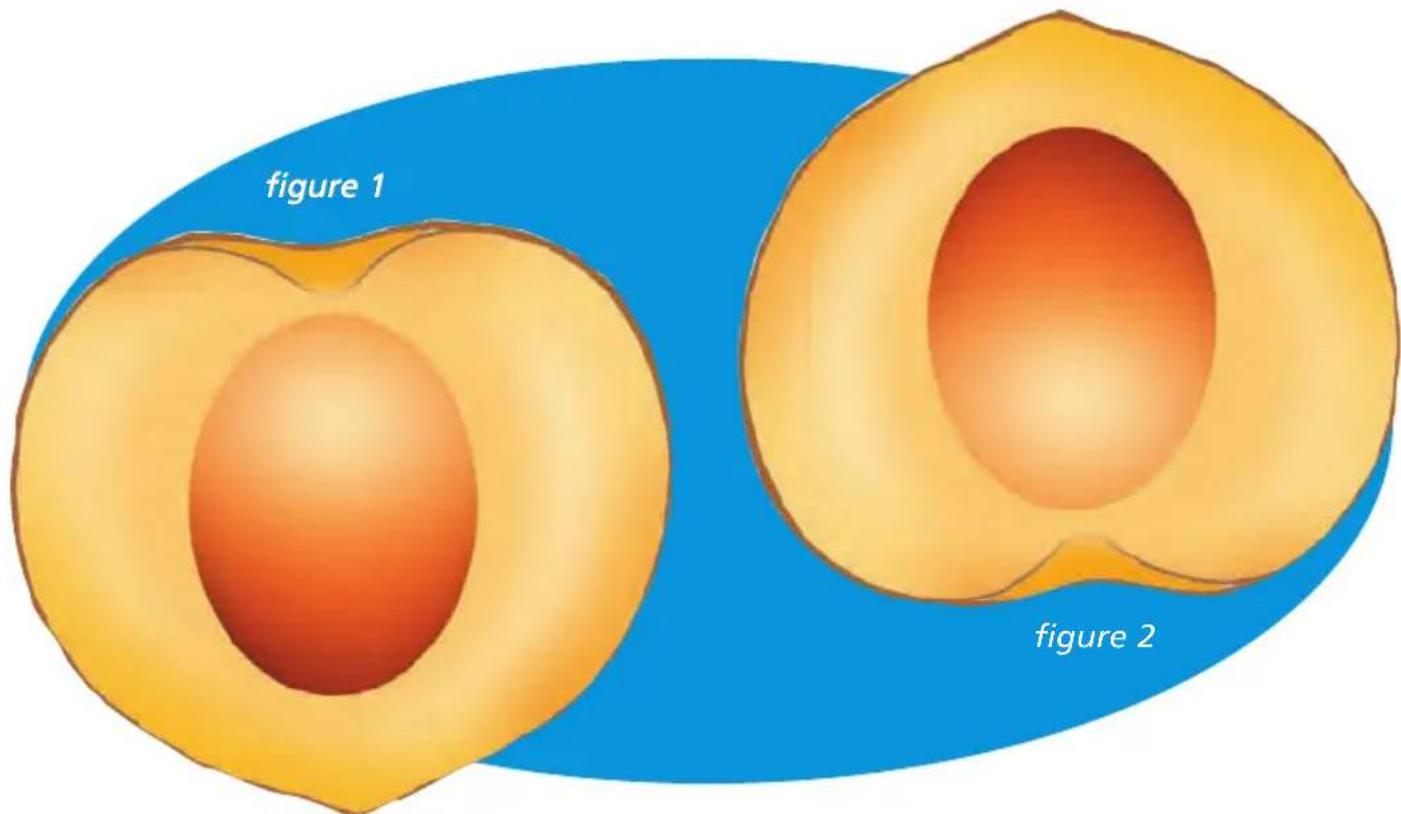
natural_image
Illustration of two peach halves, labeled 'figure 1' and 'figure 2', against a blue background (no text or symbols on the halves themselves)Why does this happen?
Why?
The explanation is that the brain tends to interpret reality by turning to past experiences and images it has already seen.
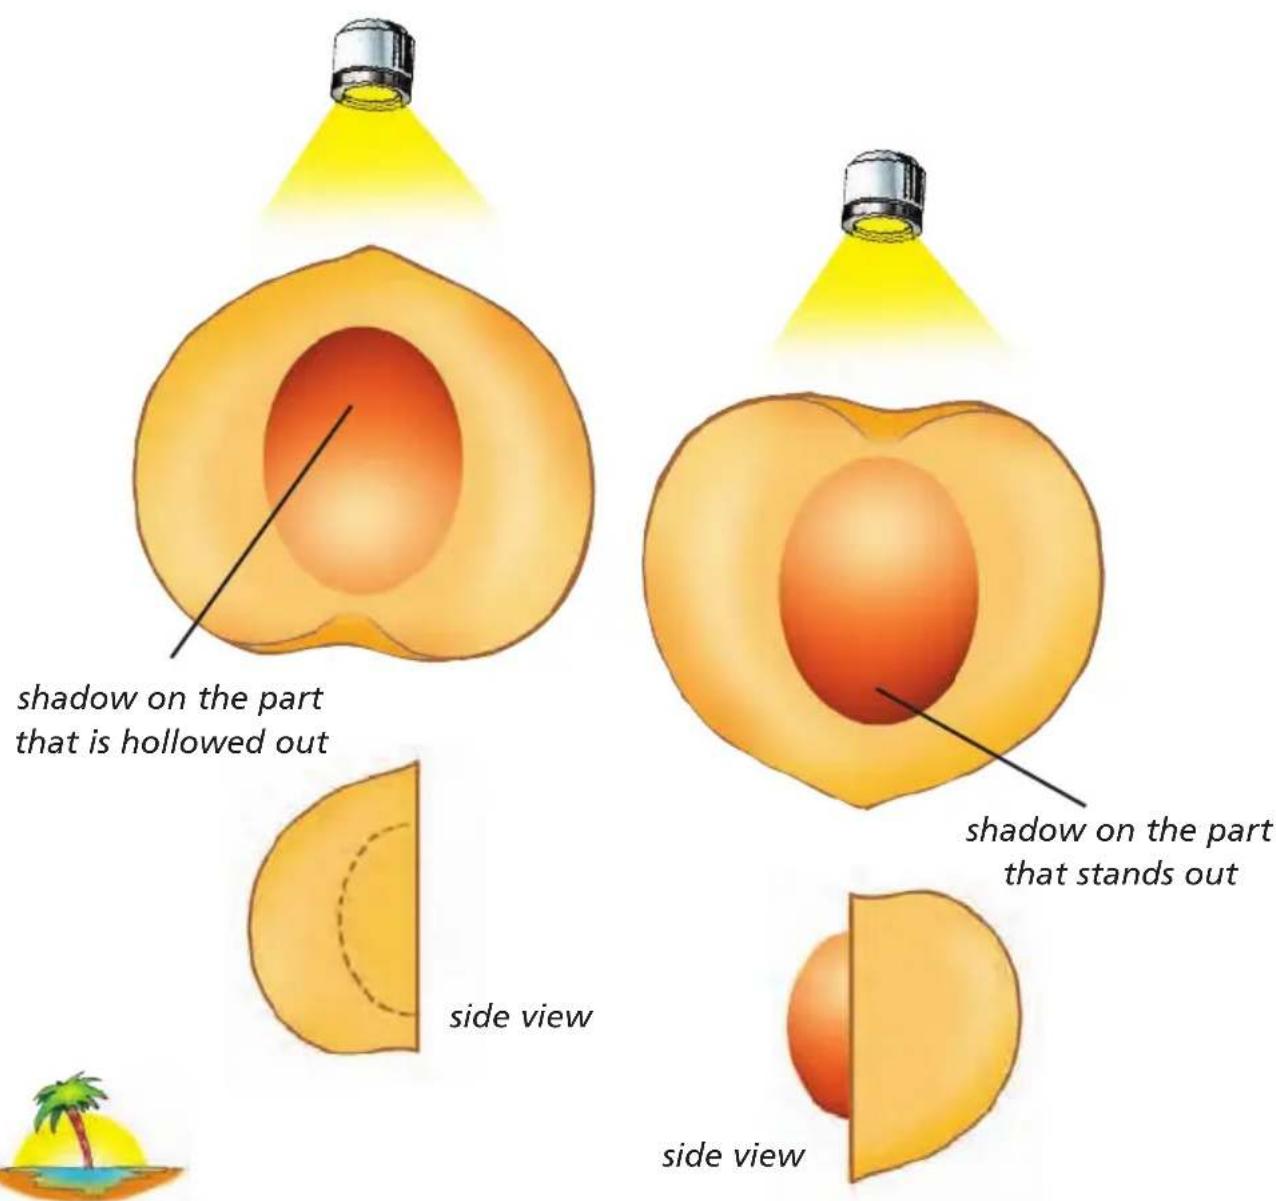
When the card is the right way up, the pit (the middle part that stands out) appears in figure 1. If it is turned upside down, the pit appears in figure 2.
All this depends on the fact that the brain is using a fundamental clue to find out where the pit is.
The clue is shadow.
Because the position of the light source indicates shadow, the brain takes it for granted that light always comes from above. The shadows in the picture influence our perception of what we see. Therefore, it seems like the pit has changed places.
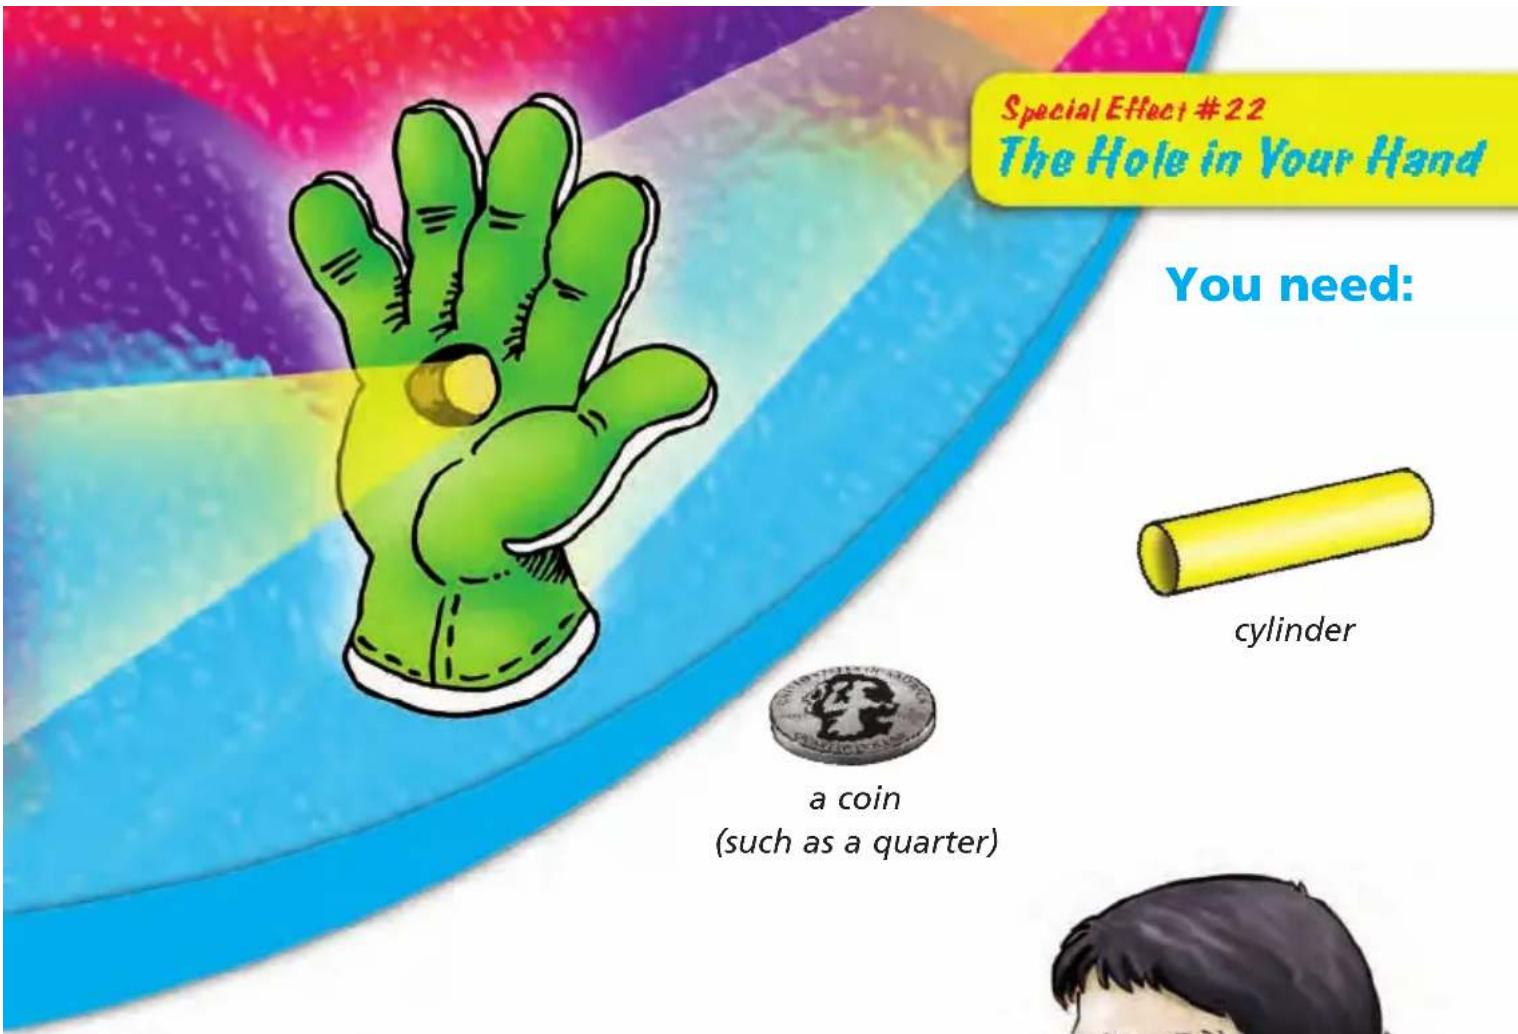
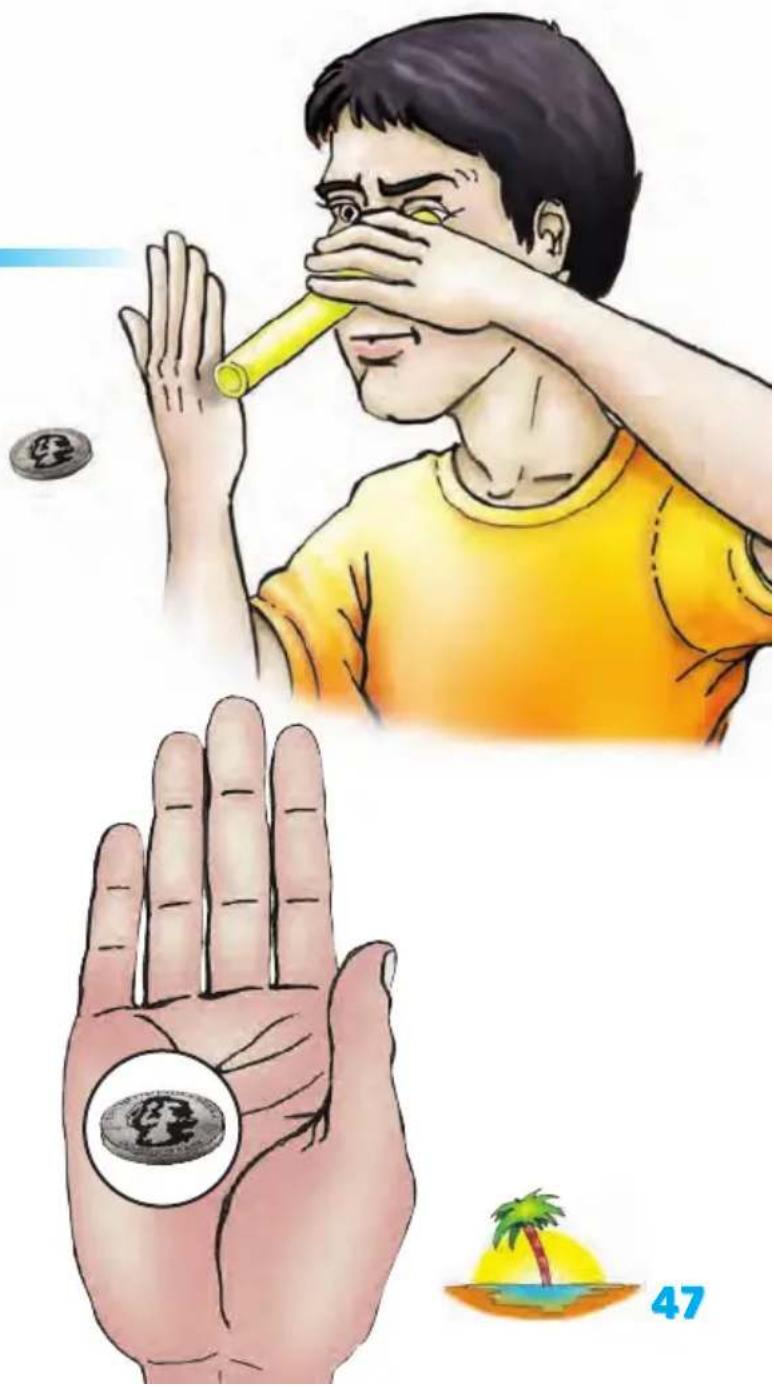
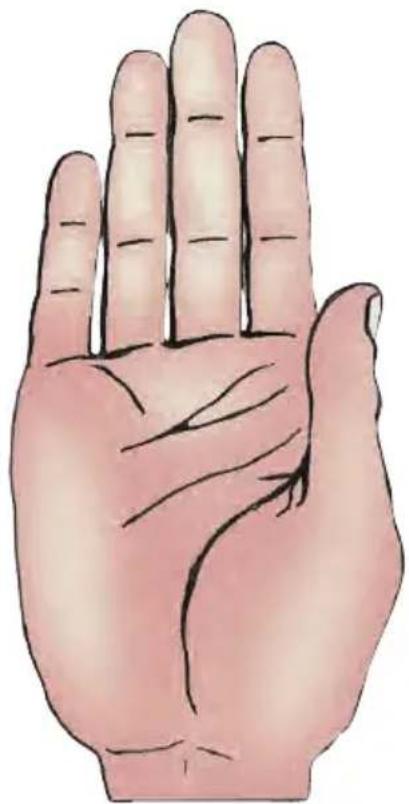
How to do it:
1) Place a coin on the table in front of you.
2) Hold the cylinder with your left hand and look at the coin through the cylinder with your left eye. Keep both eyes open.
3) Hold your open right hand so that it's touching the side of the cylinder. Slowly slide your right hand up the side of the cylinder, so that it's close to your face. Remember to keep both eyes open.
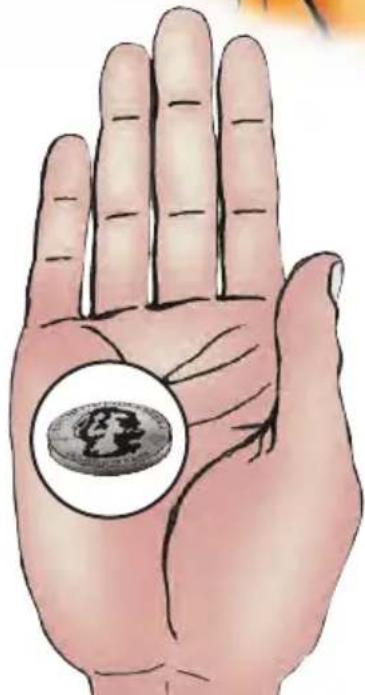
The coin appears on the palm of your hand.
natural_image
Illustration of a human hand holding a coin with a circular inset showing the coin's face (no text or symbols)
Why?
The brain superimposesthe images from both eyes, creating an unreal image.

natural_image
Illustration of a human hand with visible palm and fingers (no text or symbols)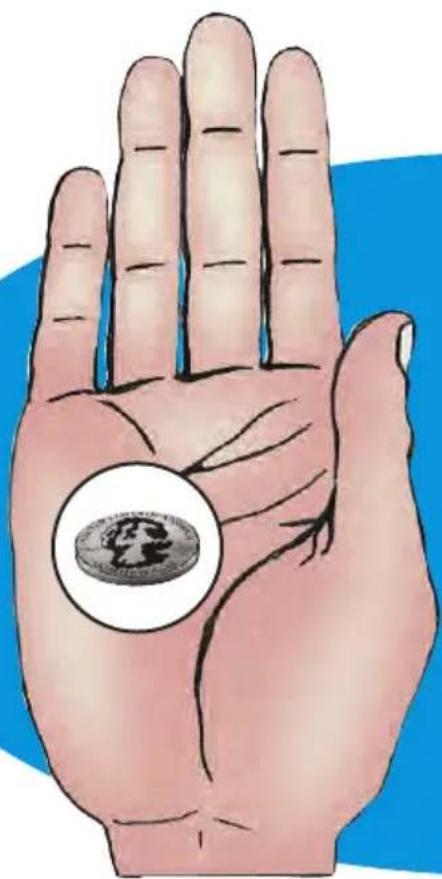
natural_image
Illustration of a human hand holding a coin with a circular inset showing the coin's face (no text or symbols)The brain receives the two images that arrive from separate eyes. It puts them together (superimposes them) and creates the illusion of an image in the palm of your hand.
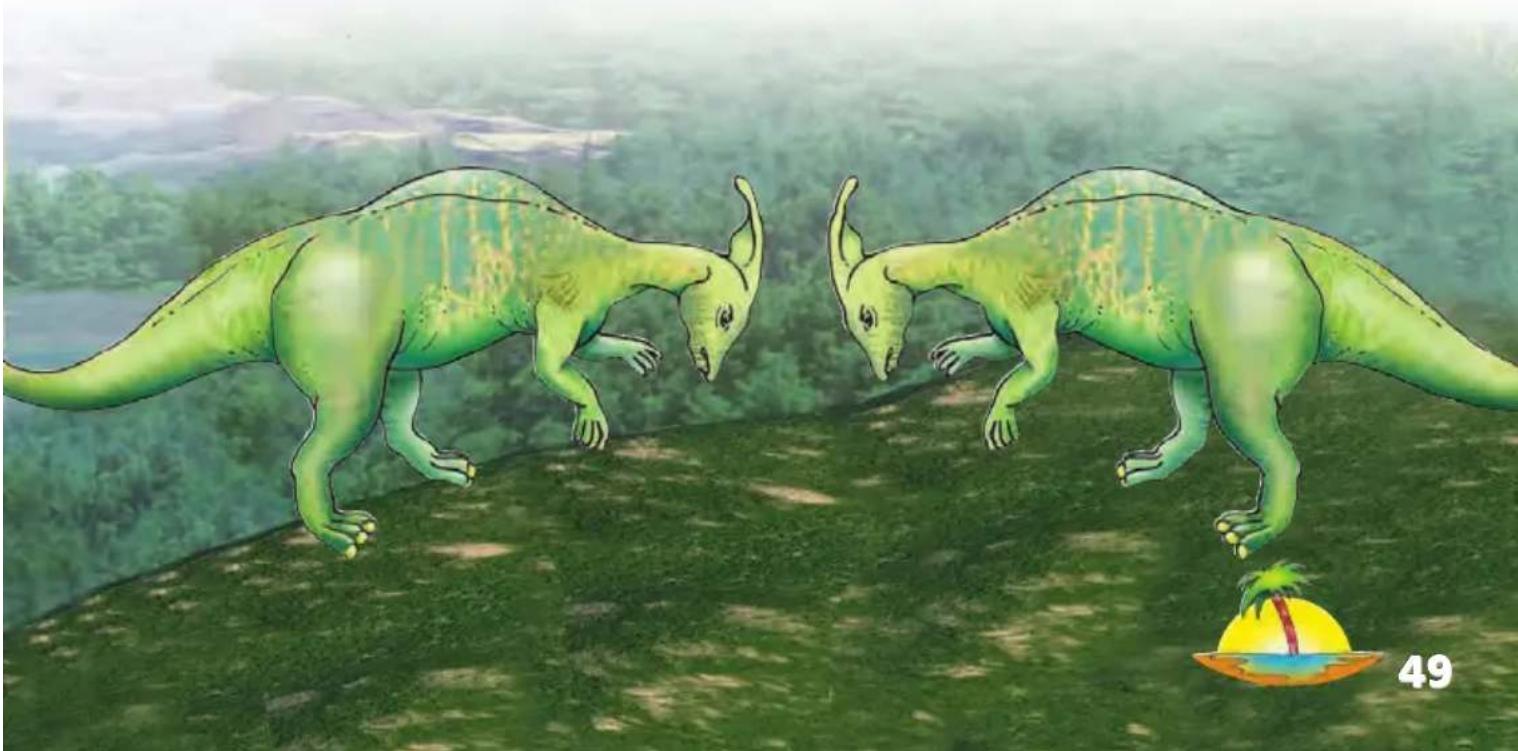
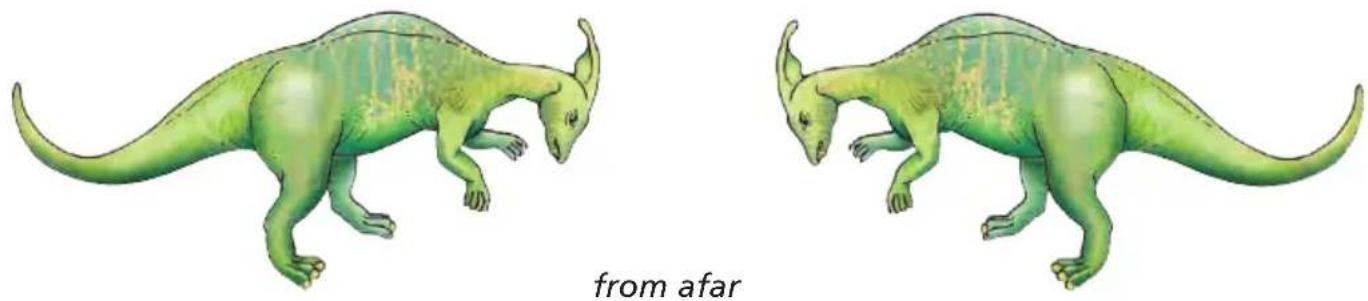
How to do it:
1) Bring the image of the dinosaurs slowly up to both open eyes until you rest the tip of your nose in the middle of the picture.
2) You'll see the heads of the dinosaurs crash together. Move the card away and then bring it near your face again to see the crash repeat.
natural_image
Illustration of two green kangaroo-like creatures standing on a grassy hill with a small palm tree nearby (no text or symbols)Why?
Sometimes the brain doesn't match up to reality when it's processing images.
The brain receives the two images that come from separate eyes; it puts them together so you get the illusion that the dinosaurs are head-butting each other.
When you look:
natural_image
Illustration of two green kangaroo dinosaurs in walking poses, labeled 'from afar' below (no other text or symbols)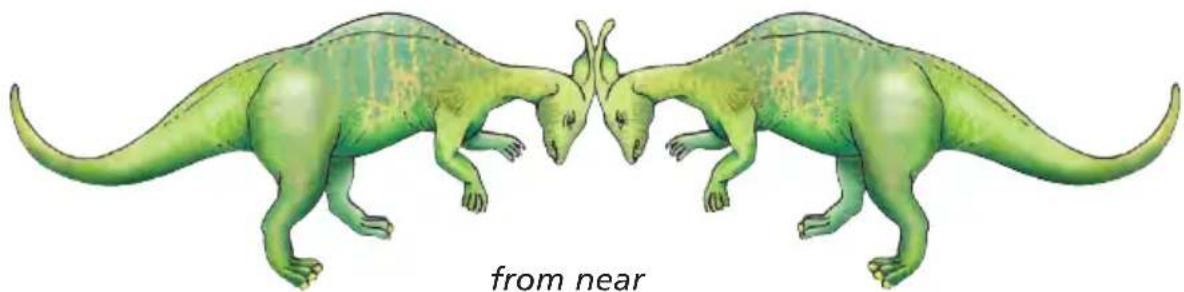
natural_image
Illustration of two green taurus-like dinosaurs facing each other, labeled 'from near' below (no other text or symbols)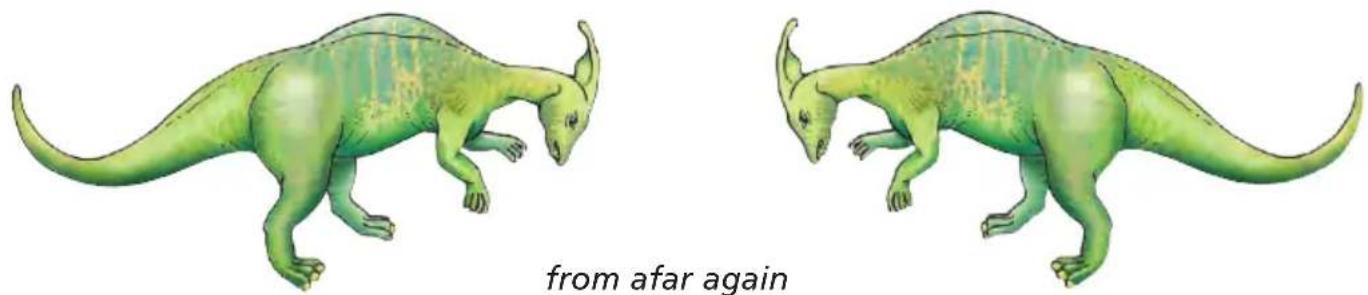
natural_image
Illustration of two green antenatal dinosaurs in a dynamic pose, labeled 'from afar again' below (no other text or symbols)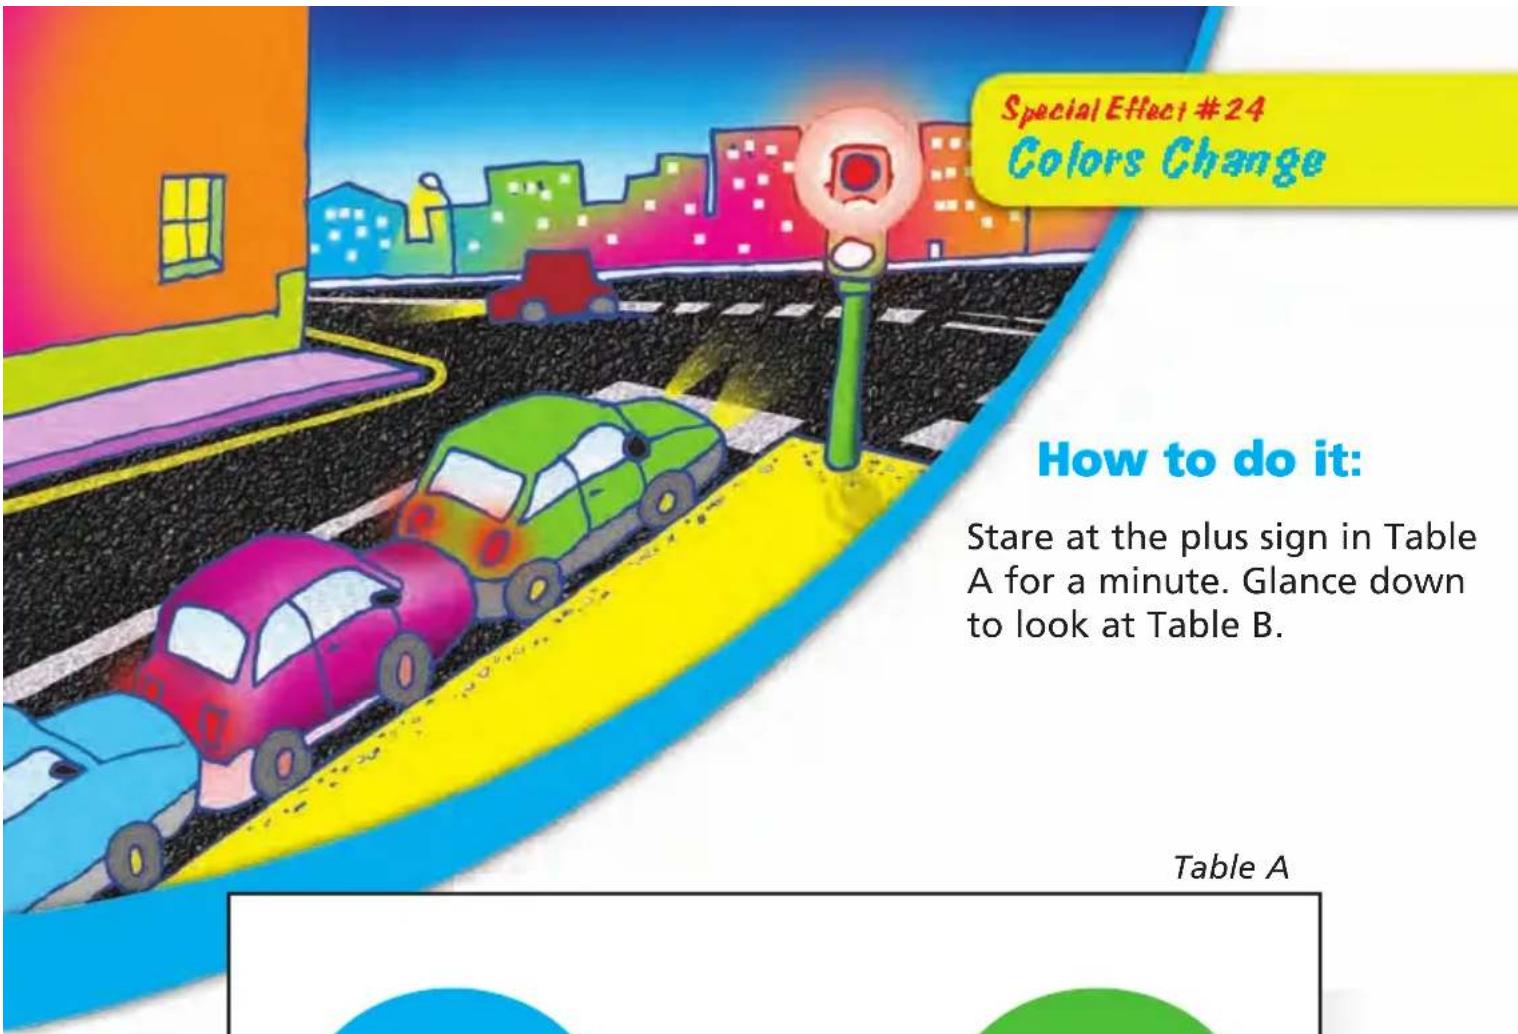
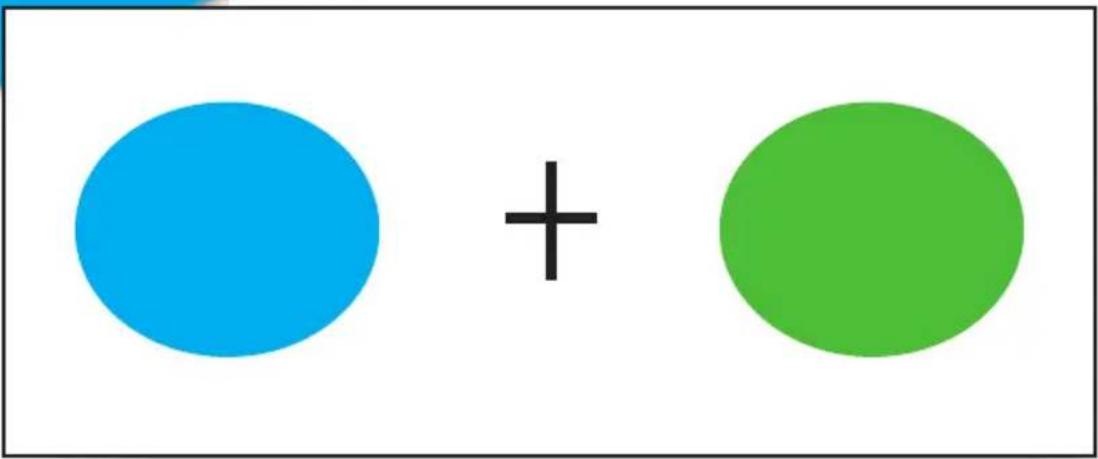
Special Effect #24 Colors Change
How to do it:
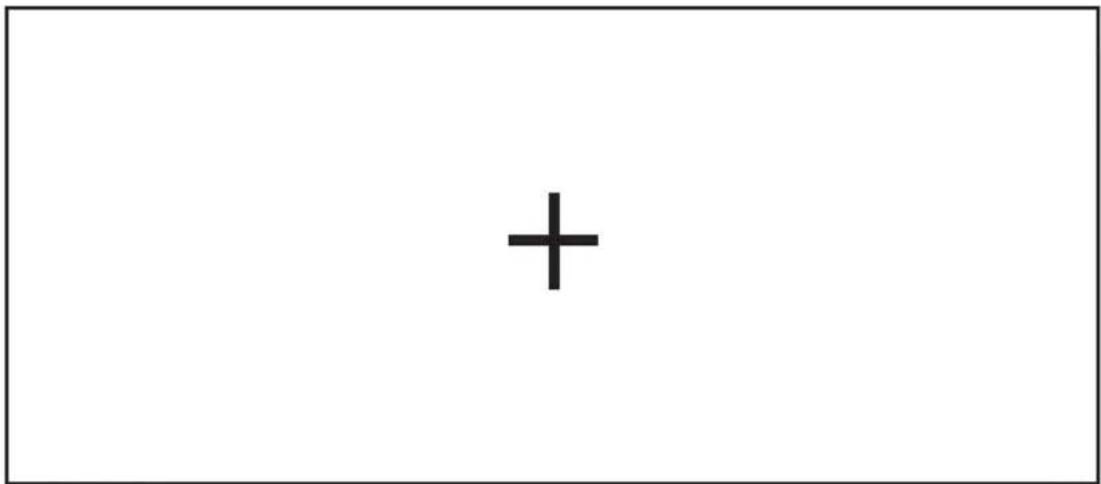
Stare at the plus sign in Table A for a minute. Glance down to look at Table B.
natural_image
Two colored circles, one blue and one green, arranged horizontally with a plus sign in the center (no text or symbols beyond the plus sign)Table B
Two splashes of color appear in Table B: yellow appears to the left and pink to the right.
Why?
The afterimagestays impressed on the retinas. Because you have fatigued the blue and green sensitive cells, you see complementary colors.
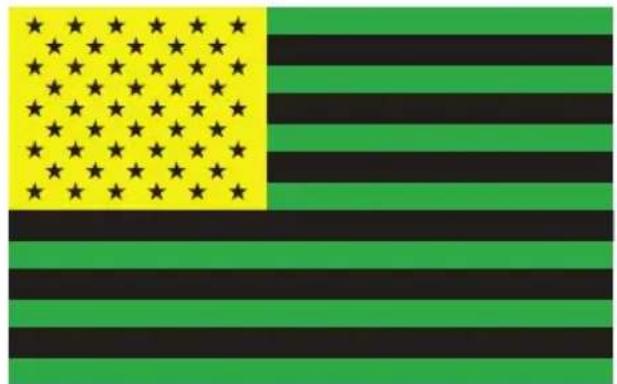
Try this:
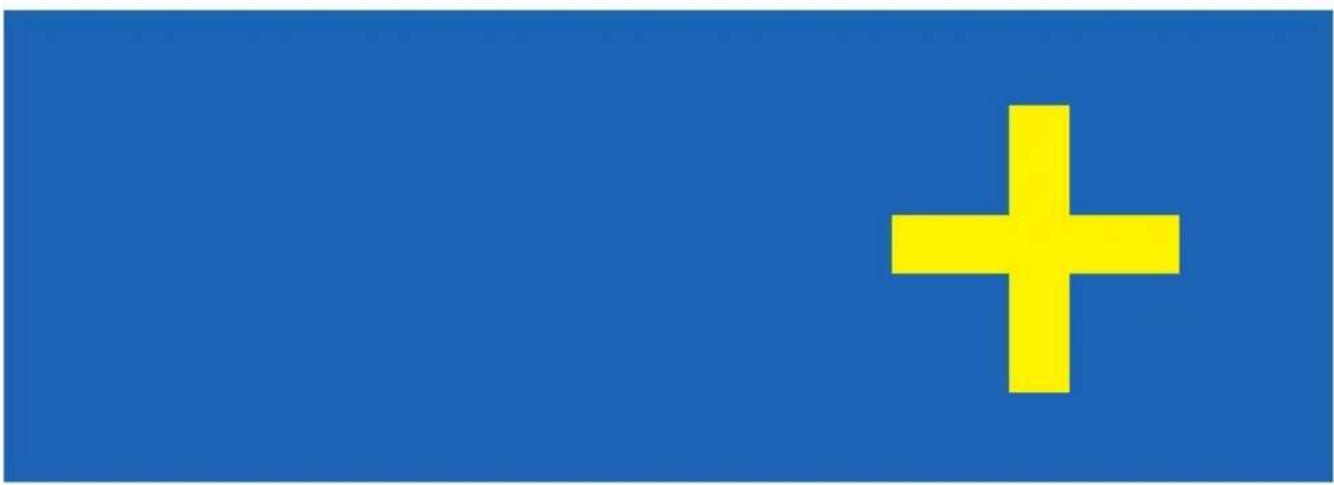
Stare at a star on the flag for a minute and then glance at the white box to the right of it. Do you see a red, white, and blue American Flag?
natural_image
Green and yellow striped flag with five stars in the center (no text or symbols)
natural_image
Empty white rectangle with black border (no text or symbols)Retina
The retina in the eye is connected to the brain via the optic nerve (see eye diagram on page 40). It's made up of millions of light sensitive cells: rods for black and white and three types of cones for distinguishing colors: red, green, and blue. All other colors result from a mix of the three. The white box reflects all the colors (see pages 32 and 34). But some of your cones are too tired to perceive them.
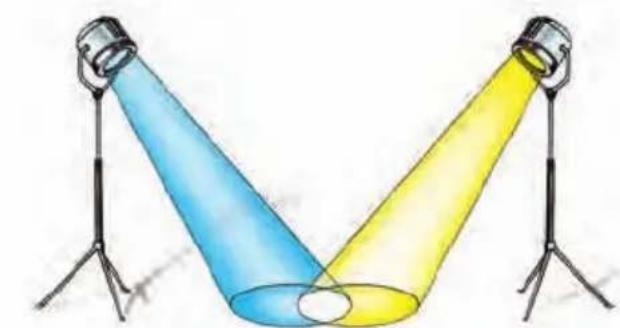
Complementary Colors
If you mix together two complementary colored lights, you get white light.
natural_image
Illustration of two spotlights with blue and yellow beams, no text or symbols present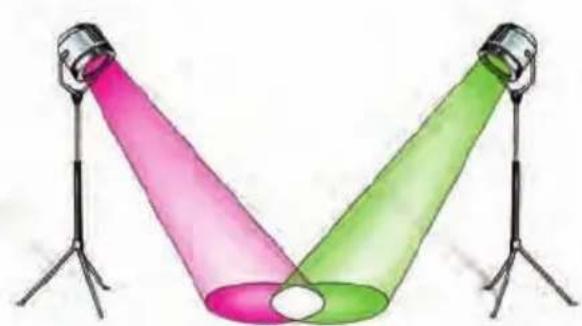
natural_image
Illustration of two spotlights with pink and green beams, no text or symbols present
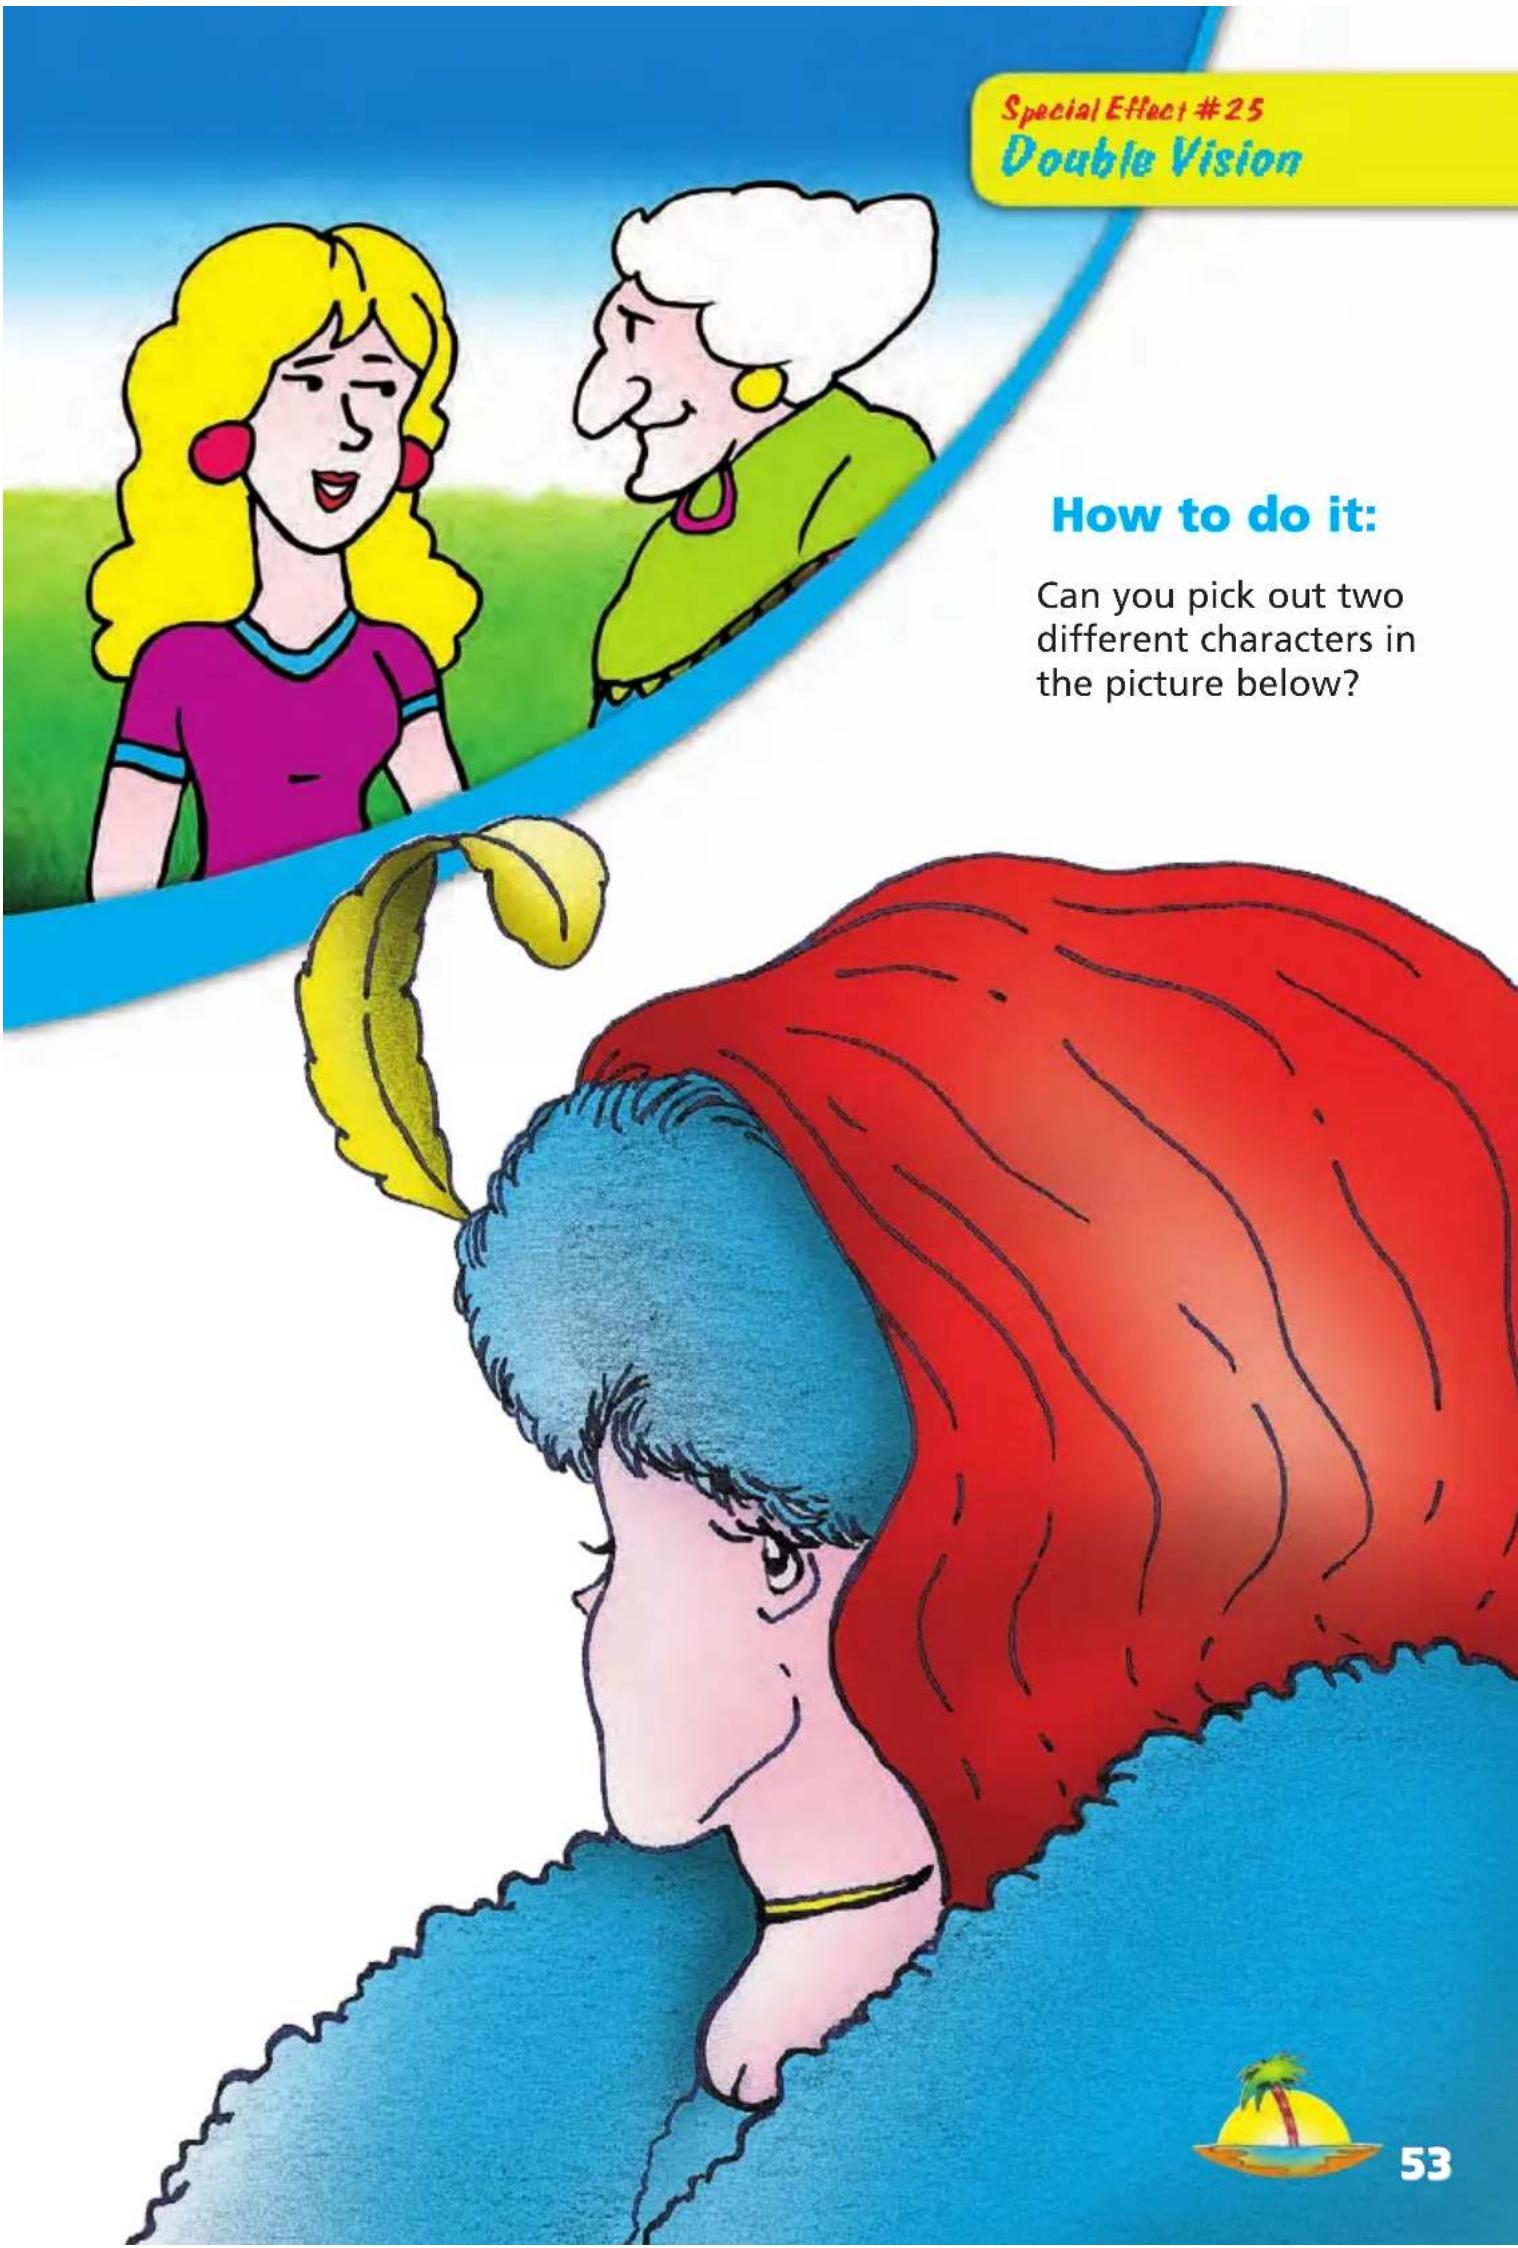
Special Effect #25
Double Vision
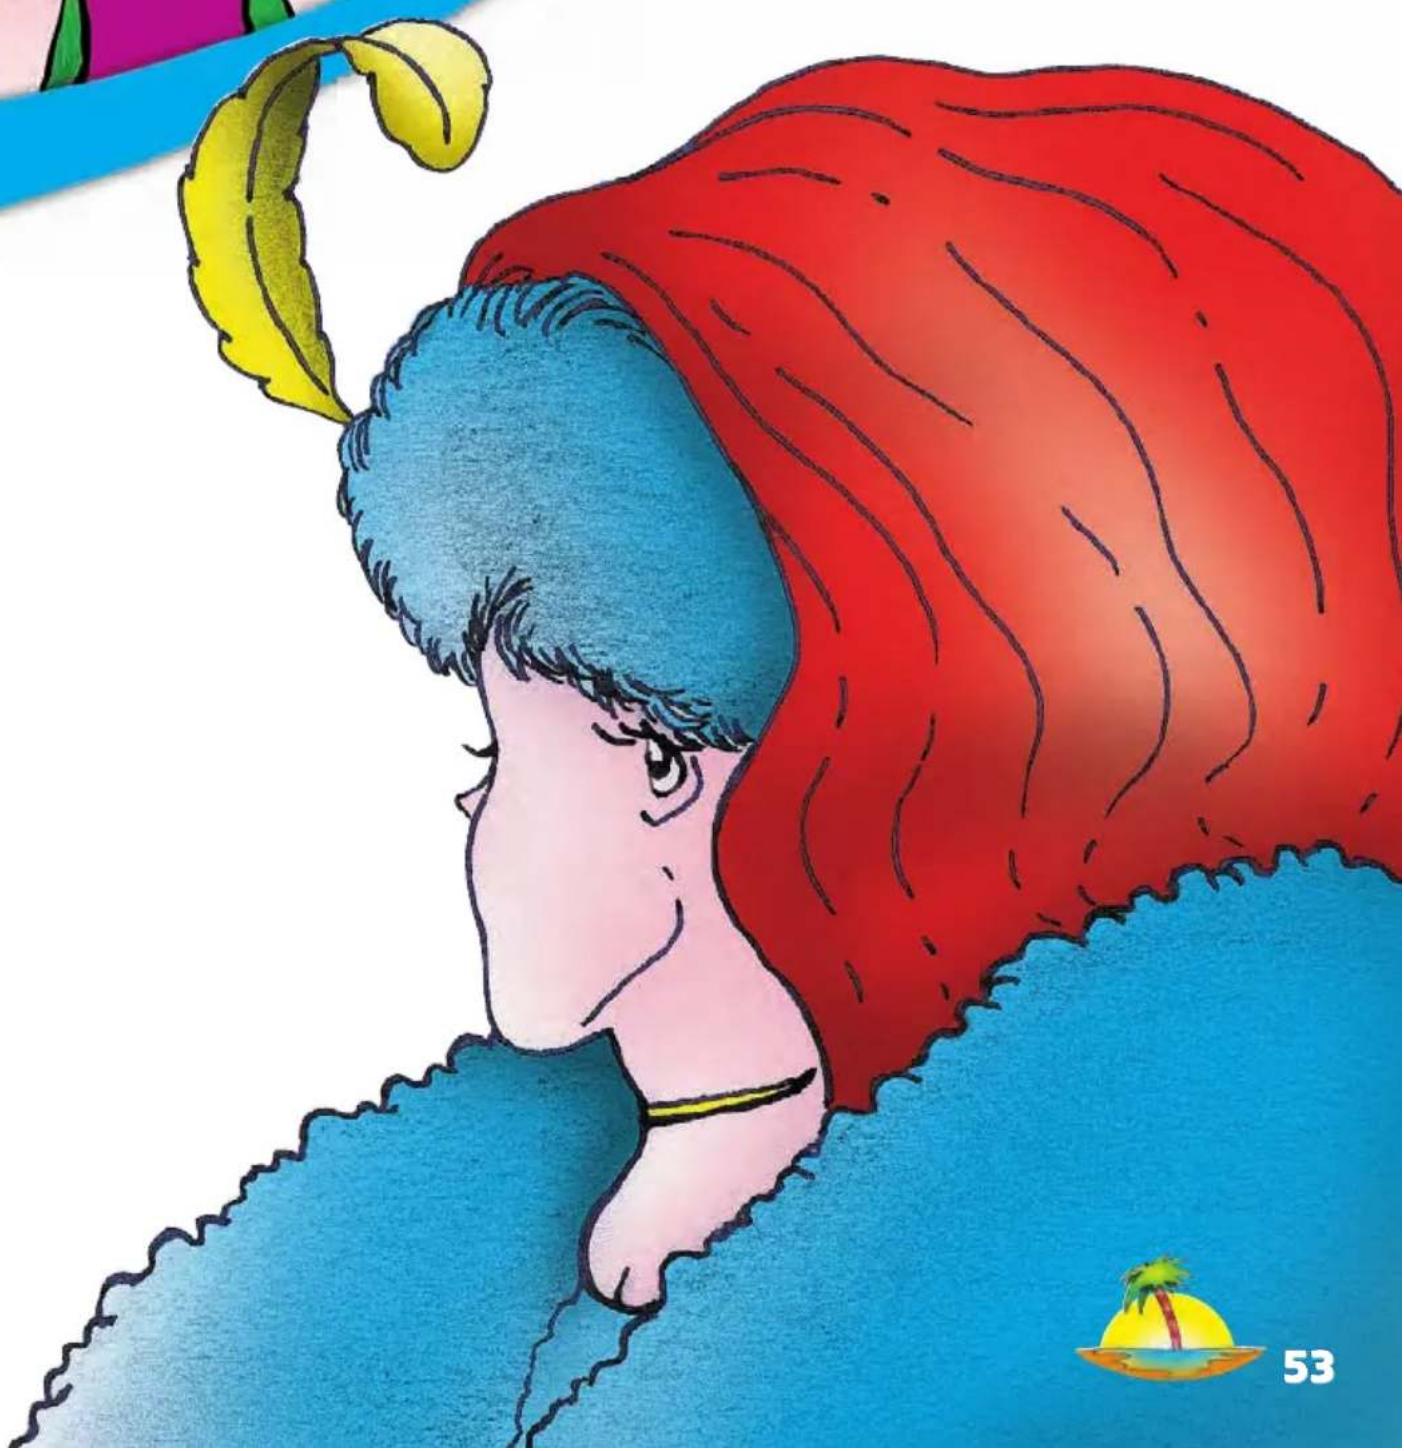
How to do it:
Can you pick out two different characters in the picture below?
natural_image
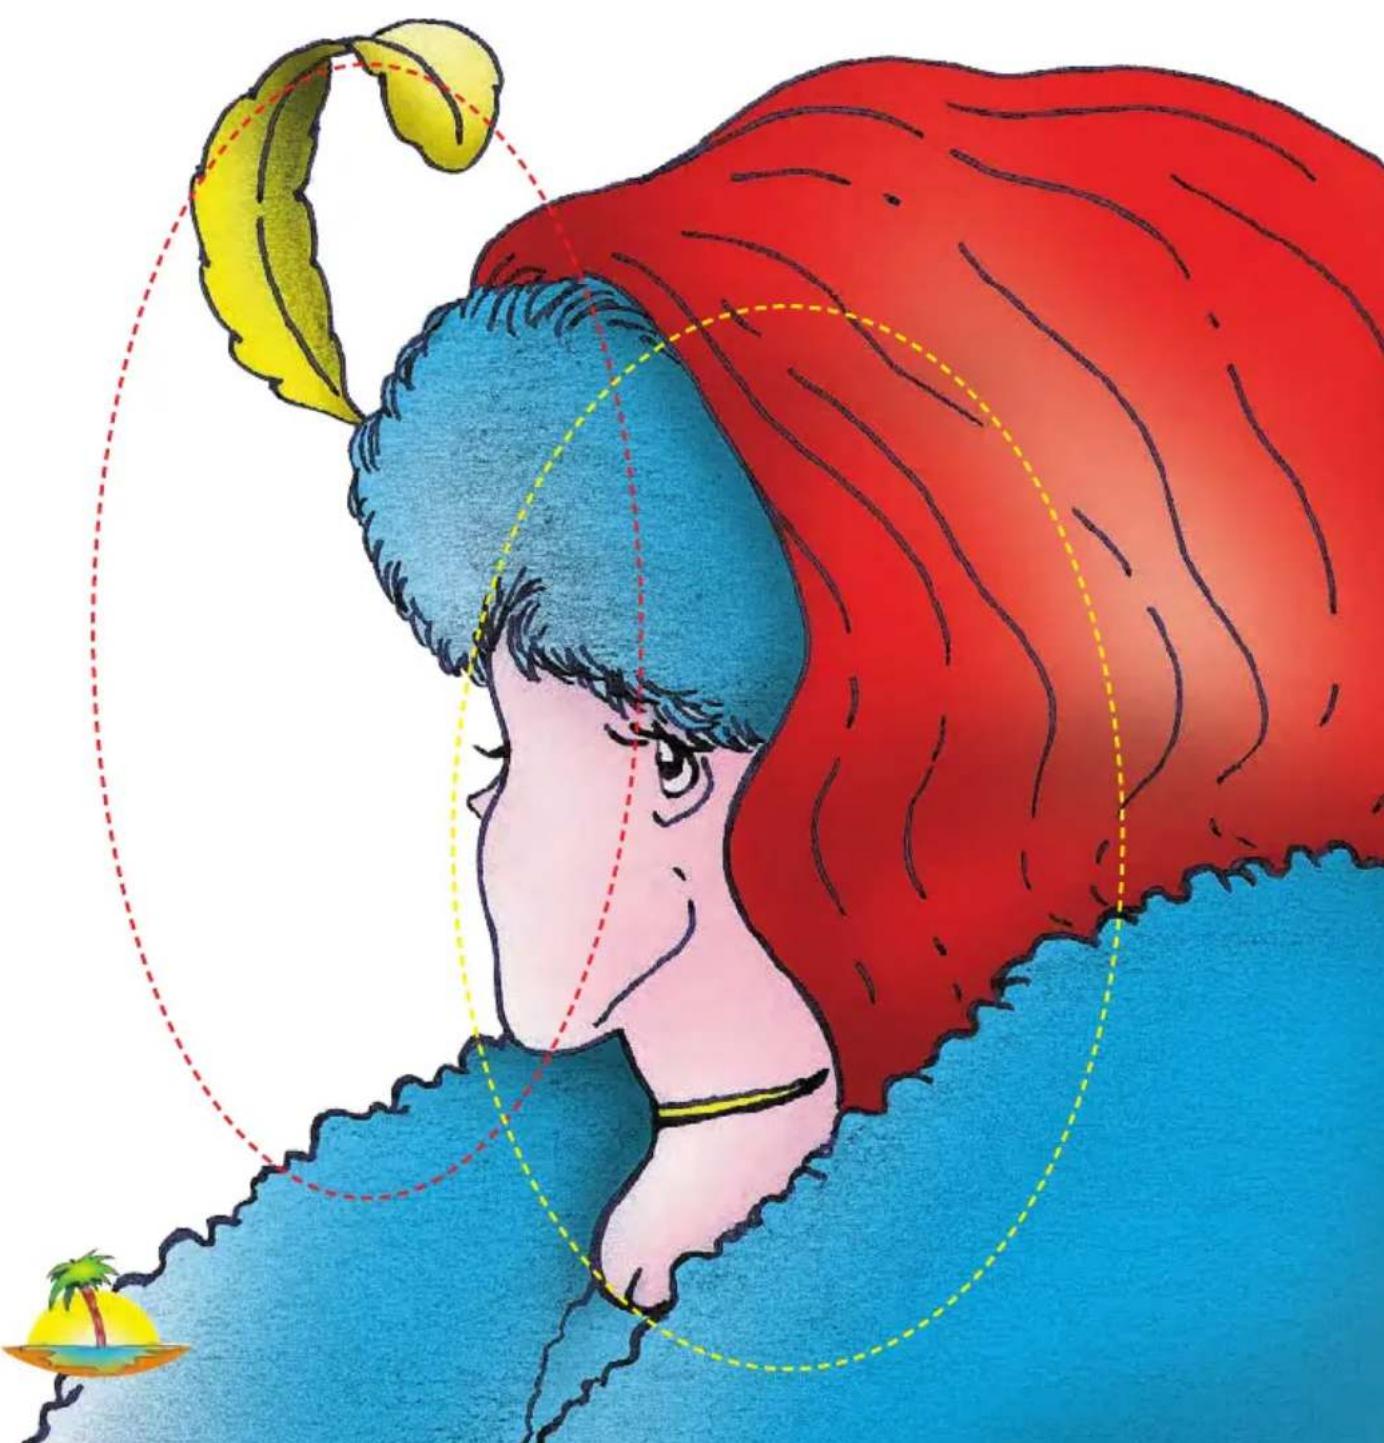
Illustration of a person with red hair and blue feathered head, wearing a blue garment, against a stylized background (no text or symbols)Why?
The eye transmits images, but the brain puts them together and gives them a meaning.
In this image, you can pick out two characters depending on how the brain reacts to the different parts of the picture. It is influenced by its own experiences, emotions, tastes, and colors.
The red ellipse highlights the picture of the young girl, the yellow encircles the old woman's face. (Hint: The young woman's chin is the older woman's nose. The young woman's nose and ear are the older woman's eyes.)
natural_image
Illustration of a person with red hair and blue feather, viewed from behind, with a small island in the corner (no text or symbols)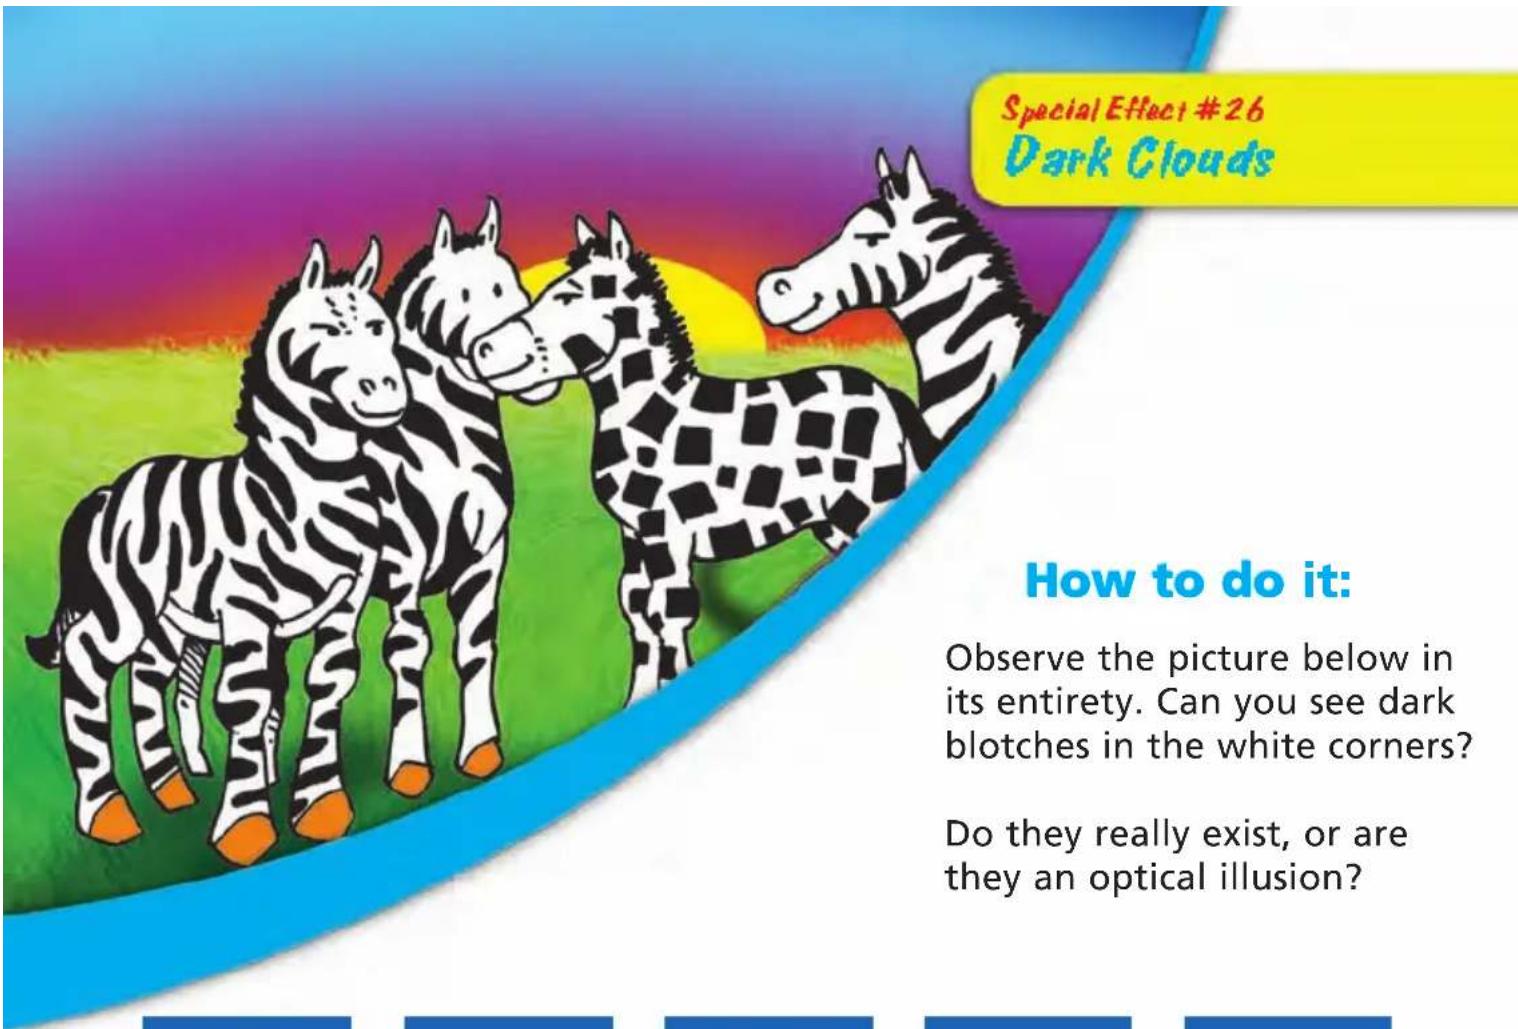
Special Effect #26
Dark Clouds
How to do it:
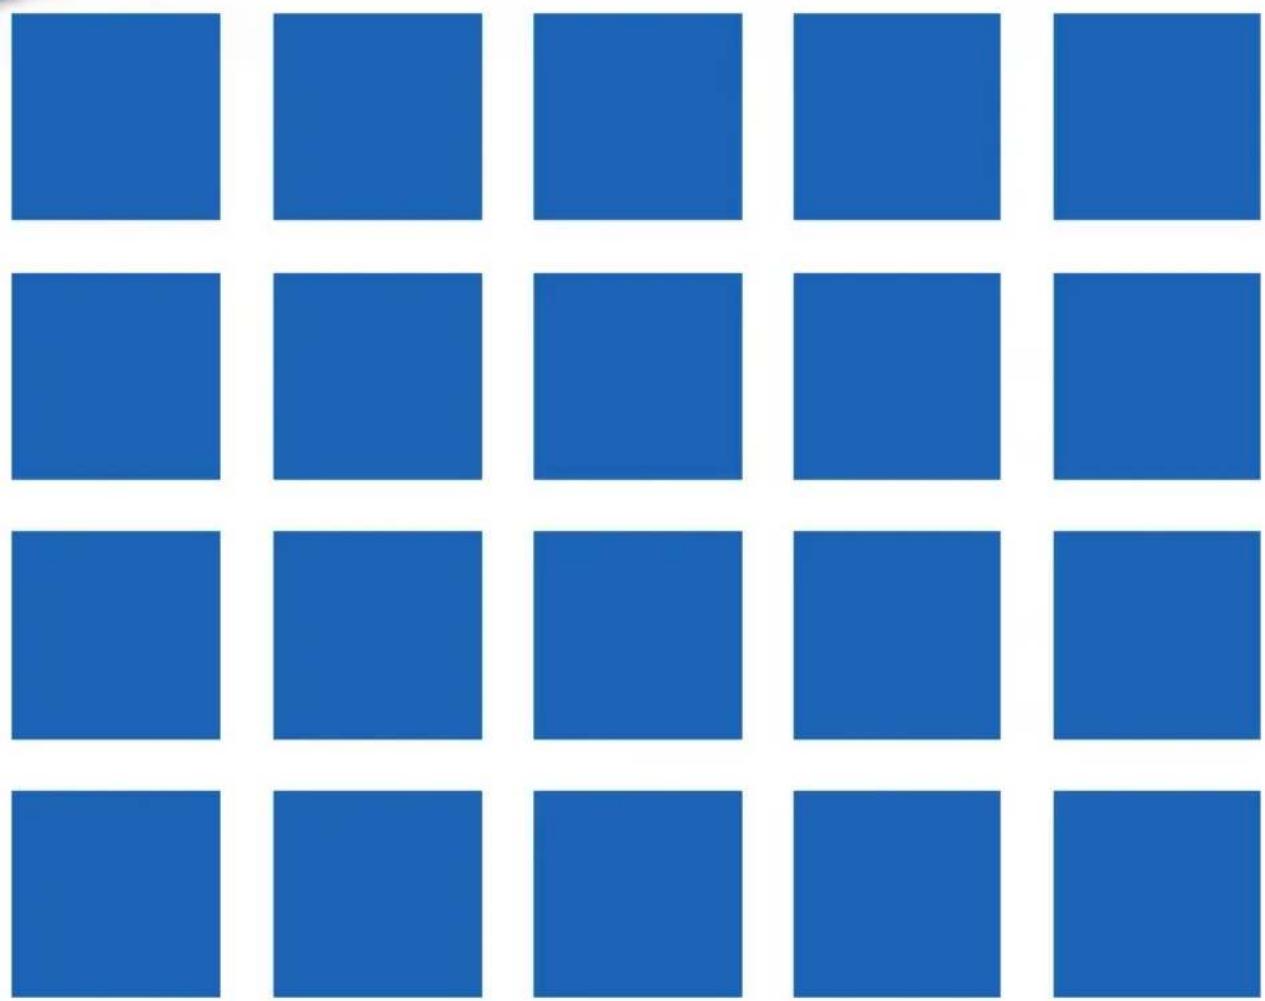
Observe the picture below in its entirety. Can you see dark blotches in the white corners?
Do they really exist, or are they an optical illusion?
natural_image
Grid of twelve blue squares arranged in 4x4 pattern, no text or symbols presentDiagram of the eye
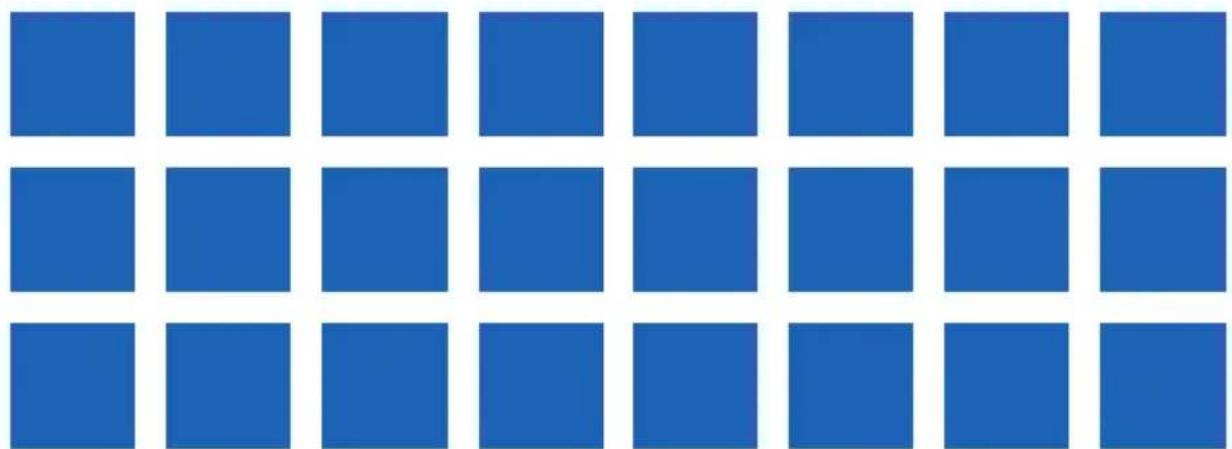
fovea: area of the retina where the clearest image is formed
The dark blotches in the white corners are due to how the light hits the most sensitive and central part of the retina, the fovea.
natural_image
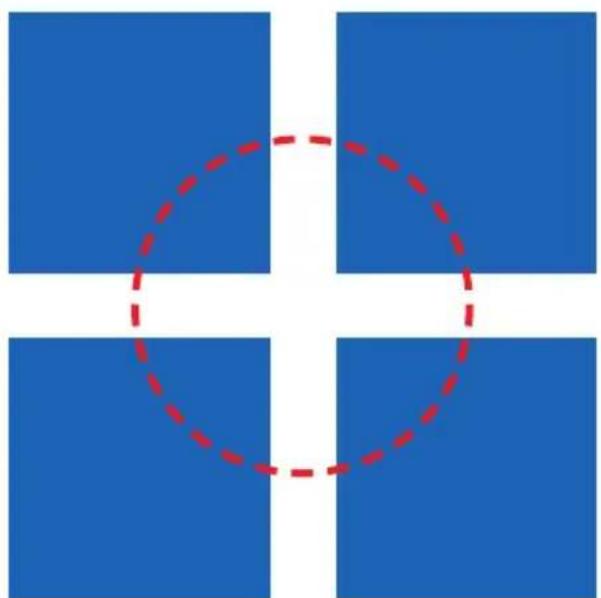
Grid of 16 blue squares arranged in 4 rows and 5 columns, no text or symbols present.When your view encompasses the whole picture, the blotches are visible. When you concentrate on a single white corner, you don't see the dark blotch any more.
Detail of a corner
natural_image
Geometric diagram with four blue squares and a red dashed circle centered on a white cross (no text or symbols)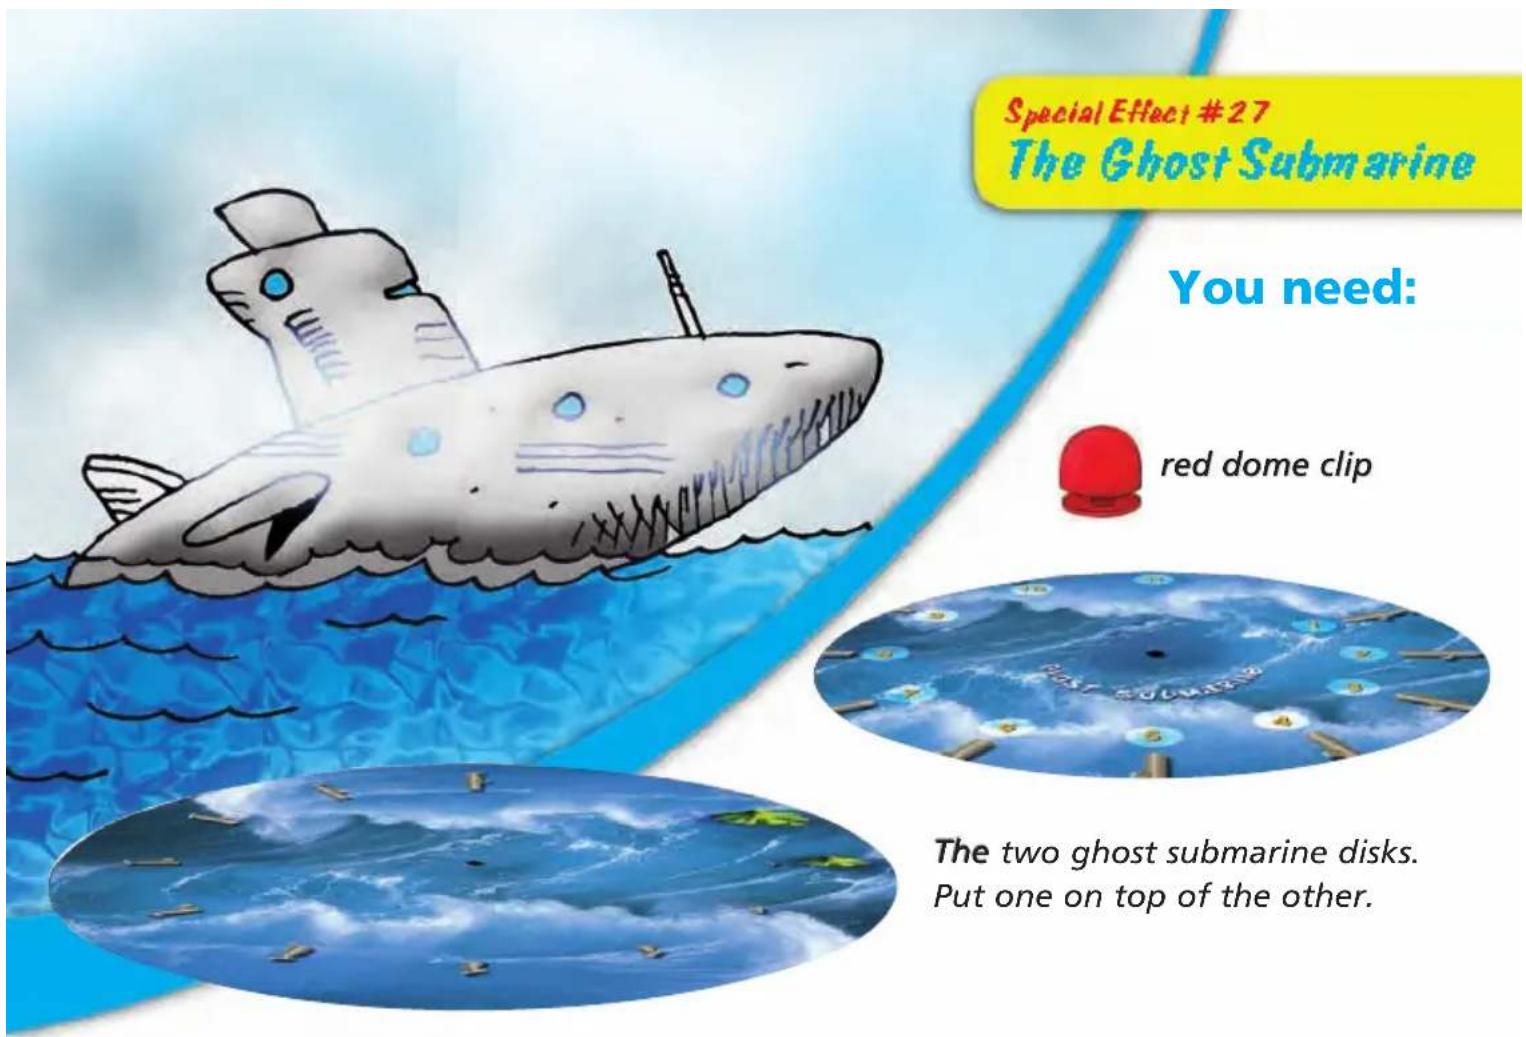
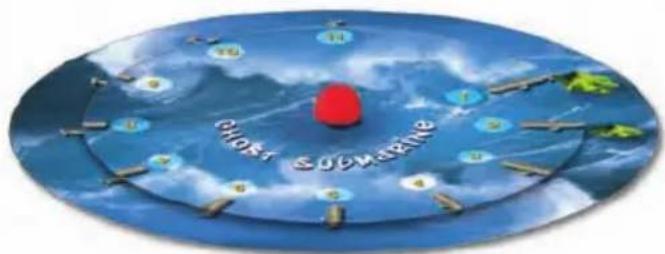
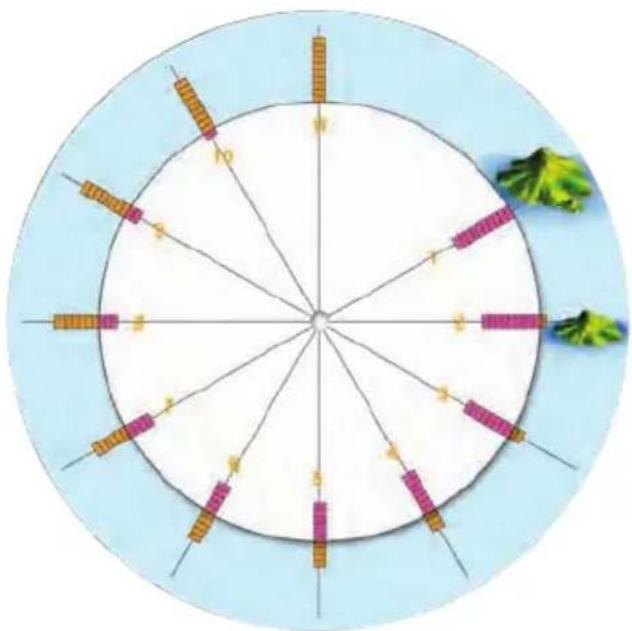
How to do it:
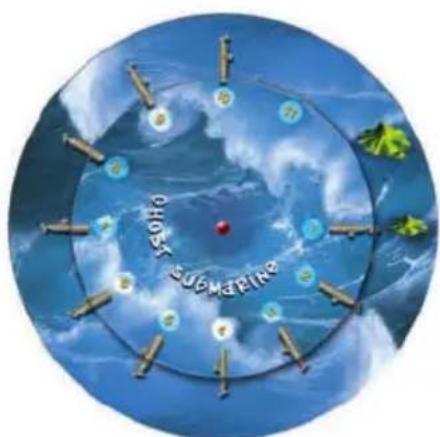
1) Assemble the two disks and then position submarine number 1 alongside the larger island, as in the picture.
2) Turn the disk slowly clockwise (move submarine 1 to the small island), until there are 10 submarines.
3) By sliding submarine 1 back to the big island, you can make 11 submarines reappear.
natural_image
Circular diagram with arrows and symbols over a blue sky background, no readable text or labelsThis way you can see 10 submarines.
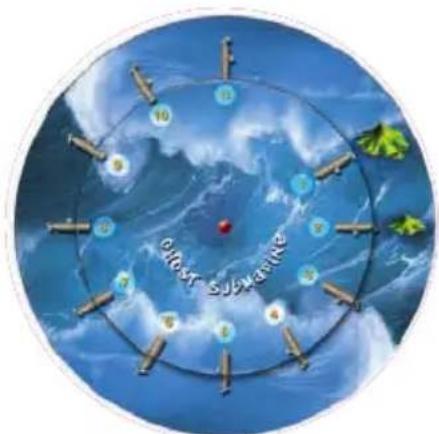
This way you can see 11 submarines.
Why?
The pictures of the submarines include parts that you can move and join with others.
When you turn the disk clockwise, no submarine disappears, but the different parts that make up the pictures redistribute themselves among the remaining ships.
Like this you see 11 submarines.
natural_image
Circular diagram with radial lines and segmented bars, no text or symbols presentWhen 11 subs are visible, every one is made up of 10 parts.
Like this you see 10 submarines.
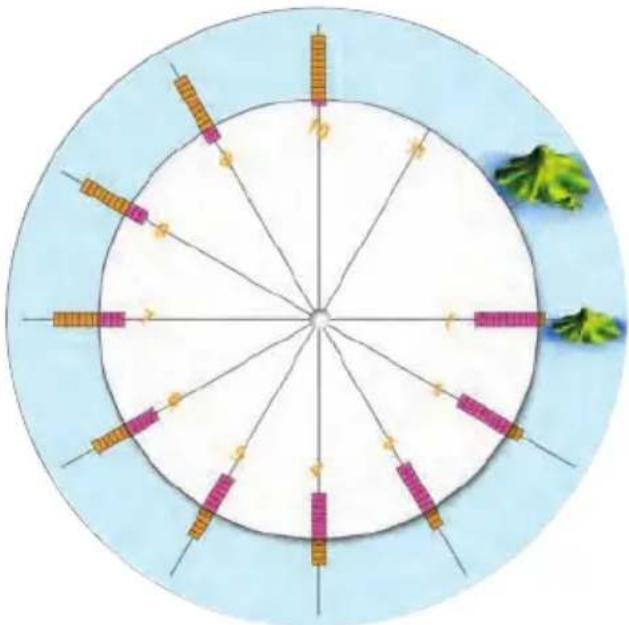
natural_image
Circular diagram with radial lines and colored rectangular elements, no text or symbols presentWhen 10 subs are visible, every one is made up of 11 parts.
natural_image
Pure grid of empty rectangular boxes with no text, numbers, or symbols
natural_image
Simple gray illustration of a submarine (no text or symbols)
natural_image
Grid of empty rectangular boxes with vertical black lines, no text or symbols present
natural_image
Simple gray illustration of a submarine (no text or symbols)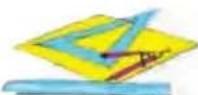
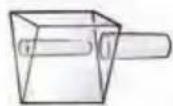
How to do it:
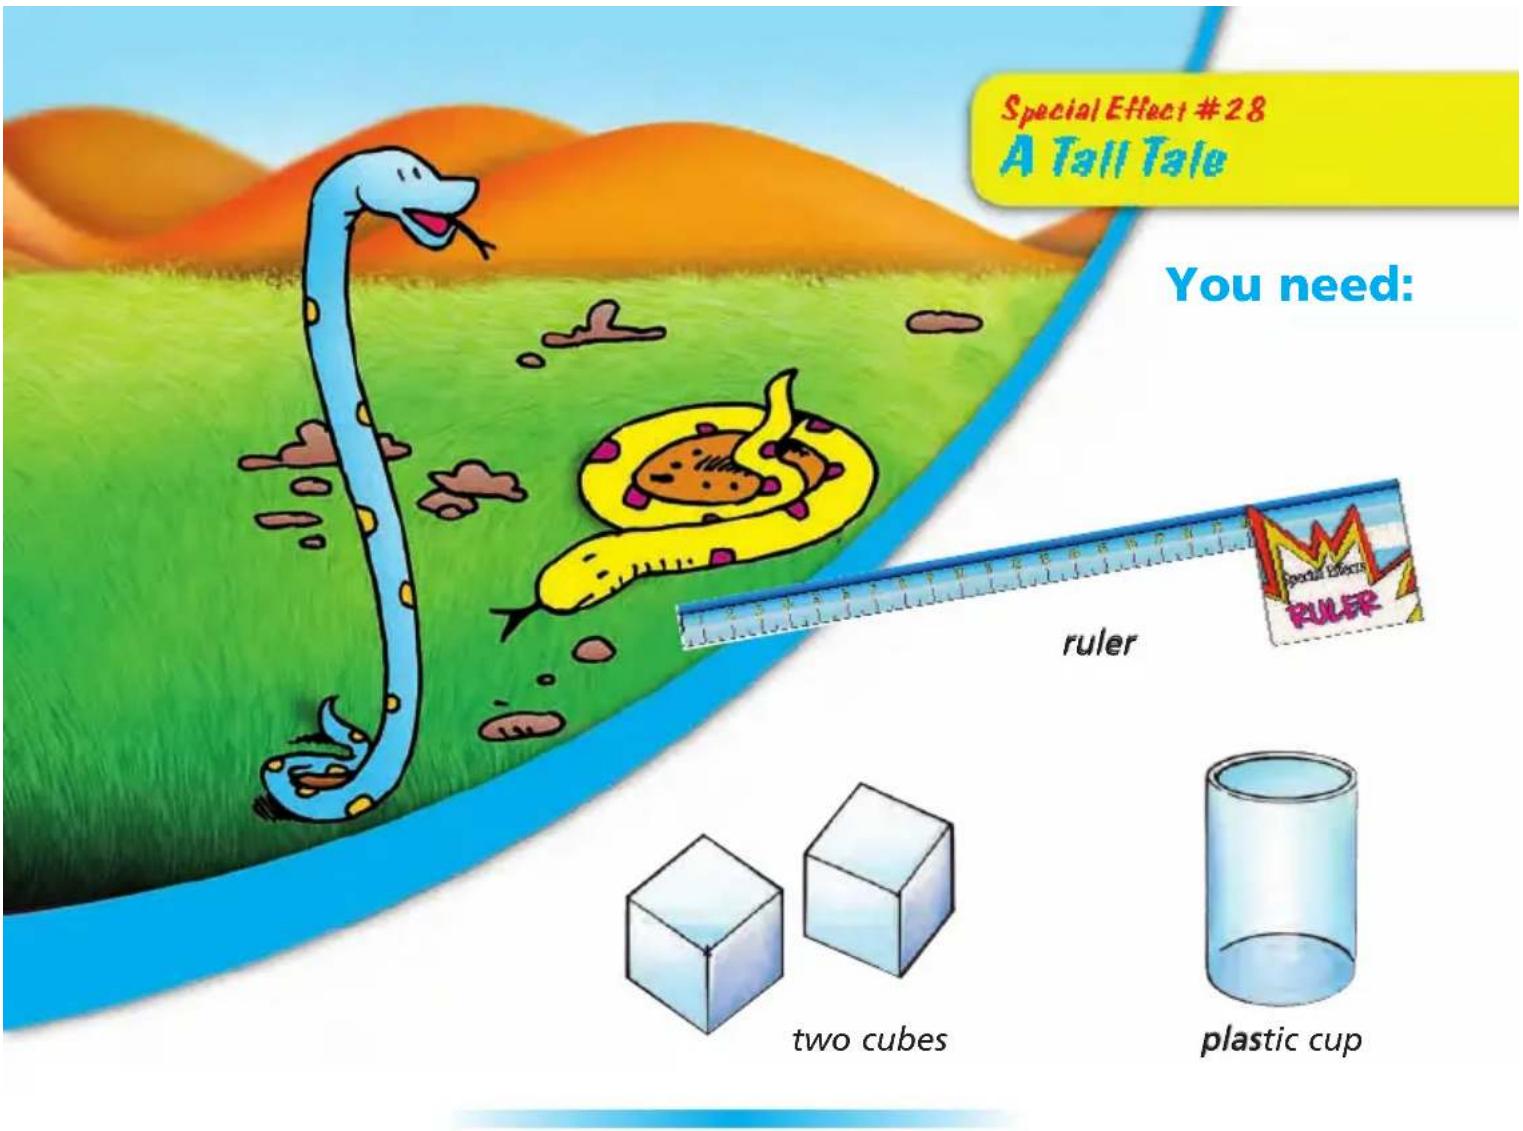
Put the cup on top of the cubes as shown in the picture.
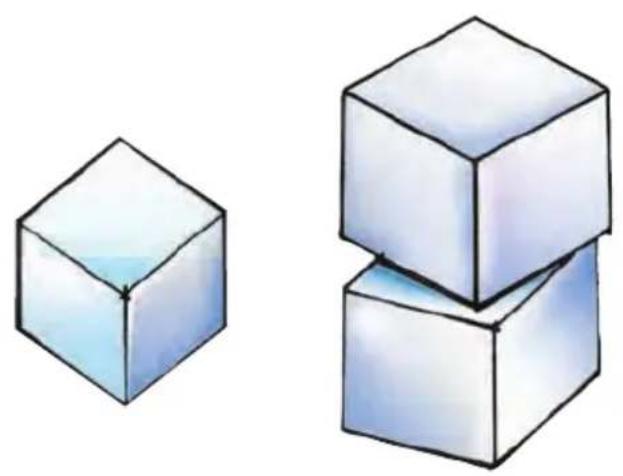
natural_image
Illustration of two stacked 3D cubes, one plain and one with shading (no text or symbols)Optical Estimation Challenge
Question: Is the height of the structure greater or less than the circumference of the cup?
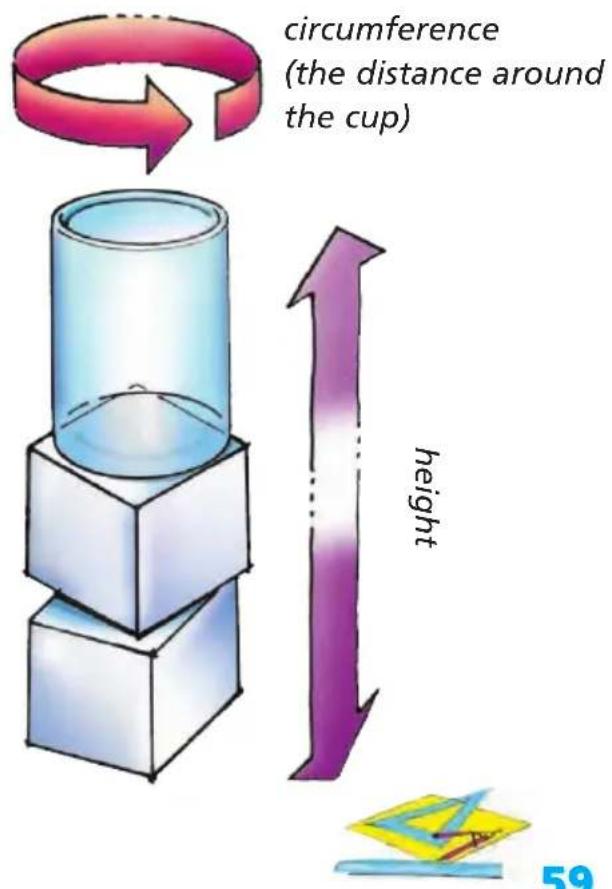
It's easy to estimate the height or length of an object, but it's difficult to predict the length of the circumference.
Use a tape measure or ruler to find the height.
There are two ways to find the circumference.
Method 1
Use a tape measure to find the circumference.
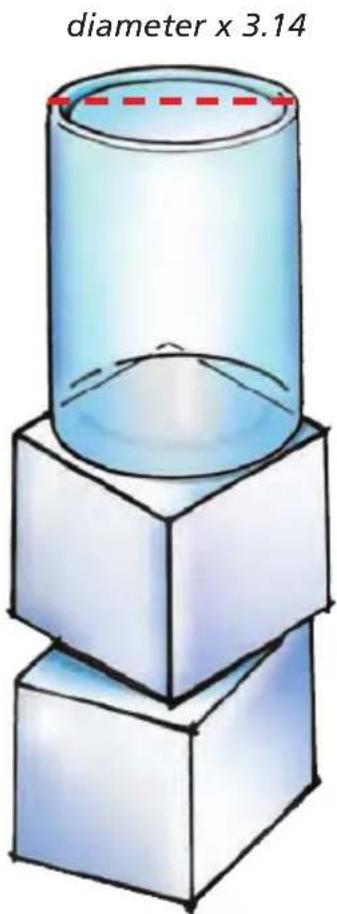
Method 2
Use the formula for circumference: Measure the diameter of the cup and multiply by 3.14, or pi ( ).
circumference = diameter x π
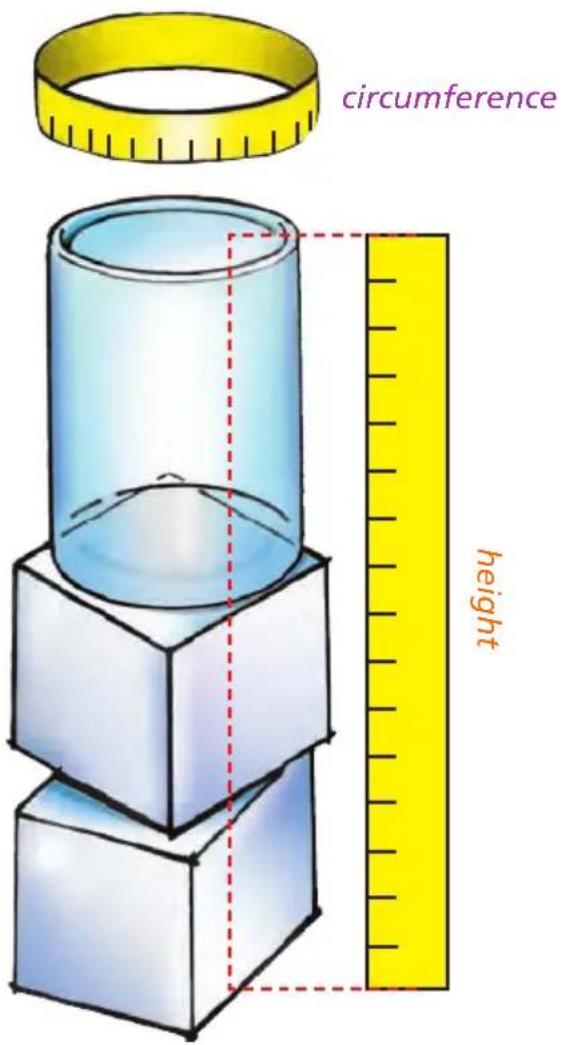
Whichever method you use, you'll find that the circumference is greater than the height of the whole structure (two cubes + cup).
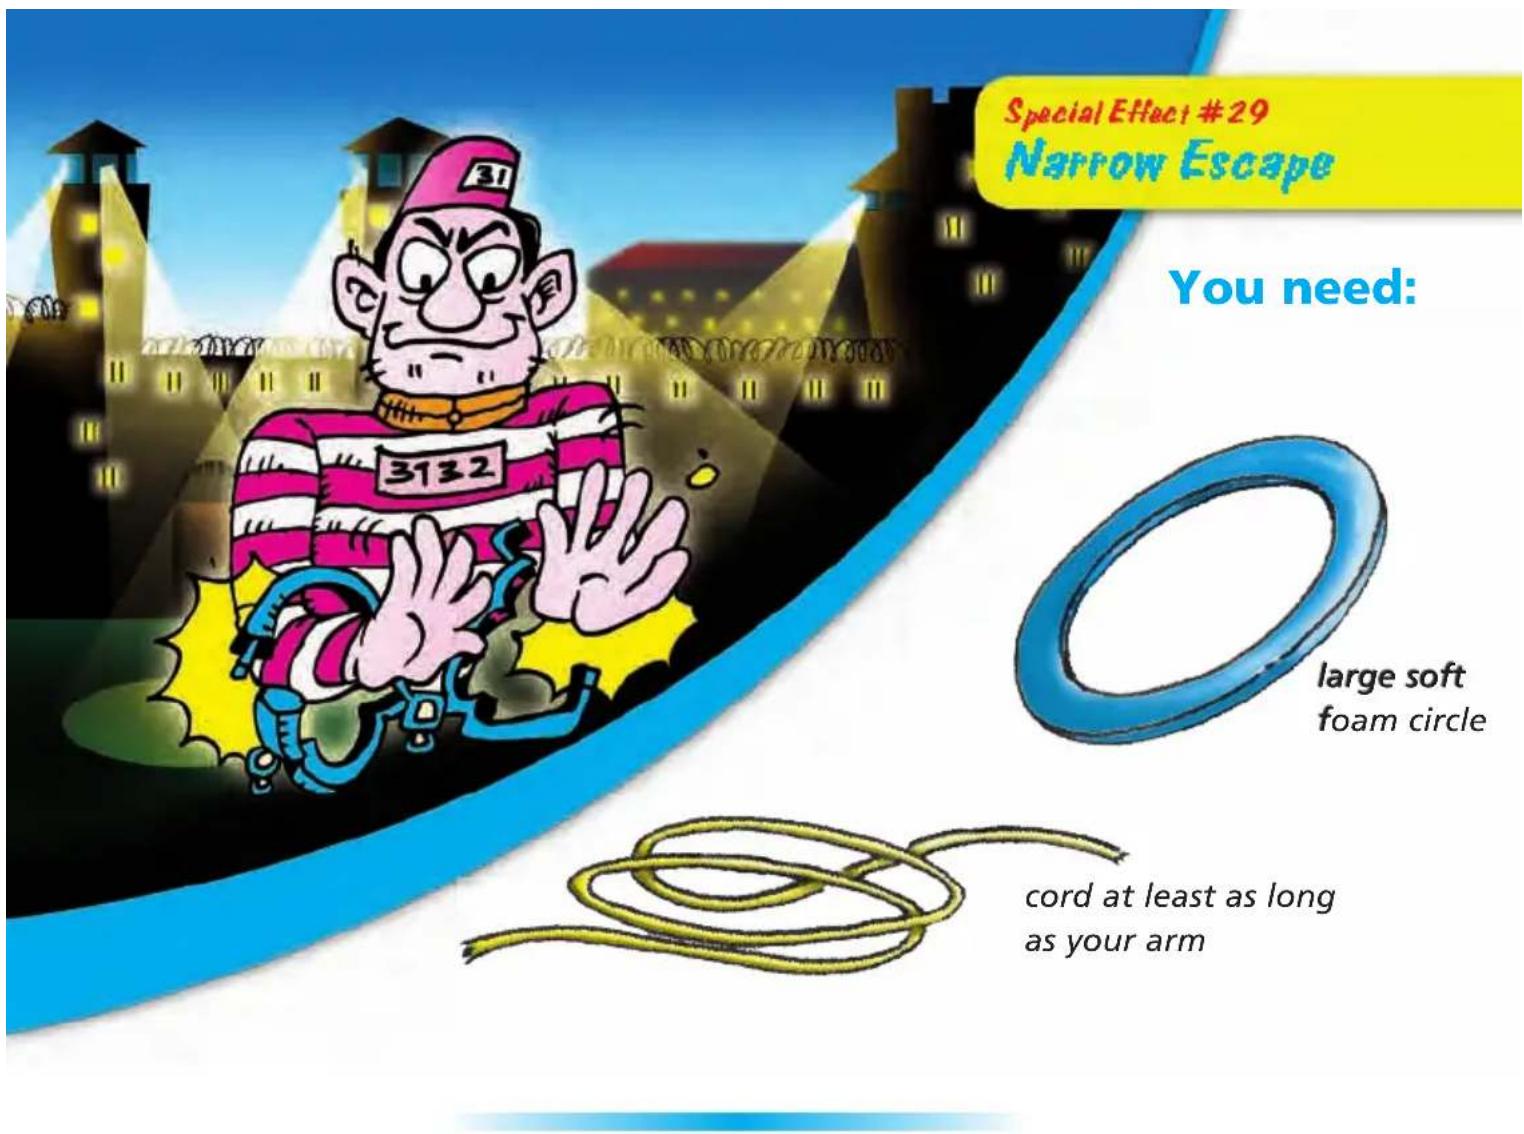
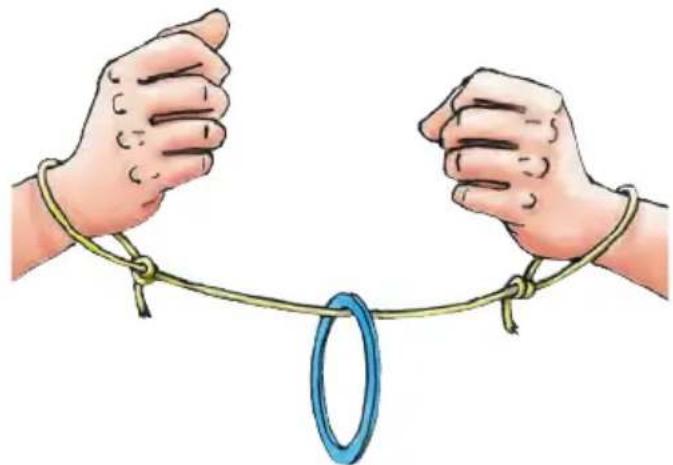
Challenge: Free the circle from the cord without untying your hands and without cutting the cord or the circle.
starting position
natural_image
Illustration of two hands tying a rope knot around a blue ring (no text or symbols)final position
On the next page you'll find all the steps to follow to set up the situation and then, working back, you should be able to solve the problem.
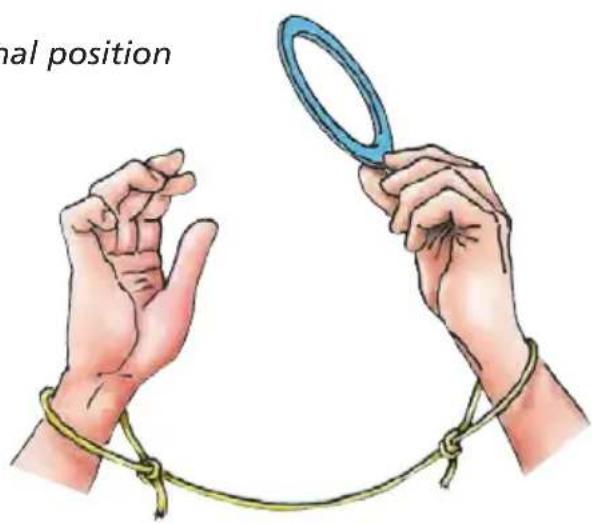
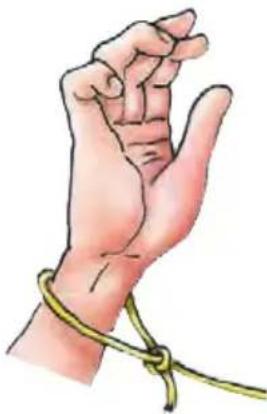
How to do it:
1) Tie your wrists loosely.
2) Slip a hand inside the circle and make it slip down between the wrist and the cord, as in the picture.
natural_image
Illustration of a human hand tied with a rope, showing crisscrossing or entwelling (no text or symbols present)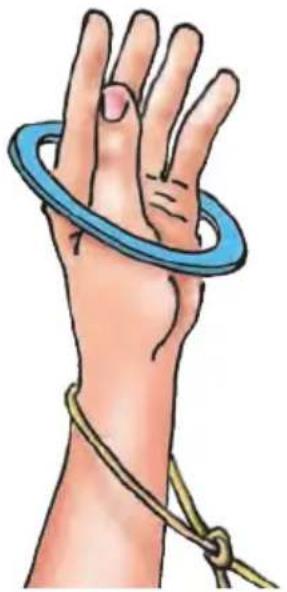
natural_image
Illustration of a human hand holding a blue ring tied with a string (no text or symbols)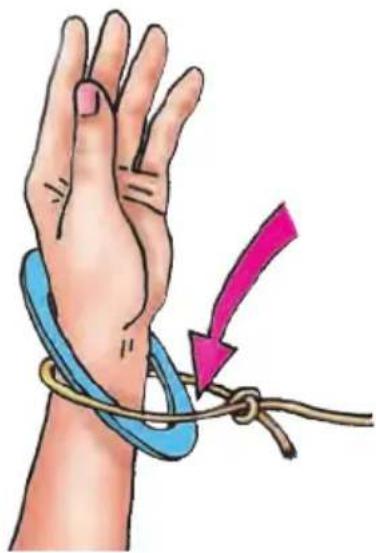
natural_image
Illustration of a hand tying a knot with a blue rope and pink arrow indicating motion (no text or symbols)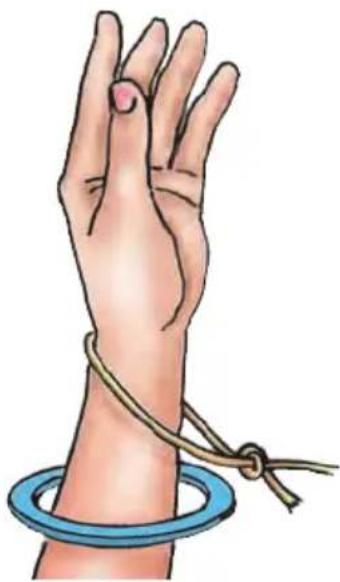
natural_image
Illustration of a human hand with a blue ring and rope tied around the wrist (no text or symbols)3) Move the circle from your arm over your hand and the cord, and then take it half way along the cord.
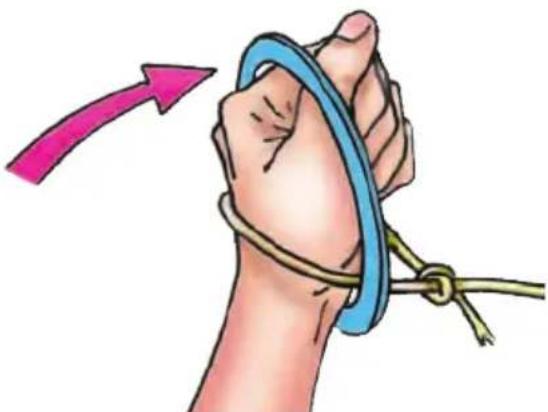
natural_image
Illustration of a hand tying a rope knot with a pink arrow indicating direction (no text or symbols)The operation in reverse gives you the answer to the problem.
The trick you have just tried belongs to a branch of modern mathematics that is interested in how shapes can roll, move, and change into different shapes. This branch is called topology, the geometry of distortion (sometimes called “rubber sheet geometry”).
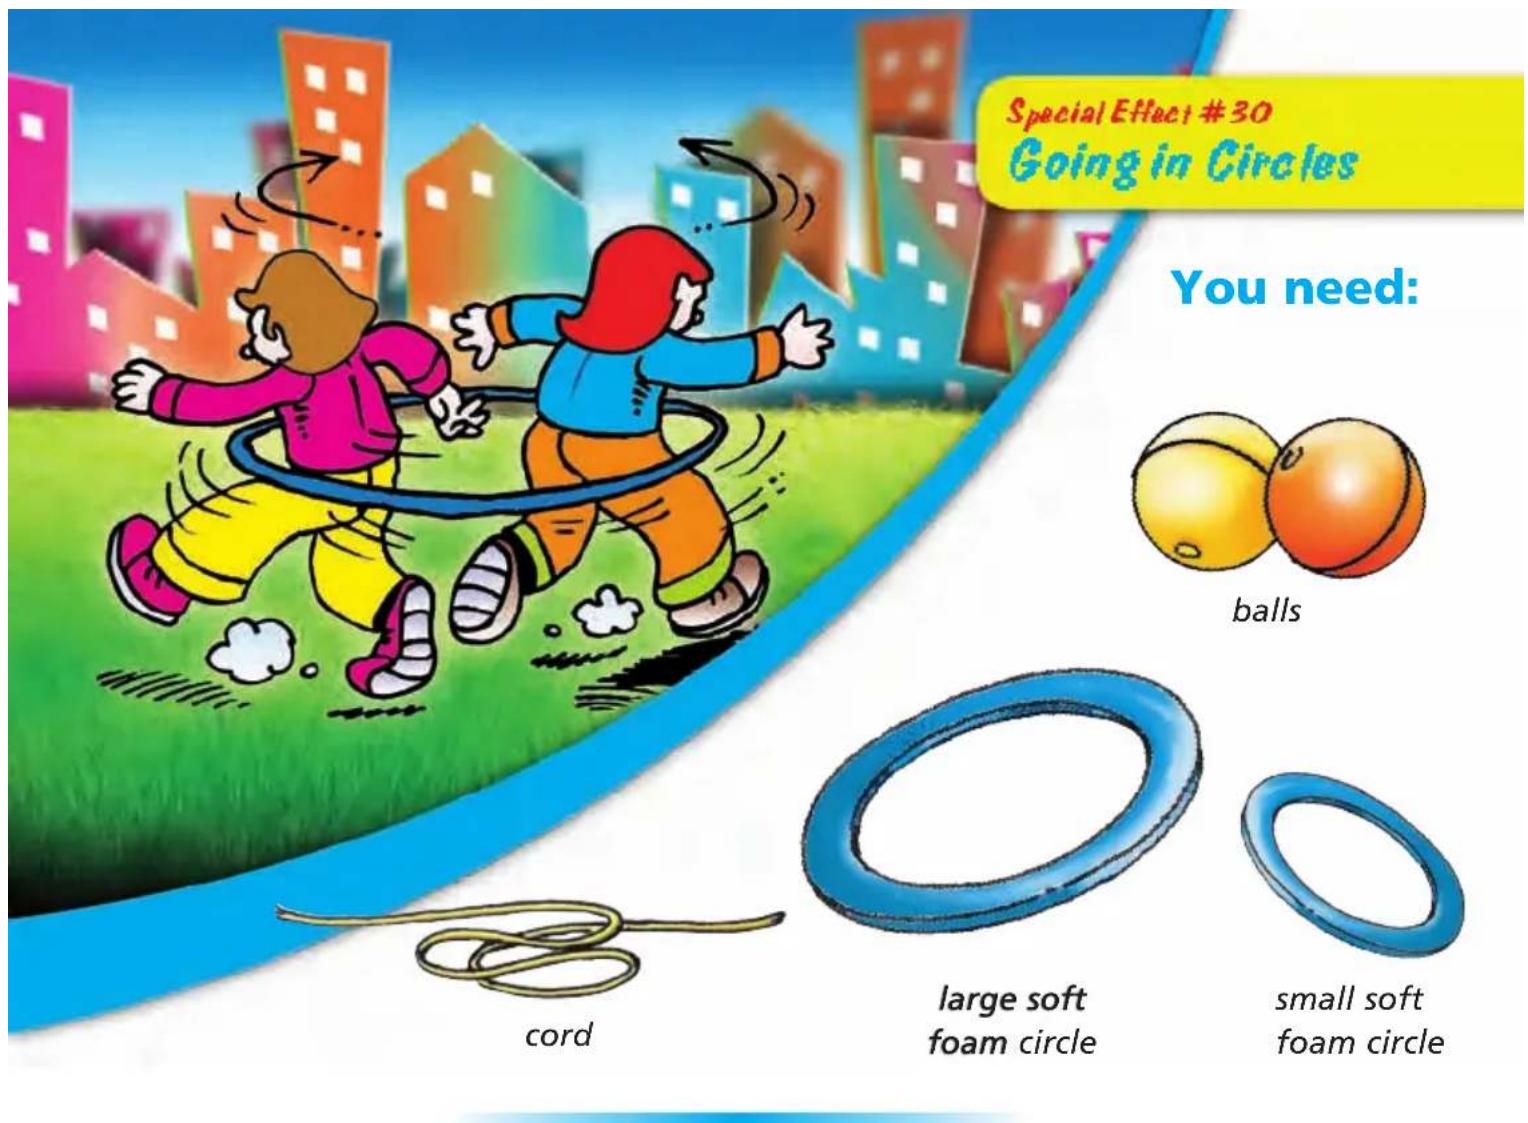
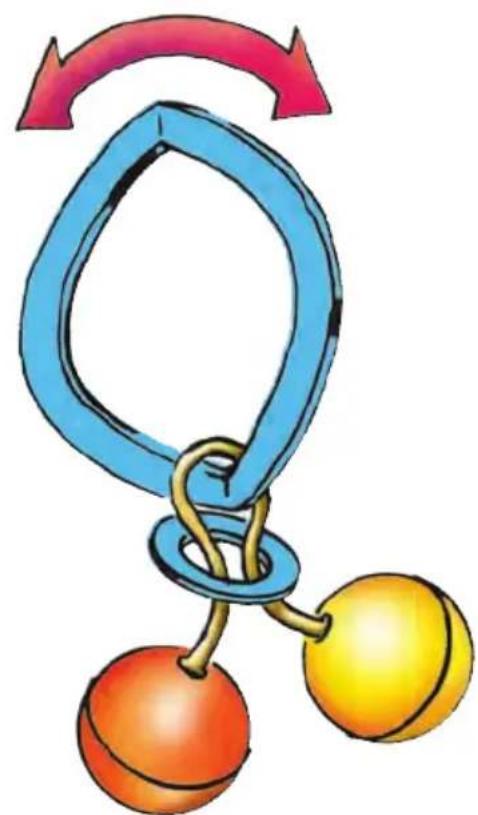
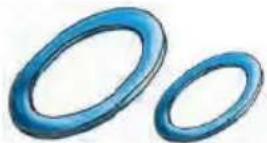
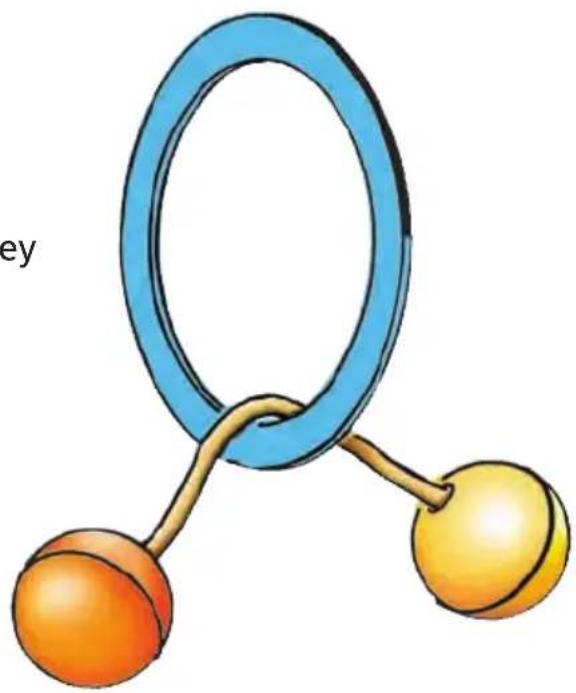
Challenge: How can you free the balls without cutting the circles or the cord?
On the next page of the card you will find all the steps to follow to get to the starting point. By working backward, you'll see the solution.
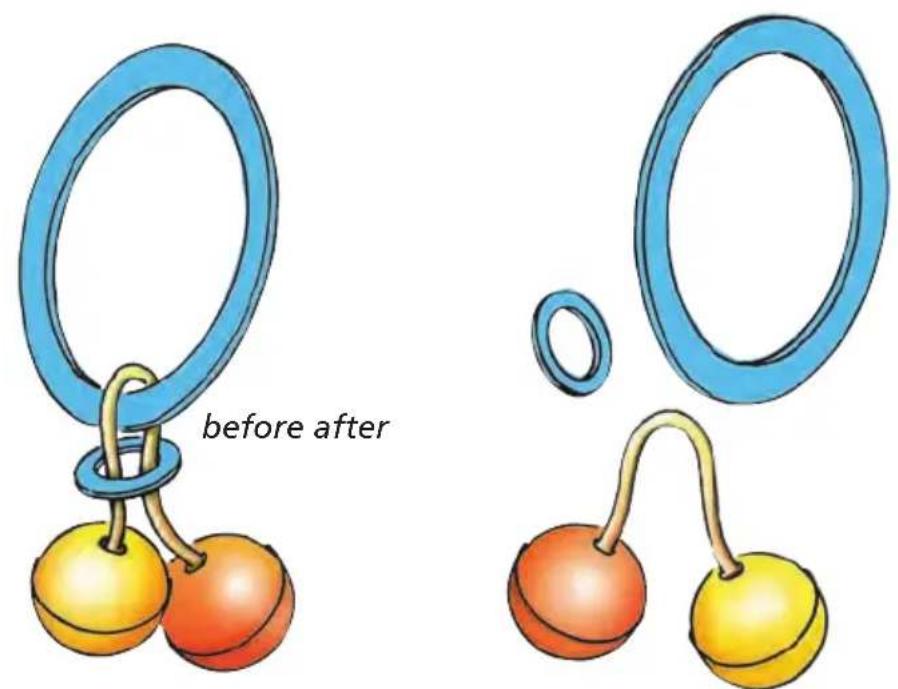
starting position final position
How to do it:
1) Attach the two balls together with a cord the length of a palm and place them so they hang over the large circle.
2) Carefully bend the large circle — so it doesn't go out of shape — as in the picture. Thread the little circle over the large one and let it come right down to the cord connecting the balls. Unbend the big circle again.
natural_image
Illustration of two cherries with blue and pink curved arrows above (no text or symbols)The reverse operation is the solution to the challenge on the previous page.
This is another topological math trick.
natural_image
Illustration of a blue ring connected to two orange spheres, no text or symbols present