SI 4000 - Washing machine Convair - Free user manual and instructions
Find the device manual for free SI 4000 Convair in PDF.

| Product Type | Washing Machine |
| Brand | Convair |
| Model | SI 4000 |
| Dimensions (H x W x D) | 85 x 60 x 60 cm |
| Weight | 70 kg |
| Power Supply | 220-240 V, 50 Hz |
| Rated Power | 2000 W |
| Capacity | 7 kg |
| Maximum Spin Speed | 1200 rpm |
| Energy Class | A++ |
| Water Consumption (per cycle) | 45 L |
| Wash Programs | Cotton, Synthetics, Delicates, Quick 30 min, Wool, Rinse & Spin |
| Noise Level (Wash/Spin) | 56 dB / 75 dB |
| Display | LED digital with remaining time |
| Delayed Start | Up to 24 hours |
| Child Lock | Yes |
| Self-Cleaning | Drum clean program |
| Spare Parts Availability | Available from Convair service centers |
| Manual Included | Yes, PDF available |
Frequently Asked Questions - SI 4000 Convair
User questions about SI 4000 Convair
0 question about this device. Answer the ones you know or ask your own.
Ask a new question about this device
Download the instructions for your Washing machine in PDF format for free! Find your manual SI 4000 - Convair and take your electronic device back in hand. On this page are published all the documents necessary for the use of your device. SI 4000 by Convair.
USER MANUAL SI 4000 Convair
OWNER'S INSTRUCTION MANUAL
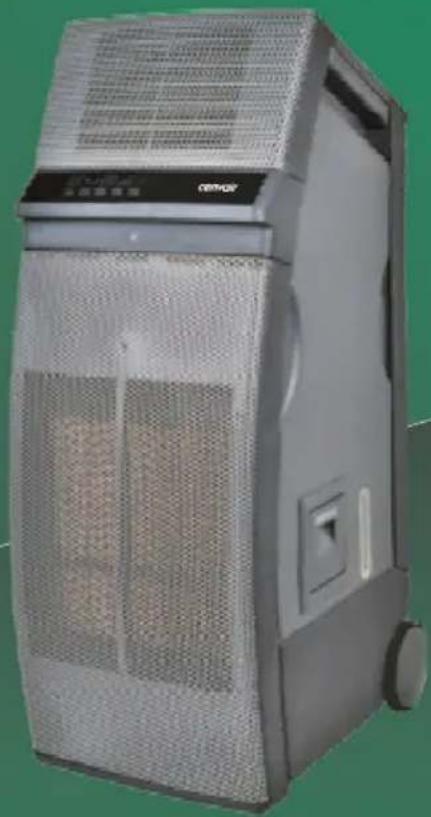
natural_image
Exterior view of a modern industrial air purifier unit (no visible text or symbols)SI4000
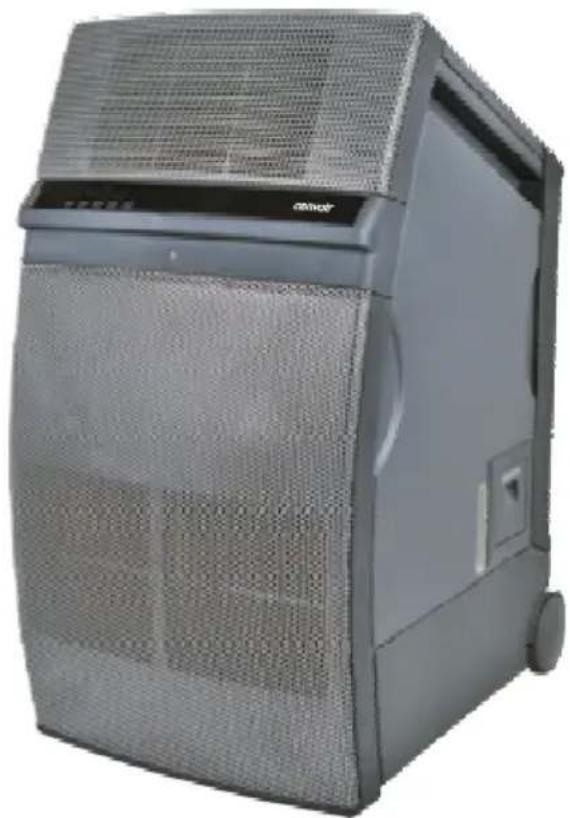
natural_image
Exterior view of a modern office building (no signage)SI5000
PORTABLE INDOOR / OUTDOOR EVAPORATIVE AIR COOLER - IMPORTANT SAFETY INSTRUCTIONS
Please read these instructions before assembling the cooler and keep for future reference.
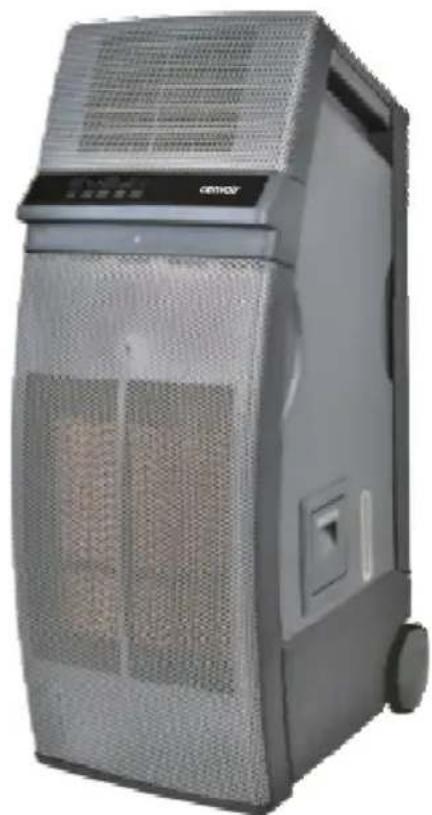
natural_image
Exterior view of a modern industrial air purifier unit (no visible text or symbols)SI4000
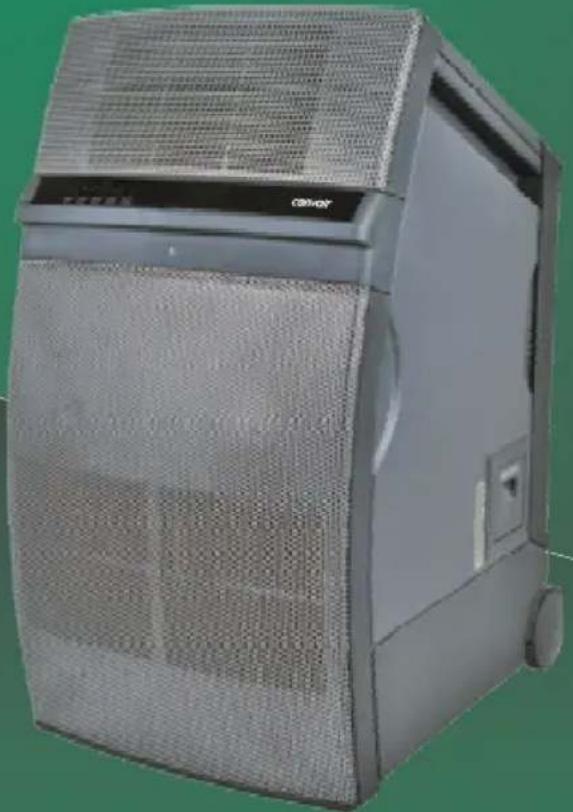
natural_image
Exterior view of a modern industrial server unit with mesh ventilation cover (no visible text or symbols)SI5000

Waste electrical products must not be disposed of with household waste. This product should be taken to your local recycling centre for safe treatment.
CONTENTS
SAFETY INSTRUCTIONS......3
OPERATING INSTRUCTIONS......4-6
Filling the water tank Draining the water tank Cooler location Using the Control Panel Using the Remote Panel
MAINTENANCE....6-8
Regular Maintenance General cleaning Cleaning the water tank Cleaning the cooling pads
TECHNICAL SPECIFICATIONS......8
TROUBLESHOOTING....9
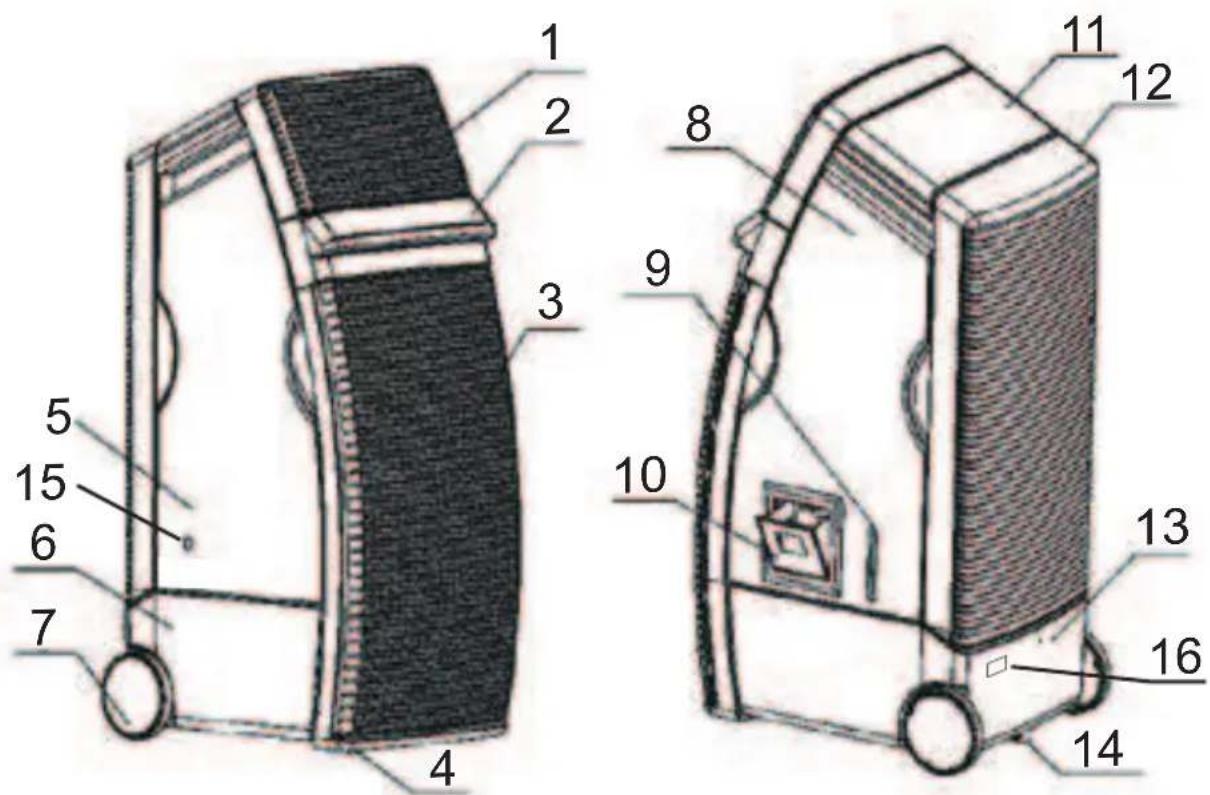
KEY
- Air Outlet
- Control Panel
- Front Air Inlet
- Front Castors
- Left Side Panels
- Water Tank
- Rear Wheels
- Right Side Panel
- Water Level Indicator
- Water Fill Door
- Top Panel
- RearAir Inlet
- Water Overflow Hole
- Drain/ Drain Plug
- Power Cord
- Rating Label
WARNING: This cooler is intended for use in an indoor or outdoor, domestic, office or warehouse environment only. Any other use is not recommended by the manufacturer and may cause fire, electrical shocks or other injury to person or property.
When using electrical appliances, basic safety precautions should always be followed:
- Your cooler operates on 220-240 Volt AC, 50Hz current only. Check the voltage to ensure it matches the cooler's rated specification.
- Before operating the cooler check it is complete and undamaged.
- If the supply cord is damaged, it must be replaced by the manufacturer, its service agent or similarly qualified persons in order to avoid a hazard. Never operate the other damaged cord or plug.
- Do not use an extension cord with this cooler. Do not run the power cord under carpeting, or cover with rugs or runners. Arrange the cord away from areas where it may be tripped over. Remove the power cord from the electrical receptacle by grasping and pulling on the power cord plug-end only, never from the cord.
- Turn the power off and unplug the before filling, cleaning or maintenance.
- Do not insert or allow objects to enter any opening as this may damage the cooler. Do not cover the air inlet or outlet on the cooler as this may cause motor damage.
- Do not use the coales where petrol, spirits, paint or other flammable goods and objects are stored.
- When using the "COOL" setting, check the water tank to ensure it is full. Operation on an empty tank could result in damage to the water pump.
- Do not operate with the wetting pads removed as this will overload and damage the motor.
- Do not use this woblemy solid-state speed control device.
- Do not leave the operating unattended for any extended period of time.
- This is contrintended for use by person's (including children or elderly) with reduced physical, sensory or mental capabilities, or lack of experience and knowledge, unless they have been given supervision or instruction concerning the use of the appliance by a person responsible for their safety.
- Do not let children play with any packaging or plastic bags. Injury may result from such practices. Children should be supervised to ensure that they do not play with the cooler
- If the isodamaged or it malfunctions, do not continue to operate it. Refer to the troubleshooting section. Do not attempt to repair or adjust any electrical or mechanical functions of the cooler, as this may void the warranty.
- This product is not intended for use in wet or damp locations. Never locate the cooler where it may fall into a bathtub or other water container. When it is not in use always store in a dry area.
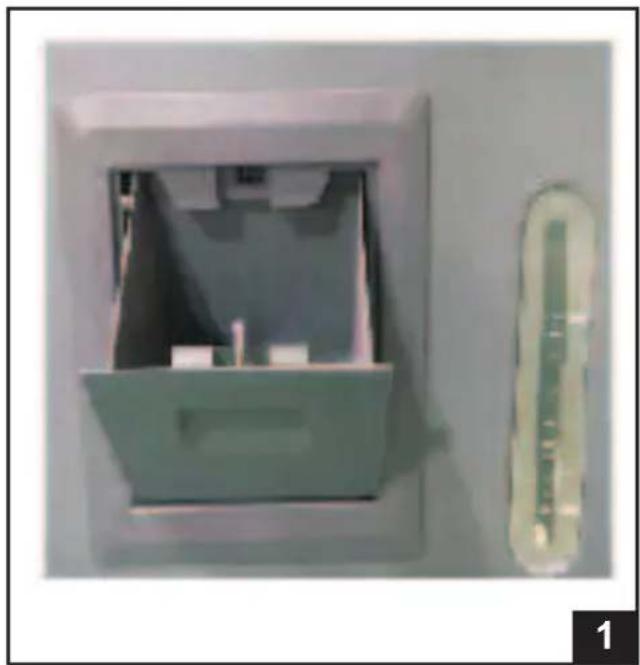
FILLING THE WATER TANK
Warning: Turn the power off, unplug and move the cooler into position prior to filling or draining the water tank.
Fill the water tank with clean water. To do this, open the water fill door located on the side panel (Fig. 1).
The tank is full when the water level indicator reaches the 'MAX' position.
Do not overfill as water will spill out onto the floor! Your cooler has an overflow hole in the rear of the tank in case this should occur.
natural_image
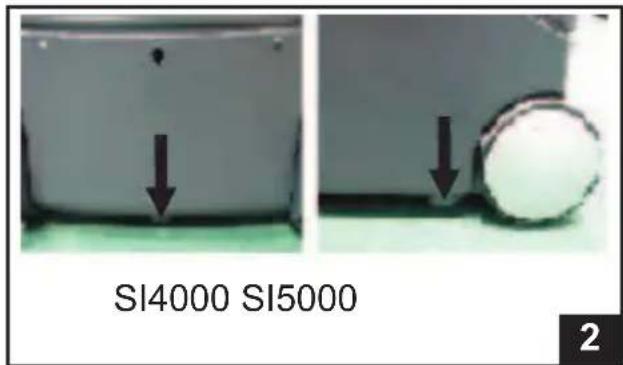
Exterior view of a wall-mounted device with a transparent lid and a small thermometer on the right (no visible text or symbols)DRAINING THE WATER TANK
Warning: Turn off and unplug the cooler prior to moving, servicing, filling or draining the water tank.
Move the cooler to a location where water can be disposed of safely. Pull out the drain plug at the bottom of the cooler to release the water from the water tank (Fig. 2).
Once it has completely drained, replace the drain plug. The cooler is ready to be filled with fresh water.
COOLER LOCATION
If using indoors, place the cooler in front of an open door or window. Ensure that there is adequate cross-ventilation in the room by leaving a door or window open opposite from the cooler.
If using outside, it can be placed in any convenient location where there is plenty of fresh air.
Following these rules will ensure your cooler will work as effectively as possible.
Warning: Do not operate the cooler with the cooling pads or grilles removed.
Plug the cooler in to a power outlet. The cooler will be in stand-by mode (the cooler will beep and the amber coloured POWER symbol will be lit), ready for operation.
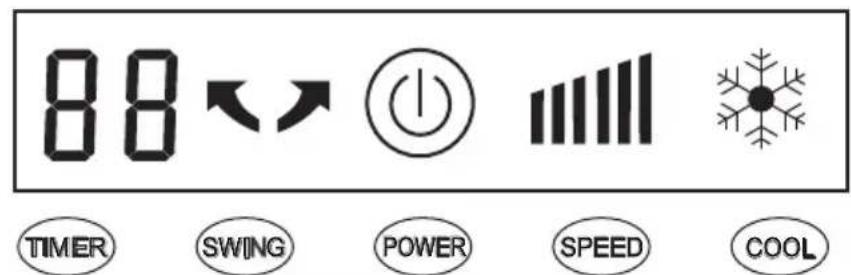
USING THE CONTROL PANEL
The cooler's control panel has a 'touch' sensitive panel. All buttons can be operated by lightly touching them.
Power ON/OFF
To turn on the unit, touch POWER button. The 'blue' outer circle will light, the TIMER will display 0.0 and the fan will come on at HIGH speed for 2 seconds and then change to LOW speed.
To turn off the cooler, touch the POWER button for 2 seconds until the cooler shuts off.
Speed Control
Touch the SPEED button to change the fan speed between LOW ( ) and HIGH ( ) speed settings.
Cooling
To use as an evaporative air cooler, touch the COOL button on the control panel. The pump will turn on and distribute water to the cooling media.
Note! Maximum cooling will not be achieved until the wetting media is fully saturated. This may take several minutes.
The cooler can be operated in FAN only mode by turning cooling off at any time.
Low Water Level Warning
Your cooler is equipped with a low water level warning function. When in COOL mode and water is below the minimum level, a warning sound will beep for a few seconds and the COOL symbol will flash continuously. The water pump will shut off to protect itself from damage. The COOL function cannot be selected until reset.
To reset, refill the water tank with fresh water. The COOL symbol will disappear and turn on the COOL function to enjoy the cool air again.
Swing Function
Touch the SWING button on the control panel to turn on the automatic swing function. The SWING symbol will be lit and the louvres will begin to move from side to side in a horizontal direction. Note! Vertical direction of the air flow is preset and cannot be adjusted.
CONTROL PANEL
OPERATING INSTRUCTIONS (cont)
Timer
Your cooler is fitted with a timer to automatically turn off up to 8 hours in advance.
Touch the TIMER button to set the timer. The TIMER can be set from 0.5 to 8.0 hours in 0.5 hour increments. Each touch will increase the set time by 0.5 hours.
To cancel the TIMER, continue touching until the display value reads "0.0". Alternatively, turn the POWER off and back on again.
Safety Lock Function
Your cooler features a safety lock function to prevent unintentional changes in function when the control panel is touched accidentally.
To lock the cooler at the selected setting, touch the POWER and COOL buttons at the same time until the power symbol on the display turns off.
To unlock the cooler from the safety lock setting, touch the POWER and COOL buttons at the same time until the power symbol appears on the display.
Your cooler is provided with a remote control, which has the same functions as the cooler's control panel.
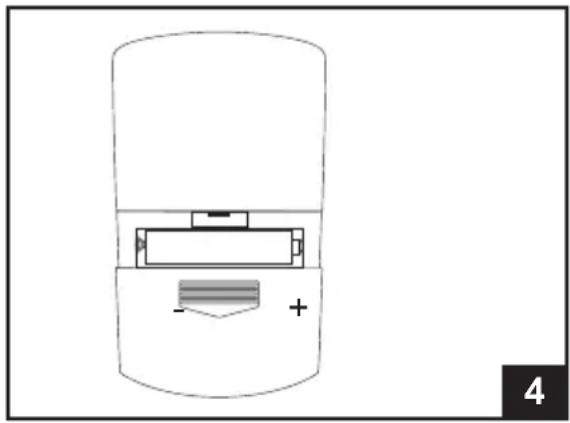
Place 2 x AAA batteries (provided) into the battery compartment, making sure the + and - match the compartment markings (Fig. 4).
natural_image
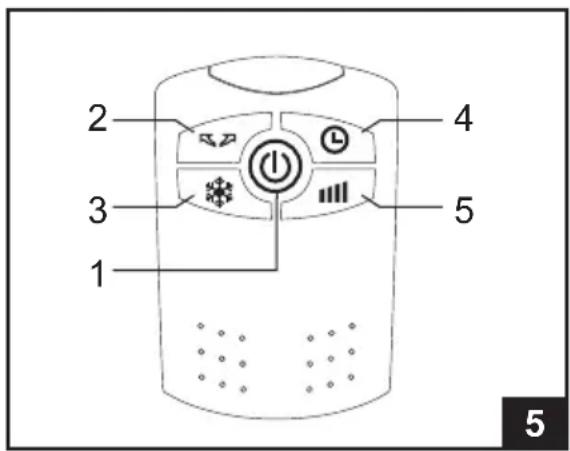
Diagram of a cylindrical device with a battery and indicator lights, labeled '4' in the corner (no text or symbols on the device itself)Operation with the remote control buttons are as below (refer Fig. 5):-
- PowerON/OFF button
- SWING vane button
- COOL mode button
- TIMER button
- FAN SPEED button
Note!
- Ensure the cooler is plugged in and ready for use.
- Always point the remote control at the cooler when operating.
- Don't abuse the remote control.
- Don't allow the remote control to get wet.
- Don't place near strong electromagnetic waves.
- Don't mix old and new batteries! If the remote control will not be used for a long time, remove the batteries to avoid corrosion.
CLEANING AND MAINTENANCE
Warning: Always disconnect the cooler from the electricity mains power before moving, cleaning or any maintenance.
Regular Maintenance:
Regular maintenance will maximize the efficiency and service life from your cooler. Before starting any maintenance operation, read thoroughly all operating and maintenance instructions observing all cautions and warning.
Whilst the cooler is still operating, turn off the COOL mode and operate the cooler on FAN only, to allow the cooling pads to dry thoroughly.
General Cleaning:
Dampen a clean cloth with water and use it on the exterior of the cooler to remove any dust or dirt. Never use harsh detergents, solvents, corrosive cleaners or any chemicals to clean the cooler. When not in use, drain the water tank and store the cooler in an area where it is dry and out of the sunlight.
Cleaning the Water Tank:
Place the cooler over a drain or other location where water can be safely removed from the tank. Remove the drain plug located at the bottom of the cooler and empty the water (refer Fig. 2, pg 4). Replace the plug, refill the water tank then remove the plug and drain the cooler again. This should be done weekly to reduce water and mineral build up and extend the life of the cooling pads.
Adamp cloth can be used to remove calcium build-up inside and outside of the cooler. The inside of the water tank should be cleaned once or twice in a season to maintain air quality.
Cleaning the Cooling Pads:
The cooler uses honeycomb cooling pads. In areas where the mineral content of the water is high, deposits may build up and restrict air flow. In this case, it is recommended that the pads be deep cleaned every two months.
Caution: Front and Rear Pad assemblies should be removed and serviced one at a time to avoid mixing of components.
Rear Pad Assembly:
Remove the two screws retaining the rear panel (Fig.6). Remove the rear panel assembly. You now have access to the inside of the water tank and honeycomb pad. To remove the pad, undo the four screws holding the pad frame to the rear panel (Fig. 8 & 9).
Once the pad frame is free, gently bend the tabs on each side to release the water spreader pan (Fig.10). Once the water spreader removed, the cooling pad can slide out of the assembly for cleaning (Fig.11).
Front Pad Assembly:
Remove the four screws retaining the front panel (Fig.7). Remove the front panel assembly by lifting the bottom side and unhooking the tabs on top. To remove the pad follow the same instructions as the rear pad assembly.
The pads can be cleaned with a soft stream of water. Do not use high pressure water as this may damage the pad. Remove any large debris by hand. Clean the pad frames, spreader and grilles by using a soft brush or damp cloth to remove mineral buildup and debris.
Once cleaning is finished, the cooler should be allowed to dry out completely before reassembly.
Reassemble the cooler in the reverse order as described above.

natural_image
Close-up of a white container with two black arrows pointing upward, placed on a light blue surface (no text or symbols visible)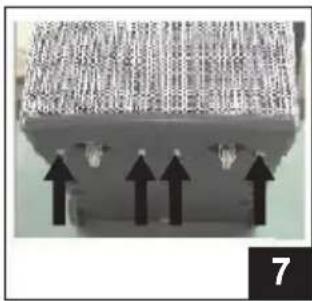
natural_image
Close-up of a mechanical component with three upward-pointing arrows indicating force or direction (no text or symbols visible)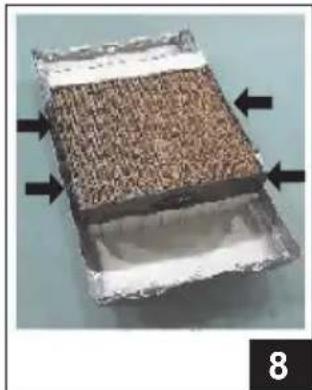
natural_image
Close-up of a rectangular container with textured surface and white bands, marked with black arrows pointing to the sides (no text or symbols visible)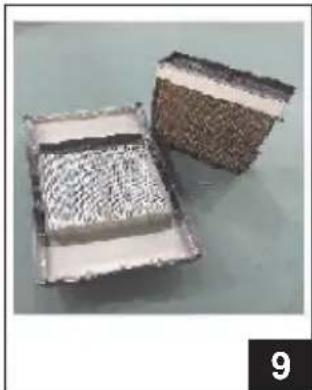
natural_image
Two rectangular metal grates with textured surfaces, one open and one closed, placed on a plain surface (no text or symbols visible)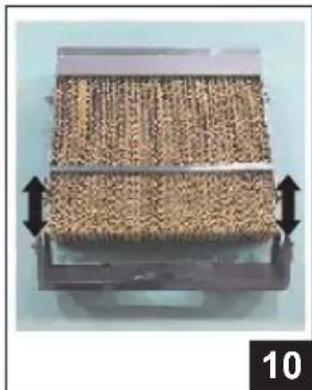
natural_image
Close-up of a mechanical component with textured surface and directional arrows indicating movement (no text or symbols)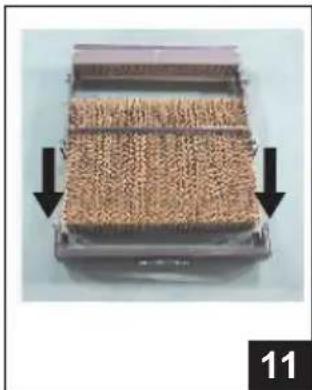
natural_image
Close-up of a container filled with granular material, showing two black arrows pointing to the side (no text or symbols visible)| SEELEY INTERNATIONAL - CONVAIR OUTBACKINDOOR/OUTDOOR PORTABLE AIR COOLERTECHNICAL SPECIFICATIONS | ||
| Model | SI4000 | SI5000 |
| Power Supply | 220-240 V ~, 50 Hz | 220-240 V ~, 50 Hz |
| Input Power (Watts) | 270 | 350 |
| Water Tank Capacity (L) | 30 | 45 |
| Weight (kg) | 25 | 38 |
| Dimensions (mm)(width / depth / height) | 430 / 560 / 1090 | 585 / 685 / 1090 |
CONDITION POSSIBLE CAUSE REMEDY
| Cooler will not operate initially. | Cord is not plugged in. | Ensure cord is plugged in and switched on at power outlet. |
| Power outlet or supply faulty. | Check the power outlet. Check the power supply | |
| Incorrect voltage. | Check that the power supply is the same as specified on the rating label. | |
| No cooling. | Pump is not turned on. | Turn cool mode on by pressing the COOL button. |
| Water tank is low or empty. | Make sure the COOL symbol is not flashing indicating low water. Fill with water again until water level indicates the tank is full. | |
| Pump is not working correctly. | Call customer service | |
| Cooling pad blocked or dirty. | Drain the tank and fill the cooler with clean water. This will help dissolve and flush out the dirt. The cooling pad should now be wet. | |
| Cooler not responding to remote controller. | Touch button safety lock | Unlock safety feature, press POWER and COOL buttons on the control panel at the same time until power indicator light comes back on. |
| Moisture in PCB | Try using the remote control to see if the unit responds. If the unit responds briefly, the likely cause is moisture in the PCB. Turn the unit off, unplug the power and call customer service. | |
| Remote Control batteries are old | Check batteries in the remote controller and replace. | |
| Remote Control reception | Remote reception distance will be significantly reduced under direct sunlight. | |
| Damaged PCB | If none of the above solutions work, the PCB/ Touch screen assembly is damaged. Call customer service. | |
| Cooler makes a bad smell. | Tank or cooling pad dirty. | Drain the tank and fill the cooler with clean water. If it still smells, clean the tank and replace the cooling pad. |
| Water quality is poor. | Add a little vanilla essence or perfume to the water. | |
| Cooler makes noise. | Low water level. | Whenever the water level is below minimum, the COOL display will continuously flash and a warning sound will beep for 10 seconds. Refill the water tank with fresh water and turn on the COOL function. |
| Motor or Fan problem. | Turn off and unplug the unit. Call customer service. | |
| Water colour yellowish at initial use. | Colour bleeds from cooling pad media. | This is normal. After several uses, the water colour will be clean. |
| Water overflows from the tank. | Too much water in tank. | Drain some water out of the tank. |
| Cooler will not operate at all. | Electrical fault. | Electrical parts must only be repaired and replaced by Authorised ServiceAgents. |
| Damaged power supply cord. | If the power supply cord of this appliance is damaged it must be replaced. Electrical parts must only be repaired and replaced byAuthorised ServiceAgents. |
It is the policy of Seeley International to introduce continual product improvement. Accordingly, specifications are subject to change without notice. Please consult with your dealer to confirm the specifications of the model selected.

Service
Australia 1-300-650-644
seeleyinternational.com
cenvair®