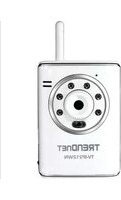
TVIP312WN - Security Camera TRENDNET - Free user manual and instructions
Find the device manual for free TVIP312WN TRENDNET in PDF.


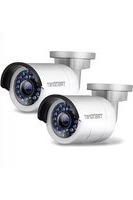
| Product Type | Security Camera |
| Brand | TRENDnet |
| Model | TVIP312WN |
| Category | IP Camera |
| Image Sensor | 1/4" Progressive Scan CMOS |
| Resolution | 1280 x 1024 (1.3 Megapixel) |
| Lens | Fixed, 4mm, F2.0 |
| Night Vision | Up to 10 meters (built-in IR LEDs) |
| Wireless Connectivity | IEEE 802.11b/g/n (2.4 GHz) |
| Wired Connectivity | 10/100 Mbps Ethernet (RJ-45) |
| Power Supply | DC 5V, 2.5A (via included adapter) |
| Power Consumption | 6W max |
| Dimensions (L x W x H) | 7.5 cm x 6.5 cm x 10.5 cm |
| Weight | 300 g |
| Operating Temperature | 0°C to 40°C |
| Storage Temperature | -20°C to 60°C |
| Humidity | 20% to 80% (non-condensing) |
| Main Features | Motion detection, push notifications, two-way audio, remote viewing via app |
| Video Compression | H.264, MJPEG |
| Mounting Type | Ceiling or wall mount (bracket included) |
| Cleaning Instructions | Wipe gently with a dry, soft cloth. Do not use harsh chemicals or liquids. |
| Safety Instructions | Use only the supplied power adapter. Avoid exposing to rain or moisture. |
| Spare Parts & Repairability | No user-serviceable parts. Contact TRENDnet support for repairs. |
Frequently Asked Questions - TVIP312WN TRENDNET
User questions about TVIP312WN TRENDNET
0 question about this device. Answer the ones you know or ask your own.
Ask a new question about this device
Download the instructions for your Security Camera in PDF format for free! Find your manual TVIP312WN - TRENDNET and take your electronic device back in hand. On this page are published all the documents necessary for the use of your device. TVIP312WN by TRENDNET.
USER MANUAL TVIP312WN TRENDNET
natural_image
White TREADNET TV-IP312WV device with circular lens and control buttons (no visible text beyond branding)Quick Installation Guide


Table of Contents
English 1
- Before You Start 1
- Hardware Installation 2
- Configure the IP Camera 3
Troubleshooting 7
Wireless Tips 8

natural_image
White Treadnet device with antenna and circular lens (no visible text or symbols on body)Package Contents
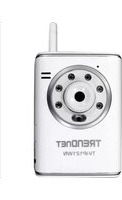
• TV-IP312WN
• CD-ROM (Utility and User's Guide)
• Multi-Language Quick Installation Guide
• Network Cable (1.5m / 5ft)
- 1 x 2dBi Detachable Antenna
- Mounting Kit
• Power Adapter (5V DC, 2.5A)
System Requirements
- A computer with a wired network adapter properly installed
- CD-ROM Drive
• VGA Resolution: 800 x 600 or above
• Web Browser: Internet Explorer (6.0 or higher) - Wireless Router (e.g. TEW-691GR) or Access Point (e.g. TEW-690AP)
- An available DHCP Server – routers usually have a built-in DHCP server
SecurView Pro Requirements
| Supported Operating Systems CPU | 1-8 Cameras | 9-32 Cameras | ||
| CPU | Memory Memory | CPU | ||
| Windows 7 (32/64-bit) | Intel Core 2 Duo | 2GB RAM or above | Intel Core 2 Quad | 4GB RAM or above |
| Windows Vista (32/64-bit) | Intel Core 2 Duo | 2GB RAM or above | Intel Core 2 Quad | 4GB RAM or above |
| Windows XP (32/64-bit) | Intel Core 2 Duo | 2GB RAM or above | Intel Core 2 Quad | 4GB RAM or above |
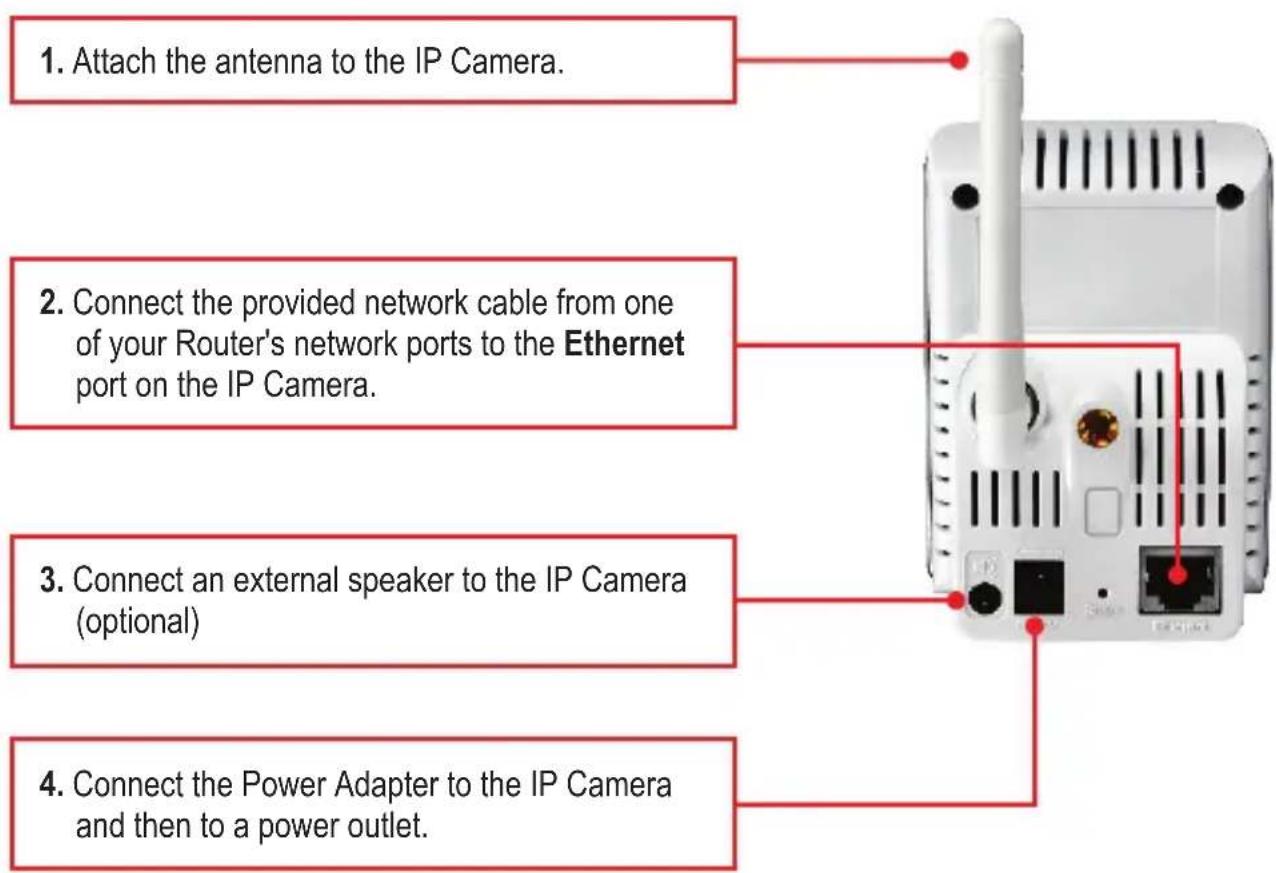
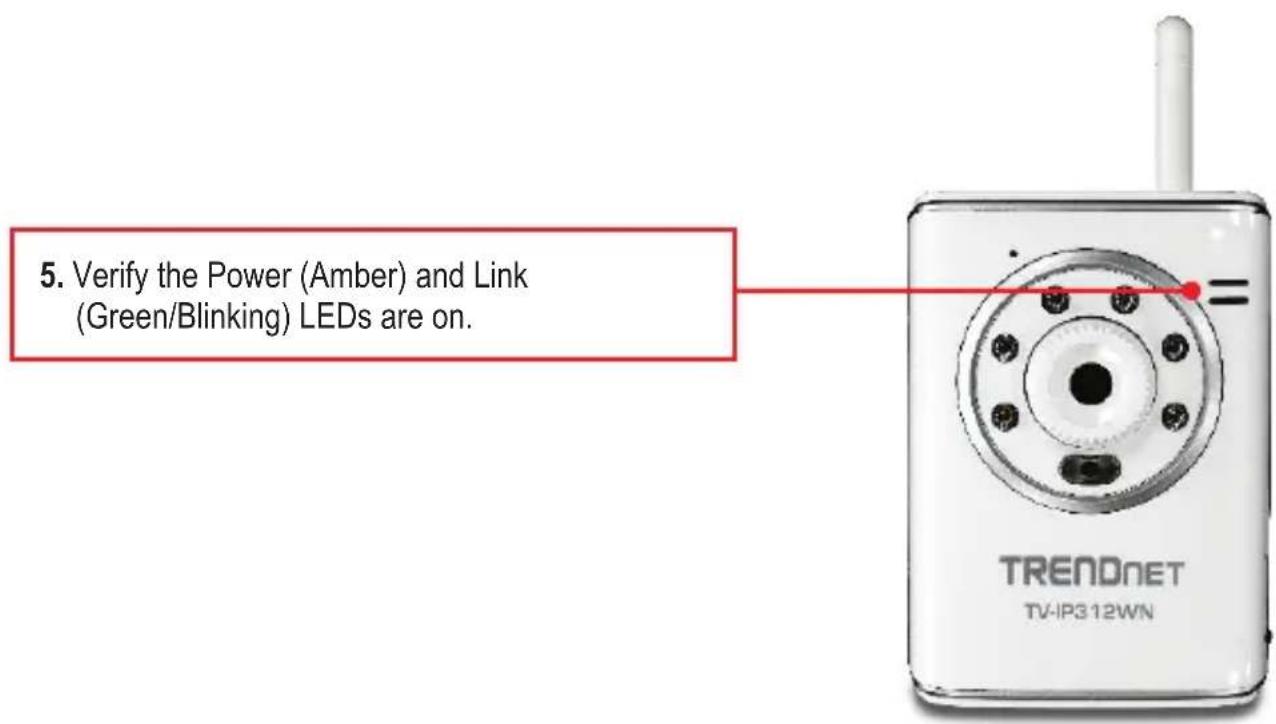
2. Hardware Installation
3. Configure the IP Camera
Note: It is recommended that you configure the IP Camera from a wired computer.
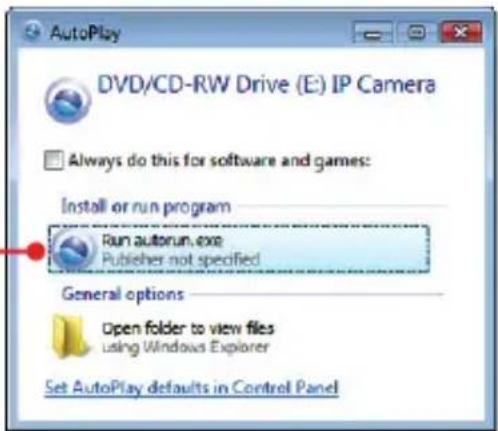
- Insert the Utility CD-ROM into your CD-ROM drive.
- Click Run autorun.exe (Windows 7/Vista only).
- Click IPSetup.
- Follow the Installation Wizard instructions.
- Once installation is complete click Close.
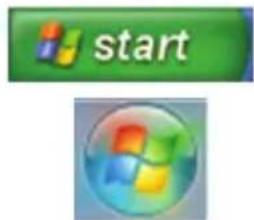
- Click the Start (Windows XP) or Windows (Windows 7) icon.
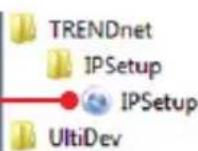
- Go to Programs → TRENDnet → IP Setup | and click IP Setup.


Note:
By default, the IP setting on the TV-IP312WN is set to DHCP. If you want to give the TV-IP312WN a static IP address, please refer to the User's Guide on the Utility CD-ROM.
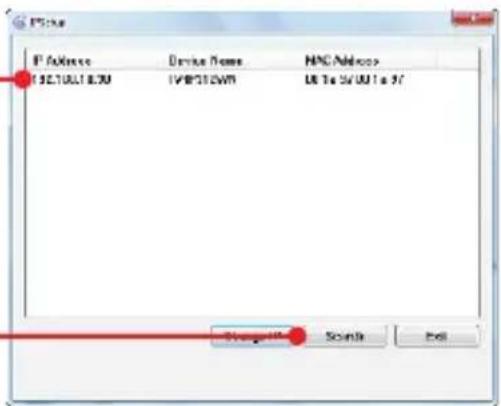
- Double click the IP Camera to access the browser configuration. Verify that the MAC address listed matches the IP address on your IP camera. The MAC address is listed on the bottom of the TV-IP312WN. Click Search if no cameras are detected.
- Enter the User name and Password, and then click OK. By default: User Name: admin Password: admin

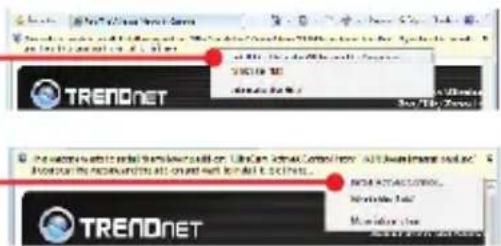
- Right click on the information bar and click Install This Add-on for All Users on This Computer... (Internet Explorer 8) or click Install ActiveX Control (Internet Explorer 6/7).
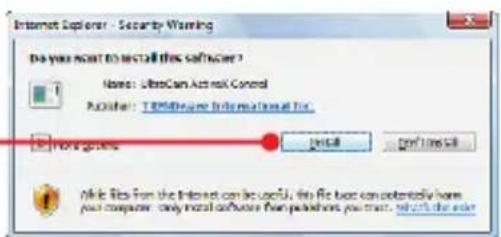
- Click Install (Internet Explorer 6/7).
Note:
If you plan on keeping the TV-IP312WN wired to your router, please skip to step 16. If you plan on connecting the TV-IP312WN wirelessly to your router, continue on to step 12.
- Click Setup, Network and then click Wireless.

- Click Site Survey. Select an ESSID. The ESSID (SSID) is the wireless network name for your wireless network (e.g. wireless router or access point). If encryption is enabled, select the proper Authentication and Encryption type, enter the Pre-Shared Key and then click Apply. (Example shows WPA2-PSK. If your wireless network does not support WPA, select open or shared instead. Contact your network administrator for more information).

-
Disconnect the RJ-45 cable and unplug the power. Then plug the power back in.
-
Verify the Power (Amber) and Link (Green/Blinking) LEDs are on.
Note:
The TV-IP312WN will not work wirelessly until you disconnect the Ethernet cable from the back of the camera.
- Click Live View. Live video will now appear. Note: If the TV-IP312WN's configuration page cannot be displayed, the IP address assigned to the IP camera may have changed. Please repeat steps 6-8.

Your configuration is complete
- For detailed information regarding the TVodP3g2MN on and advanced settings, please refer to the Troubleshooting section, User's Guide CD-ROM, or TRENDnet's website at http://www.trendnet.com.
- If you would like to use SecurView Pro software, please install the software by clicking SecurView Pro in the Autorun window and refer to the User's Guide on the CD for more information.
Register Your Product
To ensure the highest level of customer service and support, please take a moment to register your product Online at: www.trendnet.com/register
Thank you for choosing TRENDnet
-
I inserted the Utility CD-ROM into my computer's CD-ROM Drive but the installation menu does not appear automatically. What should I do?
-
For Windows 7, if the installation menu does not appear automatically, click on the Windows Icon on the bottom left hand corner of the screen, click the "Search programs and files" box, and type D:\autorun.exe, where "D" in "D:\autorun.exe" is the letter assigned to your CD-ROM Drive, and then press the ENTER key on your keyboard.
- For Windows Vista, if the installation menu does not appear automatically, click Start, click the Start Search box, and type D:\autorun.exe where "D" in "D:\autorun.exe" is the letter assigned to your CD-ROM Drive, and then press the ENTER key on your keyboard.
-
For Windows XP, if the window does not appear automatically, click Start, click Run and type D:\autorun.exe where "D" in "D:\autorun.exe" is the letter assigned to your CD-ROM Drive, and then press the ENTER key on your keyboard.
-
IP Setup is unable to detect my camera. What should I do?
-
Verify that you have followed all the steps in Section 2: Hardware Installation.
- Disable any software firewall programs such as ZoneAlarm or Norton Internet Security. If you are using Windows 7, Vista or XP disable the built in firewall.
- Click on Search in IPSetup.
-
Take a pin or paper clip. Press the Reset button on the back on the IP Camera for 10 seconds, then let go.
-
I do not have a DHCP server or DHCP is disabled on my network and I am unable to configure the TV-IP312WN. What should I do?
-
Go to the TCP/IP settings on your computer and assign a static IP address on your computer's network adapter in the subnet of 192.168.10.x. Since the default IP address of the TV-IP312WN is 192.168.10.30, do not assign a static IP address of 192.168.10.30 on your computer's network adapter.
-
Open Internet Explorer and enter http://192.168.10.30 into the address bar.
-
The Image is blurry. How can I adjust the focus on the IP Camera?
You can adjust the IP Camera's focus by rotating the lens.
-
When I click on Live View the image does not load?
-
Make sure that you are using a browser that supports ActiveX.
-
Make sure that ActiveX is installed. See steps 10-11 in Section 2: Hardware Installation.
-
How do I connect the TV-IP312WN to my wireless router or access point?
Make sure that you configure the camera to have the same SSID, encryption mode and key (if enabled).
Follow the instructions in section 2 to configure the camera with the SSID and encryption key.
-
After I successfully configured the TV-IP312WN to match my wireless network settings, I cannot connect to the camera.
-
Verify that the wireless settings match your wireless network settings.
- Verify in the wireless section of the browser configuration that the Enable option is checked.
- Make sure to disconnect the Ethernet cable from the camera and verify that the LINK LED is blinking green.
-
Please refer to the Wireless tips section if you continue to have wireless connectivity problems.
-
I forgot my password. What should I do?
Take a pin or paperclip and press the reset button on the back of the unit for 15 seconds. This will return settings back to factory defaults. Open up the IP Setup program to find out the IP address of the camera (see step 8 in Section 3: Configure the IP Camera. If you do not have a DHCP server on your network, the default IP address is 192.168.10.30. The default administrator ID and password is admin.
If you still encounter problems or have any questions regarding the TV-IP312WN, please contact TRENDnet's Technical Support Department.
The following are some general wireless tips to help minimize the impact of interference within an environment.
Assign your network a unique SSID
Do not use anything that would be identifying like "Smith Family Network". Choose something that you would easily identify when searching for available wireless networks.
Do not turn off the SSID broadcast
The SSID broadcast is intended to be on and turning it off can cause connectivity issues. The preferred method of securing a wireless network is to choose a strong form of encryption with a strong and varied encryption key.
Note: after setting up the SSID, encryption type and encryption key/passphrase, please make a note of them for future reference. You will need this information to connect your wireless computers to the wireless router/access point.
Change the channel
Most wireless access points and routers are defaulted to channel 6. If you have a site survey tool that will display the channels you can plan your channel selection around neighboring access points to minimize interference from them. If your site survey tool does not display the channel try using channels 1 or 11.
Change the channel bandwidth
If you are using an 802.11n router or access point you can also make the following changes. Change the channel bandwidth to 20/40MHz. This will provide the highest possible performance using an 802.11n device. Also, if using 802.11n you should be securing the network with WPA2 security.
Note: Due to Wi-Fi certification considerations if you choose WEP, WPA or WPA2-TKIP encryption this device may operate in legacy wireless mode (802.11b/g). You may not get 802.11n performance as these forms of encryption are not supported by the 802.11n specification.
Avoid stacking hardware on top of each other to prevent overheating issues
Maintain enough free space around the hardware for good ventilation and airflow. There should also be plenty of free space around the antennas to allow the wireless signal to propagate. Please also make sure that the wireless hardware is not placed in any type of shelving or enclosures.
There are a number of other environmental factors that can impact the range of wireless devices.
-
Adjust your wireless devices so that the signal is traveling in a straight path, rather than at an angle. The more material the signal has to pass through the more signal you will lose.
-
Keep the number of obstructions to a minimum. Each obstruction can reduce the range of a wireless device. Position the wireless devices in a manner that will minimize the amount of obstructions between them.
- Building materials can have a large impact on your wireless signal. In an indoor environment, try to position the wireless devices so that the signal passes through less dense material such as dry wall. Dense materials like metal, solid wood, glass or even furniture may block or degrade the signal.
- Antenna orientation can also have a large impact on your wireless signal. Use the wireless adapter's site survey tool to determine the best antenna orientation for your wireless devices.
- Interference from devices that produce RF (radio frequency) noise can also impact your signal. Position your wireless devices away from anything that generates RF noise, such as microwaves, HAM radios, Walkie-Talkies and baby monitors.
- Any device operating on the 2.4GHz frequency will cause interference. Devices such as 2.4GHz cordless phones or other wireless remotes operating on the 2.4GHz frequency can potentially drop the wireless signal. Although the phone may not be in use, the base can still transmit wireless signals. Move the phone's base station as far away as possible from your wireless devices.
If you are still experiencing low or no signal consider repositioning the wireless devices or installing additional access points. The use of higher gain antennas may also provide the necessary coverage depending on the environment.
Company Information:
Company Name:
TRENDnet, Inc.
Company Address:
20675 Manhattan Place
Torrance, CA 90501
USA
Product Information:
Product Description:
SecurView Wireless N Day/Night Internet Camera
Model Number:
TV-IP312WN
Brand name:
TRENDnet

Technical Standards:
EN 300 328 V1.7.1: 10-2006
EN 301 489-1 V1.8.1:04-2008
The product is herewith confirmed to comply with the requirements of Directive 1999/5/EC of the Council (European Parliament) on the radio and telecommunications terminal equipment and Energy-related products Directive 2009/125/EC.
I hereby declare that the products and devices mentioned above are consistent with the standards and provisions of the guidelines.
Sonny Su
Full Name
March 4, 2011
Date
Director of Technology
Position / Title

Signature
GPL/LGPL General Information
This TRENDnet product includes free software written by third party developers. These codes are subject to the GNU General Public License ("GPL") or GNU Lesser General Public License ("LGPL"). These codes are distributed WITHOUT WARRANTY and are subject to the copyrights of the developers. TRENDnet does not provide technical support for these codes. The details of the GNU GPL and LGPL are included in the product CD-ROM.
Please also go to (http://www.gnu.org/licenses/gpl.txt) or (http://www.gnu.org/licenses/lgpl.txt) for specific terms of each license.
The source codes are available for download from TRENDnet's web site (http://trendnet.com/downloads/list_gpl.asp) for at least three years from the product shipping date.
You could also request the source codes by contacting TRENDnet.
20675 Manhattan Place, Torrance, CA 90501, USA. Tel: +1-310-961-5500 Fax: +1-310-961-5511
This equipment has been tested and found to comply with FCC and CE Rules. Operation is subject to the following two conditions:
(1) This device may not cause harmful interference.
(2) This device must accept any interference received. Including interference that may cause undesired operation.



Waste electrical and electronic products must not be disposed of with household waste. Please recycle where facilities exist. Check with you Local Authority or Retailer for recycling advice.

NOTE: THE MANUFACTURER IS NOT RESPONSIBLE FOR ANY RADIO OR TV INTERFERENCE CAUSED BY UNAUTHORIZED MODIFICATIONS TO THIS EQUIPMENT. SUCH MODIFICATIONS COULD VOID THE USER'S AUTHORITY TO OPERATE THE EQUIPMENT.
ADVERTENCIA
Product Warranty Registration
Please take a moment to register your product online. Go to TRENDnet's website at http://www.trendnet.com/register
- Table of Contents
- English 1
- Troubleshooting 7
- Wireless Tips 8
- Package Contents
- System Requirements
- Hardware Installation
- Configure the IP Camera
- Note:
- Your configuration is complete
- Register Your Product
- Assign your network a unique SSID
- Do not turn off the SSID broadcast
- Change the channel
- Change the channel bandwidth
- Avoid stacking hardware on top of each other to prevent overheating issues
- There are a number of other environmental factors that can impact the range of wireless devices.
- Company Information:
- Product Information:
- Technical Standards:
- GPL/LGPL General Information
- ADVERTENCIA
- Product Warranty Registration
Brand : TRENDNET
Model : TVIP312WN
Category : Security Camera