
Voice Tracer VTR6100 - Dictaphone PHILIPS - Free user manual and instructions
Find the device manual for free Voice Tracer VTR6100 PHILIPS in PDF.


| Product Type | Digital Voice Recorder |
| Brand | Philips |
| Model | Voice Tracer VTR6100 |
| Dimensions | Approx. 110 x 40 x 14 mm |
| Weight | Approx. 60 g (without batteries) |
| Power Source | 2 x AAA batteries (not included) |
| Recording Format | MP3, WAV |
| Storage | Built-in memory (4 GB) + microSD card slot |
| Microphone | Built-in stereo microphone |
| Speaker | Built-in speaker |
| Display | LCD screen with backlight |
| Recording Modes | High Quality, Standard, Long Play |
| Voice Activation | Yes (VOX) |
| File Transfer | USB 2.0 connection |
| Headphone Jack | 3.5 mm |
| Battery Life | Up to 20 hours (depending on mode) |
| Maintenance | Clean with a soft, dry cloth |
| Safety | Keep away from moisture and extreme temperatures |
| Spare Parts | Batteries, microSD card, USB cable (standard) |
| General Information | Philips Voice Tracer VTR6100 digital dictaphone, ideal for lectures, meetings, and personal notes. |
Frequently Asked Questions - Voice Tracer VTR6100 PHILIPS
User questions about Voice Tracer VTR6100 PHILIPS
0 question about this device. Answer the ones you know or ask your own.
Ask a new question about this device
Download the instructions for your Dictaphone in PDF format for free! Find your manual Voice Tracer VTR6100 - PHILIPS and take your electronic device back in hand. On this page are published all the documents necessary for the use of your device. Voice Tracer VTR6100 by PHILIPS.
USER MANUAL Voice Tracer VTR6100 PHILIPS
VTR6100录音笔
使用手册
目录
1欢迎 3
2重要须知 4
3您的数码录音笔 5
4开始使用 7
5录音 10
6语音模式 13
7音乐模式 18
8调频模式 23
9系统设置 26
10常见问题 35
11技术参数 36
1 欢迎
Welcome to the world of Philips! We are honored by your choice and purchase of Philips' products. You can have comprehensive
technical
's SL
manuals,
software
downloading
www.philips.com
Product Features
- Instant voice r recording: Sin recording, slide it down to
- H igh Fidelity Speaker: Equipped plays recorded files or music quality.
- Record in common AV format MP3. fo
- USB2.0 high speed data access
• Voice-activated recording.
- USB mass storage, ensuring
Safety
I. To avoid a short circuit, do not expose the product to rain or water.
-
Do not expose the device equipment or direct sunlight.
-
Protect the cables from be
| Attention! | Before | using's | the | |||
| Manual | carefully. | The | company | |||
| loss | due | to | erroneous | operation | ||
| Special | attention | should | be | |||
| files | back | up. | ||||
Hearing safety safety
Observe the following guidelines
- Adjust to suitable volume; time.
- Please remember that do tolerance.
- Do not turn up the volume's around you.
- When in dangerous environme earphones or stop using.
- Do not use the earphones when driving, cycling, and skateboarding to avoid traffic accident and violating laws and regulations.
3 Your Voice Tracer digital recorder
What's inithe box??
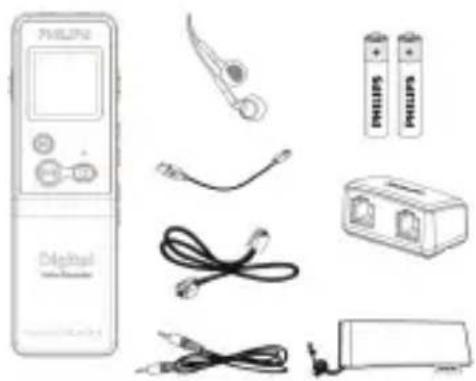


Overview :
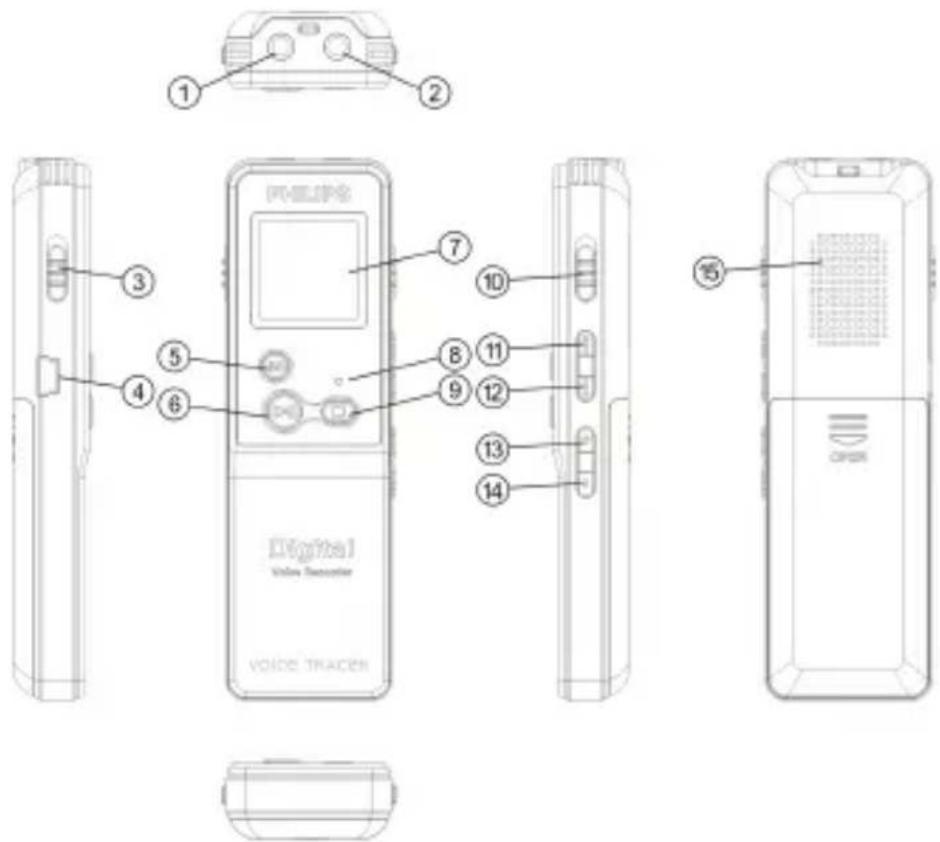
1, Earphone Socket
2, Microphone Socket/Line-in cable Socket
3, HOLD
4, USB Port
5, MENU Button
6, Power On/Off
7, Display
8, Record/Play Indicator
9, Return/Stop Button/ Folder switching
10, Record Slide Switch
11, Previous Track /Fast Backward
13, Volume Up
14, Volume Down
15, Speaker
12, Next Track / Fast Forward
Insert Battery
(I) Open the battery cover.
(2) Insert the AAA batter ies
(3) Close the battery cover.
After the battery is inserted,
to powers on the device and
PHILIPS
Note: When you need long device, please make sure tha position STOP, otherwise, the operation Then, it enters to the stopped

From the above interface, seconds to return to the main four modes. The following
Voice, Music, Radio and Setting Mode.
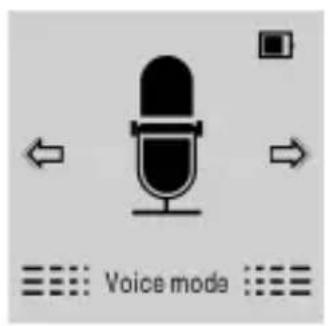

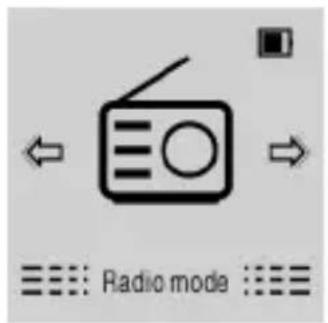
![graph TD A["Setting mode"] --> B["Two gears"] B --> C["Arrow left"] B --> D["Arrow right"]](/content/2026/05/1142386/images/e4e102b80a75e2de241056ebc227f227a752d2f545e68dfbb2faba309edbcfb1.jpg)
Note: When not taking voice recording, on any other interface,
users can press MENU button
interface.
PowerOn/Off On/Off
| When | in the power-off | state, | ||
| startup | logo | “ PHILIPS | ” is display | |
| When | the device | displays | th | |
| PLAY | button | until | the | “ Bye |
| power | ed off. | |||
Note:
| Please take out the batter time. Battery leakage mayIn the event that the device |
out the batter ies and put them in again.
- Before
replacing
the
batter
Taking
out
the
batter
ies
w
damage
the files.
Key Lock (HOLD FUNCTION)
Function)
(1)
Slide
the
HOLD
switch
on the
device.
Then
“ Hold
disappears
as shown
in the
(2) To unlock
buttons,
please
sl
OFF.
PC Connection
The
device
can
be
used
as
a l
back
up
and
move
files.
Link
cable
. The
voice
recorder
cal
storage
device
without
the
the following
picture.

When moving files into or out of the device, please do not disconnect the device from the computer. W while the device is connected
to a computer,
cannot
be operated
manually.
Before using the device, please read carefully the following instructions.
(I) In the s top state of voice select the folder you prefer.
(2) When in the Stop state, between Dolds recorded, B, C, fi any of the A, B, C, D folder it is empty. E ach folder can folder is full with 99 files, t subsequent files in the next folders are full, please delete recording.
(3) Slide the recording switch shows "Record..." and the please place the built-in sound.
(4) Press PLAY button to "Pause" and the indicator
(5) Press PLAY button again recording switch to STOP returns to the Stop interface
Recording Interface Reference:


Illustration of Recording Interface:

Note: When the low battery icon appears, it means the battery is
| nearly | empty | and | the | system | ||
| device | is recording, | the | system | |||
| file | then | shut | down. | If | the | de |
| batteries | promptly. | When | ||||
| battery, | the | following | icon | w | ||
Note:
(I) Prior to recording, please preset the record type you need and the voice activation function.
(2) Make a test recording to settings are correct.
(3) Each folder can store 99 4 folders).
(4) If the recording time exceeds the number of files reaches Please delete part of recording
(5) When recording, do not malfunction, loss or damage resulted.
(6) If need to record for a long with new one s.
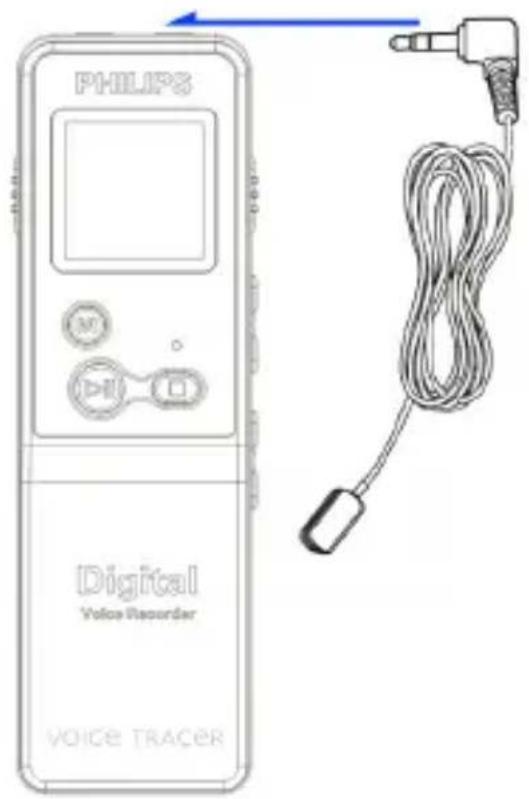
Use an External Microphone to record
When using an external microphone to record, please at first plug
into the Line in socket, and t
of recording with built-in micr
microphone, the built-in micro
plug of the external microphone
picture below.
On the main interface you can select the voice mode with “” or “▶” buttons, and then shortly Please refer to the Voice Stop
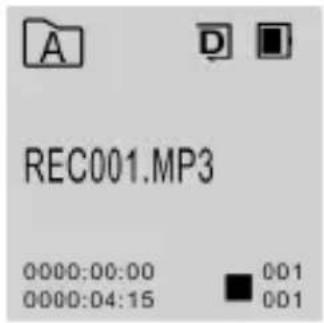
Voice Playback InPerformance Specification Specification :

Audio Playback Playback
(I) In the Stop Mode of recorded
select the folder you prefer.
(2) Please “” or play. ” to select
(3) Press Play button to start
will turn green.
(4) Press “ + ” and “ - ” to adjust volume .
(5) Press STOP to stop playing.
down the MENU button main interface.
(6) When playing, press PLAY
continue playing.
(7) When playing, press “
forward or backward
Note :
If the earphone is plugged in,
After the audio file is selected by.
When playing, press shortly
following menu list : Repeat,
l nterval . See the below interface
Repeat
A-B Replay
ReplayTimes
Replay gap
A-B Replay
ReplayTimes
Replay gap
Exit
(I) Repeat mode
As “ Repeat ” is selected, the
the Repeat mode interface
need, the interface as shown below:
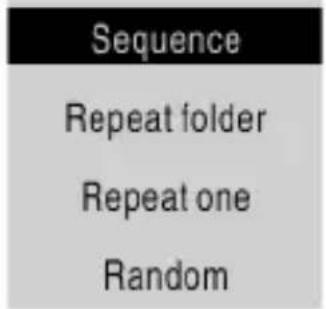
Sequence: Play all the files in selected folder in sequence, and the
playing will stop after all the
Repeat folder : play all files in
Repeat One : play current mus
R andom : random ly play the
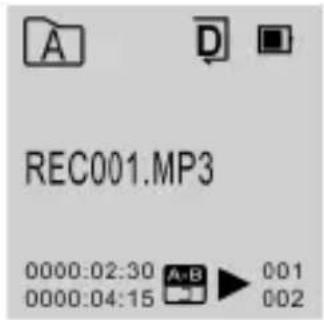
(2) AB Re play
Choose “AB Re play” from the Playin
button toplay. enter operations Re of
to AB Re play section in “Music
(3) Rep lay Times
For operations of Rep lay T in
in “Music”. playback
(4) Re play gap
For operations of Re play interval please refer to Re play gap section i " Music playback
(5) Exit
Select the “ Exit ” and confirm
Delete files files
On the stopped playing music
pop up the following menu
the below interface reference:

(I) De lete Files
Select the DELETE option
will appear. Below are the pict
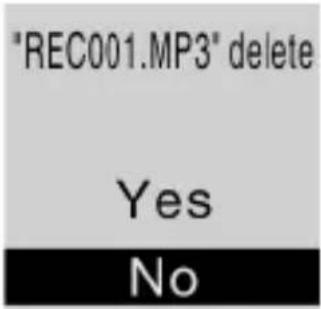
Press |◀◀ “▶▶|” and “” to choose
to keep file; press MENU button to execute.
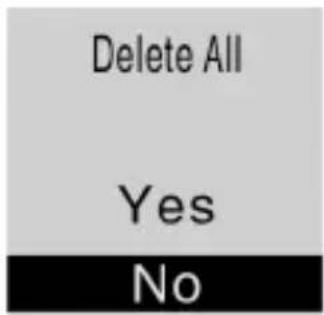
(2) Delete all
Select
the
D
elete

All
option
“ YES
”
to
confirm
deletion,
execute
. Below
are
the
pictures
Note:
When
all
files
are
delete
menu
interface.
(3) Exit
Select
the
“ Exit
” and
confirm
7 Music Mode
From the main interface, you can choose music mode with "or
“▶▶” buttons,
and
then
shortly
Files list interface
is as follows:

Note: music
files can only
folder.
Music playback Interface illustration interface illustration :
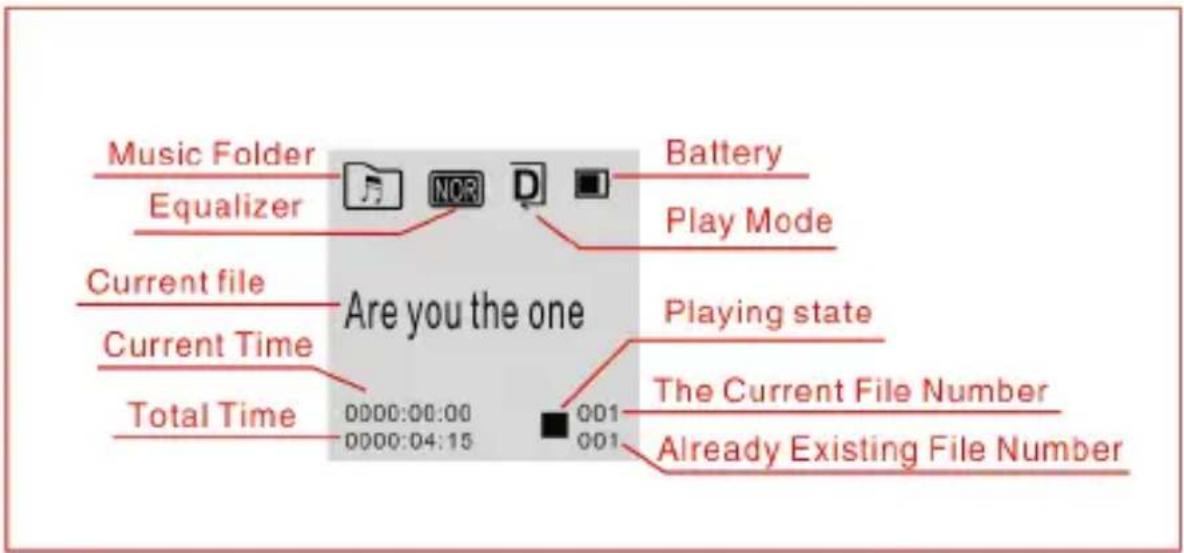
Playingmode mode
You can select
the
music

w
“▶” ”, then
press
PLAY
to
play
press the
MENU
button,
the
Repeat, Equalizer, Replay, A-B Replay times, Rep lay interval and Ex See the interface as follows:
Repeat
Equalizer
A-B Replay
ReplayTimes
A-B Replay
ReplayTimes
Replay gap
Exit
(I) Repeat
As illustrated,
when
“ Repeat
enter the
options
Ybist can
interchoose
preferred
repeat
mode
as follows
Sequence
Repeat folder
Repeat one
Random
Sequence:
Play
all
the
files
in
playing
will
stop
after
all
the
Repeat
folder
: play
all
files
in
Repeat
one:
repeat
continuously
Random:
randomly
p lay
files
(2) E qualitative
Mode
From
the
Playing
Menu
list,
enter.
The
Equalizer
includes:
Classical and DBB. Refer ence pictures are below :

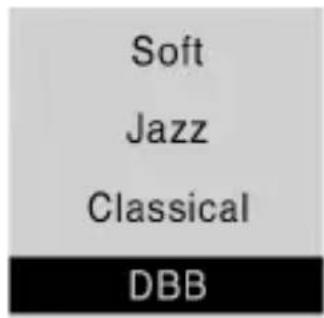
In the EQ Mode, you can choose press MENU button to confirm.
(3) A-B Replay From the M enu list, select “
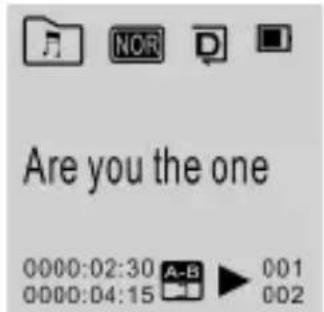
Set AB Replay
- Set the start mark: When enter Playing Menu, then s "AB Replay " mode, then pre return to the state A" from AeB music on display flickers and shortly
- Set the finish mark: After set the finish “A-B mark” is showed the When the“A-B” is displayed, the
will be replayed for specified times. After playing specified times,
the system resumes normal playing. If AB Replay is not ne
use any of the following metho
Cancellation : Shortly pres
marks and pause playing.
Shortly press “ STOP ” button
playing.
Shortly press “MENU” button
to normal playing.
(4) Rep lay times
Select “ Rep lay times ” option
button to enter into setting
by “ +”. The or ‘reference interface

(5) Rep lay gap
Replay gap means theYou cartime choosga
the “Replay gap” from the Pla
enter Replay gap setting. Use
setting
The reference interface is shown as below:
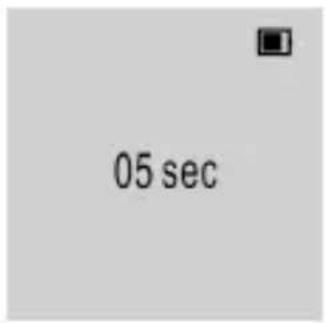
Note: The replay gap function is only applicable in A-B replay.
(6) Exit
Select the “Exit” and confirm
Delete files files
On the stopped playing interface
the below menu pops up with
See the interface as follows:

(I) D elete file
For operations of Delete file,
Mode".

(2) Delete all
For operations of Delete All, please refer to Delete All section in "Voice Mode"
(3) Exit
Select the “ Exit ” and confirm
From the main menu select Radio Mode, press MENU button to
enter.
The
default
FM
fre
quenc
of Radio
Mode:
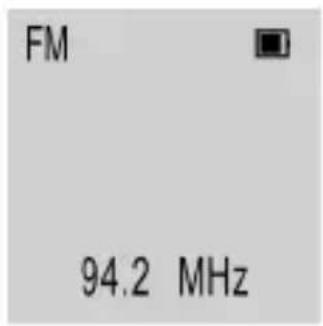
frequency

mode
use
In r adio
mode,
there
are
“ us
switch
, if some
radio
channels
PLAY
button
to
switch
between
have
been
saved,
there
is
only
frequency

mode,

p ress
“ ”
frequency
, press
MENU
button
FM
Record
, Delete
, Delete
shown as
below:
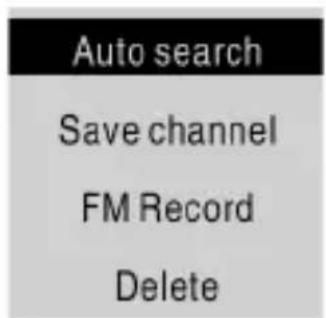

After Auto Search is selected, the system automatically searches radio channels. When a radio channel is found, the channel will be
saved
automatically
into
radio
channel
search
is
completed,
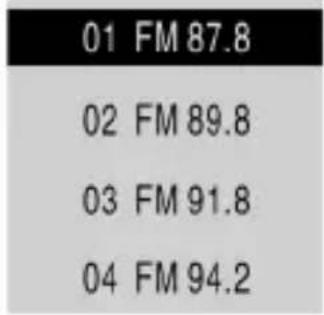
In the
frequency
mode,
way. users
user
mode,
users
can
choose
saved
channel
or
Delete
all
radio
channels
at
most.
Saved
c hannel
I ist
P
ress
“ Stop
" to
sequence
and
press
MENU
channel.
If users
choose
FM
radio.
See
the
interface
picture

Long
press
STOP
button
to
displays
the
interface
as
below:
Radio
Voice
Short press “” or “” button to select the options. Select
“ Radio ” and short press MENU button to confirm your o
then it returns to Radio Mode
press MENU button to confirm
Mode interface.
From the main menu select Setting mode, press MENU button to
enter.
The
Setting
mode
interfa
settings
, VA
Control,
Listen
Contrast,
Backlight,
Auto
O
Memory
info,
Firmware
Versio
setting.
See the
interface
picture below:
Record type
REC folder settings
VA Control
Listen In
Listen In
Auto divide
Contrast
Backlight
Auto off
Language
System time
Record time
Memory info
Firmware ver
Clear memory
Reset default se..
Firmware ver
Clear memory
Reset default se..
Exit
(1)
REC
Type
(
PCMP, SP, SLPREC&NOISE
From
the
Record
Type
Menu
selection:
PCM
REC&NOISE
Record
and
S LP
Record.
If
device
saves
the
recorded
reaches
one
hour,
and
then
interface picture below:
| PCM REC&NOISE CUT |
| PCM REC |
| HP REC |
| SP REC |
| PCM REC |
| HP REC |
| SP REC |
| SLP REC |
PCM REC&NOISE CUT: WAV format, high sound quality, bit rate: 256 kbps.
PCM REC WAV format , high sound
HP REC : MP3 format, high
S P REC : MP3 format, good
SLP REC : MP3 format, ordinary
(2) REC folder settings
The recorded file can be stored
the interface picture below:
| Folder A |
| Folder B |
| Folder C |
| Folder D |
TelephoneRecord
| Connect | the | telephone | cable | |||
| telephone | cable | to | the | telephone | ||
| the | operation | is | the | same | as | |

Line in Record::
Line in recording is a way of recording sound by connecting the
device to an audio equipment audio output via
(audio equipments such as
stereo audio cable provided
equipment's audio output with "Line
recording operation is the
Before recording with Line
sound source to a suitable le
lack fidelity.
(3) Voice-activated Recording
This is a practical function
needed. When the function
no voice is detected, the device
after 3 seconds; if voice is
recording. See the below related reference picture:
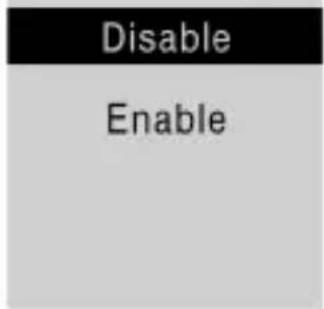
(4) The Listen In function
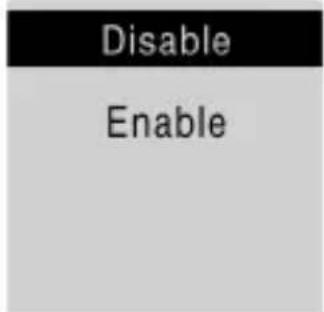
After activating the Listen In to listen if's theme sound input. See interface picture as follows:
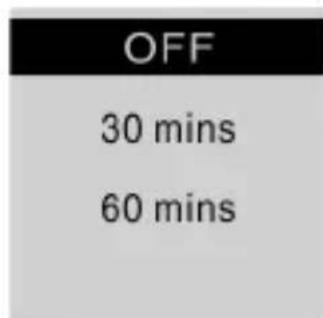
(5) Auto divide feature recording When recording, the device every 30 or 60 minutes, and
below related reference picture:
(6) Contrast
Screen contrast can be adjusted by using this function.
(7) Backlight Time
The backlight time function can be set at: 15, 30, 45, 60 seconds
Constant. 's no operation on the
backlight turns off automatically.
always. See the below picture
15 seconds
30 seconds
45 seconds
Always on
(8) Auto off
If there no operation on the devic
automatically shuts down.
automatically shut down. See

(9) L language
From the Language menu yo
language. See the following
简体中文
繁體中文
English
(10) System time setting
See the below picture of System time setting :
Set time format
Set date
Set time
On this interface,
users can
format.
For example,
when
select
”
follow:
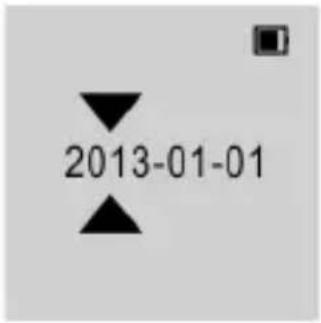
On this interface,
press
“ + ”


“
" button
to
select
"Ye
to adjust
the value.
W hen
select
"
Time
format
12-hours
24-hours
From the list, users can choose one of two time display format:
12-hour clock or 24-hour clo
When select “ Set Time ” ,

On this interface, press “ + ”
“◀”▶▶▶ “ ” button to select "H
adjust the value.
(II) Record time
Record time: preset the time
set time, the device starts void
From the menu list, select “
timer. See the below auto off
Record time
REC source
Duration
The interface of Record Time is as follow:
Set date
Set time
On this interface, users can
time when the device starts
Note: If one FM channel is
the user is listening to another
pre-set time point to start
record the FM channel which
pre-set one. Please plug in th
radio.
Record source: users can
microphone for radio The by defaultessing
takes the voice picks up by
the below auto off picture:
MIC
FM
If the “ FM Source ” is selected, the radio will be the sour ce for voi recording. Press Menu button
Record Duration
Users can set the duration and 120 minutes or unlimited.
30 min
60 min
120 min
ALL
Note : Please make sure the
recording.
(12) Memory information
You can check the memory capabi
this device by using this function.
(13) Firmware Version
You can check's firm where d evice version
(14) Clear memory
You can format's internathe device storage
(15) Reset default setting
You can r estore to default settings by using this function.
(16) Exit
Select
the
" Exit
" and
confirm
10 Frequently Asked Questions
Answers to the frequently asked questions are listed here to solve
simple
problems
that
may
tc
solved,
please
contact
the
www.philips.com/support
Cannot switch on the device device
The
batteries
are
empty,
please
Cannot record with the device:
The
maximum
file
n'sumbeemory
i:
Please
delete
some
recordings
devices.
The device cannot play recorded playio
(1)
The
device
may
be
in
lock
switch
to
OFF
position.
(2)
The
batteries
are
empty,
Storage
| Internal storage | ||||
| Estimated recording time (4GB): approximately 108 2 hours with | ||||
| Long | Recording | mode, | 270 | |
| hours | with | High | Quality | Recor |
| recording | mode. | |||
| Type | of | internal | storage | : NANC |
| Portable | Yestorage | (PC) : | ||
Dimensions and WeightWeight and
| Wide | × | Long | × | High | : 33.5 | × | I |
Weight : 70g
System requirement requirement
| Operating | System | : Windows | |
| Port | : USB |
Recording
| PCM | REC&NOISE | WAV forma CUT | : bit | ||
| PCM | REC | WAV forma rate | 768 | kbps | |
| H P REC | : bit | rate | 128kbps | , MI | |
| S P REC | : bit | rate | 32 kbps | , MP3 | |
| SLP | REC | : bit | rate | 8kbps | , MP3 |
Operating conditions conditions
| Temperature | : 5 °- | 45 °C | Hu |
Warranty card
质保书
1
year warranty
一年质保
Type: VTR6100
Serial nr:
Date of purchase
购买日期
Dealer's name, address and signature
销售商名称、地址及签字
www.philips.com/welcome
This document is printed on chlorine free produced paper Data subject to change without notice
This product was brought to the market by Speech Processing Solutions GmbH or one of its affiliates, further referred to in this document as SPS, which is the manufacturer of the product. SPS is the warrantor in relation to the product with which this booklet was packaged.
For China only
只限中国地区
Printed in China


Specifications subject to change without notice.
Trade marks are the property of Royal Philips or their respective owners.
© 2014 Speech Processing Solutions GmbH. All rights reserved. Philips and the Philips' shield emblem are registered trademarks of Koninklijke Philips N.V. and are used by Speech Processing Solutions GmbH under license from Koninklijke Philips N.V. All trademarks are the property of their respective owners.
Document version 1.0,2014-01-01

- 目录
- 1 欢迎
- PRODUCT FEATURES
- SAFETY
- HEARING SAFETY SAFETY
- 3 YOUR VOICE TRACER DIGITAL RECORDER
- INSERT BATTERY
- PHILIPS
- POWERON/OFF ON/OFF
- NOTE
- KEY LOCK (HOLD FUNCTION)
- FUNCTION)
- PC CONNECTION
- RECORDING INTERFACE REFERENCE
- ILLUSTRATION OF RECORDING INTERFACE
- USE AN EXTERNAL MICROPHONE TO RECORD
- AUDIO PLAYBACK PLAYBACK
- REPEAT
- EXIT
- DELETE FILES FILES
- DELETE ALL
- 7 MUSIC MODE
- PLAYINGMODE MODE
- SEQUENCE
- E QUALITATIVE
- RADIO
- VOICE
- RECORD TYPE
- CONTRAST
- SYSTEM TIME
- CLEAR MEMORY
- LINE IN RECORD
- BACKLIGHT TIME
- 15 SECONDS
- AUTO OFF
- L LANGUAGE
- 简体中文
- 繁體中文
- ENGLISH
- SYSTEM TIME SETTING
- SET TIME FORMAT
- 12-HOURS
- 24-HOURS
- RECORD TIME
- REC SOURCE
- DURATION
- SET DATE
- SET TIME
- MIC
- FM
- 30 MIN
- 10 FREQUENTLY ASKED QUESTIONS
- CANNOT SWITCH ON THE DEVICE DEVICE
- CANNOT RECORD WITH THE DEVICE
- THE DEVICE CANNOT PLAY RECORDED PLAYIO
- WARRANTY CARD
- 质保书
- 1
Brand : PHILIPS
Model : Voice Tracer VTR6100
Category : Dictaphone