
XTPRO XTREEM - AV Transmitter Smart-AVI - Free user manual and instructions
Find the device manual for free XTPRO XTREEM Smart-AVI in PDF.


| Product Type | HDMI Extender |
| Model | XTPRO XTREEM |
| Brand | Smart-AVI |
| Dimensions (W x D x H) | 10.5 cm x 7.0 cm x 2.5 cm |
| Weight | Approximately 250 g (each unit) |
| Power Supply | 5V DC, 2A via USB or barrel jack |
| Maximum Resolution | 4K@60Hz 4:4:4 (up to 30m) |
| Transmission Medium | Cat5e/6/7 UTP/STP cable |
| Maximum Transmission Distance | Up to 100m at 1080p, 50m at 4K |
| Video Standards | HDMI 2.0, HDCP 2.2 |
| Audio Support | Up to 7.1 channels PCM, Dolby TrueHD, DTS-HD |
| IR Control | Bidirectional IR pass-through (20-60 kHz) |
| RS-232 Pass-through | Yes, up to 115200 baud rate |
| USB Support | 1x USB 2.0 for HID or storage (optional) |
| EDID Management | Internal EDID table and pass-through |
| Operating Temperature | 0°C to 50°C (32°F to 122°F) |
| Storage Temperature | -20°C to 65°C (-4°F to 149°F) |
| Maintenance & Cleaning | Wipe with dry soft cloth; do not use liquids or solvents |
| Safety | Use only provided power adapter; avoid exposure to moisture |
| Spare Parts & Repairability | No user-serviceable parts; contact Smart-AVI for support |
Frequently Asked Questions - XTPRO XTREEM Smart-AVI
User questions about XTPRO XTREEM Smart-AVI
0 question about this device. Answer the ones you know or ask your own.
Ask a new question about this device
Download the instructions for your AV Transmitter in PDF format for free! Find your manual XTPRO XTREEM - Smart-AVI and take your electronic device back in hand. On this page are published all the documents necessary for the use of your device. XTPRO XTREEM by Smart-AVI.
USER MANUAL XTPRO XTREEM Smart-AVI
Use a Single Cat5 to Broadcast High-Resolution SXGA, Stereo Audio, RS-232 and Infrared Signals up to 1,699 Feet Away
Introduction
The XTPro family of products allows the extension of a wide range of video and audio formats, RS-232, and IR via a single Category 5 unshielded twisted pair (UTP) cable.
Features
■ Supports Single Screen
■ Uses Easy-to-Install, Inexpensive Cat5/5e/6/7/8
■ Output Reaches up to 1,699 Feet (510 m)
■ Resolutions up to 1900 x 1200
■ 300 MHz Bandwidth
■ Sends High-Resolution UXGA and Stereo Audio
■ Compatible with Line Level Stereo
■ High Ground Loop Immunity
■ Built-In Lightning, Power Surge and Transient Protection
■ Designated Trimmer and Digital Compensate System
■ Compact Metal Case Enclosure
■ Supports RS-232 and IR
What's in the box?
XTPro Xtreem - Please check the contents of the package before beginning installation.
XTPro Xtreem Package Contents
| Qty | Item | P/N |
| 1 XTPro Transmitter | XTP-TX | |
| 1 XTPro Receiver Unit-Long Distance | XTP-RXX | |
| 1 Power Supply | PS- | 5VDC2A |
| 1 Remote Control | RMT- | 2 |
Installation Diagram
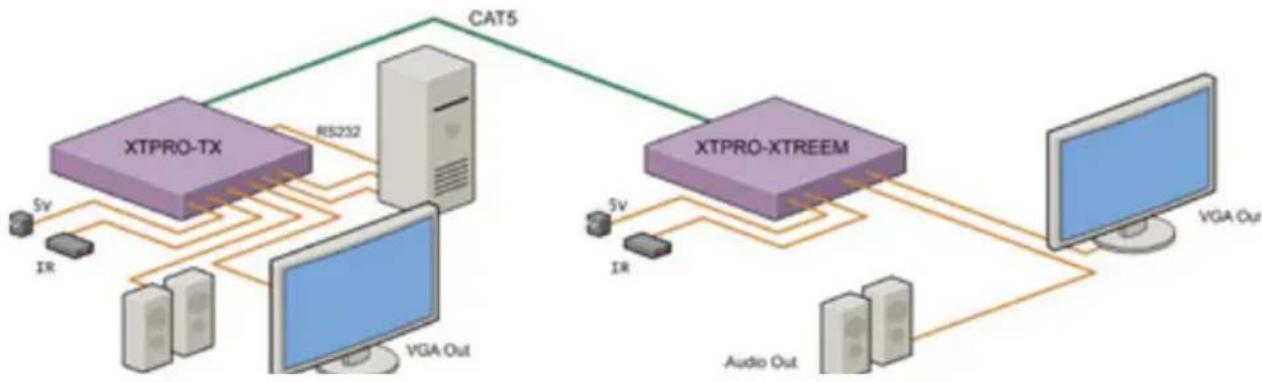
flowchart
graph TD
    A["XTPRO-TX"] -->|RS232| B["Computer"]
    C["XTPRO-XTREEM"] -->|CV| D["Computer"]
    B -->|VGA Out| E["Server Rack"]
    D -->|VGA Out| F["Server Rack"]
    A -->|CV| G["Server Rack"]
    C -->|CV| H["Server Rack"]
    A -->|IR| I["Server Rack"]
    C -->|IR| J["Server Rack"]
    A -->|SV| K["Server Rack"]
    C -->|SV| L["Server Rack"]
    A -->|CAT5| M["Computer"]
    C -->|CAT5| N["Computer"]
Connecting The Transmitter
-
Connect the output of the computer video card to the video input of the transmitter using the included male-to-male video cable.
-
Connect the output of the computer audio card to the audio input of the transmitter using a 3.5mm audio male-to-male audio cable.
-
Connect local monitor to the VGA out of the transmitter.
-
Connect external speakers to the transmitter's audio out (standard 3.5mm stereo miniplug).
-
On the back of the unit, attach the Cat5 cable that will connect to the receiver (XTPro-RXX).
*NOTE: You can not use RS-232 and IR at the same time.
Connecting The Receiver
-
Connect Cat5 cable (coming from the transmitter) to the back of the receiver.
-
Connect 1 display to the VGA out connectors on the front of the receiver.
-
Connect external speakers to the audio output connections on the front of the unit (standard 3.5mm stereo miniplug).
Preparing & Connecting System Cat5 Cable
The following is the wiring standard for terminating Cat5 cable using RJ-45 connector:
Pair 1 Pins 1 & 2
Pair 2 Pins 3 & 6
Pair 3 Pins 4 & 5
Pair 4 Pins 7 & 8
Connectors: RJ-45
Capacitance: 14 pf/ft (46.2 pf/m)
Conductor Gauge: 24 AWG
Impedance: 4 - Pair

Adjusting the XTPro Xtreme via Infrared Remote Tool
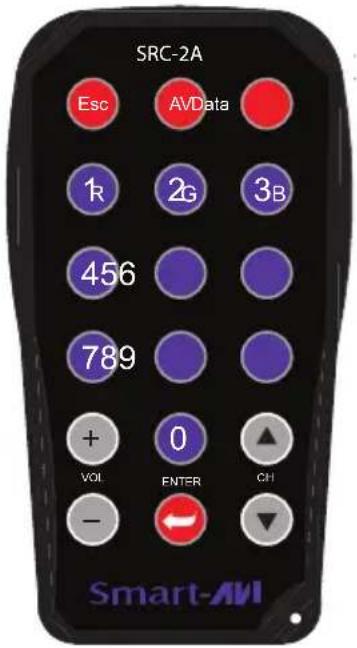
Adjusting the Smart-AVI XTPro Xtreem using the free included infrared remote control tool has been made simple for you. Follow these brief steps to adjust Gain, Contrast and Skew of your XTPro Xtreme unit at the receiver/display monitor location(s):
NOTE: It is recommended to unplug your IR-EYE during programming of the XTPro Xtreem. Failure to do so could result in unintentional control of connected IR devices.
GAIN
Gain controls the intensity of the colors displayed on your monitor. There are three signals the Gain function controls – red, blue and green colors (RGB). Too much red gain, and your reds will appear “hot” and blown-out. Too little red gain, and the red hues within the image will appear too diluted or even sepia in tone. A perfectly-adjusted gain signal delivers vivid, vibrant colors on display screen.
To adjust the XTPro Xtreem's Gain signals with the IR remote:
- Make sure the XTPro Xtreem units
Transmitter/Receiver) have been powered on. - The display window of the Receiver will read "SA" for Smart-AVI. This is the "main menu" point of the XTPro Xtreem.
- Press (AV) and then (1R), (2G) or (3B) to put the XTPro in Gain Control mode. The (1R), (2G) and (3B) buttons on the IR remote select the red, green or blue gain signals respectively.
- As you adjust the gain signals using the (+) and (-) buttons on the remote, your XTPro Xtreem display window will indicate the signal level for each adjustment (i.e. the number will go up or down depending on the color adjustment for each signal).
- Once the gain signal for each color has been adjusted to your liking, the unit will automatically save your settings.
- When you're done using the Gain Control mode, return to the main menu ("SA") by pressing (Esc) on the remote.

CONTRAST
Contrast controls how light or dark an image is on your screen by adjusting the intensity of the dark/light tones of the image. The Contrast function controls the light/dark signal of the overall image being displayed. Too much contrast, and your image will appear too faded, and white-washed. Too little contrast, and your picture will basically, be too muddy, or even appear black.
A perfectly-adjusted contrast signal gives you a crisp, well-defined image on your display screen.
To adjust the XTPro Xtreem's Contrast signal with the IR remote:
• Make sure the XTPro Xtreem units
(Transmitter/Receiver) have been powered on.
- The display window of the Receiver will read "SA" for Smart-AVI. This is the "main menu" point of the XTPro Xtreem.
- Press (AV) and then (5) to put the XTPro Xtreem in Contrast Control mode. As you adjust the contrast signal using the (+) and (-) buttons on the remote, your XTPro Xtreem window will indicate the signal level you're selecting.
- Once the contrast signal level has been adjusted to your liking, the unit will automatically save your settings.
- When you're done using the Contrast Control mode, return to the main menu ("SA") by pressing (Esc) on the remote.

SKEW
Skew is the variation of signal transmission through the Cat5 cable, from the source of your media to the display point. Quite simply, within each Cat5 cable, there is an individual wire for each color signal – red, green and blue. The wires are twisted and wrapped around each other inside the Cat5 cable in such a way that inevitably, they are not the same exact length. The Skew function of your XTPro Xtreem allows you to manually correct this variation of RGB signal “arrival” to your monitor so that the picture is perfect as you view it.
An image that has not been skew adjusted may appear garbled, blurred or ghosted. Once your system's skew has been corrected, your image will appear perfectly on your display.
To adjust the XTPro Xtreem's Skew with the IR remote:
- To best correct the skew on your display monitor, it is advised that a Cat5 test pattern template be used to assist you in this process. You may use your own or you may download one from the XTPro Xtreem support page at: http://www.smartavi.com/testpattern.htm
- Make sure the XTPro Xtreem units (Transmitter/Receiver) have been powered on.
- The display window of the Receiver will read "SA" for Smart-AVI. This is the "main menu" point of the XTPro Xtreem.
- To put the XTPro Xtreem in Skew Control mode, press (Data).
- Select the color red by pressing (1R) on the remote.
- As you adjust the skew with the test pattern template using the (+) and (-) buttons on the remote, your XTPro Xtreem display window will indicate the signal level (i.e. the number will go up or down depending on the color adjustment).
- Once the skew for the red color signal has been adjusted to your liking, the unit will automatically save your settings.
- You select the green and blue skew the same way, by pressing the (2G) and (3B) buttons respectively.
- When you're done using the Skew Control mode, return to the main menu ("SA") by pressing (Esc) on the remote.

In any adjustment mode, if the remote is not used for a short while, the system will automatically return to the main menu ("SA") and no information will be saved unless the (ENTER) button has been pressed to lock in a new setting.
Once Gain, Contrast and/or Skew settings have been adjusted, you will not need to make any further changes unless you unplug any of the hardware components attached to the XTPro Xtreem; your adjustments will remain resident in the unit's memory indefinitely, even upon powering the unit on/off, so long as it's never physically disconnected.
To reset your XTPro Xtreem unit to its original factory settings, press (Data), (AV), (9) and then (ENTER). This will erase all manual adjustments in the unit's memory and return the XTPro Xtreme to its default settings.
IMPORTANT: Once this process is completed, previous setting cannot be recovered.
SKEW TEST PATTERN TEMPLATE
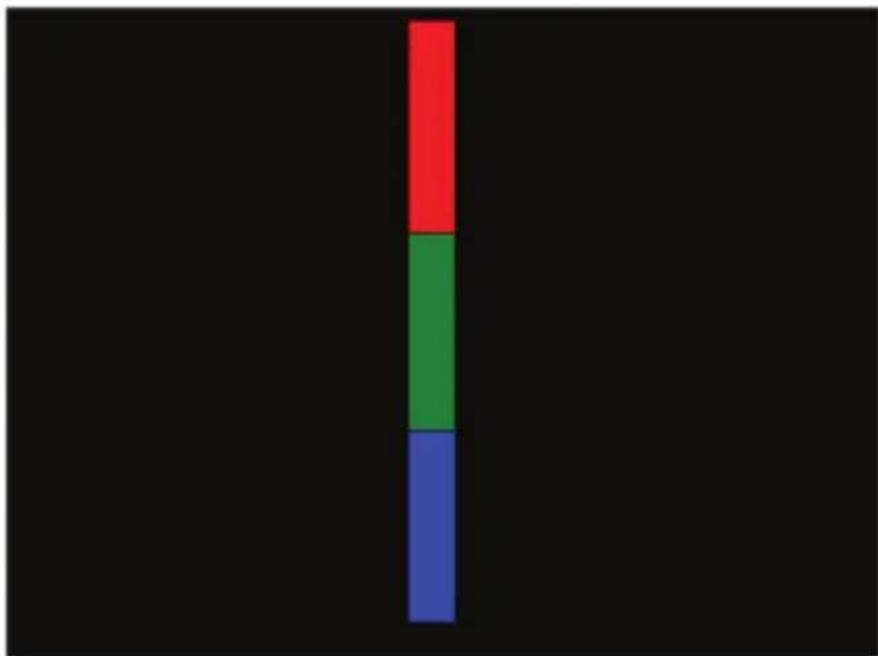
bar_stacked
| Category | Value | | -------- | ----- | | Red | 10 | | Green | 8 | | Blue | 6 |Downloadable at: www.smartavi.com/testpattern.htm
Technical Specifications
Specifications
Video Data
Format RGBHV, RGsB, YUV, Y/C, CVBS
Resolution Up to 1900 x 1200, VGA, SVGA
XGA
and
SXGA
Connector Type HD15 Socket
Video Control
· Perfect skew delay correction · 62ns total delay
· Complete skew control for RGB · 2ns delay step increments
· Complete control for Contrast · Calibration saved in Flash
· CAT-5 compensation
Audio
Signal Type Stereo unbalanced
Conector 3.5mm jack socket
RS-232
D89M
TXD,
RXD,
GRD
9600bps
Power
Requirements 5VDC@2A
Connector 2.1mm DC jack (center+ve)
Physical
Dimensions 95mm x 80mm x 23mm
Weight 0.12 kg
Notice
The information contained in this document is subject to change without notice. Smart-AVI, Inc. makes no warranty of any kind with regard to this material, including but not limited to, implied warranties of merchantability and fitness for any particular purpose.
Smart-AVI will not be liable for errors contained herein or for incidental or consequential damages in connection with the furnishing, performance or use of this material.
No part of this document may be photocopied, reproduced or translated into another language without prior written consent from Smart-AVI.
© 2010 Smart-AVI, Inc. All Rights Reserved.
2840 N. Naomi Ave.
Burbank, California 91504
Phone: (818) 565-0011
Facsimile: (818) 565-0020
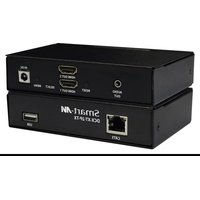
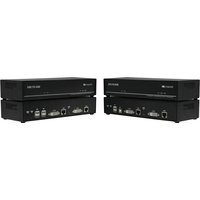

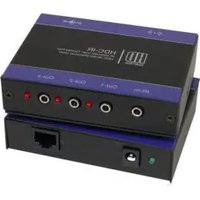
Brand : Smart-AVI
Model : XTPRO XTREEM
Category : AV Transmitter