
R9861071 - Projector accessory Barco - Free user manual and instructions
Find the device manual for free R9861071 Barco in PDF.


| Product Type | Projector Accessory |
| Brand | Barco |
| Model | R9861071 |
| Compatible Projectors | Select Barco projector models (refer to compatibility list) |
| Dimensions (W x H x D) | 200 x 100 x 50 mm |
| Weight | 0.5 kg |
| Material | High-grade plastic and metal |
| Color | Black |
| Mounting Type | Quick-release bracket |
| Function | Enhances image clarity and protects projector lens |
| Maintenance | Clean with a soft, dry cloth |
| Power Requirements | Passive component, no power needed |
| Operating Temperature | 0°C to 40°C |
| Storage Temperature | -20°C to 60°C |
| Safety Precautions | Use only with specified Barco projectors; avoid impact |
| Spare Parts Availability | Available through Barco authorized service centers |
| Repairability | Not user-serviceable; contact professional technician |
| Warranty | 2 years limited warranty |
| Country of Origin | China |
Frequently Asked Questions - R9861071 Barco
User questions about R9861071 Barco
0 question about this device. Answer the ones you know or ask your own.
Ask a new question about this device
Download the instructions for your Projector accessory in PDF format for free! Find your manual R9861071 - Barco and take your electronic device back in hand. On this page are published all the documents necessary for the use of your device. R9861071 by Barco.
USER MANUAL R9861071 Barco
Barco nv Media & Entertainment Division
Noordlaan 5, B-8520 Kuurne
Phone: +32 56.36.89.70
Fax: +32 56.36.883.86
E-mail: media@barco.com
Visit us at the web: www.barco.com
1.LENSKIT

CAUTION: Never transport the projector with the lens mounted on it!
Alwaysremovethelensbeforetransportingtheprojector.
1.1 Kit Contents
KitContents
Contents:
•Oneoftheavailablelenstypes(see"AvailableLensTypes",page1).
•InstallationManual.
•Toraysee™Cloth
1.2 Available Lens Types
Overview
| Lens | ProductNumber |
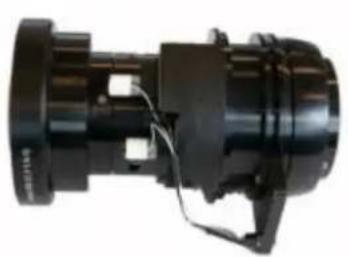
| CLD(1.2-1.5:1) | R9861060 |
| CLD(1.5-2.2:1) | R9861070 |
| CLD(2.2-4.4:1) | R9861080 |
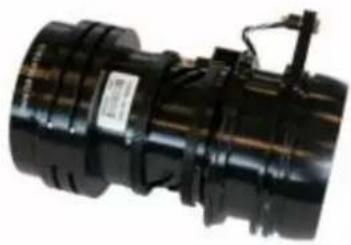
| CLD(4.4-7.0:1) | R9861090 |
natural_image
Close-up of a black mechanical component with attached clamping mechanism (no visible text or symbols)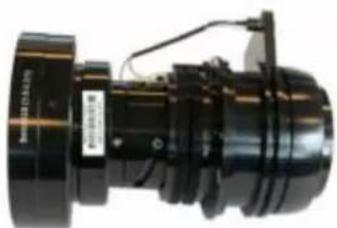
natural_image
Close-up of a black industrial mechanical component with visible internal structure and wiring (no text or symbols)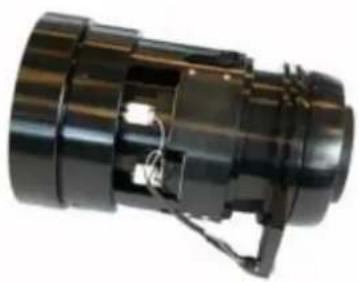
natural_image
Close-up of a black cylindrical mechanical component with internal wiring and mounting bracket (no visible text or symbols)Image1-1
CLD1.2-1.5:1R9861060
Image1-2
CLD1.5-2.2:1R9861070
Image1-3
CLD2.2-4.4:1R9861080
natural_image
Close-up of a black mechanical component with attached clamping elements (no visible text or symbols)Image1-4 CLD4.4-7.0:1R9861090
1.3 Lensformulas
Formulas
| Lens | ThrowratioforCLM | Metricformulas(meter)Inchformulas(inch) | |
| CLD(1.2-1.5:1) | 1.25-1.58 | PD_min=1.25xSW-0.13 PD_max=1.58xSW-0.05 | PD_min=1.25xSW-5.12 PD_max=1.58xSW-1.97 |
| CLD(1.5-2.2:1) | 1.57-2.36 | PD_min=1.57xSW-0.01 PD_max=2.36xSW-0.53 | PD_min=1.57xSW-0.39 PD_max=2.36xSW-20.87 |
| CLD(2.2-4.4:1) | 2.24-4.45 | PD_min=2.24xSW-0.07 PD_max=4.45xSW-0.13 | PD_min=2.24xSW-2.76 PD_max=4.45xSW-5.12 |
| CLD(4.4-7.0:1) | 4.40-6.92 | PD_min=4.40xSW-0.25 PD_max=6.92xSW-0.04 | PD_min=4.40xSW-9.84 PD_max=6.92xSW-1.58 |

CAUTION: Never transport the projector with a lens mounted in the lens holder. Always remove the lens before transporting the projector. Neglecting this and damage the lens shoulder and prism.
1.4 Lensformulas
Formulas
| Lens | ThrowratioforCLMHD | Metricformulas(meter)Inchformulas(inch) | |
| CLD(1.2-1.5:1) | 1.15-1.46 | PD_min=1.15xSW-0.13 PD_max=1.46xSW-0.05 | PD_min=1.15xSW-5.12 PD_max=1.46xSW-1.97 |
| CLD(1.5-2.2:1) | 1.45-2.18 | PD_min=1.45xSW-0.01 PD_max=2.18xSW-0.53 | PD_min=1.45xSW-0.39 PD_max=2.18xSW-20.87 |
| CLD(2.2-4.4:1) | 2.07-4.12 | PD_min=2.07xSW-0.07 PD_max=4.12xSW-0.13 | PD_min=2.07xSW-2.76 PD_max=4.12xSW-5.12 |
| CLD(4.4-7.0:1) | 4.07-6.39 | PD_min=4.07xSW-0.25 PD_max=6.39xSW-0.04 | PD_min=4.07xSW-9.84 PD_max=6.39xSW-1.58 |

CAUTION: Never transport the projector with a lens mounted in the lens holder. Always remove the lens before transporting the projector. Neglecting this and damage the lens shoulder and prism.
1.5 Lensremoval
Howtoremovethelens
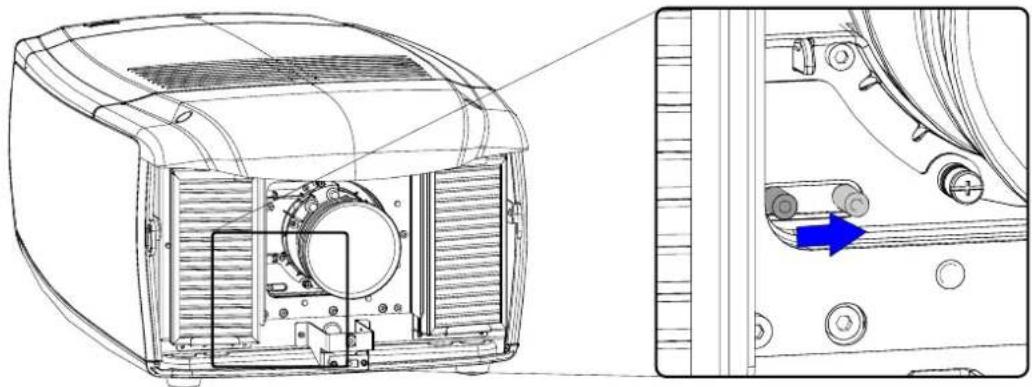
- Removethefrontcoveroftheprojector. See "Removalofthefrontcover", page4.
- Support the lens with one hand and push the lens lock handle to the right.
natural_image
Technical line drawing of a device interior showing internal components and a blue arrow indicating a specific part (no text or symbols present)Image1-5 Lensremoval
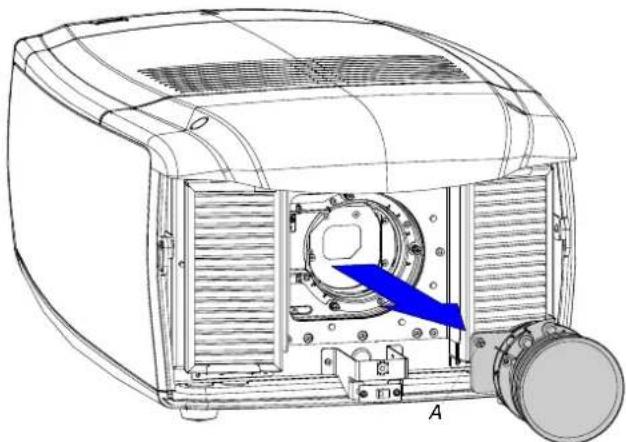
- Pulloutthelensbackwarduntilthejackconnectionisopen(A). Slidethelensoutofthelensholder.
natural_image
Technical line drawing of a mechanical device with internal components and a blue arrow indicating direction (no text or symbols)Image1-6 Slideoutlens
1.6 Lens installation
Howtoinstallthelens
- Removethefrontcoveroftheproject or. See "Removalofthefrontcover", page4.
- Removethefoamrubberintheopeningofthelensholderifnotyetremoved.
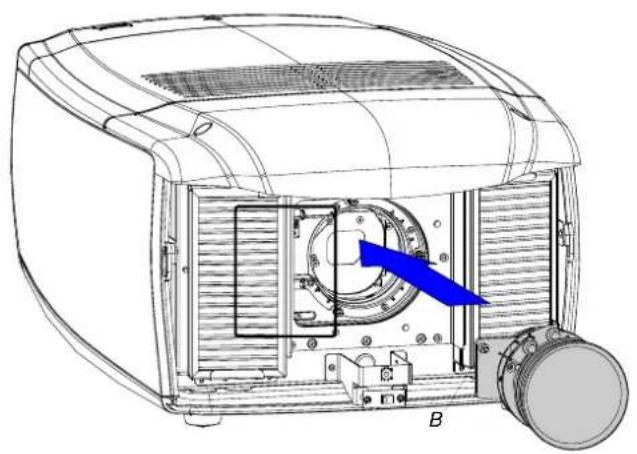
- PlacethelockhandleAisinitsrightposition(tablemountedprojector).
natural_image
Technical line drawing of a portable electronic device with internal components and a blue arrow indicating direction (no text or symbols)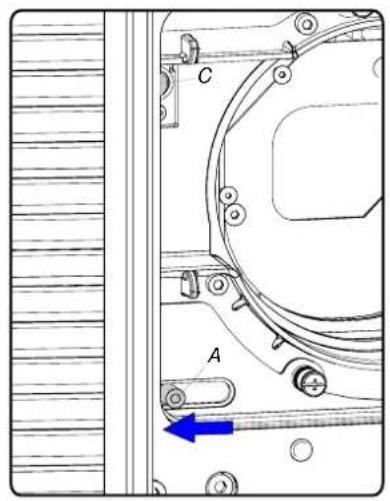
Image1-7 Mountingthelens
- Insert the lens in such a way that the female jack (C) is in front of the male jack (upper left corner) (B) and ensure the lens touches the frontplateofthelensholder.
Caution: Do not release the lens yet, as the lens may fall out of the lens holder.
-
Secure the lens in the lens holder by sliding the lens lock handle A into the "locked" position (left position for table mounted projector).
-
Checkifthelensisreallysecuredbytryingtopullthelensoutofthelensholder.

CAUTION: Never transport the projector with a lens mounted in the lens holder. Always remove the lens before transporting the projector. Neglecting this and damage the lens shoulder and prism.
1.7Removalofthefrontcover
Necessarytools
Flatscrewdriver
Howtoremovethefrontcover
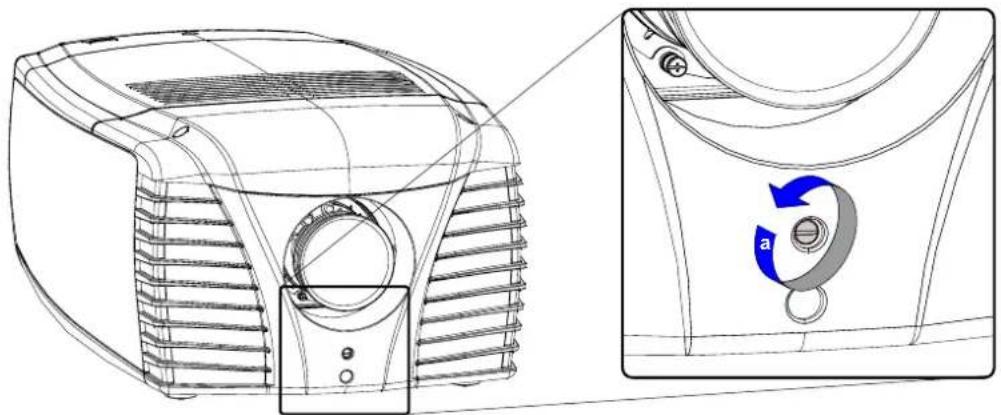
- Releasethecaptivescrewatthemiddlebottomofthefront
cover(a)
natural_image
Technical line drawing of a portable air conditioner unit with side and top views, showing internal components and a circular button labeled 'a' (no text or symbols beyond basic labels)Image1-8 Releasecaptivescrew
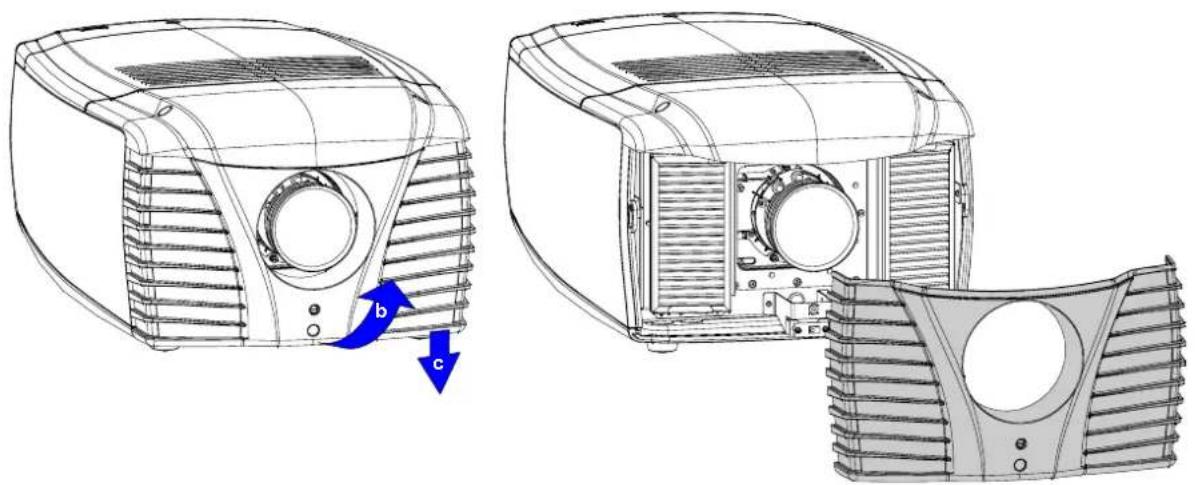
- Releasethefrontcoverfromtheprojectordoingthefollowing:
a) standinfrontoftheprojectorandpullthebottomsideofthecoveralittletowardyou(b)
b) In that slightly pivoted position, pull the cover downwards to release it from the top cover (c)
natural_image
Technical line drawings of two industrial air purifiers with blue directional arrows indicating flow or movement (no text or symbols present)Image1-9 Removethefrontcover
1.8QuickLensAdjustment
1.8.1 QuickLens Adjustment via LENSkey
Quickzoom/focusadjustment
- PresstheLENSkeyontheremotecontrolorlocalkeypad.
Thezoom/focusmenuwillbedisplayed.
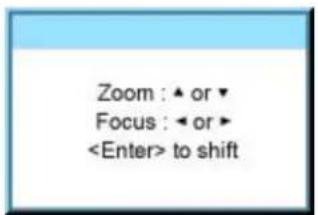
Image1-10
- Push the cursor key ▲ or ▼ to zoom and ◀ or ▶ to focus the image.
- When finished, press EXIT key to return or ENTER to continue to the shift adjustment.

Press the LENS key to switch to another pattern. Different patterns are available.
Quickshiftadjustment
- PresstheLENSkeyontheremotecontrolorlocalkeypad.
Thezoom/focusmenuwillbedisplayed.
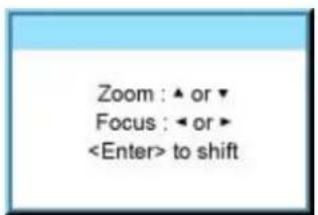
Image1-11
- PressENTER.
Theshiftmenuwillbedisplayed.
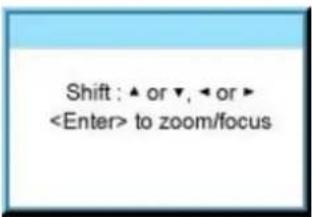
Image1-12
- Push the cursor key ▲ or ▼ to shift the image up or down and ◀ or ▶ to shift the image left or right.
- When finished, press EXIT key to return or ENTER to continue to zoom/focus.

PresstheLENSkeytoswitchtoanotherpattern.Differentpatternsareavailable.
1.8.2 Direct Lens Adjustment (RCU)
LensadjustmentbuttonsontheRemoteControl
On the Remote Control four buttons with double action are provided, allowing direct alignment for lens ZOOM, FOCUS, HORIZON-TALSHIFT and VERTICALSHIFT.
- Press LENS ZOOM button [-] or [+] (A) for correct image size on the screen.
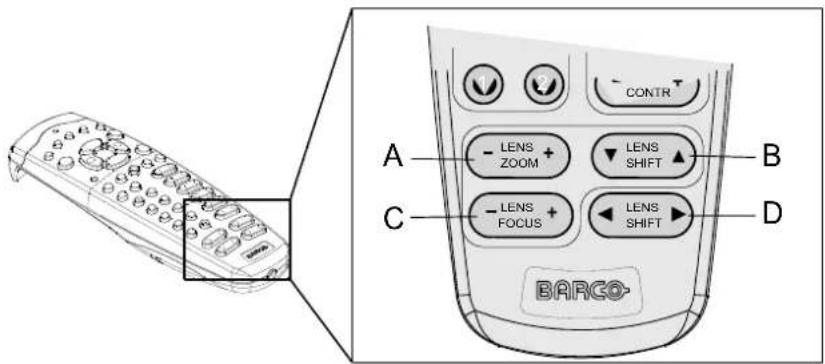
Image1-13
Directlensadjustmentkeys
AZoom
BVerticalshift
CFocus
DHorizontalshift
- Press LENS FOCUS button [-] or [+] (C) for an overall focus of the image.
- Press ▲ LENS SHIFT ▼ button for correct vertical position of the image on the screen.
- Press ◀ LENS SHIFT ▶ button for correct horizontal position of the image on the screen.
1.9Cleaningthelens

To minimize the possibility of damage to optical coatings, or scratches to lens surfaces, we have developed recommendations for cleaning. FIRST, we recommend you try to remove any material from the lens by blowing it off with clean, dry deionized air. DO NOT use any liquid to clean the lenses.
Necessarytools
Toraysee™ cloth (delivered together with the lens kit). Order number : R379058.
Howtocleanthelens?
Proceedasfollow:
- AlwayswipelenseswithaCLEANToraysee TM cloth.
- Alwayswipelensesinasingledirection.
Warning: Do not wipe back and forwards across the lens surface as this tends to grind dirt into the coating.
- Donotleavecleaningclothineitheranopenroomorlabcoatpocket, asdoingsocancontaminatethecloth.
- If smears occur when cleaning lenses, replace the cloth. Smears are the first indication of a dirty cloth.

CAUTION: Do not use fabric softener when washing the cleaning cloth or softener sheets when drying the cloth.
Donotuseliquidcleanersontheclothasdoingsowillcontaminatethecloth.

OtherlensescanalsobecleanedsafelywiththisToraysee TM cloth.
- 1.LENSKIT
- Kit Contents
- KitContents
- Available Lens Types
- Lensformulas
- Lensformulas
- Lensremoval
- Howtoremovethelens
- Lens installation
- Howtoinstallthelens
- 1.7Removalofthefrontcover
- Necessarytools
- Howtoremovethefrontcover
- 1.8QuickLensAdjustment
- QuickLens Adjustment via LENSkey
- Quickzoom/focusadjustment
- Quickshiftadjustment
- Direct Lens Adjustment (RCU)
- LensadjustmentbuttonsontheRemoteControl
- 1.9Cleaningthelens
- Howtocleanthelens?
Brand : Barco
Model : R9861071
Category : Projector accessory