303117 - Humidifier Arendo - Free user manual and instructions
Find the device manual for free 303117 Arendo in PDF.

User questions about 303117 Arendo
0 question about this device. Answer the ones you know or ask your own.
Ask a new question about this device
Download the instructions for your Humidifier in PDF format for free! Find your manual 303117 - Arendo and take your electronic device back in hand. On this page are published all the documents necessary for the use of your device. 303117 by Arendo.
USER MANUAL 303117 Arendo
natural_image
Line drawing of a teapot with a conical top and lid, showing liquid level (no text or symbols)Thank you for choosing an Arendo product. Please read the following user manual carefully so that you can get the most from the product you have purchased.
1 Scope of supply
- Air humidifier
- Cleaning brush
- User manual
2 Technical data
| Power supply 220-240V AC, 50-60Hz | |
| Standby consumption < 1W | |
| Mist generation max. 200ml / hr | |
| Actual capacity Max 1.3 litres | |
| Features • RGB LED | • Is automatically switched off when the water level is too low• Quiet operation |
3 Important usage and safety guidelines for this device
- Do not fill water above 45^ C in the tank of the humidifier. It may cause discolouration or deformation.
- The water tank is intended exclusively for water. Using aromas in the water tank is not recommended, because it is very difficult to remove the residual smell from the water tank. Use the provided aroma tray for aromas.
- The plug should be disconnected from the socket if the device is not being used.
- Disconnect the plug before cleaning the device.
- Do not operate the product without liquid.
- Use it only at normal room temperature. If the room temperature is too high or too low, it may damage the humidifier.
2 English
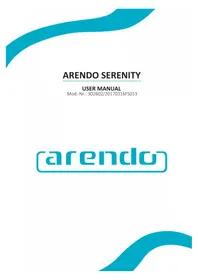
4 Product details
text_image
Water filter Mist extractor Water filter valve Lid Water tank Atomiser unit Water basin Aroma sponge Aroma tray Plug RGB LED Colour change button Power controller Status display5 Selecting the right location
Care should be taken to select the right location for the humidifier to work properly. Ensure that the humidifier is placed at a distance of at least 1.5 m from the ceiling and has a clearance of at least 50 cm on the sides and a clearance of 50 cm from the ground. Never place the humidifier next to furniture or other objects, which are sensitive to moisture. Adjust the intensity of the humidifier depending on the size of your room.

text_image
More than 1.5m clearance from the ceiling More than 50cm clearance from the wall More than 50cm clearance from the ground More than 50cm clearance from the wall6 Filling

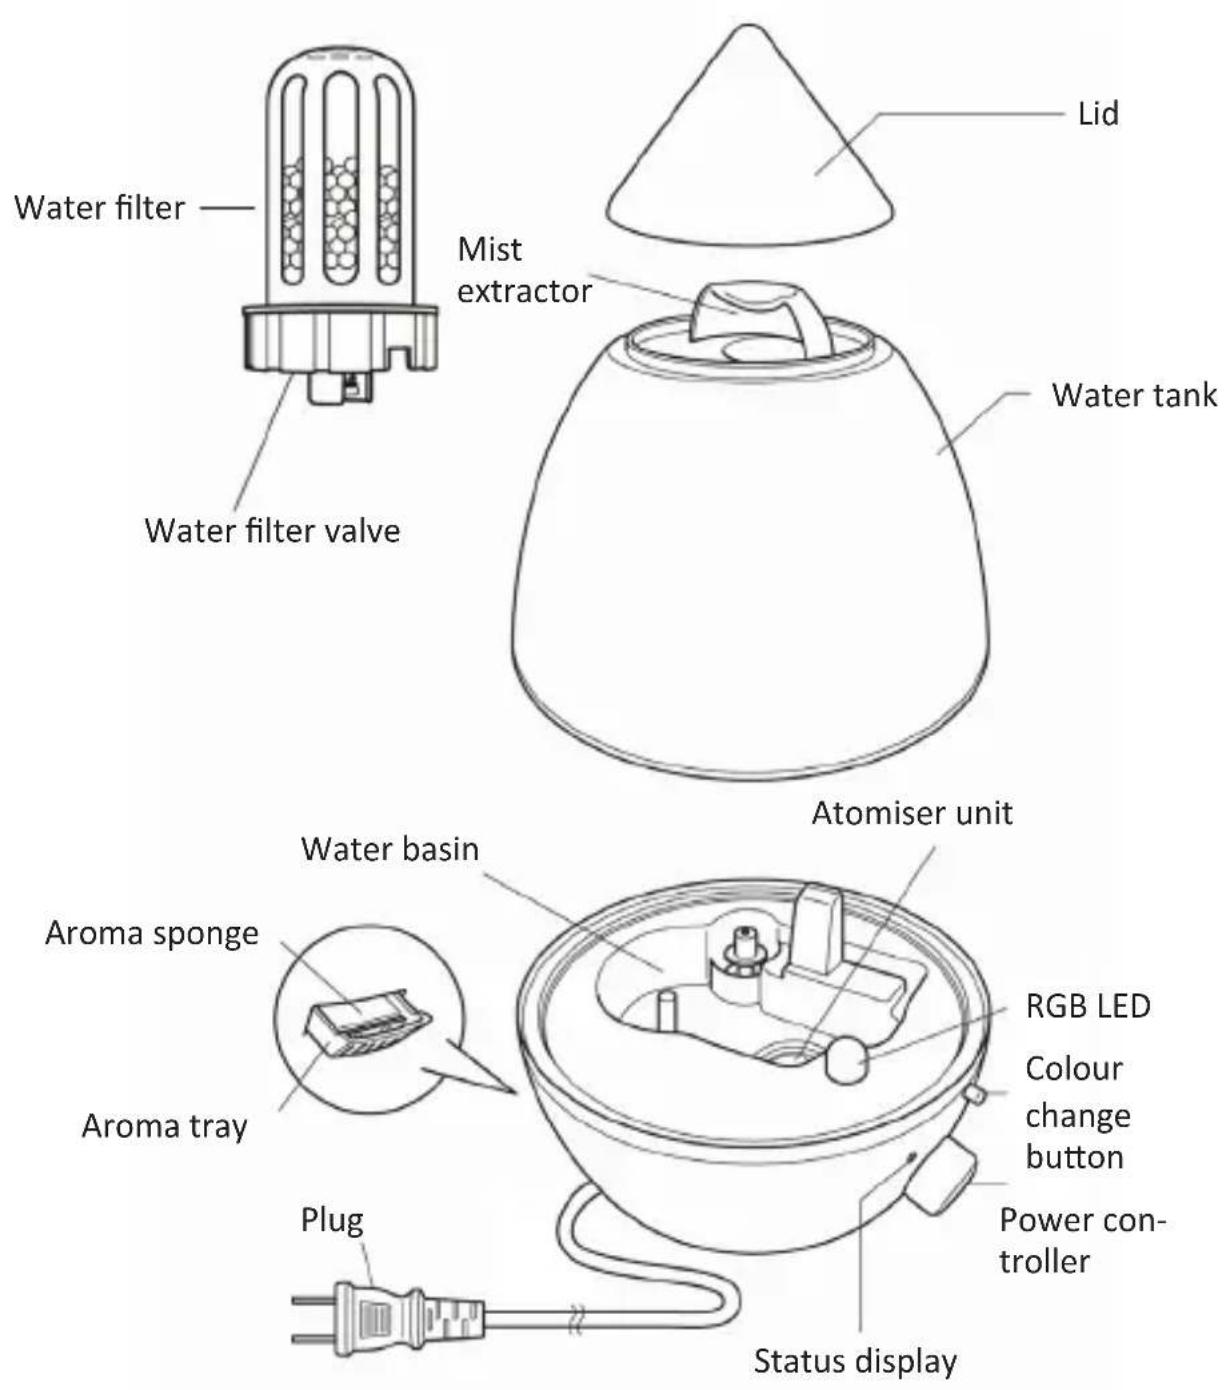
natural_image
Three-step diagram showing a device with an upward arrow inside, enclosed in a container (no text or symbols)Remove the lid from the water tank of the humidifier.
Remove the water tank from the base.
Then rotate it and remove the water filter and the cap.

natural_image
Line drawing of a laboratory apparatus with a funnel and container (no text or symbols)Fill the tank with water. Ensure that the water is not too hot. We recommend to use water at room temperature.
natural_image
Simple line drawing of a cylindrical container with a handle and internal components (no text or symbols)Then insert the water filter as shown in the figure.

natural_image
Diagram of a device with a conical top and internal components, showing flow direction (no text or symbols)Remove any residual water around the water tank.
Finally reassemble the humidifier. Mount the water tank on the base and place the lid on the water tank to close it.
7 Operation

Turn the power regulator knob counter-clockwise. The atomisation begins when the green status LED starting glowing.
You can regulate the intensity of the atomisation by turning the power regulator knob. Turn the knob to "MAX" to get the maximum atomisation
The red status LED starts glowing if the water level is too low. Switch off the device and disconnect the mains plug from the socket. Subsequently the device can be refilled.
To switch off the device or stop the atomisation, turn the power regulator knob counter-clockwise until the status LED stops glowing.
8 RGB LED settings

text_image
POWER ON + OFF MAX LED ON /OFFIf you press the LED button with the mode enabled, you can activate any desired illumination colour.
The colour rotation is as follows:
- Off
- Turquoise
- Automatic rotation of all the colours 7. Light green
- Define the colour 8. Yellow
- Purple 9. Red
- Blue 1. Off
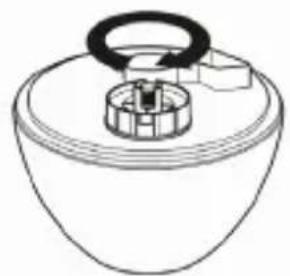
9 Aroma tray

natural_image
Line drawing of a mechanical component with a cylindrical tool and a base component (no text or symbols)Remove the aroma tray from the humidifier by pulling it lightly.
Soak the aroma sponge with any desired aroma oil or something similar, e.g. a perfume.
Then insert the aroma tray back into the humidifier.
You can now start the device. Ensure that there is enough water in the tank.
10 Cleaning and Care
Caution! Ensure that the plug has been disconnected from the socket before cleaning!
natural_image
Line drawing of a mechanical component with a central housing and side ports (no text or symbols)Cleaning the base:
Remove the lid and the water tank.
Using a clean cloth, remove any water residues and stains from the device.
Do not use any aggressive or chemical cleaning agent.

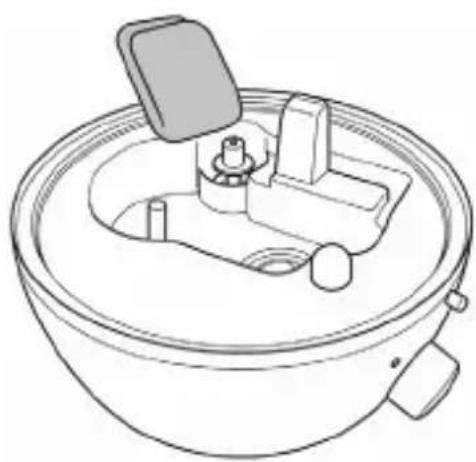
natural_image
Line drawing of a kitchen sink with a tool and an arrow indicating a component (no text or symbols)Cleaning the atomiser:
Remove the lid and the water tank.
Using a clean cloth, remove any water residues and stains from the device.
Clean the atomiser using a soft brush like for example, the cleaning brush supplied or alternatively a toothbrush.
Then wash the metal plate with water and allow the device to dry completely and uniformly.
Cleaning the water filter:
Remove the water filter as described in the section "6 Filling". Unscrew the water filter from the valve and clean the parts of the filter using hot water!
Caution! Be careful not to scald yourself in the process.
Cleaning the water tank:
Remove the lid and the water tank. Then, remove the water filter and the cap. Subsequently rinse the tank using a vinegar solution. Then wash the tank thoroughly with water. Do not leave any residue of vinegar in the tank.
Dry the device completely and uniformly.
Store the tank in its original packaging if you do not use the humidifier for a long period of time.
11 Error analysis and troubleshooting
| Error Troubleshooting | |
| The device cannot be switched on Insert the mains plug into the socket | |
| The device is switched on but the humidification does not startThe mist output is very low | Fill the water tank if the red status LED starts glowingEnsure that the humidifier is placed on an even surfaceEnsure that the regulator knob is set as desired |
| The mist has an unusual smell | Clean the tank and the atomiserEnsure that the water in the tank is not stale. If this is the case, replace the water in the tank |
| The water is draining out of the device | Ensure that the water filter was screwed on properly.Ensure that the tank is sitting correctly on the base |

Please note!

12 Safety instructions and liability disclaimer
Never try to open the device to carry out repairs or conversions. Avoid contact with mains voltages. Do not short-circuit the product. The device is not certified for use in the open air; only use it in dry conditions. Protect it from high humidity, water and snow. Keep it away from high temperatures. Do not subject the device to sudden changes in temperature or heavy vibration as this might damage electronic components. Examine the device for damage before using it. The unit should not be used if it has received an impact or has been damaged in any other way. Please observe national regulations and restrictions. Do not use the device for purposes other than those described in the instructions. This product is not a toy. Keep it out of the reach of children or mentally impaired persons. Any repair or alteration to the device not carried out by the original supplier, will invalidate the warranty or guarantee. The product may only be used by persons who have read and understood these instructions. The device specifications may change without any separate prior notice to this effect.

13 Disposal instructions
Electrical and electronic devices may only be disposed of in accordance with the European WEEE Directive and not with household rubbish. Components must be disposed of or recycled separately as dangerous, toxic elements can inflict sustained damage on the environment if they are disposed of incorrectly. As a consumer, you are bound by the Electrical and Electronic Devices Act (ElektroG) to return electrical and electronic goods free of charge at the end of their useful life to the manufacturer, the place of purchase or to specially set up, public collection points. The details in each case are governed by national law. The symbol on the product, the operating instructions and/or the packaging refers to these regulations. By separating materials in this way, recycling and disposing of old devices, you are making an important contribution towards protecting our environment.

WEEE guideline: 2012/19/EU WEEE register number: DE 67896761
WD Plus GmbH, herewith declares that this product 303117/20170909JM003 conforms to the principle requirements and other relevant stipulations. The complete Declaration of Conformity can be obtained from: WD Plus GmbH, Wohlenbergstraße 16, 30179 Hanover