SL-IBTC18 - Radio Sandstrøm - Free user manual and instructions
Find the device manual for free SL-IBTC18 Sandstrøm in PDF.

| Product Type | Portable Radio |
| Brand | Sandstrøm |
| Model | SL-IBTC18 |
| Category | Radio |
| Color | Black with silver accents |
| Dimensions (W x H x D) | Approx. 15.0 x 8.0 x 3.0 cm (5.9 x 3.1 x 1.2 in) |
| Weight | Approx. 0.5 kg (1.1 lbs) |
| Power Source | AC 230V 50Hz or 3 x AA batteries (not included) |
| Battery Type | AA alkaline (1.5V each) or rechargeable Ni-MH |
| Frequency Range FM | 87.5 - 108.0 MHz |
| Frequency Range AM | 522 - 1620 kHz |
| Speaker | Built-in, 3 inch diameter |
| Output Power | 1 W RMS |
| Headphone Jack | 3.5 mm stereo |
| Antenna | FM telescopic, AM ferrite bar |
| Display | LCD with backlight |
| Controls | Rotary tuning knob, volume dial, push buttons for functions |
| Clock Function | Yes, 12/24 hour format |
| Alarm Function | Yes, with snooze |
| Sleep Timer | Yes, selectable 60/90/120 minutes |
| Additional Features | Preset memory for 20 stations, external antenna socket, battery indicator |
| Maintenance | Clean with dry soft cloth. Do not use solvents. Unplug before cleaning. |
| Safety | Do not expose to water. Keep away from heat sources. Use only specified power supply. |
| Spare Parts | Contact Sandstrøm support for replacement antennas or knobs. |
| General Information | This radio is designed for indoor use. Refer to the user manual for detailed instructions. |
Frequently Asked Questions - SL-IBTC18 Sandstrøm
User questions about SL-IBTC18 Sandstrøm
0 question about this device. Answer the ones you know or ask your own.
Ask a new question about this device
Download the instructions for your Radio in PDF format for free! Find your manual SL-IBTC18 - Sandstrøm and take your electronic device back in hand. On this page are published all the documents necessary for the use of your device. SL-IBTC18 by Sandstrøm.
USER MANUAL SL-IBTC18 Sandstrøm
Internet Bluetooth® DAB Radio with Spotify Connect
Instruction Manual
SL-IBTB18 / SL-IBTC18
Safety Warnings....5
Unpacking....7
Product Overview......8
Front View....8
Rear View 9
Connections 10
Using the AUX Connection....10
Using Earphones....10
Turning the Radio On for the First Time....11
Charging from the USB CHARGING Port 11
Connecting To The Internet For The First Time....12
Using the WPS button on your Router....13
Using Your Wireless Network Password....14
Basic Operation 15
Switching ON/OFF 15
Selecting Modes....15
Adjusting the Volume....15
Automatically Setting the Clock....15
Alarm....16
General Settings 20
Setting a Sleep Timer....20
Setting Equaliser 20
Setting the Time and Date....21
Language....21
Factory Reset 21
Software Update 21
Info 21
Privacy policy 21
Backlight 22
Network Settings 22
Setup Wizard....22
Internet Radio Operation....23
Finding Local Radio Stations ....23
Finding Radio Stations From Around the World....24
Searching for a Radio Station by Name 25
Searching for Popular Radio Stations....25
Searching for Newest Radio Stations 26
Saving Preset Stations....26
Recalling a Preset Station....27
Finding Podcasts....27
Adding Favourite Radio Stations....28
My Added Stations....29
Spotify ....30
DAB Operation....31
Secondary Services 32
Manually Tuning In DAB Radio Stations 32
Saving Preset Stations....33
Recalling a Preset Station....33
DAB Display Modes....34
FM Operation 35
Auto Scan....35
Manual Tune 35
Scan Setting....35
Audio Setting 36
Saving Preset Stations....36
Recalling a Preset Station....37
FM Display Modes 37
Bluetooth® Operation 38
Pairing with a Bluetooth device 38
Playing Music via Bluetooth....38
Disconnecting a Bluetooth Device....38
AUX IN Operation 39
Maintenance 39
Cleaning the Unit....39
Hints and Tips 40
Specifications....41
Read all the instructions carefully before using the unit and keep them for future reference.
- Retain the manual. If you pass the unit onto a third party make sure to include this manual.
- Check that the voltage marked on the rating label matches your mains voltage.
Damage
- Please inspect the unit for damage after unpacking.
- Do not continue to operate the unit if you are in any doubt about it working normally, or if it is damaged in any way - switch off, withdraw the mains adapter and consult your dealer.
Location of Unit
- The unit must be placed on a flat stable surface and not subjected to vibrations.
- Do not place the unit on sloped or unstable surfaces as the unit may fall off or tip over.
- The mains socket must be located near the unit and should be easily accessible.
• This unit is designed for indoor use only.
Temperature
- Avoid extreme degrees of temperature, either hot or cold. Place the unit well away from heat sources such as radiators or gas / electric fires.
- Avoid exposure to direct sunlight and other sources of heat.
Naked Flames
- Never place any type of candle or naked flame on the top of or near the unit.
Moisture
- To reduce the risk of fire, electric shock or product damage, do not expose this unit to rain, moisture, dripping or splashing. No objects filled with liquids, such as vases, should be placed on the unit. Do not operate the unit with wet hands, near water or other liquid.
- If you spill any liquid into the unit, it can cause serious damage. Switch it off at the mains immediately. Withdraw the mains plug and consult your dealer.
Ventilation
- To prevent the risk of electric shock or fire hazard due to overheating, ensure that curtains and other materials do not obstruct the ventilation vents.
- A minimum distance of 5cm around the unit should be maintained to allow for sufficient ventilation.
- Do not install or place this unit in a bookcase, built-in cabinet or in another confined space. Ensure the unit is well ventilated.
Safety
• Always disconnect the unit from the mains supply before connecting / disconnecting other devices or moving the unit.
- Unplug the unit from the mains socket during a lightning storm.
- In the interests of safety and to avoid unnecessary energy consumption, never leave the unit switched on while unattended for long periods of time, e.g. overnight, while on holiday or while out of the house. Switch it off and disconnect the mains plug from the mains socket.
Mains Adapter Cable
- Make sure the unit or unit stand is not resting on top of the mains adapter cable, as the weight of the unit may damage the cable and create a safety hazard.
Mains Adapter
- The mains adapter will continue to draw electricity from the mains supply when plugged in the mains socket. In the interests of safety and to avoid unnecessary energy consumption, never leave the adapter plugged in the mains socket while unattended for long periods of time. Disconnect the adapter from the power supply.
⚠️ Use only power supplies listed in the user instructions.
Interference
- Do not place the unit on or near appliances which may cause electromagnetic interference. If you do, it may adversely affect the working of the unit, and cause a distorted sound.
Earphones
- Listening to loud sounds for prolonged periods of time may permanently damage your hearing.
- Before putting on earphones, turn the volume down then put the earphones on and slowly increase the volume until you reach a comfortable listening level.

Supervision
• Children should be supervised to ensure that they do not play with the unit.
- Never let anyone especially children push anything into the holes, slots or any other openings in the case - this could result in a fatal electric shock.
Built-in Battery Care
- Your product is powered by a built-in rechargeable battery.
- The battery can be charged and discharged hundreds of times, but will eventually wear out.
- Unplug the charger from the electrical plug and the product when not in use.
- Do not leave a fully charged battery connected to a charger, since overcharging may shorten its lifetime.
- If left unused, a fully charged battery will lose its charge over time.
• Leaving the product in hot or cold places, such as in a closed car in the summer and winter conditions, will reduce the capacity and lifetime of the battery.
- Always try to keep your device in a cool, moisture-free environment that's less than 32^ . A product with a hot or cold battery may not work temporarily, even when the battery is fully charged. Battery performance is particularly limited in temperatures well below freezing.
- If you plan to store your device for longer than six months, charge the battery for an hour every six months to keep it fresh.
- The unit should be fully recharged after using the device each time. This will keep the health of the battery.
Battery warning!
- The battery used in this product may present a risk of fire or chemical burn if mistreated.
- Do not attempt to open the product or replace the battery. It is built-in and not changeable. Use of other batteries may present a risk of fire or explosion and the warranty will be terminated.
-
Only recharge your battery with the provided approved USB cable designated for this product.
-
Dispose of batteries according to local regulations. Please recycle when possible. Do not dispose as household waste or in a fire as they may explode.
• Batteries may explode if damaged.


The lightning flash with arrowhead symbol, within an equilateral triangle, is intended to alert the user to the presence of uninsulated “dangerous voltage” within the unit’s enclosure that may be of sufficient magnitude to constitute a risk of electric shock.

The exclamation point within an equilateral triangle is intended to alert the user to the presence of important operating and maintenance (servicing) instructions in the manual accompanying the unit.
Service
- To reduce the risk of electric shock, do not remove screws. The unit does not contain any user-serviceable parts. Please leave all maintenance work to qualified personnel.
- Do not open any fixed covers as this may expose dangerous voltages.
Maintenance
- Ensure the unit is fully unplugged from the power supply before cleaning.
- Do not use any type of abrasive pad or abrasive cleaning solutions as these may damage the unit's surface.
• Do not use liquids to clean the unit. - This equipment is a Class II or double insulated electrical appliance. It has been designed in such a way that it does not require a safety connection to electrical earth.

The mains plug is used as disconnect device, the disconnect device shall remain readily operable.
\~ AC voltage: This symbol indicates that the rated voltage marked with the symbol is AC voltage.
-- DC voltage: This symbol indicates that the rated voltage marked with the symbol is DC voltage.
Thank you for purchasing your new product.
We recommend that you spend some time reading this instruction manual in order that you fully understand all the operational features it offers. You will also find some hints and tips to help you resolve any issues.
Read all the safety instructions carefully before use and keep this instruction manual for future reference.
Unpacking
Remove all items from the packaging. Retain the packaging. If you dispose of it please do so according to local regulations.
The following items are included:
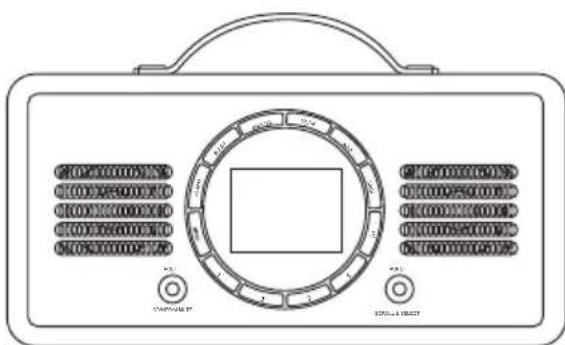
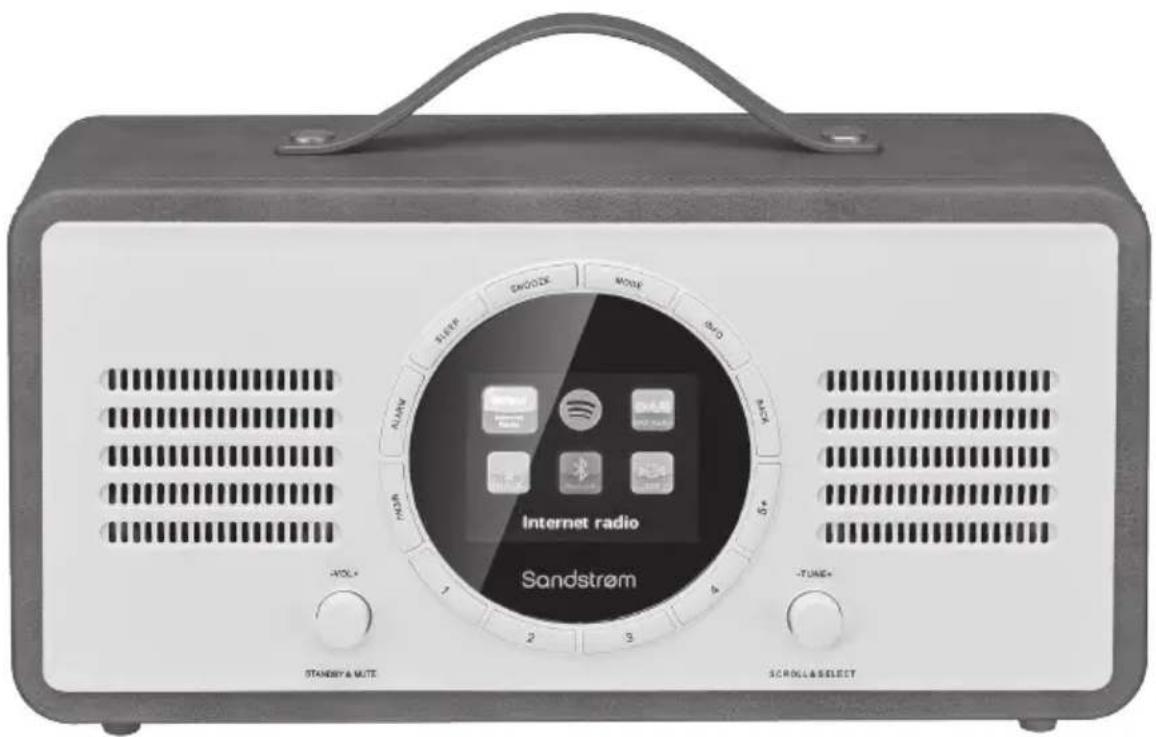
Main Unit
natural_image
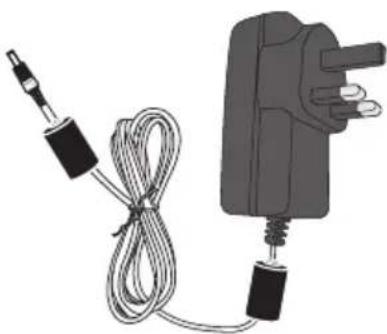
Illustration of a handheld electrical device with coiled cable and plug (no text or symbols)Mains Adapter
natural_image
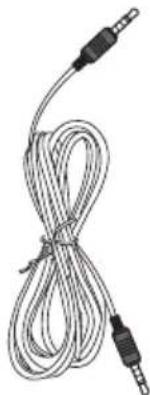
Coiled cable with two connectors and a separate connector (no text or symbols visible)3.5mm to 3.5mm Stereo Audio Cable
Instruction Manual
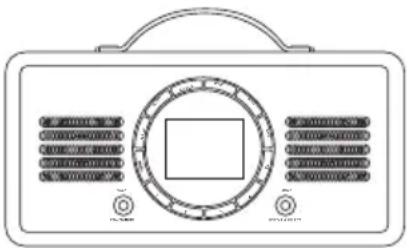
Front View
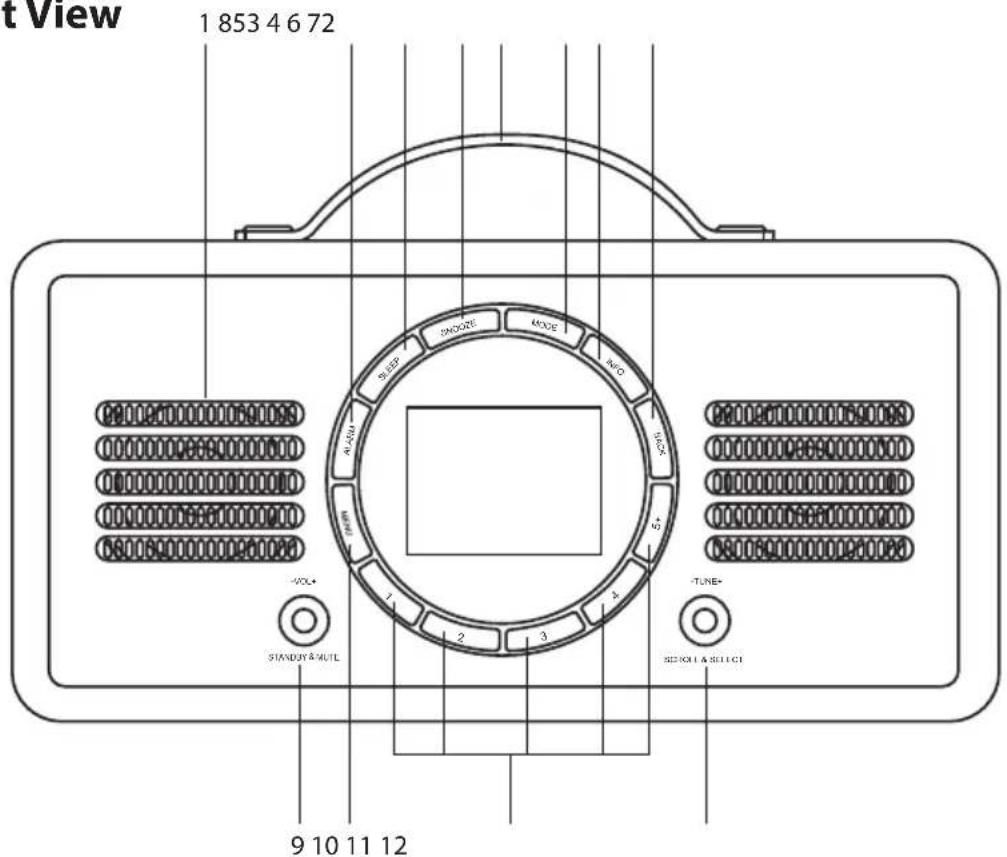
- SPEAKER
- ALARM Button
Press to set the ALARM.
- SLEEP Button
Press to set the SLEEP time.
- SNOOZE Button
Press to set the SNOOZE time when the alarm rang.
- HANDLE
- MODE Button
Press to switch between Internet Radio, Spotify Connect, DAB radio, FM radio, Bluetooth and Aux in mode.
- INFO Button
Press to view more information about the station or track playing.
- BACK Button
Press to return to the previous page in the menu.
-
-VOL+ / STANDBY & MUTE Dial
-
Press and hold to switch the unit ON.
- While the unit is ON, press to switch it into STANDBY mode.
- While the unit is ON, press and hold to mute/resume playback.
-
Rotate clockwise/anticlockwise to increase/decrease the volume.
-
MENU Button
Press to show menu for the current mode.
-
Preset 1-5+ Button
-
Press and hold to preset the corresponding radio station.
-
Press to recall the preset station.
-
-TUNE+ / SCROLL & SELECT Dial
-
Turn to perform manual tune in FM or DAB mode.
- Press and hold to reconnect the last paired Bluetooth device.
- Press to pause/resume playback in Bluetooth, Spotify Connect and Internet radio mode.
- Press to confirm a selection in the menu.
Rear View
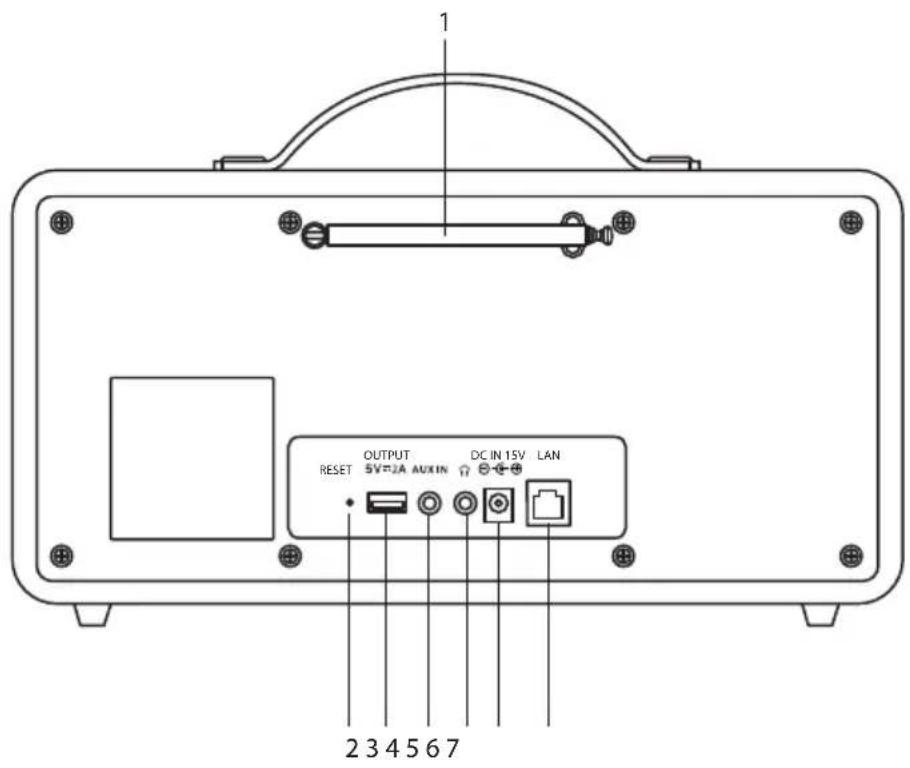
- DAB / FM Aerial
- RESET Button
- OUTPUT 5V 2A USB Port
For mobile devices charging.
- AUX IN Socket
- Headphones Socket
- DC IN 15V Socket
- LAN Socket
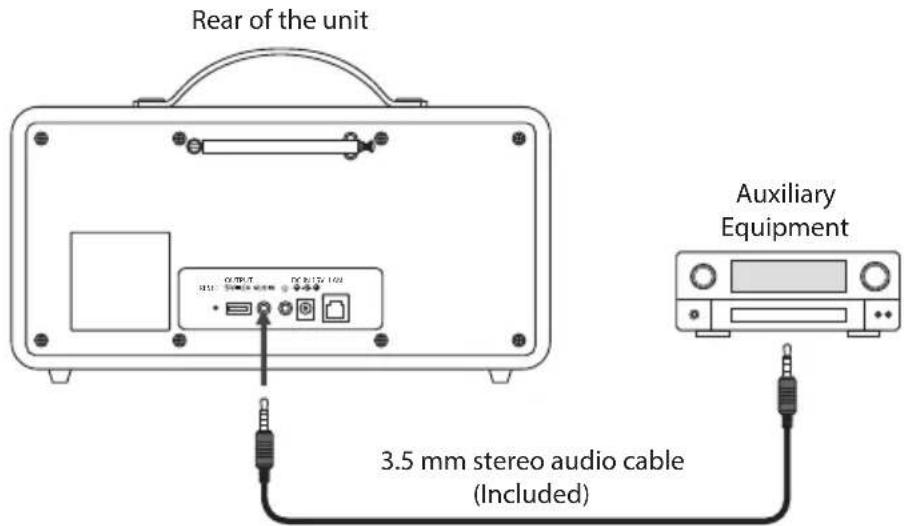
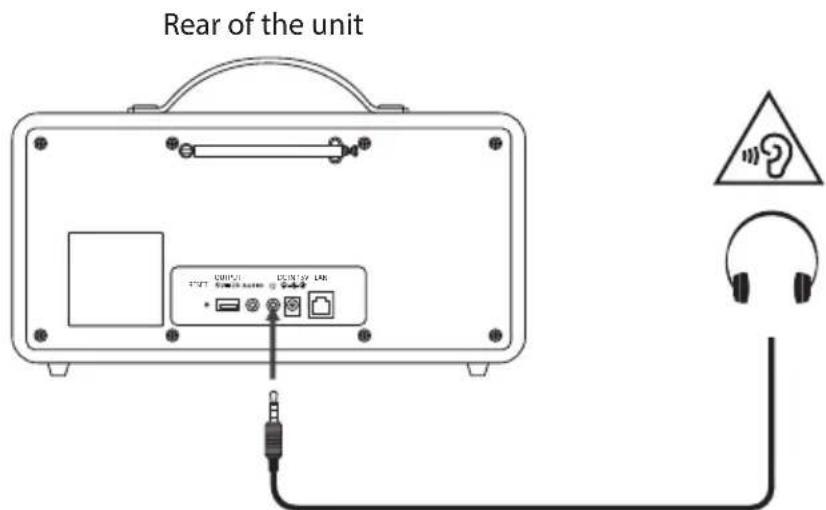
Using the AUX Connection
Connect the AUX IN socket at the rear of the unit to the line output sockets on the auxiliary equipment using a 3.5 mm to 3.5 mm stereo audio cable (included), as illustrated.
Using Earphones
Turn down the volume before connecting the earphones. Slowly raise the volume with the earphones on until you reach your desired volume. When earphones are connected, the speaker is automatically muted.

Long-term exposure to loud music may cause hearing damage. It is best to avoid extreme volume when using earphones, especially for extended periods.
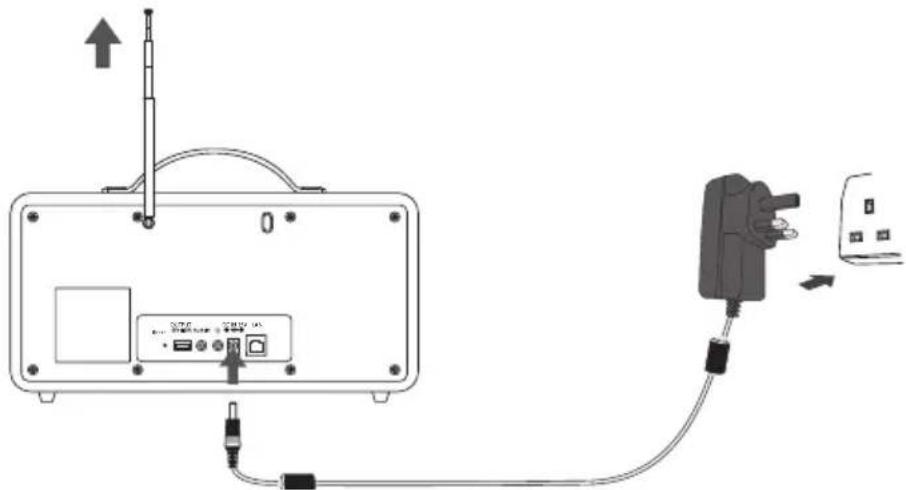
Turning the Radio On for the First Time
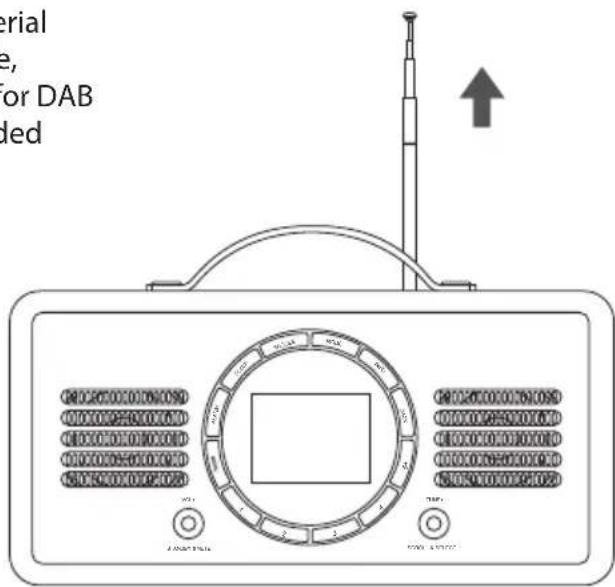
- Fully extend the aerial before plugging the unit into the mains.
- This unit is designed to operate with the built battery.
- Connecting the unit to any other power source may damage the unit. Unwind the mains adapter cable to its full length. Connect the end of the cable to the DC IN 15V ⊖—⊕ Socket at the rear of the unit and then connect the mains adapter to the mains socket. Make sure the mains adapter is firmly inserted into the mains socket. It starts battery charging and the unit is now ready to use.
- Charge the internal battery for 5 hours before first time use. It will automatically stop charging once the battery fully charged. The charging indicator shows the charging status.
- For better battery life, you may disconnect the mains adapter from the mains socket after it is fully charged.

Ensure all connections are connected before connecting to the mains power socket.

The unit supports playback up to 6 hours at mid-volume level (16) after fully charged.
Charging from the USB CHARGING Port
The OUTPUT 5V-2A USB Port is designed only for charging mobile devices (e.g. MP3 player, mobile phone, etc). It supplies 5V DC at a charging current of up to 2000 mA (2A).
Use a USB cable (not included) to connect mobile device to the OUTPUT 5V-2A USB port of the unit and the mobile device will start charging.


ONLY use the USB CHARGING port to charge small mobile devices. NEVER use this port for any other purpose.
Connecting To The Internet For The First Time
- When your radio is connected to power the splash screen (welcome message and then the unset time clock) will appear.
- Press and hold the -VOL+ / STANDBY & MUTE dial to switch on the unit, the display will show the "Privacy policy" page.
- Please visit the website mentioned in the page for the details of the privacy policy. Press SCROLL & SELECT dial to accept.
Welcome to Digital Radio
Privacy policy
Please visit the following page on a PC or mobile device. www.frontiersmart.com/privacy By continuing, you accept our privacy policy. Press SELECT to continue.
- The Setup wizard menu will now appear on the screen. The word YES will be highlighted, press SCROLL & SELECT dial to confirm.
You now have to decide if you want to connect your radio to the internet now or later. If you want to connect now, then select YES in the 'Setup wizard' or if later then select NO. To get the most out of your radio we recommend you select YES and connect it to the internet now.
- The Setup wizard menu will now appear on the screen. The word 'YES' will be highlighted, press SCROLL & SELECT to confirm.
The Date/Time screen will now appear you can choose to display the time using a 12 hour clock or 24 hour clock.
- Turn SCROLL & SELECT dial to select 12 or 24 then SCROLL & SELECT dial to confirm.
The AUTO UPDATE screen will now appear, here you can choose where you would like the time and date to be updated from.
- Turn SCROLL & SELECT dial to select UPDATE FROM DAB, UPDATE FROM FM or UPDATE FROM NETWORK (the internet). Then press SCROLL & SELECT to confirm.
If you chose to 'Update from network' the SET TIMEZONE screen will now appear, here you can choose your time zone. If you chose 'Update from DAB or FM' go to step 7.
- Turn SCROLL & SELECT dial to select your desired time zone. Then press SCROLL & SELECT to confirm.
Setup wizard
Start now?

NO
Date / Time
12/24 hour format
12
Auto update
Update from DAB
Update from FM
Update from network
No update *
Set timezone
UTC +00:00 Dublin, Ion
UTC +00:30:
UTC +01:00 Madrid, Amste
UTC +01:30
UTC +02:00 Athens, Cairo
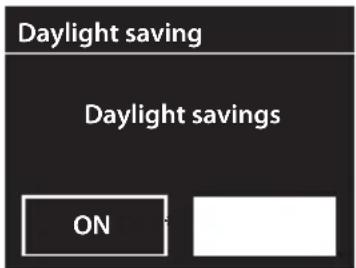
The DAYLIGHT SAVINGS screen will now appear, here you can choose if the set daylight saving ON or OFF.
-
Turn SCROLL & SELECT dial to select ON or OFF. Then press SCROLL & SELECT to confirm.
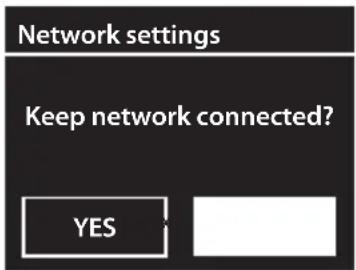
-
Select YES and then press SCROLL & SELECT to keep network connected. This enables Spotify playback in non-internet modes (i.e. DAB radio, FM radio, AUX in, Bluetooth) and STANDBY mode.
Your radio will now scan for your wireless network, this may take a few seconds then a list of all the wireless networks will appear on the screen.
Turn SCROLL & SELECT dial to select your wireless network. Then press SCROLL & SELECT to confirm.
![SSID [WPS]Home Network Guest [Rescan] [Manual config]](/content/2026/05/1127505/images/f6f2cefdd81365ae252fa43351c90beeacd90d76336521151133e29d771c65ee.jpg)
To connect your radio to your router using the WPS button follow the instructions below (Connecting Using the WPS button on your Router). OR
To connect your radio to your router using your password follow the instructions on the next page (Connecting Using Your Wireless Network Password).
Using the WPS button on your Router
Connecting using the WPS (Wi-Fi Protected Setup) button on your router is a quick and easy way to connect your radio without having to type in a password.
If your router has a WPS button you will notice [WPS] at the front of your network name.

If you don't see your wireless network scroll down to rescan and try again or you may need to move your radio closer to your wireless router, the closer the better.
- Turn SCROLL & SELECT dial to select
'Push button' then press SCROLL & SELECT to confirm.
You will now see a message on the screen telling you to press the WPS button on your router.
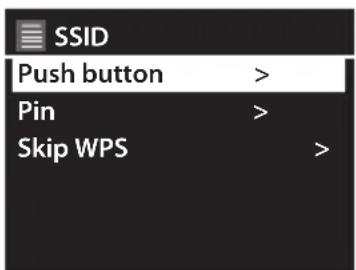
- Press the WPS button on your router. Check your routers instruction manual if you are unsure which button is the WPS button.
- Press the SCROLL & SELECT dial button. Your radio will now connect to your router, this may take a few seconds. The message 'Setup wizard completed' will be displayed when your radio has connected, press SCROLL & SELECT dial to exit the menu.
natural_image
Line drawing of a vintage portable radio with front panel and buttons (no text or symbols)Best connection speed as close as possible

natural_image
Simple black arrow pointing left, no text or symbols presentMaximum distance 5 meter
Press the WPS button
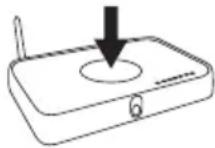
Wireless Router
Setup wizard

Setup wizard completed
Press SELECT to exit
Using Your Wireless Network Password
If your router hasn't got a WPS button you will now be asked to enter your wireless network password, or you can select SKIP WPS which will also take you to the password screen.
- Turn SCROLL & SELECT dial to select each letter/number of your password. Then press SCROLL & SELECT dial to enter the selected letter/number.
- When you have entered your password turn the SCROLL & SELECT dial to select OK on the right of the screen. Then press the SCROLL & SELECT dial. The screen will show the words 'Please wait connecting' for a few seconds. Then you will see the message 'Setup wizard completed' Press the SCROLL & SELECT dial.
Your radio is now connected to the internet.
Key:
G 3 n 6
0 1 2 3 4 5 6
7 8 9.--@
, abcde
fghijkl
mno p qrs
BKSP
OK
CANCEL
Setup wizard

Setup wizard completed
Press SELECT to exit
Switching ON/OFF
- Press and hold the -VOL+ / STANDBY & MUTE dial to switch the unit ON.
- While the unit is ON, press the -VOL+ / STANDBY & MUTE dial to switch the unit into STANDBY mode.

Remove the mains plug from the mains socket if you want to switch the unit off completely.
Selecting Modes
Press MODE on the unit to switch between Internet Radio, Spotify Connect, DAB radio, FM radio, Bluetooth and Aux in mode.

The unit will automatically go to STANDBY mode after 10 minutes if it has no audio playback. Press and hold the STANDBY & MUTE dial to switch on the unit again.
Adjusting the Volume
Adjust the radio volume by turning -VOL+ dial. Turn anti-clockwise to decrease volume and turn clockwise to increase volume.
Press and hold the STANDBY & MUTE dial to mute/resume playback.
Automatically Setting the Clock
The clock can be set and updated automatically if are connected to the internet or receive DAB / FM signals in your location. In order for the clock to synchronise to the current local time you must leave it on an Internet Radio, DAB or FM station for a short period of time. You can also choose how you would like to keep the clock up to date from the Internet, DAB or FM radio signals. Go to SYSTEM SETTINGS - TIME/DATE - AUTO UPDATE.
Alarm

Ensure the time and date is set before you can activate the alarm function.
Setting the Alarm
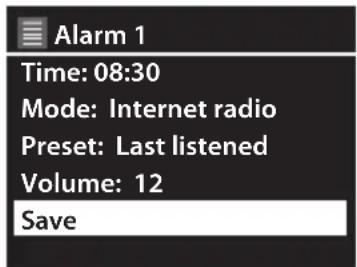
Your radio has two alarms (Alarm 1 and Alarm 2). This is handy so you can set one alarm for workdays and one for weekends. You set both alarms in the same way.
- Ensure the radio is turned ON (not in STANDBY mode), press ALARM button then press SCROLL & SELECT dial to confirm.
![Alarms Alarm 1: Off [00:00] Alarm 2: Off [00:00]](/content/2026/05/1127505/images/db7935415af6f42e131fa1badc6c30e8ea3ec202113749765bed7ec8554f0f63.jpg)
Now you can choose which alarm you would like to set, Alarm 1 or Alarm 2.
-
Turn SCROLL & SELECT dial to select ALARM 1 or ALARM 2 and press SCROLL & SELECT dial to confirm.
-
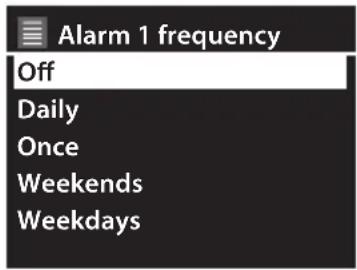
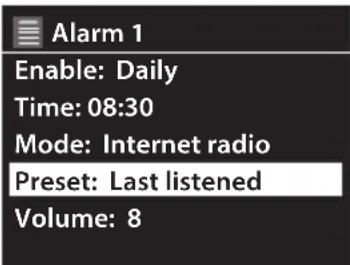
Turn SCROLL & SELECT dial to select ENABLE and press SCROLL & SELECT dial to confirm. Then turn SCROLL & SELECT dial to select DAILY - ONCE - WEEKENDS - WEEKDAYS and press SCROLL & SELECT dial to confirm.
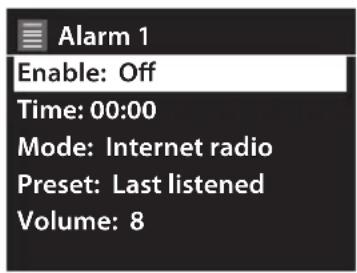
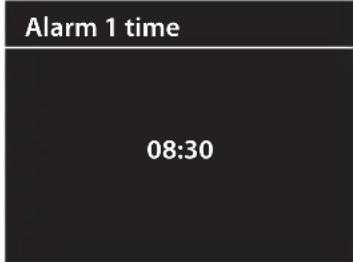
- Turn SCROLL & SELECT dial to select TIME and press SCROLL & SELECT dial to confirm. Then turn SCROLL & SELECT dial to set Alarm time and press SCROLL & SELECT dial to confirm.
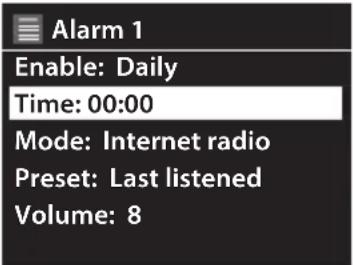
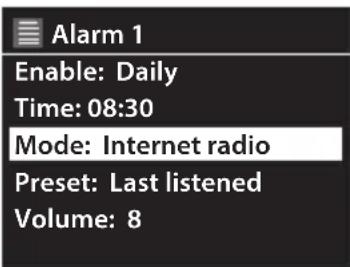
- Turn SCROLL & SELECT dial to select MODE and press SCROLL & SELECT dial to confirm. Then turn SCROLL & SELECT dial to select BUZZER - INTERNET RADIO - DAB - FM and press SCROLL & SELECT dial to confirm.
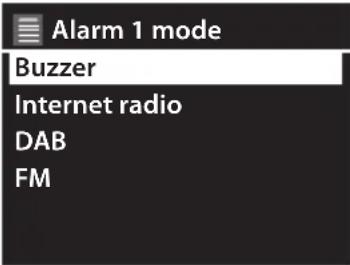

If the wake-up mode is set to Internet Radio or DAB and you're not connected to the internet or the DAB signal strength is low, the buzzer alarm will be triggered.
- Turn SCROLL & SELECT dial to select PRESET and press SCROLL & SELECT dial to confirm. Then turn SCROLL & SELECT dial to select LAST LISTENED or one of your PRESET stations and press SCROLL & SELECT dial to confirm.
(Not applicable to Buzzer)
![Alarm 1 preset Last listened 1. [Not set] 2. [Not set] 3. [Not set] 4. [Not set]](/content/2026/05/1127505/images/0141936b4390ff08f0c60888c2b0944152fe0153945a84f27cb1f994f5d1776e.jpg)
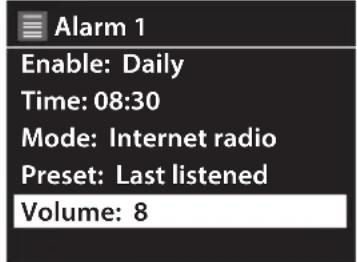
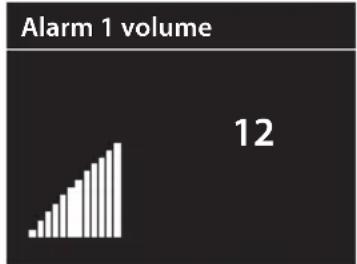
- Turn SCROLL & SELECT dial to select VOLUME and press SCROLL & SELECT dial to confirm. Then turn SCROLL & SELECT dial to select your desired VOLUME for the alarm to sound and press SCROLL & SELECT dial to confirm.
bar
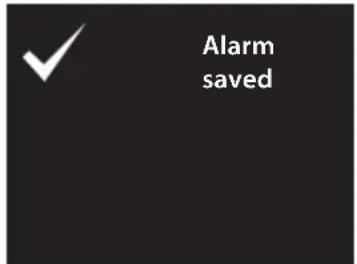
Alarm 1 volume | Category | Volume | |---|---| | Bar heights | 12 | | Count | 12 |- Turn SCROLL & SELECT dial to select SAVE and press SCROLL & SELECT dial to confirm. The ALARM SAVED screen will appear.
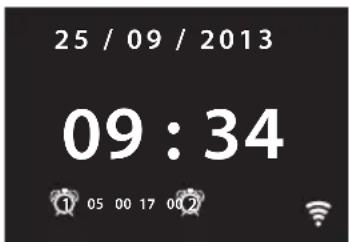
You will now see the alarm symbol ① or ② in the display. This shows which alarm is set.
Cancel Alarm
The alarm will automatically repeat at the selected time as long as the alarm icon is displayed.
To cancel an alarm press the ALARM button repeatedly until the alarm symbols disappear from the display.
Turning the Alarm Off when it Sounds
When the alarm sounds, press the STANDBY & MUTE dial to switch off the alarm.
Snooze Function
- Press SNOOZE button repeatedly to increase the snooze time 5 - 10 - 15 - 30 mins. The snooze time will show on the display.
Setting a Sleep Timer
This feature enables your radio to switch to standby mode by itself after a set sleep time.
- To set the sleep timer, press the Sleep/Alarm key repeatedly to cycle through the sleep time options: Sleep OFF, 15 MINS, 30 MINS, 45 MINS or 60 MINS.
- On the Now Playing screens the remaining sleep time is displayed at the bottom of the screen.
Setting Equaliser

This feature enables you to choose a sound equalization profile. Each of the equalization setting will change the tone of the sound from your radio when selected.
- Press MENU button - System settings - Equaliser, and then press SCROLL & SELECT dial to confirm.
- Turn SCROLL & SELECT dial and then press it to select a profile. The equalization profile options: Normal/Classical/Jazz/Pop/Rock/Speech/My EQ/My EQ profile setup.
- To set up My EQ, select "My EQ profile setup", and then press SCROLL & SELECT dial to confirm. Turn SCROLL & SELECT dial to select "Bass" or "Treble", and then press SCROLL & SELECT dial to confirm. Turn SCROLL & SELECT dial to change the value of Bass or Treble, and then press SCROLL & SELECT dial to confirm. Press BACK button, display will show "Save changes?". Turn and press SCROLL & SELECT dial to select "YES" to save changes.
Setting the Time and Date
To access all the time and date menus press MENU then go to System settings - Time/Date.
| Set Time/Date Here you can manually set the time and date. | |
| Auto update | Choose how you want the time to be automatically updated.Update from DAB - FM - NETWORK or NO UPDATE. |
| Set format Set 12 hour or 24 hour display. | |
| Set timezone Set the time zone, this is only available if you have chosen to update the time and date from Network. | |
| Daylight saving Set daylight saving ON or OFF, this is only available if you have chosen to update the time and date from Network. | |
Language
To change the language of the menus press MENU then go to System settings - Language.
See the Menu map for all the languages.
Factory Reset
If you want to delete all your stations and settings you can return your radio back to the state that it left the factory select FACTORY RESET. Press MENU then go to System settings - Factory Reset then select YES.

• After factory reset, all tuned stations, preset stations and alarm settings will be erased then your radio will switch back on.
• After Factory reset, you need to accept the Privacy policy again.
Software Update
In the software update menu you can choose if you want your radio to look for updates or not and also check for update now. Press MENU to go to System settings - Software update.
Auto-check setting
Select AUTO-CHECK SETTING then select YES to set your radio to periodically check for updates.
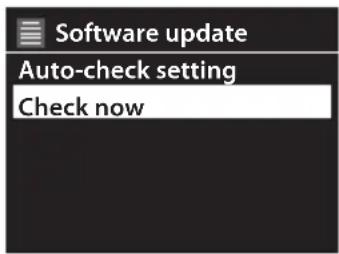
Check Now
If you want to check for updates now select CHECK NOW and your radio will start checking for any updates. If it finds an update select YES. Your radio will switch into standby and start updating the software, follow the on screen instructions.

Do not switch off the mains power while a software update is taking place.
Info
To see the Software version, Radio ID and Friendly Name of your radio go to INFO. Press MENU to go to System settings - Info.
Privacy policy
To see the Privacy policy page, press MENU to go to System settings - Privacy policy.
Backlight
You can set the brightness for the power on screens and the Standby screen. Press MENU to go to System settings - Backlight.
Privacy policy
Please visit the following page on a PC or mobile device. www.frontiersmart.com/privacy
| Timeout • On | |
| • 10 sec• 20 sec• 30 sec• 45 sec• 60 sec• 90 sec• 120 sec• 180 sec | |
| On level • High | |
| • Medium• Low | |
| Dim Level • Medium | |
| • Low• Off |
Network Settings
The NETWORK SETTINGS menu has all the setting for connecting your radio to your Wi-Fi. So if you have to re-connect your radio at any time go into the NETWORK SETTINGS menu.
| Network wizard Selecting network wizard will start the search for Wi-Fi networks, choose your network then enter your Wi-Fi password to connect to that network. | |
| PBC Wlan setup Select PBC Wlan setup if you want to connect your Wi-Fi using the WPS button on your router. This is a quick and easy way to connect your radio to your Wi-Fi network without needing a password. | |
| View settings Select View settings the following setting on your radio:Active connectionMAC addressWlan regionDHCPSSIDIP addressSubnet maskGateway addressPrimary DNSSecondary DNS | |
| Manual settings Select manual setting to enable or disable DHCP. | |
| Network profile Network profile shows the current network that has been used. | |
| Keep network connected | Enables Spotify playback in non-internet modes (i.e. DAB radio, FM radio, Bluetooth and Aux in) and STANDBY mode. |
Setup Wizard
Select Setup wizard if you want to setup your radio again. This will guide you through the setup process, setting the time/date and Wi-Fi network.
To listen to internet radio your radio must be connected to the internet. Try to position your radio as close as possible to your router to get the best connection speeds.
Finding Local Radio Stations
You can search for local radio station to the area you are located in e.g. if you are in the UK all of the UKs local radio stations will be listed.
-
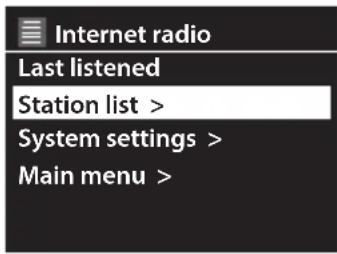
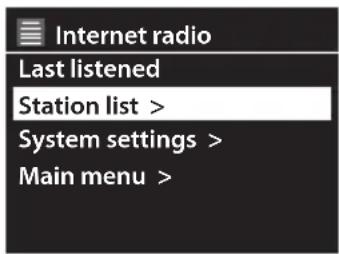
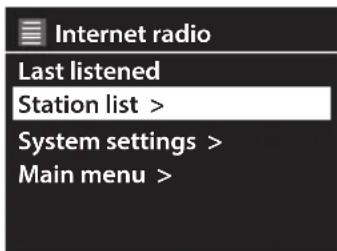
In INTERNET RADIO mode press the MENU button. Turn SCROLL & SELECT dial to select STATION LIST then press SCROLL & SELECT dial to confirm.
-
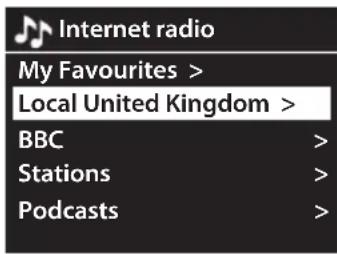
Turn SCROLL & SELECT dial to select LOCAL ---- then press SCROLL & SELECT dial to confirm.
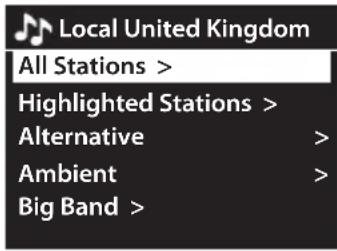
You can now select ALL STATIONS which will display a list of all the local radio stations in your location or select a genre which will just display a list of stations relating to your selected genre.
- Turn SCROLL & SELECT dial to select ALL STATIONS or a GENRE then press SCROLL & SELECT dial to confirm.
- Turn SCROLL & SELECT dial to select the radio station you want to listen to then press SCROLL & SELECT dial to confirm. It may take a few seconds for your radio to connect to the station then you will hear the station.
Finding Radio Stations From Around the World
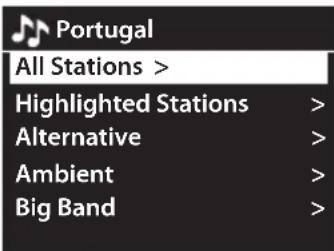
You can search for radio station from a particular country in the world. All you need to do is select the area in the world e.g. Europe then select the country e.g. Portugal. You will then be able to listen to any radio station from your selected country.
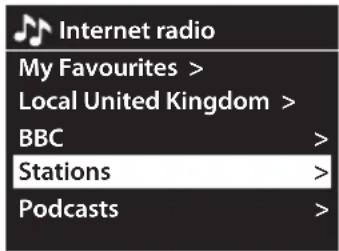
- In INTERNET RADIO mode press the MENU button. Turn SCROLL & SELECT dial to select STATION LIST then press SCROLL & SELECT dial to confirm.
- Turn SCROLL & SELECT dial to select STATIONS then press SCROLL & SELECT dial to confirm.
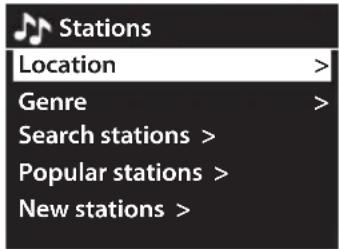
- Turn SCROLL & SELECT dial to select LOCATION then press SCROLL & SELECT dial to confirm.
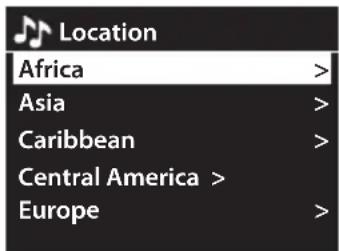
- Turn SCROLL & SELECT dial to select a area of the world e.g. Europe, then press SCROLL & SELECT dial to confirm.
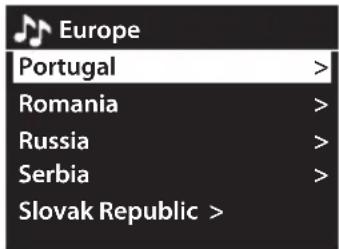
- Turn SCROLL & SELECT dial to select a country e.g. Portugal, then press SCROLL & SELECT dial to confirm.
You can now select ALL STATIONS which will display a list of all the local radio stations in your location or select a genre which will just display a list of stations relating to your selected genre.
- Turn SCROLL & SELECT dial to select ALL STATIONS or a GENRE then press SCROLL & SELECT dial to confirm.
- Turn SCROLL & SELECT dial to select the radio station you want to listen to then press SCROLL & SELECT dial to confirm. It may take a few seconds for your radio to connect to the station then you will hear the station.
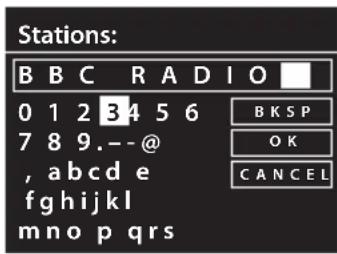
Searching for a Radio Station by Name
If you know the name of the radio station you can type the station name into the search and find it that way. For example if you want to listen to BBC RADIO 1 simply just type in the station name.
- In INTERNET RADIO mode press the MENU button.
- Select STATION LIST - STATIONS - SEARCH STATIONS, then turn SCROLL & SELECT dial to enter the name of the radio station.
- When you have typed in the station name highlight OK then press SCROLL & SELECT dial to confirm. Your radio will now display a list of all the stations with that name, select the desired station from the list.
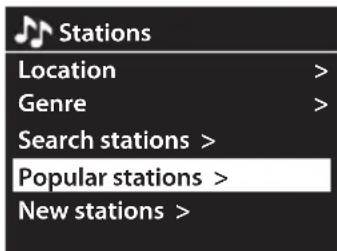
Searching for Popular Radio Stations
Your radio has a list of the most popular radio stations, these station could be from any country.
- In INTERNET RADIO mode press the MENU button.
- Select STATION LIST - STATIONS - POPULAR STATIONS, turn SCROLL & SELECT dial to select a radio station then press SCROLL & SELECT dial to confirm.
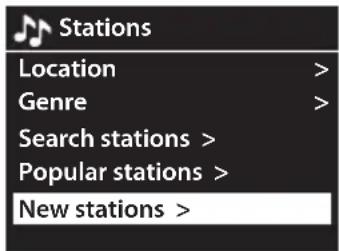
Searching for Newest Radio Stations
Your radio has a list of the newest radio stations that have been added, these station could be from any country.
- In INTERNET RADIO mode press the MENU button.
- Select STATION LIST - STATIONS - NEW STATIONS, turn SCROLL & SELECT dial to select a radio station then press SCROLL & SELECT dial to confirm.
Saving Preset Stations
You can store up to 10 of your favourite stations to the memory. This will enable you to access your favourite stations quickly and easily.
Presets 1 - 4
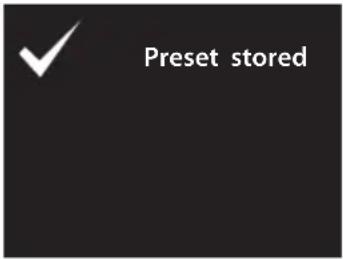
To store a preset, you must first be listening to the station that you would like to save. If you want to store the station in preset positions 1 - 4 press and hold the Preset (1 - 4) button for 2 seconds. The words Preset Stored will show on the display.
![Save to Preset 1. [Not set] 2. [Not set] 3. [Not set] 4. [Not set] 5. [Not set]](/content/2026/05/1127505/images/2e00c679ed68bebd3baf0a83f59f04735cd76f450bb3a1f99aef3a1fc312556e.jpg)
Presets 5 -10
- Press and hold the 5+ button for 2 seconds. The Save to Preset list will show on the display.
- Turn the SCROLL & SELECT dial to select the preset position that you would like to store, and then press the SCROLL & SELECT dial to save the station. The words "Preset stored" will show on the display.
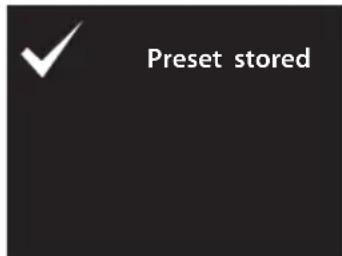

Alternatively, press and hold PRESET button 1, 2, 3 or 4 until the display shows "Preset stored".
Recalling a Preset Station
Recall Presets 1 - 4
To recall preset stations that are stored in positions 1-4 just press the Presets 1-4 button.
Recall Presets 5-10
-
Press 5+ button, the Recall from Reset list will be displayed. Press the SCROLL & SELECT dial to select your desired preset station number.
-
Press the SCROLL & SELECT dial to confirm.

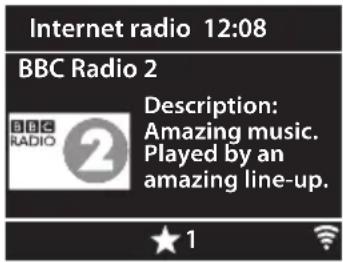
If you choose a preset that hasn't been allocated a station, "Preset Empty" will be displayed.

Alternatively, press PRESET button 1, 2, 3 or 4 directly to play the preset station.
![Recall from Preset 1. BBC Radio 2 2. KISS FM 3. BBC Radio 1 4. [Not set] 5. [Not set]](/content/2026/05/1127505/images/503c96ef2f39c381108a61c111587028f462ea636864960c4199e2c4adeb0ad2.jpg)
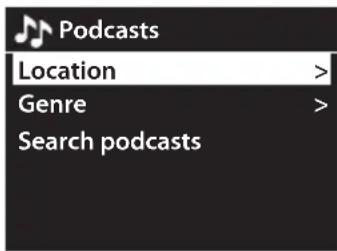
Finding Podcasts
You can search for podcasts from a particular country in the world, by genre or you can search for a particular podcast it you know its title.
-
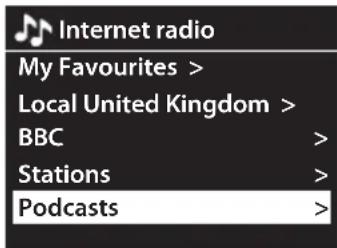
In INTERNET RADIO mode press the MENU button. Turn SCROLL & SELECT dial to select STATION LIST then press SCROLL & SELECT dial to confirm.
-
Turn SCROLL & SELECT dial to select PODCASTS then press SCROLL & SELECT dial to confirm.
-
You can now search for your Podcast by location, genre or if you know the name of the Podcast you can enter the name and search for it directly.
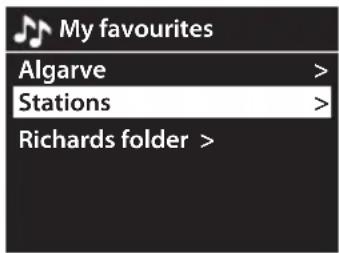
Adding Favourite Radio Stations
To make it easier to find the radio stations that you like, you can add them to the 'My favourites' list. You can add stations while listening to them or if you want to add multiple radio stations and create folders for your favourite stations then you need to go to
www.wifiradio-frontier.com
Adding a station while listening to it
- While listening to a radio station press and hold the SCROLL & SELECT dial.

- The station will now be stored in a folder called 'STATIONS'. Any station stored in this way will be placed in the STATIONS folder.
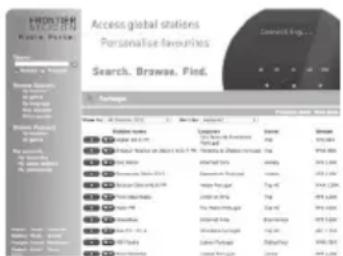
Adding Stations via the website
Before you can use this feature you must register with the website www.wifiradio-frontier.com
You will be asked to enter your email address and the radios ACCESS CODE. The access code can be found in the menu. Press MENU, go to STATION LIST - HELP - GET ACCESS CODE. The code will change every time you view it.
- Once you have registered you can search and view radio stations in a list of your choice. To add a station to the 'My Favourites' list click on the symbol.
- Now you'll be asked to choose where you want to store the station. You can crate a group or select one that you have already created.
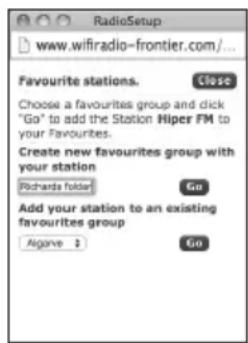
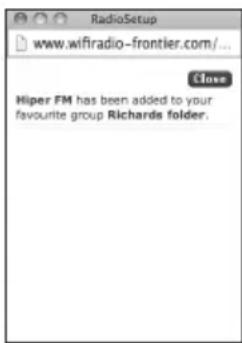
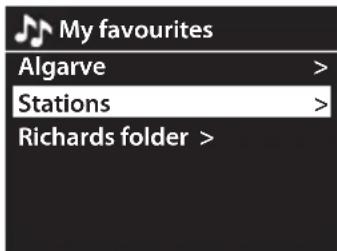
- You will find the radio station and group have now been added into the MY FAVOURITES folder.

The stations stored in MY FAVOURITES will NOT be deleted if you perform a FACTORY RESET.
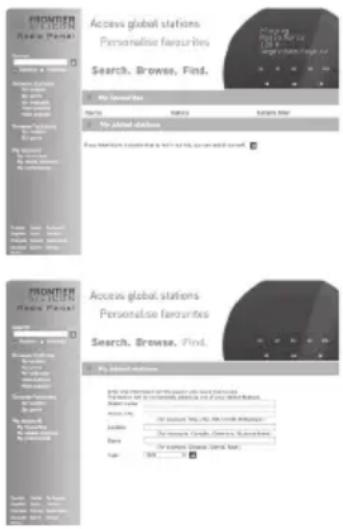
My Added Stations
Your radio has a list of radio stations but if you find a radio station thats not on the list you can add it. You can only add it from the website www.wifiradio-frontier.com
- Login to the website and click on 'MY ADDED STATIONS' on the left hand side of the screen. Then click on the blue arrow symbol.
- Add the Station name, Station URL, Location, Genre and Type then click on the blue arrow symbol. This radio station will now be added into 'MY ADDED STATIONS' on your radio.
With Spotify, you can enjoy unlimited music on your new device. Thanks to the Spotify Connect feature, you can control all this music wirelessly from your mobile or tablet (iOS and Android) and hear it on your brand new speaker with no interruptions or range problems. Your mobile phone is still free to take calls without interrupting the music on your speakers.
Download Spotify to your device.
Download the Spotify app from www.spotify.com and install on your device. For details on downloading, please refer to the website and the instruction manual of your device.
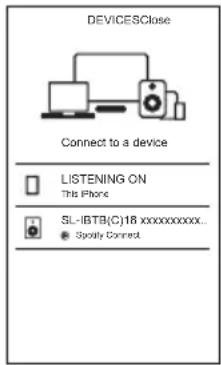
Listen out loud with Spotify Connect
- Connect your SL-IBTB(C)18 xxxxxxxxxxxxx to your wifi network.
- Open up the Spotify app on your phone, tablet or laptop using the same wifi network.
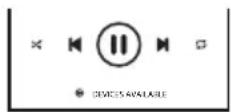
- Play a song and select Devices Available.
- Select your SL-IBTB(C)18 xxxxxxxxxxxxx and start listening.

- Once Spotify is activated, the audio streaming will be delivered from the cloud to the main unit. You can still operate your mobile or tablet device (e.g. making or answering a phone calls) while Spotify playback without interrupting the music.
• To use another Spotify account, follow the steps in Spotify Connection above.
Switching Off Network Connection
For power saving, you may switch the network connection to non-internet mode (i.e. DAB, FM, AUX, Bluetooth and Standby mode). Follow the steps below:
- Press MENU on the main unit.
- Turn SCROLL & SELECT dial to select System settings. Press SCROLL & SELECT to confirm.
- Turn SCROLL & SELECT dial to select Network. Press SCROLL & SELECT dial to confirm.
- Turn the SCROLL & SELECT dial to select Keep network connected. Press SCROLL & SELECT dial to confirm.
- Turn the SCROLL & SELECT dial to select NO. Press SCROLL & SELECT dial to confirm.

To enable the unit for internet connection, refer to the steps above. After entering Keep network connected, select YES and then press SCROLL & SELECT dial to confirm.
The first time you use DAB make sure the aerial if fully extended before selecting DAB mode, because your radio will automatically scan for DAB radio stations. If the aerial is not fully extended your radio will not tune in properly.
-
Repeatedly press MODE on the unit to select DAB radio.
-
Explore the found stations by turning the SCROLL & SELECT dial. And then press SCROLL & SELECT dial to confirm selected station.
In DAB mode, press MENU to display the DAB menu. The menu items are as follows:
| Station list Shows the list of all radio stations. | |
| Scan Select SCAN in the | menu to scan for DAB radio stations. |
| Manual tune Select MANUAL TUNE to manually tune in radio stations that may have been missed by the SCAN. | |
| DRC (Dynamic Range Compression) | If you are listening to music with high dynamic range in a noisy environment, you may wish to compress the audio dynamic range.Select DRC high, DRC low or DRC off. |
| Station order You can choose to display the order of radio stations in 3 different ways.Alphanumeric - ENSEMBLE - VALID | |
Secondary Services
You may see a <symbol after the name of the station, this indicates that there are secondary services available to that station. These secondary services contain extra services that are related to the primary station. e.g. a sports station may want to add extra commentaries. The secondary services are inserted directly after the primary station in the station list.
To select the secondary station, turn SCROLL & SELECT dial until you find the secondary service you want, then press SCROLL & SELECT dial to select it.
When the secondary service ends, the unit will automatically switch back to the primary station.
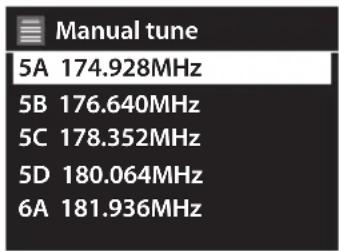
Manually Tuning In DAB Radio Stations
If your radio have missed some stations when it performed a scan you can manually tune them in. You will need to know which multiplex the station you are looking for is in.
- Press MENU. Turn SCROLL & SELECT dial to select MANUAL TUNE then press SCROLL & SELECT dial to confirm.
- Now select a multiplex. You will now see the strength of the signal for your chosen multiplex. You won't hear anything at the moment.
- Now view the STATION LIST and you will find any new radio stations that have been manually tuned in.

Saving Preset Stations
You can store up to 10 of your favourite stations to the memory. This will enable you to access your favourite stations quickly and easily.
Presets 1 - 4
To store a preset, you must first be listening to the station that you would like to save. If you want to store the station in preset positions 1 - 4 press and hold the Preset (1 - 4) button for 2 seconds. The words Preset Stored will show on the display.
Presets 5 -10
- Press and hold the 5+ button for 2 seconds. The Save to Preset list will show on the display.
- Turn the SCROLL & SELECT dial to select the preset position that you would like to store, and then press the SCROLL & SELECT dial to save the station. The words "Preset stored" will show on the display.

Alternatively, press and hold PRESET button 1, 2, 3 or 4 until the display shows "Preset stored".
![Save to Preset 1. [Not set] 2. [Not set] 3. [Not set] 4. [Not set] 5. [Not set]](/content/2026/05/1127505/images/1557492006d29e995bff2803aa606e88c302c929e63b7bb980357c7f8540faa6.jpg)
Recalling a Preset Station
Recall Presets 1 - 4
To recall preset stations that are stored in positions 1-4 just press the Presets 1-4 button.
Recall Presets 5-10
-
Press 5+ button, the Recall from Reset list will be displayed. Press the SCROLL & SELECT dial to select your desired preset station number.
-
Press the SCROLL & SELECT dial to confirm.

Alternatively, press PRESET button 1, 2, 3 or 4 directly to play the preset station.
![Recall from Preset 1. Rock Radio 1 2. BBC Radio 2 3. Absolute Radio 90s 4. BBC Radio 1 5. [Not set]](/content/2026/05/1127505/images/c976610fa46f751d462508cc947194a5356e506f59f99baf028b6f70fdce3f67.jpg)
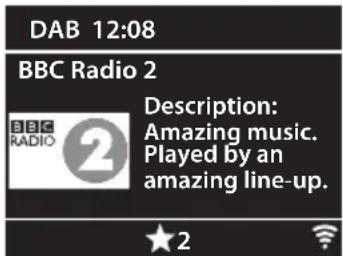
DAB Display Modes
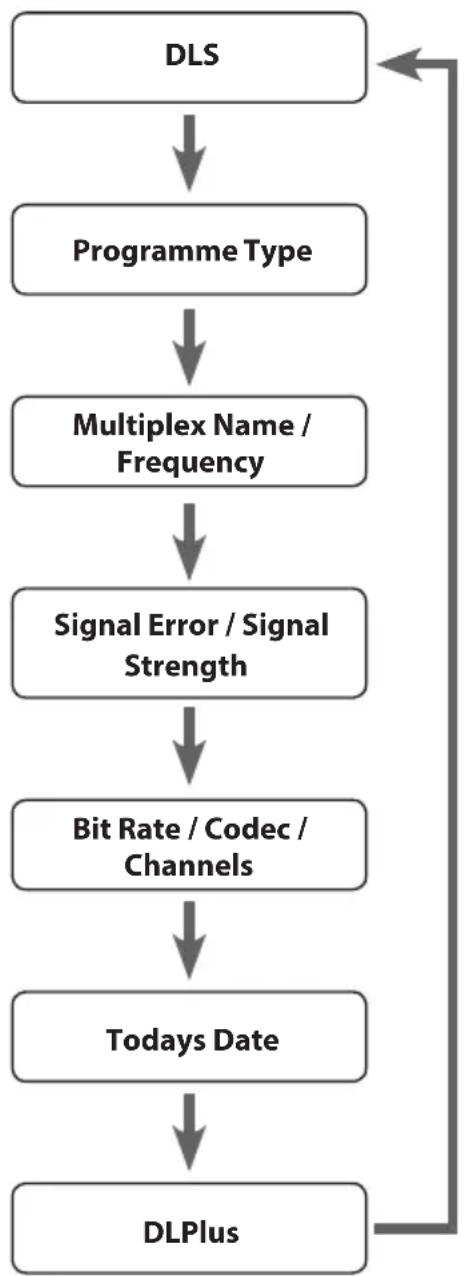
Every time you press INFO on the unit, the display will cycle through the following display modes.
The information is displayed on the lower segment of the display.
DLS (Dynamic Label Segment)
Dynamic label segment is a scrolling message that the broadcaster may include with their transmissions. The message usually includes information, such as program details etc.
Programme Type
This describes the style of the programme that is being broadcast.
Multiplex Name / Frequency
A multiplex is a collection of radio stations that are bundled and transmitted on one frequency. There are national and local multiplexes. Local ones contain stations that are specific to that area.
The frequency of the present station will be displayed.

DAB – unlike normal radio, groups together several radio stations and transmits them on one frequency.
Signal Error/ Signal Strength
The error is shown as a number. If the number is 0, it means the signal received is error free and the signal strength is strong. If the error rate is high, it is recommended to reposition the radio aerial or reposition the unit.
The display will show a slide bar to indicate the signal strength, the stronger the signal, the longer the bar will be from left to right.
Bit Rate / Codec / Channels
The display will show the digital audio bit rate being received with additional information about the audio codec and channel configuration.
flowchart
graph TD
    A["DLS"] --> B["Programme Type"]
    B --> C["Multiplex Name / Frequency"]
    C --> D["Signal Error / Signal Strength"]
    D --> E["Bit Rate / Codec / Channels"]
    E --> F["Todays Date"]
    F --> G["DLPlus"]
Todays Date
This displays the current date provided automatically by the broadcaster.
DL Plus (Dynamic Label Plus)
This displays will show the information of dynamic label Plus, which is a backward compatible extension of the DLS.

To view station information while the display is playing full screen pictures, press SCROLL & SELECT dial to minimize picture, and then you can press INFO repeatedly to view information. Press SCROLL & SELECT dial a second time to play full screen pictures.
Press MODE to select FM radio.
Auto Scan
While listening to an FM station, press SCROLL & SELECT dial to perform auto scan. Once a station has been found, the scanning will stop automatically.
Manual Tune
To tune FM frequency manually, turn SCROLL & SELECT dial until your desired frequency is reached.

Each turn will adjust the frequency by 0.05MHz. If reception is still poor, adjust the position of the DAB/FM aerial or try moving the radio to another location.
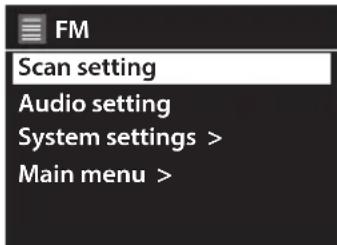
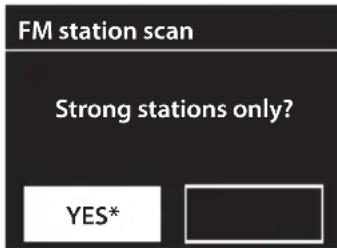
Scan Setting
In the SCAN SETTINGS menu you can choose if you want your radio to tune to ONLY the strong stations or select NO and it will try to tune to all stations, however some may be very weak.
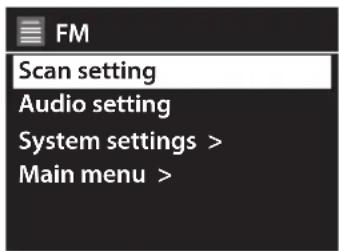
- In FM mode, press MENU to display the FM menu.
- Turn SCROLL & SELECT dial to select Scan setting and then press SCROLL & SELECT dial to confirm.
You'll now be asked if you want to scan for strong stations only or not.
- Turn SCROLL & SELECT dial to select YES (strong stations only) or NO (all stations) then press SCROLL & SELECT dial to confirm.
Audio Setting
If you find that the station you are listening is not clear, you can select to listen to it in MONO this can often clear up some of the static.
- In FM mode, press MENU to display the FM menu.
- Turn SCROLL & SELECT dial to select Audio setting and then press SCROLL & SELECT dial to confirm.
You'll now be asked if you want to listen in MONO only or not.
- Turn SCROLL & SELECT dial to select YES or NO then press SCROLL & SELECT dial to confirm.

Saving Preset Stations
You can store up to 10 of your favourite stations to the memory. This will enable you to access your favourite stations quickly and easily.
Presets 1 - 4
To store a preset, you must first be listening to the station that you would like to save. If you want to store the station in preset positions 1 - 4 press and hold the Preset (1 - 4) button for 2 seconds. The words Preset Stored will show on the display.
Presets 5 -10
- Press and hold the 5+ button for 2 seconds. The Save to Preset list will show on the display.
- Turn the SCROLL & SELECT dial to select the preset position that you would like to store, and then press the SCROLL & SELECT dial to save the station. The words "Preset stored" will show on the display.
![Save to Preset 1. [Not set] 2. [Not set] 3. [Not set] 4. [Not set] 5. [Not set]](/content/2026/05/1127505/images/951e93073855e344a594925f94125b81ddda3956358a8c300fed5c52e8b9c165.jpg)
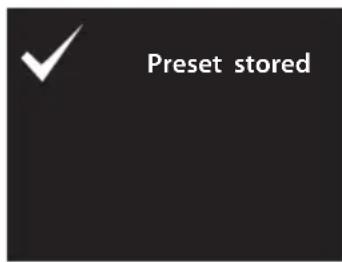

Alternatively, press and hold PRESET button 1, 2, 3 or 4 until the display shows "Preset stored".
Recalling a Preset Station
Recall Presets 1 - 4
To recall preset stations that are stored in positions 1-4 just press the Presets 1-4 button.
Recall Presets 5-10
- Press 5+ button, the Recall from Reset list will be displayed. Press the SCROLL & SELECT dial to select your desired preset station number.
- Press the SCROLL & SELECT dial to confirm

Alternatively press PRESET button 1, 2, 3 or 4 directly to play the preset station.
![Recall from Preset 1. 92.10MHz 2. 95.30MHz 3. 98.80MHz 4. 104.20MHz 5. [Not set]](/content/2026/05/1127505/images/314b9c452a453ad2c69b3a466c09daa2065e9d4fddf5c3c5a97f2a8ee81f12c2.jpg)
![FM 12:08 92.10MHz [No radio text] FM Radio](/content/2026/05/1127505/images/2afc2c47e77cc4bb8a4a5a12ceccd1ab4bfe684c1cd5301835437ebe433b1256.jpg)
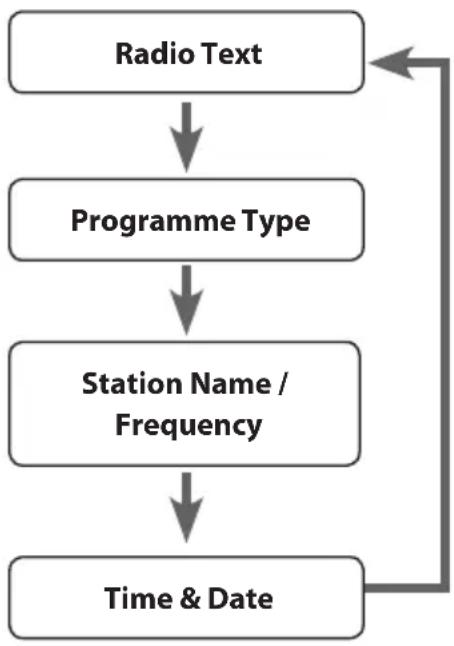
FM Display Modes
Every time you press INFO on the unit, the display will cycle through the following display modes.
The information is displayed on the lower segment of the display.
Radio Text
The broadcaster can include a message that displays information about the current programme.
Programme Type
This describes the "Style" or "Genre" of music that is being broadcast.
Station Name / Frequency
When an RDS station is received, the name of that station will be displayed, or if not the frequency will be displayed.
Todays Date
This displays the current date provided automatically by the broadcaster.
flowchart
graph TD
    A["Radio Text"] --> B["Programme Type"]
    B --> C["Station Name / Frequency"]
    C --> D["Time & Date"]
    D --> A
You can play music from a Bluetooth device through your radios speakers using Bluetooth mode. First you must pair your Bluetooth device to your radio.
Pairing with a Bluetooth device
- Repeatedly press the MODE button to select Bluetooth mode. The Bluetooth logo will start to flash in the display. This shows that the radio is in pairing mode.
- Activate Bluetooth on your device i.e. mobile phone and look for your radios model number in the Bluetooth list (SL-IBTB18 / SL-IBTC18). Once selected the Bluetooth logo on the screen will stop flashing. You are now paired.

On some Bluetooth devices you may be asked to enter a password enter '0000'.
Playing Music via Bluetooth
• You may need to adjust the volume on your radio and Bluetooth device.
- Press SCROLL & SELECT dial to play/pause music
- Turn SCROLL & SELECT dial clockwise to skip to the next track.
- Turn SCROLL & SELECT dial anticlockwise to skip to the start of the current track or to previous tracks.
Disconnecting a Bluetooth Device
You can disconnect your device in two ways, either from the radio or from your Bluetooth device.
To disconnect from a Bluetooth device from your radio, press the MENU button. Select Bluetooth disconnect and press SCROLL & SELECT dial to confirm. Then you will be asked 'Device disconnect' select YES then press SCROLL & SELECT dial to confirm. Your device will now disconnect, and the radio will go back into pairing mode. The Bluetooth logo on the screen will be flashing.
- Before connecting to the mains socket, use the 3.5 mm audio stereo cable (not included) to connect to your external audio device through the AUX IN socket at the rear of the unit.

-
When connecting the external audio device, refer to the owner's manual of the external device, as well as this manual.
• Examples of external audio devices that can be connected to the unit are: Portable MP3 Players, Cassette Players, Mini Disc Players, DVD players, etc. -
Connect the mains cable to the mains socket. Press and hold STANDBY button on the unit to switch the unit on.
- Press MODE on the unit repeatedly to select AUX IN mode.
- In AUX IN mode, you may operate your audio device directly for playback features.
- Turn -VOL+ dial to increase/decrease the volume.
Maintenance
Cleaning the Unit

Ensure the unit is fully unplugged from the mains socket before cleaning.
• To clean the unit, wipe the case with a slightly moist, lint-free cloth.
- Do not use any cleaning fluids containing alcohol, ammonia or abrasives.
• Do not spray aerosol at or near the unit.
If a problem occurs, it may often be due to something very minor. The following table contains various tips.
| Problem Solution | |
| No Power. • Ensure the mains | cable is properly connected.• Make sure that the unit is turned on. |
| The unit does not respond when pressing any buttons. | • The unit may freeze up during use. Switch the unit off and then on again.• As a last resort restore to Factory Setting, this will delete all your settings and preset radio stations. |
| DAB/FM Radio | |
| Poor reception. • Make sure the | DAB/FM aerial is fully extended.• Electrical interference in your home can cause poor reception. Move the unit away from them (especially those with motors and transformers). |
| Desired station not found. • Weak signal. Use the Manual Tune function. | |
| Internet Radio | |
| No connection. • Make sure the | Wi-Fi router is plugged in and working.• Reconnect the radio to your Wi-Fi.• Check you radio is within 5m of your router. |
| Can’t hear the radio station • Sometimes the Wi-Fi connection is temporary lost or connection is weak, check the Wi-Fi connection or move the radio closer to your router.• Not all radio stations transmit 24 hours a day, they might not be transmitting.• Not all radio stations transmit at the same volume level you may need to increase the volume. | |
| Bluetooth | |
| I cannot find “SL-IBTB18/SL-IBTC18” on my Bluetooth device. | • Ensure the Bluetooth function is activated on your Bluetooth device.• Re-pair the unit with your Bluetooth device. |
| Can’t hear the music • You may need to increase the volume on the radio and Bluetooth device. | |

If any functional abnormality is encountered, unplug the unit from the mains socket and reconnect it again.
Specifications
| Model SL-IBTB18 / SL-IBTC18 | ||
| Power Adapter (Use only power adapter listed below) | ||
| Power Adapter Manufacturer Shenzhen Flypower | Technology Co., Ltd. | |
| Power Adapter Model PS36A150K2400BD | ||
| Input AC 100 - 240 V~ 50/60 Hz, 1.0 A | ||
| Output DC 15 V 2.4A | --- ⊖-⊕ | |
| Main Unit | ||
| Power Supply DC 15 V 2.4A | --- ⊖-⊕ | |
| Battery Lithium battery 2200mAh, 11.1V | ||
| USB Output DC 5V,2000mA | ||
| Ecodesign Information | ||
| Information on Power Consumption | Power Consumption of Operation Mode | 36 W (Max.) |
| Power Consumption of Standby Mode | < 1.0 W | |
| Network Standby Power Consumption | < 2.0 W | |
| Time interval for power management function switches the unit automatically into standby | Switch to standby mode after 10 minutes after intended use | |
| How to activate wireless network port:Connect the unit with powerSwitch to wireless mode (e.g. Internet radio, Spotify)How to deactivate wireless network port:Go to System settings - Network - Keep network connected. Select No and then press SCROLL & SELECT/SNOOZE dial to keep network disconnected (p.29 and p.38). | ||
| Radio Frequency DAB/DAB+: 174.928-239.200 MHz | FM: 87.5-108 MHz | |
| Bluetooth® | Bluetooth® Version | Bluetooth® Version V5.0 |
| Maximum transmitted power | 6.81 dBm | |
| Frequency bands | 2402 - 2480 MHz | |
| Wifi Maximum transmitted power | 19 dBm | |
| Wireless Standard 802.1 | 1 a/b/g/n | |
| Frequency band 2412-24 | 472 MHz; 5180MHz-5240MHz, 5260MHz-5320MHz, 5500MHz-5700MHz | |
| Speaker Output Power 5 W rms × 2 | ||
| Working Environment - Temperature 0°C ~ 40°C | ||
| Working Environment - Relative Humidity 5% ~ 80% | ||
| THD <10% | ||
| SNR >65 dB(A) | ||
| Play Mode Bluetooth / Aux in / FM / DAB / | Internet radio / Spotify | |
| Net Weight 2203.3 g (without adapter) | 2380.5 g (with adapter) | |
| Dimension (W × D × H) 332 mm × 131.5 mm × 173.6 mm | ||
Features and specifications are subject to change without prior notice.

natural_image
Illustration of people using computers and appliances (no text or symbols)Team Knowhow
Help with all life's kit*
For general information about this appliance and handy hints and tips, please visit:
www.TeamKnowhow.com/discover or call 0344 561 1234
Partmaster ____.co.uk
Visit Partmaster.co.uk today for the easiest way to buy electrical spares and accessories.
With over 1 million spares and accessories available we can deliver direct to your door the very next day. Visit www.partmaster.co.uk or call 0344 800 3456 (UK customers only).
Calls charged at National Rate.

This radio is future-ready because it contains DAB, FM and DAB+ which is a future technology standard being adopted across Europe

The symbol on the product or its packaging indicates that this product must not be disposed of with your other household waste. Instead, it is your responsibility to dispose of your waste equipment by handing it over to a designated collection point for the recycling of waste electrical and electronic equipment. The separate collection and recycling of your waste equipment at the time of disposal will help conserve
natural resources and ensure that it is recycled in a manner that protects human health and the environment.
For more information about where you can drop off your waste for recycling, please contact your local authority, or where you purchased your product.
The Bluetooth ^® word mark and logos are registered trademarks owned by the Bluetooth SIG, Inc. and any use of such marks by DSG Retail Limited is under license. Other trademarks and trade names are those of their respective owner.
The Spotify software is subject to third party licenses found here: http://www.spotify.com/connect/third-party-licenses
In the unlikely event of a problem developing, please contact the store where you purchased your equipment.
We continually strive to improve our products; specifications may change without prior notice. For advice on where to purchase accessories, please contact the store where you purchased your equipment.
All trademarks are the property of their respective owners and all rights are acknowledged.
DSG Retail Ltd. (co. no. 504877)
1 Portal Way, London, W3 6RS, UK