
LB2650W - Screen Planar - Free user manual and instructions
Find the device manual for free LB2650W Planar in PDF.


| Product Type | 26-inch LCD Monitor |
| Model | Planar LB2650W |
| Panel Type | Active Matrix TFT LCD (CCFL backlight) |
| Screen Size (Diagonal) | 26 inches |
| Native Resolution | 1920 x 1200 (WUXGA) |
| Brightness (Typical) | 400 cd/m² |
| Contrast Ratio | 5 ms GTG response time |
| Viewing Angle (CR=5) | 178° horizontal / 178° vertical |
| Pixel Pitch | 0.2865 mm |
| Horizontal Scan Range | 31 – 93 kHz |
| Vertical Refresh Rate | 50 – 76 Hz |
| Video Inputs | Analog VGA (D-Sub), Digital DVI (plus HDMI via adapter) |
| User Controls | 4-direction cursor (with enter/exit), Menu, Exit, Source (DVI/D-Sub toggle), Auto Adjust, Power |
| OSD Languages | Selectable via OSD (English among others) |
| Power Consumption (Typical) | Approx. 80W (estimated based on size) |
| Power Saving Mode | Green LED (on), Amber (standby), Dark (off) |
| Package Contents | LCD display, VGA cable, HDMI-to-DVI cable, power cord, extension power cord, Quick Start Guide |
| Compliance | RoHS (2002/95/EC), Energy Star? (not specified) |
| Mounting Interface | VESA compatible? (not specified, but likely standard) |
| Weight (Estimate) | Approx. 8-9 kg (18-20 lbs) |
Frequently Asked Questions - LB2650W Planar
User questions about LB2650W Planar
0 question about this device. Answer the ones you know or ask your own.
Ask a new question about this device
Download the instructions for your Screen in PDF format for free! Find your manual LB2650W - Planar and take your electronic device back in hand. On this page are published all the documents necessary for the use of your device. LB2650W by Planar.
USER MANUAL LB2650W Planar
The information contained in this document is subject to change without notice. This document contains proprietary information that is protected by copyright. All rights are reserved. No part of this document may be reproduced, translated to another language or stored in a retrieval system, or transmitted by any means, electronic, mechanical, photocopying, recording, or otherwise, without prior written permission.
Windows is a registered trademark of Microsoft, Inc.
Other brands or product names are trademarks of their respective holders.
European Union 2002/95/EC Directive on the Restriction of Hazardous Substances (RoHS)
In February 2003, the European Union issued Directive 2002/95/EC on the Restriction of Hazardous Substances, commonly known as RoHS, in certain electrical and electronic equipment. It restricts the use of six hazardous substances, including lead (Pb).
The Directive states that all new products within its scope, placed on the European market after July 1, 2006 must be compliant with its requirements.
Planar Systems Inc. is fully in support of and compliant with EU Directive 2002/95/EC for applicable products within its scope.
A Planar part number will be modified with an "LF" suffix designation to indicate RoHS compliance, as shown on the part number label affi xed to the display and on the box containing the display.
Important Recycle Instruction:

LCD Lamp(s) inside this product contain mercury. This product may contain other electronic waste that can be hazardous if not disposed of properly. Recycle or dispose in accordance with local, state, or federal Laws. For more information, contact the Electronic Industries Alliance at WWW.EIAE.ORG. For lamp specific disposal information check WWW.LAMPRECYCLE.ORG.
| Revision Control | |
| DATE: DESCRIPTION | |
| January 2009 Document number 020-0973-00 Rev. A | |
| March 2009 Document number 020-0973-00 Rev. B | |
Table of Contents
Usage Notice
Precautions....4
Introduction
About the Product ....5
Package Overview ....6
Installation & Dimensional Drawings
Product Overview....7
User Controls
Front Panel Controls 10
How to Use the OSD Menus.... 11
Adjusting the Monitor's Display 12
Function Description.... 13
OSD Lock Out Function 17
Appendix
Troubleshooting 18
Standard Timing Table 19
Cosmetic Specification Disclaimer 20
Support and Service 21
Usage Notice

WARNING – To prevent the risk of fire or shock hazards, do not expose this product to rain or moisture.

WARNING – Please do not open or disassemble the product as this may cause electric shock.
Precautions
Follow all warnings, precautions and maintenance as recommended in this user's guide to maximize the life of your unit.
Do:
☐ Turn off the product before cleaning.
☐ LCD front surface may be cleaned using a soft clean cloth moistened with mild window glass commercial cleaners or 50/50 mixture of water and isopropyl alcohol.
☐ Use only high quality and safety approved AC/DC power adapter that comes with your monitor.
☐ Disconnect the power plug from AC outlet if the product is not used for an extended period of time.
Don't:
☐ Do not touch the LCD display screen surface with sharp or hard objects.
☐ Do not use abrasive cleaners, waxes or solvents for cleaning.
☐ Do not operate the product under the following conditions:
- Extremely hot, cold or humid environment.
- Areas susceptible to excessive dust and dirt.
- Near any appliance generating a strong magnetic fi eld.
- In direct sunlight.
Introduction
About Planar's LB2650W
The LB2650W products all have a 26" diagonal fl at panel screen with an active matrix, thin-fi Im transistor (TFT) liquid crystal display (LCD).
Features include:
☐ Dual signal input: Analog VGA and Digital DVI (future models will also include an additional DVI port).
□ Active matrix TFT LCD technology
☐ 1920 x 1200 WUXGA resolution
☐ 5 ms GTG response time
☐ 26" viewable display area
☐ 31 \~ 93 kHz horizontal scan
☐ 50 \~ 76 Hz vertical refresh rate
☐ 0.2865mm pixel pitch
☐ 400 cd/m²(typ.) brightness
☐ 178° H, V viewing angle, CR=5
□ CCFL backlight lamps
□ Auto-adjustment function
□ User controls
Power saving
The LB2650W monitor has been designed to assist OEM customers with forward compatibility concerns. This product is designed to provide consistent X,Y, and Z mounting points and power input requirements. Customers are requested to only utilize Planar recommended mounting points contained on the products mounting brackets to ensure forward compatibility. OEM customers are reminded that connector location may change within the “component envelope”- therefore allow additional slack in your cable lengths and route cables inside your enclosure to ensure that your design will allow for changes in exact connector location. Finally, ensure that your systems power budget is adequate to allow up to 20% additional power draw should the efficiency of this product change during its product life.
Package Overview

natural_image
Top-down schematic of a rectangular frame with side connectors and mounting points (no text or symbols)LCD Display VGA Signal Cable

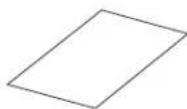
Quick Start Guide
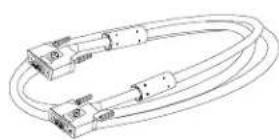
HDMI to DVI Signal Cables

natural_image
Line drawing of a multi-pin electrical plug with three leads (no text or symbols)North American Power Cord
(Please order p/n 903-0467-00 for
European style cord)
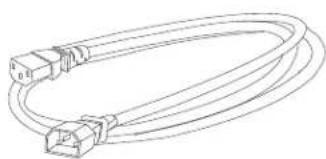
natural_image
Line drawing of a multi-core cable with connectors and leads (no text or symbols)Extension Power Cable
Installation & Dimensional Drawings
Product Overview

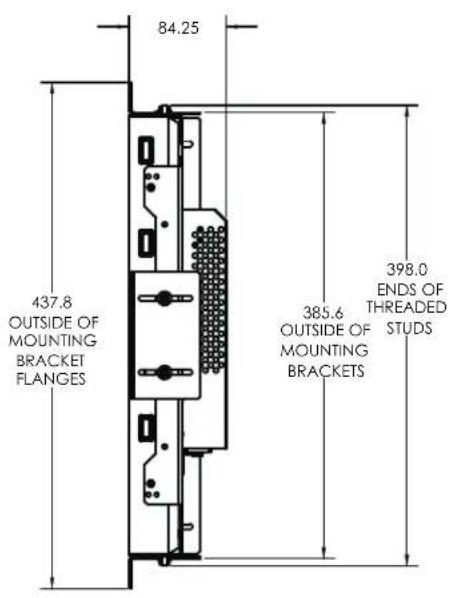

Connecting the display (Figure 1.1)
To set up this display, please refer to the following figure and procedures.
Be sure all equipment is off .1.
Connect the AC power cord to the power connector. Plug the other end 2. into an electrical outlet(1).
For the PC with Analog graphics output: connect the VGA signal cable 3. from display VGA input connector to the 15-pin connector of your host computer and tighten the screws(2).
For DVI or HDMI output: connect DVI cable from display to the PC.4.
Turn on your computer, display and video source.5.
Notice: To ensure the LCD display works well with your computer, configure the display mode of your graphic card, less than or equal to 1920 x 1200 resolution and make sure the timing of the display mode is compatible with the LCD panel. "Video Modes" of this LCD panel are listed in the appendices for your reference.
Figure 1.1

flowchart
graph TD
    A["Power Cord"] --> B["Ext. Power Cord"]
    B --> C["USB Cable (on future models)"]
    B --> D["VGA-VGA"]
    B --> E["DVI-HDMI"]
    B --> F["DVI-DVI (on future models)"]
User Controls
Front Panel Controls
A brief description and the location of all LCD Monitor functions controls
and indicators.

| Power Button Push to turn ON or turn Off . | |
| LED Indicator | Green when the monitor is on, Amber when in power saving mode, and Dark when off. |
| Cursor Button | A four direction key plus enter/exit button. Allows you to move up, down, left, right or pressed. See function chart below. |
| Menu Button Activates OSD main menu. | |
| Exit Button Exit OSD display / DV mode hot key. | |
| Source Button Select DVI or D-SUB signal source. (Toggle Switch) | |
| Auto Button Hot key for manually auto adjusting the display. | |
Cursor Button
| Press key up~Hot Key: Contrast +Menu: Cursor Up | ||
| Press key left~Hot Key: Brightness -Menu: Cursor Left/Volume - | Press key center~Item Enter/Exit | Press key right~Hot Key: Brightness +Menu: Cursor Right/Volume + |
| Press key down~Hot Key: Contrast -Menu: Cursor Down |
How to Use the OSD Menus
- Press the "Menu" button to pop up the on-screen menu and to select between the four main menus.
- Choose the adjustment items by pressing the "Select/Auto" button.
- Adjust the value of the adjustment items by pressing the "☐" button.
- The OSD menu will automatically close, if you have left it idle for a pre-set amount of time.
Adjusting the Monitor's Display
The monitor has four function control buttons to select among functions shown of OSD menu, designed for easy user-viewing environments.
OSD Function Menu
To activate the OSD Main menu, simply press "Menu" button, the menu diagram will pop up on the screen as shown on Fig. 2-2
Use the 4D+1 key to navigate through the function you want to adjust. Push the 4D+1 key to enter a sub-menu and adjust the value. Push the 4D+1 key again to exit the sub-menu. Pressing the "Exit" buttons allows you to exit the OSD menu at any time. Pressing the "Menu" key gets you back to the main menu.
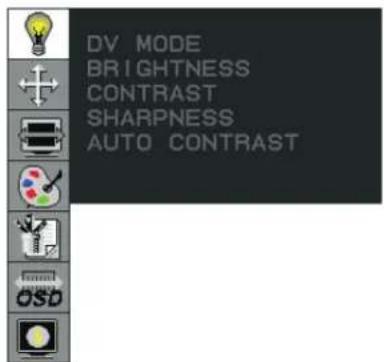
Menu under input
Figure 2-2
Attention
Firmware revision may have been updated into a latest version while the version number shown on information item in OSD menu will stay as Ver 1

Figure 2-3
Function Description
| Figure Function Function Description | |||
 | DV MODE | The following DV mode display setting can be selected by OSD(STANDARD/TEXT/sRGB/MOVIE/GAMING/PHOTO)Default setting: TEXT | |
| BRIGHTNESS | Adjust the brightness.Factory setting: 100.0% | ||
| CONTRAST | Adjust the image contrast.Factory setting:50.0% | ||
| SHARPNESS | Adjust the sharpness.Factory setting: 50% | ||
| AUTOCONTRAST(D-SUB or DVI-I Analog signal Only) | Adjust the CONTRAST to the optimal value for the video-input level automatically. | ||
| [5S0W] | AUTO ADJUSTPRESS (CENTER)OR SELECT TO ADJUST | AUTO ADJUST(D-SUB or DVI-I Analog Input Only) | Adjust the H.POSITION, V.POSITION, H-SIZE and FINE to the optimal value automatically. |
 | EXPANSION MODE | This function allows you to choose from different display modes:Full: expands all resolution to full screen.Aspect: enlarges native resolution to either horizontal or vertical limit.Real: displays native resolution.Default setting: FULL | |
| LEFT/RIGHT(D-SUB or DVI-I Analog Input Only) | Adjust the horizontal image position. | ||
| DOWN/UP(D-SUB or DVI-I Analog Input Only) | Adjust the vertical image position. | ||
| CLOCK(D-SUB or DVI-I Analog Input Only) | Adjust the sync frequency of internal pixel clock. | ||
| PHASE(D-SUB or DVI-I Analog Input | Adjust the value for improve display focus. | ||
| Only) | |||
 | Color Temperature | Choose different color temperature (9300K, 7500K, sRGB, USER).Default is USER.USER mode adjustable. | |
 | RED GREEN BLUE GAIN RED GREEN BLUE OFFSETSATURATION | Adjust the contrast and brightness of each color of the white balance.Allows you to adjust the Red/Green/Blue color gain.Allows you to adjust the Red/Green/Blue color offset.Adjust color depth, increasing this value makes pictures more colorful, decreasing makes pictures less colorful.Adjustable value from -100 to 100.Factory setting: 0 | |
 | DDC/CISIDE COLORRECALL | DDC/CI allows you to control certain settings of the monitor via computer.Default is ON.When "Full" is not selected in the "Expansion Mode" and the resolution is under the LCD panel's native resolution, the picture does not display at full screen.The borders/sides around the picture can be customized. [IMAGE]Adjust "Side Color" to customize the color of the border/sides around the picture.Reset all user settings to factory preset value except language selection. | |
 | LANGUAGE Select a language for OSD menu. | ||
| OSD LEFT/RIGHT | Control the location of the OSD menu on the screen.Factory setting: Center of the screen. | ||
| OSD UP/DOWN | |||
| OSD TURN OFF | Select OSD Menu turn off time.Factory setting: 45 seconds. | ||
| RESOLUTION NOTIFIER | Resolution notifier activity. Factory setting: OFF | ||
| [BY6G] | D-SUB INPUT1024x768 60HzVER: 1.00XXXXO | Information | Provide information about resolution, H/V frequencies, and polarity of the input signal. |
| [BTDX] | DVI-D1 INPUT1024x768 60HzVER: 1.00XXXXO | ||
 | DVI-D2 INPUT1024x768 60HzVER: 1.00XXXXO | ||
| [V7KY] | DVI-A INPUT1024x768 60HzVER: 1.00XXXXO | ||
 | Input Select | This OSD informs the user the current signal that is displayed.This OSD will automatically turn off after 2 seconds or by pressing the "Exit" key. | |
 | OSD WarningsNO SIGNAL | This OSD gives a warning when the selected input signal is not active. After power on or when the input signal become inactive, this warning appears.No signal OSD shall be shown after around 0.5sec from video mode detection. This OSD shall be turned off after 5 seconds automatically, or by "EXIT" key. Then | |
 | change to power saving mode. If direction key is pressed during power saving mode, this warning OSD is opened again. | |
 | OSD Warnings OUT OF RANGE | This function gives warning about input resolution or refresh rate that the monitor cannot display.If video signal is not at the proper timing when the monitor powers on or input signal is changed, this message opens and it disappears after 45 seconds, or by "EXIT" key. |
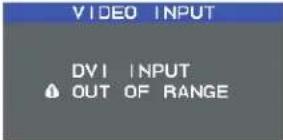 | ||
 | Auto Adjust (Analog Input Only) | When the monitor is displayed for the first time and the resolution is 800x600 and above, the monitor will auto adjust itself.To manually execute the Auto Adjust function, press the Auto button. |
Target color coordinates
| Color Temp. 9300K 7500K sRGB | |||
| u' | 0.189 | 0.194 | |
| v' | 0.446 | 0.459 | |
| x | 0.283 | 0.299 | |
| y | 0.297 | 0.315 | |
0.198
0.468
0.313
0.329
OSD Lock Out Function
The OSD Lock Function allows you to lock out the OSD menu and the button keys.
To activates the OSD lock function, the monitor must be in a normal display mode and the information menu as shown in fig-2-4 must be activated. Then follow the instructions below.
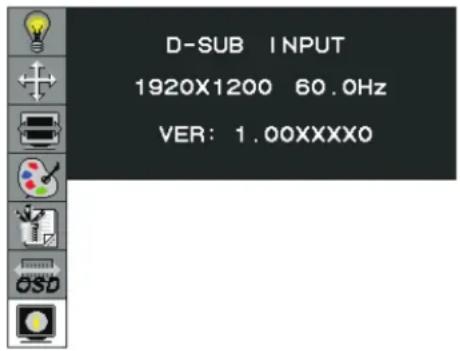
Figure 2-4
Option 1: OSD lock – all buttons be locked except the "POWER" button.
Press "Exit Key + Menu Key + Soft power key" at same time
The monitor will show an "OSD Lock Out" message, showing time as "OSD TURN OFF" setting, and the message be show again by any button, also any button exit this message, but "Power" button be turn off / on monitor.

Only repeat this step to unlock.
Option 2: OSD & Power button lock – all buttons including "POWER" button be locked.
Press "Exit Key + Menu Key + Up key" at same time
The monitor will show an "OSD Lock Out" message, showing time as "OSD TURN OFF" setting, and the message be show again by any button, also any button exit this message, but "Power" button no action.

Only repeat this step to unlock.
Appendix
Troubleshooting
If you are experiencing trouble with the LCD display, refer to the following. If the problem persists, please contact your local dealer or visit Planar Support at www.planar.com/support. See support contact information on rear cover.
PROBLEM: Picture is unclear and unstable.
The picture is unclear and unstable, please perform the following steps:
- Enter PC to "Shut Down Windows" status while you're in MS-Windows environment.
- Check the screen to see if there's any black vertical stripes appear. If there are, take advantage of the "Clock" function in OSD menu and adjust (by increment or decrement numbers) until those bars disappear.
- Move to "Phase" function in OSD menu again and adjust the monitor screen to its most clear display.
- Click "No" on "Shut Down Windows" and back to the normal PC operating environment.
PROBLEM: There is no picture on LCD Monitor
If there's no picture on the LCD Monitor, please perform the following steps:
- Make sure the power indicator on the LCD Monitor is ON, all connections are secured, and the system is running on the correct timing. Refer to Chapter 3 for information on timing.
- Turn off the LCD Monitor and then turn it back on again. If there is still no picture, press the Adjustment Control button several times.
- If step 2 doesn't work, connect your PC system to another external CRT. If your PC system Functions properly with a CRT Monitor but it does not function with the LCD Monitor, the output timing of the VGA card may be out of the LCD's synchronous range. Please change to an alternative mode listed in the Standard Timing Table or replace the VGA card, and then repeat steps 1 and 2.
PROBLEM: There is no picture on LCD Monitor
If you have chosen an output timing that is outside of the LCD Monitor's synchronous range (Horizontal: 31 \~ 93.75 kHz and Vertical: 50 \~ 76 Hz), the OSD will display a "Out of Range" message. Choose a mode that is supported by your LCD Monitor.
Also, if the signal cable is not connected to LCD monitor at all or properly, the monitor screen will display a message "No Input Signal".
Standard Timing Table
If the selected timing is NOT included in table below, this LCD monitor will use the most suitable available timing.
| TIMING NAME | FH (KHz)FV (Hz) | SYNC POLARITY | TOTAL(DOT / LINE) | ACTIVE(DOT / LINE) | SYNC WIDTH(DOT / LINE) | FRONTPORCH(DOT / LINE) | BACKPORCH(DOT / LINE) | PIXELFOREQ.(MHz) |
| 640x350 | 31.469 | + | 800 | 640 | 96 | 1625.17560 | ||
| VGA-350 | 70.087 | - | 449 | 350 | 2 | 37 | ||
| 640x400 | 31.469 | - | 800 | 640 | 96 | 16 | 4825.175 | |
| VGA-GRAPH | 70.087 | + | 449 | 400 | 2 | 12 | 35 | |
| 640x480 | 31.469 | - | 800 | 640 | 96 | 16 | 4825.175 | |
| VGA-480 | 59.94 | - | 525 | 480 | 2 | 10 | 33 | |
| 640x480 | 35 | - | 864 | 640 | 64 | 64 | 96 | 30.24 |
| APPLE MAC-480 | 66.67 | - | 525 | 480 | 3 | 3 | 39 | |
| 640x480 | 37.861 | - | 832 | 640 | 40 | 16 | 120 | 31.5 |
| VESA-480-72Hz | 72.809 | - | 520 | 480 | 3 | 1 | 20 | |
| 640x480 | 37.5 | - | 840 | 640 | 64 | 16 | 120 | 31.5 |
| VESA-480-75Hz | 75 | - | 500 | 480 | 3 | 1 | 16 | |
| 720x350 | 31.47 | + | 900 | 720 | 108 | 18 | 54 | 28.322 |
| 70Hz | 70.087 | - | 449 | 400 | 2 | 37 | 60 | |
| 720x400 | 31.469 | - | 900 | 720 | 108 | 18 | 54 | 28.322 |
| VGA-400-TEXT | 70.087 | + | 449 | 400 | 2 | 12 | 35 | |
| 832x624 | 49.725 | - | 1152 | 832 | 64 | 32 | 224 | 57.2832 |
| APPLE MAC-800 | 74.55 | - | 667 | 624 | 3 | 1 | 39 | |
| 800x600 | 35.156 | + | 1024 | 800 | 72 | 24 | 128 | 36 |
| SVGA | 56.25 | + | 625 | 600 | 2 | 1 | 22 | |
| 800x600 | 37.879 | + 1056 | 800 | 128 | 40 | 40 88 | ||
| VESA-600-60Hz | 60.317 | + | 628 | 600 | 4 | 1 | 23 | |
| 800x600 | 48.077 | + 1040 | 800 | 120 | 56 | 50 64 | ||
| VESA-600-72Hz | 72.188 | + | 666 | 600 | 6 | 37 | 23 | |
| 800x600 | 46.875 | + | 1056 | 800 | 80 | 16 | 160 | 49.5 |
| VESA-600-75Hz | 75 | + | 625 | 600 | 3 | 1 | 21 | |
| 848x480 | 31.02 | + | 1088 | 848 | 64 | 32 | 152 | 56.25 |
| VESA | 60 | + | 517 | 480 | 3 | 1 | 27 | |
| 1024x768 | 48.363 | - | 1344 | 1024 | 136 | 24 | 16065 | |
| XGA | 60.004 | - | 806 | 768 | 6 | 3 | 29 | |
| 1024x768 | 53.964 | + | 1328 | 1024 | 176 | 16 | 11271.664 | |
| COMPAQ-XGA | 66.132 | + | 816 | 768 | 4 | 8 | 36 | |
| 1024x768 | 56.476 | - | 1328 | 1024 | 136 | 24 | 14475 | |
| VESA-768-70Hz | 70.069 | - | 806 | 768 | 6 | 3 | 29 | |
| 1024x768 | 60.023 | + | 1312 | 1024 | 96 | 16 | 176 | 78.75 |
| VESA-768-75Hz | 75.029 | + | 800 | 768 | 3 | 1 | 28 | |
| 1024x768 | 60.24 | - | 1328 | 1024 | 96 | 32 | 17680 | |
| APPLE MAC-768 | 75.02 | - | 803 | 768 | 3 | 3 | 29 | |
| 1152x864 | 54.054 | + | 1480 | 1152 | 96 | 40 | 192 | 80 |
| (60Hz) | 59.27 | + | 912 | 864 | 3 | 13 | 32 | |
| 1152x864 | 63.851 | + | 1480 | 1152 | 96 | 32 | 200 | 94.499 |
| (70Hz) | 70.012 | + | 912 | 864 | 3 | 1 | 44 | |
48
| 1152x864 | 67.5 | + | 1600 | 1152 | 128 | 64108 | ||
| (75Hz) | 75 | + | 900 | 864 | ||||
| 1152x870 | 68.68 | - | 1456 | 1152 | 128 | 32 | 144 | 100 |
| (75Hz) | 75.06 | - | 915 | 870 | 3 | 3 | 39 | |
| 1280x720 | 44.772 | - | 1664 | 1280 | 128 | 64 | 192 | 74.5 |
| (60Hz) | 59.855 | + | 748 | 720 | 5 | 3 | 20 | |
| 1280x960 | 60 | + | 1800 | 1280 | 112 | 96 | 312 | 1108 |
| (60Hz) | 60 | + | 1000 | 960 | 3 | |||
| 1280x960 | 70 | + | 1800 | 1280 | 112 | 96 | 312 | 1126 |
| (70Hz) | 70 | + | 1000 | 960 | 3 | |||
| 1280x960 | 75 | + | 1800 | 1280 | 112 | 96 | 312 | 1135 |
| (75Hz) | 75 | + | 1000 | 960 | 3 | |||
| 1280x1024 | 64 | + | 1688 | 1280 | 112 | 48 | 248 | 108 |
| VESA-1024-60Hz | 60 | + | 1066 | 1024 | 3 | 1 | 38 | |
| 1280x1024 | 80 | + | 1688 | 1280 | 144 | 16 | 248 | 135 |
| VESA-1024-75Hz | 75 | + | 1066 | 1024 | 3 | 1 | 38 | |
| 1360x768 | 75 | + | 1792 | 1360 | 112 | 64 | 256 | 85.5 |
| 60Hz | 75 | + | 795 | 768 | 6 | 3 | 18 | |
| 1440x900 | 55.469 | + | 1600 | 1440 | 32 | 48 | 80 | 88.75 |
| Red. BLKing 60Hz | 59.901 | - | 926 | 900 | 6 | 3 | 17 | |
| 1440x900 | 55.935 | - | 1904 | 1440 | 152 | 80 | 232 | 106.5 |
| 60Hz | 59.887 | + | 934 | 900 | 6 | 3 | 25 | |
| 1440x900 | 70.635 | - | 1936 | 1440 | 152 | 96 | 248 | 136.75 |
| 75Hz | 74.984 | + | 942 | 900 | 6 | 3 | 33 | |
| 1680x1050 | 64.674 | + | 1840 | 1680 | 32 | 48 | 80 | 119 |
| Red. BLKing 60Hz | 59.883 | - | 1080 | 1050 | 6 | 3 | 21 | |
| 1680x1050 | 65.29 | - | 2240 | 1680 | 176 | 104 | 280 | 146.25 |
| 60Hz | 59.954 | + | 1089 | 1050 | 6 | 3 | 30 | |
| 1680x1050 | 82.306 | - | 2272 | 1680 | 176 | 120 | 296 | 187 |
| 75Hz | 74.892 | + | 1099 | 1050 | 6 | 3 | 40 | |
| 1600x1200 | 75 | + | 2160 | 1600 | 192 | 64 | 304 | 162 |
| VESA-1200-60Hz | 60 | + | 1250 | 1200 | 3 | 1 | 46 | |
| 1600x1200 | 87.5 | + | 2160 | 1600 | 192 | 64 | 304 | 189 |
| VESA-1200-70Hz | 70 | + | 1250 | 1200 | 3 | 1 | 46 | |
| 1600x1200 | 93.75 | + | 2160 | 1600 | 192 | 64 | 304 | 202.5 |
| VESA-1200-75Hz | 75 | + | 1250 | 1200 | 3 | 1 | 46 | |
| 1920x1200 | 74.038 | + | 2080 | 1920 | 32 | 48 | 80 | 154 |
| Red. BLKing 60Hz | 59.95 | - | 1235 | 1200 | 6 | 3 | 26 | |
| 1920x1200 | 74.566 | - | 2592 | 1920 | 200 | 136 | 336 | 193.25 |
| 60Hz | 59.885 | + | 1245 | 1200 | 6 | 3 | 36 |
*** DVI signal can not support 1680X1050@75, 1600X1200@70, 1600X1200@75, 1920X1200@60 non reduce mode
Note: Mode 640x350, 640x400 and 720x400 is centered in the middle of the display and cannot be expanded to full screen.
Cosmetic Specification Disclaimer: Planar's cosmetic specification shall match the cosmetic specification authored by the TFT panel manufacturer. Products that contain pixel defects shall not be deemed unsatisfactory whose pixel defects are less than those stipulated by the TFT panel manufacturer.
Support and Service
Planar is a US company based in Beaverton, Oregon and Espoo, Finland with a worldwide sales distribution network.
Visit Planar at http://www.planar.com/support for product registration, operations manuals, line drawings, touch screen drivers, warranty information and access to Planar's Technical Library for online troubleshooting.
To speak with Planar Customer Support please have your model and serial number available and dial one of these numbers:
Americas Support
Tel: 1-866-PLANAR1 (866-752-6271) or +1 503-748-1100
Hours: M-F, 8am - 8pm Eastern Time | M-F, 5am - 5pm Pacifi c Time
Europe and Asia-Pacific Support
Tel: +358-9-420-01
Hours: M-F, 7:00am - 4pm CET
Toll or long distance charges may apply.
Planar Systems, Inc.
Customer Service
24x7 Online Technical Support: http://www.planar.com/support
Americas Support
Tel: 1-866-PLANAR1 (866-752-6271) or +1 503-748-1100
Hours: M-F, 8am - 8pm Eastern Time | M-F, 5am - 5pm Pacifi c Time
Europe and Asia-Pacific Support
Tel: +358-9-420-01
Hours: M-F, 7:00am - 4pm CET
© 2009 Planar Systems, Inc. 03/09 Planar is a registered trademark of Planar Systems, Inc.
Other brands and names are the property of their respective owners.
Technical information in this document is subject to change without notice.
Document No. 020-0973-00 Rev. B
- European Union 2002/95/EC Directive on the Restriction of Hazardous Substances (RoHS)
- Important Recycle Instruction:
- Table of Contents
- Usage Notice
- Introduction
- Installation & Dimensional Drawings
- User Controls
- Appendix
- Precautions
- Do:
- Don't:
- About Planar's LB2650W
- Features include:
- Package Overview
- Connecting the display (Figure 1.1)
- Front Panel Controls
- How to Use the OSD Menus
- Adjusting the Monitor's Display
- OSD Function Menu
- Attention
- OSD Lock Out Function
- Troubleshooting
- PROBLEM: Picture is unclear and unstable.
- PROBLEM: There is no picture on LCD Monitor
- Standard Timing Table
- Support and Service
- Americas Support
- Europe and Asia-Pacific Support
Brand : Planar
Model : LB2650W
Category : Screen