
ANVR-8 - Video recorder AIRLIVE - Free user manual and instructions
Find the device manual for free ANVR-8 AIRLIVE in PDF.


| Product Type | 8-Channel Network Video Recorder (NVR) |
| Brand | AirLive |
| Model | ANVR-8 |
| Dimensions (W x D x H) | 315 x 240 x 48 mm (1U Rackmount) |
| Weight | Approximately 2.5 kg |
| Power Supply | DC 12V, 5A external adapter |
| Power Consumption | ≤ 30W (without HDD) |
| Video Input | 8 channels via RJ45 (PoE optional) |
| Video Compression | H.264 / H.265 |
| Recording Resolution | Up to 8MP per channel |
| Storage | 1 x SATA HDD (up to 10TB, not included) |
| Network Interface | 1 x Gigabit Ethernet (RJ45) |
| USB Ports | 2 x USB 2.0 (front and rear) |
| Audio | 1-ch audio input, 1-ch audio output (RCA) |
| Alarm I/O | 4 alarm inputs, 1 relay output |
| Remote Access | Web browser, mobile app (iOS/Android) |
| Operating Temperature | 0°C to 40°C (32°F to 104°F) |
| Humidity | 10% to 90% non-condensing |
| Maintenance | Keep ventilated; clean dust from vents monthly |
| Safety | CE, FCC certified; use only supplied power adapter |
| Spare Parts | Power adapter, remote control (optional) |
| Reparability | Hard drive and fan user-replaceable |
Frequently Asked Questions - ANVR-8 AIRLIVE
User questions about ANVR-8 AIRLIVE
0 question about this device. Answer the ones you know or ask your own.
Ask a new question about this device
Download the instructions for your Video recorder in PDF format for free! Find your manual ANVR-8 - AIRLIVE and take your electronic device back in hand. On this page are published all the documents necessary for the use of your device. ANVR-8 by AIRLIVE.
USER MANUAL ANVR-8 AIRLIVE
airlive®
ANVR8/16
Network Video Recorder
Quick Start Guide
Important Safety Instructions
This device is designed and manufactured to assure personal safety for indoor usage. Improper use can result in electric shock or fire hazard.
■ Do not use this product near any liquids.
■ Do not place this product on an unstable surface.
■ Do not drop or shake the product.
■ Do not allow anything to rest on the power supply and power cord.
■ Never connect other uncertain power supply to this product as it
■ may cause dangerous voltage or short out that could result in a fire or electric shock.
■ Do not put this product in an airtight space. Keep cooling system unobstructed.
■ Unplug this product from the wall outlet before cleaning.
■ Do not use liquid cleaners or aerosol cleaners. Use a damp cloth for cleaning.
FCC statements
This device complies with Part 15 of the FCC Rules. Operation is subject to the following two conditions: (1) this device may not cause harmful interference, and (2) this device must accept any interference received, including interference that may cause undesired operation.
LVD/EMC Directive

This product complies with the European Low Voltage Directive 2014/35/EU and EMC Directive 2014/30/EU.
WEEE Directive-2012/19/EU

The product this manual refers to is covered by the Waste Electrical & Electronic Equipment (WEEE) Directive and must be disposed of in a responsible manner.
Battery Directive-2013/56/EC

Battery in the product complies with the European Battery Directive 2013/56/EC. For proper recycling, return the battery to your supplier or to a designated collection point.
Hard Drive installation
There is no Hard drive built into NVR product by default. To store your media data, you must buy at least one 3.5 inch or 2.5-inch Hard Drive and install it by yourself.
An example for hard drive screws holes diagram is shown below:

Installing steps:
Important: Unplug the power cord from the power outlet before installation.


- Loosen screws on the rear panel and both sides. Remove the cover.


- Tighten the 4 screws through hard drive screws holes, connect the data and power cables

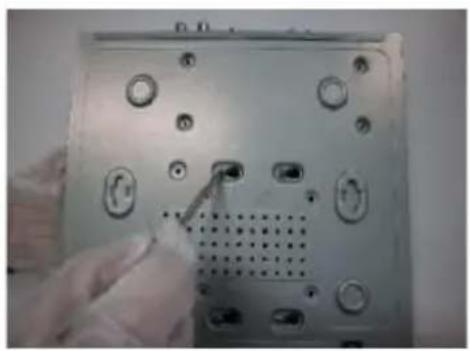
- Slide the hard drive into the screw slots. Tighten all screws.

-
Connect the HDD data and power plug to recorder main board.
-
Put the cover back and tighten all the cover screws.
Product panel View
■ Rear Panel ANVR

Notice: Picture are for reference only. The actual NVR may vary in appearance.
System Connection Diagram
■ Setup example with Router and PoE switch.
![graph TD A["HD IP Camera (without PoE)"] -->|RJ-45| B["DC 12V"] C["HD IP Camera (PoE)"] -->|RJ-45| B B --> D["POE Ethernet Switch"] D --> E["To router LAN port"] E --> F["Router"] F --> G["AnVR8/16"] G --> H["Power Adapter"] H --> I["HDMI or VGA output"] I --> J["HD Monitor"] K["iPhone/iPad"] --> L[…](/content/2026/05/1109156/images/9cd8f8767589951bfdad69d787c8511309f2da7ed506fad10e3d796186ca4584.jpg)
Important:
It's recommended to use Cat5e or above standard 4 pairs UTP for PoE network communication.
Power on and setup NVR following Wizard
After switching on, the recorder system Startup Wizard will pop up to guide you setup your system quickly.
Select your familiar language

Login with default admin account
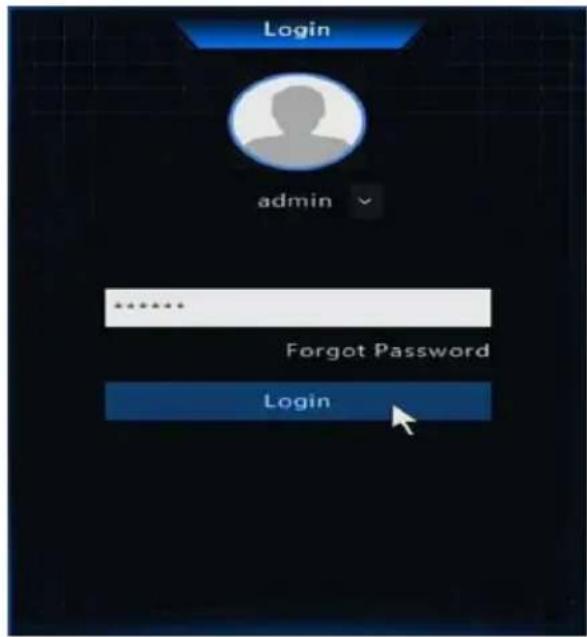
Default Password
Username: admin
Password: 123456
Change a strong password for admin
![Change Password Username admin Old Password ********** Password ********[ ] Strong Confirm ********** A strong password is recommended: at least 8 characters including uppercase and lowercase letters, digits and special characters (except / : * ? * < > | %). OK Cancel](/content/2026/05/1109156/images/bea22f760ea4afa5d470e9769ba4106de4279882d86d10d67c656a232d8820d9.jpg)
It's highly recommended to set up a strong password at least 8 characters that contain 3 kinds of characters above included in letters, digits, and special characters. (except / \: * ? ' " < > | %)
Set a pattern for unlocking the NVR more friendly
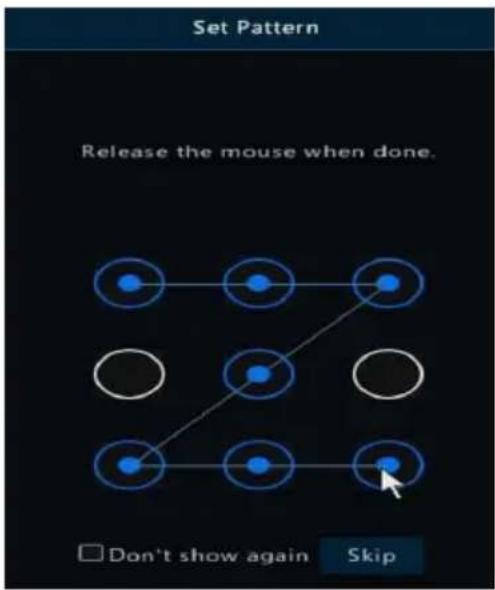
You can Skip if you do not want to use the unlock pattern feature.
Time and time zone setup

Network configuration

DHCP mode is enabled for obtaining IP address configurations automatically when there is a router or DHCP server connected in the LAN network.
If the NVR is not connected to a router or DHCP server, the NVR will set itself to 192.168.1.30 by default. You can set your PC IP address to 192.168.1.* to access the device in the local area network.
Start-up task bar

Menu: go to settings menu.
Playback: search video and playback video files.
Shutdown: shutdown or reboot this system
Right-click menu

Adding IP camera

Adding camera to NVR
- Make sure your camera can support PoE function or not.
- PoE camera: Connect the PoE camera to your network switch PoE port via Cat5e (4 pairs UTP) cable.
- No PoE camera: Connect the camera to your network switch port via Cat5e cable.
Then connect the camera power supply to camera power jack. - Connect NVR LAN Port to the same network switch with cameras.
- Go to NVR Menu -> Camera -> Refresh, search and add camera manually.
Important:
If the NVR cannot recognize your camera, please check the camera IP address configuration using the camera search tool to assign the same IP schema to the cameras. (e.g., NVR:192.168.1.130, IP cameras: 192.168.1.131, 192.168.1.132 ...)
If the camera is listed on NVR but no video is displayed, then please double-check the password when adding.
It is recommended to use static IP addresses both on NVR and cameras for more stable working in daily use.
Setup Recording
The NVR will start 7*24hrs continuous recording once camera added. This is the most reliable way to store your video/audio in daily use. Motion only recording will extend the recording time before the recordings are over written
Follow the steps blow to enable Motion/Event recording:
- Go to Main Menu -> Storage -> Hard Disk. Check the HDD status, make sure it's Normal and Read/Write.
| No. | Total(GB) | Free(GB) | Status | Type | Usage | Property | Configure |
| 1 | 5589.03 | 5247.25 | Normal | Local | Recording/Snapshot | Read/Write |
- Go to Storage -> Recording, Edit the Schedule to Motion or Event.
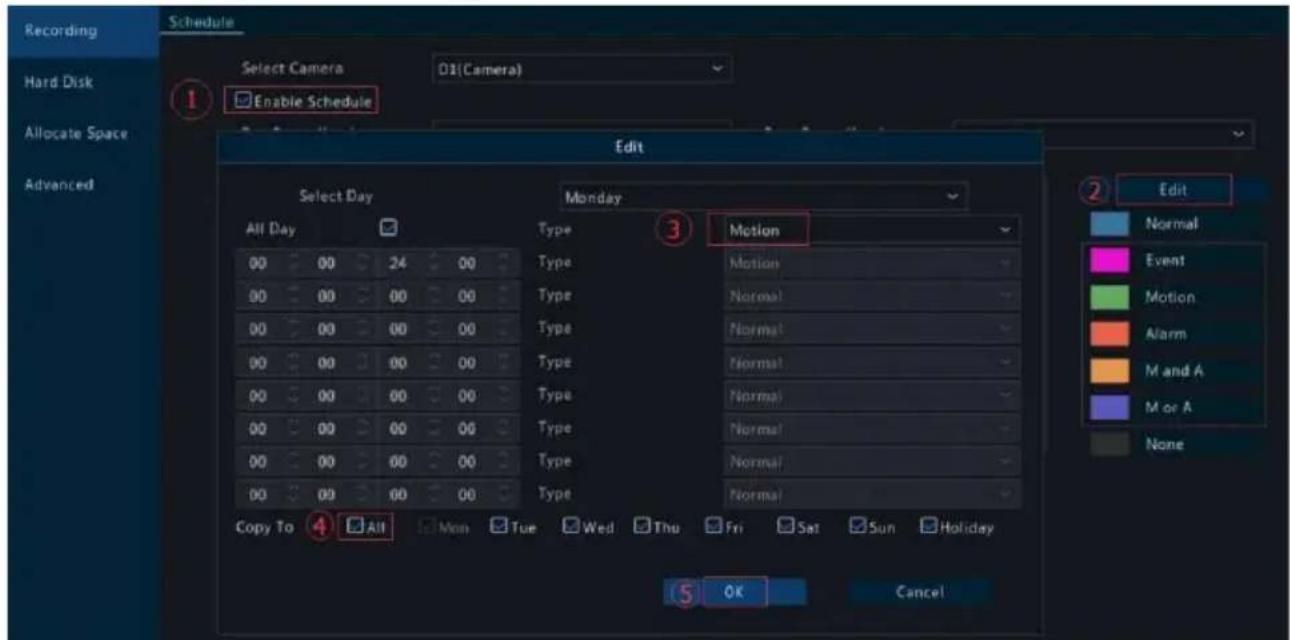
- Go to Main Menu -> Alarm -> Motion -> Motion Detection. Enable Motion detection on each channel.

- Test to be sure motion is detected and the NVR is recording the motion.
Move around in front of the camera, the icon v is display at the top-right corner on each channel. If the icon does not appear, you should access camera web interface configurations and enable motion detection manually.
Important:
Some third-party cameras cannot enable motion detection function via NVR menu directly, you should access camera web interface to enable Motion Detection.
*Intelligent Smart VCA functions
*NVR VCA Capabilities:
| Face Recognition | Face Detection, Face Comparison |
| Perimeter Protection | Cross Line Intrusion Detection, Enter Area / Leave Area |
| Mixed-Traffic Detection | Vehicle Detection, Human Body Detection |
| People Counting | People Flow Counting, Crowd Density Monitoring, Counting Report |
| Exception Detection & Statistics | Defocus Detection, Scene Change Detection, Object Removed Object Left Behind, Auto Tracking |


Human Body Detection

Vehicle Detection

Intrusion Detection


*Note:
Different camera models may have different functions, the pictures above are for reference only.
General video playback
Go to Start -> Playback or right-click menu Playback to get into the playback interface.
Select the desired date and camera then click timeline to start playback.

In this interface, cut video, copy to USB, playback USB files, snapshot functions are available.
VCA playback
Go to Start -> Playback or right-click menu Playback to get into the playback interface, select Video Retrieval for VCA type event video search.

Remote access via mobile phone
This NVR supports Android and iPhone app remote access. Follow the steps below to make it work:
- Search Guard Viewer in Google Play or Apple Store, or scan the QR code to download and install the app.

Guard Viewer


Android iPhone
- Go to Main Menu -> Network -> Basic -> P2P, make sure the Enable P2P is checked, Add Without Signup is checked and the Device Status is Online.

- Open the Guard Viewer app, and tap +Add scan the QR code in above step.


Scan to add device (except VMS) without signup. Make sure the device has enabled this function and has a strong password.

Manual Add

Auto Search in LAN

Add Wi-Fi Device
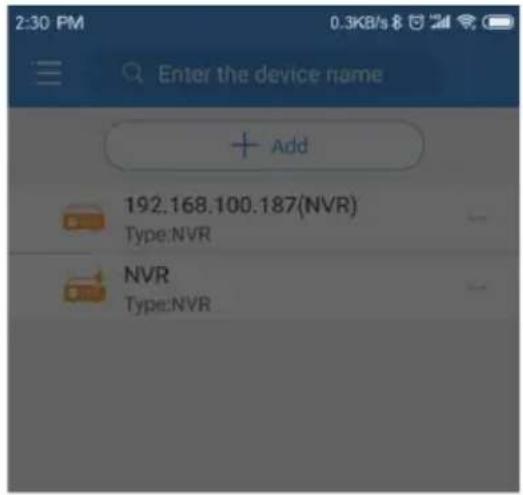
192.168.100.187(NVR)

Start Live View

Edit

Bind Cloud Account

Alarm Output

Delete
Note:
It's more Secure via Sign Up and scan to bind the device to a master account. It will reduce the risk of admin password leakage and easy to share with your family.
4. Live view and playback on mobile phone via app
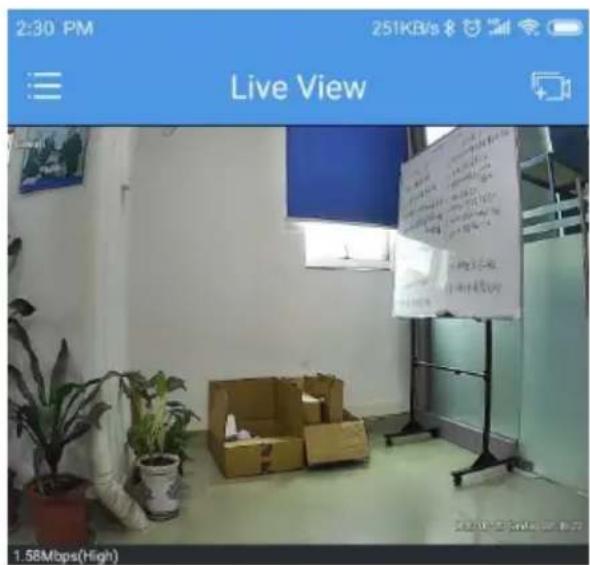


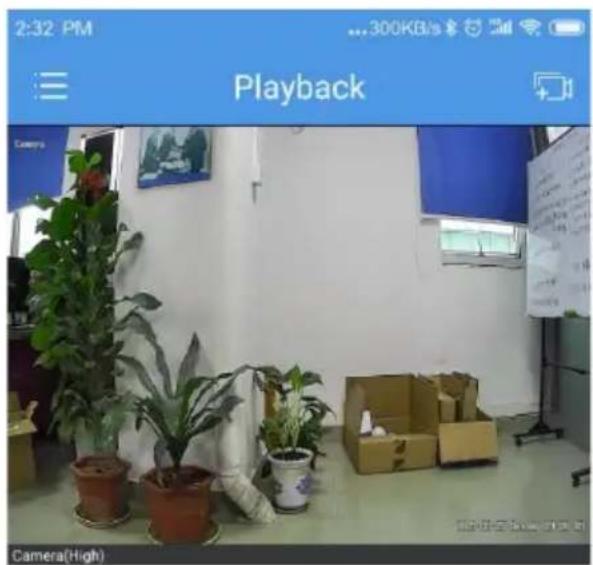


Alarm Out

PTZ

2-way Audio

Favorites

Close All


Live View

Split

Pause

Speed

Close All
Important:
A strong login password for NVR is required to use Add Without Signup. Everyone can scan the device QR code to add this device to the app.
It's highly recommended to register an account and sign into the app with the account to bind the NVR to app. This is the most reliable usage for this series NVR.
■ Once the NVR is added to the app account, the first account will become the owner and other users cannot add the NVR to their app until you share it manually.
Remote view NVR via Web Browser
For local IP address access enter the NVR IP address into the address bar of a browser to get into the NVR Web interface. You may be prompted to install the Webplayer plug-in during the first-time login into the web interface.

![http://81.12.107.org/2023-09 File Edit View Playback Setup MAB CYB CMZ P Camera 01 P Camera 04 P Camera 05 P Camera 07 P Camera 08 EONE COS 2023-09-23 Saturday/04/17:15:17 ELE 17:30 PM (2:00) 16:00 AM [Play] [NIM-ATTEN] [NAM-ATTEN] (X:24%) (0.00%)](/content/2026/05/1109156/images/82e010db9dec2a34d3f3f89a3ac91c26a988fc7feeb0fc24fe7dbe90b61f987a.jpg)
For Internet remote cloud access, please go to https://www.star4live.com

Sign up or login to your account to view your device via cloud management service interface.
Admin Password Reset
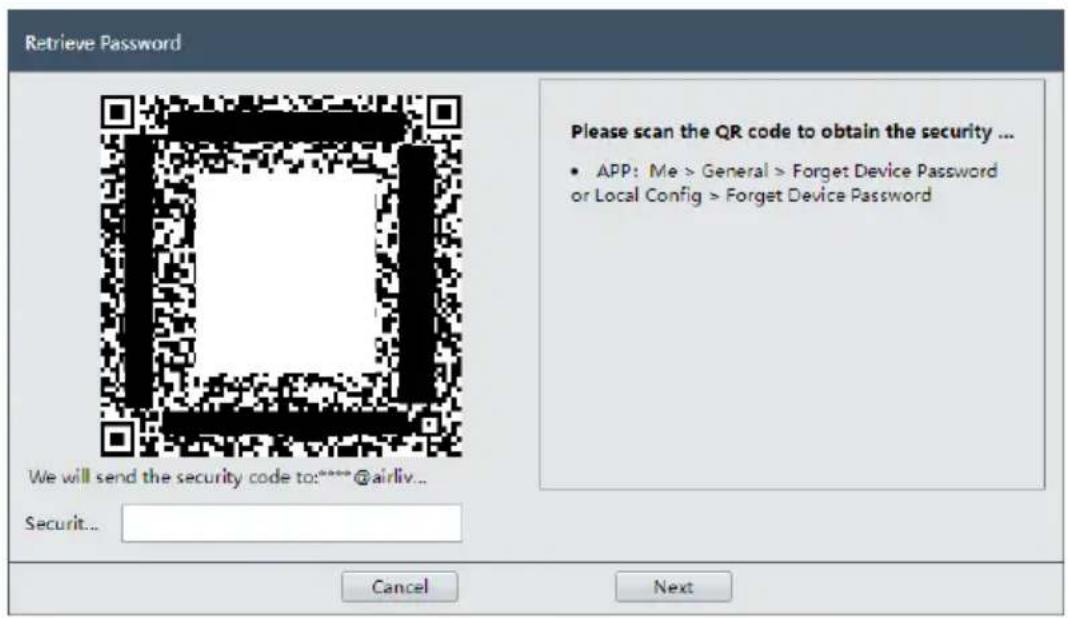
Click Forgot Password on the Login page, Scan the QR code with the Guard Viewer APP, and an email with a Security code will be sent to your email address. After entering the Security code, you can change the password.

- ANVR8/16
- NETWORK VIDEO RECORDER
- QUICK START GUIDE
- IMPORTANT SAFETY INSTRUCTIONS
- FCC STATEMENTS
- LVD/EMC DIRECTIVE
- WEEE DIRECTIVE-2012/19/EU
- BATTERY DIRECTIVE-2013/56/EC
- HARD DRIVE INSTALLATION
- INSTALLING STEPS
- PRODUCT PANEL VIEW
- SYSTEM CONNECTION DIAGRAM
- IMPORTANT
- POWER ON AND SETUP NVR FOLLOWING WIZARD
- SELECT YOUR FAMILIAR LANGUAGE
- LOGIN WITH DEFAULT ADMIN ACCOUNT
- DEFAULT PASSWORD
- CHANGE A STRONG PASSWORD FOR ADMIN
- SET A PATTERN FOR UNLOCKING THE NVR MORE FRIENDLY
- START-UP TASK BAR
- RIGHT-CLICK MENU
- ADDING IP CAMERA
- ADDING CAMERA TO NVR
- SETUP RECORDING
- INTELLIGENT SMART VCA FUNCTIONS
- NVR VCA CAPABILITIES
- NOTE
- GENERAL VIDEO PLAYBACK
- VCA PLAYBACK
- REMOTE ACCESS VIA MOBILE PHONE
- LIVE VIEW AND PLAYBACK ON MOBILE PHONE VIA APP
- REMOTE VIEW NVR VIA WEB BROWSER
- ADMIN PASSWORD RESET
Brand : AIRLIVE
Model : ANVR-8
Category : Video recorder