
KU990RW - Smartphone LG - Free user manual and instructions
Find the device manual for free KU990RW LG in PDF.


| Product Type | Smartphone |
| Brand | LG |
| Model | KU990RW (Viewty) |
| Dimensions | 103.5 x 54.4 x 14.8 mm |
| Weight | 112 g |
| Battery | Li-Ion 1000 mAh, removable |
| Display | 3.0 inch TFT resistive touchscreen, 240 x 400 pixels |
| Camera | 5 MP with Schneider-Kreuznach lens, autofocus, LED flash |
| Internal Memory | 100 MB (expandable via microSD up to 2 GB) |
| Connectivity | GSM 850/900/1800/1900, UMTS 2100, Bluetooth 2.0, USB 2.0 |
| Main Functions | Camera, video recording (480p), music player, FM radio, web browser, email |
| Maintenance | Clean with a soft, dry cloth. Avoid liquids and abrasive cleaners. |
| Safety | Use only original LG charger and battery. Do not expose to water or high temperatures. |
| Spare Parts & Repairability | Battery and back cover user-replaceable. Screen and other components require professional service. |
| General Information | Released in 2007. Supports 3G networks. Touchscreen with haptic feedback. |
Frequently Asked Questions - KU990RW LG
User questions about KU990RW LG
0 question about this device. Answer the ones you know or ask your own.
Ask a new question about this device
Download the instructions for your Smartphone in PDF format for free! Find your manual KU990RW - LG and take your electronic device back in hand. On this page are published all the documents necessary for the use of your device. KU990RW by LG.
USER MANUAL KU990RW LG
Congratulations on your purchase of the advanced and compact KU990R phone by LG, designed to operate with the latest digital mobile communication technology.
Some of the contents in this manual may differ from your phone depending on the software of the phone or your service provider.
Contents
Set up
Getting to know your phone ....4
Open view 5
Installing the USIM and battery.... 6
Memory card 8
Menu map 9
Your standby screen
Touchscreen tips ....10
The quick keys ......11
The status bar ....12
The basics
Calls 13
Making a call or video call 13
Making a call from your contacts .....13
Answering and rejecting a call 13
In-call options....14
Adjusting the call volume 14
Speed dialling....15
Making a second call ....15
Using call divert 15
Contacts....16
Searching for a contact 16
Messaging....17
Sending a message 17
Entering text ....
T9 predictive
Abc manual
Keyboard 18
Handwriting recognition 1
Setting up your email 18
Get creative
Camera 20
Taking a quick photo 20
After you've taken your photo 20
Getting to know the viewfinder......21
Using the advanced settings 22
Using the inner camera 23
Viewing your saved photos 23
Video camera 24
Shooting a quick video 24
Getting to know the viewfinder......24
Watching your videos on your TV 24
Your photos and videos 25
Sending a photo or video from the gallery 25
Viewing your photos as a slide show .....25
Editing your photos 25
Adding text to a photo 26
Adding an effect to a photo 26
Multimedia 28
My images 28
Sending a photo 28
Using an image 28
Organising your images 28
Creating a slide show....29
My sounds 29
Using a sound 29
My videos 29
Watching a video 29
Editing a video clip 29
Sending a video clip 30
Using a video clip as a ringtone 30
My games and apps 30
Downloading a game 30
Playing a game 30
Flash contents
Viewing an SWF file 30
Documents 31
Transferring a file to your phone 31
Viewing a file 31
Others
Muvee studio 31
Creating a movie 31
Music 3
Playing a song 32
Creating a playlist 32
Video playlists ....3
Voice recorder
Recording a sound or voice 33
Using the radio 33
Get organised
Organiser....34
Adding an event to your calendar 34
Adding an item to your to do list ......34
Using date fi nder 34
Setting your alarm 34
Adding a memo 34
Using your calculator 34
Adding a city to your world clock 35
Converting a unit 35
PC Sync 36
Installing LG PC Suite on your computer .. 36
Connecting your phone and PC......36
Backing up and restoring your phone's
information......36
Viewing your phone files on your PC .....36
30 Synchronising your contacts 37
Synchronising your messages 37
DivX Converter 37
The web
Accessing the web 38
Adding and accessing your bookmarks ...... 38
Saving a page 38
Accessing a saved page 38
Viewing your browser history 38
Changing the web browser settings ......39
Using your phone as a modem 39
Settings
Changing your screen settings 40
Personalising your profiles 40
Changing your phone settings 40
Changing your connectivity settings......41
Using memory manager 41
Using flight mode 41
Sending and receiving your files
using Bluetooth 41
Pairing with another Bluetooth device ..... 42
Using a Bluetooth headset 42
Accessories 43
Network service 44
Technical data....44
Guidelines
Guidelines for safe and efficient use ..... 46
Getting to know your phone

Open view


1 Remove the battery cover
Press and hold down the battery release button at the top of the phone and lift off the battery cover.


2 Remove the battery
Hold the top edge of the battery and lift the battery from the battery compartment by using the battery cover.
WARNING: Do not use your fingernail when removing the battery.
WARNING: Do not remove the battery when the phone is switched on, as this may damage the phone.
Installing the USIM and battery

3 Install the USIM card
Slide the USIM card into the USIM card holder. Make sure that the gold contact area on the card is facing downwards. To remove the USIM card, pull it gently in the reverse direction.

5 Charging your phone
Slide back the cover of the charger socket on the side of your KU990R. Insert the charger and plug into a mains electricity socket. Your KU990R will need to be charged until a message reading Fully Charged appears on screen.

4 Install the battery
Insert the top of the battery first into the top edge of the battery compartment. Ensure the battery contacts align with the terminals on the phone. Press down the bottom of the battery until it clips into place.
Memory card
Installing a memory card
Expand the memory space available on your phone using a memory card. The KU990R will support up to a 2GB memory card.
TIP! Memory card is an optional accessory.
1 Remove the battery and battery cover as before. 2 Insert memory card.
Slide the memory card into the slot at the top, until it clicks into place.
Make sure that the gold contact area is facing downwards.

3 Replace the battery cover as before.
Formatting the memory card
If your memory card is already formatted, you can begin using it. If your card isn't formatted you will need to do so.
LG KU990R | User Guide
1 From the standby screen select then touch 🎨 and choose Phone settings. 2 Touch Memory manager then choose External memory. 3 Touch Format and then confirm your choice. 4 Enter the password, if one is set, and your card will be formatted and ready to use.
TIP! To change your default storage destination, open Memory manager from the Phone settings menu and select Primary storage settings.
Note: If your memory card has existing content on it, it will automatically be filed in the correct folder, so for example videos will be stored in the My Videos folder.
Transferring your contacts
To transfer your contacts from your USIM to your phone:
1 From the standby screen select and choose Contacts. 2 Touch Settings then Copy. 3 Choose Handset to USIM and touch OK. 4 Choose All together or one by one and touch OK.
Menu map![graph TD A["Phone"] --> B["Dialling"] A --> C["Contacts"] A --> D["Call logs"] A --> E["Messaging"] A --> F["My stuff Camera"] A --> G["Muvee studio"] A --> H["Music"] A --> I["Video playlists"] A --> J["Voice recorder"] A --> K["FM radio"] A --> L["Games & Apps"] M["Desktop"] --> N["Browser"] M -->…](/content/2026/05/1108054/images/99af0accdda54eb4cc5fb2a90e156c62ebc765bd4ab8e303773f5ab9fe3493ce.jpg)
Your standby screen
Whenever your KU990R isn't in use it'll return to your home screen. From here you access all the menu options, make a quick call and view the status of your phone - as well as many other things.
Touchscreen tips
The home screen is also a great place to get accustomed to the touch screen.
To select an item touch the icon accurately. Your KU990R will vibrate slightly when it recognises you've touched an option.
To scroll through lists touch the last item visible and slide your finger up the screen. The list will move up so more items are visible.
- There's no need to press too hard, the touchscreen is sensitive enough to pick up on a light yet firm touch.
- Use the tip of your finger to touch the option you require. Be careful not to touch any other keys around it.
- When the screen light is off, press the Unlock/Lock key on the right hand side to restore the home screen.
- Don't cover the phone with a case or cover as the touchscreen will not work with any material covering them.


▲ Shortcut menu
The quick keys
The quick keys provide easy, one-touch access to your most used functions.

Touch to open the full menu which is separated into four sub-menus. Touch each sub-menu's vertical tab to view further options.

Touch to bring up the touch dialling pad to make a call. Input the number as you would using a normal key pad and touch

or press the

To initiate a video call with the number.

Touch to access the Messaging options menu. From here you can create a new SMS or folder.

Touch to open your address book. Alphabetical tabs run vertically along the left side of the screen so you can easily find the contact you're looking for. You can also create and edit existing ones.
Advice to the customer
In order to allow better antenna sensitivity LG suggest that you hold the handset as depicted in the figure below.
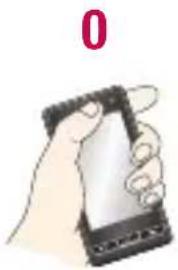

Please do not cover the antenna area with your hand during a call and using a bluetooth connection. It may degrade speech quality.
Your standby screen
The status bar
The status bar indicates, using various icons, things like signal strength, new messages and battery life as well as telling you whether your Bluetooth or GPRS is active.
Below is a table which explains the meaning of icons you're likely to see in the status bar.
| Icon | Description |
 | Multitasking |
 | Applications running |
 | Network signal strength(number of bars will vary) |
 | No network signal |
 | Remaining battery life |
 | Battery empty |
 | New text message |
 | New voice message |
 | Message inbox is full |
 | Message sending failed |
 | An alarm is set |
 | Vibrate profi le in use |
| Icon | Description |
| Normal profi le in use | |
| Outdoor profi le in use | |
| Silent profi le in use | |
| Headset profi le in use | |
| Calls are diverted | |
| GPRS available | |
| EDGE in use | |
| Roaming | |
| Flight mode is selected | |
| Bluetooth is active | |
| HSDPA available | |
| 3G available |
Calls
Making a call or video call
1 Touch 📊 to open the keypad. 2 Key in the number using the keypad. To delete a digit press the C hard key. 3 Touch or hard key to initiate the call. Touch to make a video call. 4 To end the call press the hard key.
TIP! To enter + for making an international call, touch *+ twice.
TIP! Press the lock/unlock button to lock the touchscreen to prevent calls being made by mistake.
TIP! To bring up the keypad during a call, touch 📄
Making a call from your contacts
1 From the standby screen touch to open the address book. 2 Select the alphabetical tab corresponding to the first letter of the contact you'd like to call. So, for 'Home', select E-H. 3 From the list, touch the contact you'd like to call and select the number to use if you have more than one saved. 4 Touch Call.

TIP! You can search your contacts from the call screen. Touch ☐ and choose Search contacts. Scroll through your contacts or enter the first few digits of a number to limit the list.
Answering and rejecting a call
When your phone rings press the hard key to answer the call.
Press the hard key to mute the ringing. This is great if you've forgotten to change your profile to Silent for a meeting.
Press the hard key a second time to reject the incoming call.
Calls
In-call options
TIP! To scroll through a list of options or your list of contacts, touch the last item visible and slide your finger up the screen. The list will move up so more items are visible.
Mute - Touch ✗ to turn off the microphone so the person you are talking to cannot hear you.
Speaker - Touch (to) turn on the speaker phone.
Hold - Touch Hold to put a caller on hold. Touch Resume to continue your conversation.
Keypad - Touch 📋 to open a numerical keypad for navigating menus with numbered options. For example when dialling call centres or other automated telephone services.
Options - Choose from a list of further in-call options, including Go to contacts and Go to messages so you can check your messages and add contacts during a call. You can also end the call from here by touching End call.
Adjusting the call volume
To adjust the volume during a call turn the jog wheel clockwise to increase the volume or anti-clockwise to decrease the volume.
Speed dialling
You can assign a frequently-called contact to a speed dial number.
1 Touch : : and select Contacts. 2 Touch Speed dials. 3 Your Voicemail is already set to speed dial 1. You cannot change this. Touch any other number to assign it a speed dial contact. 4 Your address book will open. Select the contact you'd like to assign to that number by touching their phone number once.
To call a speed dial number, touch from the standby screen then press and hold the assigned number until the contact appears on screen. The call will initiate automatically, there's no need to press.
Making a second call
1 During your initial call, touch ☐ and select Add new call. 2 Dial the number or search your contacts. 3 Press 📋 to connect the call. 4 Both calls will be displayed on the call screen. Your initial call will be locked and the caller put on hold. 5 Touch Swap to change between the calls. 6 To end one or both calls press ☐ and select End followed by All or Active.
TIP! You can combine your calls by selecting
■ then Join. Check that your network provider supports conference calling.
Note: You will be charged for each call you make.
Using call divert
1 Touch ⚙️ select ⏱ and choose Call settings. 2 Touch Call divert and choose Video calls and/or Voice calls. 3 Choose whether to divert all calls, when the line is busy, when there is no answer or when you are not reachable. 4 Input the number you'd like to divert to. 5 Touch Divert to activate.
Note: Charges are incurred for diverting calls. Please contact your network provider for details.
TIP! To turn off all call diverts, choose Deactivate all from the Call divert menu.
Contacts
Searching for a contact
There are two ways to search for a contact:
From the standby screen
1 From the standby screen touch open the address book. 2 Select the alphabetical tab corresponding to the first letter of the contact you'd like to view. So, for 'Home' select E-H.

TIP! You can search by group by touching
and selecting Search by group. This will bring up a list of all your groups.
From the main menu
1 Select Contacts. 2 Touch 🔒 and enter the first few letters of the contact you'd like to find using the keypad. Or select 🔒 to switch to address book view and select the tab corresponding to the first letter of the name. 3 Your address book will bring up a list of the contacts corresponding to the letters you've entered.
TIP! You can switch between the keypad search screen and the alphabetical address
book screen by touching the 📄 or 📃 icon in the top right corner of the screen.
TIP! To scroll through your list of contacts, touch the last item visible and slide your finger up the screen. The list will move up so more items are visible.
Messaging
Messaging
Your KU990R combines SMS, MMS and email into one intuitive and easy to use menu.
There are two ways to enter the messaging centre:
1 Touch ▼ from the standby screen. 2 Touch: from the standby screen, then Messaging.
Sending a message
1 Touch 📋 then choose Create new message. 2 Choose Message to send an SMS or MMS. Or to send an email, choose Email. 3 A new SMS will open. 4 Touch, or E then Insert, to add an image, video, sound or symbol. 5 Touch Send. Enter the phone number or touch Contacts to open your contacts list. You can add multiple contacts.
WARNING: You will be charged per 160 character text message for each person that you send the message to.
WARNING: If an image, video or sound is added to an SMS it will be automatically converted to an MMS and you will be charged accordingly.
Entering text
There are four ways to enter text:
T9 predictive, Abc manual, Keyboard and Handwriting recognition.
To switch between text entry methods touch the corresponding icon at the top of the screen.
A Handwriting recognition - Choose Handwriting-Screen or Handwriting-Box
T9 predictive text - Touch to turn on T9 predictive text then select T9 abc, T9 Abc or 123.
T9 abc Abc manual - Choose Abc, ABC or 123
To use the keyboard, touch ☐ and select keyboard from the drop down menu.
Use ↑ to scroll through the different keyboard types in each text entry mode (for example, capitals or lowercase).
To enter a space touch 0.
To change between upper, lower and title case press T9 abc.
To delete a character use the C hard key below the screen.
To enter a symbol touch *%&
Messaging
T9 predictive
In T9 mode you will see

T9 mode uses a built-in dictionary to recognize words you're writing based on the key sequences you touch. Simply touch the number key associated with the letter you want to enter, and the dictionary will recognize the word once all the letters are entered. For example, press 8, 3, 5, 3, 7, 4, 6, 6, 3 to write 'telephone'.
If the word you want doesn't appear, touch
or Spell. If you touch Spell you can then enter the word using Abc manual mode and your word or name will be added to the dictionary.
Abc manual
In Abc mode you will see

In Abc mode you must touch the key repeatedly to enter a letter. For example, to write 'hello', touch 4 twice, 3 twice, 5 three times, 5 three times again, then 6 three times.
Keyboard
In Keyboard mode the screen flips to landscape and a full qwerty keyboard appears on screen.
Simply touch each letter to write your message and press:
LG KU990R | User Guide

to switch to upper case to add a space
TIP! Keyboard mode predicts and shows what you will type in next. These words are predicted based on the sentences you have typed in so far. If you do not wish to use the suggested words, keep typing in new words. If you wish to use the suggested words, press the space bar to confirm them.
Handwriting recognition
In Handwriting mode you simply write on screen and your KU990R will convert your handwriting into your message. Select Screen or Box depending on your preferred view.

WARNING: You may find it easier to use a stylus in this mode, please remember to press gently to protect your screen from damage.
Setting up your email
You can stay in touch on the move using email on your KU990R. It's quick and simple to set up a POP3 or IMAP4 email account.
TIP! To scroll through a list of options, touch the last item visible and slide your finger up the screen. The list will move up so more items are visible.
1 Touch 📋 then select Settings. 2 Touch Email then Email accounts. 3 Open ☐ and touch Add new. 4 You can now choose how your account works:
Title - Enter a name for this account.
My name - Enter your name.
Username - Enter the account's username.
Password - Enter the account's password.
Email address - Enter the account's email address.
Reply email address - Enter the 'reply to' email address.
Outgoing mail server - Enter the account's details.
Incoming mail server - Enter the account's details.
Maximum receive size - Choose the size limit of your emails, the maximum is 1MB.
Mailbox type - Enter the mailbox type, POP3 or IMAP4.
Save to server - Choose whether to save your emails to the server. For IMAP4 accounts copies are always saved.
Save sent mail into - Choose where to save your IMAP4 emails. For POP3 accounts copies are always saved on the phone.
Access point - Choose your Internet access point. Press + to use a preset access point.
Auto retrieve - Choose whether to fetch your new emails automatically.
Advanced settings - Choose whether to use the advanced settings.
SMTP port number - Normally, this will be 25.
Incoming server port - Normally, this is 110 for POP3 accounts and 143 for IMAP4 accounts.
SMTP authentication - Choose the security settings for the outgoing mail server.
SMTP username - Enter the SMTP username.
SMTP password - Enter the SMTP password.
APOP secure login - Choose to activate APOP secure login for a POP3 account. IMAP4 accounts are always set to off.
Now your account is set up, it will appear in the list of accounts in your Email folder.
Camera
Taking a quick photo
1 Move the camera mode switch to 2 Open the camera lens cover using the lens cover switch located near the camera lens. The camera's viewfinder will appear on screen. 3 Holding the phone horizontally, point the lens towards the subject of the photo. 4 Slightly press the capture button, a focus box will appear in the centre of the viewfinder screen. 5 Position the phone so you can see the subject of your photo in the focus box. 6 When the focus box turns green, the camera has focused on your subject. 7 Press the capture button fully.
After you've taken your photo
Your captured photo will appear on screen. The name of the image runs along the bottom of the screen together with four icons down the right side.

NEW Touch to take another photo straightaway. Your current photo will be saved.
Touch to delete the photo you have just taken and confirm by touching Yes. The viewfinder will reappear.
Touch to set the photo you have just taken as your wallpaper.
Touch to send the photo as an MMS, Email or via Bluetooth.
TIP! Move the camera mode switch to ▶ to open the photo gallery.
Getting to know the viewfinder

TIP! You can close all the shortcut options for a clearer viewfinder screen. Simply touch the centre of the viewfinder once. To recall the options touch the screen again.
Camera
Using the advanced settings
From the viewfinder touch 📁 to open all the advanced settings options.

Image size - Change the size of the photo to save on memory space or take a picture preset to the correct size for contact. See Changing the image size.
Image quality - Choose between Super fine, Fine and Normal. The finer the quality the sharper a photo will be but the file size will increase as a result, which means you'll be able to store fewer photos in your memory.
White balance - The white balance ensures that any white in your photos is realistic. In order for your camera to correctly adjust the white balance you may need to determine the light conditions. Choose from Auto, Incandescent, Sunny, Fluorescent or Cloudy.
ISO - ISO determines the sensitivity of the camera's light sensor. The higher the ISO, the more sensitive the camera will be. This is useful in darker conditions when the flash can't be used. Choose an ISO value from Auto, ISO 100, ISO 200, ISO 400 or ISO 800.
Colour tone - Choose a colour tone to apply to the photo you're taking. See Choosing a colour tone.
Self-timer - The self-timer allows you to set a delay after the capture button is pressed. Choose from 3 seconds, 5 seconds or 10 seconds. Great for that group photo you want to be part of.
Zoom - Choose a zoom to apply to the photo you're taking.
Macro - Macro mode allows you to take extreme close-ups. If you are trying to take a close-up shot but the focus box remains red, try turning the macro mode on.
Shutter sound - Select one of the three shutter sounds.
Focus - Select the way of focus.
Switch camera - For self portraits, switch to the LG KU990R's inner camera. See Using the inner camera.
Memory in use - Choose whether to save your photos to the Handset memory or to the External memory.
Note: Always touch Save after selecting a new setting to implement the changes you've made.
TIP! When you exit the camera all your settings will return to default, except image size and image quality. Any non-default settings you require will need to be reset, for example colour tone and ISO. Check them before you shoot your next photo.
TIP! The settings menu is superimposed over the viewfinder, so when you change elements of the image colour or quality you'll be able to see the image change in preview behind the settings menu. Remember to touch Save before exiting to apply any changes.
Using the inner camera
Your LG KU990R has a 640x480 inner camera, not just for video calling but for taking pictures too.
1 To switch to the inner camera, touch and then select. 2 After a few seconds, you'll see yourself in the viewfinder. To capture the image, press the capture button as normal.
TIP! The inner camera has fewer settings as it has no flash or ISO. You can still alter the image size, image quality, white balance, and colour tone by touching in the same way as when using the main camera.
3 After you've taken the photo, you'll be offered all the same options as are available for an image taken with the main camera. 4 To return to the main camera, touch and then select.
Viewing your saved photos
1 You can access your saved photos from within the camera mode and from the standby screen. From within the camera, you simply move the camera mode switch to ▶, whilst from the standby screen you should move the camera mode switch to ▶ and then press the capture button. 2 Your gallery will appear on screen.

3 Touch the photo you want to view once to bring it to the front of the gallery. 4 Touch the photo a second time to open it fully.
Video camera
Shooting a quick video
1 Move the camera mode switch to video mode. 2 Open the camera lens cover using the lens cover switch located near the camera lens. The video camera's viewfinder will appear on screen. 3 Holding the phone horizontally, point the lens towards the subject of the video. 4 Press the capture button once to start recording. 5 REC will appear at the top of the viewfinder and a timer at the bottom showing the length of your video. 6 To pause the video, touch and resume by selecting. 7 Touch on screen or press the capture button a second time to stop recording.

Getting to know the viewfinder

Zoom - Touch to zoom in or to zoom out. Alternatively, you can use the jog wheel around the lens.
Video mode - Video mode is selected. Image size Saving to handset memory/External memory
120fps - Smaller image size with Quad Speed Playback, capturing the action at an impressive 120 frames per second. Playback is at 15 frames per second for the best view in the house. Great for capturing high speed action.
Camera mode Contrast - See
Back - Touch here to return to the standby screen.
Settings - Touch this icon to open the settings menu. See Using the advanced settings.
TIP! You can close all the shortcut options for a clearer viewfinder screen. Simply touch the centre of the viewfinder once. To recall the options, touch the screen again.
Watching your videos on your TV
Connect your KU990R to your TV using the TV output cable. Open the video you'd like to watch on TV, press || and select
Note: The TV output cable is available for purchase separately.
WARNING: All formats except 320x240 and 176x144 are compatible with watching on TV.
Your photos and videos
Sending a photo or video from the gallery
1 Touch a photo or video twice to open it. If you select a video, press || when it starts to play.
TIP! You can rename a photo or video in My stuff. Select the photo or video, then touch 📄 and choose Rename. Enter the new name for your photo or video.
2 Touch the right side of the screen to open the options menu. 3 Select and choose how you would like to send the video or photo: Message, Email, Bluetooth. 4 The chosen messaging application will open so you can send the video or photo.
Note: The photo or video may need to be resized before it can be sent by MMS. Some videos may be too large to send by MMS at all, in which case choose one of the other sending options.
Viewing your photos as a slide show
Slideshow mode will show all the photos in your gallery one at a time as a slideshow. Videos cannot be viewed as a slideshow.
1 Touch the photo you would like to begin the slideshow twice to open it.
2 Touch the right side of the screen to open the options menu. 3 Select 4 The slideshow will begin.
Editing your photos
There are loads of great things you can do to your photos to change them, add to them or liven them up a little.
1 Open the photo you'd like to edit and touch to bring up the options. 2 Select The following screen will be displayed.

3 Touch the icons to adapt your photo:
4 Crop your photo. Choose a square or circular crop area and move your finger across the screen to select the area.
Draw something on your photo freehand. Select the thickness of the line from the four options. To change the colour of the line see below (the colour icon will change to the colour you have selected).
Your photos and videos
See Adding text to a photo. Decorate your photo with stamps.
Choose from the different stamps available and touch your photo wherever you'd like them to be. To change the colour of a stamp see below.
Change the colour of a stamp, line or some text. You must select the colour before you draw, write or stamp the photo.
Select the thickness and draw over your image to remove any stamps, lines or text.
Save Save the changes you have made to the photos. Select to save the changes over the Original file, or as a New file. If you select New file, enter a file name.
Undo the last Effect or More edit you made to the photo.
Effect: See Adding an effect to a photo.
More: Touch to open further effect options including Rotate and Mirror. There are also more advanced editing options. See Morphing a photo, Adding a colour accent, and Swapping the colours in a photo.
Touch to return to the gallery.
Adding text to a photo
1. From the editing screen, touch T. 2. Select Signature to add unframed text or choose either of the speech bubble shapes. 3. Enter your text using the keypad and touch Done. 4. Move the text by touching it and sliding it to the place you'd like it to be.
Adding an effect to a photo
1. From the editing screen, touch Effect. 2. Choose to apply any of the six options to the photo:
Soften - Move the marker along the bar to soften the focus of the photo. Select Done to save the changes or choose Cancel.
Sharpen - Move the marker along the bar to sharpen the focus of the photo. Select Done to save the changes or choose Cancel.
Mosaic blur - Touch to apply a blurred mosaic effect to the photo. Touch Undo to return to the normal photo.
Frame - Add a frame to your photo.
You may be prompted to allow the image size to be changed. To see the frame types, select Yes. The chosen frame will be superimposed over your photo.
Resize - Touch here for size options.
Touch your desired size to change the size of the photo.
Colour effect - Change the colour of a photo to Black and white, Sepia, Colour negative, Enhanced RGB or Contrast. If you select Contrast move the marker along the bar to increase or decrease the contrast.
3 To undo an effect simply touch Undo.
TIP! You can add more than one effect to a photo, except for a colour effect of which you can only select one at a time.
Multimedia
You can store any multimedia files into your phone's memory so that you have easy access to all of your pictures, sounds, videos and games. You can also save your files to a memory card. The advantage of using a memory card is that you can free up space on your phone's memory.
To access the Multimedia menu, touch then 📄. Touch My stuff to open a list of folders storing all of your multimedia files.
My images
My images contains a list of pictures including default images pre-loaded onto your phone, images downloaded by you and images taken on your phone's camera. Touch 📄 to change the view from thumbnail image to list.
TIP! To scroll through a list of options, touch the last item visible and slide your finger up the screen. The list will move up so more items are visible.
Sending a photo
1 Touch: then. 2 Touch My stuff then choose My images. 3 Select a photo and touch 4 Touch Send and choose from Message, Email or Bluetooth. 5 If you choose Message or Email, your photo will be attached to the message and you can write and send the message as normal. If you choose Bluetooth, you will be prompted to turn Bluetooth on and your phone will search for a device to send the picture to.
Using an image
You can choose images to use as wallpapers and screensavers or even to identify a caller.
1 Touch: then. 2 Touch My stuff then My images. 3 Select an image and touch 4 Touch Use as and choose from:
Organising your images
1 Touch: then. 2 Touch My stuff then My images. 3 Touch then Sort by. 4 Choose from Date, Type or Name.
Note: As well as sorting your images by category, you can also manually sort them by using the Move option.
Creating a slide show
If you want to look at all of the images on your phone or scan through what you've got, you can create a slide show to save you from having to open and close each individual image.
1 Touch: then. 2 Touch My stuff then My images. 3 Touch then Slide show. 4 Use the and to skip through the images or touch R to show your images in a random order.
My sounds
The My sounds folder contains the Default sounds and Voice recordings.
From here you can manage, send or set sounds as ringtones.
Using a sound
1 Touch: then. 2 Touch My stuff then My sounds. 3 Select Default sounds or Voice recordings. 4 Select a sound and touch Play to listen to it. 5 Touch E and select Use as. 6 Choose from Voice ringtone, Video ringtone, Message tone, Start-up, Shut down.
My videos
The My videos folder shows the list of downloaded videos and videos you have recorded on your phone.
Watching a video
1 Touch: then. 2 Touch My stuff then My videos. 3 Select a video and touch Play.
TIP! To quickly delete any file in My stuff, touch it once so it is highlighted by the cursor and press the c hard key. Confirm by touching Yes.
Editing a video clip
While your video is being played and is in pause mode you can choose from a number of options to edit the video clip.
TIP! You can not edit the video clip used as a ringtone.
1 Select a video and touch Play. 2 Touch the 3 Touch Video editor and choose from: Trim - Cut the video down to only the part you want. Video merge - Merge the video with another video clip. Image merge - Merge the video with an active image from your Images folder.
Multimedia
Text overlay - Add text to the video. Image overlay - Add an image to the video.
Sending a video clip
1 Select a video and touch 2 Touch Send and choose from Message, Email or Bluetooth. 3 If you choose Message or Email, your video clip will be attached to the message and you can write and send the message as normal. If you choose Bluetooth, you will be prompted to turn Bluetooth on and your phone will search for a device to send the video to.

Using a video clip as a ringtone
1 Select a video and touch 2 Touch Use as and choose from Voice ringtone or Video ringtone.

My games and apps
You can download new games and applications to your phone to help keep you amused when you have time to spare.
Downloading a game
1 Touch: then 2 Touch Games & Apps then My games & apps. 3 Select Download games and touch Connect. 4 You will connect to the web portal from where you can find a game to download.

TIP! To quickly delete any file in My stuff, touch it once so it is highlighted by the cursor and press the C hard key. Confirm by touching Yes.
Playing a game
1 Touch: then 2 Touch My stuff then My games & apps. 3 Select a game and touch Launch.

Flash contents
The Flash contents folder contains all of your default and downloaded SWF files.
Viewing an SWF file
1 Touch: then 2 Touch My stuff then Flash contents. 3 Select the file and touch View.

Documents
From the Documents menu, you can view all of your document files. From here you can view Excel, PowerPoint, Word, Text and PDF files.
Transferring a file to your phone
Bluetooth is probably the easiest way to transfer a file from your computer to your phone. You can also use LG PC Suite via your sync cable.
Viewing a file
1 Touch: then. 2 Touch My stuff then Documents. 3 Select a document and touch View.
Others
The Others folder is used to store files which are not pictures, sounds, videos, games or applications. It is used in the same way as the Documents folder. You may find that when you transfer files from your computer to your phone that they appear in the Others folder rather than the Documents folder. If this happens you can move them.
To Move a file from Others to Documents:
1 Touch: then. 2 Touch My stuff then Others. 3 Select a file and touch 4 Touch Move, then touch Move again.
Muvee studio
The Muvee studio allows you to create an image slide show combined with music.
Creating a movie
1 Touch: then. 2 Touch Muvee studio. 3 Touch + to add an image. Touch the images you want to include then select Done. 4 Touch to choose a Muvee style. Select from: 5 Touch Play to see what you've created. 6 Touch ☐ then Save Location to choose where to save the movie.
Music
Your LG KU990R has built-in music player so you can play all your favourite tracks. To access the music player, touch 🎯 then 📄 then Music. From here you can access to number of folders:
Multimedia
Playing a song
1 Touch: then. 2 Touch Music, then All tracks. 3 Select the song you want to play and touch Play. 4 Touch to pause the song. 5 Touch to skip to the next song. 6 Touch to skip to the previous song. 7 Touch to stop the music and return to the Music menu.
TIP! To change the volume while listening to music, touch 📋.
Creating a playlist
You can create your own playlists by choosing a selection of songs from the All tracks folder.
1 Touch: then. 2 Touch Music, then Playlists. 3 Touch Add, enter the playlist name and touch Save. 4 The All tracks folder will show. Touch all of the songs that you would like to include in your playlist; a tick will show next to their name. 5 Touch Done.
To play a playlist, select it and touch Play.
Note: To add a second playlist, touch then Add new playlist.
Video playlists
All of your videos are stored in the Video playlists menu.
1 Touch: then. 2 Touch Video playlists, then All videos. A list of all your video clips will appear. 3 Touch Play to watch a video.
You can manage your video clips by creating playlists.
1 Touch: then. 2 Touch Video playlists, then Playlists. 3 Touch Add, enter the playlist name and touch Save. 4 All of your videos will show in a list. Select the ones you want in the playlist; a tick will appear next to their name. 5 Touch Done.
Voice recorder
Use your voice recorder to record voice memos or other sounds.
1 Touch: then. 2 Touch Voice recorder then and choose from:
Duration – Set the recording duration. Choose from MMS message size, 1 minute or No limit.
Quality – Select the sound quality. Choose from Super Fine, Fine or Normal.
Go to my sounds – Open the Voice recordings folder in My sounds.
Recording a sound or voice
1 Touch: then. 2 Touch Voice recorder. 3 Touch to begin recording. 4 Touch to end recording. 5 Touch to listen to your recording.
Using the radio
Your LG KU990R has an FM radio feature so you can tune into your favourite stations to listen to on the move.
Note: You will need to insert your headphones in order to listen to the radio. Insert them into the headphone socket (this is the same socket that you plug your charger into).
Organiser
Adding an event to your calendar
1 From the standby screen select ● then touch 📋 and choose Organiser. Select Calendar. 2 Select the date you would like to add an event to. 3 Touch ☐ then Add new event.
TIP! You can set a holiday period in your calendar. Touch each day you are on holiday one at a time, then touch ☐ and select Holiday. Each day will be shaded red. When you come to set an alarm, you can choose to exclude days set as holiday.
Adding an item to your to do list
1 From the standby screen select ; then touch 📋 and choose Organiser. 2 Select To do and touch Add.
TIP! You can edit an item by selecting it, and touching ☐ Now select Edit. Confirm your amends by selecting Save.
Using date finder
1 From the standby screen select , then touch 📋 and choose Organiser. 2 Select Date finder. 3 In the From tab set your required date. 4 In the After tab set the number of days. 5 The Target date will be shown below.
LG KU990R | User Guide
Setting your alarm
1 From the standby screen select ☐, then ☐ and choose Alarms. 2 Select ▶ and touch Add new.
Note: You can set up to 5 alarms.
Adding a memo
1 From the standby screen select , then touch and choose Memo. 2 If there are no existing memos, select Add or if you have already added some memos, select followed by Add new.
TIP! You can edit an existing memo. Select the one you want to edit and touch Edit.
Using your calculator
1 From the standby screen select ⚙, then touch 📋 and choose Tools. 2 Select Calculator. 3 Touch the numeric keys to input numbers. 4 For simple calculations, touch the function you require (+, -, *, /) , followed by =. 5 For more complex calculations, touch and choose from sin, cos, tan, log, ln, exp, sqrt, deg or rad.
Adding a city to your world clock
1 From the standby screen select ⋮, then touch 🔒 and choose Tools. 2 Select World clock. 3 Touch the 📁 icon, followed by Add city. Start typing the name of the city you require and it will show at the top of the screen. Alternately touch Map, and select your chosen city from the map. 4 Touch Select to confirm your choice.
TIP! If you are abroad you can change your time zone from World Clock by touching 📄 followed by Change time zone. Choose your required time zone as above, and touch Select.
Converting a unit
1 From the standby screen select ⋮, then touch 🔒 and choose Tools. 2 Select Converter. 3 Choose whether you would like to convert Currency, Surface, Length, Weight, Temperature, Volume or Velocity. 4 You can now select the unit, and enter the value you would like to convert from, followed by the unit you would like to convert to.
PC Sync
You can synchronise your PC with your phone to make sure all your important details and dates match, but also as a backup to put your mind at ease.
Installing LG PC Suite on your computer
1 From the standby screen select ⚙, then touch ⏻ and choose Phone settings. 2 Select Connectivity, then USB connection mode. 3 Select Data Service and touch OK. 4 Insert the supplied CD into your PC. LG PC Suite Installer will appear on your screen. Click on LG PC Suite Installer. 5 Select the language you would like the installer to run in and click OK. 6 Follow the instructions on screen to complete the LG PC Suite Installer wizard. 7 Once installation is complete, the LG PC Suite icon will appear on your desktop.
Connecting your phone and PC
1 Connect the USB cable to your phone and your PC. 2 Double click on the LG PC Suite Icon on your desktop.
3 Click on Connection Wizard, then USB. 4 Click on Next, then Next again, then Finish. Your phone and PC are now connected.
Backing up and restoring your phone's information
1 Connect your phone to your PC as outlined above. 2 Click on the Backup icon, and select Backup or Restore. 3 Mark the contents you would like to back up or restore. Select the location you would like to backup information to, or restore information from. Click OK. 4 Your information will be backed up.
Viewing your phone files on your PC
1 Connect your phone to your PC as outlined above. 2 Click on the Contents icon. 3 All of the documents, flash contents, images, sounds and videos you have saved onto your phone will be displayed on the screen in the LG Phone folder.
TIP! Viewing the contents of your phone on your PC helps you to arrange files, organise documents and remove contents you no longer need.
Synchronising your contacts
1 Connect your phone to your PC. 2 Click on the Contacts icon. 3 Select Transfer, then Import from mobile handset. Your PC will now import and display all contacts saved to your USIM card and handset. 4 Click on File and select Save. You can now select where you would like to save your contacts to.
Note: To backup contacts saved to your USIM card, click on the SIM card folder on the left side of your PC screen. Select Edit at the top of the screen, then Select all. Right-click your contacts and select Copy to contact. Now click on the Handset folder on the left of your screen and all your numbers will be displayed.
Synchronising your messages
1 Connect your phone to your PC. 2 Click on the Messages icon. 3 All of your PC and phone messages will be displayed in folders on your screen. 4 Use the tool bar at the top of your screen to edit and rearrange messages.
DivX Converter
Install the DivX converter which is supplied on the same CD as the PC Sync software.
Once installed, select DivX from the Program Files on your PC, then DivX Converter, followed by Converter.
This will open the Converter application. Use the arrows in the application to change the conversion format to Mobile. If you right-click on the application box and select Preferences, you can change the location where the converted files are saved.
Once you are ready to convert your files, simply drag and drop the files into the application for initial analysis. Following this, you will need to select Convert for the process to begin. When the process is finished, a Conversion complete pop-up will be displayed.
The converted file can now be transferred to your phone, using the Mass Storage functionality or Upload via contents using the PC Sync software.
The web
Accessing the web
1. From the standby screen, select :: then touch 🔒 and choose Browser. 2. To access the browser homepage directly, select Home. Alternatively, select Enter address and type in your desired URL, followed by Connect.
Adding and accessing your bookmarks
For easy and fast access to your favourite websites, you can add bookmarks and save web pages.
1. From the standby screen, select : : then touch 📋 and choose Browser. 2. Select Bookmarks. A list of your Bookmarks will appear on the screen. 3. To add a new bookmark, select and touch Add new. Enter a name for your bookmark followed by the URL.
Saving a page
1. Access your required webpage as described above. 2. Touch ▲ and select Save this page. 3. Enter a name for the webpage so you can easily recognise it. 4. Touch Save.
TIP! This menu will also allow you to edit titles of saved pages, protect or unprotect the screen memo, and delete saved pages.
Accessing a saved page
1 From the standby screen select : : then touch 📞 and choose Browser. 2 Select Saved pages. 3 Select the required page and touch, followed by Open.
Viewing your browser history
1 From the standby screen select 🎯 then touch 🔒 and choose Browser. Select History.
Changing the web browser settings
1 From the standby screen select :: then touch 📋 and choose Browser. Select Settings.
2 You can choose to edit Profiles, Character encoding, Cache, Cookies, Java script, security, or to reset all settings, select Reset Settings.
Using your phone as a modem
Your KU990R can double as a modem for your PC, giving you email and internet access even when you can't connect using wires. You can use either the USB cable or Bluetooth.
Using the USB cable:
1 Ensure you have the LG PC Suite installed on your PC. 2 Connect your KU990R and your PC using the USB cable and launch the LG PC Suite software. 3 Click Communication on your PC. Then click Settings and select Modem. 4 Choose LG Mobile USB Modem and select OK. It will now appear on screen. 5 Click Connect and your PC will connect through your KU990R.
Using Bluetooth:
1 Ensure Bluetooth is switched On and Visible for both your PC and KU990R. 2 Pair your PC and KU990R so that a passcode is required for connection. 3 Use the Connection wizard on your LG PC Suite to create an active Bluetooth connection. 4 Click Communication on your PC. Then click Setting. 5 Click Modem. 6 Choose Standard Modem over Bluetooth link and click OK. It will now appear on screen. 7 Click Connect and your PC will connect through your KU990R.
Settings
Within this folder you can adapt your settings to make your KU990R personal to you.
Changing your screen settings
1 Touch , then choose

2 Touch Screen settings and then choose from:
Main screen theme - Choose the theme for your standby screen or outgoing call.
Clock and Calendar - Choose what is visible on your standby screen.
Brightness - Adjust the screen's brightness
Backlight - Choose how long the backlight remains on for.
Note: The longer the backlight is on for, the more battery power is used and you may need to charge your phone more often.
Handset theme - Quickly change the whole look of your screen.
Font - Adjust the font colour.
Personalising your profiles
You can quickly change your profile on the standby screen. Simply touch the currently active profile icon in the top right corner.
Using the settings menu you can personalise each profile setting.
1 Press: and then choose 2 Touch Profiles and then choose the profile you want to edit. You cannot edit the Silent and Vibrate only profiles. 3 Touch and choose Edit.

Changing your phone settings
Enjoy the freedom of adapting your KU990R so that it works in a way which suits you best.
TIP! To scroll through a list of options, touch the last item visible and slide your finger up the screen. The list will move up so more items are visible.
1 Touch: then choose 2 Touch Phone settings then choose from the list below.

Date and time - Adjust your date and time settings or choose to auto update the time when you travel or for daylight saving.
Powersave - Choose to switch the factory set power saving settings On or Off.
Languages - Change the language of your KU990R's display.
Security - Adjust your security settings, including PIN codes, handset lock and auto key lock.
Connectivity - See Changing your connectivity settings on the next page for more information.
Memory manager - See Using memory manager.
Touchpad calibration - Reset your screen for ease of use.
Reset settings - Reset all the settings to their factory definitions.
Handset information - View the technical information for your KU990R.
Changing your connectivity settings
Your connectivity settings have already been set up by your network operator, so you can enjoy your new phone from the off. If you want to change any settings, use this menu.
Touch 🎯 then 📣 Touch Phone settings and select Connectivity.
Using memory manager
Your KU990R has three memories available: the phone, the USIM Card and an external memory card (you may need to purchase the memory card separately).
You can use memory manager to determine how each memory is used and see how much space is available.
Touch : : followed by . Select Phone settings then Memory Manager.
Using flight mode
Turn on flight mode by selecting ☐, then ⚙. Touch Flight mode and select On. Flight mode will not allow you to make calls, connect to the Internet, send messages or use Bluetooth.
Sending and receiving your files using Bluetooth
Bluetooth is a great way to send and receive files as no wires are needed and connection is quick and easy. You can also connect to a Bluetooth headset to make and receive calls.
To send a file:
1 Open the file you want to send, typically this will be a photo, video or music file. 2 Touch 📄 and choose Send. Choose Bluetooth. 3 Touch Yes to turn Bluetooth on. 4 Your KU990R will automatically search for other Bluetooth enabled devices within range. 5 Choose the device you want to send the file to and touch Select. 6 Your file will be sent.
TIP! Keep an eye on the progress bar to make sure your file is sent.
Settings
To receive a file:
1 To receive files your Bluetooth must be both On and Visible. See change your Bluetooth settings below for more information. 2 A message will prompt you to accept the file from the sender. Touch Yes to receive the file. 3 You will see where the file has been saved and you can choose to View the file or Use as wallpaper. Files will usually be saved to the relevant folder in My Stuff.
Changing your Bluetooth settings:
1 Touch : and choose Settings. 2 Choose Bluetooth then Settings.
Pairing with another Bluetooth device
By pairing your KU990R and another device, you can set up a passcode protected connection. This means your pairing is more secure.
1 Check your Bluetooth is On and Visible. You can change your visibility in the Settings menu. 2 Touch Paired Devices then New. 3 Your KU990R will search for devices. When the search is completed Refresh and Add will appear on screen.
LG KU990R | User Guide
4 Choose the device you want to pair with and enter the passcode then touch OK. 5 Your phone will then connect to the other device, on which you should enter the same passcode. 6 Your passcode protected Bluetooth connection is now ready.
Using a Bluetooth headset
1 Check your Bluetooth is On and Visible. 2 Follow the instructions that came with your headset to place your headset in pairing mode and pair your devices. 3 Touch Yes to Connect now. Your KU990R will automatically switch to Headset profile.
Accessories
These accessories were supplied with KU990R.
Data cable and CD Connect and synchronise your KU990R and PC.

User Guide Learn more about your KU990R.

Stylus and carry strap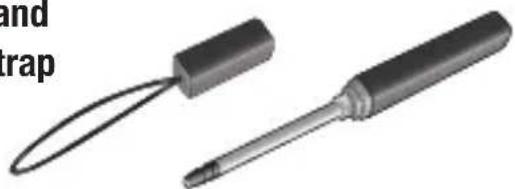
Stereo headset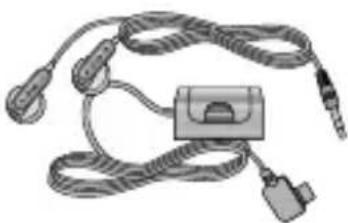
Note
• Always use genuine LG accessories. - Failure to do this may invalidate your warranty. • Accessories may be different in different regions; please check with our regional service company or agent for further inquiries.
Network service
The wireless phone described in this guide is approved for use on the GSM 900, DCS 1800, PCS1900 and W-CDMA network.
A number of features included in this guide are called Network Services. These are special services that you arrange through your wireless service provider. Before you can take advantage of any of these Network Services, you must subscribe to them through your service provider and obtain instructions for their use from your service provider.
Technical data
General
Product name : KU990R
System : GSM 900 / DCS 1800 / PCS 1900 / W-CDMA
Ambient Temperatures
Max: +55°C (discharging), +45°C (charging)
Min : -10°C
Declaration of Conformity

LG Electronics
Suppliers Details
Name
LG Electronics Inc
Address
LG Electronics Inc. LG Twin Towers 20,
Yeouido-dong, Yeongdeungpo-gu, Seoul, Korea 150-721
Product Details
Product Name
GSM 900 / DCS 1800 / PCS 1900 / W-CDMA Terminal Equipment
Model Name
KU990R
Trade Name
LG
CE 0168
Applicable Standards Details
R&TTE Directive 1999/5/EC
ETSI EN 301 489-01 V1.6.1, ETSI EN 301 489-07 V1.3.1
ETSI EN 301 489-17 V1.3.1 and ETSI EN 301 489-24 V1.3.1
ETSI TS 151 010-1 V5.9.0 specified by ETSI EN 301 511 V9.0.2
ETSI TS 134 121 V5.5.0 specified by ETSI EN 301 908-1 V2.2.1 and ETSI EN 301 908-2 V2.2.1
ETSI EN 300 328 V1.6.1
EN 50360/EN 50361:2001
EN 60950-1:2001
Supplementary Information
Declaration
I hereby declare under our sole responsibility that the product mentioned above to which this declaration relates complies with the above mentioned standards and Directives.
Name
Issued Date
Jin Seog, Kim / Director
29 Nov, 2007

LG Electronics Inc. Amsterdam Office
Veluwezcom 15, 1327 AE Almere, The Netherlands
Tel: +31-36-547-8940, e-mail: seokim@lge.com
Signature of representative
Guidelines for safe and efficient use
Please read these simple guidelines. Not following these guidelines may be dangerous or illegal. Further detailed information is given in this manual.
WARNING

- Mobile phones must be switched off at all times in an aircraft.
- Do not hold the phone in your hand while driving.
- Do not use your phone near petrol stations, fuel depots, chemical plants or blasting operations.
- For your safety, use ONLY specified ORIGINAL batteries and chargers.
- Do not handle the phone with wet hands while it is being charged. It may cause an electric shock or seriously damage your phone.
- Keep the phone in a safe place out of small children's reach. It includes small parts which if detached
CAUTION
- Switch off the phone in any area where required by special regulations. For example, do not use your phone in hospitals or it may affect sensitive medical equipment.
- Emergency calls may not be available under all mobile networks. Therefore, you should never depend solely on the phone for emergency calls.
- Only use ORIGINAL accessories to avoid damage to your phone.
- All radio transmitters carry risks of interference with electronics in close proximity. Minor interference may affect TVs, radios, PCs, etc.
- Batteries should be disposed of in accordance with relevant legislation. • Do not dismantle the phone or battery.
Exposure to radio frequency energy
Radio wave exposure and Specific Absorption Rate (SAR) information
This mobile phone model KU990R has been designed to comply with applicable safety requirements for exposure to radio waves. These requirements are based on scientific guidelines that include safety margins designed to assure the safety of all persons, regardless of age and health.
- The radio wave exposure guidelines employ a unit of measurement known as the Specific Absorption Rate, or SAR. Tests for SAR are conducted using standardized methods with the phone transmitting at its highest certified power level in all used frequency bands.
- While there may be differences between the SAR levels of various LG phone models, they are all designed to meet the relevant guidelines for exposure to radio waves.
- The SAR limit recommended by the International Commission on Non-Ionizing Radiation Protection (ICNIRP) is 2 W/kg averaged over ten (10) grams of tissue.
- The highest SAR value for this model phone tested by DASY4 for use at the ear is 0.771 W/kg (10g).
- SAR data information for residents in countries/regions that have adopted the SAR limit recommended by the Institute of Electrical and Electronics Engineers (IEEE), which is 1.08 W/kg (10g) averaged over one (1) gram of tissue.
Product care and maintenance
WARNING!
Only use batteries, chargers and accessories approved for use with this particular phone model. The use of any other types may invalidate any approval or warranty applying to the phone, and may be dangerous.
- Do not disassemble this unit. Take it to a qualified service technician when repair work is required.
- Keep away from electrical appliances such as TVs, radios, and personal computers.
- The unit should be kept away from heat sources such as radiators or cookers.
- Do not drop.
- Do not subject this unit to mechanical vibration or shock.
- The coating of the phone may be damaged if covered with wrap or vinyl wrapper.
- Use dry cloth to clean the exterior of the unit. (Do not use solvent such as benzene, thinner or alcohol.)
Guidelines for safe and efficient Use
- Do not subject this unit to excessive smoke or dust.
- Do not keep the phone next to credit cards or transport tickets; it can affect the information on the magnetic strips.
- Do not tap the screen with a sharp object; otherwise, it may damage the phone.
- Do not expose the phone to liquid or moisture.
- Use the accessories like an earphone cautiously. Do not touch the antenna unnecessarily.
Efficient phone operation
Electronics devices
All mobile phones may get interference, which could affect performance.
- Do not use your mobile phone near medical equipment without requesting permission. Avoid placing the phone over pacemakers, i.e. in your breast pocket.
- Some hearing aids might be disturbed by mobile phones.
- Minor interference may affect TVs, radios, PCs, etc.
Road safety
Check the laws and regulations on the use of mobile phones in the areas when you drive.
• Do not use a hand-held phone while driving. - Give full attention to driving. - Use a hands-free kit, if available. - Pull off the road and park before making or answering a call if driving conditions so require. - RF energy may affect some electronic systems in your vehicle such as car stereos and safety equipment. - When your vehicle is equipped with an air bag, do not obstruct with installed or portable wireless equipment. It can fail or cause serious injury due to improper performance.
Blasting area
Do not use the phone where blasting is in progress. Observe restrictions, and follow any regulations or rules.
Potentially explosive atmospheres
- Do not use the phone at a refueling point. Don't use near fuel or chemicals.
- Do not transport or store flammable gas, liquid, or explosives in the compartment of your vehicle which contains your mobile phone and accessories.
Guidelines for safe and efficient Use
In aircraft
Wireless devices can cause interference in aircraft.
- Turn off your mobile phone before boarding any aircraft.
- Do not use it on the ground without crew permission.
Children
Keep the phone in a safe place out of small children's reach. It includes small parts which if detached may cause a choking hazard.
Emergency calls
Emergency calls may not be available under all mobile networks. Therefore, you should never depend solely on the phone for emergency calls. Check with your local service provider.
Battery information and care
- You do not need to completely discharge the battery before recharging. Unlike other battery systems, there is no memory effect that could compromise the battery's performance.
- Use only LG batteries and chargers. LG chargers are designed to maximize the battery life.
- Do not disassemble or short-circuit the battery pack.
- Keep the metal contacts of the battery pack clean.
- Replace the battery when it no longer provides acceptable performance. The battery pack may be recharged hundreds of times until it needs replacing.
- Recharge the battery if it has not been used for a long time to maximize usability.
- Do not expose the battery charger to direct sunlight or use it in high humidity, such as the bathroom.
- Do not leave the battery in hot or cold places, this may deteriorate the battery performance.
- There is risk of explosion if the battery is replaced by an incorrect type.
- Dispose of used batteries according to the manufacturer's instructions. Please recycle when possible. Do not dispose as household waste.
- Dispose of used batteries according to the manufacturer's instructions.
KU990R
- Simplified Chinese
2 Removing the battery 2 Removing the battery
Warning Warning: Do not use your fingernails to remove the battery.
4 Installing the battery 4 Installing the battery
5 Charging 5 Charging
33 Replace the battery cover as before.
Formatting the memory card Formatting the memory card
3 Tap the icon to adjust the photo:
Battery Battery

Stylus and lanyard

Stereo headset

Note
Declaration of Conformity

LG Electronics
Suppliers Details
Name
LG Electronics Inc
Address
LG Electronics Inc. LG Twin Towers 20,
Yeouido-dong, Yeongdeungpo-gu, Seoul, Korea 150-721
Product Details
Product Name
GSM 900 / DCS 1800 / PCS 1900 / W-CDMA Terminal Equipment
Model Name
KU990R
Trade Name
LG
CE 0168
Applicable Standards Details
R&TTE Directive 1999/5/EC
ETSI EN 301 489-01 V1.6.1, ETSI EN 301 489-07 V1.3.1
ETSI EN 301 489-17 V1.3.1, ETSI EN 301 489-24 V1.3.1
ETSI TS 151 010-1 V5.9.0 specified by ETSI EN 301 511 V9.0.2
ETSI TS 134 121 V5.5.0 specified by ETSI EN 301 908-1 V2.2.1, ETSI EN 301 908-2 V2.2.1
ETSI EN 300 328 V1.6.1
EN 50360/EN 50361:2001
EN 60950-1:2001
Supplementary Information
Declaration
I hereby declare under our sole responsibility that the product mentioned above to which this declaration relates complies with the above mentioned standards and Directives
Name
Issued Date
Jin Seog, Kim / Director
29 Nov, 2007

LG Electronics Inc. Amsterdam Office
Veluwezcom 15, 1327 AE Almere, The Netherlands
Tel: +31-36-547-8940, e-mail: seokim@lge.com
Signature of representative
Camera
Lock/Unlock Key (Image Stabilization Key in Camera)



2 Remove the battery
3 Insert the USIM card
4 Install the battery
5 Charge your phone

Do not cover the antenna area with your hands during calls and using a Bluetooth connection may reduce speech quality.
Your standby screen
Status bar
Your photos and videos
Data cable and CD
Battery

User Guide
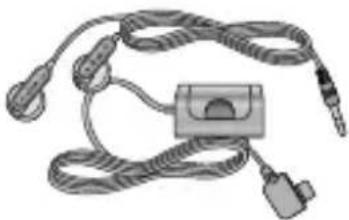
Stereo headset
Note
Declaration of Conformity

LG Electronics
Suppliers Details
Name
LG Electronics Inc
Address
LG Electronics Inc. LG Twin Towers 20,
Yeouido-dong, Yeongdeungpo-gu, Seoul, Korea 150-721
Product Details
Product Name
GSM 900 / DCS 1800 / PCS 1900 / W-CDMA Terminal Equipment
Model Name
KU990R
Trade Name
LG
CE 0168
Applicable Standards Details
R&TTE Directive 1999/5/EC
ETSI EN 301 489-01 V1.6.1, ETSI EN 301 489-07 V1.3.1
ETSI EN 301 489-17 V1.3.1, ETSI EN 301 489-24 V1.3.1
ETSI TS 151 010-1 V5.9.0 specified by ETSI EN 301 511 V9.0.2
FTSITS 134 121 V5.5.0 specified by FTSI EN 301 908-1 V2.2.1 FTSI EN 301 908-2 V2.2.1,
ETSI EN 300 328 V1.6.1
EN 50360/EN 50361:2001
EN 60950-1:2001
Supplementary Information
Declaration
I hereby declare under our sole responsibility that the product mentioned above to which this declaration relates complies with the above mentioned standards and Directives
Name
Issued Date
Jin Seog, Kim / Director
29 Nov, 2007

LG Electronics Inc. Amsterdam Office
Veluwezcom 15, 1327 AE Almere, The Netherlands
Tel: +31-36-547-8940, e-mail: seokim@lge.com
Signature of representative

Portrait Tombol
Open view


2 Removing the battery
3 Installing the USIM card
4 Installing the battery
5 Charging your phone

Data cable and CD
Battery

User Guide
Learn more about your KU990R.
Stereo headset

Note
Declaration of Conformity

LG Electronics
Suppliers Details
Name
LG Electronics Inc
Address
LG Electronics Inc. LG Twin Towers 20,
Yeouido-dong, Yeongdeungpo-gu, Seoul, Korea 150-721
Product Details
Product Name
GSM 900 / DCS 1800 / PCS 1900 / W-CDMA Terminal Equipment
Model Name
KU990R
Trade Name
LG
CE 0168
Applicable Standards Details
R&TTE Directive 1999/5/FC
ETSI EN 301 489-01 V1.6.1, ETSI EN 301 489-07 V1.3.1
ETSI EN 301 489-17 V1.3.1, ETSI EN 301 489-24 V1.3.1
ETSI TS 151 010-1 V5.9.0 specified by ETSI EN 301 511 V9.0.2
ETSI TS 134 121 V5.5.0 specified by ETSI EN 301 908-1 V2.2.1, ETSI EN 301 908-2 V2.2.1
ETSI EN 300 328 V1.6.1
EN 50360/EN 50361:2001
EN 60950-1:2001
Supplementary Information
Declaration
I hereby declare under our sole responsibility that the product mentioned above to which this declaration relates complies with the above mentioned standards and Directives
Name
Issued Date
Jin Seog, Kim / Director
29 Nov, 2007

LG Electronics Inc. Amsterdam Office
Veluwezcom 15, 1327 AE Almere, The Netherlands
Tel: +31-36-547-8940, e-mail: seokim@lge.com
Signature of representative
- CONTENTS
- SET UP
- YOUR STANDBY SCREEN
- THE BASICS
- GET CREATIVE
- GET ORGANISED
- THE WEB
- SETTINGS
- GUIDELINES
- GETTING TO KNOW YOUR PHONE
- OPEN VIEW
- REMOVE THE BATTERY COVER
- REMOVE THE BATTERY
- INSTALLING THE USIM AND BATTERY
- INSTALL THE USIM CARD
- CHARGING YOUR PHONE
- INSTALL THE BATTERY
- MEMORY CARD
- INSTALLING A MEMORY CARD
- FORMATTING THE MEMORY CARD
- TRANSFERRING YOUR CONTACTS
- TOUCHSCREEN TIPS
- THE QUICK KEYS
- ADVICE TO THE CUSTOMER
- THE STATUS BAR
- CALLS
- MAKING A CALL OR VIDEO CALL
- MAKING A CALL FROM YOUR CONTACTS
- ANSWERING AND REJECTING A CALL
- ADJUSTING THE CALL VOLUME
- SPEED DIALLING
- MAKING A SECOND CALL
- USING CALL DIVERT
- CONTACTS
- SEARCHING FOR A CONTACT
- FROM THE STANDBY SCREEN
- FROM THE MAIN MENU
- MESSAGING
- SENDING A MESSAGE
- ENTERING TEXT
- A HANDWRITING RECOGNITION - CHOOSE HANDWRITING-SCREEN OR HANDWRITING-BOX
- T9 ABC ABC MANUAL - CHOOSE ABC, ABC OR
- T9 PREDICTIVE
- ABC MANUAL
- KEYBOARD
- HANDWRITING RECOGNITION
- SETTING UP YOUR EMAIL
- CAMERA
- TAKING A QUICK PHOTO
- AFTER YOU'VE TAKEN YOUR PHOTO
- GETTING TO KNOW THE VIEWFINDER
- USING THE ADVANCED SETTINGS
- USING THE INNER CAMERA
- VIEWING YOUR SAVED PHOTOS
- VIDEO CAMERA
- SHOOTING A QUICK VIDEO
- WATCHING YOUR VIDEOS ON YOUR TV
- YOUR PHOTOS AND VIDEOS
- SENDING A PHOTO OR VIDEO FROM THE GALLERY
- VIEWING YOUR PHOTOS AS A SLIDE SHOW
- EDITING YOUR PHOTOS
- SEE ADDING TEXT TO A PHOTO. DECORATE YOUR PHOTO WITH STAMPS
- EFFECT: SEE ADDING AN EFFECT TO A PHOTO
- ADDING TEXT TO A PHOTO
- ADDING AN EFFECT TO A PHOTO
- MULTIMEDIA
- MY IMAGES
- SENDING A PHOTO
- USING AN IMAGE
- ORGANISING YOUR IMAGES
- CREATING A SLIDE SHOW
- MY SOUNDS
- USING A SOUND
- MY VIDEOS
- WATCHING A VIDEO
- EDITING A VIDEO CLIP
- SENDING A VIDEO CLIP
- USING A VIDEO CLIP AS A RINGTONE
- MY GAMES AND APPS
- DOWNLOADING A GAME
- PLAYING A GAME
- FLASH CONTENTS
- VIEWING AN SWF FILE
- DOCUMENTS
- TRANSFERRING A FILE TO YOUR PHONE
- VIEWING A FILE
- OTHERS
- MUVEE STUDIO
- CREATING A MOVIE
- MUSIC
- PLAYING A SONG
- CREATING A PLAYLIST
- VIDEO PLAYLISTS
- VOICE RECORDER
- RECORDING A SOUND OR VOICE
- USING THE RADIO
- ORGANISER
- ADDING AN EVENT TO YOUR CALENDAR
- ADDING AN ITEM TO YOUR TO DO LIST
- USING DATE FINDER
- SETTING YOUR ALARM
- ADDING A MEMO
- USING YOUR CALCULATOR
- ADDING A CITY TO YOUR WORLD CLOCK
- CONVERTING A UNIT
- PC SYNC
- INSTALLING LG PC SUITE ON YOUR COMPUTER
- CONNECTING YOUR PHONE AND PC
- BACKING UP AND RESTORING YOUR PHONE'S INFORMATION
- VIEWING YOUR PHONE FILES ON YOUR PC
- SYNCHRONISING YOUR CONTACTS
- SYNCHRONISING YOUR MESSAGES
- DIVX CONVERTER
- ACCESSING THE WEB
- ADDING AND ACCESSING YOUR BOOKMARKS
- SAVING A PAGE
- ACCESSING A SAVED PAGE
- VIEWING YOUR BROWSER HISTORY
- CHANGING THE WEB BROWSER SETTINGS
- USING YOUR PHONE AS A MODEM
- USING THE USB CABLE
- USING BLUETOOTH
- CHANGING YOUR SCREEN SETTINGS
- PERSONALISING YOUR PROFILES
- CHANGING YOUR PHONE SETTINGS
- CHANGING YOUR CONNECTIVITY SETTINGS
- USING MEMORY MANAGER
- USING FLIGHT MODE
- SENDING AND RECEIVING YOUR FILES USING BLUETOOTH
- TO SEND A FILE
- TO RECEIVE A FILE
- CHANGING YOUR BLUETOOTH SETTINGS
- PAIRING WITH ANOTHER BLUETOOTH DEVICE
- USING A BLUETOOTH HEADSET
- ACCESSORIES
- NOTE
- NETWORK SERVICE
- TECHNICAL DATA
- GENERAL
- AMBIENT TEMPERATURES
- DECLARATION OF CONFORMITY
- SUPPLIERS DETAILS
- PRODUCT DETAILS
- APPLICABLE STANDARDS DETAILS
- SUPPLEMENTARY INFORMATION
- DECLARATION
- GUIDELINES FOR SAFE AND EFFICIENT USE
- WARNING
- CAUTION
- EXPOSURE TO RADIO FREQUENCY ENERGY
- PRODUCT CARE AND MAINTENANCE
- EFFICIENT PHONE OPERATION
- ELECTRONICS DEVICES
- ROAD SAFETY
- BLASTING AREA
- POTENTIALLY EXPLOSIVE ATMOSPHERES
- IN AIRCRAFT
- CHILDREN
- EMERGENCY CALLS
- BATTERY INFORMATION AND CARE
- KU990R
- INSERT THE USIM CARD
- CHARGE YOUR PHONE
- STATUS BAR
- DATA CABLE AND CD
- BATTERY
- USER GUIDE
- STEREO HEADSET
- REMOVING THE BATTERY
- INSTALLING THE USIM CARD
- INSTALLING THE BATTERY
Brand : LG
Model : KU990RW
Category : Smartphone