
VCC 6426 O - Vacuum Cleaner BEKO - Free user manual and instructions
Find the device manual for free VCC 6426 O BEKO in PDF.


| Product Type | Canister Vacuum Cleaner |
| Model | VCC 6426 O |
| Brand | Beko |
| Power Consumption | 2200 W |
| Dust Bag Capacity | 2 L |
| Filtration System | HEPA 13 Washable Filter |
| Cord Length | 6 m |
| Operating Radius | 8 m |
| Noise Level | 80 dB(A) |
| Weight | 5.5 kg |
| Dimensions (L x W x H) | 45 x 28 x 25 cm |
| Included Accessories | Crevice Tool, Dusting Brush, Upholstery Nozzle, Floor Brush |
| Control Type | Foot Pedal On/Off, Variable Suction Power |
| Dust Bag Indicator | Yes |
| Automatic Cord Rewind | Yes |
| Thermal Protection | Yes |
| Warranty | 2 Years |
Frequently Asked Questions - VCC 6426 O BEKO
User questions about VCC 6426 O BEKO
0 question about this device. Answer the ones you know or ask your own.
Ask a new question about this device
Download the instructions for your Vacuum Cleaner in PDF format for free! Find your manual VCC 6426 O - BEKO and take your electronic device back in hand. On this page are published all the documents necessary for the use of your device. VCC 6426 O by BEKO.
USER MANUAL VCC 6426 O BEKO
natural_image
Black and orange vacuum cleaner with coiled hose and handle, isolated on white background (no text or symbols)VCC 6426 0
VCC 6426 B
ENTR RU
BS MK SR
01M-8835813200-2916-01
01M-8835803200-2916-01
beko
Please read this manual first!
Dear Valued Customer,
Thank you for preferring this Beko appliance. We hope that you get the best results from your appliance which has been manufactured with high quality and state-of-the-art technology. For this reason, please read this user manual and all other provided documents carefully before using the appliance and keep it as a reference for future use. If you hand over the appliance to someone else, give the user manual as well. Follow the instructions by paying attention to all the information and warnings in the user manual.
Remember that this user manual may also apply to other models. Differences between models are explicitly described in the manual.
Meanings of the Symbols
Following symbols are used in various sections of this manual:

Important information and useful hints about usage.

WARNING: Warnings against dangerous situations concerning the security of life and property.

Protection class for electric shock.

This product has been manufactured in environmental friendly modern plants without giving any harm to the nature.
1 Important safety and environmental instructions 4-5
1.1 General safety 4
1.2 Compliance with the WEEE Directive and disposal of waste products.... 5
1.3 Package information 5
2 Your vacuum cleaner 6
2.1 Overview 6
2.2 Technical data....6
3 Usage 7-8
3.1 Intended use ....7
3.2 Attaching/removing the hose....7
3.3 Attaching/removing the telescopic tube . . .7
3.4 Attaching/removing the parquet/ carpet brush ....7
3.5 Adjusting the parquet/carpet brush.....7
3.6 Operation 7
3.6.1 Adjusting the suction power .....7
3.6.2 Dust indicator 8
3.7 Accessories....8
3.8 Switching off the vacuum cleaner and parking feature....8
4 Cleaning and care 9
4.1 Replacing the dust bag....9
4.2 Cleaning the filters....9
4.2.1 Motor protection filter 9
4.2.2 HEPA filter 9
1 Important safety and environmental instructions
This section contains safety instructions that will help protect from risk of personal injury or property damage.
Failure to follow these instructions invalidates the granted warranty.
1.1 General safety
- This appliance complies with the international security standards.
- This appliance can be used children aged from 8 years and above and persons with reduced physical, sensory or mental capabilities or lack of experience and knowledge if they have been given supervision or instruction concerning use of the appliance in a safe way and understand the hazards involved. Children shall not play with the appliance. Cleaning and user maintenance shall not be made by children without supervision.
- Do not use it if the power cable or the appliance itself is damaged. Contact an authorized service.
- Your mains power supply should comply with the information supplied on the rating plate of the appliance.
- The mains supply of the appliance must be secured with a minimum 16 A fuse.
- Do not use the appliance with an extension cord.
th• In order to prevent the power cable from getting damaged, make sure that it doesn't get bystuck, twisted or rub against sharp surfaces.
- Do not touch the appliance or its plug when it is plugged if your hands are damp or wet.
- Do not pull the power cable when unplugging the appliance.
- Do not vacuum flammable materials and when vacuuming cigarette ashes make sure that it got cold.
- Do not vacuum water or other liquid materials.
- Protect the appliance from rain, humidity and heat sources.
1 Important safety and environmental instructions
- Never use the appliance• If your store the package in or near to combustible material, keep it out of the or inflammable places and reach of children.
1.2 Compliance with the WEEE Directive and disposal of waste products
- Unplug the appliance before cleaning and maintenance.
- Do not dip the appliance or in cable in water to clean it.
- Check the hose of the appliance regularly. Do not use if it is damaged and contact an authorized service.
- Do not attempt to dismantle the appliance.
- Only use the original parts parts recommended by the manufacturer.
- If heavily used for cleaning dust such as cement or grout the dust indicator will lit earlier then expected, in such case replace the dust bag even it is empty.
- Do not use the appliance without filters; otherwise it can get damaged.
- When vacuuming the stairs, the appliance should be located below the user.
This product does not include harmful and prohibited materials specified in the "Regulation for Supervision of the Waste Electric and Electronic Appliances" issued by the Ministry of Environment and Urban Planning. This appliance conforms to the WEEE regulation. This product has been manufactured with high quality parts and materials which can be reused and are suitable for recycling. Therefore, do not dispose the product with normal domestic waste at the end of its service life. Take it to a collection point for the recycling of electrical and electronic equipment. Ask the local authority in your area for these collection points. Contribute to the preservation of environment and natural sources by taking the used products to the recycling points.
1.3 Package information
Package of the product is made of recyclable materials in accordance with our National Legislation. Do not dispose of the packaging materials together with the domestic or other wastes. Take them to the packaging material collection points designated by the local authorities.
2 Your vacuum cleaner
2.1 Overview

2.2 Technical data
Supply voltage : 220-240 V\~, 50-60 Hz
Power :2000 W Nom
:2600 W Max
Usage radius : 8m
Suction power : 400 W
Filter : HEPA 12
- Handle
- Vacuum control
- Telescopic tube
- Telescopic tube adjustment latch
- HEPA filter cover
- On/Off button
- Accessory storage compartment
- Parquet/carpet brush adjustment latch
- Parquet/carpet brush
- Button for opening the accessory storage compartment
- Carriage handle
- Button for opening the dust container
- Suction nozzle
- Hose cap
- Hose
- Dust bag fullness indicator
- Cable winding button
- Electronic control panel
Technical and design modification rights are reserved.
The values which are declared in the markings affixed on your appliance or other printed documents supplied with it represent the values which were obtained in the laboratories pursuant to the pertinent standards. These values may vary according to the usage of the appliance and ambient conditions.
3 Usage
3.1 Intended use
The appliance was designed for household use and is not suitable for industrial use.
3.2 Attaching/removing the hose
- To attach the hose (15), push the hose cap (14) in the arrow direction in order to match it with the suction nozzle and rotate it clockwise.
- To remove the hose (15), rotate the hose cap (14) anti-clockwise and remove it.
3.3 Attaching/removing the telescopic tube
- Attach the telescopic tube (3) to the handle (1).
- Pull the telescopic tube (3) from the handle (1) to remove it.
- To adjust the length of the telescopic tube, push the telescopic tube adjustment latch (4) in the arrow direction and pull it from the end of it.

natural_image
Close-up of a metallic cylindrical mechanical component with an arrow indicating direction (no text or symbols visible)3.4 Attaching/removing the parquet/carpet brush
- Attach the telescopic tube (3) to the parquet/ carpet brush (8).
- Pull the telescopic tube (3) from the parquet/ carpet brush (8) to remove it.
3.5 Adjusting the parquet/carpet brush
Perform the following actions on the adjustment latch (8) located on the parquet/carpet brush (9);
- Use "###" position for hard surfaces and parquet.

- Use "" position for rugs and carpets.

3.6 Operation
- Plug in the appliance after pulling the power plug located at the back of the appliance.
- Press the on/off button (6) to switch on your appliance.
3.6.1 Adjusting the suction power
You can adjust the suction power using the + / - keys of the electronic control panel (18) found on the vacuum cleaner.

- Use your appliance at level to clean curtains and table cloths.
- Use your appliance at level to clean sofas.
- Use your appliance at level to clean carpets, rugs, etc.
- Use your appliance at level to clean floors such as parquet, wooden floors.
3 Usage
- Use your appliance at Level to clean hard surfaces.
You can lower the suction power of the parquet carpet brush by pulling backward the vacuum adjustment control (2) located on the handle (1) without the need to use the suction adjustment knob found on the appliance.
3.6.2 Dust indicator
When the dust bag is full, the dust bag fullness indicator (16) will turn red. Replace the dust bag (see 4.1).
3.7 Accessories
You can open the accessory storage compartment (7) by pressing the button for opening the accessory storage compartment (10).
Crevice tool

Suitable for cleaning surfaces which are difficult to clean, such as areas remaining under sofas and furniture.
Dust brush
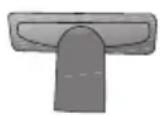
Suitable for cleaning objects such as curtains, floorings, vulnerable fragile things, couches, sofas etc.

WARNING: Do not perform cleaning tasks using the end part of the handle (1).
3.8 Switching off the vacuum cleaner and parking feature
- Switch off the appliance with the on/off button (6) and unplug it.
- Press the cord winding button (17) to rewind the power cord.
Vertical parking feature
Insert the hook of the parquet/carpet brush (9) into the parking groove located at the bottom section of the appliance.
Horizontal parking feature
Insert the hook of the parquet/carpet brush (9) into the parking groove located at the rear section of the appliance.
4 Cleaning and care
Switch off and unplug the appliance before cleaning it.

WARNING: Never use gasoline, solvent, abrasive cleaning agents, metal objects or hard brushes to clean the appliance.
4.1 Replacing the dust bag
When the dust bag is full, the dust bag fullness indicator (16) will turn red.
- Open the top lid by pressing the button for opening the dust container (12).
- Remove the dust bag from the dust container by pulling it upwards.
- Remove the dust bag from its guide by pulling it from its tray.
- Dispose the full dust bag.
- Holding its tray, push the new dust bag into the bag holder. Ensure that it is fully seated.
- Place back the dust bag holder into its place in the dust container.
- Close the upper cap of the appliance.

WARNING: Do not force the top lid to close it, otherwise the plastic parts can be damaged.

WARNING: Dust bags provided from locations other than the authorized dealers and services are not original. Such dust bags have a lesser quality and they become torn in a shorter period and render your appliance non-operational. Faults caused by using unauthentic dust bags are not covered by the scope of the warranty.

WARNING: Do not wash the dust bag.
4.2 Cleaning the filters
After each 5 dust bag replacement (may vary depending on the frequency and area of usage), clean the filters.

WARNING: Do not use appliances producing hot air such as hair dryer or heater to dry the filters.

WARNING: Do not install the filters without completely drying them; otherwise, smell of moisture may occur during use, water can leak from the back of the appliance or the filters may get damaged.

WARNING: Attach the filters into their places after they have dried.
4.2.1 Motor protection filter
- Open the top lid by pressing the button for opening the dust container (12).
- Pull out the filter tray.
- Remove the foam filter from the grid inside.
- After washing the motor protection filter under running water, wring it out slightly and leave it to dry (for 24 hours minimum).
4.2.2 HEPA filter
- Open the HEPA filter cover which is on your appliance and remove the HEPA filter by pulling it from its handle.
- Shake off the HEPA outlet filter to eliminate the dust on it. After that, you can wash it by holding its clean side under running cool water.
- If you wash the HEPA filter, dry it at room temperature (for 24 hours minimum). Do not use it before ensuring that it is completely dry.
natural_image
Close-up of a mechanical shaft with a small inset component, showing no text or symbols.natural_image
Simple 3D illustration of a cylindrical object with a shaded cross-section (no text or symbols)natural_image
Close-up of a cylindrical mechanical component with an arrow indicating a feature (no text or symbols visible)natural_image
Simple 3D illustration of a cylindrical object with a shaded cross-section (no text or symbols)natural_image
3D rendering of a cylindrical mechanical component with an arrow indicating direction (no text or symbols)3.4 Postavljanje/uklanjanje četke za parket/tepih
- Postavite teleskopsku cijev (3) na četku za parket/tepih (8).
- Povucite teleskopsku cijev (3) s četke za parket/tepih (8) da biste je uklonili.
natural_image
Close-up of a cylindrical mechanical component with an arrow indicating direction (no text or symbols visible)natural_image
Simple 3D illustration of a cylindrical object with a textured top and base, resembling a tool or component (no text or symbols)natural_image
Close-up of a cylindrical mechanical component with an arrow indicating direction (no visible text or symbols)3.4 Postavljanje/uklanjanje četke za parket/tepih
- Povežite teleskopsku cev (3) sa četkom za parket/tepih (8).
- Povucite teleskopsku cev (3) sa četke za parket/tepih (8) da biste je uklonili.
natural_image
Simple 3D illustration of a vertical cylindrical object with textured surface (no text or symbols)فرشاة الأترية
natural_image
Close-up of a cylindrical mechanical component with a pointed tip and arrow indicating direction (no visible text or symbols)البيانات الفنية 2.2
natural_image
Black and orange vacuum cleaner with coiled hose and handle, no visible text or symbolsVCC 6426 0
VCC 6426 B
AR
beko
01M-8835813200-2916-01
01M-8835803200-2916-01
- Please read this manual first!
- Meanings of the Symbols
- Important safety and environmental instructions 4-5
- Your vacuum cleaner 6
- Usage 7-8
- Cleaning and care 9
- Important safety and environmental instructions
- General safety
- Compliance with the WEEE Directive and disposal of waste products
- Package information
- Your vacuum cleaner
- Technical data
- Usage
- Intended use
- Attaching/removing the hose
- Attaching/removing the telescopic tube
- Attaching/removing the parquet/carpet brush
- Adjusting the parquet/carpet brush
- Operation
- Adjusting the suction power
- Dust indicator
- Accessories
- Crevice tool
- Dust brush
- Switching off the vacuum cleaner and parking feature
- Vertical parking feature
- Horizontal parking feature
- Cleaning and care
- Replacing the dust bag
- Cleaning the filters
- Motor protection filter
- HEPA filter
- Postavljanje/uklanjanje četke za parket/tepih
Brand : BEKO
Model : VCC 6426 O
Category : Vacuum Cleaner