
BFE4915N - Cooker Becken - Free user manual and instructions
Find the device manual for free BFE4915N Becken in PDF.


| Product Type | Free-standing Electric Cooker |
| Brand | Becken |
| Model | BFE4915N |
| Color | White |
| Hob Type | Vitroceramic (Radiant Zones) |
| Number of Cooking Zones | 4 (2 x 14 cm, 2 x 18 cm) |
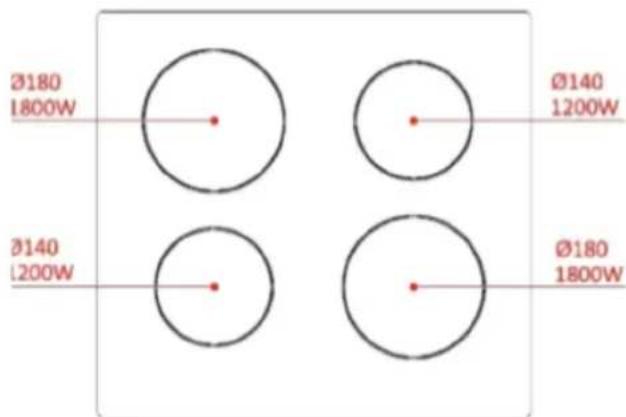
| Hob Zone Power | Rear Right: 1200W (14 cm), Rear Left: 1800W (18 cm), Front Right: 1800W (18 cm), Front Left: 1200W (14 cm) |
| Oven Type | Electric with Grill, Turbo Fan, and Turnspit |
| Oven Volume | 52 Liters |
| Energy Class | A |
| Energy Consumption (Convection) | 0.717 kWh |
| Energy Efficiency Index | 95.6 |
| Overall Dimensions (W x D x H) | 500 x 600 x 855 mm |
| Oven Inner Dimensions (W x D x H) | 392 x 402 x 324 mm |
| Oven Lamp Power | 15 W |
| Thermostat Range | 50-250 °C |
| Heating Elements | Bottom: 800 W, Top: 650 W, Grill: 1500 W |
| Supply Voltage | 220-240 V / 380-415 V or 230 V / 400 V, 50-60 Hz |
| Required Fuse | 16 Amp minimum |
| Cleaning Instructions | Cool down and unplug before cleaning. Use soft cloth for exterior; avoid abrasive cleaners. |
| Safety Features | Child safety warning, auto-off timer, overheat protection, anti-tip chain |
| Warranty | 2 years against manufacturing defects |
| Included Accessories | Wire grid, tray, turnspit hook, turnspit rod with forks |
Frequently Asked Questions - BFE4915N Becken
User questions about BFE4915N Becken
0 question about this device. Answer the ones you know or ask your own.
Ask a new question about this device
Download the instructions for your Cooker in PDF format for free! Find your manual BFE4915N - Becken and take your electronic device back in hand. On this page are published all the documents necessary for the use of your device. BFE4915N by Becken.
USER MANUAL BFE4915N Becken
Vitroceramic top plate free standing electric stove
natural_image
White electric stove oven with four top ovens and control knobs (no visible text or symbols)INSTRUCTIONS MANUAL
MANUAL DE INSTRUÇÕES
BFE4915N WH
Dear client,
Thank you for purchasing this product.
The quality of this appliance has been certified by several laboratory tests. This instructions manual is provided to simplify the use of the appliance as well as to guarantee a safe use.
Please read carefully the instructions and safety measures described in this manual.
We sincerely hope you will be satisfied when using your new appliance.
INDEX
1. SAFETY INSTRUCTIONS 4
1.1. Power Supply 5
1.2. Power Cord and Other Cables 5
1.3. Humidity and Water 5
1.4. Cleaning 6
1.5. General Precautions 6
2. OPERATING INSTRUCTIONS 12
2.1. Product Description 12
2.2. Product Usage 13
2.3. Maintenance 20
2.4. Troubleshooting 21
- TECHNICAL SPECIFICATIONS 23
- POST-SALE SERVICE 27
- ENVIRONMENTAL PROTECTION 27
1. SAFETY INSTRUCTIONS
 | WARNING |  |
| RISK OF ELECTRIC SHOCKDO NOT OPEN | ||
| Warning: to avoid the risk of electric shock, do not remove the cover. The interior does not contain any parts that can be repaired by the user. Ask for assistance from the Customer Support Service. | ||
Important Warnings
Before using your appliance read this instructions manual carefully and keep it in a safe place as you may need to consult it in the future.
Before turning on your appliance, and to ensure a safe and correct operation, do not use if:
- It has fallen to the ground;
- You notice any evidence of damage;
- Any anomaly occurs during its operation.
To avoid hazards or deterioration of your appliance through incorrect use it is advisable to read these instructions thoroughly.
Your appliance may not be used for other purposes than the ones intended and solely for household use. Any damage resulting from using the appliance outside this scope, any incorrect use, as well as any manual modifications to the product will not be covered and automatically voids the warranty.
[you can trust]
Assistance
In case of malfunction, take your appliance to the Customer Support Service for assistance.
This appliance can be used by children from the age of 8 and by people with reduced physical, sensorial or mental capabilities and/or lack of experience and knowledge if they have been given instructions on using the appliance safely and if they understand the hazards involved. Children may not play with the appliance. Cleaning and maintenance must not be carried out by children without supervision.
These instructions are also available at
www.suporteworten.pt
1.1. Power Supply
Make sure the main voltage is compatible with the appliance's. If this is not the case please consult the Customer Support Service.
1.2. Power Cord and Other Cables
Do not tangle the cord or pull it to disconnect the appliance. Also, keep the cord away from warm surfaces.
Never use the appliance if it has a damaged cable or socket. Take it to the Customer Support Service for replacement.
1.3. Humidity and Water
Do not use your appliance in humid places. Do not allow the appliance to become wet under any circumstances as this may be dangerous. To avoid fire hazard or electric
shock do not expose your appliance to humidity or water. Furthermore, do not place your appliance under water (e.g. for cleaning).
1.4. Cleaning
Before cleaning, be sure to switch off the appliance and remove the plug from the main power supply. Always allow the unit to cool down before cleaning.
To clean the exterior of the product use a dry soft cloth only.
1.5. General Precautions
- Please follow the instructions in the user manual which will help you to properly install and operate this product and enjoy its advanced features. Please keep the instructions for future reference.
- Read all instructions before using the product.
- Maintenance and service operations are only to be carried out by authorized professionals.
- Any damage caused by manual modifications to the product is not covered by the warranty.
- If this product is used for other purposes than the ones originally intended, or if it is not correctly connected, the product may become damaged and the warranty will be voided.
- Pieces of packaging (plastic bags, polystyrene etc.) must
[you can trust]
not be left within reach of children, as they are potentially dangerous. Please dispose of packaging thoughtfully by the appropriate means.
• WARNING: this appliance must be earthed!
- Please find all required information regarding your stove's power and ratings on the rating label located behind the appliance.
- Ensure that the electricity supply is off before installing your appliance.
- Ensure that the appliance is off before replacing the lamp to avoid the possibility of electric shock.
- If the supply cord is damaged, it must be replaced by the manufacturer, its services agent or similar qualified persons in order to avoid hazard.
- Usage of your appliance creates moisture and heat in the room; make sure your kitchen is well ventilated.
- Keep your stove's electrical cable away from hot areas; do not let it touch the appliance. Keep them away from sharp sides and heated surfaces.
- Prolonged intensive use of the appliance may call for additional ventilation, for example increasing the level of mechanical ventilation where present.
- When the stove is hot, never touch the stove glass with bare hands.
- This appliance is for cooking purposes only. It must not be used for other purposes like heating a room. All our appliances are only for domestic use, not for commercial use.
- Before using your appliance, keep curtains, paper or flammable items away from it. Do not keep combustible or flammable things in or near the appliance.
- Use oven mitts. Do not touch hot surfaces.
- Do not transport the stove holding it by its door handle.
- Do not use the stove in any potentially explosive atmosphere.
- f the current rate of the fuse in your installation is less than 16 Amp, have a qualified electrician fit a16 Amp fuse.
- When the oven is being used, some parts may become hot; children should be kept away and supervised at all times.
- Do not splash cool water onto an oven tray or inside the oven when the oven surface is still hot. Rising steam may cause burns and a sudden temperature exchange may cause damages on the surface of the stove.
- WARNING: accessible parts may become hot during use.
[you can trust]
Young children should be kept away.
- WARNING: the appliance and its accessible parts become hot during use. Care should be taken to avoid touching heating elements. Children under the age of 8 should be kept away unless continuously supervised.
- Do not use harsh abrasive cleaners or sharp metal scrapers to clean the oven door glass given they can scratch the surface which may result in the glass shattering.
- This appliance is produced in accordance with the safety regulations. Incorrect use will harm people and damage the stove.
- The stove must be supplied via a suitable double pole isolating switch, with a minimum contact separation of 3 mm in all poles placed in a readily accessible position adjacent to the stove.
• Children should be supervised to ensure they do not play with the stove. Never let them play with the stove.
- The stove may be located in a kitchen, a kitchen/diner or bed/sitting room but not in a room containing a bath or shower.
- Caution: glass lids may shatter when heated. Turn off all burners before shutting the lid. Any spillage should be removed from the lid before opening.
- In models with a digital timer, you will to reset your digital timer rightly following a power cut. Otherwise, your stove will not operate.
- Caution: accessible parts may be hot when the grill is in use. Young children should be kept away.
- Do not put flammable, combustible, explosive liquid able or deformable by heat any material in the stove against possible risk of danger even if your appliance is not in use.
- Bread may catch fire if the toasting time is too long. Close supervision is necessary during toasting.
- When cleaning the fan guard panel (optional), the stove must be switched off before removing the guard. After cleaning it, the guard must be replaced in its correct position into the stove.
- WARNING: before obtaining access to terminals, all supply circuits must be disconnected.
- WARNING: unattended cooking on a hob with fat or oil can be dangerous and may result in fire. NEVER try to extinguish a fire with water, but switch off the appliance and then cover flame e.g. with a lid or a fire blanket.
- WARNING: danger of fire: do not store items on the cooking surfaces.
- WARNING: if the surface is cracked, switch off the appliance to avoid the possibility of electric shock.
[you can trust]
- The appliance is not intended to be operated by means of an external timer or separate remote-control system.
- WARNING: this stove is not intended for use by persons (including children) with reduced physical, sensory or mental capabilities, or lack of experience and knowledge, unless they have been given supervision or instruction concerning use of the appliance by a person responsible for their safety.
• Children should be supervised to ensure that they do not play with the appliance.
- Metallic objects such as knives, forks, spoons and lids should not be placed on the hob surface since they can get hot.
• The glass ceramic can be damaged by objects falling onto it.
- If the surface is cracked, switch off the appliance to avoid the possibility of electric shock, for hob surfaces of glassceramic or similar material which protect live parts.
- When the stove is being used, some parts may become hot, even when you the knobs have been turned on. Children should be kept away and supervised at all times.
- Do not touch to cooking vitroceramic hob zone a few minutes after use until you are sure the surface is cold.
CAUTION: The cooking process has to be supervised. A short term cooking process has to be supervised continuously.
Cooking ranges and ovens shall state that the appliance must not be installed behind a decorative door in order to avoid overheating.
Do not use harsh abrasive cleaners or sharp metal scrapers to clean the oven door glass/ the glass of hinged lids of the hob (as appropriate),
2. Operating Instructions
2.1. Product Description
Appliance Symbols:
- Closed
Top heating element
Stove & grill heating element
Grill heating element
Oven lamp
Stove heating element
Grill & turnspit
Turbo fan
Turnspit


- Stove
- Command panel
- Wire grid
- Tray
- Cavity
- Bottom cover
- Door handle
- Stove door
- Command knobs
- Bottom shelve
- Middle down shelve
- Middle top shelve
- Top shelve
- Oven lamp
[you can trust]
2.2. Product usage
This user manual is prepared for more than one model. Some of the features specified in the Manual may not be available in your appliance.
INSTALLATION
- The adjustment conditions for this appliance are stated on the rating label.
- Your stove requires a 32-40 Ampere supply. If necessary, installation by a qualified electrician is recommended.
- Electrical connection of the stove should only be made to earthed connections/sockets installed in compliance with local regulations. If there are no earthed connections/sockets in place where the stove will be installed, contact immediately a qualified electrician to install. The manufacturer is not responsible for damages due to the stove not being connected to an earth system.
- Your stove is for use with 230 V / 400 V AC, 50–60 Hz or 220-240 V / 380-415 V AC, 50-60 Hz electric supply. If your supply is different from the specified value, contact the Customer Support Service.
- When placing your stove on its location, ensure that it is at the counter level. Bring it to the counter level by adjusting the feet if necessary.
- Some models are supplied without a plug-an-lead set. In this case, use a flexible cable suitable for connection to mono phase: H05 VV-F 3G 2.5 mm2, H05 VV-F 3G 4 mm2 or for 3 phase: H05 VV-F 5G 1.5 mm2.
Before using the stove, in order to ensure its safe use, fix it to the wall using the chain and hooked screw supplied. Ensure the hook is screwed into the wall securely
WARNING!
In order to prevent the stove from tipping over, you will need to secure the stove according to the instructions for installation.
[you can trust]

Before using the stove, remove all flammable tapes, Styrofoam or any other packaging materials. Also remove the user manual and other flammable materials from inside of stove.
USAGE AND DESCRIPTION OF HOB SECTION FOR VITROCERAMIC
For ring control
- You can operate the hob with the ring switches on the stove's control panel. This switch regulates the energy supply in order to reach a desired temperature set by you.
- In order to achieve a good cooking result, the bottom of the pans should be as thick and flat as possible.
- The bottom of the pans and the cooking zones should have the same size. If possible, always place lids on the pans. Always place cookware on the cooking zone before switching them on. Switch the cooking zones off before the end of the cooking time, to take
[you can trust]
advantage of residual heat.
-
Turn the knob clockwise to turn them on. The temperature set by the knob position on the line will gradually increase up to max (single zone).
-
For a dual cooking zone, the first ring will work like a single zone; the second ring will start work when turned with a little bit extra force clockwise to the "max" end area of the ring sign. When you turn it counter-clockwise, the first ring will work as maximum range and the second ring's power will reduce up to you desire temperature.
-
At the "O" position, all the rings are off.

natural_image
Four black-and-white silhouettes of cooking pots with crossed handles, no text or symbols presentSTOVE DESCRIPTION

Using an electrical stove:
- When your stove is operated first time, you might sense an odour from the heating elements being used for the first time. In order to get rid of this, operate them at 250 °C for 45-60 minutes while empty.
- The stove control knob should be positioned to the desired value; otherwise, the stove will not operate.
- The thermostat control knob should be positioned to the desired temperature value.
- The timer control knob should be positioned to the desired timing value. When the end of the set cooking time is reached, you will heard a "bing" sound from the timer and the stove will stop its operate. If you want to use the stove without the timer control, turn the timer control knob to the manual position, indicated with the symbol (optional).
- When the oven is being used, its door should not be opened frequently. Otherwise, heat circulation may be imbalanced and the cooking results may change.
- You should preheat the oven for 5-10 min before using it.
Table of cooking times:
| Woburner | Temperature (°C) | Rack position | Cooking time (min.) |
| Creamed cake 150 - 170 2 30 - 35 | |||
| Pastry 200 - 220 2 35 - 45 | |||
| Biscuit 160 - 170 3 20 - 25 | |||
| Cookie 160 - 170 3 20 - 35 | |||
| Cake 160 - 180 2 25 - 35 | |||
| Braided cookie | 200 - 220 | 2 | 30 - 40 |
| Filo pastry | 180 - 220 2 35 - 45 |
[you can trust]
| Savoury pastry 160 - 180 2 20 - 30 | ||
| Lamb meat 200 - 230 1 90 - 120 | ||
| Veal 200 - 230 1 90 - 120 | ||
| Mutton 210 - 230 1 90 - 120 | ||
| Chicken (pieces) 210 - 230 1 75 - 100 | ||
| Fish 190 - 210 2 40 - 50 |
Note: results may vary according to area voltage and material's quality, amount of food and temperatures. Using a cake mould while for baking cakes provides better results.
USING THE TURNSPIT
(\*) Optional
If your stove has a turnspit option please follows recommendations below.
Install the turnspit hook to the fixing hole on the stove cavity. Put the desired food to be cooked on the turnspit and lock with the forks and screws. Install the turnspit on the turnspit motor as shown below and operate the turnspit system using the command knob on the control panel.

- Disconnect the stove from the socket.
- While the oven is operating or shortly after it starts operating, it will be extremely hot. Avoid touching its heating elements.
- Never clean its interior, panel, lid, trays and all other oven parts using tools like hard brushes, a cleaning mesh or a knife. Do not use abrasive, scratching agents and detergents.
- After cleaning the interior of the oven with a soapy cloth, rinse it and then dry it thoroughly with a soft cloth.
- Clean the glass surfaces with a special glass cleaning agent.
- Do not clean the oven with steam cleaners.
- Before opening the oven's top lid, clean any spilled liquid from the lid. Before closing the lid, ensure that the stove table is cooled enough.
- Never use flammable agents like acid, thinner and gasoline when cleaning your oven.
- Do not wash any part of your oven in dishwasher.
Removing the oven door:

natural_image
Illustration of a hand using a tool to cut or install a component near a window (no text or symbols visible)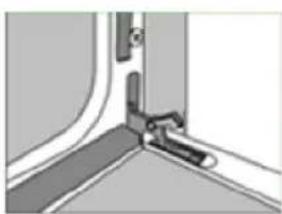
natural_image
Close-up of a mechanical joint or bracket with no visible text or symbols
natural_image
Illustration of a person bending over a wall-mounted device (no text or symbols visible)Changing the oven lamp:
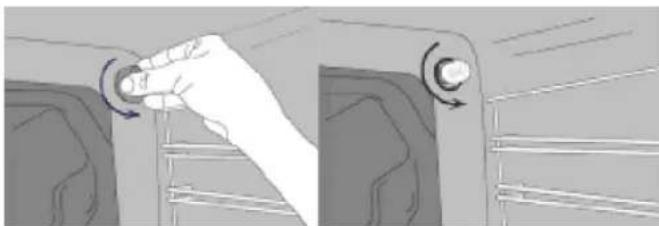
Let the stove's cavity and grill burner or heating elements cool down. Cut off the stove's electrical connection before changing the lamp. Replace it with a 15-25 W, 300 °C temperature resistant lamp.
natural_image
Illustration of a hand pressing down on a mechanical component with rotational arrows (no text or symbols)[you can trust]
2.4. Troubleshooting
Electrical equipment
| Problem Possible Causes Suggested Solutions | ||
| The oven is not working. | Fuse malfunction or automatic fuse blown. | Check the general fuse box and make the necessary corrections if there are any thrown breakers. Check the general fuse box to see if the automatic fuse or the breakers are thrown off. If the problem persists, contact the Customer Support Service for maintenance. |
| The device is unplugged from the grounded power socket. | Make sure the device is plugged in. | |
| The oven light is not working. | The stove's lamp is defective. | Replace the lamp. |
| There is no current. | Check the general fuse box and make the necessary corrections if there are any thrown breakers. Check the general fuse box to see if the automatic fuse or the breakers are thrown off. If the problem persists, contact the Customer Support Service for maintenance. | |
| The oven is not heating. | The stove temperature and/or cooking mode has not been set. | Set the cooking mode and temperature. |
| There is no current. | Check the general fuse box and make the necessary corrections if there are any thrown breakers. Check the general fuse box to see if the automatic fuse or the breakers are thrown off. If the problem persists, contact the Customer Support Service for maintenance. |
Digital Timer/ Display (models with digital timer)
| Problem Possible Causes Suggested Solutions | ||
| The time display is flashing or the clock is lit up. | Occurrence before power failure. | Set the current time. Turn off the cooking mode and reset the desired cooking mode. |
If the problem persists:
- Cut the electricity connection to the stove (turn off the circuit breaker).
- Call the manufacturer, its services agent or a similarly qualified person.
[you can trust]
IMPORTANT
Do not try to repair any appliance parts by yourself.
- Technical Specifications
| SPECIFICATIONS 50 x | 60 |
| Outer width 500 mm | |
| Outer depth 600 mm | |
| Outer height 855 mm | |
| Inner width 392 mm | |
| Inner depth 402 mm | |
| Inner height 324 mm | |
| Lamp power 15 W | |
| Thermostat 50-250 °C | |
| Bottom heating element 800 W | |
| Top heating element 650 W | |
| Grill heating element* 1500 W | |
| Supply voltage* 220-240 V / 380-415 V or 230 V / 400 V AC, 50-60 Hz. | |
| 140 mm highlight 1200 W | |
| 180 mm highlight 1800 W |
Product specifications
| Type 50x60 Vitroceramic Top Plate FreeStanding Electric Stove | |
| Cavity Number 1 | |
| Energy Source Electrical | |
| Volume 52 lt | |
| Energy Consumption / Convection Mode (EC) | 0,717 kWh |
| Energy Efficiency Index (EEI) | 95,6 |
| Energy Class A | |
| Measurement method EN | 60350-1 / Regulation (EU)66/2014 |
INFORMATION FOR DOMESTIC ELECTRIC HOB
natural_image
Simple line drawing of a four-circular object inside a rectangular frame (no text or symbols)ZONE 1ZONE 3
ZONE 2ZONE 4
[you can trust]
| ZONE EXPLANATION TYPE | ||
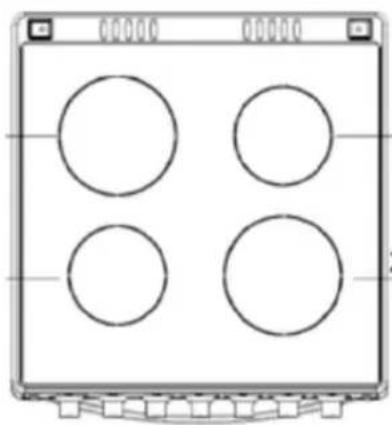
| 1 The | hot plate on the back right 14 cm 1200 W | |
| 2 The | hot plate on the back left 18 cm 1800 W | |
| 3 The | hot plate on the front right 18 cm 1800 W | |
| 4 The | hot plate on the front right 14 cm 1200 W | |
No. 66/2014(EU) Table 5a
| SYMBOL VALUE | UNIT | ||
| Model identification | 50 x 50 cm50 x 60 cm60 x 60 cm | / | / |
| Type of hob | Free standing stove | / | / |
| Number of cooking zones and/or areas | / | 4 | / |
| Heating technology (induction cooking zones and cooking areas, radiant cooking zones, solid plates) | Solid plates cooking zones | / | / |
| For circular cooking zones or areas: diameter of useful surface area per electric heated cooking zone, rounded to the nearest 5 mm | ∅ 14/18 cm | ||
| For non-circular cooking zones or areas: length and width of useful surface area per electric heated cooking zone, rounded to the nearest 5 mm | L W | / | / |
| Energy consumption per cooking zone or area calculated per kg | EC electric cooking | COOKING ZONE 1: 0,195 COOKING ZONE 2: 0,182 COOKING ZONE 3: 0,186 COOKING ZONE 4: 0,195 | Wh/kg |
| Energy consumption for the hob calculated per kg | EC electric hob | 189,7 Wh/kg |
[you can trust]
4. Post-Sale Service
Becken has designed this appliance in order to guarantee maximum reliability. However, if a problem occurs do not attempt to open the appliance - there is a risk of electrical shock. If you are not able to solve the problem, please contact the Customer Support Service of any Worten, Modelo or Continente store in order to be assisted. Worten Equipamentos para o Lar provides a 2-year warranty for manufacturing defects from the date of purchase of the appliance.
WARNING: any attempt to repair the appliance without contacting the manufacturer or seller will void the warranty.
All users must be familiar with these instructions. Knowing what could go wrong can help prevent problems from occurring.
5. Environmental Protection
In order to protect the environment, we strive to reduce the volume of packaging used, limiting it to three easily sorted materials: cardboard, paper and plastic. The appliance is manufactured using recyclable materials after disassembled by a specialized company. Please comply with local regulations concerning the recycling of all materials.
natural_image
Symbol of a trash bin crossed with no visible text or numbers, accompanied by a blank rectangular block below (no text or symbols present)
natural_image
Four black-and-white pictograms of cooking pots with crossed x-marks, no text or symbols present.STOVE DESCRIPTION
natural_image
Illustration of a hand using a tool to adjust or install a component near a window (no text or symbols visible)
natural_image
Close-up of a mechanical joint or bracket with no visible text or symbols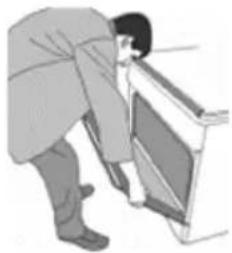
natural_image
Illustration of a person bending over a chair (no text or symbols visible)[you can trust]
natural_image
Illustration of a hand pressing a button on a vehicle door panel (no text or symbols visible)natural_image
Simple line drawing of a four-circular component inside a rectangular frame (no text or symbols)ZONA 1ZONA 3
ZONA 2 ZONA 4
natural_image
Symbol of a trash bin crossed with no text or numbers, representing waste sorting or disposal (no text present)

natural_image
Simple black-and-white icon of a cooking pot with crossed scales (no text or symbols)
natural_image
Simple black-and-white icon of a house with crossed lines indicating prohibition or restriction (no text or symbols)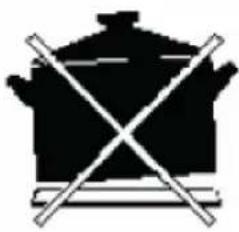
natural_image
Simple black-and-white icon of a cooking pot with crossed x-marks (no text or symbols)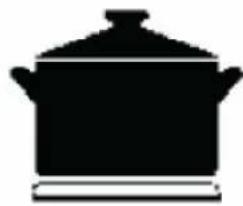
natural_image
Silhouette of a cooking pot with lid and side handles (no text or symbols)DESCRIÇÃO DO FOGÃO

natural_image
Isometric technical drawing of a mechanical housing assembly with internal components and a tool (no text or symbols)2.3. Manutenção
natural_image
Illustration of a hand using a tool to adjust or install a component near a window (no text or symbols visible)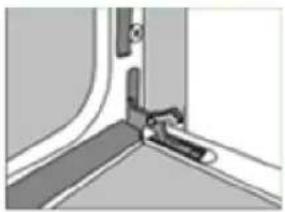
natural_image
Close-up of a mechanical joint or bracket detail (no visible text or symbols)
natural_image
Illustration of a person bending over a chair (no text or symbols visible)natural_image
Illustration of a hand pressing a button on a vehicle door panel, showing rotational motion (no text or symbols)natural_image
Simple line drawing of four empty circles inside a rectangular frame (no text or symbols)ZONA 1ZONA 3
ZONA 2
natural_image
Symbol of a trash bin crossed with no visible text or numbers, accompanied by a horizontal line and a rectangular block below (no text or symbols present)
natural_image
Line drawing of a vintage cooktop with four fans and a side view showing the internal rotation of the stove (no text or symbols)
natural_image
Line drawing of a kitchen appliance with a red upward arrow indicating motion or change (no text or symbols)
natural_image
Line drawing of a mechanical device with a green checkmark and circular annotation (no text or symbols)- Vitroceramic top plate free standing electric stove
- INDEX
- SAFETY INSTRUCTIONS 4
- OPERATING INSTRUCTIONS 12
- SAFETY INSTRUCTIONS
- Important Warnings
- Assistance
- Power Supply
- Power Cord and Other Cables
- Humidity and Water
- Cleaning
- General Precautions
- Operating Instructions
- Product Description
- Product usage
- INSTALLATION
- WARNING!
- USAGE AND DESCRIPTION OF HOB SECTION FOR VITROCERAMIC
- For ring control
- Using an electrical stove:
- USING THE TURNSPIT
- (\*) Optional
- Removing the oven door:
- Changing the oven lamp:
- Troubleshooting
- IMPORTANT
- Post-Sale Service
- Environmental Protection
- Manutenção
Brand : Becken
Model : BFE4915N
Category : Cooker