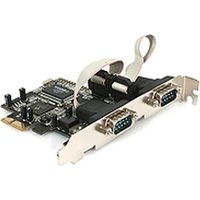
PEX2S550 - Electronic board StarTech.com - Free user manual and instructions
Find the device manual for free PEX2S550 StarTech.com in PDF.


| Product Type | PCI Express Serial Port Card |
| Model | PEX2S550 |
| Number of Ports | 2 |
| Interface | RS-232 |
| Bus Type | PCI Express x1 |
| Data Rate | Up to 921.6 Kbps |
| Connector Type | 2 x DB9 Male (via included bracket) |
| Dimensions | 120 mm x 64 mm x 20 mm |
| Weight | 90 g |
| Power Supply | Powered by PCIe slot (3.3V) |
| Operating Temperature | 0°C to 70°C |
| Storage Temperature | -20°C to 80°C |
| Operating Humidity | 5% to 90% (non-condensing) |
| Chipset | Oxford Semiconductor OXPCIe952 |
| FIFO Buffer | 128 bytes per port (transmit and receive) |
| Compatible Operating Systems | Windows, Linux, macOS |
| Surge Protection | 15 kV ESD protection on serial ports |
| Regulatory Approvals | CE, FCC, RoHS |
| Package Contents | Serial card, low-profile bracket, driver CD |
| Warranty | 2 years |
| Cleaning Instructions | Use dry cloth; avoid liquids and abrasive cleaners |
| Safety Precautions | Install in grounded chassis; disconnect power before installation |
| Spare Parts Availability | Contact StarTech.com support for replacement brackets or cables |
Frequently Asked Questions - PEX2S550 StarTech.com
User questions about PEX2S550 StarTech.com
0 question about this device. Answer the ones you know or ask your own.
Ask a new question about this device
Download the instructions for your Electronic board in PDF format for free! Find your manual PEX2S550 - StarTech.com and take your electronic device back in hand. On this page are published all the documents necessary for the use of your device. PEX2S550 by StarTech.com.
USER MANUAL PEX2S550 StarTech.com
PCI Express Serial Card
1 Port 16650 PCI Express Serial Card
2 Port 16650 PCI Express Serial Card
PEX1S550
PEX2S550
Instruction Manual

natural_image
Close-up of a black electronic circuit board with multiple ports and connectors (no visible text or symbols)Actual product may vary from photo
StarTech.com

The Professionals' Source for Hard-to-Find Computer Parts
FCC Compliance Statement
This equipment has been tested and found to comply with the limits for a Class B digital device, pursuant to part 15 of the FCC Rules. These limits are designed to provide reasonable protection against harmful interference in a residential installation. This equipment generates, uses and can radiate radio frequency energy and, if not installed and used in accordance with the instructions, may cause harmful interference to radio communications. However, there is no guarantee that interference will not occur in a particular installation. If this equipment does cause harmful interference to radio or television reception, which can be determined by turning the equipment off and on, the user is encouraged to try to correct the interference by one or more of the following measures:
- Reorient or relocate the receiving antenna.
- Increase the separation between the equipment and receiver.
- Connect the equipment into an outlet on a circuit different from that to which the receiver is connected.
- Consult the dealer or an experienced radio/TV technician for help.
Use of Trademarks, Registered Trademarks, and other Protected Names and Symbols
This manual may make reference to trademarks, registered trademarks, and other protected names and/or symbols of third-party companies not related in any way to StarTech.com. Where they occur these references are for illustrative purposes only and do not represent an endorsement of a product or service by StarTech.com, or an endorsement of the product(s) to which this manual applies by the third-party company in question. Regardless of any direct acknowledgement elsewhere in the body of this document, StarTech.com hereby acknowledges that all trademarks, registered trademarks, service marks, and other protected names and/or symbols contained in this manual and related documents are the property of their respective holders.
Instruction Manual
Table of Contents
Introduction ....1
Features ....1
Before you begin....1
System requirements ....1
Contents 1
Installation 2
Installing the PCI Express serial card ....2
Driver installation 2
Verifying installation....3
Adjusting COM port addresses 4
Specifications 4
Technical Support ....5
Warranty Information ....5
Instruction Manual
Introduction
Thank you for purchasing a PCI Express Serial Card. This card allows you to add 1 (PEX1S550) or 2 (PEX2S550) independent DB9 or DB25 RS-232 serial ports to your computer, for industrial communication, automation applications and more. The card is compliant with PCI Express Base Specification 1.0a, and offers data transfer rates of up to 230.4Kbps, to help ensure smooth operation of your serial peripherals.
Features
- Compliant with PCI Express base specification rev. 1.0a
• Supports 1x UART serial port
• 1 or 2 independent RS-232 serial ports built-in
• Built-in 16C650 UART with 16 byte transmit-receive FIFO data transfer rates up to 230.4Kbps
• Supports Microsoft Windows 2000/XP/2003 Server
Before You Begin
System Requirements
- PCI Express enabled computer with one available PCI Express slot
- Operating systems supported: Windows 2000/XP/2003
Contents
This package should contain:
- PCI Express serial card (1)
- Software CD ROM (1)
- User's Manual (1)
Instruction Manual
Installation
Installing the PCI Express serial card
- Shut down all power connected to the computer, as well as all devices connected to the computer peripherally (i.e. Printers, Monitors, Scanners etc.). As an added step to ensure safe installation, unplug the power supply from the computer.
- Remove the computer cover. For more detailed instruction on how to perform this step, please refer to the documentation that was included with your computer at the time of purchase.
- Locate an empty PCI Express slot, removing the metal bracket covering the corresponding empty port/socket.
- Position the serial card above the open PCI Express slot, ensuring that the card is properly aligned with the slot. Insert the card firmly into the slot, distributing force evenly across the length of the board. Once inserted, secure the card into the adjoining socket (previously covered by metal bracket), using the correct size screw (if necessary, please consult documentation included with computer at time of purchase).
- Replace the computer cover and re-connect all power to the computer.
Driver installation
Please note: To ensure proper installation, please perform the physical installation prior to installing the accompanying drivers.
Windows 2000:
- Upon rebooting the computer for the first time following the installation of the serial card, Windows will detect the PCI serial card, and prompt for driver installation, with the Found New Hardware Wizard. Please click on Next, to advance to the next screen.
- You will then be notified that This wizard will complete the installation for this device: PCI Simple Communications Controller. Please select Search for a suitable driver for my device (recommended) and click Next.
- The Found New Hardware Wizard will then ask what you want the wizard to do. Please select Search for a suitable driver for my device (recommended) and click on Next.
- At the next screen, please select Specify a location and ensure that all other checkboxes are empty. Click Next.
- Insert the Drivers CD into your CD-ROM/DVD-ROM drive. Here, you can either browse to the folder in which the drivers are located, or type in the exact path. To browse, please click the Browse button, and select D:\PCIe\2S\2000, where D:\ is the letter designated for your CD-ROM/DVD-ROM drive. Click Next, followed by Finish.
Instruction Manual
Windows XP:
- Upon rebooting the computer for the first time following the installation of the serial card, Windows will detect the PCI serial card, and prompt for driver installation, with the Found New Hardware Wizard. Please select Install from a list or specific location (Advanced), then click Next.
- Insert the Drivers CD, and select Include this location in the search, ensuring that this is the only selection made (no other checkmarks present). In the text box provided, either type in D:\PCIe\2S\XP, or browse to this file by clicking the Browse button and navigating to the file. Once the file path has been entered, please click Next.
- If the Hardware Installation window pops up, click Continue Anyways, then Finish.
- You will be required to follow steps 1-3 twice more, for installation to complete. Once finished, please restart your computer for the settings/installation to take effect.
Windows Server 2003:
- Upon rebooting the computer for the first time following the installation of the serial card, Windows will detect the PCI serial card, and prompt for driver installation, with the Found New Hardware Wizard. Please select Install from a list or specific location (Advanced), then click Next.
- Insert the Drivers CD, and select Include this location in the search, ensuring that this is the only selection made (no other checkmarks present). In the text box provided, either type in D:\PCIe\2S\2003, or browse to this file by clicking the Browse button and navigating to the file. Once the file path appears in the text box, please click Next.
- If the Hardware Installation window pops up, click Continue Anyways, then Finish.
- You will be required to follow steps 1-3 twice more, for installation to complete. Once finished, please restart your computer for the settings/installation to take effect.
Verifying Installation
- Right-click My Computer, then click Manage. Click on Device Manager.
- Click on the + symbol located to the left of Ports (COM & LPT). You should see NetMos PCI Serial Port listed (once for PEX1S550, twice for PEX2S550)
- Click on the + symbol located to the left of Multifunction adapters. Here, you should see NetMos 9835 listed(once for PEX1S550, twice for PEX2S550).
Instruction Manual
Adjusting COM Port Addresses
Some serial devices need a specific COM port in order to work. If your serial devices work properly, there is no need to modify the COM port settings.
- From the Device Manager window, double-click on Ports (COM & LPT), then double-click the NetMos PCI Serial Port you wish to change.
- Select the Settings tab and click Advanced.
- Click the down arrow that is next to the COM Port Number box, select a COM port that is not in use, then click OK and close the Device Manager to save the changes.
- (PEX2S550 only): Please follow steps 1-3 again to change the second Serial port if necessary.
Specifications
| Certifications (Regulatory) FCC, CE, RoHS, WEEE | |
| Bus Type PCI Express (PCIe) | |
| Connectors | PEX1S550: DB9 Male Serial x 1PEX2S550: DB9 Male Serial x 2 |
| Maximum Data Transfer Rate | 230.4 Kbps/sec |
| Chipset | PEX1S550: MOSCHIP MCS9820CVPEX2S550: MOSCHIP MCS9835CV |
| Operating system support | Windows: 2000/XP/Server 2003 |
| Operating Temperature | 0°C - 70°C |
| Data bits | 5,6,7,8-bit |
| Parity | Even, odd, none, or force parity generations |
| Dimensions | 92 x 21 x 120mm |
| Weight | PEX1S550: 90gPEX2S550: 100g |
Instruction Manual
Technical Support
StarTech.com's lifetime technical support is an integral part of our commitment to provide industry-leading solutions. If you ever need help with your product, visit
www.startech.com/support and access our comprehensive selection of online tools, documentation, and downloads.
Warranty Information
This product is backed by a lifetime warranty. In addition, StarTech.com warrants its products against defects in materials and workmanship for the periods noted, following the initial date of purchase. During this period, the products may be returned for repair, or replacement with equivalent products at our discretion. The warranty covers parts and labor costs only. StarTech.com does not warrant its products from defects or damages arising from misuse, abuse, alteration, or normal wear and tear.
Limitation of Liability
In no event shall the liability of StarTech.com Ltd. and StarTech.com USA LLP (or their officers, directors, employees or agents) for any damages (whether direct or indirect, special, punitive, incidental, consequential, or otherwise), loss of profits, loss of business, or any pecuniary loss, arising out of or related to the use of the product exceed the actual price paid for the product.
Some states do not allow the exclusion or limitation of incidental or consequential damages. If such laws apply, the limitations or exclusions contained in this statement may not apply to you.
About StarTech.com
StarTech.com is “The Professionals’ Source for Hard-to-Find Computer Parts”. Since 1985, we have been providing IT professionals with the quality products they need to complete their solutions. We offer an unmatched selection of computer parts, cables, server management solutions and A/V products and serve a worldwide market through our locations in the United States, Canada, the United Kingdom and Taiwan.
Visit www.startech.com for complete information about all our products and to access exclusive interactive tools such as the Parts Finder and the KVM Reference Guide. StarTech.com makes it easy to complete almost any IT solution. Find out for yourself why our products lead the industry in performance, support, and value.
- PCI Express Serial Card
- FCC Compliance Statement
- Use of Trademarks, Registered Trademarks, and other Protected Names and Symbols
- Instruction Manual
- Table of Contents
- Introduction
- Features
- Before You Begin
- System Requirements
- Contents
- Installation
- Installing the PCI Express serial card
- Driver installation
- Windows 2000:
- Windows XP:
- Windows Server 2003:
- Verifying Installation
- Adjusting COM Port Addresses
- Technical Support
- Warranty Information
- Limitation of Liability
- About StarTech.com
Brand : StarTech.com
Model : PEX2S550
Category : Electronic board