
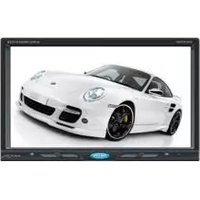
MPD107O - Car radio ORION - Free user manual and instructions
Find the device manual for free MPD107O ORION in PDF.


| Product Type | Car Stereo (Single DIN) |
| Brand | Orion |
| Model | MPD107O |
| Dimensions (W x H x D) | 178 x 50 x 160 mm |
| Weight | 0.6 kg |
| Power Supply | 12V DC (negative ground) |
| Max Power Output | 4 x 50 Watts |
| Display | LCD with backlight |
| Radio Bands | FM, AM |
| Preset Stations | 30 (18 FM + 12 AM) |
| Playback Media | USB, SD card, AUX input |
| Audio Formats | MP3, WMA, WAV |
| Bluetooth | Yes (hands-free calling and audio streaming) |
| RCA Pre-outs | 2 pairs (front/rear) |
| Remote Control | Included (IR) |
| Steering Wheel Control | Compatible (adapter required) |
| Cleaning Instructions | Wipe with dry, soft cloth; avoid solvents |
| Safety Precautions | Disconnect battery before installation; use fuses as specified |
| Spare Parts / Repairability | Contact authorized service center; no user-serviceable parts |
| Warranty | 1 year limited warranty |
Frequently Asked Questions - MPD107O ORION
User questions about MPD107O ORION
0 question about this device. Answer the ones you know or ask your own.
Ask a new question about this device
Download the instructions for your Car radio in PDF format for free! Find your manual MPD107O - ORION and take your electronic device back in hand. On this page are published all the documents necessary for the use of your device. MPD107O by ORION.
USER MANUAL MPD107O ORION
ORION MPD-107O CAR MP3 RECEIVER INSTRUCTIONS
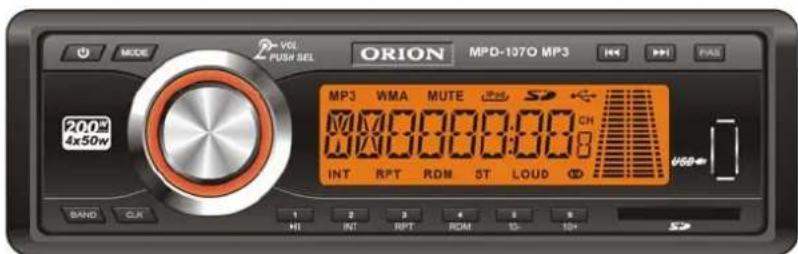
WELCOME
Thank you for purchasing our product. Please read all instructions carefully before operation, to ensure your complete understanding and to obtain a longer service life from the unit.
PRECAUTIONS
The unit can only be used in 12V negative ground system.
·Before installation, Please disconnect the car battery terminal to prevent short circuit.
- When replacing the fuse, be sure to use one matching the amperage rating stated on the original fuse, otherwise the unit will perhaps be damaged.
·As the laser beam used in this compact disc player is harmful to the eyes, do not attempt to disassemble the cabinet.
·Do not allow metal or other things getting into the unit, otherwise the unit will perhaps be damaged.
- If your car is parked in direct sunlight resulting in a considerable rise in temperature inside the car, allow the unit to cool off before operation.
CONTENTS
Front Panel....2
Power On/Off....3
Clock Setting....3
Radio Operation....4
Mp3 Playing 7
SD Card playing....9
Sound Adjustment....9
Maintenance....10
Trouble Shooting....10
Front Panel
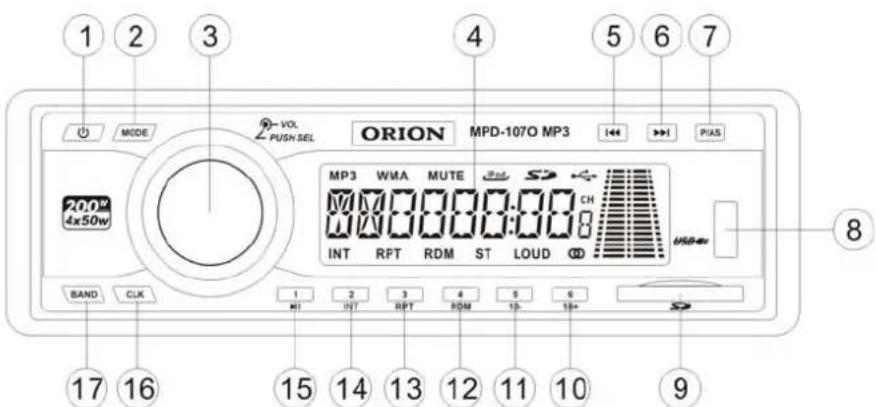
- Power on/off
- Mode choice
- Volume adjustment/function menu choice
- LCD display
- Tune down/previous song
- Tune up/next song
- Tuning/auto store
- USB interface
- SD Card interface
- Preset station 6/forward overleap 10 songs
- Preset station5/reverse overlap 10 songs
- Preset station4/random play
- Preset station3/repeat play
- Preset station2/scan play
- Preset station1/play&pause
- Clock
- Band choice

- MP3 play indicator
- WMA play indicator
- SD card indicator
- USB indicator
- Dynamic Level Indicator
- Preset station indicator
- FM stereo indicator
- Loud indicator
- Random play indicator
- Repeat play indicator
- Scan play indicator
- Main display area
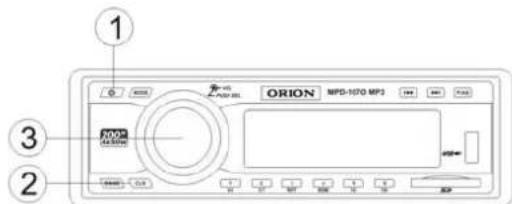
Power on/off

-
Press the PWR button to power on.
-
Press the PWR button again to power off.
Clock setting
·The time starts at 0:00 in default when power on.
The format of time is 24 hours.
0:00
- Press the CLK button, the time displays on LCD.
0:01
- Press and hold the CLK button (over 1 second), the "hour" and "minute" will flash in LCD.
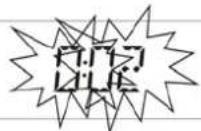
- Screw the knob toward the left side to adjust the "minute", and toward the right side to adjust the "hour".
10:26
- It will return the foregone status after 5 seconds without any operation.
- Display the time when working:
Press the CLK button to display the time, press again to cancel. the longest time of display is 5 seconds.
Radio operation
- The frequency ranges of FM1 FM2 and FM3 are identical (FM1:65-74MHz, FM2/FM3:87.5-108.0MHz).
The frequency ranges of AM1 and AM2 are identical (522-1620KHz).
- If turn off during radio receiving, and turn on again, it will still stay on the former frequency.
- If FM broadcasting in stereo and the signal is good, the indication sign "∅" will light on.
Auto/Manual seek station
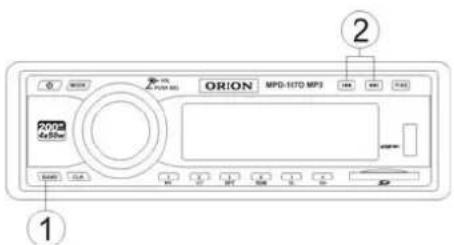
- Press the BND button to choose a wave band among FM1 FM2 FM3 AM1 and Am2.
- Manual tuning: Short press ◀◀ button, the frequency will increase or decrease step by step.
Auto tuning: Long press ◀◀ ▶▶ button more than 2 seconds, radio automatic upward or downward search broadcasting station, when searched the broadcasting station, it will stop search.
Auto preset station

-
Press the BND button to choose a wave band among FM1 FM2 FM3 AM1 and AM2.
-
Press PS/AS more than 2 seconds to preset station automatically. The presetting starts from the lowest frequency. During the course, the frequency changes quickly. Press again to stop the presetting.

·Maximum 6 stations can be preset in each wave band, and the station with stronger signal will be preset preferential.
- It will scan-play all preset stations, then play the station which corresponding to the button 1.

·Preset again on the same wave band, the formerly preset stations will be replaced.

Manual preset station

-
Press the BND button to choose a wave band among FM1 FM2 FM3 AM1 and AM2.
-
Press ▶▶ ( ◀◀) button or to preset a station.
-
Press one of the 1-6 buttons more than 2 seconds, the current station will be stored in the corresponding button.

- Repeat these steps, maximum 6 stations can be preset in each wave band.
- Preset again on the same wave band, the formerly preset stations will be replaced.
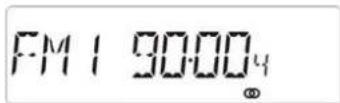
Tune in the preset station

-
Press the BND button to choose a wave band among FM1 FM2 FM3 AM1 and AM2.
-
Press one of the 1-6 buttons to play the corresponding station. The wave band, station, frequency will display on the screen.
- Press the right knob to scan-play all stations per 5 seconds, and skip over stations without signal. Press again to stop.
Mp3 playing

-
Press the PWR button to power on.
-
Connect flash disk or MP3 player to the USB interface.

- The total number of MP3 songs will be displayed on the screen after 10 seconds.

- Press the MOD button to choose a mode you want to play when a flash disk, MP3 player, has
connected.
- Song's number, elapsed time and information about MP3 such as folder's name song's name singer's name and so on will be showed on the screen circularly.
·The details display depends on MP3 itself.
- No support for display of CHINESE.
Press the following buttons to operate MP3 playing

| Buttons | Functions |
| ▶II | •Play/pause. |
| ▶I | •Press the button to skip to the next song.•Press and hold the button to fast search forward within one song until the required part, release the button to start playing from the point. the next song will start to play when search forward beyond one song. |
| |◀| | •Press the button to skip to the previous song.•Press and hold the button to fast search backward within one song until the required part, release the button to start playing from the point. The current song will start to play again when search backward beyond one song. |
| 5/10- | •Press the button reverse overleap 10 songs, Press and hold the button more than 1 second to choose a folder. |
| 6/10+ | •Press the button forward overleap 10 songs, Press and hold the button more than 1 second to choose a folder. |
Int play
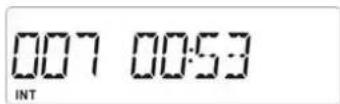
- Press the 2/INT button to play the beginning 10 seconds music of all songs in sequence from the next song, the “INT” indicator will be lighted. Press again to cancel.
Repeat play
- The current song will be replayed when the 3/RPT button is pressed, the "RPT" indicator will be lighted. Press again to cancel.

Random play
- It will randomly play all songs when the 4/RDM button is pressed, the "RDM" indicator will be lighted. Press again to cancel.

SD Card playing
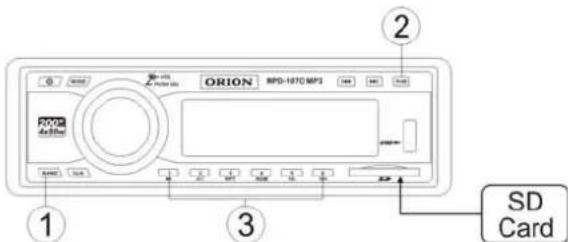
-
Connect the SD card to the SD interface.
-
Press the MOD button to choose which mode you want to play when the SD card have connected.
-
The other operation is same as the "MP3 playing".
Sound adjustment

- Press the PWR button to power on.
- Press the knob to select the corresponding item from BAS/TRE/BAL/FAD/EQ/LOUD/VOL.
- Screw the knob to adjust every item as your needs.
| Items | VOL- VOL+ | |
| BAS | Reduce the volume of BASS | Increase the volume of BASS |
| TRE Reduce the volume of treble Reduce the volume of treble | ||
| BAL Reduce the volume of right loudspeaker | Reduce the volume of left loudspeaker | |
| FAD Reduce the Volume of the Front Loudspeaker | Reduce the Volume of the Back Loudspeaker | |
| EQ EQ function Off EQ function On | ||
| Loud Loudness function Off Loudness function On | ||
| VOL | Reduce volume | Increase volume |
·Screw the left knob without pressing to adjust volume.
Settings of sound effects
-4 optional sound effects: POP /CLAS/ROC.
- Press the left knob to select "EQ OFF" from "BAS/TRE/BAL/FAD/EQ OFF".

- Press the knob to select which sound effect you want from "EQ OFF/POP /CLAS/ROC".
- "EQ OFF" is default, namely sound effect is disable.
Maintenance
Clean Front Panel
- When the front panel gets contaminated, please wipe the surface with a soft dry cloth.
- Don't use solvent such as benzene, alcohol and so on.
Trouble shooting
| SYMPTOMS | CAUSES | SOLUTIONS |
| The CD can’t play The power connection is not correctThe volume control was lower | Adjust the volumeCheck the 12V and ground connections | |
| No power The vehicle ignition is switched offThe fuse is blown | Switch the ignition to the “ON” or “ACC” positionReplace the fuse with a same one | |
| No radio signal The antenna cable is not connected | Insert the antenna cable firmly into the antenna jack on the unit | |
| The radio does not stop on any stations when tuning. | The signals are weak. Select a station with manual tuning. |
- Design and specifications are subject to change without notice.

- ORION MPD-107O CAR MP3 RECEIVER INSTRUCTIONS
- WELCOME
- PRECAUTIONS
- CONTENTS
- FRONT PANEL
- POWER ON/OFF
- CLOCK SETTING
- RADIO OPERATION
- AUTO/MANUAL SEEK STATION
- AUTO PRESET STATION
- MANUAL PRESET STATION
- TUNE IN THE PRESET STATION
- MP3 PLAYING
- INT PLAY
- REPEAT PLAY
- RANDOM PLAY
- SD CARD PLAYING
- SOUND ADJUSTMENT
- SETTINGS OF SOUND EFFECTS
- MAINTENANCE
- TROUBLE SHOOTING
Brand : ORION
Model : MPD107O
Category : Car radio