
CMG 9428 DS UK - Microwave CANDY - Free user manual and instructions
Find the device manual for free CMG 9428 DS UK CANDY in PDF.


| Product Type | Microwave with Grill |
| Brand | Candy |
| Model | CMG 9428 DS UK |
| Capacity | 28 liters |
| Microwave Power | 900 watts |
| Grill Power | 1000 watts |
| Control Type | Digital touch + push button |
| Display | LED digital display |
| Number of Power Levels | 10 |
| Defrost Function | Yes, by weight and time |
| Auto Cook Programs | 8 preset programs for common dishes |
| Turntable | Glass turntable, 320 mm diameter |
| Interior Light | Yes, automatic on during cooking |
| Child Safety Lock | Yes, activates by holding STOP button for 3 seconds |
| Dimensions (H x W x D) | 310 x 510 x 400 mm |
| Weight | 15.5 kg |
| Voltage | 230 V, 50 Hz |
| Rated Input Power | 1300 watts |
| Cleaning and Maintenance | Wipe interior with damp cloth; avoid abrasive cleaners |
| Accessories Included | Glass turntable, roller ring, grill rack |
| Energy Efficiency Class | A |
| Repairability Index | 6.5 out of 10 |
| Spare Parts Availability | Spare parts available for at least 7 years after production |
Frequently Asked Questions - CMG 9428 DS UK CANDY
User questions about CMG 9428 DS UK CANDY
0 question about this device. Answer the ones you know or ask your own.
Ask a new question about this device
Download the instructions for your Microwave in PDF format for free! Find your manual CMG 9428 DS UK - CANDY and take your electronic device back in hand. On this page are published all the documents necessary for the use of your device. CMG 9428 DS UK by CANDY.
USER MANUAL CMG 9428 DS UK CANDY
Read these instructions carefully before using your microwave oven, and keep it carefully.
If you follow the instructions, your oven will provide you with many years of good service.
SAVE THESE INSTRUCTIONS CAREFULLY

PRECAUTIONSATOAAVOIDAPOSSIBLEAEXPOSURE TOAEXCESSIVEAMICROWAVEAENERGY
(a)(Do(not(attempt(to)operate(this)oven(with(the)door(open(since(this)can result(in(harmful(exposure(to)microwave(energy.(It(is important(not(to break(or(tamper(with(the)safety(interlocks.
(b)(Do(not(place(any(object(between(the(oven(front(face(and(the(door(or(allow soil(or(cleaner(residue(to(accumulate(on(sealing(surfaces.
(c)(WARNING:(If(the(door(or(door(seals(are(damaged,(the(oven(must(not be(operated(until(it(has(been(repaired(by(a(competent(person.
ADDENDUM
If(the(apparatus)is(not)maintained(in(a)good(state)of(cleanliness,(its(surface)could be(degraded)and(affect(the)lifespan(of(the(apparatus)and(lead(to(a)dangerous situation.
Specifications
| Model: | CMG 9428 DS |
| Rated(Voltage: | 230V~50Hz |
| Rated(Input(Power(Microwave): | 1450W |
| Rated(Output(Power(Microwave): | 900W |
| Rated(Input(Power(Grill): | 1200W(up)+500W(down) |
| Oven(Capacity: | 28L |
| Turntable(Diameter: | 315 mm |
| External(Dimensions(LxWxH): | 520(x4(x335(mm4(4 |
| Net(Weight: | Approx. 16.8 kg |
IMPORTANTASAFETYAINSTRUCTIONS
WARNING
To(reduce(the(risk(of(fire,(electric(shock, injury(to)(persons or(exposure to(excessive(microwave(oven(energy(when using(your appliance,(follow(basic(precautions,(including the(following:
- (Warning: (Liquids) and (other) foods (must not be heated in sealed containers (since they are liable to explode.
2.(Warning:(It(is(hazardous(for(anyone(other than(a)competent(person(to/remove(a cover(which(gives(protection(against exposure(to(microwave(energy.
3.(Warning:(Only(allow(children(to(use(the oven(without(supervision(when(adequate instructions(have been(given(so(that(the child(is(able(to(use(the(oven(in(a(safe way and(understand(the(hazards(of(improper use.
4.(Warning:(When(the)appliance(is)operated in(the)combination(mode,(children)should only(use(the)oven(under(adult)supervision due(to(the)temperatures(generated. (only(for(grill(series)
5.(Only(use)utensils(suitable(for(use)(in microwave(ovens.
6.(The(oven)(should(be)(cleaned(regularly(and any(food)(deposits)(should(be)(removed.
7.(Read(and/follow(the(specific:"PRECAUTIONS(TO(AVOID(POSSIBLE(EXPOSURE TO(EXCESSIVE(MICROWAVE(ENERGY").
8.(When(heating(food(in)plastic(or)(paper containers,(keep(an)eye(on(the oven(due to(the)possibility(of(ignition.
9.(If(smoke(is(observed,(switch(off(or(unplug the(appliance(and(keep(the doorway(closed in(order(to(stifle(any(flames.
10.(Do(not(overcook)(food.
11.(Do(not(use(the(oven(cavity(for(storage purposes.(Do(not(store(items,such(as bread,(cookies,(etc.(inside(the(oven. - (Remove(wire(twist-ties(and(metal(handles from(paper(or(plastic(containers/bags before(placing(them(in(the(oven.
13.(Install(or)+locate(this)oven(only)(in accordance(with(the)installation instructions(provided.
14.(Eggs(in(the(shell(and(whole(hard-boiled eggs(should(not(be)heated(in(microwave ovens(since(they(may(explode,(even after(microwave(heating(has(ended.
15.(Use(this)appliance(only)for(its)intended uses(as)described(in)manual.(Do(not use)corrosive(chemicals)(or(vapors in(this)appliance.(This)oven(is)especially designed(to)heat.(It(is)not(designed(for industrial(or(laboratory(use.
16.(If(the(supply(cord)is(damaged,(it(must be(replaced(by(the(manufacturer,(its service(agent(or(simarily(qualified persons(in(order(to(avoid(a(hazard.
17.(Do(not(store(or(use(this(appliance outdoors.
18.(Do(not(use(this(oven(near(water,(in(a wet(basement(or(near(a(swimming pool.
19.(The(temperature(of(accessible(surfaces may(be(high(when(the)(appliance(is operating.(Keep(cord(away(from(heated surface,(and(do(not(cover(any(events on(the(oven.
20.(Do(not(let(cord(hang(over(edge(of(table or(counter.
21.(Failure(to)maintain(the(oven)(in(a(clean condition(could(lead(to)deterioration of(the(surface(that(could(adversely affect(the life(of(the(appliance(and possibly(result(in(a(hazardous(situation.
22.(The contents(of(feeding(bottles)and baby(food(jars)shall(be(stirred(or(shaken and(the(temperature(checked(before consumption,(in(order(to(avoid(burns.
23.(Microwave(heating(of)beverages(can result(in(delayed(eruptive)boiling, therefore(take(care(when(handling(the container.
ToAReduceAtheARiskAofAlnjuryAtoAPersons GroundingAInstallation
DANGER
Electric Shock Hazard Touching some of the internal components can cause serious personal injury or death. Do not disassemble this appliance.
WARNING
Electric Shock Hazard
Improper use of the grounding can result in electric shock. Do not plug into an outlet until appliance is properly installed and grounded.
CLEANING
Be sure to disconnect the
oven from the power supply.
- Clean the inside of the oven after using with a slightly damp cloth.
- Clean the accessories in the usual way in soapy water.
- The door frame and seal and neighbouring parts must be cleaned carefully with a damp cloth when they are dirty.
This appliance must be grounded. In the event of an electrical short circuit, grounding reduces the risk of electric shock by providing an escape wire for the electric current. This appliance is equipped with a cord having a grounding wire with a grounding plug. The plug must be plugged into an outlet that is properly installed and grounded.
Consult a qualified electrician or serviceman if the grounding instructions are not completely understood or if doubt exists as to whether the appliance is properly grounded. If it is necessary to use an extension cord, use only a 3-wire extension cord.
- A short power-supply cord is provided to reduce the risks resulting from becoming entangled in or tripping over a longer cord.
- If a long cord set or extension cord is used:
1) The marked electrical rating of the cord set or extension cord should be at least as great as the electrical rating of the appliance.
2) The extension cord must be a grounding-type 3-wire cord.
3) The long cord should be arranged so that it will not drape over the counter top or tabletop where it can be pulled on by children or tripped over unintentionally.
UTENSILS
CAUTION
PersonalAlInjuryAHazard
It(is(hazardous(for(anyone other(than a(competent(person to(carry out(any(service or(repair operation(that involves(the(removal of(a cover(which)gives protection against(exposure to(microwave energy.
See(the(instructions(on)"Materials(you(can(use in microwave(oven(or(to(be(avoided(in(microwave oven." There(may(be(certain(non-metallic(utensils(that(are not safe(to(use(for(microwaving.(If(in(doubt, you(can(test(the utensil(in(question(following(the(procedure(below.
UtensilATest:
- Fill a microwave-safe container with 1 cup of cold water((250ml) along(with(the utensil(in(question.
2.(Cook on(maximum(power for(1(minute. - Carefully feel the utensil. If the empty utensil is warm,(do not(use(it for(microwave(cooking.
4.(DoAnotAexceedA1AminuteAcookingAtime.
MaterialsAyouAcanAuseAinAmicrowaveAoven
UtensilsARemarks
| Aluminum(foil(Shielding(only.(Small(smooth pieces(can(be(used(to(cover(thin(parts(of meat or poultry to prevent overcooking. Arcing can occur if foil is too close to oven walls. The foil should be at least 1 inch (2.5cm) away from oven(walls. | |
| Browning(dish | Follow(manufacturer's(instructions.(The(bottom(of(browning(dish(must(be at least 3/16 inch (5mm) above the turntable. Incorrect usage may cause the(turntable(to(break. |
| Dinnerware | Microwave-safe(only.(Follow(manufacturer's instructions.(Do not(use cracked(or(chipped(dishes. |
| Glass(jars | Always remove lid. Use only to heat food until just warm. Most glass jars are(not(heat(resistant and(may break. |
| Glassware | Heat-resistant oven glassware only. Make sure there is no metallic trim. Do(not(use(cracked or(chipped dishes. |
| Oven(cooking bags | Follow manufacturer's instructions. Do not close with metal tie. Make slits(to(allow(steam to(escape. |
| Paper(plates and(cups | Use for short-term cooking/warming only. Do not leave oven unattended while(cooking. |
| Paper(towels | Use to cover food for reheating and absorbing fat. Use with supervision for(a(short-term(cooking only. |
| Parchment paper | Use as a cover to prevent splattering or a wrap for steaming. |
| Plastic | Microwave-safe(only.(Follow(the manufacturer's(instructions. Should(be labeled "Microwave Safe". Some plastic containers soften, as the food inside gets hot. "Boiling bags" and tightly closed plastic bags should be slit,(pierced(or(vented as(directed by(package. |
| Plastic.wrap | Microwave-safe only. Use to cover food during cooking to retain moisture. Do not allow plastic wrap to touch food. |
| Thermometers(Microwave-safe(only((meat(and candy(thermometers). | |
| Wax paper | Use as a cover to prevent splattering and retain moisture. |
MaterialsAtoAbeAavoidedAinAmicrowaveAoven
UtensilsARemarks
| Aluminum tray | May cause arcing. Transfer food into microwave-safe dish. |
| Food carton with metal handle | May cause arcing. Transfer food into microwave-safe dish. |
| Metal or metal-trimmed utensils | Metal shields the food from microwave energy. Metal trim may cause arcing. |
| Metal twist ties | May cause arcing and could cause a fire in the oven. |
| Paper bags | May cause a fire in the oven. |
| Plastic foam | Plastic foam may melt or contaminate the liquid inside when exposed to high temperature. |
| Wood | Wood will dry out when used in the microwave oven and may split or crack. |
SETTINGAUPAYOURAOVEN
NamesAofAOvenAPartsAandAAccessories
Remove the oven and all materials from the carton and oven cavity.
Your oven comes with the following accessories:
Ceramic Plate 1
Instruction Manual 1
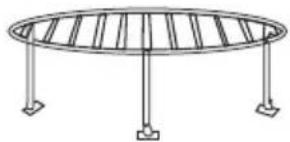
Grill Rack 1

Grill Rack
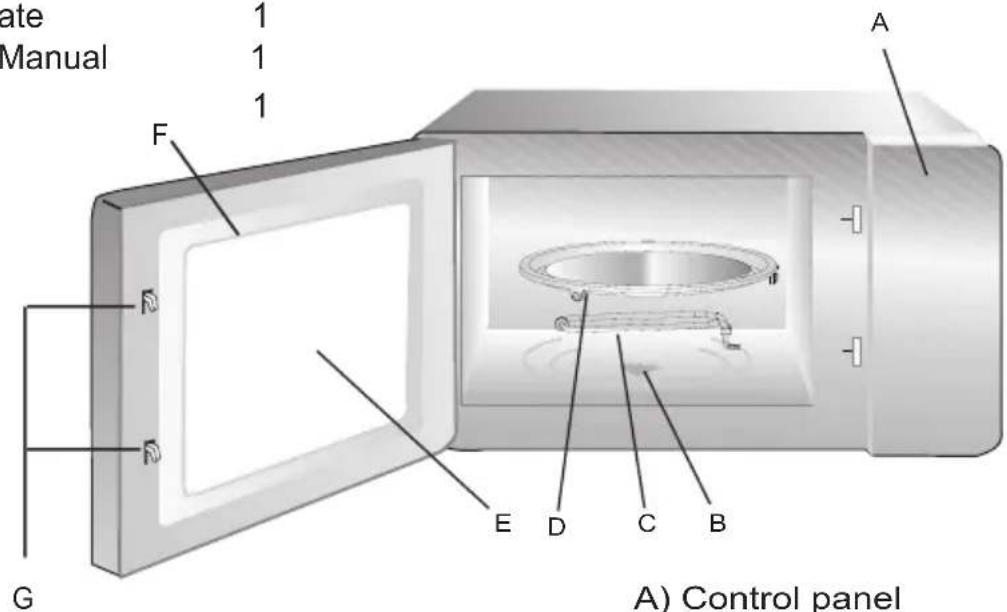
A) Control panel
B) Turntable shaft
C) Grill heater
D) Ceramic plate
E) Observation window
F) Door assembly
G) Safety interlock system
Shut off oven power if the door is opened during operation.
UTENSIL INSTRUCTIONS
| Cooking States | Utensil | Sample | |
| Microwave |  | Ceramic Plate+Grill Rack | |
| Combi | 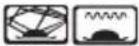 | ||
| Defrost |  | ||
| Vegetable |  | ||
| Auto Reheat |  | ||
| Meat |  | ||
| Pasta |  | ||
| Potato |  | ||
| Soup |  | ||
| Grill |  | Ceramic Plate | |
| Chicken |  | ||
| Pizza |  | ||
For better cooking results, we suggest to cook under the following two ways:
1) When in the microwave, Combi and defrost states, please use the ceramic plate with the grill rack to cook". Please put the food on the grill rack directly;
2) When in the grill states, use the ceramic plate only. Please put the food on the ceramic plate directly.
Turntable Installation

a. Never place the ceramic plate upside down. The ceramic plate should never be restricted.
b. If ceramic plate cracks or breaks, contact your nearest authorized service center.
Countertop Installation
Remove all packing material and accessories. Examine the oven for any damage such as dents or broken door. Do not install if oven is damaged.
Installation
- Select a level surface that provide enough open space for the intake and/or outlet vents.
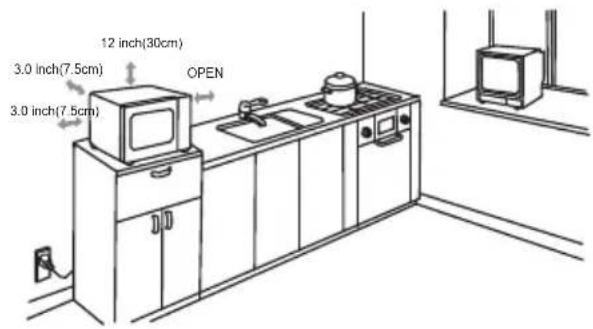
A minimum clearance of 3.0 inches (7.5cm) is required between the oven and any adjacent walls. One side must be open.
(1) Leave a minimum clearance of 12 inches (30cm) above the oven.
(2) Do not remove the legs from the bottom of the oven.
Cabinet: Remove any protective film found on the microwave oven cabinet surface. Do not remove the light brown Mica cover that is attached to the oven cavity to protect the magnetron.
(3) Blocking the intake and/or outlet openings can damage the oven.
(4) Place the oven as far away from radios and TV as possible. Operation of microwave oven may cause interference to your radio or TV reception.
- Plug your oven into a standard household outlet. Be sure the voltage and the frequency is the same as the voltage and the frequency on the rating label.
WARNING: Do not install oven over a range cooktop or other heat-producing appliance. If installed near or over a heat source, the oven could be damaged and the warranty would be void.
The accessible surface may be hot during operation.
OPERATION
This microwave oven applies modern electronic control to adjust cooking parameters to(meet(your(needs(better).
1. ClockASetting
When the microwave oven is plugged into a wall outlet, the oven display"0:00".
1)(Press)("the(hour(figures(flash.
2)(Turn)("(to(adjust(the(hour(figures(within(0-23.
3)(Press)("", the(minute(figures(flash.
4)(Turn)("(to)adjust(the(minute(figures(within(0-59.
5)(Press)("(to(finish(clock(setting.
Note: During clock setting, if you press " STOP "pad, the clock setting will(be(exit.
2.APre-SetAfunction
Note:(Clock(must)be set(at first.
1) Input the cooking program you need. Three stages can be set at most. (pre-set(for(defrosting(is not available.)
2)(Press("", the(hour(figures(flash.
3)(Turn)("(to)adjust(the(hour(figures.
4)(Press)("",(the(minute(figures(flash.
5)(Turn)("(to)adjust(the(minute(figures.
6)(Press(" + 60" ◊ "(to(finish(the(pre-set(function.
Note: It will not function if the clock not set at first. If the pre-set time arrives but the(oven)(door)(is)(closed, (the(microwave(oven(will(cook(automatically(after alarming(once, otherwise, (the(oven(will(cancel(the(setting(after)alarming(once.
3. Microwave cooking
1) Press "to choose microwave power as the microwave power chart;
2) Turn " to adjust the cooking time;
3) Press " " to start cooking or press
" "sto cancel the setting.
Microwave Power Chart
| Press Times | 1 | 2 | 3 | 4 | 5 | Utensil |
| Power | High | Med.High | Med. | Med.Low | Low |  |
| Display | P100 | P80 | P50 | P30 | P10 |
NOTE: the step quantities for the adjustment time of the coding switch are as follow:
1) Press "to choose grill power as the grill power chart;
2) Turn " " to adjust the cooking time;
3) Press "4 to start cooking.
Grill Power Chart
| Press Times | Display | Up Grill Power | Down Grill Power | Utensil |
| 1 | G - 1 | 100% |  | |
| 2 | G - 2 | 100% | 100% | |
| 3 | G - 3 | 100% |
5. Microwave +Grill cooking
1)(Press "("to)choose(combi.(power(as(the(combination(power(chart;
2)(Turn "("to)adjust(the(cooking(time;
3)(Press(")("to start(cooking.
Combination Power Chart
| Press Times | Power | Display | Microwave Power | Grill Power | Utensil |
| 1 | Combi. 1 | C - 1 | 30% | 70% |  |
| 2 | Combi. 2 | C -2 | 55% | 45% | |
| 3 | Combi. 3 | C - 3 | 24% | 76% |
6. Start/Express
1) (When(the(oven(is(in(the(waiting(states,(press("6p")o
start(cooking(with(full(microwave(power.(Each(press(will(add(one(minute.
2)(In(grill,(micro.(or(combi.(cooking(state,(each(press(on("f"60" ◇ will(add(one(minute's(cooking(time. In(multi-section(cooking(state,(the(time(can(be added(only(in(the(lastsection.(The(max.(time(is(95(minutes.
3)(Turn)("(anticlockwise(to(choose(cooking(time,(and(then(press("to(start/cooking(with100%(microwave(power.
7. Defrost by Weight
1)(Press("once(to(choose(weight(defrost(function (dEF1).
2)(Turn)("(to(select(the(weight(of(food.
3)(Press)("(46)(start(defrosting(.
8. Defrost by Time
1)(Press("two choose timefrost(function (dEF2).
2)(Turn)("(to(select(the(cooking(time.
3)(Press(" + 60") "(to(start(defrosting(
Note: When defrost, please use the ceramic plate with grill rack " ", as indicated in the UTENSIL INSTRUCTION.
9.AAutoAMenu
1) Turn "clockwise to choose the menu you want, and "A-1", "A-2" to "A-8" will display as the auto menu chart.
2) Press " + 60" confirm.
3) Turn " " to select the weight of food.
4) Press " + to start the cooking.
Note: APleaseApayAattentionAtoAthisApoint
Chicken and frozen pizza should be roasted on the ceramic plate directly.
10.AMulti-sectionACooking
At most 3 sections can be input for cooking. In multi-section cooking, if there is one section for automatic defrosting, then automatic defrosting shall be placed in the first section.
Example: If you want to cook the food with 100% microwave power for 10 minutes+ 80% microwave power for 15 minutes. Do it as following:
1) Press "once, "P100" displays;
2) Turn " " to adjust the cooking time of 10 minutes;
3) Press " twice, "P80" displays;
4) Turn "" to adjust the cooking time of 15 minutes;
5) Press " + 60" start cooking.
11.AChildASafeALock
Lock: Press "53 seconds, after a long "deep". it shows and enters the Locked status.
Unlock: Press " 50 seconds," " disappeared 80.30" bit returns to normal status.

12. Checking Performance
(1) Clock(checking
During(cooking(process, (press)")to(check(the(current(time. In(pre-set(state, (press)")to(check(the(pre-set(time.
(2) Power(checking
In(the(Micro.or(Combi.(cooking(mode,(press("o r " (" t check(and(the(power(level(will(display(for(4(seconds. In(the(Grill(cooking(mode,(press("to(check(grill(type.
Pay special attention please :
The(maximum(cooking(time)that(can)be(set(for(,)) " " " " and(function(are(95(minutes.
Auto Menu Chart
Please refers to the following table for better use of Auto Menu.
| Menu Weight(g) | Display | Utensil | |
| Vegetable | 200 | 200 |  |
| 300 | 300 | ||
| 400 | 400 | ||
| 500 | 500 | ||
| Auto Reheat | 150 | 150 | |
| 250 | 250 | ||
| 350 | 350 | ||
| 400 | 400 | ||
| Meat | 200 | 200 | |
| 300 | 300 | ||
| 350 | 350 | ||
| 400 | 400 | ||
| 500 | 500 | ||
| 600 | 600 | ||
| Pasta | 50 (water 450g) | 50 | |
| 100(water 800g) | 100 | ||
| 150(water 1200g) | 150 | ||
| Potato | 1(approximately230g) | 1 | |
| 2(approximately460g) | 2 | ||
| 3(approximately690g) | 3 | ||
| Soup | 500 | 500 | |
| 750 | 750 | ||
| 1000 | 1000 | ||
| Roast Chicken | 600 | 600 | 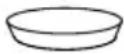 |
| 1000 | 1000 | ||
| 1400 | 1400 | ||
| Roast Pizza | 300 | 300 | |
| 400 | 400 | ||
| 500 | 500 | ||
| 600 | 600 | ||
Trouble shooting
| Normal | |
| Microwave oven interfering TV reception | Radio and TV reception may be interfered when microwave oven operating. It is similar to the interference of small electrical appliances, like mixer, vacuum cleaner, and electric fan.It is normal. |
| Dim oven light | In low power microwave cooking, oven light may become dim. It is normal. |
| Steam accumulating on door, hot air out of vents | In cooking, steam may come out of food. Most will get out from vents. But some may accumulate on cool place like oven door. It is normal. |
| Oven started accidentally with no food in. | It is forbidden to run the unit without any food inside.It is very dangerous. |
| Trouble | Possible Cause | Remedy |
| Oven can not be started. | (1) Power cord not plugged in tightly. | Unplug. Then plug again after 10 seconds. |
| (2) Fuse blowing or circuit breaker works. | Replace fuse or reset circuit breaker (repaired by professional personnel of our company) | |
| (3) Trouble with outlet. | Test outlet with other electrical appliances. | |
| Oven does not heat. | (4) Door not closed well. | Close door well. |
| Glass turntable makes noise when microwave oven operates | (5) Dirty roller rest and oven bottom. | Refer to "Maintenance of Microwave" to clean dirty parts. |
CUSTOMER ASSISTANCE SERVICE
If you cannot identify the cause of the operating anomaly: switch off the appliance (do not subject it to rought treatment) and contact the Assistance Service.
PRODUCT SERIAL NUMBER. Where can I find it?
It is important that you to inform the Assistance Service of your product code and its serial number (a 16 character code which begins with the number 3); this can be found on the guarantee certificate or on the data plate located on the appliance.
It will help to avoid wasted journeys to technicians, thereby (and most significantly) saving the corresponding callout charges.
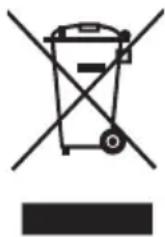
This appliance is marked according to the European directive 2002/96/EC on Waste Electrical and Electronic Equipment (WEEE). By ensuring this product is disposed of correctly, you will help prevent potential negative consequences for the environment and human health, which could otherwise be caused by inappropriate waste handling of this product.
The symbol on the product indicates that this product may not be treated as household waste. Instead it shall be handed over to the applicable collection point for the recycling of electrical and electronic equipment Disposal must be carried out in accordance with local environmental regulations for waste disposal.
For more detailed information about treatment, recovery and recycling of this product, please contact your local city office, your household waste disposal service or the shop where you purchased the product.
Cooking Guide
MICROWAVES
Microwave energy actually penetrates food, attracted and absorbed by its water, fat and sugar content.
The microwaves cause the molecules in the food to move rapidly. The rapid movement of these molecules creates friction and the resulting heat cooks the food.
COOKING
Cookware for microwave cooking:
Cookware must allow microwave energy to pass through it for maximum efficiency. Microwaves can penetrate through ceramic, glass, porcelain and plastic as well as paper and wood, but they are reflected by metal, such as stainless steel, aluminium and copper. So food must never be cooked in metal containers.
Foods suitable for microwave cooking:
Many kinds of food are suitable for microwave cooking, including fresh or frozen vegetables, fruit, pasta, rice, grains, beans, fish, and meat. Sauces, custard, soups, steamed puddings, preserves, and chutneys can also be cooked in a microwave oven. Generally speaking, microwave cooking is ideal for any food that would normally be prepared on a hob.
Covering during cooking
To cover the food during cooking is very important, as the evaporated water rises as steam and contributes to cooking process. Food can be covered in different ways: e.g. with a ceramic plate, plastic cover or microwave suitable cling film.
Standing times
After cooking is over food the standing time is important to allow the temperature to even out within the food.
Cooking Guide
Cooking Guide for frozen vegetables
Use a suitable glass pyrex bowl with lid. Cook covered for the minimum time - see table. Continue cooking to get the result you prefer.
Stir twice during cooking and once after cooking. Add salt, herbs or butter after cooking. Cover during standing time..
| Food Portion Power | Time (min.) | Standing Time (min.) | Instructions | |
| Spinach | 150g P80 5-6 2-3 | Add 15 ml (1 tablespoon) cold water. | ||
| Broccoli | 300g P80 8-9 2-3 | A d d 3 0 ml (2 t b s p .) cold water. | ||
| Peas | 300g P80 7-8 2-3 | A d d 1 5 ml (1 t b s p .) cold water. | ||
| Green Beans | 300g P80 7 1/2 -8 1/2 2-3 | A d d 3 0 ml (2 t b s p .) cold water. | ||
| Mixed Vegetables (carrots/peas/corn) | 300g P80 7-8 2-3 | A d d 1 5 ml (1 t b s p .) cold water. | ||
| Mixed Vegetables (Chinese style) | 300g P80 7 1/2 -8 1/2 2-3 | A d d 1 5 ml (1 t b s p .) cold water. |
Cooking Guide
Cooking Guide for fresh vegetables
Use a suitable glass pyrex bowl with lid. Add 30-45 ml cold water (2-3 tbsp.) for every 250 g unless another water quantity is recommended - see table. Cook covered for the minimum time - see table. Continue cooking to get the result you prefer. Stir once during and once after cooking. Add salt, herbs or butter after cooking. Cover during a standing time of 3 minutes.
Hint: Cut the fresh vegetables into even sized pieces. The smaller they are cut, the quicker they will cook.
All fresh vegetables should be cooked using full microwave power (P100).
| Food | Portion | Time (min.) | Standing Time (min.) | Instructions |
| Broccoli | 250g 500g | 3 1/2 -46-7 | 3 | Prepare even sized florets. Arrange the stems to the centre. |
| Brussels Sprouts | 250g 5 | -5 1/2 3 | Add 60-75 ml (5-6 tbsp.) water. | |
| Carrots | 250g 3 | 1/2 -4 3 | Cut carrots into even sized slices. | |
| Cauliflower | 250g 500g | 4-4 1/2 6 1/2 -7 1/2 | 3 | Prepare even sized florets. Cut big florets into halves. Arrange stems to the centre. |
| Courgettes | 250g 3 | -3 1/2 3 | Cut courgettes into slices. Add 30 ml (2 tbsp.) water or a knob of butter. Cook until just tender. | |
| Egg Plants | 250g 2 | 1/2 -3 3 | Cut egg plants into small slices and sprinkle with 1 tablespoon lemon juice. | |
| Leeks | 250g 3 | -3 1/2 3 | Cut leeks into thick slices. | |
| Mushrooms | 125g 250g | 1-1 1/2 2-2 1/2 | 3 | Prepare small whole or sliced mushrooms. Do not add any water. Sprinkle with lemon juice. Spice with salt and pepper. Drain before serving. |
| Onions | 250g 4 | -4 1/2 3 | Cut onions into slices or halves. Add only 15 ml (1 tbsp.) water. | |
| Pepper | 250g 3 | 1/2 -4 3 | Cut pepper into small slices. | |
| Potatoes | 250g 500g | 3-46-7 | 3 | Weigh the peeled potatoes and cut them into similar sized halves or quarters. |
| Turnip Cabbage | 250g | 4 1/2 -5 | 3 | Cut turnip cabbage into small cubes. |
Cooking Guide
Cooking Guide for rice and pasta
Rice: Use a large glass pyrex bowl with lid - rice doubles in volume during cooking. Cook covered. After the cooking time is over, stir before standing time and salt or add herbs and butter. Remark: the rice may not have absorbed all water after the cooking time is finished.
Pasta: Use a large glass pyrex bowl. Add boiling water, a pinch of salt and stir well. Cook uncovered. Stir occasionally during and after cooking. Cover during standing time and drain thoroughly afterwards.
| Food Portion Power | Time (min.) | Standing Time (min.) | Instructions | ||
| White Rice (parboiled) | 250g375g | P100 | 15-16 171/2-181/2 | 5 | Add 500 ml cold water.Add 750 ml cold water. |
| Brown Rice (parboiled) | 250g375g | P100 | 20-2122-23 | 5 | Add 500 ml cold water.Add 750 ml cold water. |
| Mixed Rice (rice + wild rice) | 250g P | 100 16-17 5 | Add 500 ml cold water. | ||
| Mixed Corn (rice + grain) | 250g P | 100 17-18 5 | Add 400 ml cold water. | ||
| Pasta | 250g P | 100 10-11 5 | Add 1000 ml hot water. | ||
REHEATING
Your microwave oven will reheat food in a fraction of the time that conventional ovens hobs normally take.
Use the power levels and reheating times in the following chart as a guide. The times in the chart consider liquids with a room temperature of about +18 to +20°C or a chilled food with a temperature of about +5 to +7°C.
Arranging and covering
Avoid reheating large items such as joint of meat - they tend to overcook and dry out before the centre is piping hot. Reheating small pieces will be more successful.
Power levels and stirring
Some foods can be reheated using maximum power while others should be reheated using lower power.
Check the tables for guidance. In general, it is better to reheat food using a lower power level, if the food is delicate, in large quantities, or if it is likely to heat up very quickly (mince pies, for example).
Stir well or turn food over during reheating for best results. When possible, stir again before serving.
Cooking Guide
Take particular care when heating liquids and baby foods. To prevent eruptive boiling of liquids and possible scalding, stir before, during and after heating. Keep them in the microwave oven during standing time. We recommend putting a plastic spoon or glass stick into the liquids. Avoid overheating (and therefore spoiling) the food. It is preferable to underestimate cooking time and add extra heating time, if necessary.
Heating and standing times
When reheating food for the first time, it is helpful to make a note of the time taken - for future reference.
Always make sure that the reheated food is piping hot throughout.
Allow food to stand for a short time after reheating - to let the temperature even out. The recommended standing time after reheating is 2-4 minutes, unless another time is recommended in the chart..
Take particular care when heating liquids and baby food. See also the chapter with the safety precautions.
REHEATING LIQUIDS
Always allow a standing time of at least 20 seconds after the oven has been switched off to allow the temperature to even out. Stir during heating, if necessary, and ALWAYS stir after heating. To prevent eruptive boiling and possible scalding, you should put a spoon or glass stick into the beverages and stir before, during and after heating.
REHEATING BABY FOOD
BABY FOOD:
Empty into a deep ceramic plate. Cover with plastic lid. Stir well after reheating! Let stand for 2-3 minutes before serving. Stir again and check the temperature. Recommended serving temperature: between 30-40°C.
BABY MILK:
Pour milk into a sterilised glass bottle. Reheat uncovered. Never heat a baby's bottle with teat on, as the bottle may explode if overheated. Shake well before standing time and again before serving! Always carefully check the temperature of baby milk or food before giving it to the baby. Recommended serving temperature: ca. 37°C.
REMARK:
Baby food particularly needs to be checked carefully before serving to prevent burns.
Use the power levels and times in the next table as a guide lines for reheating.
Cooking Guide
Reheating Liquids and Food
Use the power levels and times in this table as a guide lines for reheating.
| Food Portion Power | Time (min.) | Standing Time (min.) | Instructions | ||
| Drinks (coffee, milk, tea, water with room temperature) | 150 ml (1cup)300 ml (2cups)450 ml (3cups)600 ml (4cups) | P100 | 1-11/2 11/2-2 21/2-3 3-31/2 | 1-2 | Pour into a ceramic cup and reheat uncovered. Place 1 cup in the centre , 2 opposite of each other and 3 or 4 in a circle. Stir carefully before and after standing time, be careful while taking them out of oven. |
| Soup (chilled) | 250g350g450g550g | P100 | 2-21/2 21/2-3 3-31/2 31/2-4 | 2-3 | Pour into a deep ceramic plate or deep ceramic bowl.Cover with plastic lid. Stir well after reheating. Stir again before serving. |
| Stew (chilled) | 350g P80 | 41/2-51/2 | 2-3 | Put stew in a deep ceramic plate. Cover with plastic lid.Stir occasionally during reheating and again before standing and serving. | |
| Pasta with sauce (chilled) | 350g P80 31/2-41/2 3 | Put pasta (e.g. spaghetti or egg noodles) on a flat ceramic plate. Cover with microwave cling film. Stir before serving. | |||
| Filled pasta with sauce (chilled) | 350g P80 | 4-5 3 | Put filled pasta (e.g. ravioli, tortellini) in a deep ceramic plate. Cover with plastic lid. Stir occasionally during reheating and again before standing and serving. | ||
| Plated Meal (chilled) | 350g450g550g | P80 | 41/2-51/2 5-6 51/2-61/2 | 3 | Plate a meal of 2-3 chilled components on a ceramic dish. Cover with microwave cling-film. |
Cooking Guide
Reheating Baby Food and Milk
Use the power levels and times in this table as guide lines for reheating.
| Food Portion Power Time | Standing Time (min.) | Instructions | |||
| Baby food (vegetables + meat) | 190g P | 80 30sec. 2-3 | Empty into ceramic deep plate.Cook covered. Stir after cooking time. Stand for 2-3 minutes.Before serving, stir well and check the tem- perature carefully. | ||
| Baby porridge (grain + milk + fruit) | 190g P | 80 20sec. 2-3 | Empty into ceramic deep plate.Cook covered. Stir after cooking time. Stand for 2-3 minutes.Before serving, stir well and check the tem- perature carefully. | ||
| Baby milk | 100ml200ml | P30 | 30-40 sec.1 min to1 min10 sec. | 2-3 | Stir or shake well and pour into a sterilised glass bottle. Place into the centre of turntable. Cook uncovered. Shake well and stand for at least 3 minutes. Before serving, shake well and check the tempera- ture carefully. |
Cooking Guide
GRILL
The grill-heating element is located underneath the ceiling of the cavity. It operates while the door is closed and the turntable is rotating. The turntable's rotation makes the food brown more evenly. Preheating the grill for 4 minutes will make the food brown more quickly.
Cookware for grilling:
Should be flameproof and may include metal. Do not use any type of plastic cookware, as it can melt.
Food suitable for grilling:
Chops, sausages, steaks, hamburgers, bacon and gammon rashers, thin fish portions, sandwiches and all kinds of toast with toppings.
IMPORTANT REMARK:
Please remember that food must be placed on the high rack, unless another instruction is recommended.
MICROWAVE + GRILL
This cooking mode combines the radiant heat that is coming from the grill with the speed of microwave cooking. It operates only while the door is closed and the turntable is rotating. Due to the rotation of the turntable, the food browns evenly.
Cookware for cooking with microwave + grill
Please use cookware that microwaves can pass through. Cookware should be flameproof. Do not use metal cookware with combination mode. Do not use any type of plastic cookware, as it can melt.
Food suitable for microwave + grill cooking:
Food suitable for combination mode cooking include all kinds of cooked food which need reheating and browning (e.g. baked pasta), as well as foods which require a short cooking time to brown the top of the food. Also, this mode can be used for thick food portions that benefit from a browned and crispy top (e.g. chicken pieces, turning them over half way through cooking). Please refer to the grill table for further details.
The food must be turned over, if it is to be browned on both sides.
Cooking Guide
Grill Guide for fresh food
Preheat the grill with the grill-function for 4 minutes.
Use the power levels and times in this table as guide lines for grilling.
| Fresh Food | Portion Power | 1. Side Time (min) | 2. Side Time (min) | Instructions | |
| Toast Slices | 4pcs(each25g) | Grill only | 31/2-41/2 | 3-4 | Put the toast slices side by side on the rack. |
| Bread Rolls(already baked) | 2-4 pieces | Grill only | 21/2-31/2 | 11/2-21/2 | Put bread rolls first with the bot t o m s i d e u p in a c i r c l e directly on the turntable. |
| Grilled Tomatoes | 200g(2pcs)400g(4pcs) | C2 | 31/2-41/2 5-6 | - | Cut tomatoes into halves. Put some cheese on top. Arrange in a circle in a flat glass pyrex dish. Place it on the rack. |
| Tomato-Cheese Toast | 4 pcs(300g) | C2 4-5 - | Toast the breas slices first. Put the toast with topping on the rack. Stand for 2-3 minutes. | ||
| Toast Hawaii(pineapple,ham, cheese slices) | 2 pcs(300g)4 pcs(600g) | C1 | 31/2-41/2 6-7 | - | Toast the bread slices first. Put the toast with topping on the rack. Put 2 toasts opposite directly on the rack. Stand for 2-3 minutes. |
| Baked Potatoes | 250g500g | C1 | 41/2-51/2 61/2-71/2 | - | Cut potatoes into halves. Put them in a circle on therack with the cut side to the grill. |
| Gratin Potatoes/vegetables(chilled) | 500g | C1 | 9-11 | - | Put the fresh gratin into small glass Grill pyrex dish. Put the dish on the rack. After cooking stand for 2-3 minutes. |
| Chicken Pieces | 450g(2pcs)650g(2-3pcs)850g(4pcs) | C2 | 7-89-1011-12 | 7-88-99-10 | Brush chicken pieces with oil and spices. Put them in a circle with the bones to the middle. Put one chicken piece not into the centre of the rack. Stand for 2-3 minutes. |
| Roast Chicken | 900g1100g | C1 | 10-1212-14 | 9-1111-13 | Brush chicken with oil and spices. Put chicken first breast side down, second side breast side up directly on turntable. Stand for 5 minutes after grilling. |
Cooking Guide
Grill Guide for fresh food
| Fresh Food Portion Power | 1. Side Time (min) | 2. Side Time (min) | Instructions | ||
| Lamb Chops (medium) | 400g(4pcs) | Grill only | 10-12 8-9 | Brush the lamb chops with oil and spices. Lay them in a circle on the rack. After grilling stand for 2-3 minutes. | |
| Pork Steaks | 250 g(2pcs)500 g(4pcs) | MW + Grill | C26-78-10 | (Grill only)5-67-8 | Brush the pork steaks with oil and spices. Lay them in a circle on the rack. After grilling stand for 2-3 minutes. |
| Roast Fish | 450g650g | C2 | 6-77-8 | 7-88-9 | Brush skin of whole fish with oil and herbs and spices. Put fish side by side (head to tail) on rack. |
| Baked Apples | 2 apple(ca.400g)4 apples(ca.800g) | C2 | 6-710-12 | - | Core the apples and fill them with raisins and jam. Put some almond slices on top. Put apples on a flat glass pyrex dish. Place the dish directly on the turntable. |
Cooking Guide
Grill Guide for frozen food
Use the power levels and times in this table as guide lines for grilling.
| Fresh Food Portion Power | 1. Side Time (min) | 2. Side Time (min) | Instructions | ||
| Bread Rolls(each ca. 50 g) | 2 pcs4 pcs | MW+ Grill | C2 11/2-2 21/2-3 | Grill only2-32-3 | Arrange rolls in a circle with the bottom side up directly on the turntable.Grill the second side of the rolls up to the crisp you prefer. Stand for 2-5 minutes. |
| Baguettes/Garlic Bread | 200-250 g(1pc) | MW+ Grill | C1 31/2-4 | Grill only2-3 | Put frozen baguette diagonally on baking paper on the rack. After grilling stand for 2-3 minutes. |
| Gratin(vegetables or potatoes) | 400g C1 | 13-15 - | Put frozen gratin into a small glass pyrex dish.Put the dish on the rack.After cooking stand for 2-3 minutes. | ||
| Pasta(Cannelloni, Macaroni, Lasagne) | 400g C1 | 14-16 - | Put frozen pasta into a small flat rectangular glass pyrex dish. Put the dish directly on the turntable. After cooking stand for 2-3 minutes. | ||
| Fish Gratin 400g C1 | 16-18 - | Put frozen fish gratin into a small flat rectangular glass pyrex dish. Put the dish directly on the turntable. After cooking stand for 2-3 minutes. | |||
Using the Crusty Plate
Your CANDY microwave oven has a crusty plate as an additional accessory.
This crusty plate allows you to brown food not only on the top with the grill, but also the bottom of the food turns crispy and brown due to the high temperature of the crusty plate.
Several items which you can prepare on the crusty plate can be found in the chart (see next page).
The crusty plate can also be used for bacon, eggs, sausages, etc.
- Place the crusty plate directly on the turntable and preheat it with highest Microwave-Grill-Combination[600W+Grill] by following the times and instructions in the chart.
• Always use oven gloves to take out the crusty plate, as it is becoming very hot.
- Brush the plate with oil if you are cooking food, such as bacon and eggs, in order to brown the food nicely.
- Please note that the crusty plate has a teflon layer which is not scratch-resis tant. Do not use any sharp objects like a knife to cut on the crusty plate.
- Use plastic accessories to avoid scratches on the surface of the crusty plate or remove the food from the plate before cutting
- Place the food on the crusty plate.
- Do not place any objects on the crusty plate that are not heat-resistant; e.g. plastic bowels.
- Never place the crusty plate in the oven without turntable.
-
Place the crusty plate on the metal rack(or turntable) in the microwave.
-
Select the appropriate cooking time and power. Refer to the table on the next page.
Using the Crusty Plate
How to clean the Crusty Plate
Clean the crusty plate with warm water and detergent and rinse off with clean water.
Do not use a scrubbing brush or a hard sponge otherwise the top layer will be damaged.
Please Note
The crusty plate is not dishwasher-safe.
Crusty Plate Setting
We recommend to preheat the crusty plate directly on the turn-table. Preheat the crusty plate with the 600W+Grill function and follow the times and instructions in the table.
| Food Portion Power Preheating Time Cooking Time Recommendations | ||||
| Bacon | 4 slices (80g)8 slices (160g) | C1 3min. 3-3 1/2 min. | 4 1/2 -5min. | Preheat crusty plate. Put slices side by side on crusty plate. Put crusty plate on the rack. |
| Grilled Tomatoes | 200g (2pcs)400g (4pcs) | C1 3min. 3min. | 4min. | Preheat crusty plate.Cut tomatoes in halves.Put some cheese on top. Arrange in a circle on crusty plate. Put crusty plate on the rack. |
| Burger (frozen) | 2 pieces (125g)4 pieces (250g) | C1 3min. 6-6 1/2 min | 8-8 1/2 min. | Preheat crusty plate. Put frozen burger in a circle on crusty plate. Put crusty plate on the rack.Turn over after 4-5 min. |
| Baguettes (frozen) | 100-150g (1pc)200-250g (2pcs) | C1 5min. 5-6min. | 6-7min. | Preheat crusty plate. Put one baguette beside the centre, 2 baguettes side by side on the plate. Put crusty plate on rack. |
| Oven Chips (frozen) | 200g300g400g | C1 4min. 9min. | 12min.15min. | Preheat crusty plate.Distribute oven chips on crusty plate. Put the plate on the rack. Turn over after half of cooking time. |
Crusty Plate Setting
| Food Portion Power Preheating Time | Cooking Time | Recommendations | ||
| Fish Fingers (frozen) | 150g(5pcs)300g(10pcs) | C1 4min. 6-6 1/2 min.8 1/2 -9min. | Preheat crusty plate.Brush plate with 1 tbsp.Put fish fingers in a circle on the plate. Turn over after 3 1/2 min (5 pcs) or after 5 min (10 pcs). | |
| Chicken Nuggets (frozen) | 125g250g | C1 4min. 4 1/2 -5min.6 1/2 -7min. | Preheat crusty plate.Brush plate with 1 tbsp.Put chicken nuggets on the plate. Put crusty plate on the rack. Turn over after 3 min (125g) or 5 min (250g). | |
CANDY
Forno a microonde
MANUALE DI ISTRUZIONI MODELLI: CMG 9428 DS
- PRECAUTIONSATOAAVOIDAPOSSIBLEAEXPOSURE TOAEXCESSIVEAMICROWAVEAENERGY
- ADDENDUM
- IMPORTANTASAFETYAINSTRUCTIONS
- WARNING
- TOAREDUCEATHEARISKAOFALNJURYATOAPERSONS GROUNDINGAINSTALLATION
- DANGER
- CLEANING
- UTENSILS
- CAUTION
- PERSONALALINJURYAHAZARD
- UTENSILATEST
- MATERIALSAYOUACANAUSEAINAMICROWAVEAOVEN
- UTENSILSAREMARKS
- MATERIALSATOABEAAVOIDEDAINAMICROWAVEAOVEN
- SETTINGAUPAYOURAOVEN
- NAMESAOFAOVENAPARTSAANDAACCESSORIES
- COUNTERTOP INSTALLATION
- INSTALLATION
- OPERATION
- CLOCKASETTING
- 2.APRE-SETAFUNCTION
- MICROWAVE COOKING
- MICROWAVE POWER CHART
- GRILL POWER CHART
- MICROWAVE +GRILL COOKING
- START/EXPRESS
- DEFROST BY WEIGHT
- DEFROST BY TIME
- 9.AAUTOAMENU
- NOTE: APLEASEAPAYAATTENTIONATOATHISAPOINT
- 10.AMULTI-SECTIONACOOKING
- 11.ACHILDASAFEALOCK
- CHECKING PERFORMANCE
- PAY SPECIAL ATTENTION PLEASE
- AUTO MENU CHART
- CUSTOMER ASSISTANCE SERVICE
- COOKING GUIDE
- MICROWAVES
- COOKING
- COOKWARE FOR MICROWAVE COOKING
- FOODS SUITABLE FOR MICROWAVE COOKING
- COVERING DURING COOKING
- STANDING TIMES
- COOKING GUIDE FOR FROZEN VEGETABLES
- COOKING GUIDE FOR FRESH VEGETABLES
- COOKING GUIDE FOR RICE AND PASTA
- REHEATING
- ARRANGING AND COVERING
- POWER LEVELS AND STIRRING
- HEATING AND STANDING TIMES
- REHEATING LIQUIDS
- REHEATING BABY FOOD
- BABY FOOD
- BABY MILK
- REMARK
- REHEATING BABY FOOD AND MILK
- GRILL
- COOKWARE FOR GRILLING
- FOOD SUITABLE FOR GRILLING
- IMPORTANT REMARK
- MICROWAVE + GRILL
- COOKWARE FOR COOKING WITH MICROWAVE + GRILL
- FOOD SUITABLE FOR MICROWAVE + GRILL COOKING
- GRILL GUIDE FOR FRESH FOOD
- GRILL GUIDE FOR FROZEN FOOD
- USING THE CRUSTY PLATE
- HOW TO CLEAN THE CRUSTY PLATE
- PLEASE NOTE
- CRUSTY PLATE SETTING
- CANDY
- FORNO A MICROONDE
- MANUALE DI ISTRUZIONI MODELLI: CMG 9428 DS
Brand : CANDY
Model : CMG 9428 DS UK
Category : Microwave