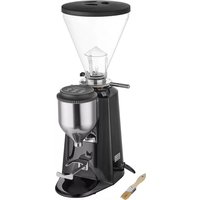
On Demand 236ECEGOD - Coffee maker Estella Caffe - Free user manual and instructions
Find the device manual for free On Demand 236ECEGOD Estella Caffe in PDF.


| Product Type | Espresso Grinder |
| Brand | Estella Caffe |
| Model | On Demand 236ECEGOD |
| Color | Black and Silver |
| Grind Adjustment | Yes, via threaded handle and grind selector |
| Burr Type | Cone-shaped burrs |
| Hopper Capacity | Standard (fills with espresso beans) |
| Power | 120V AC (typical, matches machine rating) |
| Grounding | Wall receptacle must be grounded; no extension cords |
| Programming | Programmable one-cup and two-cup buttons (time in seconds) |
| Continuous Run | Yes, hold button down |
| Dispensing | Manual lever forward to release grounds |
| Safety Features | Automatic Power Failure Installment Button; unplug before reaching in |
| Cleaning | Wash funnel with nonabrasive soap, air dry; use brush and vacuum |
| Parts Included | Funnel, lid, adjustment handle, doser, portafilter holder |
| Replaceable Parts | Funnel, lid, springs, screws, adjustment stick |
| Warranty | Not specified in manual |
| Certifications | Intertek |
| Manual Language | English (PDF available) |
Frequently Asked Questions - On Demand 236ECEGOD Estella Caffe
User questions about On Demand 236ECEGOD Estella Caffe
0 question about this device. Answer the ones you know or ask your own.
Ask a new question about this device
Download the instructions for your Coffee maker in PDF format for free! Find your manual On Demand 236ECEGOD - Estella Caffe and take your electronic device back in hand. On this page are published all the documents necessary for the use of your device. On Demand 236ECEGOD by Estella Caffe.
USER MANUAL On Demand 236ECEGOD Estella Caffe
natural_image
Black and silver portable coffee mixer with clear glass funnel and control panel (no visible text or symbols)

Intertek 3058215
On Demand Espresso Grinder
236ECEGOD
08/2022
Index
Index 1
Safety Warnings....2
Troubleshooting....2
Installation 2
Programming 3
Operation 4
Cleaning 4
Parts List....5
NOTE: Save these instructions for future reference.
Safety Warnings
- This machine should only be used by qualified personnel.
- Do not allow anyone under the age of 18 to use this machine.
- Do not unplug the grinder by pulling on the cord.
- Unplug the grinder before reaching in for any reason.
- Beware that grinder may continue to spin for a short period of time after turning off the machine.
- Do not operate with wet hands.
- Do not allow liquid to come into contact with the grinder.
- Only put espresso beans into hopper.
Troubleshooting
- Make sure that the handle on the grinder is correctly screwed in place and that it stays within the lines on the grind selector.
If the grinder is not working or tripping:
First check the grind selector. It is possible that beans got stuck in the grinder - to check, turn the handle to a more coarse setting and turn on machine. If this does not work, try using the Automatic Power Failure Installment Button. This is located next to the power button, and can be used when the grinder has tripped or has stopped working. This will reset the grinder.
Installation
- Make sure grinder is sitting on a flat surface.
- Before plugging in the grinder, make sure the voltage of the electric supply match machine ratings.
- If hopper becomes detached, make sure to securely fit it into the grinder. The handle will need to be screwed into place to the grind selector.
Wall receptacle must be grounded. Do not use extension cords or wall adapters.
Programming
-
You can program both the one cup and two cup buttons located on the setting panel. Doing so will allow the machine to run for the amount of time selected, when the button is pressed.
-
To program time (in seconds), click on either the one cup or two cup button and adjust the time to the desired amount using the minus (-) and plus (+) buttons.
-
When you reach the desired time you can then hit the start button to begin grinding,

1 Decrease time (in seconds) of how long the grinder is grinding beans.
2 Increase time (in seconds) of how long the grinder is grinding beans.
3 The one cup button is for the first setting, which you can program to the amount of time the machine will grind beans for.
4 The two cup button is for the second setting, which you can program to the amount of time the machine will grind beans for.
5 The continuous run button will continue to run as long as the button is held down. The grinder will stop when the button is released.
Operation
- Ensure that the hopper is securely fitted to the top of the grinder.
- Close the slide underneath the hopper.
- Fill the hopper with espresso beans and secure the lid.
- Open the slide to allow beans to fall into the grinder.
- Turn the power switch to the on position.
- Put the portafilter below the doser, and make sure to hold in place during the grinding process.
- To start grinding, select the button for either the one cup or two cup setting and hit start, or manually grind by pressing the arrow button.
- The grinder will grind beans until the selected time runs out or you can press the 'Start' button again to stop the grinder.
If grounds are not dispensing ensure that properly dried espresso beans are being used.
Make sure to pull dispensing lever entire way forward and then allow to release back to its original position.
Note: To adjust coarseness of grounds thread the adjustment handle into the grind selector and rotate to desired position. Only adjust coarseness while the machine is on. Please note that adjusting the grind will change the amount dispensed.
Cleaning
- Close slide and pull off the funnel from the machine.
- Use vacuum cleaner to get any loose grounds out of machine.
- Wash the funnel with nonabrasive soap and water
- Make sure to dry the funnel completely by air drying
- Use brush to sweep off any loose grounds and dust that are in funnel, doser, and base.
Caution: Do not get water/soap in the base and burr area.
Parts List

1 Grind Adjustment Spring
2 Grinding Machine
3 Gear Plate Group
4 M4 Screw
5 Grinding Machine Anchor Screw
6 M4 Screw
7 Cone-Shape Coffee Beans Pouring Trough
8 Grinder Selector
9 Adjustment Stick
10 Grind Adjustment Abut Screw (M4 Screw)
11 Funnel
12 Funnel Lid
13 Cooling Fan
14 Foundation Lid
15 Footpad
16 Power Button
17 Automatic Power Failure Installment Button
18 Funnel
19 Setting Panel
20 Handle Frame
21 Controller
22 Slide


Brand : Estella Caffe
Model : On Demand 236ECEGOD
Category : Coffee maker