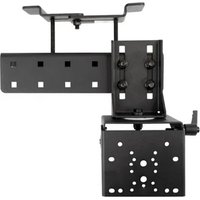
7160-1425 - Accessoire pour chariot élévateur Gamber-Johnson - Free user manual and instructions
Find the device manual for free 7160-1425 Gamber-Johnson in PDF.


| Product Type | Vehicle Laptop Mount |
| Brand | Gamber-Johnson |
| Model | 7160-1425 |
| Compatible Devices | Laptops up to 15.6 inches |
| Mounting Type | Pedestal mount with adjustable arm |
| Material | Steel and aluminum construction |
| Dimensions (Base) | 10 x 8 inches (25.4 x 20.3 cm) |
| Weight Capacity | 15 lbs (6.8 kg) |
| Weight | 5.5 lbs (2.5 kg) |
| Adjustment Range | Tilt, swivel, and 12-inch vertical adjustment |
| Installation | Bolts to vehicle floor, no drilling required |
| Power Supply | None (passive mount) |
| Maintenance | Wipe clean with a damp cloth; lubricate pivot points annually |
| Safety Features | Rounded edges, no pinch points |
| Spare Parts | Replacement hardware kit available |
| Repairability | Modular design allows easy part replacement |
| Warranty | 3-year limited warranty |
| Certifications | SAE J1455 compliant |
| Country of Origin | USA |
Frequently Asked Questions - 7160-1425 Gamber-Johnson
User questions about 7160-1425 Gamber-Johnson
0 question about this device. Answer the ones you know or ask your own.
Ask a new question about this device
Download the instructions for your Accessoire pour chariot élévateur in PDF format for free! Find your manual 7160-1425 - Gamber-Johnson and take your electronic device back in hand. On this page are published all the documents necessary for the use of your device. 7160-1425 by Gamber-Johnson.
USER MANUAL 7160-1425 Gamber-Johnson
INSTALLATION INSTRUCTIONS
7160-1425
CAB OVERHEAD GUARD MOUNT
Revision
Rev B
Form Product
INST-936
Printing Spec: PS-001
This instruction sheet is for the Gamber-Johnson Cab Overhead Guard Mount (7160-1425). It is designed to mount a computer cradle or docking station near the roof of an enclosed cab forklift. There are 2 ways to mount it based on how close the roof is to the overhead guard bars.
Attaching the mount when there is a minimum 1/2" clearance between the cab roof and the overhead guard bars:
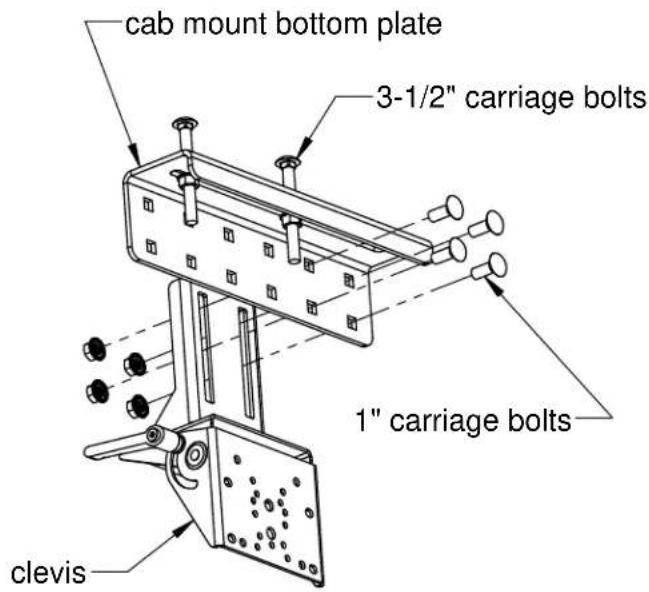
- Attach the clevis portion of the mount to the cab mount bottom plate with the (4) 3/8 x 1" carriage bolts and serrated flange nuts found in hardware bag 7120-0932. There are multiple mounting locations, so pick the one that best fits your application.
- Loosely attach the (2) 3/8 x 3-1/2" carriage bolts and serrated flange nuts into the long slot of the bottom plate as shown.
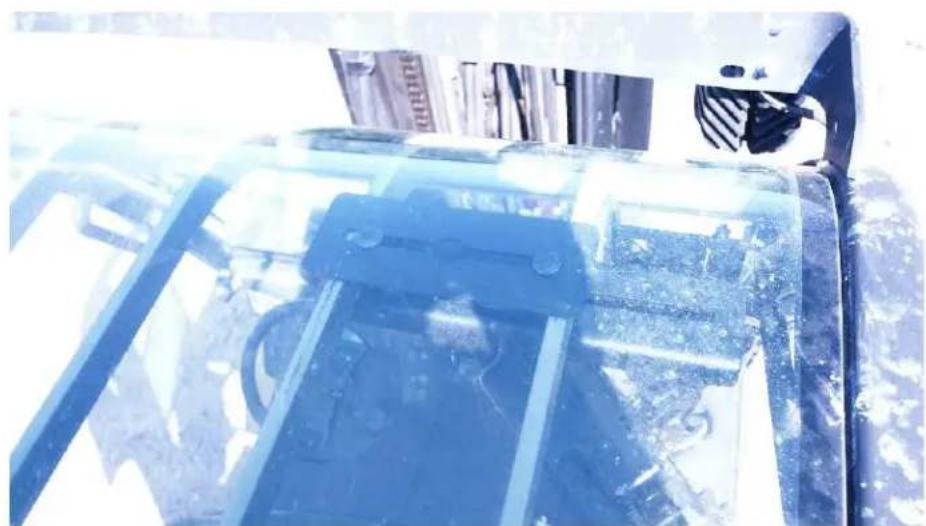
- Place the cab mount top plate on top of the overhead bars (between the bars and the roof glass) in the approx. location the mount will be located.

Product Mounting Disclaimer
Gamber-Johnson is not liable under any theory of contract or tort law for any loss, damage, personal injury, special, incidental or consequential damages for personal injury or other damage of any nature arising directly or indirectly as a result of the improper installation or use of its products in vehicle or any other application. In order to safely install and use Gamber-Johnson products full consideration of vehicle occupants, vehicle systems (i.e., the location of fuel lines, brake lines, electrical, drive train or other systems), air-bags and other safety equipment is required. Gamber-Johnson specifically disclaims any responsibility for the improper use or installation of its products not consistent with original vehicle manufactures specifications and recommendations, Gamber-Johnson product instruction sheets, or workmanship standards as endorsed through the Gamber-Johnson Certified Installer Program.
© Copyright 2019 Gamber-Johnson, LLC
If you need assistance or have questions, call Gamber-Johnson at 1-800-456-6868
Attaching the mount:
- Insert the heads of the 3/8" x 3-1/2" carriage blots through the keyhole opening in the top plate and slide the carriage bolts outward so they are next to the overhead guard vertical bars. Fine tune the position of the mount in the vehicle and tighten the nuts on the 3/8 x 3-1/2" carriage bolts to hold the mount in place.


Attaching the mount when there is only 1/4" to 1/2" clearance between the cab roof and the overhead guard bars:
-
Attach the clevis portion of the mount to the cab mount bottom plate with the (4) 3/8 x 1" carriage bolts and serrated flange nuts found in hardware bag 7120-0932. There are multiple mounting locations, so pick the one that best fits your application.
-
Loosely connect the short and long hooks together with the 3/8 x 1 long carriage bolt and serrated lock nut.
-
Insert the (2) 3/8 x 3-1/2" long carriage bolts found in hardware bag 7120-0932 through the slots as shown. Place the hooks on top of the overhead bars and adjust the width as shown. Tighten the 1" long carriage bolt to hold the hooks in place.
Note: if the bars are too close together. The 1" carriage bolt can be eliminated. One of the 3-1/2" carriage bolts will need to run through both hooks and be held in place with the lock nut.
- Attach the cab mount bottom plate to the 3-1/2" long carriage bolts with the serrated lock nuts found in hardware bag 7120-0932. Fine tune the position of the mount in the vehicle and tighten the nuts in place.


Brand : Gamber-Johnson
Model : 7160-1425
Category : Accessoire pour chariot élévateur