
KITGD50 - Food waste disposer SMEG - Free user manual and instructions
Find the device manual for free KITGD50 SMEG in PDF.


| Product Type | Food Waste Disposer |
| Brand | Smeg |
| Model | KITGD50 |
| Dimensions (W x D x H) | Approx. 8 x 8 x 13 inches |
| Weight | Approx. 8 lbs (3.6 kg) |
| Power Supply | 120 V / 60 Hz |
| Motor Type | Permanent Magnet Motor |
| Motor Power | 0.5 HP (370 W) |
| Grinding Stages | Multi-stage grinding system |
| Capacity | 1.0 liter grinding chamber |
| Feed Type | Continuous feed |
| Noise Level | Approx. 60 dB (quiet operation) |
| Material | Stainless steel grinding components, polymer body |
| Safety Features | Overload protection, manual reset button |
| Installation | Under-sink, 3-bolt mounting system |
| Dishwasher Connection | Yes, dishwasher drain compatible |
| Warranty | 2 years limited warranty |
| Cleaning | Self-cleaning with citrus peels or cleaning tablets |
| Repairability | Replaceable grinding ring and impellers |
| Certifications | cULus, CE |
Frequently Asked Questions - KITGD50 SMEG
User questions about KITGD50 SMEG
0 question about this device. Answer the ones you know or ask your own.
Ask a new question about this device
Download the instructions for your Food waste disposer in PDF format for free! Find your manual KITGD50 - SMEG and take your electronic device back in hand. On this page are published all the documents necessary for the use of your device. KITGD50 by SMEG.
USER MANUAL KITGD50 SMEG
FOOD VASTE DISPOSER INSTALLATION AND USE
English - Paes 9-14
For specialized installers use only.
The following instruÃtions are for qualified installers able to do all the operations in the űost ÃorreÃt way aÃÄording to the eleÃtriÃal and pluübing rules.
Assembly parts
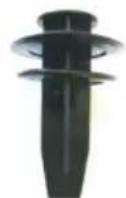
1

2
Conveyor Sink flange
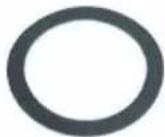
3
Flange gasket
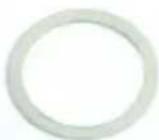
4

5
Flange washer Metal ring Mounting ring

6

7

8

9
Hinged Claüp Drain pipe Tube flange,
tube rubber gasket and sÄrews

1/bis
Extra sink stopper

natural_image
Close-up of a black plastic water purifier with inlet and outlet ports (no text or symbols visible)Sink mount flange installation
Reúove the sink waste trap (fig. 1) with a sÃrewdriver and sÃrape the left over pluübers putty used to seal the sink

natural_image
Close-up of a small kitchen drain or sink with a circular vent and handle (no text or symbols visible)Fig. 1
Garbage disposer installation
Loosen the hinged Ālaŭp (7) and levering with your h ands reŭove the garbage disposer flange, unsĂrew the ůount ring (6) and take the flange washer away. (4)
A. Put the sink flange (2) in the disăharge sinkhole, taking Āare that the blaăk flange gasket (3) sets perfeătly well. If it's not a stainless steel sink but a synthetiă or a Āerauiiă one, you better apply a thin Aoat of sanitary stopper instead of flange gasket.
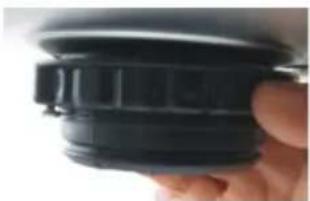
B. ünder the sink: you need to firüly seat and attaÄh the ücking ring whiÄh has three sÄrews used to tighten the ücking ring (3-5-6) asseü bly so it will apply firüly to the sink bottoü
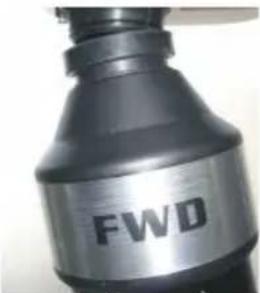
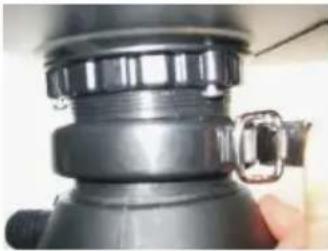
C. Join the garbage disposer to the flange and put the hinged Aluüp in position (D) To faÄilitate insertion between the garbage disposer and the flange put soue Aooking oil on the border of the guard-splash.

natural_image
Hand holding a dark, glossy, metallic object with a flared rim (no text or symbols visible)A.
natural_image
Close-up of a hand holding a black plastic camera lens (no text or symbols visible)B.
C.
natural_image
Close-up of a black plastic kitchen sink with a handle and screwdriver (no text or symbols visible)D.
Plumbing Connection
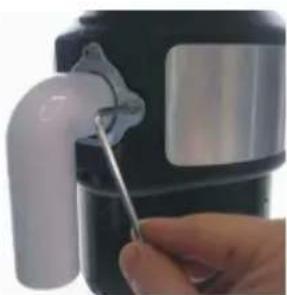
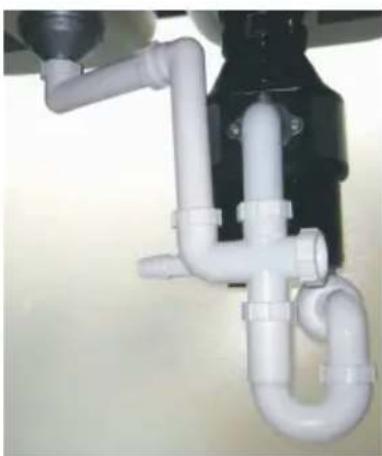
AttaAh the disposer disAcharge tube with the tube flange using the given sArew. ConneAt the garbage disposer disAcharge tube (see fig.E) and tighten it to the drain trap (ex. F.1-F.2) To avoid probleüs, before ÄonneAting the pluübs, Aontrol the tubes Aleaning theü if needed.
natural_image
Close-up of a hand using a tool to lift a white pipe fitting into a black airfoil (no text or symbols visible)E.
natural_image
Close-up of a white PVC pipe fitting attached to a black mechanical component (no text or symbols visible)F.1

natural_image
Close-up of a pipe system with black and white pipes, no visible text or symbolsF.2
Electric connection
All úodels are preset to operate at 220-240V/50 Hz.
See to it that the feeding tension Åorresponds to the said value.
Make sure that a proper soAket is installed under the sink. If not, fit it up.
OPERATÜNG ÜNSTRUCTÜONS
- Reúove the sink drain stopper
- Turn Äold water on to a üediuü-high flow and turn the waste disposer on. (Fig. G-H)
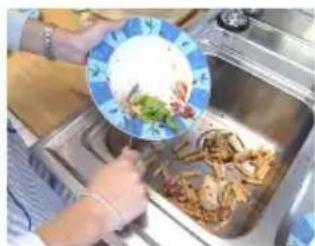
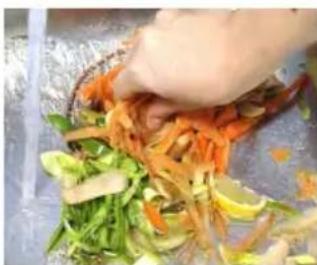
- Put all food waste into the diposer while the disposer is operating and water running. (Fig. I-L)
- Let the disposer Äontinue to run for about half a üinute after the grinding is over.
- Turn the disposer off and leave the water running for half a üinute (Fig. M-N)
CAUTÜON:
- Make sure that the authorities perüit the installation of the waste disposer
- The applianÃe ùust be installed so that the reset buttons is readily aÃëssible
- The applianÃe ùust be positioned so that the plug is aÃAessible
- Use the garbage disposer only for food waste.
- Do not use the food waste disposer with hard aterials like glass or etal.
- Turn the ÚaÂhine off or unplug it while trying to unbloÂk a bloÂked grinding wheel with a tool.
- üse only Äold water.
DO NOT PUT ÜNSÜDE:
- Metal, glass, Ahina.
• Lye and drain Åleaning ÅheüiÅals. - PlastiÀ úaterials.
- artichoke or pineapple leaves, asparagus, celery, filamentous elements should be previously shredded and gradually spilled together with a homogeneous mix of other food waste

natural_image
Person pouring water from a stainless steel kitchen sink (no text or symbols visible)Fig. G

natural_image
Close-up of a finger pressing a green toggle switch on a white surface (no text or symbols visible)Fig. H
natural_image
Person preparing food in a stainless steel kitchen, holding a plate with herbs and ingredients (no visible text or symbols)Fig. I
natural_image
Close-up of hands preparing food with shredded carrots and vegetables on a metal tray (no text visible)Fig. L

natural_image
Close-up of a finger pressing a button on a light surface (no text or symbols visible)Fig. M

natural_image
Hand using a hand wrench to clean or store stainless steel kitchen sink (no text or symbols visible)Fig. N
SAFETÄ ÜNSTRUCTÜONS
The waste disposer has an overload proteAtion.
If an objeAt falls into the housing or if there is overload the waste disposer stops autoúatiAally. You should operate as follows:
- Put the switAh of the plant in the OFF position or unplug it.
- Insert the hex wrenÂh (Fig.12) into the opening at the bottoû of the ùotor shaft and rotate the tool and the Āounter ĀloÂkwise to unbloÂk the food waste disposer(Fig. 13)
- Reúove the objeAt or the overload.
- Wait for 5/10 üinutes.
- Push the red reset disposer bottoü (Fig. 14) and restart the üaÄhine.

natural_image
Metal angle tool with a bent handle (no text or symbols visible)Fig. 12

natural_image
Close-up of a hand inserting a small electronic component into a black circular device (no visible text or symbols)Fig. 13

natural_image
Close-up of a mechanical component with a red laser beam and circular features (no visible text or symbols)Fig. 14
With norúal usage your disposer should not require any speÃial Ãare.
The ûotor is perüanently lubriÄated and will not require oiling under norüal usage Äonditions. If used aÄÄording to the operating instruÄtions above, your disposer should not require Äleaning. However should it start to süell grinding a tray of iÄe Åubes in the disposer will Älean the grinding Äoüponents. Grinding a leüon Äut into quarters will also give your disposer a fresh, Älean süell.
If used in a proper way the will last for years
Dishwasher Connection (Fig.11)
It is possible to AonneAt the dishwasher disAharge tube with the food waste disposer ∅ 25üü.
With the help of a sÄrewdriver and a rubber haüüer reüove the plastiÄ stopper positioned in the inner site of the dishwasher ÄonneÄtion.
Fasten the dishwasher disÄharge tube to the garbage disposer

natural_image
Close-up of a mechanical device with a black cylindrical body and metallic fittings (no visible text or symbols)Fig. 11
NOTES
Reúinding the right proÃedure for use the úaÃhine:
- Open the water (üaxiüuü jet)
- Turn on the disposer
- Gradually push the organià üaterial within the grinding Ãhaüber until its total eliûination
- Let the water run for a few seÃonds
- Turn off the disposer and turn off the water
- It's iúportant not to load the grinding Āhaúber before opening the water and turning on the disposer or using a slow jet of water during the grinding, otherwise it would Āreate a dough diffiÃult to evaÃuate or even worse Ālog the drain. Water is the waste vehiÃle so úore water ūeans better results.
- Our disposer has no blades inside, it works like a grater. This peAuliarity üakes it safer. At the saüe tiüe, absenÄe of blades ÄoüpliÄates strong fibrous waste disposal (artiÄhoke, Äelery, leeks in big quantities, etÄ).
- It is not reAouüended to use hot water while using the disposer. Cold water keeps fat partiÅles solid, reüoving theü üore easily.
• To speed grinding Aut or break into suller pieAes bones and peels, especially larger ones. - If the disposer works loudly in absenÃe of hard waste suÂh as bones or fruits hazels, üake sure that a spoon, bottle Ãap or soüe objeÂt didn't fall aÃÄidentally into the grinding Āhaüber. If it is so, turn off the disposer, turn off the water and reüove the objeÂt using a pair of pinÃers with long handles or any other siújilar tool.
- FOOD VASTE DISPOSER INSTALLATION AND USE
- For specialized installers use only.
- Assembly parts
- Sink mount flange installation
- Garbage disposer installation
- Plumbing Connection
- Electric connection
- OPERATÜNG ÜNSTRUCTÜONS
- CAUTÜON:
- DO NOT PUT ÜNSÜDE:
- SAFETÄ ÜNSTRUCTÜONS
- Dishwasher Connection (Fig.11)
- NOTES
Brand : SMEG
Model : KITGD50
Category : Food waste disposer