Premium 7 Resistive - Tablet Nextbook - Free user manual and instructions
Find the device manual for free Premium 7 Resistive Nextbook in PDF.


| Product type | Touchscreen tablet |
| Brand | Nextbook |
| Model | Premium 7 Resistive |
| Screen | 7-inch TFT LCD, 800x480 pixels, resistive touchscreen |
| Processor | Cortex-A8 1 GHz |
| RAM | 512 MB DDR |
| Internal storage | 4 GB |
| Expandable storage | microSD card up to 32 GB (SDHC) |
| Operating system | Android 4.0 |
| Connectivity | Wi-Fi 802.11 b/g/n, micro USB 2.0, 3.5 mm headphone jack |
| Battery | Rechargeable lithium-ion, charges in about 5 hours |
| Battery life | About 6 hours music, 5 hours video, 4.5 hours web browsing |
| Supported audio formats | MP3, WAV, OGG, FLAC, APE, AAC |
| Supported video formats | AVI, 3GP, MP4, RM, RMVB, FLV, MKV, MOV, VOB, DAT, WMV |
| Supported e-book formats | PDF, EPUB, TXT, FB2, RTF, PDB |
| Supported image formats | JPEG, BMP, GIF, PNG |
| Sensors | Accelerometer (G-sensor) |
| Power | DC 5V adapter via DC-IN port |
Frequently Asked Questions - Premium 7 Resistive Nextbook
User questions about Premium 7 Resistive Nextbook
0 question about this device. Answer the ones you know or ask your own.
Ask a new question about this device
Download the instructions for your Tablet in PDF format for free! Find your manual Premium 7 Resistive - Nextbook and take your electronic device back in hand. On this page are published all the documents necessary for the use of your device. Premium 7 Resistive by Nextbook.
USER MANUAL Premium 7 Resistive Nextbook
- Do not subject the device to severe impact or drop it from heights.
- Do not use the device in extreme hot or cold, dusty or damp conditions. Do not expose it to direct sunlight.
- Avoid using the device near strong magnetic fields.
- Normal functioning of the product may be disturbed by ESD. If so, simply reset and restart the device following the instruction manual. During file transmission, please handle with care and operate in a static-free environment.
- Keep the device away from water and other liquids. In the event that water or other liquids enter the device, power off the product immediately and clean the device.
- Do not use chemicals to clean the device in order to avoid corrosion. Clean it with a dry cloth.
- Do not install this equipment in a confined space such as a book case or similar unit. The ventilation should not be impeded by covering the ventilation openings with items such as newspaper, table-cloths, curtains etc.
- No naked flame sources, such as lighted candles, should be placed on the apparatus.
- Attention should be drawn to environmental aspects of battery disposal.
- Use the apparatus in moderate climates.
- We are not responsible for damage or lost data caused by malfunction, misuse, modification of the device or battery replacement.
- Do not attempt to disassemble, repair or modify the product. This will invalidate the warranty.
- If the device will not be used for an extended period of time, please charge the battery at least once per month to maintain battery life.
- Charge the battery if:
a) The battery level icon displays (An empty battery)
b) The device powers off automatically when restarted.
c) There is no response when pressing keys with keys unlocked and battery full. - Do not interrupt the connection when the device is being formatted or transferring files. Otherwise, data may be corrupted or lost.
- When the device is used as a portable HD, please use only per the instructions. Otherwise, permanent data loss could occur.
- Please use and install data using the attachments/accessories provided and only according to the manufacturer's instruction.
- Please refer to the information on the bottom of the device for electrical and safety information before installing data or operating the device.
- To reduce the risk of fire or electric shock, do not expose this device to rain or moisture. The device should not be exposed to dripping or splashing. Never place objects filled with liquids, such as vases, on the device.
-
There is danger of explosion if the battery is replaced incorrectly. Replace only with the same or equivalent type.
-
The battery (battery or batteries or battery pack) should not be exposed to excessive heat such as sunlight, fire or the like.
- Please follow responsible procedures for battery disposal.
- If the power adaptor disconnected from the device, the device will remain operable as long as the battery has sufficient charge.
- The power adaptor is a CLASS II apparatus with double insulation, and no external ground is provided.
● Safety symbol explanation:
| CAUTION RISK OF ELECTRIC SHOCK DO NOT OPEN | ||||
| This symbol indicates: Danger of high voltage. Be careful of electric strike! | ! | This symbol indicates: Safety parts in the equipment. They cannot be replaced during repair job. | ||
- The lightning flash with arrowhead symbol within an equilateral triangle is intended to alert the user to the presence of non-insulated “dangerous voltage” within the product's enclosure that may be of sufficient magnitude to constitute a risk of electric shock.
- To reduce the risk of electric shock, do not remove the cover (or back) as there are no user-serviceable parts inside. Refer servicing to qualified personnel.
- The exclamation point within an equilateral triangle is intended to alert the user to the presence of important operating and maintenance instructions in the literature accompanying the device.
- Correct Disposal of this product. This marking indicates that this product should not be disposed of with other household waste in the EU. To prevent possible harm to the environment or human health from uncontrolled waste disposal, recycle it responsibly to promote the sustainable reuse of material resources. To dispose of your used device, please use the return and collection systems available in your area or contact the retailer where the product was purchased. They can take this product for safe environmental recycling.
- This equipment should be installed and operated with minimum distance 20cm between the radiator & your body.
- CE in which countries where the product may be used freely: Germany, UK, Italy, Spain, Belgium, Netherlands, Portugal, Greece, Ireland, Denmark, Luxembourg, Austria, Finland, Sweden, Norway and Iceland. In France, except the channel 10 through 13, law prohibits the use of other channels.
Listening Cautions
- This product respects the current regulations for limiting the output volume of consumer audio devices to a safe level. By listening to your device with headphones or earbuds at high volumes, you run the risk of permanent damage to your ears. Even if you get used to listening at high volumes and it seems normal to you, you still risk the possibility of damaging your hearing. Reduce the volume of your device to a reasonable level to avoid permanent hearing damage. If you hear ringing in your ears, reduce the volume or shut off your device. This device has been tested with the supplied earphones. In order to preserve your hearing, it is advised that you use only the following headphone models: the earphones supplied with your device, or any other headphones that respect the current regulations. Other types of headphones may produce higher volume levels. (At full power, the prolonged listening of the walkman can damage the ear of the use)
● Maximum output voltage<=150mv
- Do not use while operating a motorized vehicle. It may create a traffic hazard and is illegal in many areas.
- You should use extreme caution or temporarily discontinue use in potentially hazardous situations created by obstructed hearing.
- Even if your headphones or earphones are the open-air type designed to let you hear outside sounds, don't turn up the volume so high that you can't hear what's around you.
- Sound can be deceiving. Over time your hearing “comfort level” adapts to higher volumes of sound. What sounds “normal” can actually be loud and harmful to your hearing. Guard against this by setting the volume of your device at a safe level BEFORE your hearing adapts.
To establish a safe volume level:
a. Start your volume control at a low setting.
b. Slowly increase the sound until you can hear it comfortably and clearly, and without distortion. Once you have established a comfortable sound level, leave it there.
This manual may not reflect your actual device's operation. All information is subject to change without prior notification. Please follow your actual device's operational procedures.
Table of Content
Safety Precautions....1
Listening Cautions....3
Feature Summary ....5
Accessories 5
Buttons & Ports ....5
Charging Battery....6
Transferring Files 6
Turning On the Unit....6
Home Screen 7
Unlocking the Screen 9
Tips on touching screen .... 10
Accessing Internet....10
Reading E-Books 12
Playing Music....13
Playing Video....15
Viewing Photos 16
Using the Camcorder/Camera 17
Exploring Files 17
Sending/Receiving E-mails....20
Managing 3 rd Party Applications ....22
Close Recent Applications ......23
Managing Tasks....23
Troubleshooting 24
Specifications 24
FCC Statement 25
Feature Summary
Wi-Fi Connectivity
With the latest Wi-Fi technology, this device can connect you to the Internet wherever you are.
7.0" Touch Screen
Touch or slide your finger on the screen, the screen responds instantly.
Third-party Application Support
With the built-in Android TM OS, you can install a large number of third-party applications in this device.
Built-in Camera Lens
Equipped with the built-in camera lens, this unit can function as a webcam or video recorder.
Built-in G-sensor
The screen changes to landscape or portrait automatically when the device rotates.
Entertainment
You can enjoy music, movies, pictures and e-books with the device.
Accessories
- Main Unit
-
User Manual
-
USB cable
-
Warranty Card
-
AC Adaptor
- Pouch
Buttons & Ports

a. VOL- - turn down the volume
b. VOL+ - turn up the volume
c. Power button – press and hold to power on or off the unit; briefly press to turn on or off the screen.
d. Earphone Port – connect to stereo earphones.
e. Built-in speakers
f. Touch screen
g. Camera lens
h. Micro USB Port – connect to a computer through USB cable.
i. Charge indicator
j. POWER-IN port - connect to power supply through DC adaptor
k. Micro SD card slot
I. Reset pin hole/Built-in microphone – reset your device if it freezes.
Charging Battery
The device has a built-in rechargeable battery. No extra battery installation is required. Just charge the device when it indicates low battery.
To charge the battery, connect the device to any standard wall outlet via the DC-IN port using the power adaptor. It takes about 5 hours to fully charge the battery. When the battery is fully charged, the charge indicator should light up in orange. During charging, the indicator lights up in red.
Note:
a. You are strongly recommended to charge the battery immediately when the device indicates the battery is lower than 15%!
b. You can operate the device even when it is being charged. But for extended battery life, it is suggested NOT to use the device when it is charging.
c. It is recommended to charge the battery before you use the device for the first time.
d. For maximum performance, lithium-ion batteries need to be used often. If you don't use the device often, be sure to recharge the battery at least once per month.
e. Be sure to use only the dedicated power adaptor provided with the unit for charging.
Transferring Files
Before reading or playing files, you need to transfer media files from a computer to the device.
(1) Connect the device to a computer with the supplied USB cable.
(2) Tap "Turn on USB storage" to connect the device to computer.
(3) Once connected, two removable disk drives will show on your computer. One represents the internal memory of the device, and the other represents the memory card inserted into the device. Now you can copy files from or to these disk drives just as you would on your hard drive.
(4) As you complete file transfer, choose "Turn off USB storage" to disconnect the device.
(5) Remove the device from the computer safely.
The pre-installed applications and Android OS occupy a considerable part of capacity – nearly more than 1GB, it is normal that you see huge difference between available memory space and total capacity.
Turning On the Unit
To turn on the device, press and hold the Power button on the unit until you see the boot-up screen. It may take a few minutes to start up the system, please wait before you proceed.

A Startup Wizard should start when the unit turns on. Please follow the wizard to set the district where you are – USA or Canada.
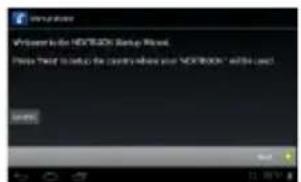


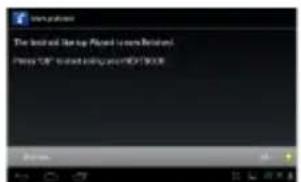
Next time if you want to start the Startup Wizard manually, you can tap "Settings" → "About tablet" → "Startup wizard", and then restart the device.

To turn off the device, press and hold the Power button until you see the option "Power Off", tap on "Power Off" and then tap on "OK".
Tip: For the sake of power saving, this device may sleep with the screen display off when there is no touch action for a while (depending on the actual setting of Screen Timeout). You can briefly press the Power button to wake it up.
Home Screen

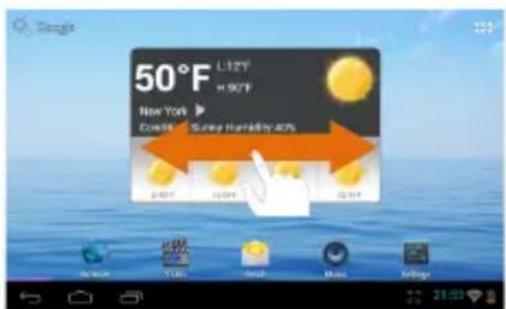
The extended Home Screen
Slide your finger horizontally on the screen to go to the left or right panel of the extended Home Screen.
Customizing Home Screen Items
- To add a Home Screen item (shortcuts, widgets, folders etc.), you can tap the application icon to display all applications and then hold your tap on an item until it is placed on home page.

- To move a Home Screen item, hold your finger onto it until it is highlighted, then drag it to the desired location, and release it.
- To remove a Home Screen item, hold your finger onto it until it is highlighted, drag it to the recycle bin "Remove" and then release your finger.

Changing the wallpaper
Hold your tap on the Home screen until a menu appear. Tap on "Wallpaper" and then choose a picture as the desktop wallpaper.

Weather Forecast Setting
- You can choose a worldwide city you are interested in by tapping the weather forecast info. Locate the city by selecting the state where the city is and then selecting the city, or inputting the city name directly in the “Search City” filed.
- You can change the default temperature unit by checking or unchecking the "Use Celsius" option.
Preset Applications
The device has many useful applications pre-installed. You can tap the Application Tab to display them.

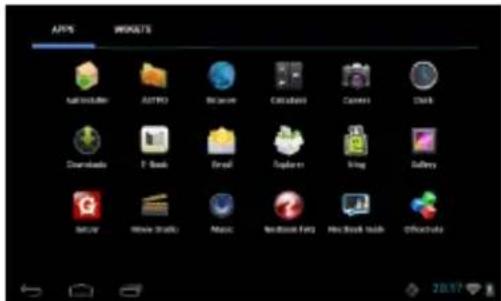
The following table explain function of main applications:
 | ApkInstaller – Install or uninstall applications |  | Explorer – explore files and folders |
 | ASTRO – Manage files and folders |  | Gallery – view photos |
 | Browser – Surf on Internet |  | GetJar – Application library |
 | Calculator |  | Music – Playing music files |
 | Camera – take photos or video clips. |  | Nextbook FAQ – FAQ about the unit |
 | Clock |  | Nextbook Guide – Guide on how to use the unit. |
 | Downloads – store downloaded applications |  | Office Suite – View Office document in WORD, EXCEL etc. |
 | E-book – Read e-books stored in the unit.(Note: To read or purchase ebooks online, please use the ebook store application instead.) |  | Email – Send or receive e-mails |
 | Fring – make video calls or send message online. |  | Movie Studio - Edit videos |
 | Net Nanny Browser – An Internet filtering software that helps parents protect their children and monitor their Internet use, includes unsafe website block, profanity masking, safe search, remote administration and report, etc. |
Unlocking the Screen
The screen will be locked after the device is idle for a few seconds. You need to unlock the screen by dragging the lock icon 🔒 rightwards before you continue to use the device.

Tips on touching screen
- Click: Briefly click on an item can open an application or page.
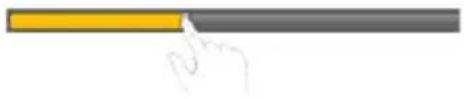
- Drag: When watching a video or listening to music, you can tap on the progress
bar to playback any designated section of the file. You can drag the cursor of the progress bar to any other elapsed time point of the file.
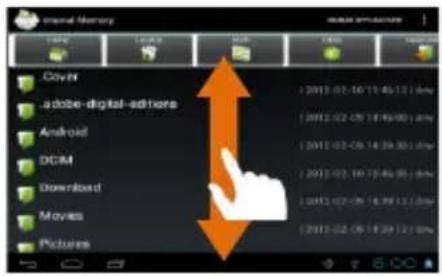
- Slide finger: In different browsers (File, Music, Video, Photo, etc.), you can hold your finger on the screen and then drag up and down to scroll the file list up and down.
- Hold finger: In some browsers (File, Music, Video, Photo, Web etc.), you may hold your finger on an item to display options.

- Pinch finger: You can zoom the page by pinching your finger.

Accessing Internet
This device features built-in Wi-Fi technology so that you can access the internet over Wi-Fi network. First of all, you need to configure a Wi-Fi network. For such purpose, you need to stay in a Wi-Fi service zone. Whenever it is within the coverage of a WiFi network you have configured, the device will attempt to make a connection.
Make WI-FI Connection
Before launching an Internet application such as the web browser, you first need to activate the Wi-Fi and configure a Wi-Fi network.
(1) Tap " in the Home screen.
(2) Slide the WIFI toggle switch to "ON" to turn on WIFI.


(3) Your Tablet will scan automatically for available WiFi networks and display them in the right panel. The list of available networks shows all the wireless networks in range of your device. Choose a network from the list and then tap "Connect" to connect. Some network may be secured with password, enter the password before connecting. If the connection is successful, the message Connected to...(WiFi Network Name) will appear under the WIFI Setting.
Note:
a) The available network list is constantly refreshed automatically.
b) When the Wi-Fi is enabled, the device will connect automatically to your configured networks when they are in range.
c) If the device detects a network that has never been configured, it will display a notification icon.
Launching the Web browser
To launch the Web browser, you tap the Browser icon in the Applications screen.
To display menus, tap


in the Applications
To enter a new address, tap the address bar and then type in address.
Note: Not all wireless networks offer access to the Internet. Some Wi-Fi networks only link several computers together, without any Internet connection.
- You can scroll the screen up and down by tapping on the page and dragging it up or down (be careful not to tap a link until you are ready!).
• To open a link, simply tap it.
• To go back to the previous page that you browsed, tap the Back icon

• To display the available menu items, tap the Menu icon

• To go back directly to the Home screen, tap the Home icon

Reading E-Books
Transfer E-books from Computer
Before reading, you need to transfer or download e-books to the device. You can copy e-books from your computer's local drive to the device by USB connection (see the "Transferring files" section mentioned before).
Note: Make sure your e-books are in format of PDF, EPUB, TXT, FB2, RTF or PDB supported by the device.
Start Reading
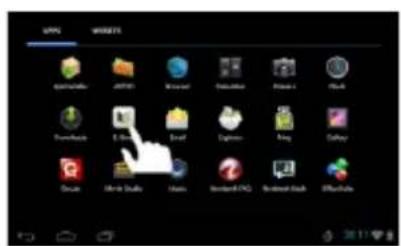
(1) In the Application page, tap "E-book" to enter the e-book reader mode.
(2) Slide your finger left and right on the book shelf to browse e-books.
(3) Tap an e-book to start reading immediately.


Search for E-book
(1) Tap on the Menu icon

(2) Enter the e-book name or author with case sensitive and then tap ENTER button to start searching.
(3) The search result is displayed.
Page Up/Down
When you are reading the e-book, you can slide your finger on the screen left and right to page up or down.

You can let the ebook page up and down automatically by: a) tapping the Men Menu icon to display e-book settings; b) Tap "Auto Flip"; c) Selecting a flip interval time.
Other Settings
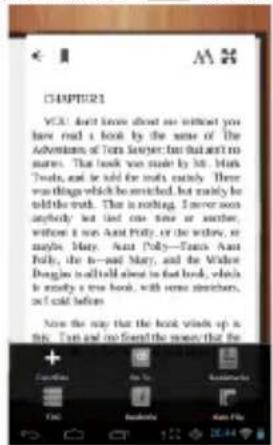
When you are reading, tap the Menu icon 📄 to display e-book settings.
Playing Music
Tap the Music icon in the application page to launch the music player.
Music Library
You should enter the music library once you start the music player. The Music Library shows your music files sorted by categories (Artist, Album, etc.) if your music files contain these song information tags. If some of your music files do not contain information tags, they will be classified as (Unknown) in the Music Library. When new music is copied to the device, the Music Library will be updated automatically.
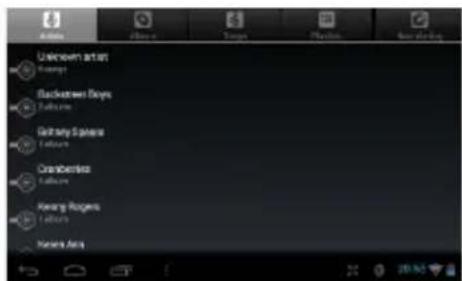
- You can drag your finger up and down on the file list to scroll through it.
- Tap a song to play.
 | Artist | List music files by artist. |
 | Album | List music files by album. |
| [2AAS] | Songs | List all music files. |
 | Playlists | List your favorite songs. |
 | Now Playing | Go to the Now Playing screen. |
Shuffle songs
In the library, tap the Menu icon Shuffle all.

to display options – Play all, Party shuffle and
Play all – play tracks in normal order.
Party shuffle – shuffle 7-8 songs as a group each time.
Shuffle all – shuffle all songs stored in the device.
Playback Screen
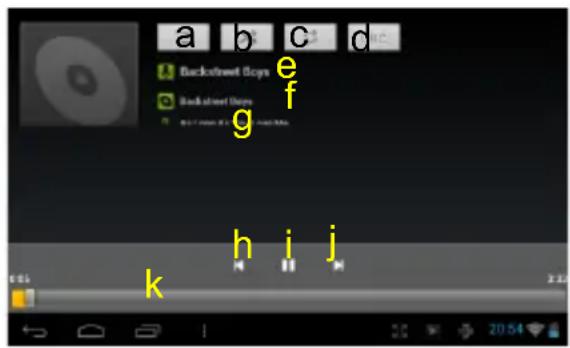
Playback menu
a. Now Playing List
b. Shuffle songs /Not shuffle
c. Repeat /Not repeat
d. Display lyric
e. Artist Name
f. Album Name
g. Title (holding your tap on the title can search for information about the track from the Internet.)
h. Previous song/Rewind
i. Play/Pause
j. Next song/Fast Forward
k. Progress bar
During playback of a music file, tap on the MENU icon menu:

to bring up a context

Library— return to music library menu.
Party Shuffle – select Party Shuffle mode
Add to playlist – add a song to the playlist.
Delete – delete a song.
Sound Effects – Set the sound effects for the music playback.
Playlist
The playlist is a list of songs that you have added manually.
To add the current track to a playlist, tap playlist" and then choose a playlist or tap. To play a playlist,

during playback, select "Add to
(1) In the Music menu, tap the Playlist icon that you have added are listed.

to display all the playlist. All songs
(2) Tap a song to start playing.
Playing Video
Tap the Video icon in the application page to launch the video player.
Navigate through Video Files
You should see the video list when you enter the video player.
- You can drag your finger up and down on the video list to scroll the video list up and down.
- Tap a video to start playing.
Playback Screen

a. VOL-
b. Progress bar
c. VOL+
d. Bookmark
e. Brightness
f. Previous Video/Fast Rewind
g. Play/Pause
h. Next video/Fast forward
i. View Mode
j. Exit
k. Video settings
Note: Some video files may not be played correctly with the device. Refer to the Technical Specifications and make sure the video resolution, encoding format or file type is supported.
Video Playback Settings
Tap on the 📄 to display the video settings.
| Delete Bookmark and Play from beginning | Delete bookmark and play from beginning. |
| Delete Bookmark Delete the video | e o bookmark. |
| Play Mode | Single – plays the current video and then stops after playing.Repeat One – Repeat the current video.Repeat All – Repeat all videos. |
| Help Get instructions on playing | video. |
| Return | Exit from the menu. |
Viewing Photos
Tap the Gallery icon in the application page to launch the Photo Gallery.
Viewing Photos
(1) Photos should be listed in thumbnail. You can slide your finger on the screen left or right to browse photos.
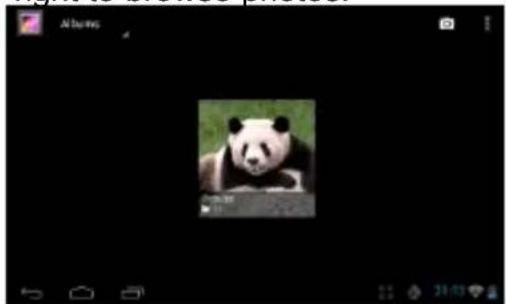
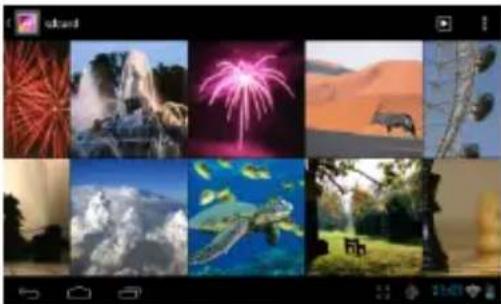
(2) Tap a photo thumbnail to view the photo in full screen.

(3) To display the previous/next picture, slide your finger on the screen horizontally.
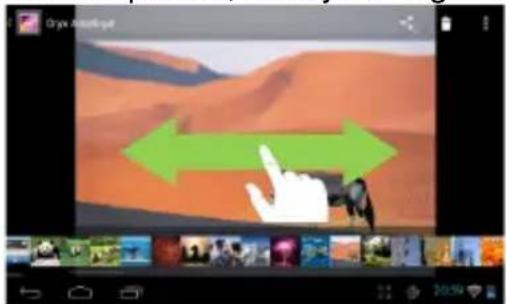
(4) To zoom in or out the picture, pinch your finger on the picture.

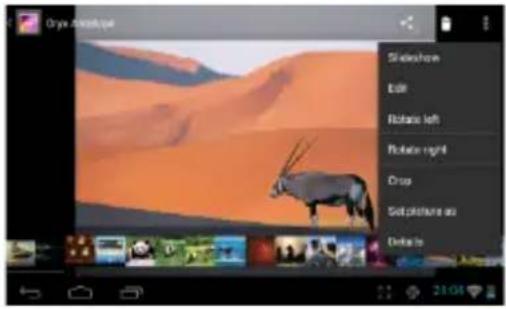
Display Menu
When you are viewing the picture, you can tap on the screen or the Menu icon show a menu.

to
Using the Camcorder/Camera
Tap the Camera in the application page to launch the Camera.

- To start making video clips, tap on the Start/Stop button recording.

to start video
- Tap on the Start/Stop button 📄 again to stop video recording or photographing.
- The video clip / photo can be previewed in the Preview Window.
- To play the video clip that you have made, enter the Video Player, and then tap the video.
- To view the photo that you have taken, enter the Photo Viewer mode, and then tap the photo.
Exploring Files
You can explore files and folders with the Explorer and Astro application. In the Home Screen, tap the Applications shortcut to display all applications and then tap the Explorer icon or ASTRO to enter the file explorer mode.
Using the Explorer
Navigate through Files and Folders
- You can drag your finger up and down to scroll the file list up and down.
• To open a file or folder, tap the file/folder. - Tap MANAGE APPLICATIONS, you can uninstall applications (see details in the "Managing 3rd party Applications" section).
• You can go back or forward one level in the
![Internal Memory Home Language Mark User HowTo DC/MS Download Movies Pictures Notifications [2011-03-06 20:39:29] drive [2011-03-03 22:57:08] drive [2011-03-03 22:57:08] drive [2011-03-03 21:50:12] drive [2011-03-03 22:57:08] drive](/content/2026/05/1085623/images/c1fcb3f2b98862e02f05de02934396a216bf137197e6ea130dbdc36b03c11f84.jpg)
interface by tapping on the Back icon or Next icon
- You can go back one level in the directory by tapping on the LevelUp button
- Wherever you are in the interface, you can go back directly to the Home screen by tapping
- Tapping can hide/display the toolbar.
- Tap the Home icon 📁 to go to the root directory.
Using the Toolbar
You can use the toolbar to navigate through your device's internal memory/ memory card and delete or copy files.
![graph LR A["Home"] --> B["LevelUp"] B --> C["Multi"] C --> D["Editor"] D --> E["NewFolder"]](/content/2026/05/1085623/images/3ebd46a8806e24d68f48dd89646f999e63512a8543765cab4ef98ac1f69649cc.jpg)
Sliding your finger on the toolbar can scroll through all tools.
| Home | Go to the Home Screen. |
| LevelUp | Go back one level in the directory. |
| Multi | Select more than one file. |
| Editor | Copy, delete, move, paste or rename the file or folder. |
| New Folder | Create a new folder. |
| Back | Go back one level in the interface. |
| Next | Go forward one level in the interface. |
Copy/Move Files and Folders
(1) In the file list, scroll up and down by sliding your finger to select the file/folder that you want to copy or move.
(2) Hold the selected file/folder until a pop-up menu appears.
(3) Select "Copy" or "Move" from the pop-up menu.
(4) Navigate to the location where you wish to copy or move the file/folder to.
(5) Select the Editor icon from the toolbar and then choose "Paste."

Delete Files and Folders
(1) In the file list, scroll up and down the list by sliding finger to select the file/folder that you want to delete.
(2) Hold the selected file/folder until a pop-up menu appears.
(3) Select "Delete" from the pop-up menu, then select "Delete" to confirm or "Cancel" to quit.
Rename Files and Folders
(1) In the file list, scroll up and down the list by sliding finger to select the file/folder that you want to rename.
(2) Hold the selected file/folder until a pop-up menu appears.
(3) Select "Rename" from the pop-up menu.
(4) Tap the input field to display the virtual keyboard, and then choose letters from the virtual keyboard to rename the file/folders.
(5) Tap "OK" to confirm the new name.
Select Multiple Items
You can select more than one file or folder together.
(1) In the top toolbar, tap the Multi icon " [REDACTED]."
(2) Tap the files/folders you want to choose. The file/folder name turns red when selected. (To deselect the file/folder, tap it again.)
(3) Once you finished selection, you can delete, copy or move the selected files by tapping on the Editor icon
Using the ASTRO
Navigate through Files and Folders
- You can drag your finger up and down to scroll the file list up and down.
• To open a file or folder, tap the file/folder. - Tap the menu icon ☐, you can manage the applications (see details in the “Managing 3rd party Applications” section).
• You can go back or forward one level in the
interface by tapping on the Back icon 🙏 or Next icon 📁.

- You can go back one level in the directory by tapping on the LevelUp button
- Wherever you are in the interface, you can go back directly to the Home screen by tapping on the Return icon
- Tap the Home icon 📋 to go to the root directory.
Using the Toolbar
You can use the toolbar to navigate through your device's internal memory/ memory card and delete or copy files.
Tapping on the grey area can hide/display the toolbar.

Sliding your finger on the toolbar can scroll through all tools.
| Home | Go to the Home Screen. |
| Up | Go back one level in the directory. |
| Multi | Select more than one file. |
| Edit | Copy, delete, move, paste or rename the file or folder. |
| Search | Search for a specific file or folder |
| Back | Go back one level in the interface. |
| Next | Go forward one level in the interface. |
| View | Display files and folders in list or icons. |
| Sort | Sort files and folders by name, date, size or file type. |
| Prefs | Preferences for the ASTRO |
| Network | Enable the Wi-Fi network or Bluetooth (if available). |
Copy/Move Files and Folders
(1) Navigate through the file/folder and locate the file/folder you want.
(2) Tap the Multi icon 📋 and then tap the file(s) /folder(s) that you want. You can select multiple items by tapping. To deselect the item(s), tap the Cancel icon 📋.
(3) Select "Copy" or "Move" from the pop-up menu.
(4) Navigate to the location where you wish to copy or move the file/folder to.
(5) Select the Edit icon from the toolbar and then choose "Paste."
Delete Files and Folders
(1) Navigate through the file/folder and locate the file/folder you want.
(2) Tap the Multi icon and then tap the file(s) /folder(s) that you want. You can select multiple items by tapping. To deselect the item(s), tap the Cancel icon.
(3) Select "Delete" from the pop-up menu and then select "Delete" to confirm.
Compress Files/Folder with Zip
(1) Navigate through the file/folder and locate the file/folder you want.
(2) Tap the Multi icon and then tap the file(s) /folder(s) that you want. You can select multiple items by tapping. To deselect the item(s), tap the Cancel icon.
(3) Select "Zip" from the pop-up menu.
(4) Enter a name for the zip file and then tap "Create".
File Options
You can hold your finger on an item to display the following options:
Details – file information
Open As – open the file with another application.
Edit – copy, delete, move, zip the file
Send – send the file by e-mail (email account login required.)
Set As – set the file as desktop

Sending/Receiving E-mails
This device has an E-mail application pre-installed. You can send or receive e-mails from the Internet at any time with this device. Make sure you have an Internet connection before using the email service.
In the Home Screen, tap the Applications shortcut to display all applications and then tap the Email icon to launch the e-mail application.
Setup Email Account
First you need to setup an E-mail account for receiving or sending emails.
(1) Start up the email application by tapping the Email application icon and you are
prompted to setup an account.
(2) Input your email address and login password. You can set the account as default by selecting the option "Send email from this account by default".
(3) Tap "Manual Setup" to set the email server information.
(4) Choose the server type from POP3, IMAP or Exchange for incoming emails. To know what type of your email server is, you can consult the service provider, network administrator or search for information in the Internet.
(5) Input required information (server, port etc.). You can obtain the information from the service provider, network administrator or the Internet.
(6) Choose the server type for outgoing emails, and input required server information.
(7) Click "Next" to continue. Your tablet will check the server settings. When it prompts you that "Your account is set up, and email is on its way", your account is set up successfully.
(8) Input your name and then tap on "Done" to finish.
Note: If you have more than one account, every time when you start up the email application, you enter the default email account.
Manage Accounts
You can setup more than one account and manage these accounts by checking information about the account, adding another account or deleting an account.
Add another Account
Following these steps to add another account if you want.
(1) Launch the email application and then tap on the Menu icon ☐ to display the menu item. Choose "Accounts" to display accounts.
(2) Tap on the Menu icon ☐ to display the menu item, and then choose "Add account".
(3) Follow the steps of setting up a Email Account to add an account.
Delete an Email Account
(1) When you are in the email box, tap on the Menu icon ☐ to display the menu items.
(2) Tap on "Accounts" to display all email accounts.
(3) Hold your tap on the account that you want to delete until a menu pop up.
(4) Tap on "Remove Account", and then tap on "OK" to confirm.
Check the Account Setting
(1) When you are in the email box, tap on the Menu icon ☐ to display the menu items.
(2) Tap on "Accounts" to display all email accounts.
(3) Hold your tap on the account that you want to check until a menu pop up.
(4) Tap "Account settings", and then you should see all setting information about the account. You can edit these settings as you want.
View Emails
You should enter your mailbox when you start up the email application.
- In the mailbox, you can slide your finger up and down to scroll through the email list.
- Tap on an email to open it.
- Holding your tap on the email can display a menu. With the menu, you can open, reply, forward or delete the email.
Email Menu Items
In the email list, tap on the Menu icon

to display the menu.
| Refresh | Refresh the emails. |
| Compose | Compose a new email. |
| Folders | Go back to email box. |
| Accounts | View all email accounts. |
| Account Settings | Check your account settings. |
Managing 3 rd Party Applications
Your device provides support to many useful third-party applications. You can purchase the applications to add more functions to your device. They are available online at the Internet or directly on your product.
Pre-installed Applications
The device has pre-installed applications when it was manufactured. You can see them by tapping the Applications icon 📄. They are video player, audio player, browser, alarm clock, calculator etc.
Install Applications
You can install applications manually following these steps:
(1) Download the installation file directly from the built-in application library (e.g. GetJar) or Internet. Make sure the file is in format of .apk which is supported by your Internet Tablet system.
(2) Copy the installation file to your Internet Tablet by USB connection.
(3) Turn on your Internet Tablet and locate the installation file with the Explorer.
(4) Once the application is installed successfully, you can find it in the application tab.
Uninstall Applications
(1) Tap the Settings shortcut in the Home Screen to display all system settings.
(2) Select "Apps".
(3) Tab on the application that you want to uninstall.
(4) Tab on "Uninstall" to uninstall the application.

Note:
• You cannot uninstall the pre-installed applications.
- Some of the applications developed for Android mobile might not run properly in the Device. Please consult the respective software developer for further information.
Close Recent Applications
Your device can remember applications that you used recently. That's very useful when you want to go back to a window you opened recently. Also, you can close these applications to enhance system performance.
(1) Tap to display applications that you used recently.
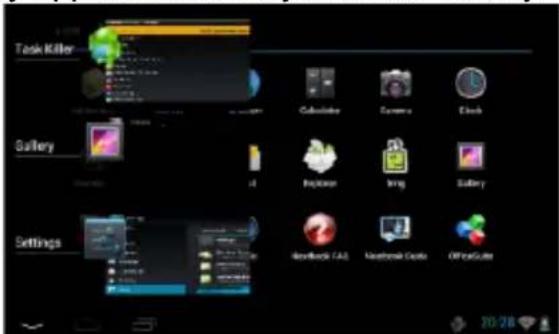
(2) Hold your tap on the application that you want to stop, and then select "Remove from list".

Managing Tasks
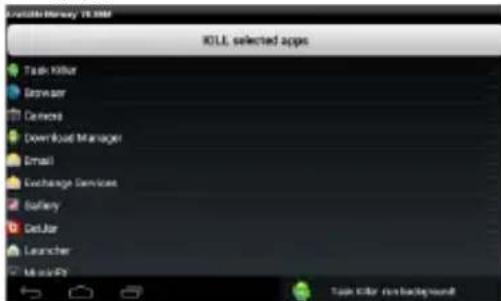
Your Internet Tablet can handle multiple tasks at the same time. For example, you can view photos while listening to music. Multitasking is helpful but inefficient if too many tasks are running. In order to save system memory and enhance system performance, you can end some tasks that you don't use at the moment.
(1) Tap "Advanced Task Killer" application.
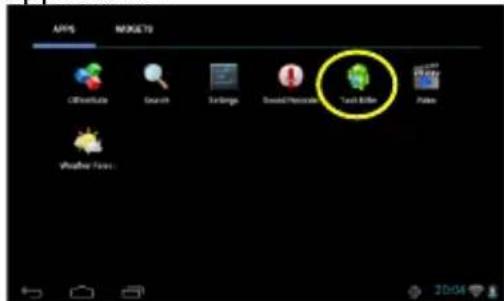
(3) Tap "KILL selected apps" to end the task.
(2) Tap the task that you want to end.
Troubleshooting
Reset this device
- In the event that the device freezes, you can force the device to shut down by holding the Power button for 15 seconds.
- If the Power button does not reset your device, use the "pinhole reset" button on the device.
Specifications
| Item Description | |||
| CPU | Based on Cortex-A8Main CPU frequency: 1GHz | ||
| DDR 512MB | |||
| Built-in operating system | Android OS 4.0 | ||
| Hardware | IBM PC or compatible PC, Note-book or Macintosh with USB port | ||
| Internal Memory | 4GB | ||
| Memory Card type | Micro-SD card: 1GB, 2GB, 4GB (SDHC), 8GB (SDHC), 16GB, 32GB(optional) | ||
| Operation System | Windows2000/XP/Vista/windows 7/Linux2.4/MAC OS 10.6.7 above | ||
| Interface | USB2.0 High speed | ||
| SD (compatible SDHC) | |||
| 3.5mm Earphone | |||
| Connection Agreement | WiFi (802.11 b/g/n) | ||
| G-sensor | Support 360 rotation | ||
| E-Book | File Format | PDF/EPUB/TXT/FB2/PDB/RTF | |
| Coding Format | PDF / EPUB Format: .Open | ||
| TXT / FB2/PDB /RTF Format: .Open | |||
| Photo Format | JPEG(Baseline): 2Mpels (Max) | ||
| BMP | |||
| GIF (Static) 1000x 1000 (Max.) | |||
| PNG | |||
| Audio | File Format | MP3/WAV/OGG/FLAC/APE/AAC/WMA | |
| Coding Format | MP3 (MPEG1/2/2.5 Audio Layer 1/2/3): 8~48KHZ/8~320Kbps,CBR and VBR | ||
| WAV (MS-ADPCM, IMA-ADPCM, PCM): 8~48KHZ | |||
| OGG (Q1-Q10): 8~48KHZ | |||
| FLAC(Compress Level 0~8): 8~48KHZ | |||
| APE (Version 3.95,3.97,3.98,3.99,normal and fast): 8~48KHZ | |||
| AAC(ADIF, ATDS Header AAC-LC and AAC-HE): 8~48KHZ | |||
| Video | File Format | AVI, 3GP, MP4, RM, RMVB, FLV, MOV, | |
| Coding Format | AVI(MPEG4,XVID,DIVX3/4/5/6, MS MPEG4 V3) | 1920*1088pixels/30FPS (Max) | |
| Audio Codec: MP2/MP3/AC3/AAC/PCM | |||
| 3GP/MP4(H.264,H.263,MPEG4,XVID,DIVX3/4/5/6, MS MPEG4 V3) | MPEG4,XVID,DIVX3/4/5/6:1920*1088pixels/30FPS (Max.) | ||
| H.264: 1920*1088pixels/30FPS (Max) | |||
| Audio Codec: MP2/MP3/AC3/AAC/PCM | |||
| RM/RMVB(Real video 8/9) | 1920*1088pixels/30FPS (Max) | ||
| Audio Codec: Cook/AAC | |||
| FLV(Sorenson Spark) | 1920*1088pixels/30FPS (Max) | ||
| Audio Codec: MP3 | |||
| MOV(H.264,H.263,MPEG4,XVID,DIVX3/4/5/6, MS MPEG4 V3) | MPEG4, XVID,DIVX3/4/5/6, MS MPEG4 V3: 1920*1088 pixels/30FPS/38.4Mbps(Max.) | ||
| H.264:1920*1088pixels/30FPS/20Mbps(Max) | |||
| Audio Codec: MP2/MP3/AC3/AAC/AMR | |||
| MPG/DAT/VOB(MPEG1/2) | 1920*1088pixels/30FPS/80Mbps(Max.) | ||
| Audio Codec: MP2/MP3 | |||
| Battery Charge Time | About 5 Hours | ||
| Battery Life | About 6 hours of music playback;About 5 hours of video playback;About 4.5 hours of web browsing. | ||
| Display | 7.0-inch TFT LCD, Touchpad (resistive touch pad), 800X480 pixels. | ||
| SNR | >=75dB | ||
| Frequency Response Range | 20Hz—20KHz | ||
| Power Supply | Rechargeable lithium-ion polymer battery;AC Adapter: AC Input 100-240V~50/60Hz, DC Output 5V/2A | ||
| Storage Temp. | -20°C ~ +65°C | ||
| Ambient Temp. | 0°C ~ +50°C | ||
| Operation Relative Humidity | 20% ~ 90% (40°C) | ||
| Storage Relative Humidity | 20% ~ 93% (40°C) | ||
FCC Statement
This equipment generates, uses and can radiate radio frequency energy and, if not installed and used in accordance with the instructions, may cause harmful interference to radio communication. However, there is no guarantee that interference will not occur in a particular installation. If this equipment does cause harmful interference to radio or television reception, which can be determined by turning the equipment off and on, the user is encouraged to try to correct the interference by one or more of the following measures:
- Reorient or relocate the receiving antenna.
- Increase the separation between the equipment and receiver.
- Connect the equipment into an outlet on a circuit different from that to which the receiver is connected.
- Consult the dealer or an experienced radio/TV technician for help.
Caution: Any changes or modifications to this device not explicitly approved by manufacturer could void your authority to operate this equipment.
USA
This device complies with Part 15 of the FCC Rules. Operation is subject to the following two conditions:
(1) this device may not cause harmful interference, and
(2) this device must accept any interference received, including interference that may cause undesired operation.
Changes or modifications not expressly approved by the party responsible for compliance could void the user's authority to operate the equipment.
Canada:
This device complies with Industry Canada licence-exempt RSS standards(s).
Operation is subject to the following two conditions: (1) this device may not cause interference, and 2) this device must accept any interference, including interference and that may cause undesired operation of the device.
FCC RF warning statement:
The device has been evaluated to meet general RF exposure requirement. The device can be used in portable exposure condition without restriction.
Other names of systems and products mentioned in these instructions are usually the registered trademarks or trademarks of the manufacturers who developed the system or product concerned. The ™ and ® marks are not used to identify registered trademarks and trademarks in these instructions.
This manual was correct and complete at the time of printing. However, new specifications and updates can occur at any time without prior notice. No part of this manual may be copied, republished, reproduced, transmitted or distributed in any way without prior written consent of E Fun. Any unauthorized distribution of this manual is expressly forbidden.
E Fun may find it necessary to modify, amend or otherwise change or update this manual. We reserve the right to do this at any time, without any prior notice. All specifications and features are subject to change without notice. All screen shots shown are simulated and may not represent the actual screen on production units sold to consumers.
For instruction manuals, updated drivers or other information, be sure to visit our website at:
www.nextbookusa.com
Or write to us at:
E Fun
136 N. Grand Avenue # 148
West Covina, CA 91791
USA
Copyright © 2012
Mesures de sécurité
| CAUTION RISK OF ELECTRIC SHOCK DO NOT OPEN | |||
| This symbol indicates: Danger of high voltage. Be careful of electric strike! | ! | This symbol indicates: Safety parts in the equipment. They cannot be replaced during repair job. | |



Accéder à Internet
Autres réglages

Affichage du menu
Gérer des tâches
- LISTENING CAUTIONS
- TABLE OF CONTENT
- FEATURE SUMMARY
- WI-FI CONNECTIVITY
- 7.0" TOUCH SCREEN
- THIRD-PARTY APPLICATION SUPPORT
- BUILT-IN CAMERA LENS
- BUILT-IN G-SENSOR
- ENTERTAINMENT
- ACCESSORIES
- BUTTONS & PORTS
- CHARGING BATTERY
- NOTE
- TRANSFERRING FILES
- TURNING ON THE UNIT
- HOME SCREEN
- THE EXTENDED HOME SCREEN
- CUSTOMIZING HOME SCREEN ITEMS
- CHANGING THE WALLPAPER
- WEATHER FORECAST SETTING
- PRESET APPLICATIONS
- UNLOCKING THE SCREEN
- TIPS ON TOUCHING SCREEN
- ACCESSING INTERNET
- MAKE WI-FI CONNECTION
- LAUNCHING THE WEB BROWSER
- READING E-BOOKS
- TRANSFER E-BOOKS FROM COMPUTER
- START READING
- SEARCH FOR E-BOOK
- PAGE UP/DOWN
- OTHER SETTINGS
- PLAYING MUSIC
- MUSIC LIBRARY
- SHUFFLE SONGS
- PLAYBACK SCREEN
- PLAYBACK MENU
- PLAYLIST
- PLAYING VIDEO
- NAVIGATE THROUGH VIDEO FILES
- VIDEO PLAYBACK SETTINGS
- VIEWING PHOTOS
- DISPLAY MENU
- USING THE CAMCORDER/CAMERA
- EXPLORING FILES
- USING THE EXPLORER
- NAVIGATE THROUGH FILES AND FOLDERS
- USING THE TOOLBAR
- COPY/MOVE FILES AND FOLDERS
- DELETE FILES AND FOLDERS
- RENAME FILES AND FOLDERS
- SELECT MULTIPLE ITEMS
- USING THE ASTRO
- COMPRESS FILES/FOLDER WITH ZIP
- FILE OPTIONS
- SENDING/RECEIVING E-MAILS
- SETUP EMAIL ACCOUNT
- MANAGE ACCOUNTS
- ADD ANOTHER ACCOUNT
- DELETE AN EMAIL ACCOUNT
- CHECK THE ACCOUNT SETTING
- VIEW EMAILS
- EMAIL MENU ITEMS
- MANAGING 3 RD PARTY APPLICATIONS
- PRE-INSTALLED APPLICATIONS
- INSTALL APPLICATIONS
- UNINSTALL APPLICATIONS
- CLOSE RECENT APPLICATIONS
- MANAGING TASKS
- TROUBLESHOOTING
- RESET THIS DEVICE
- FCC STATEMENT
- USA
- CANADA
- FCC RF WARNING STATEMENT
- MESURES DE SÉCURITÉ
- ACCÉDER À INTERNET
- AUTRES RÉGLAGES
- AFFICHAGE DU MENU
- GÉRER DES TÂCHES
Brand : Nextbook
Model : Premium 7 Resistive
Category : Tablet