
B7300 - Téléphone intelligent SAMSUNG - Free user manual and instructions
Find the device manual for free B7300 SAMSUNG in PDF.


| Product Type | Smartphone |
| Brand | Samsung |
| Model | B7300 |
| Dimensions | 112 x 56 x 12.5 mm |
| Weight | 110 g |
| Display Size | 3.0 inches |
| Display Type | TFT resistive touchscreen |
| Operating System | Windows Mobile 6.1 |
| Processor | 800 MHz |
| RAM | 256 MB |
| Internal Storage | 512 MB ROM |
| Expandable Storage | microSD up to 32 GB |
| Rear Camera | 3.15 MP with autofocus |
| Battery Capacity | 1500 mAh Li-Ion |
| Standby Time | Up to 500 hours |
| Talk Time | Up to 8 hours |
| Connectivity | GSM, HSDPA, Wi-Fi 802.11 b/g, Bluetooth 2.0, USB |
| GPS | Yes, with A-GPS |
| Maintenance | Clean with dry soft cloth; avoid liquids and extreme temperatures. |
| Safety | Use only original charger; do not expose to moisture or high heat. |
| Spare Parts & Repairability | Battery, SIM, and microSD are user-accessible; other repairs require service center. |
Frequently Asked Questions - B7300 SAMSUNG
User questions about B7300 SAMSUNG
0 question about this device. Answer the ones you know or ask your own.
Ask a new question about this device
Download the instructions for your Téléphone intelligent in PDF format for free! Find your manual B7300 - SAMSUNG and take your electronic device back in hand. On this page are published all the documents necessary for the use of your device. B7300 by SAMSUNG.
USER MANUAL B7300 SAMSUNG
natural_image
Stylized illustration of a mobile phone tree with flowers and a butterfly, no text or symbols presentRead me first!
When you need information, instructions, and tips to learn more about your device, you have several options available:
- Help System (on your device) - your device includes Help. This embedded, searchable help system explains how to use various Microsoft programs and features.
- Extended Usage Guide(online in English only) - on the Samsung website, you will find the Extended Usage Guide in Adobe Acrobat (.pdf) format. You can either view the guide online or download and print the file for your convenience. The Extended Usage Guide contains advanced usage tips and more details about particular functions of your device. To view the file, you must have Adobe Reader or Adobe Acrobat installed-you can download Adobe Reader free from Adobe's website (www.adobe.com).
- User Manual (printed) - this user manual has been specially designed to guide you through the functions and features of your device. It contains extensive information about Samsung software and features and tips for using and maintaining the device. For any topics not covered in this manual, please refer to the embedded help as described above.
Instructional Icons
Before you start, familiarise yourself with the icons you will see in this manual:

Warning – situations that could cause injury to yourself or others

Caution – situations that could cause damage to your device or other equipment

Note – notes, usage tips, or additional information
▶ Refer to – pages with related information; for example: ▶ p. 12 (represents "see page 12")
Followed by – the order of options or menus you must select to perform a step; for example: Tap Start > Settings (represents Start, followed by Settings)
[ ] Square brackets – device keys; for example: [ ] (represents the End/Power key)
Copyrights and trademarks
Rights to all technologies and products that comprise this device are the property of their respective owners:
- This product includes software licensed from MS, an affiliate of the Microsoft Corporation. Microsoft and software bearing the Microsoft name are registered trademarks of the Microsoft Corporation.
- Java™, is a trademark of Sun Microsystems, Inc.
- Bluetooth ^ is a registered trademark of the Bluetooth SIG, Inc. worldwide. Bluetooth QD ID: B015579
- Wi i -®, the Wi-Fi CERTIFIED logo, and the Wi-Fi logo are registered trademarks of the Wi-Fi Alliance.
- D i v ^ is a registered trademark of DivX, Inc., and is used under licence.
- SRS® and SRS® are trademarks of SRS Labs, Inc. CS Headphone and WOW HD technologies are incorporated under licence from SRS Labs, Inc.

Windows Mobile

C€0168①
ABOUT DIVX VIDEO
DivX ^® is a digital video format created by DivX, Inc. This is an official DivX Certified device that plays DivX video. Visit www.divx.com for more information and software tools to convert your files into DivX video. DivX Certified to play DivX ^® video up to 320x240.
ABOUT DIVX VIDEO-ON-DEMAND
This DivX Certified ^® device must be registered in order to play DivX Video-on-Demand (VOD) content. To generate the registration code, locate the DivX VOD section in the device setup menu. Go to vod.divx.com with this code to complete the registration process and learn more about DivX VOD.
Contents
Introducing your device 9
Unpack 9
Get to know your device 10
Assemble and prepare your device 15
Turn on your device for first time 18
Customise your device 23
Use Widgets 26
Use the shortcut toolbar 30
Work with applications 31
Enter text 33
Communication 40
Work with contacts 40
Calling 45
Messaging 49
Multimedia 53
Camera 53
Media Player 60
Photo 64
Digital Frame 66
FM Radio 68
Video Editor 70
Games 74
Java 74
Personal productivity 75
ActiveSync 75
Clock 79
Schedule 82
Notes 84
Memo 85
Recorder 86
Tasks 87
Calculator 88
Unit Converter 90
Smart Reader 91
Smart Search 93
Web applications 96
Web browsing with Opera 96
Rich Internet 98
Search Widget 98
Streaming Player 99
Midomi 100
RSS Reader 101
Podcast 104
QIK 106
Communities 109
Samsung Application Store 111
Marketplace 112
Microsoft My Phone 113
Connectivity 114
Connect to the internet or your network 114
GPS 118
Bluetooth 121
Wi-Fi 126
Connected Home 128
Troubleshooting 133
Safety and usage information 138
Index 151
Introducing your device
Unpack
Your package contains the following items:
- Handset
- Battery
- Travel adapter (charger)
- User manual

- The items supplied with your device and available accessories may be different depending on your region or service provider.
- The supplied accessories perform best for your phone.
Get to know your device
Front view


Keys
| Key Function | |
 | Open the dialling screen; Make or answer a call; Activate the speakerphone during a call (press and hold) |
 | Return to the previous menu level; Launch Task Switcher (press and hold) |
 | Turn the device on or off (press and hold); End a call; Return to the Today screen |
| [X32X] | Adjust the volume; During a call, adjust the voice volume; During an incoming call, mute the call ringer |
 | Access Main menu; Launch Recorder (press and hold) |
| [4248] | Activate or deactivate Sleep mode; Lock or unlock the external keys and the touch screen (press and hold) |
 | Activate the camera; In Camera mode, take a photo or record a video |
Icons
| Icon Function | |
 | UMTS network available |
 | UMTS network available (data call unavailable) |
 | UMTS network connected |
 | HSDPA network available |
 | HSDPA network connected |
 | ActiveSync in progress |
 | Battery level |
 | Battery charging |
 | Attempt to access via Bluetooth or Bluetooth activated |
| Icon Function | |
 | Bluetooth visibility activated |
 | Receiving data via Bluetooth |
 | Bluetooth stereo headset connected |
 | Bluetooth hands-free connected |
 | Call on hold |
 | Call forwarding activated |
 | Connected to a computer |
 | Data call in progress |
 | EDGE network available |
 | EDGE network connected |
 | GPRS network available |
 | GPRS network connected |
 | Searching for a signal |
| [XABX] | Missed call |
 | More status icons available (tap the icon to see them) |
 | New text message |
| [HYAB] | New email message |
 | New multimedia message |
 | New voice mail message |
 | No signal |
 | No SIM or USIM card |
 | Pending alarm |
 | Offline |
| Icon Function | |
| Ringer on | |
| Ringer set to vibrate | |
| Roaming (outside of normal service area) | |
| Signal strength | |
| Synchronisation error | |
| Urgent notification (tap the icon to see the message) | |
| Voice call in progress | |
| Wi-Fi activated | |
| Wi-Fi data call in progress | |
Assemble and prepare your device
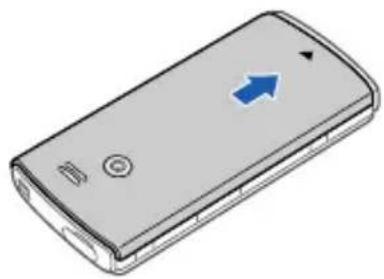
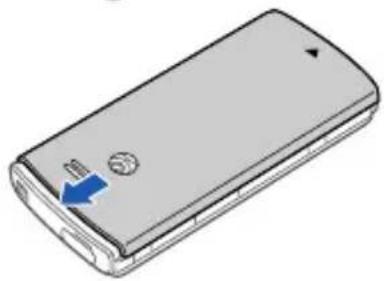
Before you can use your device, you must install the SIM or USIM card, install the battery, and charge the battery. Installing a SIM or USIM card is optional, but may be required to fully utilise some applications and store media files.
Insert the SIM or USIM card and battery
natural_image
Illustration of a mobile phone casing with a blue arrow pointing to the top-right corner (no text or symbols)1 Remove the battery cover.

natural_image
Diagram of a device's internal structure showing a highlighted component (no text or symbols present)2 Insert the SIM or USIM card.

Insert the SIM or USIM card with the gold-coloured contacts facing the device.
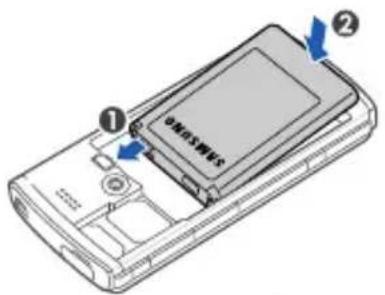
3 Insert the battery.
natural_image
Illustration of a mobile phone casing with a blue arrow pointing to the side panel (no text or symbols)4 Replace the battery cover.
Charge battery
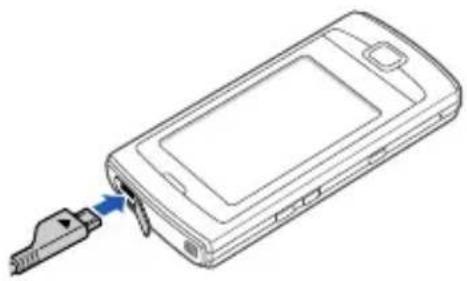
natural_image
Line drawing of a mobile phone with a USB cable inserted into the main body (no text or symbols)1 Open the cover to the multifunction jack on the top of the device.
2 Plug the small end of the travel adapter into the device.
3 Plug the large end of the travel adapter into a power outlet.
4 When charging is finished, unplug the travel adapter from the power outlet.
5 Remove the travel adapter from the device.

Although a charger cable is connected,
- The battery may not charge in some situations to protect the device.
- The battery level may remain low if the device is using a large amount of power.
Insert a memory card (optional)
By inserting a memory card, you can store multimedia files and messages or back up your important information. Your device accepts microSD ^TM or microSDHC ^TM memory cards up to 32 GB (depending on memory card manufacturer and type).

Formatting the memory card on a PC may cause incompatibility with your phone. Format the memory card only on the phone.

natural_image
Line drawing of a smartphone with a magnified inset showing a cable being inserted (no text or symbols)1 Open the cover to the memory card slot on the right of the device.
2 Insert a memory card with the label side facing-up.
3 Push the memory card in the memory card slot until it locks in place.
Turn on your device for first time
1 Press and hold []to turn on your device.
2 Follow the on-screen instructions. Your device will automatically connect to the cellular network.
Activate Sleep mode
You can activate Sleep mode to save power when you do not use your device.
To activate Sleep mode, press [ ] Your device will turn off the screen. To deactivate Sleep mode, press [ ] again.
Lock external keys and touch screen
You can lock the external keys and the touch screen to prevent any unwanted device operations from accidentally pressing any of the keys and the screen.
To lock the keys and the screen, press and hold [ ] To unlock, press and hold [ ] again.
You can also tap Start > Lock. To unlock, slide the lock icon to the left or right.
Use the touch screen
You can perform the following actions on your device's touch screen:

For optimal use of the touch screen, remove the screen protection film before using your device.
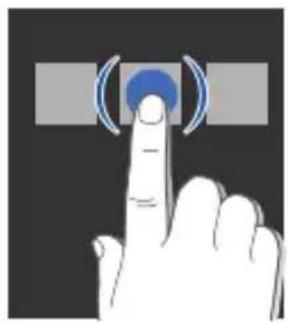
natural_image
Hand icon pointing at a blue circular button on a gray rectangular background (no text or symbols)- Tap an icon to open a menu or launch an application.
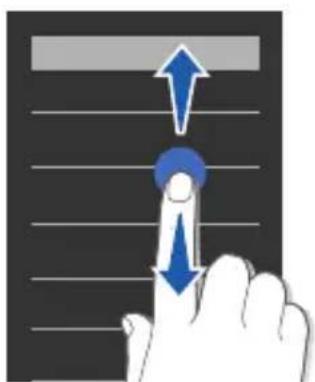
natural_image
Illustration of a hand pressing down on a document with arrows indicating upward and downward motion (no text or symbols)- Drag your finger up or down to scroll through vertical lists.

natural_image
Hand icon pointing at three squares with blue arrows indicating movement (no text or symbols)- Drag your finger left or right to scroll through horizontal lists.

If your device does not respond accurately to your screen taps, realign your touch screen. To realign the screen, tap Start > Settings > Basic Settings tab > General Settings > Align Screen > Align screen.
Disable wireless functions
1 Tap Start > Settings.
2 On the Basic Settings tab, tap General Settings > Wireless Manager.
3 Tap next to Phone.
- Your device will show 📋 on the Today screen.
To enable wireless functions, repeat steps 1-3 above.
Reset the device

natural_image
Line drawing of a smartphone with a dotted circular arrow indicating left-side movement (no text or symbols)If your device freezes or hangs, you may need to close programs or reset the device to regain functionality. If your device is still responsive but a program is frozen, close the program via Task Switcher. ▶ p. 32
If your device is frozen and unresponsive, remove the battery cover and use a small object, such as a toothpick, to press the reset button.
Customise your device
Learn to change themes and background images, add or remove items, and adjust the system volume from the Today screen.
Change your theme or background image
1 Tap Start > Settings.
2 On the Basic Settings tab, tap Display and Light.
3 Tap Theme or Wallpaper and select the desired option to customise the display.
4 Tap Yes (if necessary).
5 When you are finished, tap Done.
Add or remove items on the Today screen
1 Tap Start > Settings.
2 On the Basic Settings tab, tap Display and Light.
3 Tap Items on Today.
4 Tap the check boxes next to each item to add or remove items.

Some items are not compatible with Samsung widgets. If you choose to add Samsung WidgetPlus, the only other items that will work simultaneously are Windows Live and Windows Live Search.
5 Tap Done.
6 When you are finished, tap Done.
Adjust the system volume
To adjust the system volume, press the Volume key up or down. To set the device to vibrate, press and hold the Volume key down. To deactivate the vibrate feature, press and hold the Volume key down again.
Activate Etiquette pause
You can temporarily pause the music player or mute event alarms by placing the device face down when Etiquette pause is activated. To activate Etiquette pause,
1 Tap Start > Settings.
2 On the Basic Settings tab, tap Motion Settings > Etiquette.
3 Tap next to Enable etiquette pause.
4 Tap Done.
Use Widgets
Use widgets on the Today screen. Widgets are user friendly shortcuts to commonly used applications allowing you to customise the Today screen.
Open the toolbar
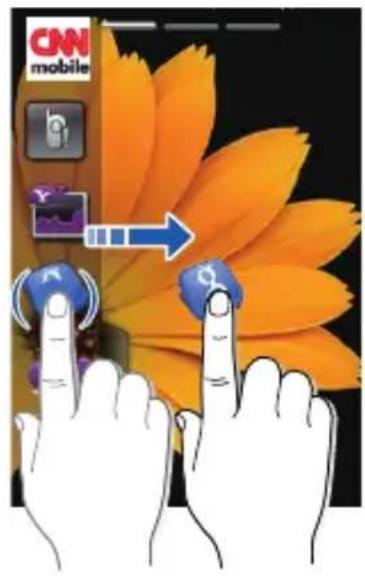
Tap the arrow at the bottom left of the Today screen to open the toolbar. You can rearrange widgets on the toolbar or drag them to the Today screen.
| Widget Function | |
 | View the current time and date |
 | View the current time |
 | View the time in other cities or regions |
 | Get the latest weather updates from AccuWeather* |
 | View the calendar |
 | Browse your photos and set a photo as the wallpaper |
 | Use services from MySpace* |
 | Use services from FaceBook* |
 | Search the web with YouTube* |
 | Create and view memos |
 | Change the current sound profile |
 | View a new message or missed calls |
 | Download new widgets from a website |
 | View the network connection status |
 | Monitor your wireless connections |
 | Get news updates from CNN* |
 | Get updates from Yahoo! Finance* |
 | Search the web with Yahoo!* |
 | Search the web with Google* |
 | View the current time |
 | View or set an countdown timer |
 | Use services from Flickr* |
 | Use services from Friendster* |
 | Use services from Photobucket* |
 | Use services from Picasa* |
 | Listen to music via the mini player |
 | Listen to the FM radio |
Widget Function

Create and listen to audio notes
View the current day and date
* These widgets require a connection to the internet, which may result in additional charges.

Depending on your region or service provider, available widgets may vary.
Drag the widgets to the Today screen
1 Open the toolbar.
2 Drag a widget from the toolbar to the Today screen. You can position the widget anywhere on the screen.
Customise widgets
1 Open the toolbar.
2 Tap at the top of the toolbar.
3 Tap the check boxes next to items that you want to appear on the toolbar.
4 When you are finished, tap Done.
Use the shortcut toolbar
Your device provides you with a shortcut toolbar on the Home screen. You can set shortcuts to your favourite applications to access them more quickly.
Access items on the shortcut toolbar
From the Home screen, tap an application on the shortcut toolbar.
Edit items on the shortcut toolbar
1 Tap at the top right corner of the shortcut toolbar.
2 Customise the shortcut toolbar as desired.
- T a p and select an application to add a shortcut to the toolbar.
- T a an application to remove a shortcut from the toolbar.
3 When you are finished, tap OK at the top right corner of the shortcut toolbar.
Work with applications
Learn to open applications or folders and switch between open applications.
Open applications or folders
1 Tap Start.
- You can press the Menu key to access applications categorised by type. In this mode, you can organise applications as desired by tapping Edit.
2 To open an application, tap the application icon.
3 To open a folder, tapFile Manager and navigate to the desired folder.
Switch applications
Your device allows you to multi-task by running multiple applications at the same time.
To switch from one active application to another,
1 Tap Start > Task Switcher.
- Task Switcher shows thumbnail images of all open programs.
2 Tap a thumbnail to switch to the corresponding application.
Close applications
To send the current application to the background, tap X or OK.
To close an application,
1 Tap Start > Task Switcher.
2 Tap End.
3 Tap ✗
Access the help system
To access the help system of your device, tap Start > Help. The embedded help system appears.
Enter text
When you need to enter text, tap the default input panel icon (at the bottom of the screen. Tap the arrow next to the icon and select one of the following input methods for entering text:
- Block Recognizer
- Keyboard
- Letter Recognizer
- Samsung Keypad
- Transcriber
You can tap the input panel icon at any time to show or hide the input panel.
You can also use the virtual QWERTY keyboard if you are creating a text, multimedia, or email message. Rotate the device anti-clockwise to the landscape orientation.
Enter text with Block Recognizer
Write individual letters and numbers in the writing area in the Palm Graffiti style.
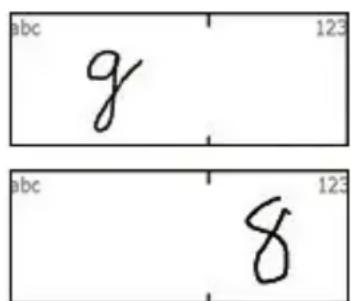
1 Tap the input panel icon.
2 Tap the arrow next to the input panel icon and select Block Recognizer.
3 Write each character in the writing area at the bottom of the screen:
- Write letters on the left side of the writing area.
- Write numbers on the right side of the writing area.

- Drag your finger upward to change the case (ABC, Abc, or abc).
- Tap once on the screen to enter symbols (123 or abc will change to the icon).
- Drag your finger leftward to delete the last letter.
- To view demonstrations of how to enter characters, refer to the embedded help system.
Enter text with the keyboard
1 Tap the input panel icon.
2 Tap the arrow next to the input panel icon and select Keyboard.
3 Tap characters to enter your text:
- To switch to numbers and symbols, tap 123.
- To access special characters, tap áü.
Enter text with Letter Recognizer
Write individual letters and numbers on the touch screen.
1 Tap the input panel icon.
2 Tap the arrow next to the input panel icon and select Letter Recognizer.
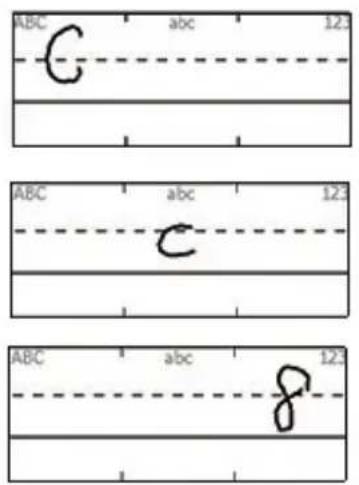
3 Write each character in the writing area at the bottom of the screen:
- Write upper-case letters in the ABC column on the left side of the writing area.
- Write lower-case letters in the abc column in the middle of the writing area.
- Write numbers and symbols in the 123 column on the right side of the writing area.

To view demonstrations of how to write characters, refer to the embedded help system.

Enter text with Samsung Keypad
1 Tap the input panel icon.
2 Tap the arrow next to the input panel icon and select Samsung Keypad.
3 Tap characters to enter your text:
- To enter the text in T9 mode, tap MODE to turn on xt9. Tap the appropriate keys to enter an entire word.
- To enter the text in ABC mode, tap MODE to turn off xt9. Tap the appropriate key to enter a character.
- To enter symbols, tap SYM.
• To enter numbers, tap 123.

To change the keypad style, tap and hold MODE, select a style and tap Done.
Enter text with Transcriber
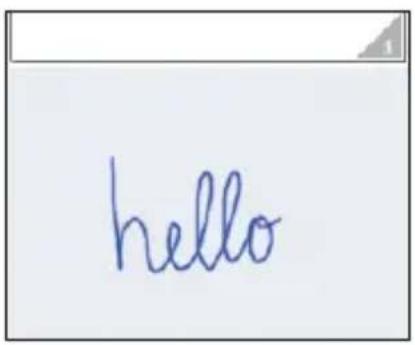
With Transcriber, you can write anywhere on the screen. Unlike Letter Recognizer or Block Recognizer, you can use cursive (joined-up) handwriting to write complete words.
1 Tap the input panel icon.
2 Tap the arrow next to the input panel icon and select Transcriber .
3 Tap ok to close the intro screen.
4 Write legibly anywhere on the screen.
5 Pause and allow Transcriber to convert your writing to text.
You can access the following tools from the Transcriber toolbar:
| Tap To | |
| Change Transcriber options | |
| View demonstrations of how to write characters | |
| Open the list of punctuation marks, symbols, and numbers | |
| a | Change the input mode toA, a, or 123 |
| spc | Insert a space |
| Start a new line | |
| Move the cursor to the left | |
| Move the cursor to the right | |
| Clear your input | |
| Open the embedded help |
Communication
Work with contacts
Learn to use contact cards and groups to store personal information, such as names, phone numbers, and addresses.
Create a new Outlook or SIM contact card
1 Tap Start > Phonebook.
2 Tap New > Save to outlook or Save to SIM.
3 Enter contact information.
4 When you are finished entering information, tap Done to save the contact card.
Search for a contact card
1 Tap Start > Phonebook.
2 Tap.
3 Tap a few letters of the contact's name.
- As you enter letters, the screen will show contacts that match your input.
- You can also drag to select the first letter of the name.
4 Tap a contact to open it.
Copy or move contact cards
To copy or move contact cards from your device's memory to a SIM or USIM card and vice versa,
1 Tap Start > Phonebook.
2 To copy contacts, tap Menu > Copy > a copy option. Refer to step 4.
3 To move contacts, tapMenu > Move > a move option.
4 Tap the check boxes next to the contacts that you want to copy or move.
5 Tap Done.
Organise your contacts into categories
1 Tap Start > Phonebook.
2 Tap a contact in the device's memory.
3 Tap Edit.
4 Scroll down and tap the categories field.
5 Tap the check boxes next to the desired categories and tap Done.
6 Tap Done to save the contact card.
Assign a speed dial number to a contact card
To assign a speed dial number to one of your contacts,
1 Tap Start > Phonebook.
2 Tap
3 Tap New and select a contact.
4 Select the contact's phone number to use for speed dialling.
5 Select a speed dial location.
Assign a photo to a contact card
1 Tap Start > Phonebook.
2 Tap a contact in the device's memory.
3 Tap Edit.
4 Tap the photo icon at the top left of the contact card.
5 Take a new photo or select a photo.
6 Tap Done to save the contact card.
Assign a ringtone to a contact card
1 Tap Start > Phonebook.
2 Tap a contact in the device's memory.
3 Tap Edit.
4 Scroll down and tap Add field.
5 Scroll down and tap the ringtone field.
6 Select a ringtone and tap Done.
7 Tap Done twice to save the contact card.
Calling
Learn to make and receive calls, reject calls, and adjust the call volume.
Make a call
1 Press [—].
2 Enter an area code and phone number.
3 Tap or press [].
- For a video call, tap Menu > Video Call.
4 To end the call, press [ ]
Make a call from Phonebook
1 Tap Start > Phonebook.
2 Tap a contact.
3 Tap a number.
Answer a call
1 Press [].
2 For a video call, tap Show me to allow the caller to see you via the front camera lens.
3 To end the call, press [ ]
Reject a call
Press [ ] When you reject a call, the caller will hear a busy tone.
Adjust the call volume
To adjust the call volume, press the Volume key up or down during a call.
Call an international number
1 Press [].
2 Tap Keypad (if necessary).
3 Tap and hold to insert the + character (this replaces the international access code).
4 Tap the number keys to enter the complete number you want to dial (country code, area code, and phone number), and then tap 📋 or press [ ] to dial.
5 To end the call, press [ ]
Access the call log
1 Tap Start > Call Log.
2 Select one of the following filters for your call log results:
Icon Function

All calls

Incoming calls

Outgoing calls

Missed calls
3 Scroll through the call log.
- To make a call, tap 📞 next to the number you want to dial.
- To check the call time, tap Menu > Call Timer. Tap to reset the call time.
Messaging
Learn to use messaging functions.
Send a text message
1 Tap Start > Message.
2 Tap.
3 Tap Tap to add recipients to enter a contact.
4 Tap the message field and enter your message text.
5 Tap Send to send the message.
Send a multimedia message
1 Tap Start > Message.
2 Tap.
3 Tap Tap to add recipients to enter a contact.
4 Tap Menu > Add Subject.
5 Enter a message subject.
6 Tap the message field and enter your message text.
7 Tap the input panel icon to display the toolbar.
8 Tap one of the following icons to add an attachment:
Icon Function

Attach a photo

Attach a music file

Attach a video

Capture and attach a photo

Record and attach a voice memo

Record and attach a video
9 Tap Menu > Attach > an option to attach other types of files (if necessary).
10 Tap Send to send the message.
Send an email message
1 Tap Start > E-mail.
2 Tap the name of an email account.
3 Tap Menu > New.
4 Tap the subject field and enter a message subject.
5 Tap the recipient field and enter the recipient's address.
6 Tap the message field and enter your message text.
7 Tap Menu > Insert > an option to attach other types of files (if necessary).
8 Tap Send to send the message.
View messages
You can access message folders for your received messages.
To view messages,
1 Tap Start > Message or E-mail.
2 Tap one of the email accounts and Inbox (if necessary).
3 Tap a message to view it.

You can view all text or multimedia messages sent to and received from a specific contact like a messenger.
Add an email account
1 Tap Start > E-mail.
2 Tap Others.
3 Tap one of the preset email accounts or tap +to add a new account.
4 Enter your ID and password and tap Done, or follow the on-screen instructions to complete the account setup.
Multimedia
Learn to capture photos and videos, listen to music, and take advantage of your device's multimedia features.
Camera
Your device allows you to take digital photos (jpg format) or record videos (3gp format).

Do not remove your memory card while saving photos or videos if the memory location is set to memory card.
Capture a photo
1 Press the Camera key.
2 Rotate the device anti-clockwise to the landscape orientation.

The camera interface appears only in the landscape orientation.
3 Aim the lens at the subject and make any adjustments.
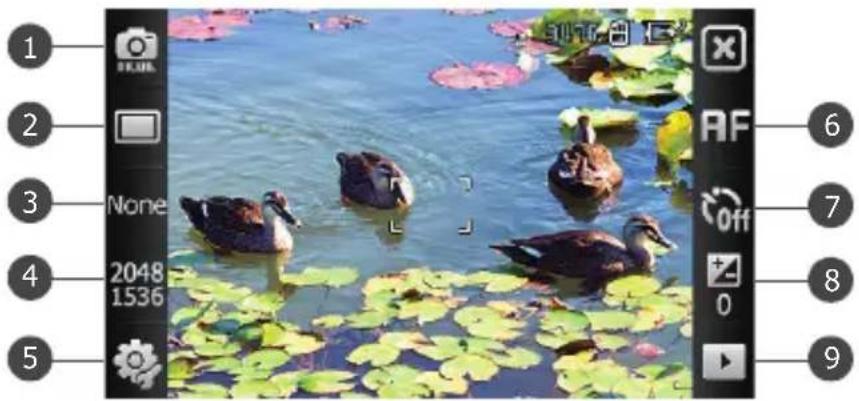
natural_image
Photo of ducks swimming in a pond with lily pads, displayed within a camera interface (no text or symbols on the duck or background)| Icon Function | |
| 1 | Switch to camcorder |
| 2 | Change the shooting mode |
| 3 | Change the scene mode |
| 4 | Change the image size |
| 5 | Change the camera settings |
| 6 | Change the auto focus setting |
| 7 | Change the time delay |
| 8 | Adjust the brightness |
| 9 | Access quick view |
4 Press the Camera key to capture the photo.
View a photo
1 From the viewfinder, tap
2 Scroll left or right to the photo you want.
Record a video
1 Press the Camera key.
2 Rotate the device anti-clockwise to the landscape orientation.
3 Tap to launch the camcorder.
4 Aim the lens at the subject and make any adjustments.

natural_image
Photo of ducks swimming in a pond with lily pads, no visible text or symbols on the duck or background.| Icon Function | |
| 1 | Switch to camera |
| 2 | Change the recording mode |
| 3 | Change the video resolution |
| 4 | Change the camcorder settings |
| 5 | Change the time delay |
| 6 | Adjust the brightness |
| 7 | Access quick view |
5 Press the Camera key to begin recording.
6 When you are finished, tap ☐ or press the Camera key to stop recording.
Play a video
1 From the viewfinder, tap
2 Scroll left or right to the video you want.
3 Tap to play the video.
Capture photos in Smile shot mode
1 Press the Camera key.
2 Rotate the device anti-clockwise to the landscape orientation.
3 Tap ▶. 😊
4 Aim the camera lens at your subject and press the Camera key.
- The device recognises faces in an image and detects when your subjects smile. When all your subjects are smiling, the camera will automatically capture the photo.

In some cases, you may have to disable smile shot to capture a photo of your subject, even if he or she is smiling.
Capture a series of photos
1 Press the Camera key.
2 Rotate the device anti-clockwise to the landscape orientation.
3 Tap ▷.
4 Aim the camera lens at your subject and press and hold the Camera key.
- The device captures photos in succession until you release the Camera key. You can capture up to 6 photos at a time.
Create a photo mosaic
1 Press the Camera key.
2 Rotate the device anti-clockwise to the landscape orientation.
3 Tap □ > ✿.
4 Select a mosaic type.
5 Aim the camera lens at your subject and pressthe Camera key to capture the first shot.
6 Repeat step 5 to capture the rest of the shots. When you have captured all the shots necessary for the mosaic, the camera will automatically combine them into one photo.

natural_image
Scenic landscape with a lake, lotus pond, and lush greenery under a blue sky (no text or symbols visible)Capture panoramic photos
1 Press the Camera key.
2 Rotate the device anti-clockwise to the landscape orientation.
3 Tap □ > □.
4 Aim the camera lens at your subject and press the Camera key to capture the first shot.
5 Slowly move the device to a direction. The device captures the next photo automatically.
6 Repeat step 5 to capture the rest of the shots. When you have captured all the shots necessary for the panoramic photo, the camera will automatically combine them into one panoramic photo.

natural_image
Four-panel photo sequence showing a grassy hillside with bare trees, followed by dry reeds and tall grass under cloudy sky (no text or symbols)Media Player
Your device is equipped with Media Player, as well as Windows Media Player. The procedures that follow explain how to use Media Player. For information about Windows Media Player, refer to embedded help system.
Add music files to your device
Use any of the following methods to add music files to your device:
- Copy files to a memory card and insert the card into the device ▶ p. 17
- Download files from the wireless web (refer to the embedded help system)
- Receive via Bluetooth ▶ p. 124
- Synchronise with ActiveSync ^ ▶ p. 76
Update the library
1 Tap Start > Media Player.
2 Tap Search to locate and add new files to the Media Player library.
3 When the library is updated, tap Done.
Play music or video files
1 Tap Start > Media Player.
2 Tap Player (if necessary).
3 Tap to open the currently playing list.
4 Tap.+
5 Select files you want to play and tap Done.
6 Tapafie.
7 During playback, use the following controls:
Icon Function

Adjust the volume

Skip to the previous file; Scan backward in a file (tap and hold)

Pause playback

Resume playback
Icon Function

Skip to the next file; Scan forward in a file (tap and hold)

• : Select a surround sound system
• :Change the sound effect
• : Change the shuffle or repeat option
• : Specify a section to repeat

- SRS CS Headphone ^TM delivers a 5.1 surround sound experience over standard headphones or earbuds when listening to multichannel content, such as DVD movies.
- W O W TM significantly improves the playback quality of audio, delivering a dynamic 3D entertainment experience with deep, rich bass and high frequency clarity for crisp detail.
Create a playlist
1 Tap Start > Media Player.
2 Tap Library to view the library.
3 Tap
4 Tap Menu > New Playlist.
5 Enter a title for your new playlist.
6 Tap the photo field and select a photo for your playlist (if necessary).
7 Tap Done.
Add files to a playlist
1 From the library, tap
2 Tap Menu > Add to Playlist.
3 Select files you want to add and tap Done.
4 Select a playlist.
Photo
Learn to view photos and slideshows.
View a photo
1 Tap Start > Photo.
2 Tap a folder or tap All to view all thumbnails.
3 Tap a thumbnail to view the photo.
4 While viewing the photo, drag your finger left or right to view other photos.
- To zoom in or out, tap and hold the screen. When appears, drag your finger up or down. Double-touch the screen to exit the zoom screen.
Start a slideshow
1 Tap Start > Photo.
2 Tap a folder or tap All to view all thumbnails.
3 Tap Menu > Slide show.
- You can tap the screen and 🎯 to select a background music.
4 To end the slideshow, tap the screen and OK.
Digital Frame
With Digital Frame, you can view slideshows with background music.
View slideshows with background music
1 Tap Start > Digital Frame.
2 Rotate the device anti-clockwise to the landscape orientation.
3 Tap
4 Select a folder of photos to view and set transition effects and time.
5 Tap the sound field.
6 Tap the check boxes next to music files you want.
7 Tap Select.
8 Tap next to Enable Background Sound.
9 Tap Done.
10 During playback, use the following controls:
Icon Function

Change the layout of the display

Skip to the previous photo

End the slideshow

Skip to the next photo

Change the style of the date and time on the screen

Change the slideshow settings

Close Digital Frame
- Press the Volume key to adjust the volume of the background music.
FM Radio
You can listen to your favourite stations with FM radio.
Listen to the FM radio
1 Plug a headset into the multifunction jack.
2 Tap Start > FM Radio.
3 Tap OK to start automatic tuning.
4 When the scan is complete, tap Done twice.
5 Tap 📄 to can through available radio stations.
- To tune a radio station, tap or . -
- To adjust the volume, tap
- To change the sound output, tap
Save radio stations by automatic tuning
1 From the radio screen, tap Scan.
2 Tap Yes to confirm.
3 When the scan is complete, tapDone.
Save radio stations manually
1 From the radio screen, scroll to the radio station you want to save.
2 Tap one of the symbols near the bottom of the screen.
Select a station
1 From the radio screen, tap FM 1 or FM 2.
2 Tap the station you want from the area near the bottom of the screen.
Record the FM radio
1 From the radio screen, tap Menu > Record to record the current station.
2 When you are finished, tapStop. The recorded file is saved in My Documents > FM Radio.
Video Editor
With Video Editor, you can edit or make videos by combining photos or videos.
Auto-crop a video
1 Tap Start > Video Editor
2 Rotate the device anti-clockwise to the landscape orientation.
3 Select Auto cut.
4 Select a style and tap →
5 Tap the check box on a video and tap
6 Tap to preview the video.
7 Tap to save the video.
8 Tap OK.
Add pre-recorded audio to a video
1 Tap Start > Video Editor
2 Rotate the device anti-clockwise to the landscape orientation.
3 Select Music movie.
4 Select a style and tap
5 Tap the check boxes on images to add and tap
6 Delete images or tap to change how they are displayed (if necessary).
7 Tap
8 Tap an audio file and tap √
9 Tap
10 Tap Enter text here.
11 Enter a video title and tap Done.
12 Tap
13 Tap to preview the video.
14 Tap to save the video.
15 Tap OK.
Create a storyboard
1 Tap Start > Video Editor
2 Rotate the device anti-clockwise to the landscape orientation.
3 Tap Storyboard.
4 Tap.+
5 Tap the check boxes on images or videos to add and tap Done. To select all, tap 📄 to deselect all, tap ). 🌘
6 Customise the storyboard as desired by tapping the following icons (refer to the Extended Usage Guide for more information about customising storyboards):
• add clips
• : add audio files
• : create a text slide
- : delete clips
- To edit viewable duration, dub clips (record audio), add subtitles, edit transitions, and add effects, tap a thumbnail image and an appropriate icon.
7 Tap
8 Tap to preview the video.
9 Tap to save the video.
10 Tap OK.
Games
Play fun games, such as Bubble Breaker and Solitaire. You can also download and play Java games on your device.
1 Tap Start > Games.
2 Select a game.
Java
Your device supports applications and games built on the Java platform. To download Java-based applications,
1 Tap Start > Java.
2 Tap Download to launch the Opera browser and go to the Samsung Mobile website.
3 Follow the directions on the website to download new Java-based applications.
Personal productivity
ActiveSync
With ActiveSync, you can synchronise your device with a computer and back up and restore your data.
Install ActiveSync on your computer
Before you can synchronise your data, you must install ActiveSync, either from the supplied CD-ROM or the Microsoft website (http://www.microsoft.com).
To install ActiveSync from the supplied CD-ROM,
1 Insert the CD-ROM into your computer.
2 Follow the on-screen instructions to complete the setup.
3 When installation is complete, follow the on-screen instructions in the Synchronisation Setup Wizard to connect your device to the computer and create a data sharing partnership.
Connect your device to a computer
1 Tap Start > Settings.
2 On the Basic Settings tab, tap General Settings > USB Connection > Active Sync.
3 Tap Done.
4 Connect one end (mini-USB) of the PC data cable to the multifunction jack on your device and the other end to the USB port on your computer.
Synchronise your data
When you connect your device to a computer, ActiveSync should begin synchronising your data automatically. You can begin the synchronisation manually by tapping Sync. To stop a synchronisation in progress, tap Stop.
You can also manually find and copy files from your device to a computer and vice versa. From the Microsoft ActiveSync window, click Explore.
For more information on synchronising your data, refer to the embedded help system.

If you format the My Documents folder by using a connected computer, the writing speed to the My Documents folder may be reduced. Format the My Documents folder only from the device to avoid this situation.
Add an Exchange server
1 Tap Start > ActiveSync.
2 Tap Menu > Add Server Source...
3 Enter an email address.
4 Tap Next.
5 Enter your Exchange user name, password, and domain name.
6 Tap Next.
7 Enter a server address. To establish a secure connection, tap the check box that reads This server requires an encrypted (SSL) connection.
8 Tap Next.
9 Select the types of data to synchronise.
10 When you are finished, tap Finish.
Change the synchronisation schedule
If you routinely synchronise your data via an Exchange server, you can configure settings for both peak and off-peak schedules. To change the synchronisation schedules,
1 Tap Start > ActiveSync.
2 Tap Menu > Schedule...
3 Set the following options:
- Peak times: set the frequency of synchronisations during peak hours
-
Off-peak times: set the frequency of synchronisations during off-peak hours
-
Use above settings when roaming: set to use the synchronisation schedules even when roaming
- Send/receive when I click Send: set to synchronise when you tap Send in Messaging
4 When you are finished, tap ok.
Clock
Learn to set and control alarms, reminders, and world clocks. You can also use the stopwatch.
Set an alarm
1 Tap Start > Clock.
2 On the Alarm tab, tap New.
3 Set the alarm options.
4 When you are finished, tap Done.

The auto power-up feature sets the device to automatically turn on and sound the alarm at the designated time if the device is turned off. To use this feature, set the alarm to sound at least 2 minutes later.
Stop an alarm
When an alarm without snooze sounds, tap Dismiss. When an alarm with snooze sounds, tap Dismiss to stop it or Snooze to delay the alarm for the length of time you specified. Alarms with snooze will repeat according to the number of times you specified in the settings or until you tap Dismiss.
Schedule an anniversary
1 Tap Start > Clock.
2 On the Anniversary tab, tap New.
3 Set the anniversary options.
4 When you are finished, tap Done.
Create a world clock
1 Tap Start > Clock.
2 On the World Clock tab, tap New.
3 Tap to open a list of cities.
Tap Name or Time to sort the list by name or timezone.
4 Tapacity.
5 Tap Done.
6 Tap Set as Home Clock to reset the time zone (if necessary).
7 Tap Done.

Use the stopwatch
1 Tap Start > Clock.
2 On the Stop watch tab, tap Start.
3 Tap Lap to record lap times.
4 When you are finished, tap Stop.
5 Tap Reset to clear the recorded times.
Schedule
Use Schedule to keep track of appointments, birthdays, or other events.
Create a calendar event
1 Tap Start > Schedule.
2 Tap New.
3 Complete the fields and adjust the settings for your event.
4 When you are finished, tap Done.

In the month view, underlines will appear under dates with scheduled appointments.
Change the calendar view
1 Tap Start > Schedule.
2 Tap a tab to change the calendar view:
• :full month in one view
- : Hourly blocks for the days in one full week (Sunday to Saturday)
- : Hurly blocks for one full day
- :est of scheduled appointments
Stop an event reminder
When the reminder alarm sounds for a calender event, tap Dismiss.
Notes
Use Notes to create memos, sketches, and recordings.
Create a note
1 Tap Start > Notes.
2 Tap New to create a new note(if necessary).
3 Enter your note with the input panel.
- To create sketches, see “Create a sketch.”
- To create recordings, tap Menu > View Recording Toolbar
4 When you are finished, tap OK.
Create a sketch
1 Tap Start > Notes.
2 Tap New.
3 Make your sketch with strokes.
4 To edit the sketch, tapMenu >Draw.
Tap the sketch to make the selection handles appear. You can then use the handles to drag or resize the sketch or tap Menu to access other options.
Memo
Use Memo to create memos that combine text and freehand drawing. To create a memo:
1 Tap Start > Memo.
2 Tap New (if necessary).
3 Create your memo with the drawing tools and input panel.
4 When you are finished, tap Save.
5 Tap OK.
Recorder
Use Recorder to record, listen to, and send voice memos.
Record a voice memo
1 Tap Start > Recorder.
2 Tap Record.
3 Set recording volume and tap 🍼 begin the recording.
4 Record your voice memo.
5 When you are finished, tap □
6 Tap OK.
Listen to a voice memo
1 Tap Start > Recorder.
2 Tap a memo. Playback will begin automatically.
3 During playback, use the following controls:
| Icon Function | |
 | Adjust the volume |
 | Skip to the previous file; Scan backward in a file (tap and hold) |
 | Pause playback |
 | Resume playback |
 | Skip to the next file; Scan forward in a file (tap and hold) |
Tasks
Use Tasks to create to-do lists and reminders.
Create a task
1 Tap Start > Tasks .
2 Tap Menu > New Task.
3 Enter details for the task.

To set a reminder for the task, tap the due field and set a due date. Next, tap the reminder field, select Remind me, and then specify the time and date of the reminder.
4 When you are finished, tap OK.
Mark a task as completed
After completing a task,
1 Tap Start > Tasks .
2 Tap the check box next to the task name.
- Once you have marked a task complete, you will no longer receive any scheduled reminders for that task.
Calculator
Use the calculator to perform basic mathematical calculations. To perform a calculation,
1 Tap Start > Calculator.
2 Enter the first number using the calculator buttons on the screen.
- To clear the displayed numbers, tap C.
- To clear the last digit entered in a multi-digit entry, tap ←.
3 Tap the appropriate math function.
4 Enter the second number.
5 To view the result, tap =.
You can use the following buttons while performing calculations:
• C: clear the number you entered
- MC: clear any value that is stored in the calculator's memory
- MR: recall the stored value from memory and inserts it into the current calculation
- M+: add the current number to the value stored in the calculator's memory
To use a scientific calculator,
1 Tap Start > Calculator.
2 Tap Scientific.
3 Rotate the device anti-clockwise to the landscape orientation.
4 Perform a calculation by using the buttons on the screen.
Unit Converter
Use Unit Converter to convert one unit of measure to another. To perform a conversion,
1 Tap Start > Unit Converter.
2 Select a type of measurement from the tabs at the top of the screen:
3 Select the unit of measure to convert.
4 Enter the base amount. The device displays the conversion result.

For the currency converter, tap Edit Rate to set the basic rate first.
Smart Reader
Use Smart Reader to capture information from a business card or a document, and translate text.
Capture images of business cards or documents
1 Tap Start > Smart Reader.
2 Rotate the device anti-clockwise to the landscape orientation.
3 Tap BizCard or Document.
4 Align the business card or document in the screen.
- For business cards, you must align the corners of the card with the corners of the frame (the frame will turn green when aligned).
5 Press the Camera key to capture the image.

- If you have activated the BizCard automatic capture setting, the device will automatically capture the image once the card is aligned in the frame.
- For best results, place business cards or documents on a flat, level surface and ensure adequate lighting.
6 Tap Save.
7 Tap OK.
View captured images
1 Tap Start > Smart Reader.
2 Rotate the device anti-clockwise to the landscape orientation.
3 Tap Image.
4 Tap the following tabs to sort captured images:
| Icon Functions | |
| View all captured images | |
| View captured images of business cards | |
| View captured images of documents | |
5 Scroll left or right to an image.
Smart Search
Use Smart Search to search for any specific data stored in your device (including contacts, call logs, media files, schedules, messages, or programs) or on the web.
Search inside the device
1 Tap Start > Smart Search.
2 Tap the My Phone tab (if necessary).
3 Tap theAll drop-down menu and select a category.
4 Tap the text input field.
5 Enter a letter or a word of the data to search and tap 🔒
- Any data including the letter or word you have entered will be listed.
6 Tap the data you want to access.
Search on the web
1 Tap Start > Smart Search.
2 Tap the Web tab (if necessary).
3 Tap the Google drop-down menu and select between Google and Bing.
You can get the data from Google services (Mail, YouTube, Maps) or Bing services (MSN Today, Hotmail, Messenger, Spaces).
4 Tap the text input field.
5 Enter a letter or a word of the data to search on the web and tap 🔒.
- Any data including the letter or word you have entered will be listed.
6 Tap the data you want to access.
Web applications
Web browsing with Opera
Learn to access and bookmark your favourite web pages with the Opera Mobile browser.

- You may incur additional charges for accessing the web and downloading media.
- Available icons may vary depending on your region or service provider.
Browse the web
1 Tap Start > Opera Browser.
2 Navigate web pages by tapping the following controls:
Icon Functions

Return to the previous page

Open a favourite web page

Open a new tab or page, or page you have previously accessed
Icon Functions

Open the homepage

Open the browser menu
To search the web, tap the address bar at the top of the screen, tap the lower field and enter a keyword, and tap 📁 To change the default browser from Opera Browser to Internet Explorer, tap ▲ > Settings > Advanced. Clear the check box next to Set Opera as default browser.
Bookmark your favourite pages
To add a web page to your list of favourites,
1 Tap Start > Opera Browser.
2 Tap ★. +
3 Enter a name for the web page, the web address, and select a folder (you can add a new folder by tapping Add new folder in the drop-down menu).
4 When you are finished, tap
Rich Internet
Use Rich Internet to search for ringtones, videos, and images and download them to your device.
1 Tap Start > Rich Internet.
2 Scroll to a category and select an option.
3 Scroll to a file and download it to your device.
Search Widget
Use Live Search and use many service links in directory such as Directions, Maps, Hotmail, and Messenger.
1 Tap Start > Search Widget.
2 Enter a letter or a word of the data to search in Live Search and tap 🔒.

Tap directory to use service links.
Streaming Player
Use Streaming Player to watch videos or listen to audio files directly from the internet.
Stream media from the internet
1 Tap Start > Streaming Player.
2 Tap
3 Enter the URL of a streaming media file.
4 Tap Connect.
5 During playback, use the following controls:
Icon Function

Adjust the volume

Pause playback

Resume playback

Stop playback

Zoom in or out
Midomi
Use the Midomi web service to identify songs either by singing or humming the song into your device or using your device to grab the song from the radio or other audio source.
Search for song information by singing or humming the song
1 Tap Start > Midomi.
2 Tap the Sing tab (if necessary).
3 Tap the area of the screen that reads Tap and sing or hum and begin singing or humming the song.

Try to sing or hum at least 10 seconds of the song for best results.
4 When you are finished singing or humming, tap the area that reads RECORDING. The Midomi service will search for a match and return the results.
Search for song information by grabbing the song from an audio source
1 Tap Start > Midomi.
2 Tap the Grab tab (if necessary).
3 Tap the area of the screen that reads Tap and hold to a speaker and place the device near the audio source.

Try to grab at least 10 seconds of the song for best results.
4 When you are finished, tap the area that reads RECORDING. The Midomi service will search for a match and return the results.
RSS Reader
Learn to use RSS reader to get the latest news and information from your favourite websites.
Subscribe to RSS feeds
To subscribe to RSS feeds by entering an address,
1 Tap Start > RSS Reader.
2 Tap a feed category.
3 Tap Add Feed.
4 Tap Add RSS/ATOM URL.
5 Enter the address of an RSS feed and tap Done.
6 Enter the name of the RSS feed and set a feed category.
7 Tap Add.
To subscribe to RSS feeds by searching,
1 Tap Start > RSS Reader.
2 Tap a feed category.
3 Tap Add Feed.

4 Tap Search for Feeds.
5 Use the input panel to enter a keyword and tap
6 Tap a feed.
7 Tap Add > OK.
8 When you are finished, tap Done.
Update and read RSS feeds
1 Tap Start > RSS Reader.
2 Tap a category > a feed.
3 Tap Update.
- Your device will attempt to connect to the internet. If necessary, activate your internet connection.
4 Tap Done.
5 Tap a headline and a link to read it.
Podcast
Use Podcast to search for, download, and listen to podcasts.
Subscribe to Podcasts
To subscribe to Podcasts by entering an address,
1 Tap Start > Podcast.
2 Tap Menu > Add Podcast URL.
3 Enter the address of a podcast and tap Add > OK.
To subscribe to Podcasts by searching,
1 Tap Start > Podcast.
2 Tap Menu > Search Podcast.
3 Use the input panel to enter a keyword and tap Your device searches for related podcasts and displays the results.
4 Tap the podcast you want to subscribe to and tap Add > OK.
Download and play podcasts
1 Tap Start > Podcast.
2 Tap a podcast.
3 Tap Menu > Download.
4 Tap items you want to download.
5 Tap Done to download the items.
6 When you are finished, tap OK.
Update your podcast library
Once you have subscribed to podcasts (▶ p. 104), you can easily update your library to listen to the latest episodes. To update your podcast library,
1 Tap Start > Podcast.
2 Tap a podcast.
3 Tap Update.
4 Tap Done.
QIK
QIK allows you to easily broadcast live videos over the internet. You can share your live video with others or store the video so your friends and family can view it later.
Sign up for a new account
1 Tap Start > QIK.
2 Tap New user.
3 Enter user information.
4 Tap Join.
5 Follow the on-screen instructions.
Sign in to QIK
1 Tap Start > QIK.
2 Tap Existing user.
3 Enter your login ID and password.
4 Tap Sign In.
5 Follow the on-screen instructions.
Stream live video to your friends and family
1 Sign in to the QIK website.
2 Tap
Your video will stream live via the QIK website. To see the live video, visit your personalised webpage: http://qik.com/username.
While streaming, you can control the streaming video with the following controls (tap the viewfinder to display or hide the controls):
| Icon Function | |
 | Change the resolution |
 | Make the stream private (accessibly only by logging in to the QIK website) or public (accessible to anyone) |
 | Turn the audio on or off |
 | Change settings |
 | Add a title and description to the video |
 | Post the video to YouTube or another website or send a link to the video via Twitter or text message |
 | Start or stop the video stream |
You can also zoom in or zoom out by pressing the Volume key up or down.
Communities
Communities is a convenient feature that allows you to post your photos to websites and blogs.
Upload photos
Use Communities to upload photos directly to your website or blog. To upload photos,
1 Tap Start > Communities.
2 Tap a blog or website.
3 Tap Upload.
4 Enter your ID and password, and tap Done (if necessary).
5 Enter a title for your image and tap Tap to Add.
6 Tap an image and select an album.
7 Select other options (if necessary).
8 Tap Done.
- The image will be uploaded to the website or blog.
9 When the upload is complete, you can go to the website, view the upload details, or return to the list of sites by tapping the appropriate button.
Upload photos at a later time (Upload reservation)
With the Upload reservation feature of Communities, you can set a specific date and time to upload your photos to a website or blog. To create an upload reservation,
1 Tap Start > Communities.
2 Tap Menu > Options > Upload reservation.
3 Tap New.
4 Tap a website or blog.
5 Enter a title for your image and tap Tap to Add.
6 Select an image.
7 Select other options (if necessary).
8 Tap the Date drop-down menu and select a date for the upload reservation and tap Done.
9 Tap the eTime drop-down menu and set a time for the upload reservation and tap Done.
10 When you are finished, tap Done.
Samsung Application Store
With Samsung Application Store, you can easily find new applications—games, utilities, references, and more. Browse Samsung Application Store and download applications directly to your device using a Wi-Fi or cellular connection.

- You may incur additional charges for accessing the web and downloading applications.
- This feature may be unavailable depending on your region or service provider.
1 Tap Start > Application Store.
2 Tap Accept to accept the disclaimer information.
3 Tap one of the following tabs to view available applications:
- : New applications
• : Popular paid and free applications
• : Applications sorted by category - To search for applications, tap and enter a keyword.
4 Tap an application and download it to the device.
- For free applications: Tap Get
- For paid applications: Tap Buy
Marketplace
Marketplace allows you to find and add new applications to your device. With Marketplace, you can search, browse, preview, buy, and download new applications directly to your mobile device. Available applications depend on your network operator and service provider.
1 Tap Start > Marketplace.
2 Search for and download the applications you want.
Microsoft My Phone
Use Microsoft My Phone to synchronise your contacts, calendar, tasks, text messages, music, photos, videos, and other documents with your My phone account at http://myphone.microsoft.com.
1 Tap Start > Microsoft My Phone.
2 Tap Next.
3 Tap Accept.
4 Enter your user name and password and tap Sign in.
5 Synchronise the data with your device and the web.
- You will be able to access and use the data on your My Phone page.
Connectivity
Connect to the internet or your network
You can connect to your Internet Service Provider (ISP) and use the connection to send and receive email messages and to browse the internet. You can also connect to any private network, such as a corporate network you use at work.
Connect to the internet
1 Obtain the following information from your internet service provider: phone number for your ISP server, user name, and password.
2 Tap Start > Settings.
3 On the Advanced Settings tab, tap Connection > Connections.
4 In My Internet, tap Add a new modem connection.
5 Create a modem connection. To view detailed information for any screen while changing the settings, tap the ? icon.
6 When the connection is successfully configured, run Opera Browser or Internet Explorer to begin browsing the internet. Your device will automatically attempt to connect.

To set up a network card or wireless network connection to your ISP, add a new connection under My Work Network
Connect to work
1 Obtain the following information from your network administrator: server phone number, user name, and password.
2 Tap Start > Settings.
3 On the Advanced Settings tab, tap Connection > Connections.
4 On the Advanced tab, tap Select Networks and select My Work Network from the drop-down list (if necessary).
5 On the Tasks tab, set up a modem, VPN server connection, or proxy server in My Work Network. To view detailed information for any screen while changing the settings, tap the ? icon.
6 When the connection is successfully configured, run Opera Browser or Internet Explorer to begin browsing the internet. Your device will automatically attempt to connect.

You can select an authentication method for GPRS connections by using GPRS Authentications.
End a connection
To disconnect,
- When connected via dial-up, VPN, or ISP, tap your status bar and tap the active network connection icon (←→, ←→, ←→, ←→) or 📋The wireless manager screen appears. Tap All Data Connection and Disconnect.
- When connected via a cable, detach your device from the computer by disconnecting the cable.
- When connected via a modem or a network (Ethernet) card, remove the card from your device.
To set options to end a network connection,
1 Tap Start > Settings.
2 On the Basic Settings tab, tap General Settings > Wireless Manager.
3 Tap Menu > Data con. Settings.
4 Tap the check box next to an option.
- End key (Short Press): When you press the End key, the network connection is disconnected.
- Sleep: When Sleep mode activates, the network connection is disconnected.
- No packet for: When the data packet is not transferred for the specific time interval, the network connection is disconnected.
Find the active network connection
The icons at the top of the display will show active connections. Tap any connectivity icon to view the active connection. A small window will display the connection information.

Wi-Fi and data connections can be active at the same time. When both connections are active, the device will use Wi-Fi as the default internet connection.
GPS
To use GPS applications of your device, you can connect to an external GPS receiver and enhance the GPS functionality.
Connect to an external GPS receiver
By default, the device uses the internal GPS receiver but you can connect to an external GPS receiver. Because the internal GPS receiver uses the COM9 hardware port and baud rate 4800, you need to change the COM port setting to use an external GPS receiver..

Your device is compatible only with Bluetooth-enabled GPS receivers.
1 Turn on your external GPS receiver.
2 Turn on the Bluetooth wireless feature of your device and connect it with the external GPS receiver.▶ p. 121
3 From the Bluetooth screen, tap Menu > Device Service > Options next Serial Port > New Outgoing Port.
4 Select the connected external GPS receiver, tap Next, and check the COM port.
5 Tap Start > Settings.
6 On the Basic Settings tab, tap General Settings > GPS > Connection.
7 In GPS hardware port drop-down menu, tap a port for the external GPS receiver.
8 Tap Done.
Update the GPS functionality
Enhance the GPS functionality by downloading GPS data files. You can improve the speed and accuracy of positioning capability and expand your navigation to areas where cellular networks are accessible. Use XTRA or Assist GPS depending on your service provider.
To use XTRA,
1 Tap Start > Settings.
2 On the Basic Settings tab, tap General Settings > GPS > XTRA.
3 Tap next to Enable XTRA Server.
4 Select when to automatically download XTRA data.
5 Tap next to Enable SNTP Server.
6 Tap Download XTRA Data.

GPS data of up to 35 KB will be downloaded.
To use Assist GPS,
1 Tap Start > Settings.
2 On the Basic Settings tab, tap General Settings > GPS > Assist GPS.
3 Tap next to Enable A-GPS.
4 Enter the server address and select an access point.
Server addresses may differ depending on the service provider. The default port is 7275.
5 Tap Done.
Bluetooth
You can connect with other Bluetooth-enabled wireless devices within a range. Walls or other obstacles between devices may block or impair the wireless connection.
Turn on the Bluetooth wireless feature
1 Tap Start > Settings.
2 On the Basic Settings tab, tap Network Settings > Bluetooth.
3 Tap the device icon in the middle of the screen.
4 To allow other devices to find and connect to your device, tap Menu > Device Info, and tap next to Enable visibility to other devices > Done.
Change Bluetooth device names
You can alter the name that your device will display to other Bluetooth-enabled devices. To change the device name,
1 Tap Start > Settings.
2 On the Basic Settings tab, tap Network Settings > Bluetooth.
3 Tap Menu > Device Info.
4 Tap the name input field.
5 Enter a device name.
6 Tap Done.
Search for and pair with a Bluetooth-enabled device
1 Tap Start > Settings.
2 On the Basic Settings tab, tap Network Settings > Bluetooth.
3 Tap Search.
- Your device will search for and display the icons of Bluetooth-enabled devices.
- To select a search option, tap Menu > Options and select a type from the drop-down menu.
4 Drag a device icon to your device icon in the middle of the screen.
5 Enter the 1- to 16-digit Bluetooth PIN for the device you are trying to connect to and tap Done.

To pair with another Bluetooth-enabled device, both devices must use the same passcode. Headsets or hands-free car kits may use a fixed passcode, such as 0000.
Send data via the Bluetooth wireless feature
1 Locate an item or a file to send.
2 Select a sending option.
3 Tap a device name to send.
Receive data via the Bluetooth wireless feature
1 Enter the PIN for the Bluetooth wireless feature (if necessary).
2 When a pop-up window appears, tap Hide.
- T a Cancel to stop receiving the data.
3 When prompted to allow incoming data, tap Yes to save the data to your device.
To receive all incoming beams,
1 Tap Start > Settings.
2 On the Basic Settings tab, tap Network Settings > Bluetooth.
3 Tap Menu > Device Service.
4 Tap Options next to Object Push.
5 Tap next to Enable to receive all Incoming beams (if necessary).
6 Tap Done.
Activate the smart pairing option
1 Tap Start > Settings.
2 On the Basic Settings tab, tap Network Settings > Bluetooth.
3 Tap Menu > Device Service.
4 Tap Options next to Hands-free or Headset.
5 Tap next to Enable smart pairing.
6 Tap Done.
Wi-Fi
Your device features wireless networking capabilities that allow you to connect to wireless local area networks (WLANs).

This device uses non-harmonised frequency and is intended for use in all European countries. The WLAN can be operated in the EU without restriction indoors, but cannot be operated outdoors in France.
Activate and connect to a WLAN
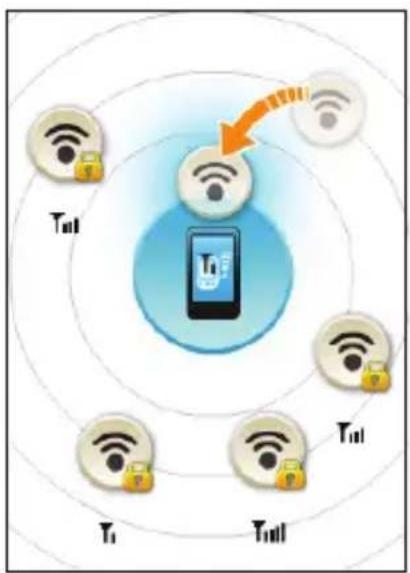
flowchart
graph TD
    A["Wireless Sensors"] --> B["Smart Phone Icon"]
    C["Wi-Fi Security"] --> B
    D["Wireless Sensors"] --> B
    E["Wi-Fi Security"] --> B
    F["Wireless Sensors"] --> B
    G["Wi-Fi Security"] --> B
    H["Wireless Sensors"] --> B
    I["Wi-Fi Security"] --> B
    J["Wireless Sensors"] --> B
    K["Wi-Fi Security"] --> B
    L["Wireless Sensors"] --> B
    M["Wi-Fi Security"] --> B
    N["Wireless Sensors"] --> B
    O["Wi-Fi Security"] --> B
    P["Wireless Sensors"] --> B
    Q["Wi-Fi Security"] --> B
    R["Wireless Sensors"] --> B
    S["Wi-Fi Security"] --> B
    T["Wireless Sensors"] --> B
    U["Wi-Fi Security"] --> B
    V["Wireless Sensors"] --> B
    W["Wi-Fi Security"] --> B
    X["Wireless Sensors"] --> B
    Y["Wi-Fi Security"] --> B
    Z["Wireless Sensors"] --> B
    AA["Wi-Fi Security"] --> B
    AB["Wireless Sensors"] --> B
    AC["Wi-Fi Security"] --> B
    AD["Wireless Sensors"] --> B
    AE["Wi-Fi Security"] --> B
    AF["Wireless Sensors"] --> B
    AG["Wi-Fi Security"] --> B
    AH["Wireless Sensors"] --> B
    AI["Wi-Fi Security"] --> B
    AJ["Wireless Sensors"] --> B
    AK["Wi-Fi Security"] --> B
    AL["Wireless Sensors"] --> B
    AM["Wi-Fi Security"] --> B
    AN["Wireless Sensors"] --> B
    AO["Wi-Fi Security"] --> B
    AP["Wireless Sensors"] --> B
    AQ["Wi-Fi Security"] --> B
    AR["Wireless Sensors"] --> B
    AS["Wi-Fi Security"] --> B
    AT["Wireless Sensors"] --> B
    AU["Wi-Fi Security"] --> B
    AV["Wireless Sensors"] --> B
    AW["Wi-Fi Security"] --> B
    AX["Wireless Sensors"] --> B
    AY["Wi-Fi Security"] --> B
1 Tap Start > Settings.
2 On the Basic Settings tab, tap Network Settings > Wi-Fi.
3 Tap the device icon in the middle of the screen.
4 Tap Search.
- The device will display available WLAN connections.
5 Drag a network icon to the device icon in the middle of the screen.
- The device will attempt to connect to the WLAN.
6 Select a network profile, enter a password, and tap Finish (if necessary).
Create a new Wi-Fi connection
1 Tap Start > Settings.
2 On the Basic Settings tab, tap Network Settings > Wi-Fi.
3 Tap Menu > Add New.
4 Enter a network name and configure connection settings.
5 When you are finished, tap Next.
6 Enter network authentication settings and tapFinish.
- The new Wi-Fi network will appear on the Wi-Fi screen. To connect to the network, drag the network icon to the device icon in the middle of the screen.
Connected Home
The connected home application allows you to share media files between devices in your home. You can access and play files from devices that support the Digital Living Network Alliance (DLNA) standard.
Play files with another device
1 Search for and connect to a network using the WLAN.
▶ p. 127
2 Tap Start > Connected Home.
3 Tap the device icon in the left side of the screen.
4 Tap the icon in the middle of the screen to select your device.
5 Tap Menu > Settings.
6 Tap Sharing Folders... under My media Sharing.
7 Tap Add.. to share a folder (maximum of three folders).
8 Navigate to and tap a folder name.
You can change a shared folder by tapping Change... and locating a new folder. You can remove a folder from the list of shared folders by tapping Delete.
9 Tap Done twice.

10 Tap the icon in the middle of the screen to select your device.
11 Select a folder and locate files.
12 Tap to return to the now playing list.
13 Tap the device icon in the right side of the screen.
14 Select a player—the one that will play the media files.
- The media files of the selected folder appear or start playback on the selected player. You can control playback using icons of your device.
- A buffer may occur on the player depending on the network connection and the connected server.
Play files from one device to the other device
1 Search for and connect to a network using the WLAN.
▶ p. 127
2 Tap Start > Connected Home.
3 Tap the device icon in the left side of the screen.
4 Tap a device—the one that contains media files.
5 Select a folder and locate files.
6 Tap to return to the now playing list.
7 Tap the device icon in the right side of the screen.
8 Select a player—the one that will play the media files.
- The selected media files appear or start playback on the selected player. You can control playback using icons of your device.
- A buffer may occur on the player depending on the network connection and the connected server.
Download files to your device
1 Search for and connect to a network using the WLAN.
▶ p. 127
2 Tap Start > Connected Home.
3 Tap the device icon in the left side of the screen.
4 Select Menu > Settings.
5 Tap Change... under Download location.
6 Select a folder and tap Done.
7 Select a device—the one that contains media files.
8 Select a folder and locate files.
9 Tap Menu > Download.
10 Select files and tap Download.
- The files will be downloaded to your device.
Delete files
You can delete files from the now playing list to prevent them from being played on your device. This will not delete the file from the server.
Troubleshooting
If you have trouble with your device, try these procedures before you contact a service professional.
When you turn on your device, the following messages may appear:
| Message Try this to solve the problem: | |
| The SIM card is missing. | Ensure that the SIM or USIM card is installed correctly. |
| Enter PIN. | When using the device for the first time or when the PIN requirement feature is enabled, you must enter the PIN supplied with the SIM or USIM card. To disable the PIN requirement feature, tap Start > Settings > Basic Settings tab > Security > SIM PIN, and then tap next to Require PIN when phone is used. |
| SIM card blocked. | Your SIM or USIM card is blocked, usually as a result of entering your PIN incorrectly several times. You must enter the PUK supplied by your service provider. |
Your device does not show a signal (no bars next to the network icon)
- If you just turned on the device, wait about 2 minutes for your device to find the network and receive a signal.
- You may not be able to receive a signal in tunnels or elevators. Move to an open area.
- You may be between service areas. You should receive a signal when you enter a service area.
You forgot a security, PIN, or PUK code
If you forget or lose this or another code, contact the seller or your service provider.
Your display shows white lines
The display may show white lines if you have turned the device on after a long period of disuse or if you removed the battery without first turning off the device. The display should correct itself in a short time.
You enter a number, but the call is not dialled
- Ensure that you have pressed [].
- Ensure that you have accessed the right cellular network.
- Ensure that you have not set call barring for the phone number.
You select a contact to call, but the call is not dialled
- Ensure that the correct number is stored in the contact information.
- Re-enter and save the number (if necessary).
Another caller cannot hear you speaking
- Ensure that you are not blocking the built-in microphone.
- Move the built-in microphone closer to your mouth.
- If using a headset, ensure that it is properly connected.
The sound quality of a call is poor
- Ensure that you are not blocking the internal antenna and the Bluetooth antenna. The internal antenna and the Bluetooth antenna are located at the bottom of the device.
- When you are in areas with weak signals, you may lose reception. Move to another area and try again.
The battery does not charge properly or sometimes your device turns itself off while charging
- Disconnect the device from the charger, remove and reinstall the battery, and try charging again.
- The battery terminals may be dirty. Wipe both gold-coloured contacts with a clean and soft cloth and try charging the battery again.
- If the battery no longer charges completely, dispose of the old battery properly and replace it with a new battery.
- If you are using the PC data cable to charge the battery, install ActiveSync on your computer first.
Your device is hot to the touch
When you use several applications at once, your device requires more power and may heat up. This is normal and should not affect your device's lifespan or performance.
You cannot find a folder when exploring your device via ActiveSync on your computer
If you name foldering in a language that does not match the display language of your computer, the name will not display correctly.
Change the language setting of your computer to match the language you wish to use.
Your device cannot connect to the internet
- Ensure that you have entered valid settings for your internet service provider.
- Ensure that you have activated the wireless connection to your mobile service provider and that the signal is not obstructed.
- Ensure that you have entered the correct user name and password.
You cannot find a Bluetooth-enabled device
- Ensure that both devices have activated the Bluetooth wireless feature.
- Ensure that the distance between the devices is not more than 10 metres and that they are not separated by walls or other obstacles.
- Ensure that the settings for each device allow them to be visible to other devices.
- Ensure that both devices are compatible with Bluetooth wireless technology.
- Ensure that the correct PIN has been entered on both devices.
You cannot listen to music on a remote Bluetooth headset
- Ensure that your device is connected to the headset.
- Ensure that the music format you are trying to listen to is supported by the headset.
- Ensure that the distance between the headset and device is not more than 10 metres and that they are not separated by walls or other obstacles.
Safety and usage information
Comply with the following precautions to avoid dangerous or illegal situations and ensure peak performance of your device.

Safety warnings
Keep your device away from small children and pets
Keep your device and all accessories out of the reach of small children or animals. Small parts may cause choking or serious injury if swallowed.
Protect your hearing

Listening to a headset at high volumes can damage your hearing. Use only the minimum volume setting necessary to hear your conversation or music.
Install mobile devices and equipment with caution
Ensure that any mobile devices or related equipment installed in your vehicle are securely mounted. Avoid placing your device and accessories near or in an air bag deployment area. Improperly installed wireless equipment can cause serious injury when air bags inflate rapidly.
Handle and dispose of batteries and chargers with care
- Use only Samsung-approved batteries and chargers specifically designed for your device.
Incompatible batteries and chargers can cause serious injuries or damage to your device. - Never dispose of batteries or devices in a fire. Follow all local regulations when disposing of used batteries or devices.
- Never place batteries or devices on or in heating devices, such as microwave ovens, stoves, or radiators. Batteries may explode when overheated.
- Never crush or puncture the battery. Avoid exposing the battery to high external pressure, which can lead to an internal short circuit and overheating.
Avoid interference with pacemakers
Maintain a minimum of 15 cm (6 inches) between mobile devices and pacemakers to avoid potential interference, as recommended by manufacturers and the independent research group, Wireless Technology Research. If you have any reason to suspect that your device is interfering with a pacemaker or other medical device, turn off the device immediately and contact the manufacturer of the pacemaker or medical device for guidance.
Turn off the device in potentially explosive environments
Do not use your device at refuelling points (service stations) or near fuels or chemicals. Turn off your device whenever directed by warning signs or instructions. Your device could cause explosions or fire in and around fuel or chemical storage and transfer areas or blasting areas. Do not store or carry flammable liquids, gases, or explosive materials in the same compartment as the device, its parts, or accessories.
Reduce the risk of repetitive motion injuries
While using your device, hold the device with a relaxed grip, press the keys lightly, use special features that reduce the number of keys you have to press (such as templates and predictive text), and take frequent breaks.
Do not use the device if the screen is cracked or broken
Broken glass or acrylic could cause injury to your hand and face. Bring the device to a Samsung service centre to replace the screen. Damage caused by careless handling will void your manufacturer's warranty.

Safety precautions
Drive safely at all times
Avoid using your device while driving and obey all regulations that restrict the use of mobile devices while driving. Use hands-free accessories to increase your safety when possible.
Follow all safety warnings and regulations
Comply with any regulations that restrict the use of a mobile device in a certain area.
Use only Samsung-approved accessories
Using incompatible accessories may damage your device or cause injury.
Turn off the device near medical equipment
Your device can interfere with medical equipment in hospitals or health care facilities. Follow all regulations, posted warnings, and directions from medical personnel.
Turn off the device or disable the wireless functions when in an aircraft
Your device can cause interference with aircraft equipment. Follow all airline regulations and turn off your device or switch to a mode that disables the wireless functions when directed by airline personnel.
Protect batteries and chargers from damage
- Avoid exposing batteries to very cold or very hot temperatures (below 0^ C/32° F or above 45^ C/113° F). Extreme temperatures can reduce the charging capacity and life of your batteries.
- Prevent batteries from contacting metal objects, as this can create a connection between the + and - terminals of your batteries and lead to temporary or permanent battery damage.
- Never use a damaged charger or battery.
- Risk of explosion if a battery is replaced by an incorrect type. Dispose of used batteries according to the instructions.
Handle your device carefully and sensibly
- Do not disassemble your device due to a risk of electric shock.
- Do not allow your device to get wet—liquids can cause serious damage and will change the colour of the label that indicates water damage inside the device. Do not handle your device with wet hands. Water damage to your device can void your manufacturer's warranty.
- Avoid using or storing your device in dusty, dirty areas to prevent damage to moving parts.
- Your device is a complex electronic device—protect it from impacts and rough handling to avoid serious damage.
- Do not paint your device, as paint can clog moving parts and prevent proper operation.
- If your device has a camera flash or light, avoid using it close to the eyes of children or animals.
- Your device may be damaged by exposure to magnetic fields. Do not use carrying cases or accessories with magnetic closures or allow your device to come in contact with magnetic fields for extended periods of time.
Avoid interference with other electronic devices
Your device emits radio frequency (RF) signals that may interfere with unshielded or improperly shielded electronic equipment, such as pacemakers, hearing aids, medical devices, and other electronic devices in homes or vehicles. Consult the manufacturers of your electronic devices to solve any interference problems you experience.

Important usage information
Use your device in the normal position
Avoid contact with your device's internal antenna.
Allow only qualified personnel to service your device
Allowing unqualified personnel to service your device may result in damage to your device and will void your warranty.
Ensure maximum battery and charger life
-
Avoid charging batteries for more than a week, as overcharging may shorten battery life.
• Over time, unused batteries will discharge and must be recharged before use. -
Disconnect chargers from power sources when not in use.
- Use batteries only for their intended purpose.
Handle SIM cards and memory cards with care
- Do not remove a card while the device is transferring or accessing information, as this could result in loss of data and/or damage to the card or device.
- Protect cards from strong shocks, static electricity, and electrical noise from other devices.
- Frequent writing and erasing will shorten the life span of memory cards.
- Do not touch gold-coloured contacts or terminals with your fingers or metal objects. If dirty, wipe the card with a soft cloth.
Ensure access to emergency services
Emergency calls from your device may not be possible in some areas or circumstances. Before travelling in remote or undeveloped areas, plan an alternate method of contacting emergency services personnel.
Specific Absorption Rate (SAR) certification information
Your device conforms to European Union (EU) standards that limit human exposure to radio frequency (RF) energy emitted by radio and telecommunications equipment. These standards prevent the sale of mobile devices that exceed a maximum exposure level (known as the Specific Absorption Rate, or SAR) of 2.0 watts per kilogram.
During testing, the maximum SAR recorded for this model was 0.791 watts per kilogram. In normal use, the actual SAR is likely to be much lower, as the device has been designed to emit only the RF energy necessary to transmit a signal to the nearest base station. By automatically emitting lower levels when possible, your device reduces your overall exposure to RF energy.
The Declaration of Conformity at the back of this guide demonstrates your device's compliance with the European Radio & Terminal Telecommunications Equipment (R&TTE) directive. For more information about the SAR and related EU standards, visit the Samsung mobile device website.
Correct disposal of this product
(Waste Electrical & Electronic Equipment)
(Applicable in the European Union and other European countries with separate collection systems)
This marking on the product, accessories or literature indicates that the product and its electronic accessories (e.g.
charger, headset, USB cable) should not be disposed of with other household waste at the end of their working life. To prevent possible harm to the environment or human health from uncontrolled waste disposal, please separate these items from other types of waste and recycle them responsibly to promote the sustainable reuse of material resources.
Household users should contact either the retailer where they purchased this product, or their local government office, for details of where and how they can take these items for environmentally safe recycling.
Business users should contact their supplier and check the terms and conditions of the purchase contract. This product and its electronic accessories should not be mixed with other commercial wastes for disposal.
This EEE is compliant with RoHS.
Correct disposal of batteries in this product
(Applicable in the European Union and other European countries with separate battery return systems)
This marking on the battery, manual or packaging indicates
that the batteries in this product should not be disposed of with other household waste at the end of their working life.
Where marked, the chemical symbols Hg, Cd or Pb indicate that the battery contains mercury, cadmium or lead above the reference levels in EC Directive 2006/66. If batteries are not properly disposed of, these substances can cause harm to human health or the environment.
To protect natural resources and to promote material reuse, please separate batteries from other types of waste and recycle them through your local, free battery return system.
Disclaimer
Some content and services accessible through this device belong to third parties and are protected by copyright, patent, trademark and/or other intellectual property laws. Such content and services are provided solely for your personal noncommercial use. You may not use any content or services in a manner that has not been authorised by the content owner or service provider. Without limiting the foregoing, unless expressly authorised by the applicable content owner or service provider, you may not modify, copy, republish, upload, post, transmit, translate, sell, create derivative works, exploit, or distribute in any manner or medium any content or services displayed through this device.
"THIRD PARTY CONTENT AND SERVICES ARE PROVIDED "AS IS." SAMSUNG DOES NOT WARRANT CONTENT OR SERVICES SO PROVIDED, EITHER EXPRESSLY OR IMPLIEDLY, FOR ANY PURPOSE. SAMSUNG EXPRESSLY DISCLAIMS ANY IMPLIED WARRANTIES, INCLUDING BUT NOT LIMITED TO, WARRANTIES OF MERCHANTABILITY OR FITNESS FOR A PARTICULAR PURPOSE. SAMSUNG DOES NOT GUARANTEE THE ACCURACY, VALIDITY, TIMELINESS, LEGALITY, OR COMPLETENESS OF ANY CONTENT OR SERVICE MADE AVAILABLE THROUGH THIS DEVICE AND UNDER NO CIRCUMSTANCES, INCLUDING NEGLIGENCE, SHALL SAMSUNG BE LIABLE, WHETHER IN CONTRACT OR TORT,
FOR ANY DIRECT, INDIRECT, INCIDENTAL, SPECIAL OR CONSEQUENTIAL DAMAGES, ATTORNEY FEES, EXPENSES, OR ANY OTHER DAMAGES ARISING OUT OF, OR IN CONNECTION WITH, ANY INFORMATION CONTAINED IN, OR AS A RESULT OF THE USE OF ANY CONTENT OR SERVICE BY YOU OR ANY THIRD PARTY, EVEN IF ADVISED OF THE POSSIBILITY OF SUCH DAMAGES."
Third party services may be terminated or interrupted at any time, and Samsung makes no representation or warranty that any content or service will remain available for any period of time. Content and services are transmitted by third parties by means of networks and transmission facilities over which Samsung has no control. Without limiting the generality of this disclaimer, Samsung expressly disclaims any responsibility or liability for any interruption or suspension of any content or service made available through this device.
Samsung is neither responsible nor liable for customer service related to the content and services. Any question or request for service relating to the content or services should be made directly to the respective content and service providers.
Index
ActiveSync
Exchange server, 77
installing, 75
schedule, 78
synchronise, 76
alarm
setting, 79
stopping, 80
Application Store 111
background image
see Today Screen
battery
charging, 16
installing, 15
Bluetooth
activating, 122
connecting to other devices,
123
receiving data, 124
sending data, 124
browser
see Opera
calculator 88
calendar
see Schedule
calls
answering, 46
from Call Log, 48
from Phonebook, 45
international number, 47
making, 45
rejecting, 46
camera 53
Communities 109
Connected Home 128
contacts
assigning photos, 43 assigning ringtones, 44 assigning speed dial numbers, 43 copying and moving contact cards, 41 creating contacts, 40 organising, 42 searching for contacts, 41
converter
see Unit Converter
Digital Frame 66
Etiquette pause 25
Exchange Server
see ActiveSync
FM radio
listening, 68
recording songs, 70
saving stations, 69
games 74
GPS 118
help system 33
internet
see Opera
Java 74
lock 19
Marketplace 112
Media Player
creating a playlist, 63 playing files, 62 updating the library, 61
Memo 85
memory card 17
Messaging
adding email accounts, 52
sending email, 51
sending multimedia, 49
sending text, 49
viewing, 52
Microsoft My Phone 113
Midomi 100
notes
audio, see Recorder
creating, 84
sketches, 84
Opera
adding bookmarks, 97
browsing, 96
Photo
starting slideshows, 65
viewing photos, 65
photos
basic capturing, 53
capturing a series of photos,
58
capturing in Smile shot
mode, 57
capturing panoramic
photos, 59
mosaic, 58
viewing, 55
Podcast 104
QIK 106
radio
see FM radio
Recorder 86
reset 22
Rich Internet 98
RSS Reader 101
Schedule
changing views, 83
creating events, 82
stopping event alarms, 83
SIM card 15
sketches 84
Smart Reader
capturing images, 91
viewing captured images, 92
Smart Search 93
stopwatch 81
Streaming Player 99
Task Switcher 32
Tasks
creating, 87
marking as completed, 88
text input
Block Recognizer, 34
keyboard, 35
Letter Recognizer, 36
Samsung Keypad, 37
Transcriber, 38
themes
see Today Screen
Today screen
adding or removing items, 24
changing themes or
background images, 23
Unit Converter 90
USIM card 15
Video Editor 70
videos
playing, 57
recording, 55
volume
call volume, 46
system volume, 25
Widgets
customising widgets, 29
dragging to the Today
screen, 29
opening the toolbar, 26
Wi-Fi 126
world clock 81
Declaration of Conformity (R&TTE)
we, Samsung Electronics
declare under our sole responsibility that the product
GSM Mobile Phone : GT-B7300
to which this declaration relates, is in conformity with the following standards and/or other normative documents.
SAFETY EN 60950-1 : 2001+A11:2004
EMC EN 301489-01 V1.6.1 (09-2005)
EN 301489-07 V1.3.1 (11-2005)
EN 301489-17 V1.2.1 (08-2002)
EN 301489-19 V1.2.1 (11-2002)
EN 301489-24 V1.4.1 (09-2007)
SAR EN 50360 : 2001
EN 62209-1 : 2006
RADIO EN 301511 V9.0.2 (03-2003)
EN 300328 V1.7.1 (10-2006)
EN 301908-1 V3.2.1 (05-2007)
EN 301908-2 V3.2.1 (05-2007)
We hereby declare that [all essential radio test suites have been carried out and that] the above named product is in conformity to all the essential requirements of Directive 1999/5/EC.
The conformity assessment procedure referred to in Article 10 and detailed in Annex[IV] of Directive 1999/5/EC has been followed with the involvement of the following Notified Body(ies):
BABT, Balfour House, Churchfield Road, Walton-on-Thames, Surrey, KT122TD, UK*
Identificationmark: 0168
The technical documentation kept at :
Samsung Electronics QA Lab.
CE0168!
which will be made available upon request.
(Representative in the EU)
Samsung Electronics Euro QA Lab. Blackbushe Business Park, Saxony Way, Yateley, Hampshire, GU46 6GG, UK*
2009.07.09 Yong-Sang Park / S. Manager
p.s.patz
(place and date of issue) (name and signature of authorised person)
* It is not the address of Samsung Service Centre. For the address or the phone number of Samsung Service Centre, see the warranty card or contact the retailer where you purchased your phone.
Some of the contents in this manual may differ from your device depending on the software of the device or your service provider.
SAMSUNG ELECTRONICS

World Wide Web
http://www.samsungmobile.com
Printed in Korea
Code No.:GH68-24419A
English (EU). 10/2009. Rev. 1.1
- Read me first!
- Instructional Icons
- Copyrights and trademarks
- ABOUT DIVX VIDEO
- ABOUT DIVX VIDEO-ON-DEMAND
- Contents
- Introducing your device 9
- Communication 40
- Multimedia 53
- Personal productivity 75
- Web applications 96
- Connectivity 114
- Troubleshooting 133
- Safety and usage information 138
- Index 151
- Introducing your device
- Unpack
- Get to know your device
- Front view
- Keys
- Assemble and prepare your device
- Insert the SIM or USIM card and battery
- Charge battery
- Insert a memory card (optional)
- Turn on your device for first time
- Activate Sleep mode
- Lock external keys and touch screen
- Use the touch screen
- Disable wireless functions
- Reset the device
- Customise your device
- Change your theme or background image
- Add or remove items on the Today screen
- Adjust the system volume
- Activate Etiquette pause
- Use Widgets
- Open the toolbar
- Widget Function
- Drag the widgets to the Today screen
- Customise widgets
- Use the shortcut toolbar
- Access items on the shortcut toolbar
- Edit items on the shortcut toolbar
- Work with applications
- Open applications or folders
- Switch applications
- Close applications
- Access the help system
- Enter text
- Enter text with Block Recognizer
- Enter text with the keyboard
- Enter text with Letter Recognizer
- Enter text with Samsung Keypad
- Enter text with Transcriber
- Communication
- Work with contacts
- Create a new Outlook or SIM contact card
- Search for a contact card
- Copy or move contact cards
- Organise your contacts into categories
- Assign a speed dial number to a contact card
- Assign a photo to a contact card
- Assign a ringtone to a contact card
- Calling
- Make a call
- Make a call from Phonebook
- Answer a call
- Reject a call
- Adjust the call volume
- Call an international number
- Access the call log
- Icon Function
- Messaging
- Send a text message
- Send a multimedia message
- Send an email message
- View messages
- Add an email account
- Multimedia
- Camera
- Capture a photo
- Aim the lens at the subject and make any adjustments.
- View a photo
- Record a video
- Play a video
- Capture photos in Smile shot mode
- Capture a series of photos
- Create a photo mosaic
- Capture panoramic photos
- Media Player
- Add music files to your device
- Update the library
- Play music or video files
- Create a playlist
- Add files to a playlist
- Photo
- Start a slideshow
- Digital Frame
- View slideshows with background music
- Tap Done.
- During playback, use the following controls:
- FM Radio
- Listen to the FM radio
- Save radio stations by automatic tuning
- Save radio stations manually
- Select a station
- Record the FM radio
- Video Editor
- Auto-crop a video
- Add pre-recorded audio to a video
- Create a storyboard
- Games
- Java
- Personal productivity
- ActiveSync
- Install ActiveSync on your computer
- Connect your device to a computer
- Synchronise your data
- Add an Exchange server
- Change the synchronisation schedule
- Clock
- Set an alarm
- Stop an alarm
- Schedule an anniversary
- Create a world clock
- Use the stopwatch
- Schedule
- Create a calendar event
- Change the calendar view
- Stop an event reminder
- Notes
- Create a note
- Create a sketch
- Memo
- Recorder
- Record a voice memo
- Listen to a voice memo
- During playback, use the following controls:
- Tasks
- Create a task
- Mark a task as completed
- Calculator
- Unit Converter
- Smart Reader
- Capture images of business cards or documents
- View captured images
- Smart Search
- Search inside the device
- Search on the web
- Web applications
- Web browsing with Opera
- Browse the web
- Icon Functions
- Bookmark your favourite pages
- Rich Internet
- Search Widget
- Streaming Player
- Stream media from the internet
- Midomi
- Search for song information by singing or humming the song
- Search for song information by grabbing the song from an audio source
- RSS Reader
- Subscribe to RSS feeds
- Update and read RSS feeds
- Podcast
- Subscribe to Podcasts
- Download and play podcasts
- Update your podcast library
- QIK
- Sign up for a new account
- Sign in to QIK
- Stream live video to your friends and family
- Communities
- Upload photos
- Upload photos at a later time (Upload reservation)
- Samsung Application Store
- Marketplace
- Microsoft My Phone
- Connectivity
- Connect to the internet or your network
- Connect to the internet
- Connect to work
- End a connection
- To disconnect,
- Find the active network connection
- GPS
- Connect to an external GPS receiver
- Update the GPS functionality
- Bluetooth
- Turn on the Bluetooth wireless feature
- Change Bluetooth device names
- Search for and pair with a Bluetooth-enabled device
- Send data via the Bluetooth wireless feature
- Receive data via the Bluetooth wireless feature
- Activate the smart pairing option
- Wi-Fi
- Activate and connect to a WLAN
- Create a new Wi-Fi connection
- Connected Home
- Play files with another device
- Play files from one device to the other device
- Download files to your device
- Delete files
- Troubleshooting
- Your device does not show a signal (no bars next to the network icon)
- You forgot a security, PIN, or PUK code
- Your display shows white lines
- You enter a number, but the call is not dialled
- You select a contact to call, but the call is not dialled
- Another caller cannot hear you speaking
- The sound quality of a call is poor
- The battery does not charge properly or sometimes your device turns itself off while charging
- Your device is hot to the touch
- You cannot find a folder when exploring your device via ActiveSync on your computer
- Your device cannot connect to the internet
- You cannot find a Bluetooth-enabled device
- You cannot listen to music on a remote Bluetooth headset
- Safety and usage information
- Safety warnings
- Keep your device away from small children and pets
- Protect your hearing
- Install mobile devices and equipment with caution
- Handle and dispose of batteries and chargers with care
- Avoid interference with pacemakers
- Turn off the device in potentially explosive environments
- Reduce the risk of repetitive motion injuries
- Do not use the device if the screen is cracked or broken
- Safety precautions
- Drive safely at all times
- Follow all safety warnings and regulations
- Use only Samsung-approved accessories
- Turn off the device near medical equipment
- Turn off the device or disable the wireless functions when in an aircraft
- Protect batteries and chargers from damage
- Handle your device carefully and sensibly
- Avoid interference with other electronic devices
- Important usage information
- Use your device in the normal position
- Allow only qualified personnel to service your device
- Ensure maximum battery and charger life
- Handle SIM cards and memory cards with care
- Ensure access to emergency services
- Specific Absorption Rate (SAR) certification information
- Correct disposal of this product
- Correct disposal of batteries in this product
- Disclaimer
- Index
- alarm
- Application Store 111
- background image
- battery
- browser
- calculator 88
- calendar
- calls
- camera 53
- Communities 109
- Connected Home 128
- contacts
- converter
- Digital Frame 66
- Etiquette pause 25
- Exchange Server
- games 74
- GPS 118
- help system 33
- internet
- Java 74
- lock 19
- Marketplace 112
- Memo 85
- memory card 17
- Microsoft My Phone 113
- Midomi 100
- Opera
- photos
- Podcast 104
- QIK 106
- radio
- Recorder 86
- reset 22
- Rich Internet 98
- RSS Reader 101
- SIM card 15
- sketches 84
- Smart Search 93
- stopwatch 81
- Streaming Player 99
- Task Switcher 32
- text input
- themes
- Today screen
- Unit Converter 90
- USIM card 15
- Video Editor 70
- videos
- volume
- Widgets
- Declaration of Conformity (R&TTE)
- we, Samsung Electronics
- GSM Mobile Phone : GT-B7300
- SAMSUNG ELECTRONICS
Brand : SAMSUNG
Model : B7300
Category : Téléphone intelligent