
Studio View - Telephone BLU - Free user manual and instructions
Find the device manual for free Studio View BLU in PDF.


| Product Type | Smartphone |
| Brand | BLU |
| Model | Studio View |
| Battery Type | Lithium-ion (Li-ion) |
| Battery Capacity | 2850 mAh |
| Battery Voltage | 3.8 V |
| Battery Power | 10.83 Wh |
| Charger Input | 100-240V ~ 0.3A 50/60Hz |
| Charger Output | 5.0V == 1.5A |
| SAR (Head) | 0.64 W/kg |
| SAR (Body) | 0.43 W/kg |
| Operating System | Android (implied) |
| Connectivity | Wi-Fi, Bluetooth, GPS, FM Radio |
| Camera | Yes (details not specified) |
| Navigation Bar | Back, Home, Recent Apps |
| Notifications | Customizable panel with quick settings |
| Messaging | SMS and MMS |
| Gmail support | |
| App Store | Google Play Store |
| Music Formats | AMR, MIDI, MP3, WAV, OGG |
| Sound Recorder | Yes |
| File Manager | Files Go |
| Calendar | Yes |
| Clock | Alarm, World Clock, Stopwatch |
| Battery Replacement | Removable (user can remove and insert) |
| Cleaning | Use soft dry cloth; avoid solvents |
| Safety Compliance | FCC part 15, SAR limits |
Frequently Asked Questions - Studio View BLU
User questions about Studio View BLU
0 question about this device. Answer the ones you know or ask your own.
Ask a new question about this device
Download the instructions for your Telephone in PDF format for free! Find your manual Studio View - BLU and take your electronic device back in hand. On this page are published all the documents necessary for the use of your device. Studio View by BLU.
USER MANUAL Studio View BLU
RF Exposure Information (SAR)......42
Introduction......44
Navigation Bar....44
Notifications Bar 45
Call Functions 48
Contacts 50
Messaging 54
Bluetooth & Wi-Fi....56
Opera Browser......Error! Bookmark not defined.
Opera Mini 59
Gmail 60
Play Store 62
Amazon Services......Error! Bookmark not defined.
Camera 65
Photos 67
Play Music ....Error! Bookmark not defined.
Music 70
FM Radio ....Error! Bookmark not defined.
Sound Recorder....74
Files ...... Error! Bookmark not defined.
Files Go......Error! Bookmark not defined.
Calendar 78
Clock....80
Settings 82
USB Storage 86
Troubleshooting 89
Safety Information
Please carefully read the terms below:
Use Safely
Do not use the phone in situations where it might cause danger.
Transportation Safety
Please observe all transportation laws and regulations.
Please drive with both hands on the wheel.
PLEASE DRIVE RESPONSIBLY - DO NOT TEXT AND DRIVE
Hospital Safety
Please follow hospital rules and limitations.
Please turn off your mobile phone when near medical instruments.
Airport Safety
Remember to follow all airport and flight safety regulations.
Chemical Warning
Do not use your mobile phone around fuels or chemicals.
Temperature Warning
Do not subject your phone to extreme temperature conditions.
Water Hazard
Your phone is not waterproof. Keep your phone away from water or liquid to avoid damage.
Emergency Calls
Make sure your mobile phone is switched on and in a service area. In home screen, tap the phone key and dial the emergency number.
Accessories and Batteries
Use only BLU authorized batteries and accessories.
Battery Safety and Precautions
For better performance and longer battery life, it is recommended that you charge the battery fully before using the mobile phone for the first time.
The optimum performance of a new battery is typically achieved after two or three complete charge cycles.
Note: Keep in mind that continuous overcharging will affect long-term battery life.
While charging, keep the mobile phone out the reach of children.
Store the battery in a cool and dry place away from direct sunlight and water.
Do not expose batteries to extreme temperatures (below -8°C (18°F) or above 43°C (110°F).
Immediately stop using the battery if it produces an odor, cracks and leaks, overheats, distorts or has any other type of physical damage.
Avoid using the charger near or around liquids. If the charger is exposed to water or any liquids, immediately unplug it from the outlet to reduce the risk of overheating, charger malfunction, electric shock or fire.
ELECTRICAL SPECIFICATIONS / ESPECIFICACIONES ELÉCTRICAS / ESPECIFICAÇÕES ELÉTRICAS / CARACTERISTIQUES ÉLECTRIQUES
STUDIO VIEW
| BATTERY | BATERIA | BATERIA | BATTERIE | |||
| CAPACITYCAPACIDADCAPACIDADECAPACITÉ | VOLTAGEVOLTAJEVOLTAGEMTENSION | BATTERY TYPETIPO DE BATERIATIPO DE BATERIATYPE DE BATTERIE | POWERPOTENCIAPOTÊNCIAPUISSANCE |
| 2850 mAh | 3.8 V = | Li-ion | 10.83 Wh |
| CHARGER | CARGADOR | CARREGADOR | CHARGEUR | |||
| VOLTAGEVOLTAJEVOLTAGEMTENSION | CURRENTCORRIENTECORRIENTECOURANT | FREQUENCYFRECUENCIAFREQUÊNCIAFREQUENCE | |
| INPUTENTRADAENTRÉE | 100V-240V ~ | 0.3 A | 50Hz/60Hz |
| OUTPUTSALIDASAÍDASORTIE | 5.0 V == | 1.5 A | |
| TELEPHONE | TELÉFONO | TELEFONE | TÉLEPHONE | |
| CONSUMPTIONALIMENTACIÓNCONSUMOCONSOMMATION | 3.8 V = |
FCC Regulations:
This mobile phone complies with part 15 of the FCC Rules. Operation is subject to the following two conditions: (1) This device may not cause harmful interference, and (2) this device must accept any interference received, including interference that may cause undesired operation.
This mobile phone has been tested and found to comply with the limits for a Class B digital device, pursuant to Part 15 of the FCC Rules. These limits are designed to provide reasonable protection against harmful interference in a residential installation. This equipment generates, uses and can radiated radio frequency energy and, if not installed and used in accordance with the instructions, may cause harmful interference to radio communications. However, there is no guarantee that interference will not occur in a particular installation. If this equipment does cause harmful interference to radio or television reception, which can be determined by turning the equipment off and on, the user is encouraged to try to correct the interference by one or more of the following measures:
-Reorient or relocate the receiving antenna.
-Increase the separation between the equipment and receiver.
-Connect the equipment into an outlet on a circuit different from that to which the receiver is connected.
-Consult the dealer or an experienced radio/TV technician for help.
Changes or modifications not expressly approved by the party responsible for compliance could void the user's authority to operate the equipment.
The antenna(s) used for this transmitter must not be co-located or operating in conjunction with any other antenna or transmitter.
RF Exposure Information (SAR)
This mobile phone meets the government's requirements for exposure to radio waves.
This phone is designed and manufactured not to exceed the emission limits for exposure to radio frequency (RF) energy set by the Federal Communications Commission of the U.S. Government.
The exposure standard for wireless mobile phones employs a unit of measurement known as the Specific Absorption Rate, or SAR. The SAR limit set by the FCC is 1.6W/kg. *Tests for SAR are conducted using standard operating positions accepted by the FCC with the phone transmitting at its highest certified power level in all tested frequency bands. Although the SAR is determined at the highest certified power level, the actual SAR level of the phone while operating can be well below the maximum value. This is because the phone is designed to operate at multiple power levels so as to use only the poser required to reach the network. In general, the closer you are to a wireless base station antenna, the lower the power output.
The highest SAR value for the model phone as reported to the FCC when tested for use at the ear is 0.64W/kg and when worn on the body, as described in this user guide, is0.43W/kg (Body-worn measurements differ among phone models, depending upon available accessories and FCC requirements.)
While there may be differences between the SAR levels of various phones and at various positions, they all meet the government requirement.
The FCC has granted an Equipment Authorization for this model phone with all reported SAR levels evaluated as in compliance with the FCC RF exposure guidelines. SAR information on this model phone is on file with
the FCC and can be found under the Display Grant section of www.fcc.gov/oet/ea/fccid after searching on FCC ID: YHLBLUSTUDIOVIEW
For body worn operation, this phone has been tested and meets the FCC RF exposure guidelines for use with an accessory that contains no metal and the positions the handset a minimum of 1.0cm from the body. Use of other accessories may not ensure compliance with FCC RF exposure guidelines. If you do not use a body-worn accessory and are not holding the phone at the ear, position the handset a minimum of 1.0cm from your body when the phone is switched on.
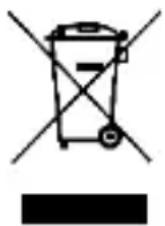
Hazardous Waste – Battery Disposal
Warning: Do not throw away batteries with uncontrolled daily waste.
The marking in this manual indicates that the batteries in this product should not be disposed with household trash at the end of its working life. If the batteries are not disposed of properly, the substances included can cause harm to human health and the environment. Please follow environmental laws and guidelines for proper waste disposal.
Cleaning and Maintenance
Avoid using the handset and accessories in excessively moist areas to avoid malfunction.
Use a soft, dry cloth to clean the handset, battery and charger.
Do not use alcohol, thinner, benzene or any other solvent to clean the handset.
Introduction
Power On and Off
On - Please ensure the SIM card has been properly inserted into the phone. Long press the Power key to switch the phone on.
Off - In standby mode, long press on Power key until an options menu appears. Select Power Off in the menu to power off the phone.
Navigation Bar
The navigation bar is a dedicated area that displays device navigation buttons. These system buttons allow the user to control the phone seamlessly.

Back
Returns to the previous screen; Closes the keyboard, any open program, or any menu option.
Home

The home button pauses any current action and returns to the home screen.
Recent Apps
Opens a list of recently opened applications that allows you to switch conveniently between them. This option can also close any open applications by swiping to the side.
Notifications Bar
The notification bar is located on the top of the screen which contains useful and important information regarding your phone and the applications that are installed.
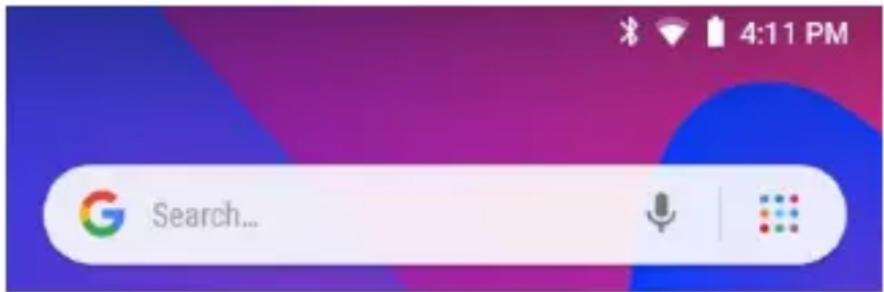
On the notification bar, several icons will appear such as signal bar, time, battery indicator, data indicator, Bluetooth and Wi-Fi. You may slide the notification bar down with your finger to display any pending notifications or actions.
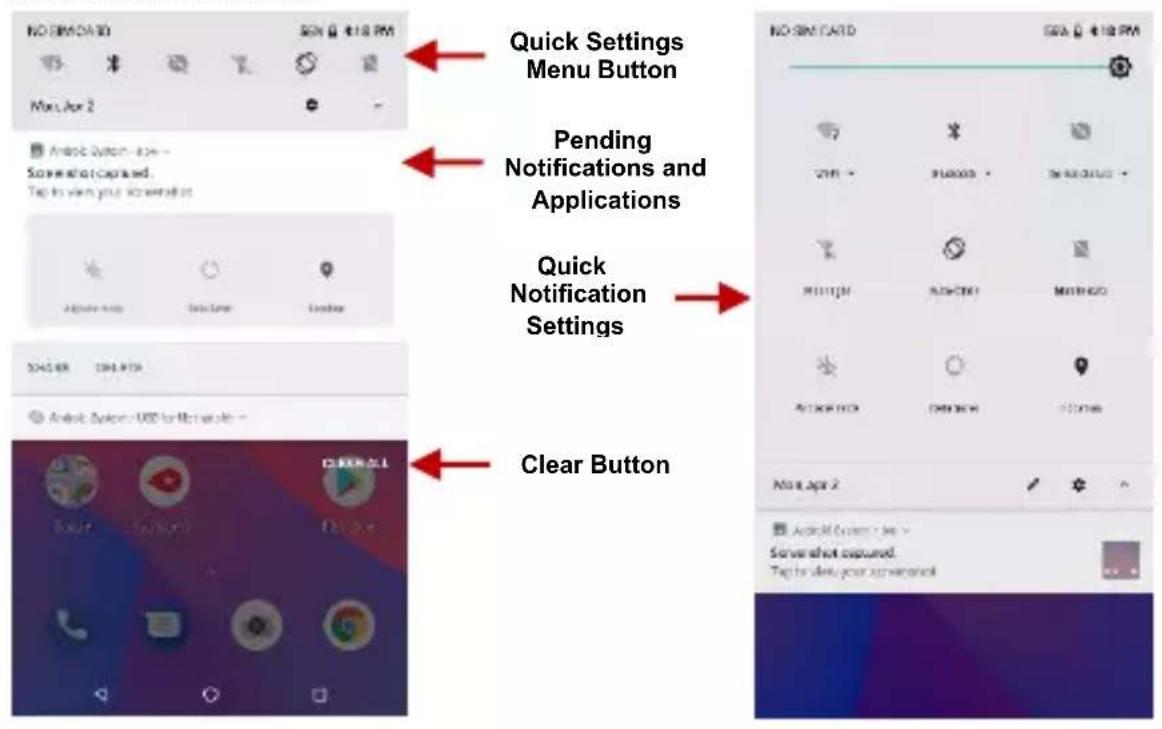
Notification Settings
The notification settings panel provides shortcuts to different phone settings for quick access. Click on any of the shortcut notification icons to power on or off.
To clear notifications:
» Drag down the notification bar and click the clear notification icon on the lower right hand part of the notification screen.
To access the quick notification settings menu:
» Drag down the notification bar completely. Some settings include Wi-Fi, Bluetooth, Location, Airplane mode, and Flashlight.
Call Functions
At the dialing interface, enter the phone number and then click the dial key.
Placing a Call
» Click the Keypad button to open the dial keyboard. At the dial keyboard, enter the phone number you wish to dial.
You may also press and hold the 0 key to add a (+) sign when adding an international dialing prefix.
» Click the dial button to make the call.
If dialing an extension, you may click on the keypad button to open the keypad interface and enter the number of the extension.
» Click the end button to end the call.
Call Options
There are different options that can be used in the call log and dialing interface. You may press the menu key while in the general dialing interface and adjust call settings, enter call history, clear your frequently dialed numbers, and add a new contact.
Call Logs
Every telephone number called and received will be saved in the phones call log. All recently called numbers in the call log can be dialed by clicking on the contact tile in the speed dial tab, or by clicking on the contact and selecting call back in the recent tab. When the number appears on the list, click it to view details. To delete a call from the call history, press the menu key and select delete. You may remove one or multiple calls.

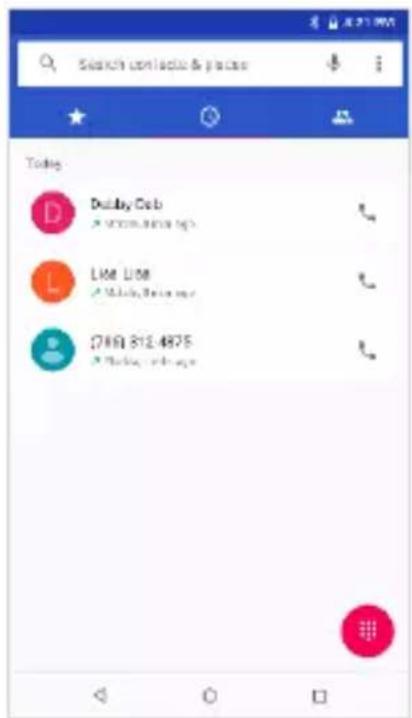
To maintain organized, the call log has Favorites, Recent Calls, and Contact set up in quick tabs
Contacts
Open Contacts
To access » Click on the applications menu then on the Contacts icon.
» The default display is the phone contacts and SIM card contacts.
» Contacts are organized alphabetically by default.
Click the menu button to enter the contact search interface or scroll to search a contact. Any numbers or letters associated with any of the contacts saved in the list will be shown in the search results.
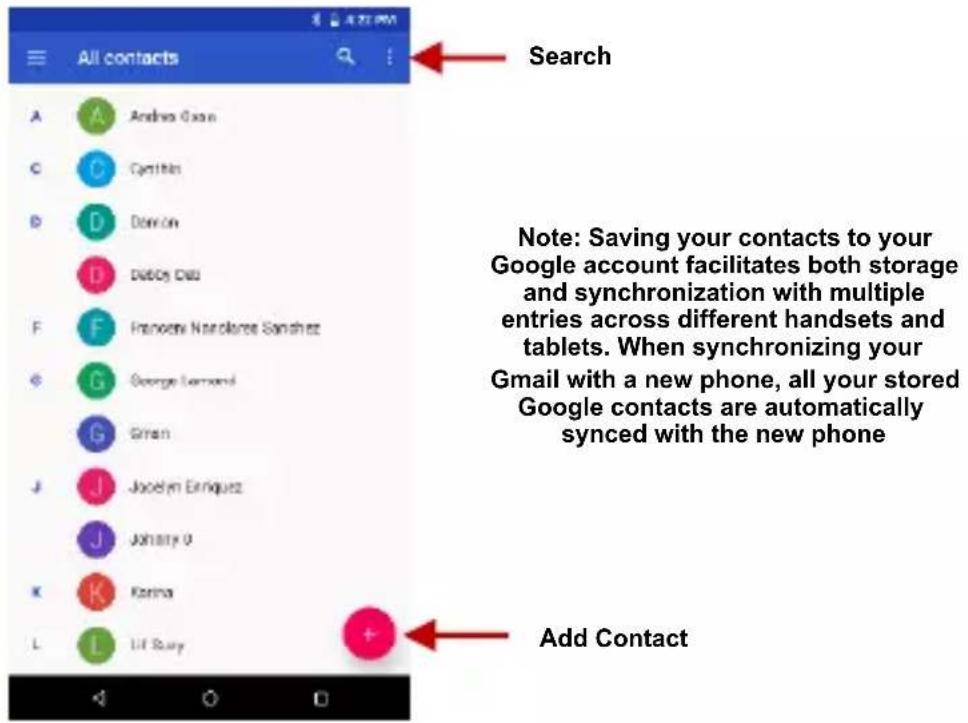
Add New Contact
» Click the add contact icon to add contact icon in the bottom right.
» You may save your contacts to either your Google account, phone or SIM card.
» Enter the contact information that include adding a picture, name, telephone number, group, address, and email among other options.
» Click to save contact.

Contact information field
Note: You may add individual contacts to any of the home screens by entering the contacts menu, clicking on the specific contact, pressing menu, and then selecting the 'Add to home screen' option. You can also share contacts via MMS, Gmail, Bluetooth, and other share options within the same settings menu.
Delete Contact
» Click on the Contacts icon to enter the phonebook.
» Click and hold on the contact that you wish to delete.
(Once selected, you may also scroll and select other contact(s) you wish to delete)
» Click on the bin to Delete.

Import / Export Contacts
The phone allows you to import and export contacts to synchronize information between different storage types that include the SIM card, Gmail account and your phone.
To import or export contacts:
» Click the Contacts icon to enter the phonebook.
» Click the menu button and select Import / Export
» Select the source you want to copy the contacts. Once selected click next and select the destination where you want the contact to be copied to and then select the desired contacts to be copied.
Messaging
You may use this function to exchange text messages and multimedia messages with your family and friends. The messages to and from the same contact or phone number will be saved into a single conversation so you may see the entire message history conveniently.
Open Messaging
To access » Click on the Application Menu then on the Messaging icon.

Sending an SMS
Application Menu > Messaging > New message
» Click the contact icon to enter text message recipient
» Compose Text Message and click Send
Sending an MMS
When creating message, the default message style is SMS. The message will automatically convert to MMS when adding an attachment or when surpassing 10 pages of SMS messages.
» Click the attachment icon in the messaging interface.
» Click to add attachments and create an MMS message.
Bluetooth & Wi-Fi
Bluetooth is a short-range wireless communications technology that devices can use to exchange information and connect to different types of devices that include headsets and other devices. Wi-Fi allows mobile phones to connect to the internet wirelessly.
Power on Bluetooth
To access » Click on the Settings icon then on Bluetooth and select to power on Bluetooth. Click on Pair New Device.
» The Bluetooth will then start to scan for all devices within its range and will display all available devices.
» When the scan is complete, all the devices found will display in a list under available devices. Once the device has been identified, click on it to pair.


List of available Bluetooth devices
Note: The maximum detecting time of the phone is 2 minutes
Power on Wi-Fi
To access » Click on the Settings icon then on Wi-Fi and select to power on Wi-Fi
» Click on the desired Wi-Fi network to be connected.
Note: Unsecured networks can be connected to directly - secured networks require a password or credentials prior to connection.
To display advanced options, click on the available option tab.

The network connection screen displays the password field and also displays advanced connection options
Opera Mini
Menu Functions Settings
App Layout
- This option changes the layout between phone and tablet.
Theme
- Change browser color
Start Page Content
- This option configures which news options appear on the start page.
New Tabs
- This option adjusts the way tabs open
Clear Browsing Data
• This option clears any data stored
Night Mode
- This option enables/disables Night Mode
Full Screen
- This option enables/disables Full Screen mode
Notifications
• This option enables notifications
Data Savings
- Select between high and extreme data savings
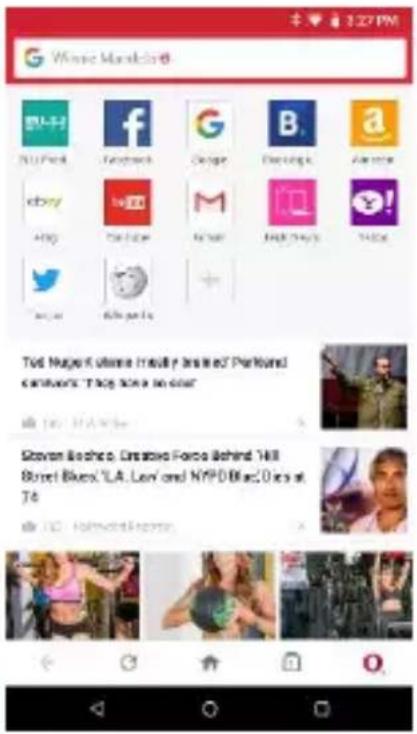

Click menu to access the internet browser options
Gmail
Gmail is Google's free email service. To access the Gmail program, click the applications menu and click on the Gmail icon and either sign in with your existing account or follow the instructions to create a new account.
Note: In order to keep accounts streamlined with Google services, your Gmail account user name and password will be used for some Google programs that include Google Play Store, Google Drive, Google Photos, Google +, Google Calendar, and Google Wallet.
Open Gmail
To access » Click on the Applications Menu then on the Gmail icon.
Sending an Email
» Click the Compose button to create a new email.
» Enter the recipient's email address.
» Enter a subject
» Compose your message. Click the attachment button to add an attachment.
» Click the Send button to send the email.

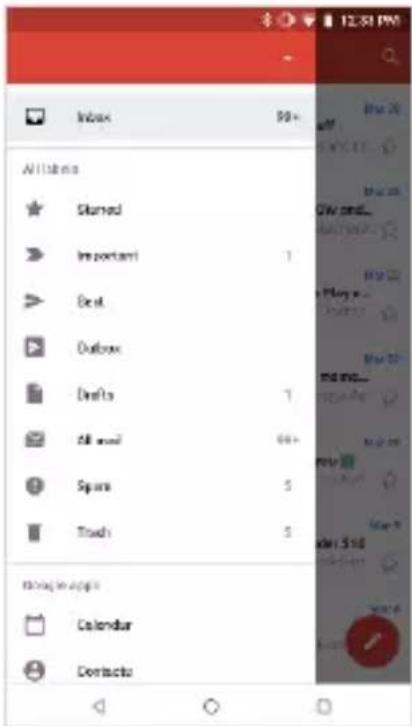
The Gmail inbox is separated by default in three different categories.
These categories include primary inbox, social inbox where all your Facebook, Twitter, and social media emails are separated to and your Promotions inbox where all your commercial emails are separated.
You may adjust these categories in Gmail settings
Play Store
Google Play allows you to download music, movies, and games directly to your device.
Note: You will need to log in to your Google account when configuring the phone or entering the Play Store for the first time.
Open the Play Store
To access » Click on the Applications Menu then on the Play Store icon

Search and select between different Play Store categories
Installing an Application
» Browse through the categories available or enter the name on the search text box to find your desired application.
» Click on the application.
» Click on INSTALL (for free applications) or click on the PRICE (for paid applications).
» Follow the on-screen instructions to complete the installation.


bar
| Category | Value ($) | |---|---| | In-app purchases | 0.99 | | Downloads | 5 | | Strategy | 3.8 | | Similar | (no explicit value shown) |Android OS Note: Any native or installed applications will ask for permission when accessed for the first time.
Camera
Prior to use: It is suggested that you insert SD card before using the camera or video camera. All photos or videos taken by the phone should be typically stored in the memory card for storage of large capacity images and videos.
Open the Camera
To access » Click the Applications Menu then on the Camera icon
Note: You may place a camera shortcut icon on any of the screens
Taking a Picture
» Aim at the object or scene that the picture will be taken.
» Click the Shutter button on the screen to capture the image.
» After taking the picture all file will be saved in the cameras gallery folder.
» You can view the photos by clicking the preview box button.
Recording a Video
» Aim at the object or scene that the video will be taken.
» Click the Video button to start recording.
» Click on the Video button to stop recording.
You may adjust various settings for the camera by pressing Menu while in the camera interface. When in the standard camera mode, you can switch to video to record or click the gallery preview box.
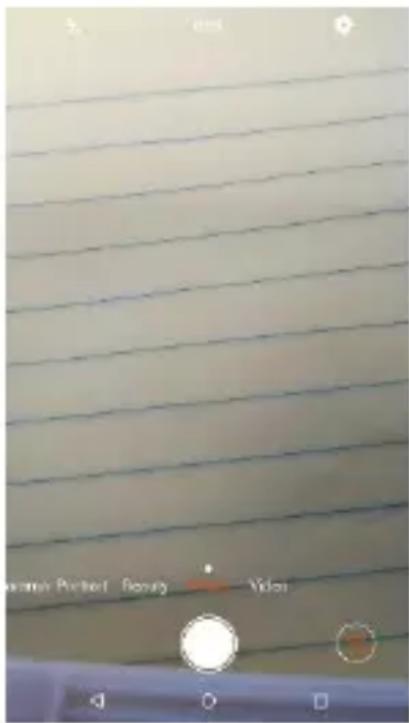
Camera Options
Select between Camera & Video
Photos
Google Photos organizes all your pictures and videos in a single application.
Open the Gallery
To access » Click on the Applications Menu then on the Photos icon
Viewing Pictures and Videos
» Click on an image to view in full screen. To play a video clip, click the play button.
» To navigate through the gallery, slide your finger to the left or right.

Pictures and videos are stored in separate albums and pictures can be organized by date and location.
Share Pictures
While on the image, click on the Share button to share the image. You may share pictures by sending them through different types of installed applications. You may also send pictures through the MMS message function
by attaching a picture and via Bluetooth.
Adjust Image
While on the image, click the Edit button to adjust images. You may select from different filters or editing options such as Light, Color, Pop, and Crop.
Crop Pictures
While on the image, click the Edit button to Crop the size of the picture. Once the picture appears, pinch your fingers in or out to adjust the size. To keep proportion, hold down any of the four corners of the image and adjust.
Music
Open Music
You may choose to search for music from media folder through artist name, song name, album name. following formats are available: AMR, MIDI, MP3, WAV, and OGG.
The
Next Radio
Next Radio is an Android app that combines local FM radio via your device's built-in tuner with enhanced content via the Internet to show you album art, station logos, and song & program details in an engaging display. If you like a song, you can purchase it instantly as you are listening.
Open the Radio
To access » Click the applications menu then on the radio icon.
Note: Next Radio uses wired headphones that work as an antenna to receive signal.
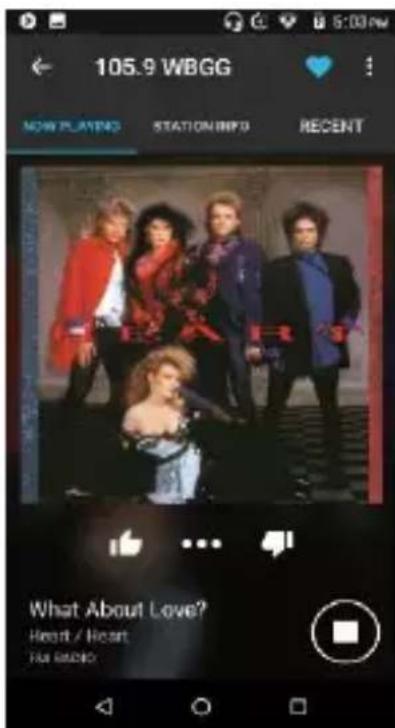
Browse through Now Playing, Station Info, and Recent Playlist
Click to Like and Dislike what is currently playing
Sound Recorder
You may send any recorded audio via the File Manager by selecting any of the default share options that include Bluetooth, MMS, Google Drive and Gmail.
Open the Sound Recorder
To access » Click on the applications menu then click on the Sound Recorder icon.
Record
» Keep the phone's microphone near the sound source.
» Click the record button to record the audio and click the stop button to end the recording.

Note: It is suggested that you save all your recordings in your SD card for maximum storage capacity. Please ensure the SD card is installed for extended storage space.
Files Go
The Files Go manager allows you to search and organize your stored phone files conveniently and efficiently through one program.
Open the Files Go
To access » Click on the applications menu then click on the Files icon.

Scroll and search through the Files Go Downloaded and system files.
Calendar
The calendar helps keep track of your life's most important moments in one application.
Open the Calendar
To access » Click on the Application Menu then on the Calendar icon.
Creating an Event
» Long press on the specific date to add a new event. In the new event window, click Edit.
» Enter the new event details including name, location, start date and time.
» Click to save the settings.

Click to add a new event

Enter Calendar information that ranges from Name, Location, Date among other options
Clock
You can use this feature to set up alarms, view the local time in different cities anywhere in the world, and even run a stopwatch.
Open the Alarm Clock
To access » Click on the Application Menu then click on the Clock icon.
View the Current Time in Other Cities
» Click on the Clock icon.
» Click on the World Clock button and select the desired cities.
Create a New Alarm
» Click on the Alarm icon tab.
» Click on the Add Alarm button to add a new alarm.
» Set the time.


Click to add, edit or delete alarms
Then click on the specific hour and minute to set the alarm.
Settings
Network & Internet
- Settings » Wi-Fi to power on. When on, the Wi-Fi will automatically search for available networks. Any unsecured network can be used directly and any secured network requires a password or credentials prior to connection
• Mobile Network and Data Usage
• Hotspot & Tethering, VPN - SIM Cards
- Airplane Mode
Note: Airplane Mode will turn off all network connections automatically - Emergency Alerts
Connected Devices
- Power on Bluetooth. Once on, click to add new device. If not, BT will automatically connect to any paired devices
- Printing
- USB
Note: Establish USB connection types
Apps & Notifications
- Manage Applications - Manage and delete installed applications
- Running Applications- Press the Stop button to terminate any of the applications from the running apps list and clear any RAM usage
- Change default apps and set permissions
Battery
- General power usage information
• Power on intelligent power saving
• Show battery percentage
Display
- Brightness
- Adaptive Brightness
• Wallpaper, Sleep, Font Size, Auto Rotate and other advanced settings
Sound
This option sets the ring tone settings for receiving calls and notifications. Some of the settings include:
• Media Volume, Alarm Volume and Ring Volume
• Vibration settings, Default notification sound and tones
Storage
• View phone files and storage information and free up space
Security & Location
Set up basic screen locks: Use slide, pattern, PIN or password to lock the screen.
- Pattern: The initial set up will include simple unlock instructions and examples. Click to continue the security pattern step. Note: You can add additional pattern security at power on
• PIN: Enter a PIN number to unlock the screen
• Password: Use a password to unlock the screen - Find My Device
- Google Play Protect
-
Location Services
-
High Accuracy – Use Wi-Fi and Mobile Networks to determine location.
- Battery Saving – Use Mobile Networks to determine location.
- Device Only – Use GPS to determine your location.
Users & Accounts
- Add and manage accounts
- Add Emergency Information
- Data Sync
Accessibility
• Text-to-speech, Magnification, Pointers and other accessibility options
• Add and manage Google accounts and settings
System
Language & Input
• Language – Change the language of the phone
• Personal Dictionary - Add or delete words to the custom dictionary keyboard
Date & Time
- Select Date Format - There are 3 kinds of formats you can choose from: Month-Day-Year, Day-Month-Year and Year-Month-Day.
Backup
- Backup Data – Will back up all application data, WLAN passwords, and other settings to Google's servers or services
Developer Options
If the phone does not display Developer options, press build number seven (7) times in the about phone tab
• The developer option gives access to USB Debugging and other developer tools
System Update
- Check for OS system updates
Reset Options
- Reset system and application preferences
- Perform Factory Reset
About Device
- Verify current device information
USB Storage
Open USB Storage
Connect your phone to a computer using a USB cable. Once connected, a connection interface will appear on the notification settings. Click the USB notification bar icon to access the USB computer connection menu and select the desired setting.

USB Connection Options:
- Charging Only
- Transfer files
• Camera (PTP): Transfer photos
Troubleshooting
Below is a list of common problems that may occur when using your mobile phone. Try these easy troubleshooting steps to resolve any type of issues you may encounter.
The phone does not power on
- Press and hold the power key until the startup sequence appears on the display.
- Check the battery level and ensure there is sufficient charge.
The phone does not respond after several minutes
- Remove and insert the battery – If the phone has an internal battery, please press and hold the power button.
The phone powers off by itself
- Check if the screen lock of the phone is enabled.
- Check if the phone needs to be charged.
The battery will not charge
- Check if the battery is already fully charged.
■ Make sure that the battery is inserted correctly.
■ Ensure that the battery being used is a BLU approved battery.
■ Double check if the charger connector is properly connected to the phone.
Note: Connect charger only after the battery has been inserted.
The standby time is too short
- Please keep in mind that standby time relates directly to phone usage (Internet, Text, Voice Calls, Maps, etc.).
■ Batteries typically have to be replaced after a year of use.
The phone cannot connect to the network (Voice or Data)
- Verify if you have active service with your service provider.
- Contact your local network service provider and verify if you are within its network coverage area.
The phone displays a SIM Error
■ Make sure the SIM is properly inserted and in its intended slot.
■ Make sure that the SIM card is not damaged or scratched.
The PIN code was entered incorrectly three times
The SIM card will lock and you will need to enter the PUK code (PIN Unlock Code). Please contact your local service provider to obtain the PUK.
I cannot make calls
■ Make sure that the number you dialed is correct and the dial key has been pressed.
- Use the full national area code when dialing out of your area or when abroad, use country-specific international access codes.
I cannot receive calls
■ Make sure that your phone is connected to a network.
The caller ID does not display on incoming calls
- Contact your local network service provider and verify you have the caller ID feature enabled on your account or verify if the caller may have blocked his number from appearing.
The caller cannot leave a voicemail message
- Contact your local network service provider and verify if the voicemail service is active on your account or check if the network is busy.
The phone does not connect to the internet
- Ensure with your service provider that your account has the appropriate internet/data plan enabled.
■ Ensure internet APN settings are configured (Carrier dependent).
Text Messages cannot be Sent / Received
■ Ensure text messaging is enabled with your service provider.
■ Ensure APN settings are configured (Carrier dependent).
The information provided in this user manual is subject to change without notice and BLU Products reserves the right to modify the manual at any given time. BLU Products has made every effort to ensure that this user manual is accurate and disclaims responsibility and liability for any inaccuracies or omissions.
FCC Regulations:
This mobile phone complies with part 15 of the FCC Rules. Operation is subject to the following two conditions: (1) This device may not cause harmful interference, and (2) this device must accept any interference received, including interference that may cause undesired operation.
This mobile phone has been tested and found to comply with the limits for a Class B digital device, pursuant to Part 15 of the FCC Rules. These limits are designed to provide reasonable protection against harmful interference in a residential installation. This equipment generates, uses and can radiated radio frequency energy and, if not installed and used in accordance with the instructions, may cause harmful interference to radio communications. However, there is no guarantee that interference will not occur in a particular installation If this equipment does cause harmful interference to radio or television reception, which can be determined by turning the equipment off and on, the user is encouraged to try to correct the interference by one or more of the following measures:
-Reorient or relocate the receiving antenna.
-Increase the separation between the equipment and receiver.
-Connect the equipment into an outlet on a circuit different from that to which the receiver is connected.
-Consult the dealer or an experienced radio/TV technician for help.
Changes or modifications not expressly approved by the party responsible for compliance could void the user's authority to operate the equipment.
The antenna(s) used for this transmitter must not be co-located or operating in conjunction with any other antenna or transmitter.
▶ RF Exposure Information (SAR)
This mobile phone meets the government's requirements for exposure to radio waves.
This phone is designed and manufactured not to exceed the emission limits for exposure to radio frequency (RF) energy set by the Federal Communications Commission of the U.S. Government.
The exposure standard for wireless mobile phones employs a unit of measurement known as the Specific Absorption Rate, or SAR. The SAR limit set by the FCC is 1.6W/kg. *Tests for SAR are conducted using standard operating positions accepted by the FCC with the phone transmitting at its highest certified power level in all tested frequency bands. Although the SAR is determined at the highest certified power level, the actual SAR level of the phone while operating can be well below the maximum value. This is because the phone is designed to operate at multiple power levels so as to use only the poser required to reach the network. In general, the closer you are to a wireless base station antenna, the lower the power output.
The highest SAR value for the model phone as reported to the FCC when tested for use at the ear is 0.64W/kg and when worn on the body, as described in this user guide, is 0.43W/kg (Body-worn measurements differ among phone models, depending upon available accessories and FCC requirements.)
While there may be differences between the SAR levels of various phones and at various positions, they all meet the government requirement.
The FCC has granted an Equipment Authorization for this model phone with all reported SAR levels evaluated as in compliance with the FCC RF exposure guidelines. SAR information on this model phone is on file with the FCC and can be found under the Display Grant section of www.fcc.gov/oet/ea/fccid after searching on FCC ID: YHLBLUSTUDIOVIEW
For body worn operation, this phone has been tested and meets the FCC RF exposure guidelines for use with an accessory that contains no metal and the positions the handset a minimum of 1.5cm from the body. Use of other accessories may not ensure compliance with FCC RF exposure guidelines. If you do not use a body-worn accessory and are not holding the phone at the ear, position the handset a minimum of 1.5 cm from your body when the phone is switched on.
- Safety Information
- Use Safely
- Transportation Safety
- Hospital Safety
- Airport Safety
- Chemical Warning
- Temperature Warning
- Water Hazard
- Emergency Calls
- Accessories and Batteries
- Battery Safety and Precautions
- FCC Regulations:
- RF Exposure Information (SAR)
- Hazardous Waste – Battery Disposal
- Cleaning and Maintenance
- Introduction
- Power On and Off
- Navigation Bar
- Back
- Home
- Recent Apps
- Notifications Bar
- To clear notifications:
- To access the quick notification settings menu:
- Call Functions
- Placing a Call
- Call Options
- Call Logs
- Contacts
- Open Contacts
- Add New Contact
- Delete Contact
- To import or export contacts:
- Messaging
- Open Messaging
- Sending an SMS
- Sending an MMS
- Bluetooth & Wi-Fi
- Power on Bluetooth
- Power on Wi-Fi
- Opera Mini
- App Layout
- Theme
- Start Page Content
- New Tabs
- Clear Browsing Data
- Night Mode
- Full Screen
- Notifications
- Data Savings
- Gmail
- Open Gmail
- Sending an Email
- Play Store
- Open the Play Store
- Installing an Application
- Camera
- Open the Camera
- Taking a Picture
- Recording a Video
- Photos
- Open the Gallery
- Viewing Pictures and Videos
- Share Pictures
- Adjust Image
- Crop Pictures
- Music
- Open Music
- Next Radio
- Open the Radio
- Sound Recorder
- Open the Sound Recorder
- Record
- Files Go
- Open the Files Go
- Calendar
- Open the Calendar
- Creating an Event
- Clock
- Open the Alarm Clock
- View the Current Time in Other Cities
- Create a New Alarm
- Settings
- Network & Internet
- Connected Devices
- Apps & Notifications
- Battery
- Display
- Sound
- Storage
- Security & Location
- Users & Accounts
- Accessibility
- System
- Language & Input
- Date & Time
- Backup
- Developer Options
- System Update
- Reset Options
- About Device
- USB Storage
- Open USB Storage
- USB Connection Options:
- Troubleshooting
- The phone does not power on
- The phone does not respond after several minutes
- The phone powers off by itself
- The battery will not charge
- The standby time is too short
- The phone cannot connect to the network (Voice or Data)
- The phone displays a SIM Error
- The PIN code was entered incorrectly three times
- I cannot make calls
- I cannot receive calls
- The caller ID does not display on incoming calls
- The caller cannot leave a voicemail message
- The phone does not connect to the internet
- Text Messages cannot be Sent / Received
- ▶ RF Exposure Information (SAR)
Brand : BLU
Model : Studio View
Category : Telephone